This French-made Jeantet leather-clad Scoop came to me in an estate lot I bought last summer. At first glance the pipe appeared to be in good shape, requiring only a light cleaning to make it ready for a new pipe steward. First glances, however, are sometimes not as accurate as we would like.
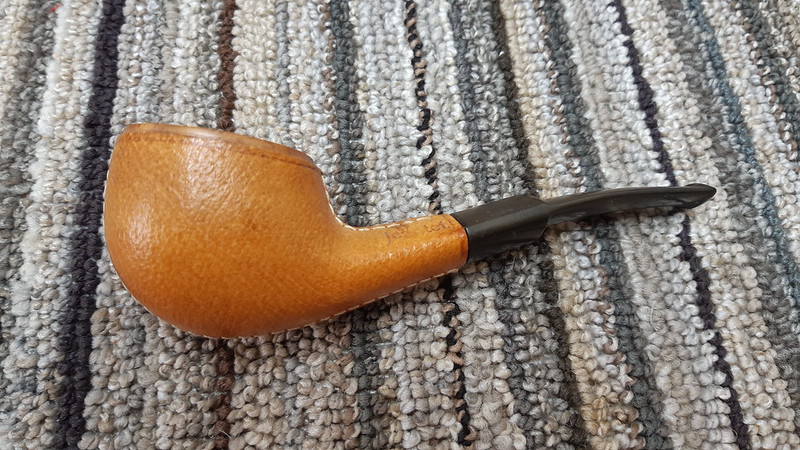
This series of pics shows the pipe as it was when I first brought it to the worktable. A jacket of smooth tan leather hid all bit the rim of the briar stummel from view. The rim itself was dark with carbon lava and good old-fashioned dirt, and the leather wrap was dirty and greasy in the hand, with a stain of some sort overlapping the stitching on the shank near the shank/stem junction. The vulcanite stem was oxidized and showed some light tooth chatter but otherwise looked to be in decent condition.


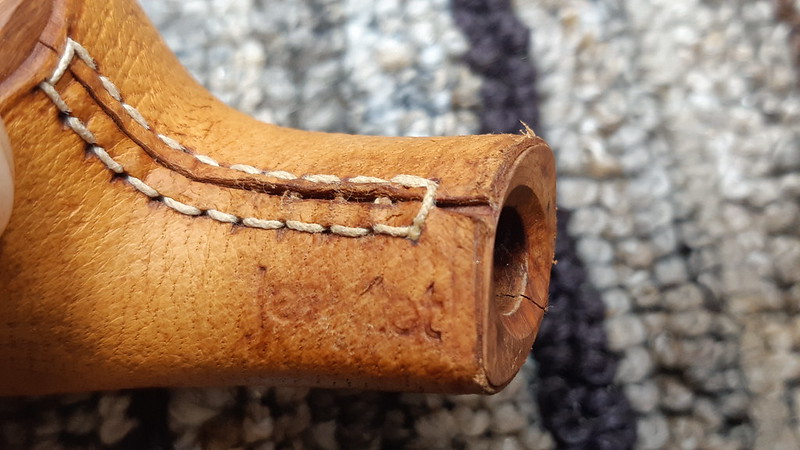
The pipe is stamped “Jeantet” on the leather wrapper at the shank, while the stem is inset with a “J” in an aluminum oval and “Made in France” on the underside near the stem face. My guess is that the pipe dates to the 1970s or 1980s. There isn’t a lot of published information available, but it seems leather-clad pipes were pioneered by the Longchamps factory in France after World War II to make use of a supply of blemished stummels. The style caught on and other manufacturers jumped on the trend, which flourished for a few decades but died out in the late 1970s to early 1980s.
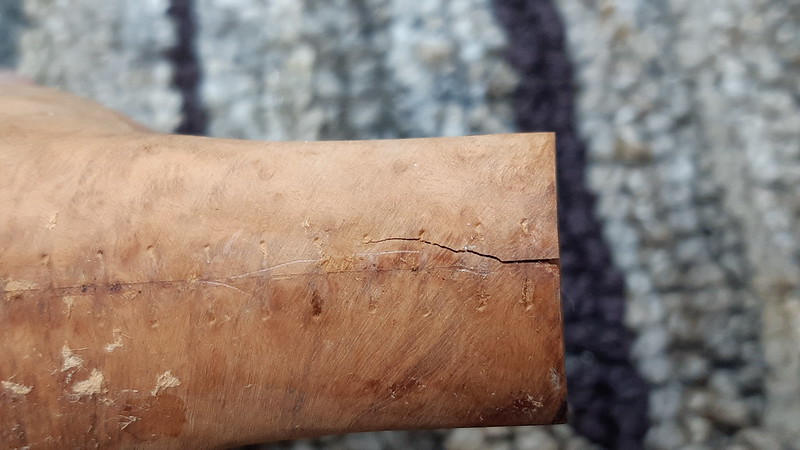
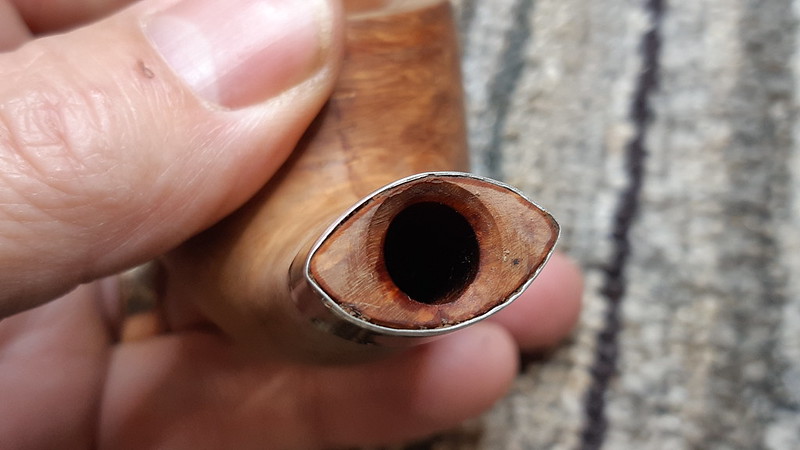
Getting back to the patient on the table, I twisted out the stem to start the cleaning process and found a large crack running up the underside of the shank. It was hidden under the leather warpper but clearly visible when examined from inside the mortise.

What to do now? I had two options – repair the shank crack using a sleeve inside the mortise or remove the leather wrapper and install a shank band to seal the crack. As the leather was already stained in a few places I didn’t mind the idea of removing it. Besides, I was curious to see whether this stummel suffered from the same blemishes as the original Longchamps pipes.
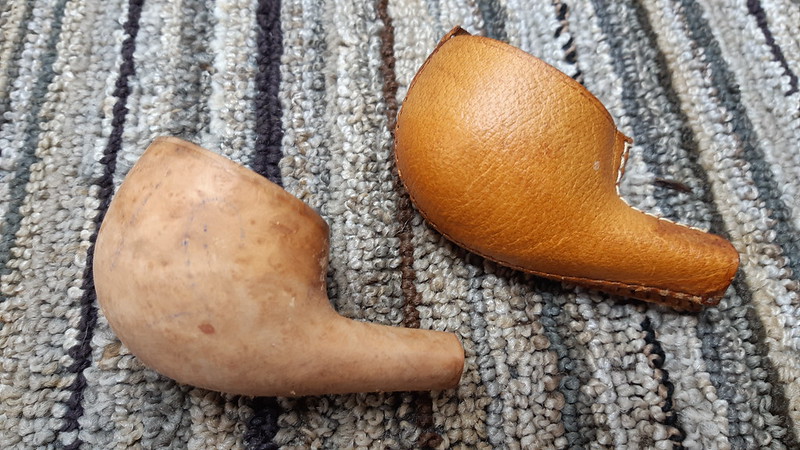
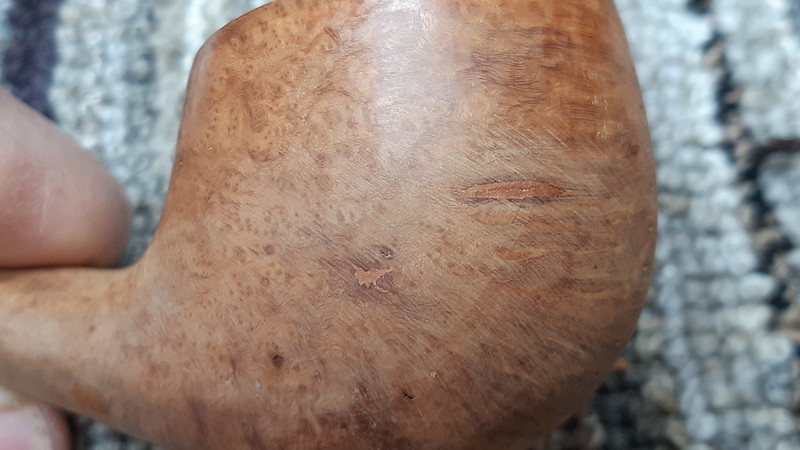
Decision made, I snipped the stitches holding the leather in place and removed it. As this series of shots shows, the briar had a number of fills spread around the stummel and the heavy stitching had left its imprint in the wood, but I had certainly seen worse briar on other pipes.

I selected a suitable nickel shank band from my supplies and squeezed it into an oval. It slipped over the end of the shank, the briar reaching about halfway through the band’s width. Using a heat gun, I warmed the band to make the metal expand, and seated it the rest of the way onto the shank by holding the stummel, shank downwards, against the table and pushing until the band was flush with the shank face. When the band cooled, it contracted back to its original size, clamping itself firmly in place. Note how the shank crack is now tightly closed.

Now to make the stummel pretty again. The leather was not going back on, so I decided to refinish the briar with another traditional method of dealing with less-than-perfect briar – rustication.
I used several different carving burrs in my rotary tool to texturize the surface of the shank, bowl and rim, leaving only a tiny strip of smooth briar along the edge of the band. I debated leaving the rim smooth but a few poorly placed fills changed my mind.


The rustication was looking good but felt a bit sharp in the hand. A scrub with a brass tire brush knocked the points off the briar.

There were two spots on the front left face of the bowl that needed a bit more attention. These were naturally occurring flaws in the briar that ran a bit deeper than my rustication. Not wanting to carve away too much material, I opted to fill the pits with a mix of CA glue and briar dust, then rusticate the fills to blend them in.


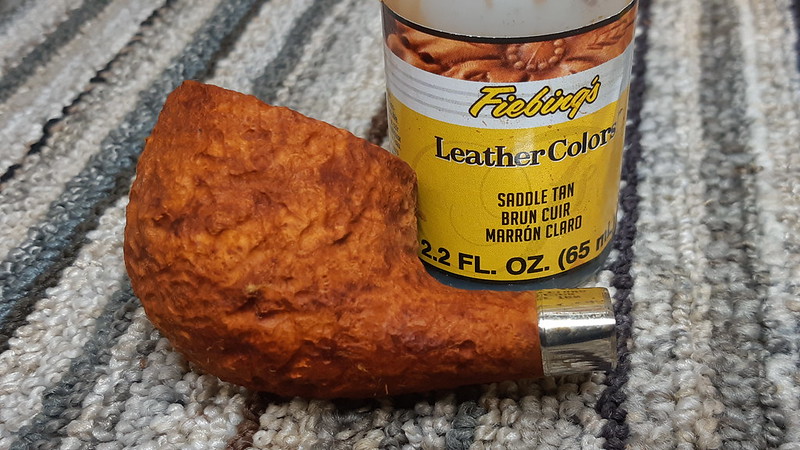
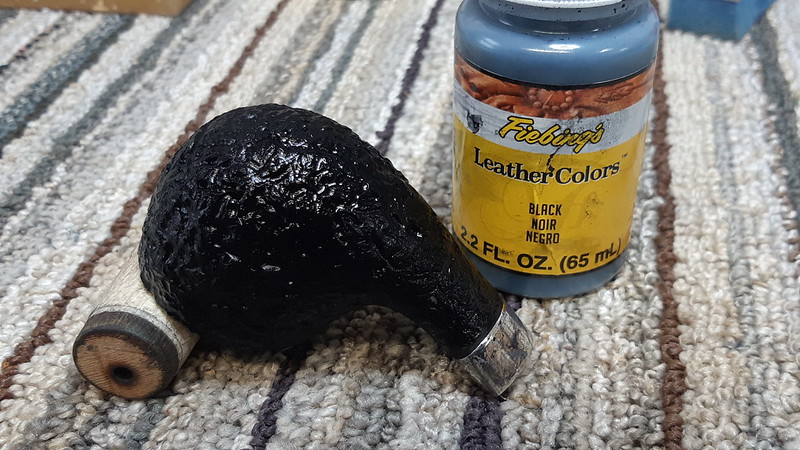
I decided on a classic black-over-red colour scheme for the pipe, first applying a coat of Fiebing’s Saddle Tan leather dye to the briar. I let it dry, then used a dark stain pen on the two spot fills to hide them deeper under the black top coat. When the dye had dried, I hand buffed away the excess then wiped a bit of mineral oil over the stummel to help moisturize the briar and deepen the finish.


I let the oil sit on the briar for a few minutes then removed the excess by hand buffing the stummel with an old towel. I have found that a freshly refinished pipe will buff up better if it is allowed to rest for a bit after oiling. This gives the briar time to absorb any oil left on the surface and find a new equilibrium. I let this stummel sit overnight, and made double use of the time by dropping the stem into an Oxyclean bath to soften the oxidation and old tars.
The next morning, I rescued the stem from the Oxy soak and scrubbed away the now soft oxidation with 0000 steel wool and Magic Eraser. I ran a pipe cleaner dipped in alcohol through the airway to remove any remaining gunk, then wet-sanded the vulcanite to 2000-grit.
Then it was time to take the pipe to the buffer. Mounting the stem in the shank, I polished the stem with both Red Tripoli and White Diamond compounds to erase the sanding scratches and bring up the shine. I also lightly buffed the stummel with White Diamond to both knock any lingering sharp edges off and to remove a bit of the black dye from the high spots to reveal the red underneath. Then I applied a few lights coats of Carnauba wax, light on the stummel and heavier on the stem, to complete this estate pipe revival.
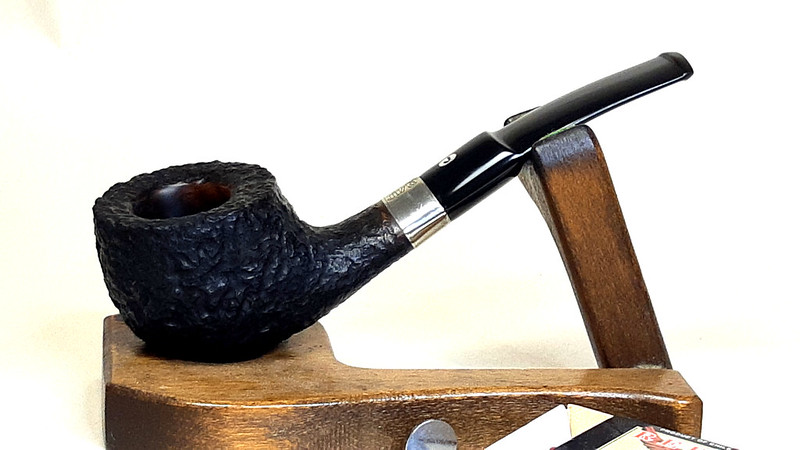
The finished pipe is no longer wearing its original leather jacket; rather, it sports a fairly deep and craggy rustication that both looks good and feels great in the hand. The shine of silver from the shank band adds a touch of bling to the affair while complementing the metal stem logo nicely and leads the eye down the long, wide saddle stem to a well-formed button.
There is a valid argument to be made here that the pipe really isn’t a Jeantet product anymore after having such a drastic makeover – it certainly bears little resemblance to the pipe that left the factory decades ago. Perhaps if I had had a suitable oval saddle stem on hand I may have taken the time to complete the “de-Jeantet-ification”, but I didn’t, so the “J” stays, at least for now.
Thanks for joining me for this somewhat involved estate pipe rescue. If this Jeantet Scoop has caught your eye and you’d like to add it to your rack and rotation, you can find it on the Pipe Inventory page now.
Until next time, Happy Piping! Here’s the finished pipe.