
Here is another estate pipe from my box of refurbs-in-waiting. This Brigham 218 Pear had been buried at the bottom of the pile for some time when I dug it out and decided it was time to work on it.
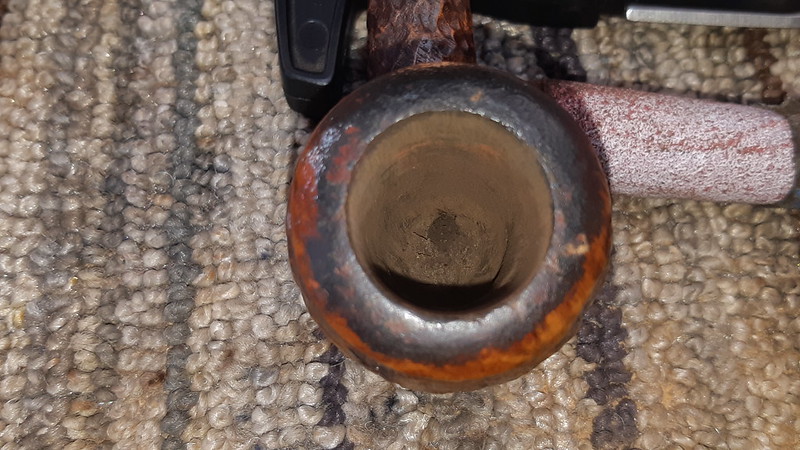
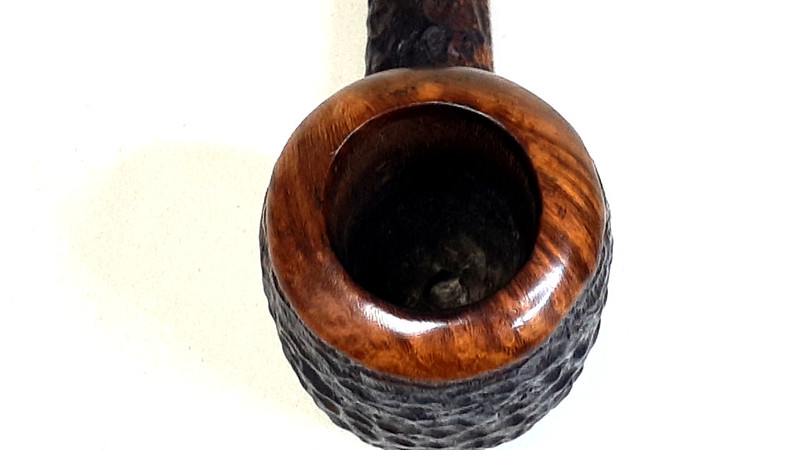
Here is the pipe as it looked when I brought it to the worktable. Although relatively young (the stamps date this Brigham to the 1990s or early 2000s), it was clear to me that the pipe had been “ridden hard and put away wet”. The domed rim was covered in a crust of carbon lava, though not thickly enough to hide several dents and scratches, and the chamber boasted a thick but uneven cake. The stem was lightly oxidized and showed both tooth chatter and a few dents at the button.


The pipe is stamped “218” (meaning a 2-Dot quality in Shape 18 Pear) followed by “Brigham”. The lack of a Country of Manufacture stamp dates the pipe to the 1990s or early 2000s, the last period of Brigham’s Canadian pipe production.

Somewhat disconcertingly, the stem refused to budge when I attempted to twist it out of the shank. As a restorer, this raises a few potential red flags – is the pipe gummed up with tars? Has the aluminum tenon corroded and bonded the stem to the shank? Or has the stem actually been glued into the shank as a bad DIY solution to a broken tenon? The only way to find out is to get the stem out of the shank and investigate.
To get the ball rolling, I dribbled a bit of 99% isopropyl alcohol into the stem/shank junction. Sometimes this is all the effort necessary to loosen the bonds of a bit of tar or other gunk, so it’s a good starting position for resolving a seized stem. I let the alcohol soak in while I worked on clearing the tobacco chamber of the old cake.
I reamed the chamber with my Castleford reamer set and followed up with sandpaper wrapped around a dowel. The V-shaped chamber was in good shape under the cake.

After clearing the chamber I tried again to twist off the stem, but again had no luck. I repeated the alcohol application at the stem/shank junction a few times but to no effect. Stepping up the treatment, I slid a pipe cleaner into the stem and poured alcohol into the chamber, tilting the pipe to let the alcohol flow into the airway and fill the mortise. The pipe cleaner stopped the alcohol from simply running out the end of the stem. With about half the chamber full of alcohol, I set the pipe aside to sit while the alcohol (hopefully) worked to break down whatever was holding the stem in place.


I let the pipe sit for about an hour then came back to it and tried again to remove the stem. This time I was successful – the stem twisted out of the shank, though grudgingly. A word of caution for those of you that find yourself in a similar situation – take your time and do not force the stem. There is a real risk of shattering the shank, breaking the tenon or both if too much force is applied to a really stuck stem.
I took this series of shots to show what has caused the stem to seize in the shank. I’d like to say it is an uncommon issue with these vintage Brigham pipes, but it is not. Note the thick layer of grey stuff on the tenon in the first pic below. This is aluminum corrosion caused by moisture from a used filter attacking the metal over time. The corrosion/oxidation builds up until it fills the space between the tenon and the shank, effectively gluing the stem in position.


I gave the tenon a quick scrub with 0000 steel wool to remove the worst of the corrosion buildup then dropped the stem into a bath of Oxyclean and warm water. This would loosen the remaining corrosion residue, as well as raise the oxidation from the stem for easy removal.

While the stem soaked, I worked on the stummel, first cleaning the shank with cotton swabs dipped in alcohol. You can see in this pic that the used swabs are grey from aluminum corrosion instead of the more usual dark brown from tar.

After cleaning the shank and airway, I moved to the exterior of the pipe and started a fairly lengthy rehabilitation process on the smooth rim. The worst of the carbon lava crust came away under 0000 steel wool, revealing a number of dents and dings underneath.

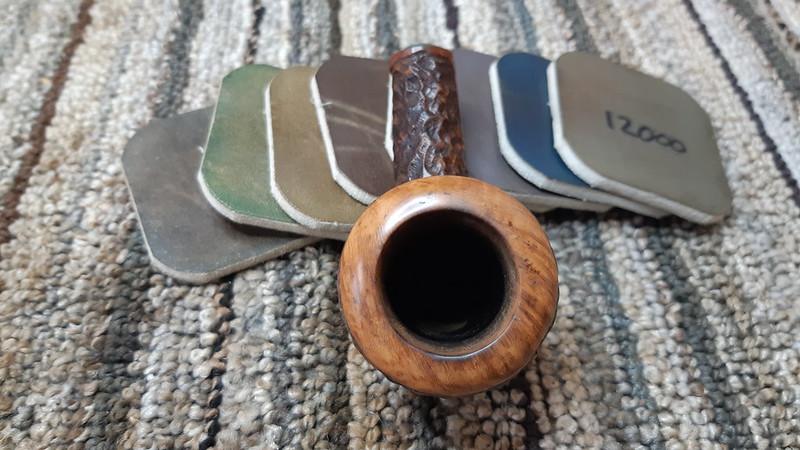
The dents were rather shallow so I decided to simply sand the rim flat again. I worked through progressively finer grits of abrasive, from 220 to 2000 grit, then gave the rim a full course of Micromesh sanding pads from 2400 through 12000 grit. Each grade of sandpaper smoothed out the scratches from the previous grade, deepened the colour of the briar and brought up the shine.

Just before closing the shop for the night, I filled the bowl with cotton balls and twisted another into the shank, then filled the pipe with alcohol. When the cotton in the shank started to show moisture, I set the stummel aside for the night to let the alcohol dissolve any remaining tars, which will be captured in the cotton.

When I came back to the shop the next day, the cotton wool had turned a light brown colour. I removed the cotton balls and let the remaining alcohol evaporate. The stummel was much fresher, and better smelling, after its alcohol treatment.

A scrub with Murphy’s Oil Soap and a toothbrush lifted a surprising amount of dirt, grease and old wax from the rusticated finish and prepared the briar for staining.

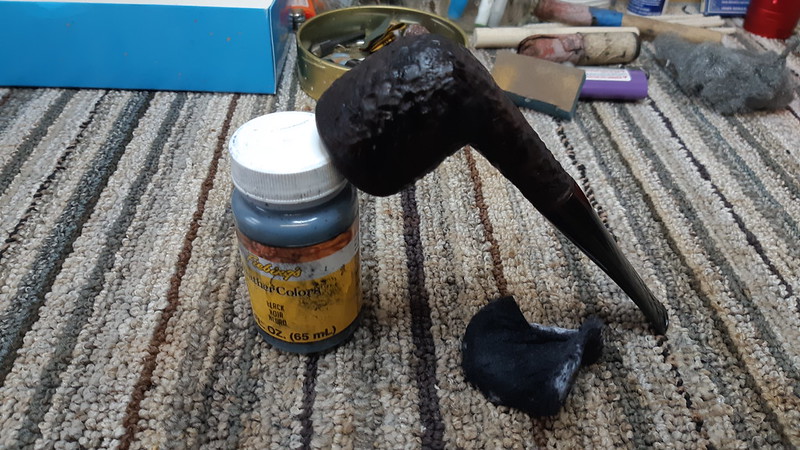
I applied a coat of Fiebing’s Black leather dye to the briar and let it dry before hand buffing away the excess with a towel. I use the water-based version of Fiebing’s dyes, so removing the black from the smooth rim and stamping area was a simple matter of wiping the briar with a damp bit of Magic Eraser. This left the dye only in the grain while letting the natural red-brown of the briar shine through.
I set the stummel aside at this point and rescued the stem from its Oxyclean bath. The softened oxidation came away easily under 0000 steel wool and Magic Eraser. I followed up the basic cleaning by attacking the stem’s airway with pipe cleaners and cotton swabs dipped in alcohol.

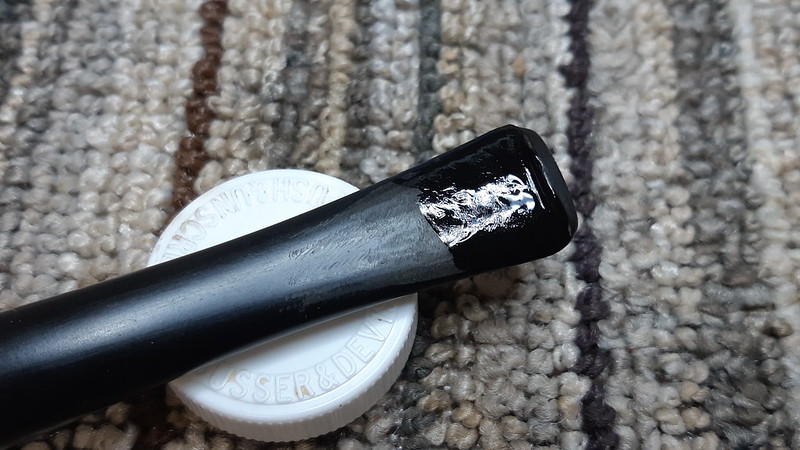
The stem was looking pretty good but the bite area still had some tooth dents to deal with. Thankfully, the dents were not all that deep. A combination of sanding and a top dressing with CA glue did the trick, after which I filed and sanded the stem flat and smooth to 2000-grit.


Then it was time to reassemble the pipe and take it to the buffer for a run of Red Tripoli and White Diamond compounds followed by a few light coats of Carnauba wax. The buffing compounds erased the last stray sanding marks and enhanced the colour of the smooth areas of briar while the Carnauba wax added shine and a layer of protection for the revived finish.
The restored pipe is looking great after its time on the worktable. Gone is the ugly carbon lava from the rim and the unsightly dents and dings that were hiding underneath. The briar is clean, fresh and inviting and the stem is once again a jet black in which the two brass Dots shine like stars against the night sky.
I’m somewhat tempted to keep this 1990s Brigham 218 Pear for myself, but I already own two Brigham pipes in this shape. Happily, this one found a new home with a new piper for Christmas.
Thanks for following along with me on this estate pipe restoration. As I mentioned previously, a seized stem can be a tricky thing to loosen up without damaging the pipe. I hope this post added a few ideas to your restoration tool box.
Until next time, Happy Piping! Here’s the finished pipe.


A very helpful article but what would your techniques be if the stem remained fixed? It would be helpful to know what steps 3,4,5 etc. would be. Thanks again for the fine articles.
LikeLiked by 2 people
Hi James. Other options include freezing a pipe to shrink the tenon enough to remove the stem, and, ironically, heat may also do the trick. Heating the shank/stem junction can soften whatever it is holding the tenon in the shank, as long as it is not glued with epoxy.
As a last resort, and assuming you’re willing to put in the effort, a glued-in stem can be cut off and the shank drilled out to make room for a new stem.
LikeLiked by 1 person