
It’s been a while since I worked on a pipe from my own box of refurbs-in-waiting, so today when I found myself temporarily in between other jobs, I dug through my pile of estate pipes and pulled out this 1990s vintage Brigham 303 Billiard.
As you can see from this first series of pictures, the pipe was in bad shape when I brought it to the worktable. The finish was worn to that indeterminate shade of old t-shirts that have seen better days and the briar looked dry, dirty and neglected. The stem was stuck about a quarter of an inch shy of the shank face, gummed up by some serious oxidation of the aluminum tenon, and to make things worse, the shank was cracked, with a split in the briar running about 5/8ths of an inch down the shank from the face. The stem itself was lightly oxidized and carried some light tooth chatter, while the rim of the bowl had a few scratches and dents. All in, this Brigham was less than inspiring to say the least.


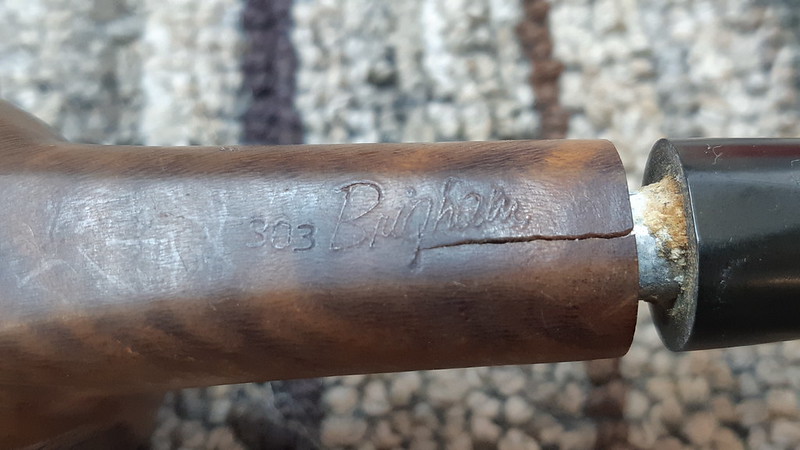
This close shot shows both the extent of the shank crack and the pipe’s stamps, which read “303” (a 3-Dot quality in Shape 03 Medium Billiard) and “Brigham”. The lack of a Country of Manufacture stamp dates the pipe to the 1990s or early 2000s when Brigham was slowly moving production to the EU from Canada.
After carefully twisting the stem out of the shank, it became clear why it couldn’t seat properly. There was a LOT of oxidation on the tenon and filter holder, very likely caused by the pipe’s last owner abandoning the pipe with a soggy filter in place.

The filter proved to be locked in place by all the corrosion and muck. To loosen it up I stood the stem upright in a shot glass of 99% isopropyl alcohol and left it to soak for a bit.

While the stem soaked, I worked on the stummel, first cleaning out the tobacco chamber using sandpaper wrapped around a dowel. The light cake in the chamber came away easily. Underneath it all, the chamber walls and floor were in great shape.


My first priority for the stummel was to repair the shank crack. After making sure that the crack was not jammed full of crud, I used my bench vise to pinch the crack shut after flowing a bit of CA glue into it. I left the stummel in the vise until the glue had cured, then brought it back to my worktable. A bit of light sanding smoothed the repair out flush with the surrounding briar.

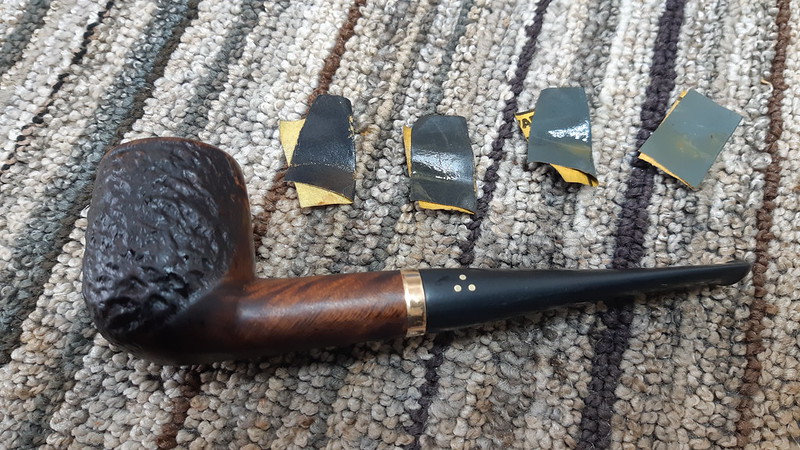
Glue alone would not be sufficient to hold the crack closed under use. To make a permanent repair, the shank needed some mechanical reinforcement which, in this case, would be a thin brass band that I felt would compliment the brass Dots on the stem nicely.

The band was a snug fit, just barely fitting over the briar. To seat it properly, I heated the band over the heat gun to expand the metal then pushed the band home. When it colled, the band shrunk back to size, clamping the shank firmly.

With the crack repaired, I carried on with a good cleaning of the stummel’s internals. I used a handful of cotton swabs and pipe cleaners dipped in alcohol to clear out the accumulated tars and debris from the shank and airway.

The exterior also got a good cleaning using Murphy’s Oil Soap and a toothbrush to lift away decades of dust, dirt and grease form the finish.

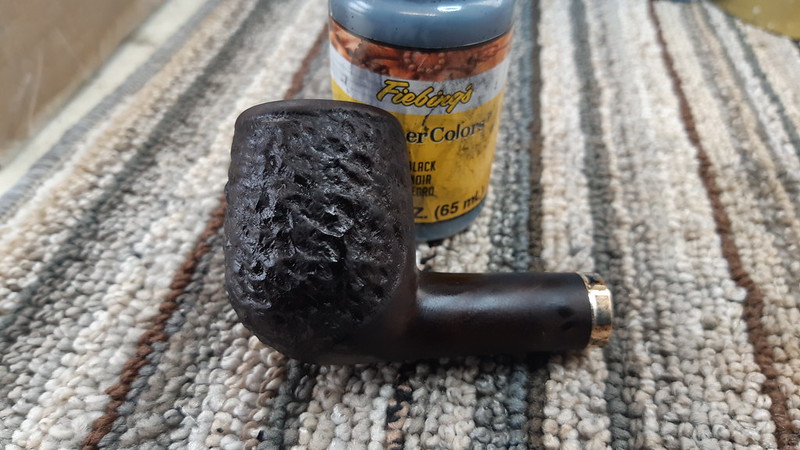
Then it was time to refinish the briar. I sanded the rim lightly to remove the scratches and dents, then polished it to 2000-grit before applying a good coat of Fiebing’s Black leather dye to the entire stummel. I let the dye dry then used a damp bit of Magic Eraser to remove the excess dye from the smooth parts of the stummel. This left the black only in the grain and in the rusticated areas.
A wipe of mineral oil helped inject some moisture into the briar and gave the revived finish depth and pop. I let the oil sit on the briar for a few minutes then buffed the excess away using an old towel.

I set the stummel aside at this point and took another look at the stem. The alcohol soak had done its job and I was able to twist the very dirty filter out of the tenon. Yuck.

The vulcanite stem was only lightly oxidized but I dropped it into an Oxyclean bath anyway as the soak would both raise the oxidation for easy removal and loosen up the tars and other crud that inevitably was lurking inside the stem’s airway.

I retrieved the stem about an hour later and scrubbed away the oxidation with 0000 steel wool and Magic Eraser. The Oxyclean had also done its job inside the airway as it only took a few cotton swabs and pipe cleaners to finish the cleanup.

Getting a pipe cleaner through the stem proved a bit difficult so In opened up the airway a bit by heating the stem over a lighter flame briefly and pushing a pipe cleaner al the way through. I left the pipe cleaner in place as the vulcanite cooled and set the new shape.

Now coming to the end of this restoration, I mounted the stem in the shank and wet sanded the vulcanite with 400 – 2000 grit sandpapers to smooth and polish the rubber. Looking good!
All that was left to do now was to take the finished pipe to the buffer for a run of Red Tripoli and White Diamond compounds to erase any stray sanding marks and bring up the shine. A few light coats of Carnauba wax added more shine and a layer of protection fore the revived finish.
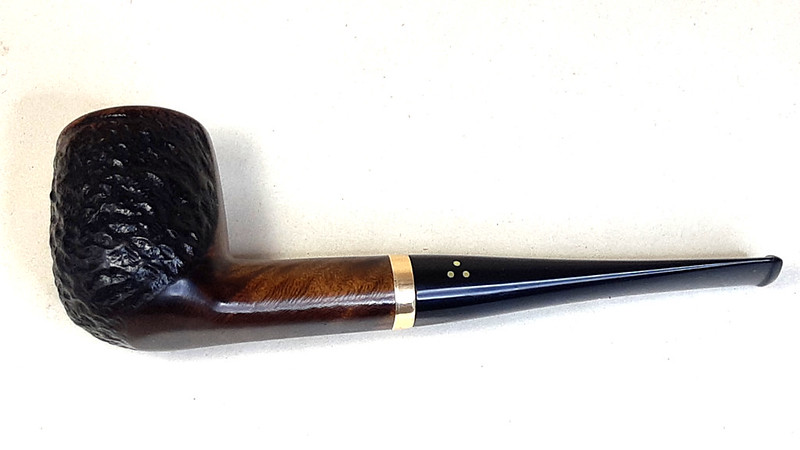
This renewed 1990s-era Brigham 303 is looking sharp after its time on the bench. The ugly shank crack has disappeared and the briar is fresh and clean while the new brass shank band brings out the honey tones in the stummel’s finish and the brass Dots in the now jet black stem. There are a few small marks here and there on the stummel but I think that’s more than acceptable on a 30-year-old pipe.
This lovely pipe has already found a new home with a new steward.
Thanks for joining me for this estate pipe restoration. It’s no secret around here that I have a soft spot for vintage, made in Canada, Brigham pipes and I think this 303 would be a great addition to anyone’s collection.
Until next time, Happy Piping! Here’s the finished pipe.


Better than new!
LikeLiked by 2 people
Thanks, Richard! I’m also happy to report that the pipe’s new owner has reported that it smokes very nicely – a win all around! 🙂
LikeLiked by 1 person