
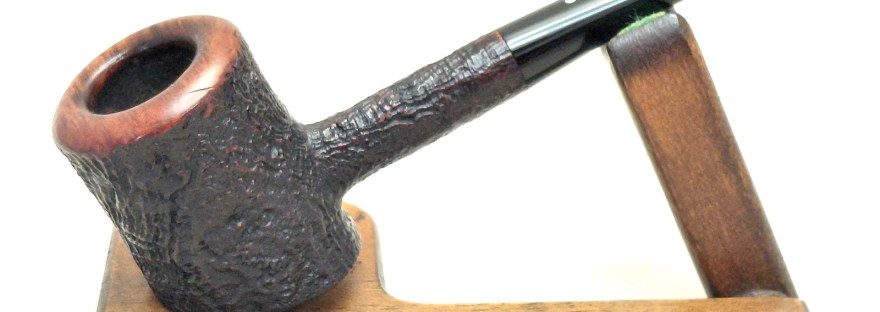
If you smoke enough pipes for long enough, chances are that eventually you break one. After all, many pipes are not really that robust in construction, with features like pencil shanks, delicate carvings or questionably sized stem tenons. The pipe on the bench in today’s post is one such unfortunate briar, but one that can be restored to near factory spec.
As this initial series of images shows, the pipe in question is a Dunhill Shell Poker that had suffered a broken shank. The break is positioned near the end of the mortise, a fairly common place for a break as the briar here is thin.


The smooth rim of the bowl is rounded over, or “crowned”. A simple touch but rather classy, in my opinion.

The underside of the bowl is stamped “475” over “Dunhill Shell” over “Made in England 7” over “4S”. If I’m reading the dating key at Pipephil.eu properly, This information tells us that the pipe is a 1967 Dunhill Shell Briar, Shape 475 Poker in a Group 4 size.

The pipe has been really well cared for, despite the damage to the shank. The pipe’s steward obviously loves his pipes, and that care makes my job here so much easier. With no need to clean the pipe first, I could get straight on to the shank repair.
This close shot of the two parts of the shank show that the break was clean, with no missing shards of briar or other such issues to deal with. The pieces fit together tightly, so if I played my cards right, there would be little need for cosmetic touchups after the shank was repaired.

Clearly, the shank needed to be glued back together for the pipe to be smokable once again, but glue alone would not hold up under use. The torque applied to the shank through mounting and dismounting the stem from the mortise could be enough on its own to snap the glue joint. The break would need to be reinforced with a splint.
Shown in this pic is the damaged shank and a short section of aluminum tubing that just fit inside the factory mortise, leaving enough room for some epoxy to hold it all together. The splint needed to be positioned across the break, with enough tubing on either side to form a solid repair.


There was about an eighth of an inch of mortise on the bowl side of the break, which I felt would leave the splint hanging by its metaphorical fingertips on that end. To increase the strength of the repair, I deepened the mortise on the bowl side of the shank by roughly another eighth of an inch. This allowed the splint to overlap the break by 1/4″ to 3/8″ on both sides.
Here you can see the splint dry fit into the modified mortise.

A quick test fit of the second part of the shank over the splint showed just how clean this break really was. I had every hope for an invisible repair!

This shot looking down the shank mortise, shows the splint in place. I’d need to modify the stem tenon to accommodate the reduced interior diameter.

To glue up the repair, I mixed up a small amount of two-part epoxy. I used JB Weld branded 5-minute epoxy here, but any standard epoxy will serve just as well. If the break had been closer to the rear edge of the bowl, I might have elected to use JB Weld high-heat epoxy as added insurance, but that was not necessary in this case.

Regular readers will know that I like to clamp repairs of this sort vertically to let gravity help keep the parts in position as the adhesive cures. I went one step further this time by placing a heavy block on the end of the shank after applying the epoxy and assembling the shank. The weight pushed the two halves of the shank tightly together while the epoxy cured overnight.


When I came back to the pipe the following morning, I removed the weight from the shank and the stummel from the padded vise. As I had hoped, the weight had done its job, and the crack had glued up virtually invisibly. A quick spin by hand of a suitably sized drill bit in the shank removed the inevitable blobs of excess epoxy from the mortise.
As I mentioned previously, I did need to reduce the diameter of the front portion of the stem tenon to allow it to fit smoothly inside the splint.


All that was left to do now was to take the repaired pipe to the buffer for a quick polishing and waxing. I skipped the Red Tripoli wheel on this one, opting to buff the briar and stem with only White Diamond buffing compound to restore the shine. A few light coats of Carnauba wax added more shine and some UV protection.
And with that, this Dunhill Shell Briar Poker was ready to send home to its steward where it should serve faithfully for many more years. The pipe looks as factory original as always, thanks to the internal splice. Without peeking into the mortise, you’d never know that the pipe had been damaged at all.
I think the takeaway from this repair is two-fold. First, life happens and pipes break from time to time. Second, a broken shank is not the guaranteed death knell for a pipe that many may fear it is. This repair project is, I think, ample proof of this claim.
I hope you’ve enjoyed watching me put Humpty Dumpty together again. I’m quite pleased with the results, as is the pipe’s steward who reports that this much loved Dunhill Poker not only looks great but also smokes just as well as it did before the damage occurred. That’s a successful repair in anyone’s book.
Until next time, Happy Piping! Here’s the finished pipe.


Brilliant repair!
LikeLiked by 1 person
Thanks! Luckily, the break on this shank was clean and the parts fit back together without losses that would have needed filling. 👍
LikeLike