
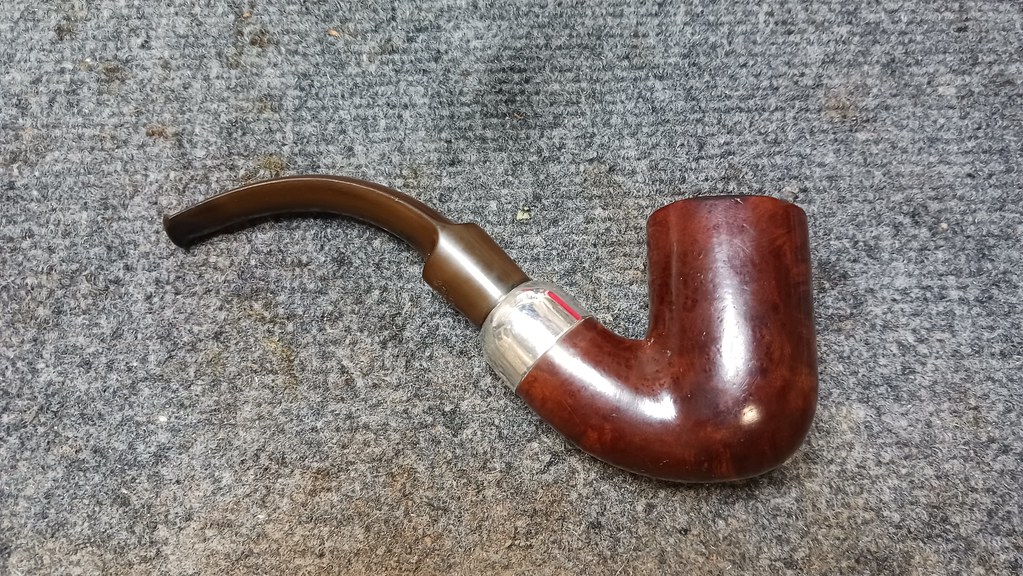
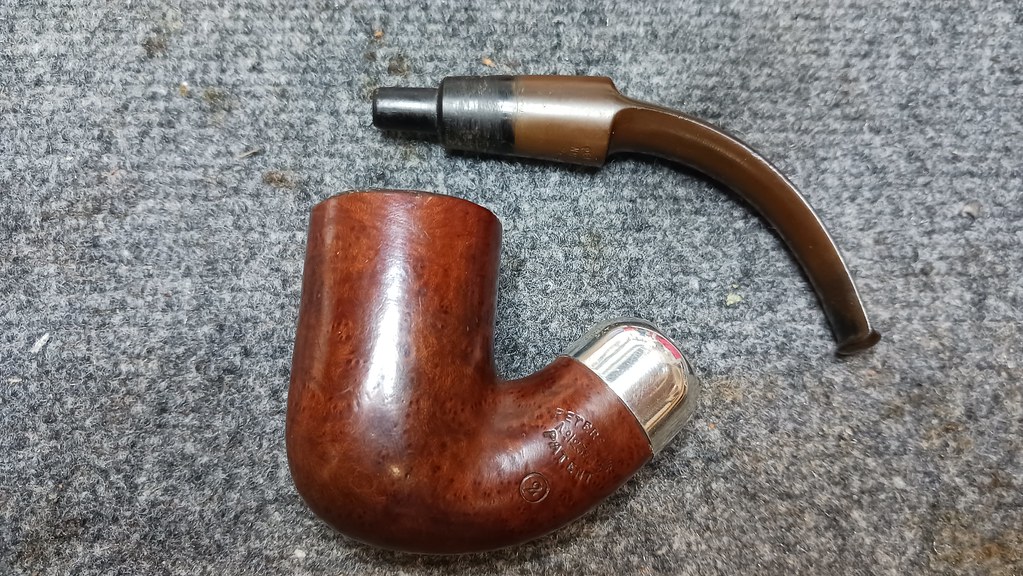
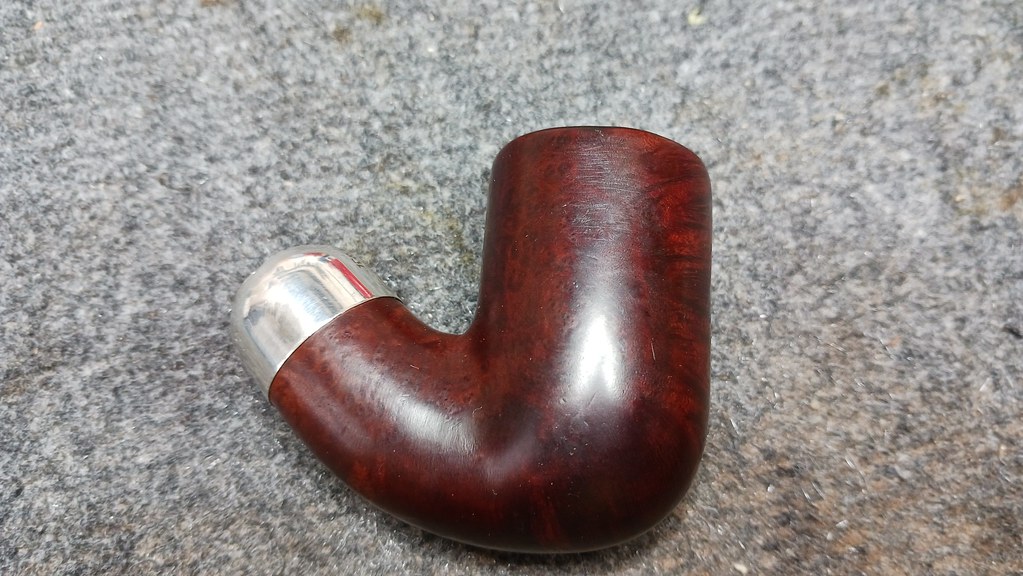
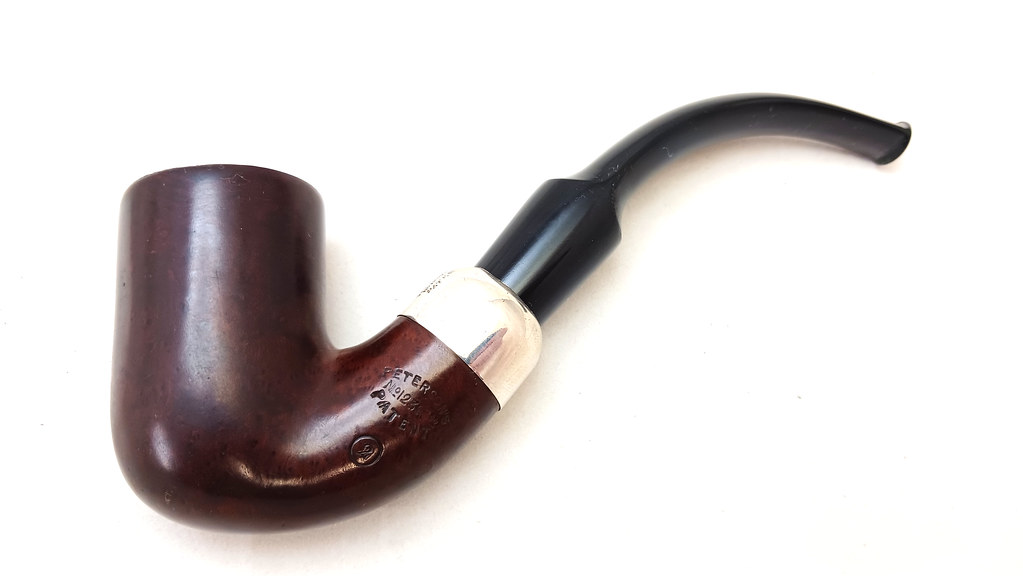
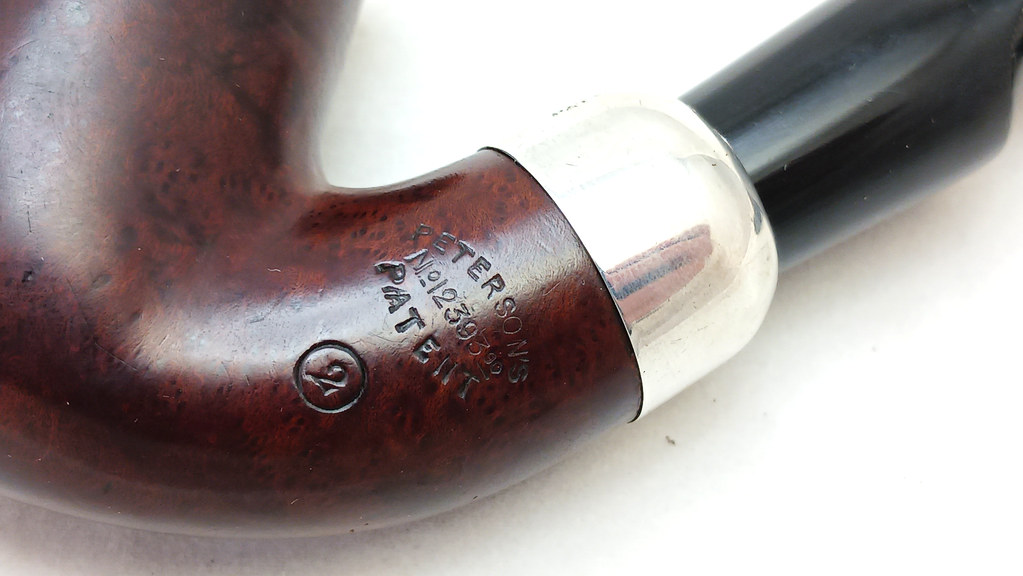
Over the years, I have had the pleasure of working on some truly vintage, museum-quality pipes, but never one is as good starting condition as the subject of today’s post, an early Peterson Patent System pipe that predates the now famous Peterson P-Lip by three years.
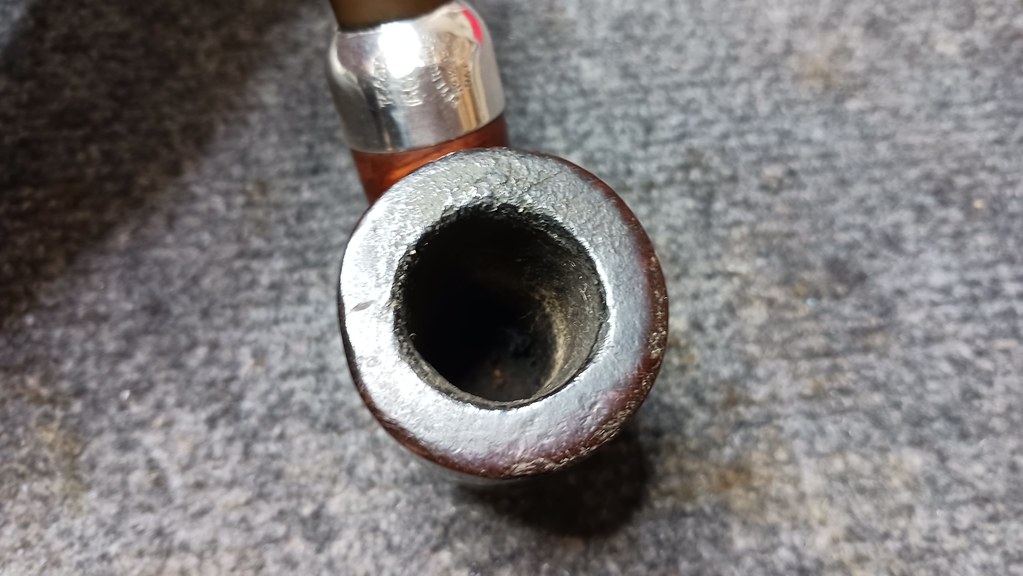
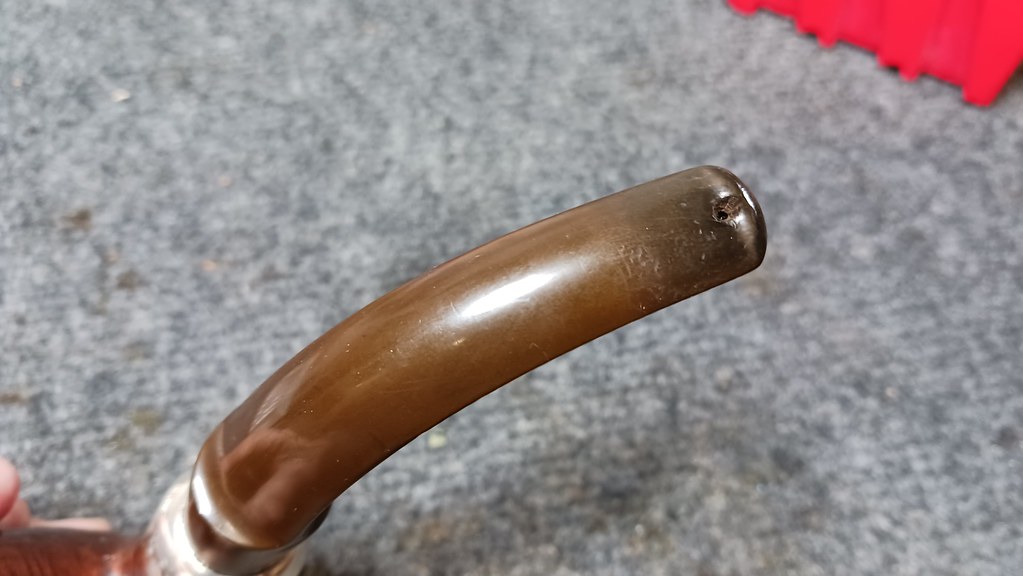
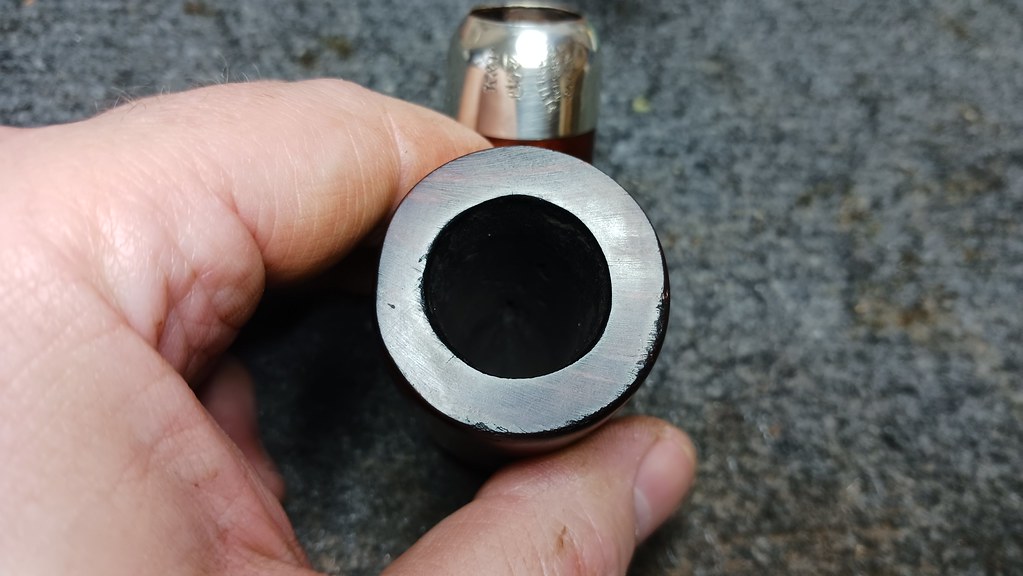
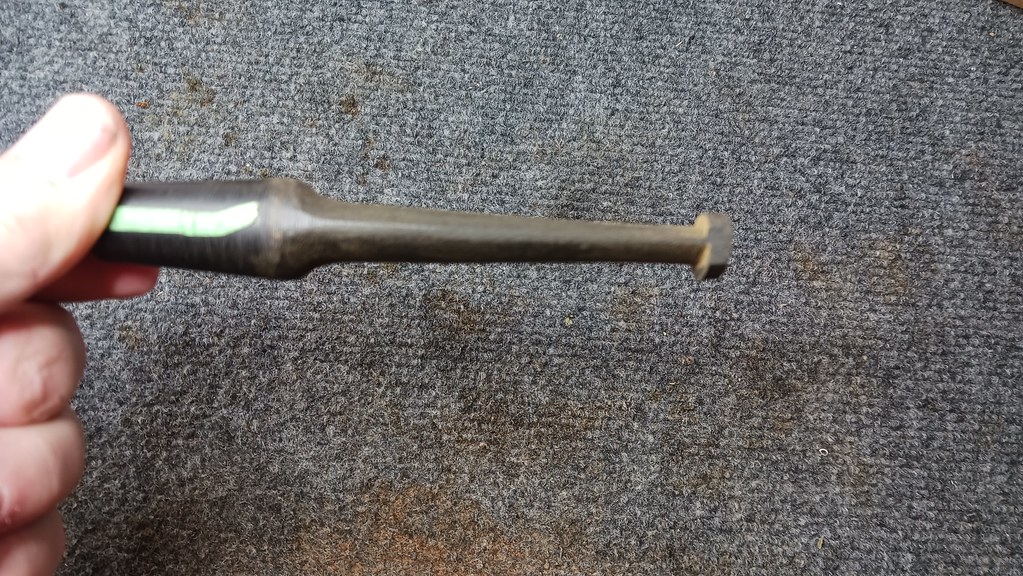
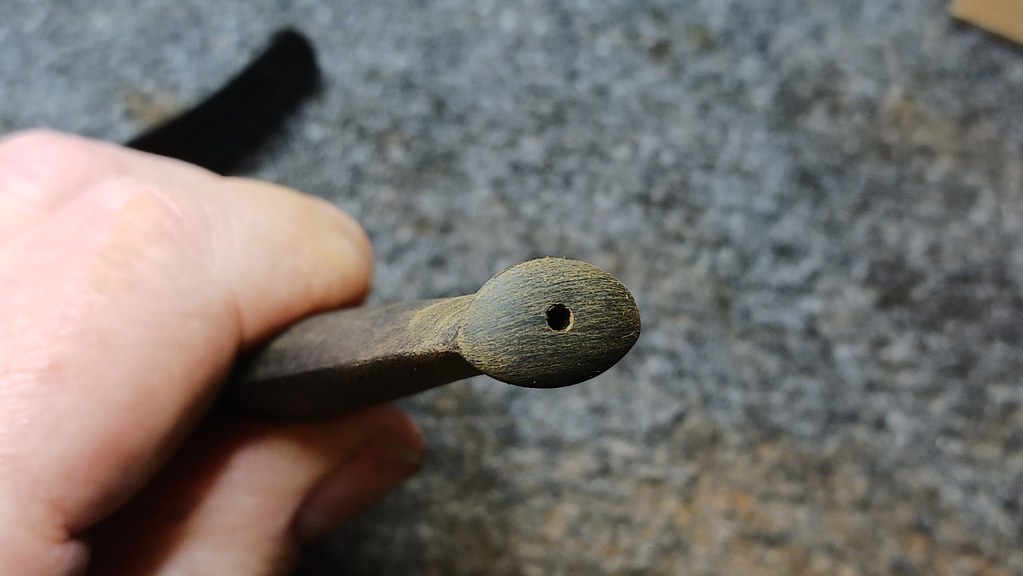
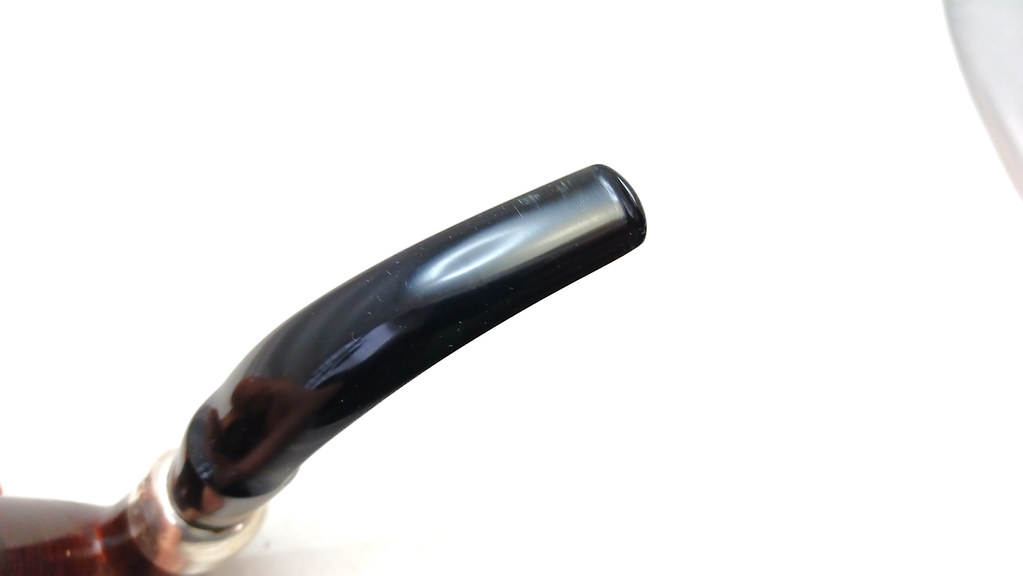
As you can see from this initial series of images, the pipe was in remarkably good condition for its age – except for some rim dents and a somewhat out of round inner rim, the stummel was looking good. The original stem, though oxidized, was also in really good shape for 130 year old Ebonite/Vulcanite. I’d have to be careful cleaning up the stem to avoid buffing out the Peterson Patent stamp on the rear face of the Army Mount tenon, but the bigger issue was a hole in the top of the stem just behind the button. Its position and shape looked like someone’s attempt to make an Orific Button stem into a P-Lip stem.

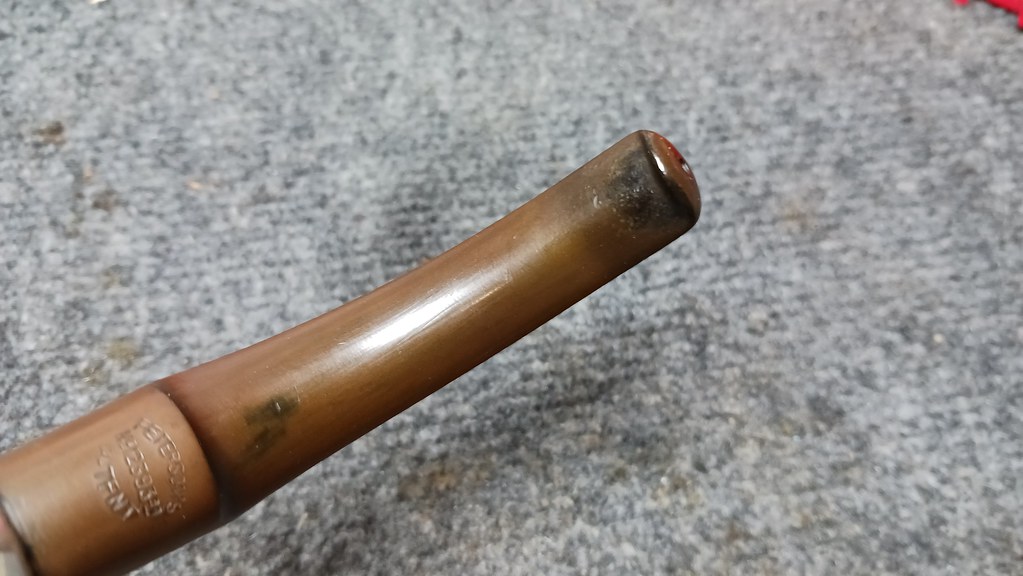
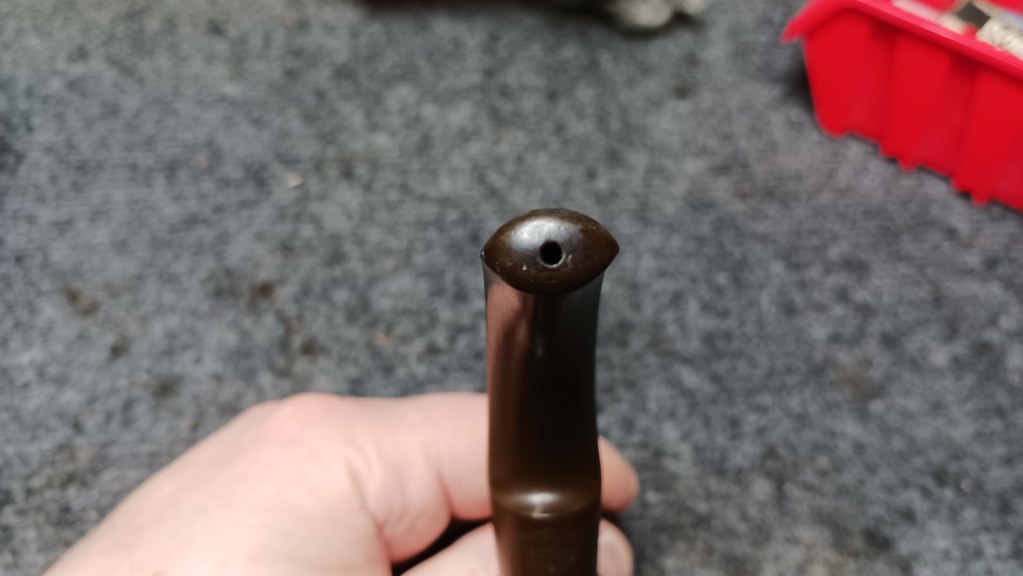
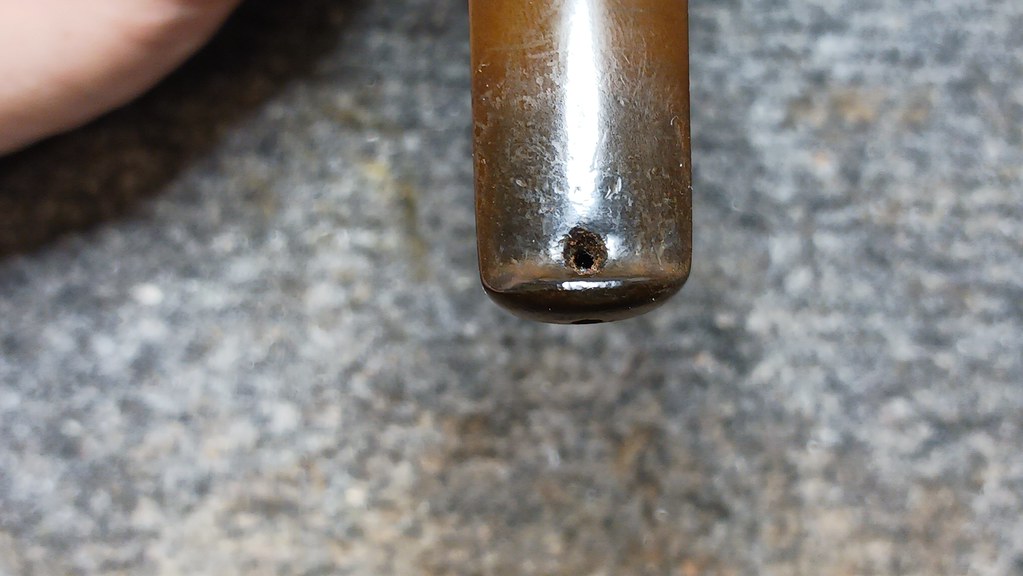
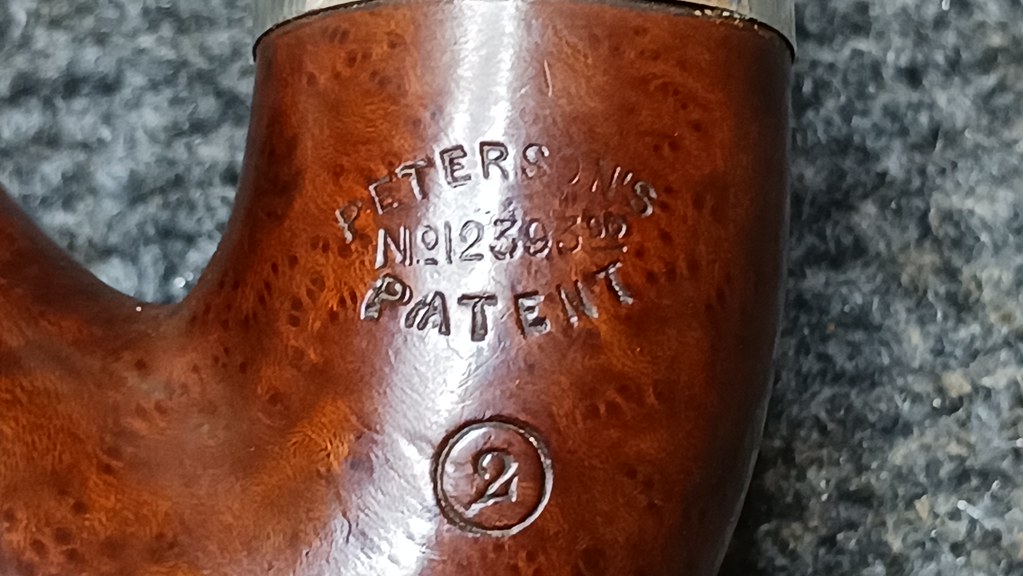
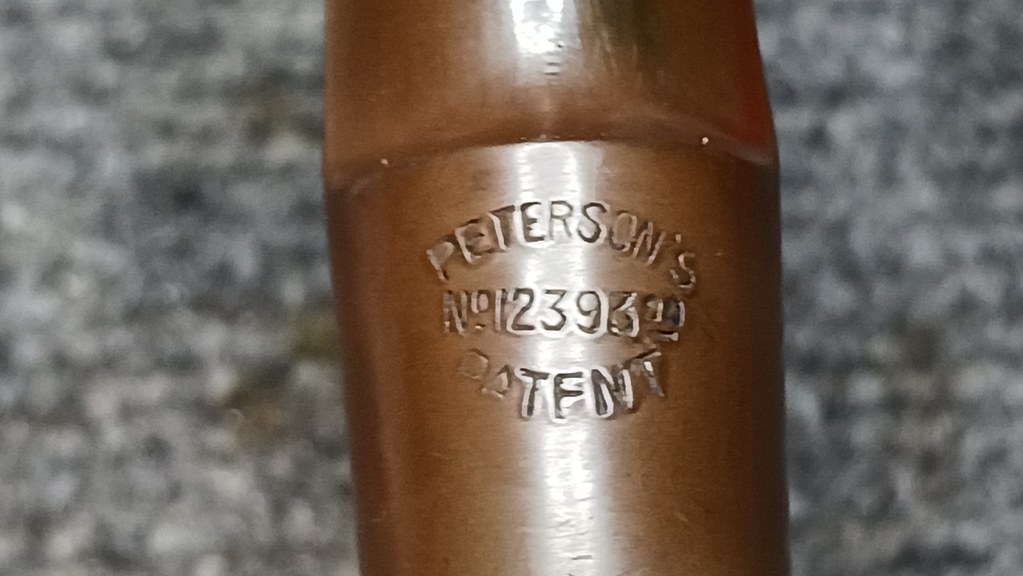
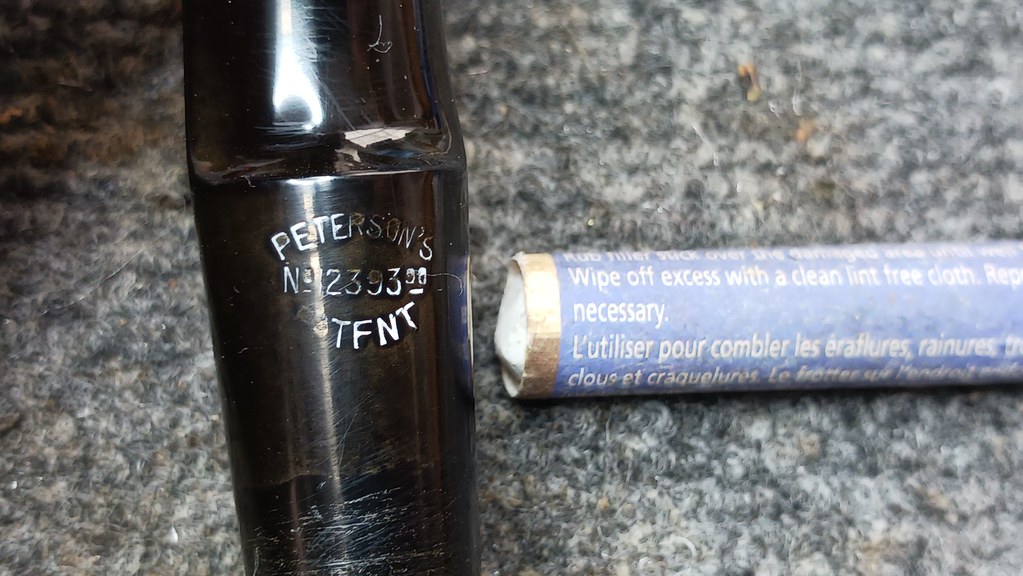
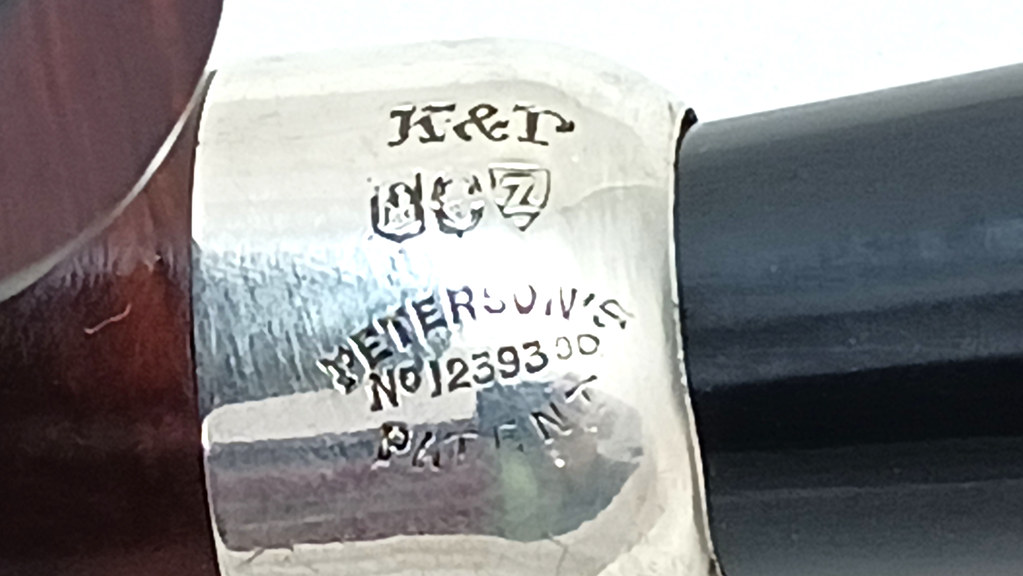
The shank cap is stamped “K&P” over a trio of hallmarks – Hibernia (Ireland), a Harp (Dublin) and a date letter, “Z”. The date letter corresponds to 1895. This places the manufacture of this pipe four years after Peterson first patented his System and three years before the advent of the P-Lip in 1898, making this pipe fairly significant historically.
The shank cap, shank and stem all share the same patent stamp, which reads “Peterson’s” (arched) over “No 1239390” over “Patent” (arched).

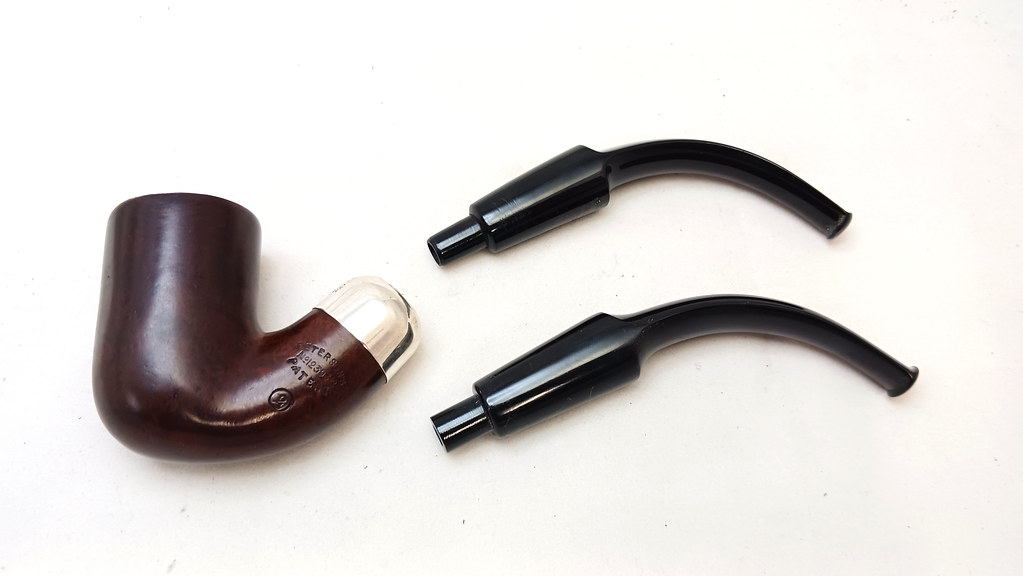
My marching orders for this pipe were fairly straightforward – the pipe would be cleaned and polished, the original stem deoxidized and the extraneous hole in the top of the button patched. The original stem would be maintained by the pipe’s steward as a display piece, but as he wishes also to be able to smoke the pipe, a new Hand Cut Ebonite stem would be made for the stummel.
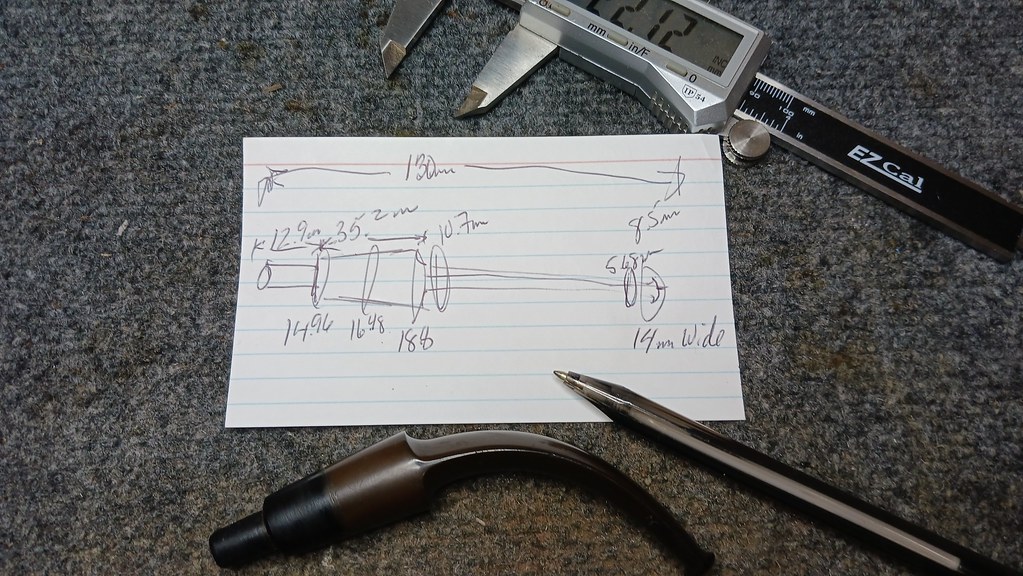
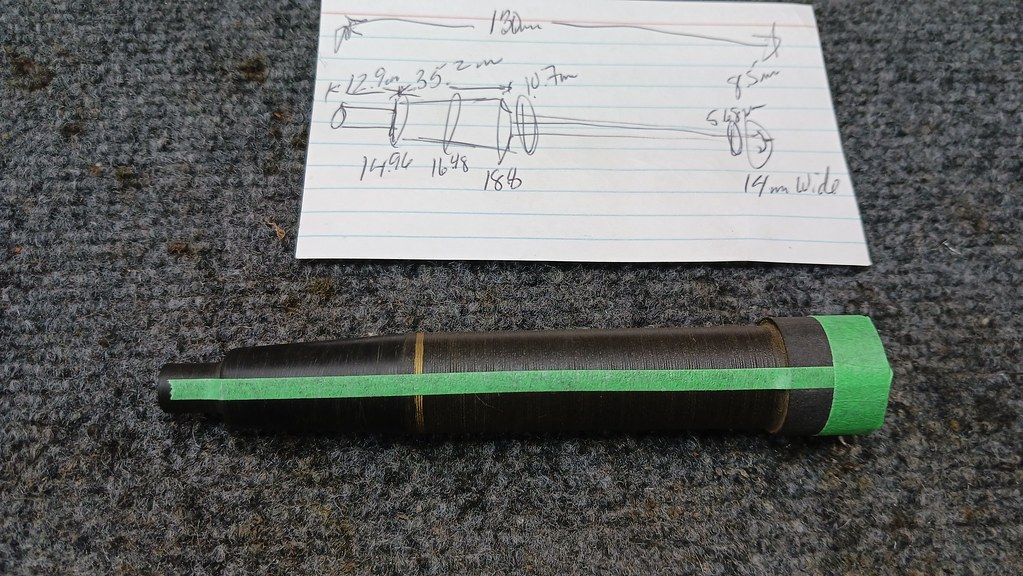
In order to recreate the 130 year old stem profile, I started off by making a quick sketch and filling in as many of the critical measurements as possible, including overall length and diameter, the length and diameter of the integral “chimney” or tenon extension, the dimensions of the tapered Army mount tenon, and the thickness of the saddle stem at various positions along its length.
Before I could translate these measurements into a new stem, however, I needed to clean the stummel to ensure that the new stem was fitting against the tapered walls of the shank mortise instead of a layer of tars and other goodies.
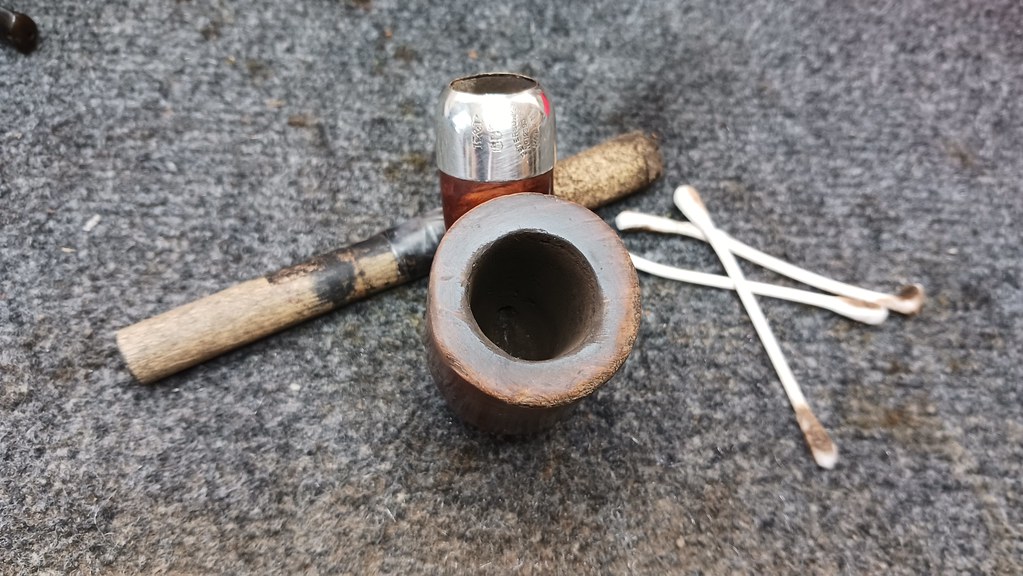
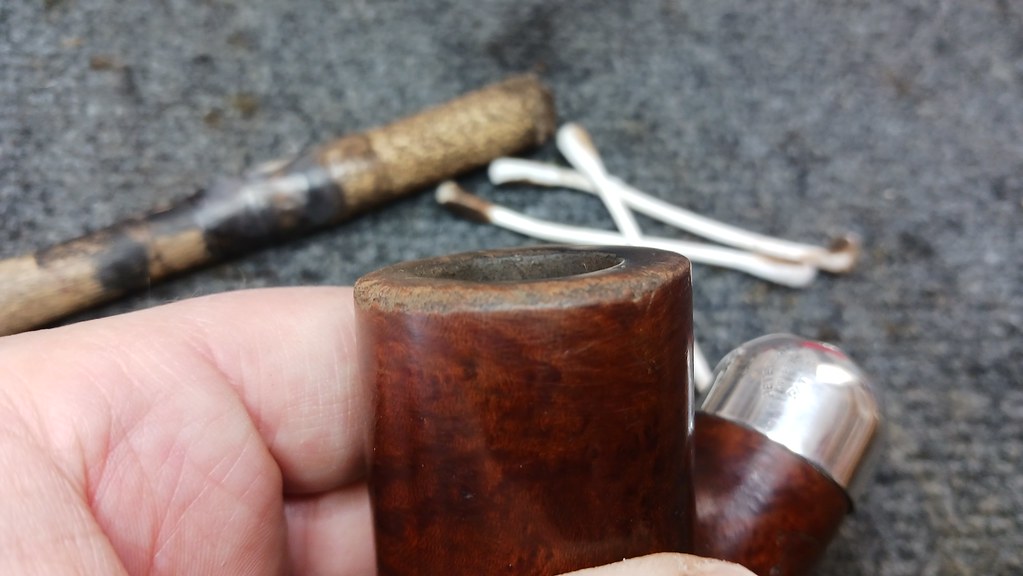
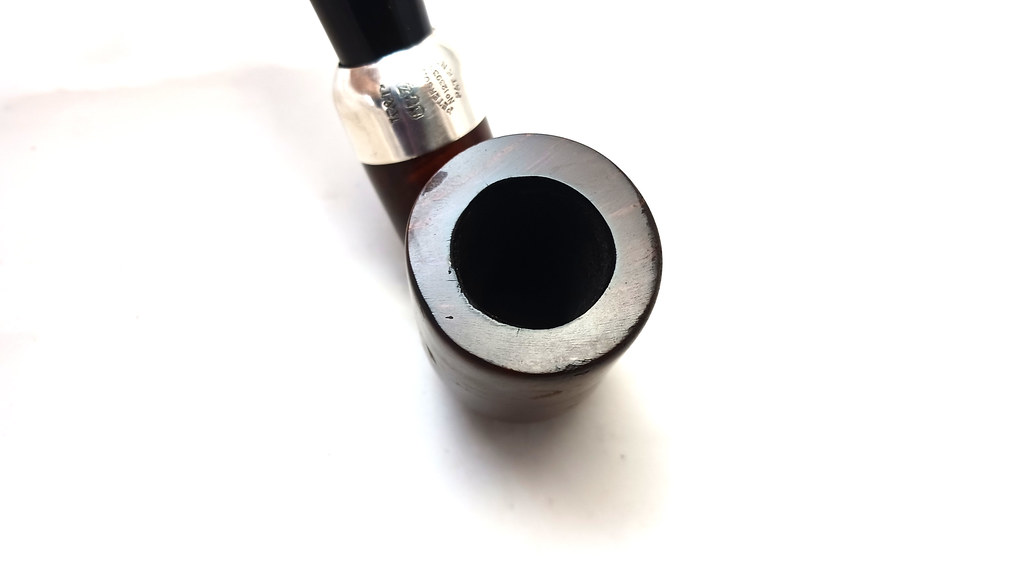
I began the work by removing a light haze of carbon from the rim surface and gently sanding out the old carbon cake from the chamber.
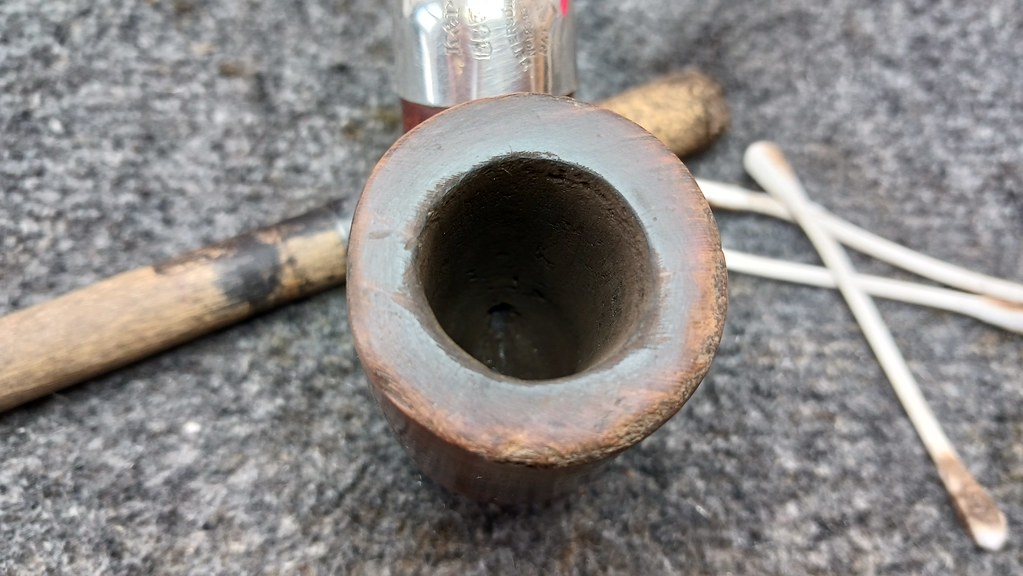
Here you can see the relatively thin line of “road rash” on the outer rim. As I said earlier, the pipe was in remarkable condition for its age, and the pipe’s steward didn’t want it restored to “as new” appearance, but the cosmetics could be improved upon without getting overly invasive.
To make sure the airway was open, I ran a few pipe cleaners dipped in isopropyl alcohol through the stem before popping it into a bath of Oxyclean and warm water to soak for a bit. The bath softens the oxidation, making it easy to remove later.
While the stem soaked, I worked on the stummel, giving it a good cleaning inside and out with pipe cleaners, cotton swabs and more ispropyl alcohol.
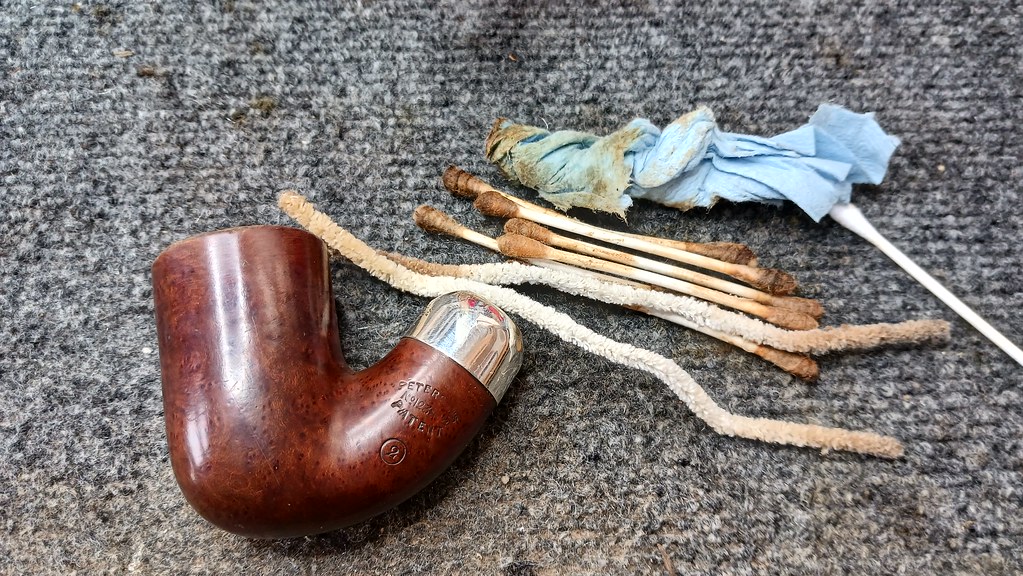
When the briar was clean, I very gently reworked the ragged edges of the outer rim to mediate the worst of the damage. I also used a scrap of sandpaper to smooth out the irregularities in the inner rim edge left behind by reaming the pipe with a knife blade. When I was happy with the results, I wiped the stummel down with mineral oil to enliven the grand and add some moisture to the dry briar.
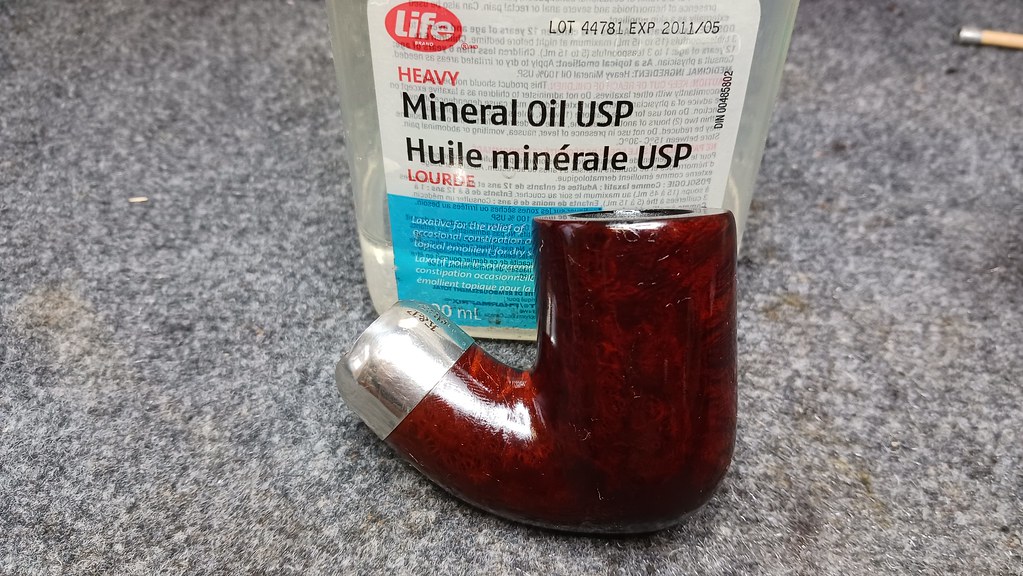
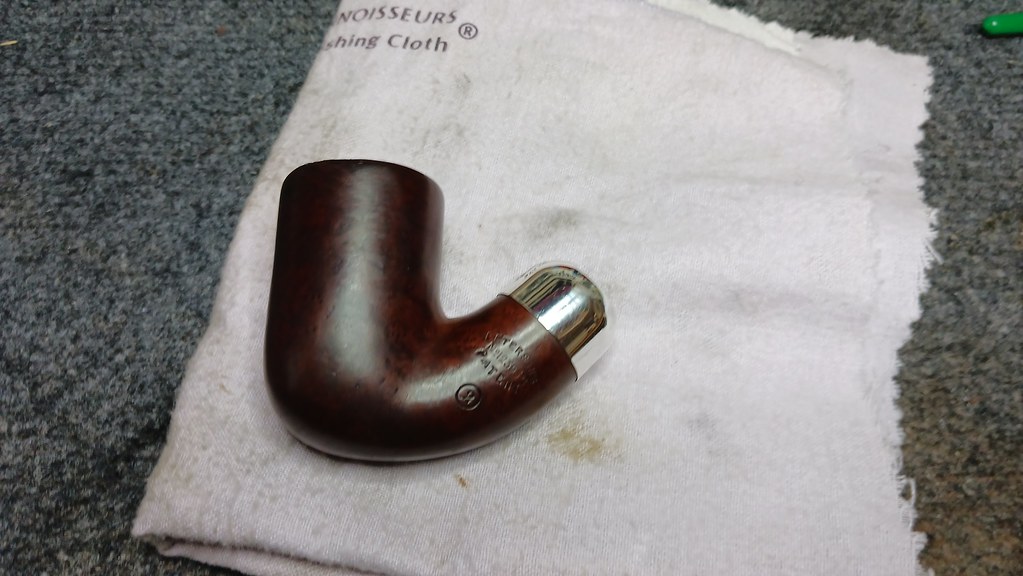
I let the oil sit on the stummel for a few minutes, then removed the excess by hand buffing with a clean towel. Here is the stummel after the cleaning. The briar is (intentionally) still far from perfect, but the damage to the rim is not quite so glaring.


Before switching gears to work on the stem, I took a moment to shine up the silver shank cap using a jeweler’s cloth. This removed the tarnish and grime and gave the silver a high lustre.
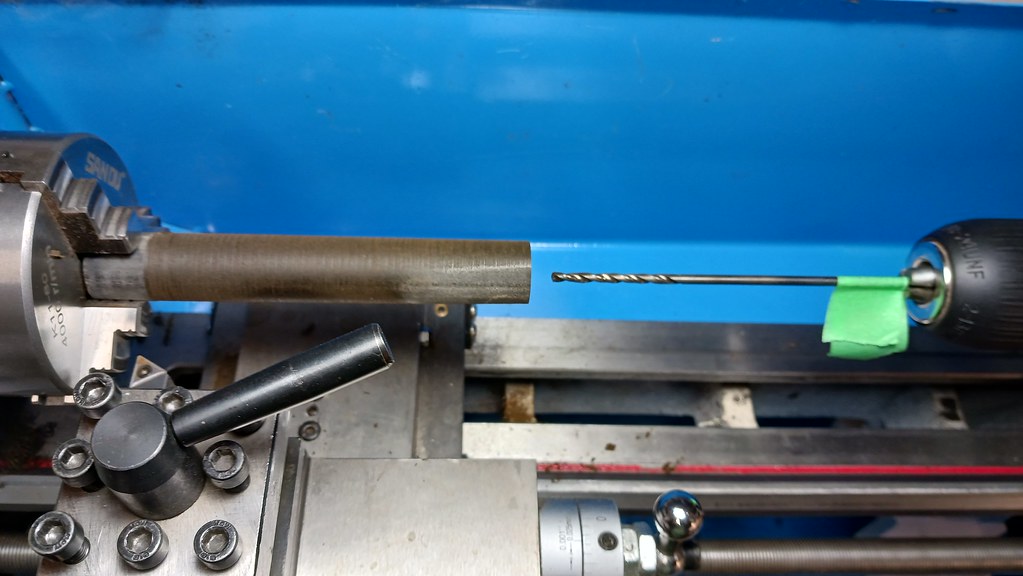
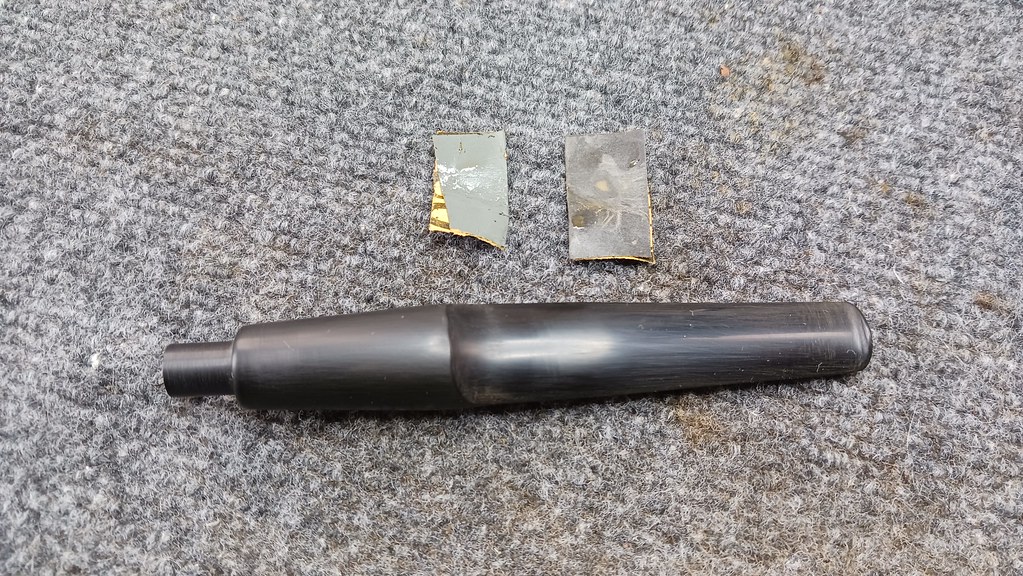
I set the stummel aside at this point to get started on the new Ebonite Hand Cut stem. I cut a length of Ebonite rod slightly longer than the finished stem to allow myself some wiggle room (It’s a lot easier to remove excess material than it is to add missing Ebonite!), then mounted the rod in the lathe to drill the airway.
The original 1895 stem featured the tapered bore that Peterson still uses in its System pipes. In this case, the airway at the button end is about 3/32″, or slightly under 2.4mm, in diameter but it widens as the airway moves down to the tenon end of the stem, where is measures 7/32″ or about 5.5mm.
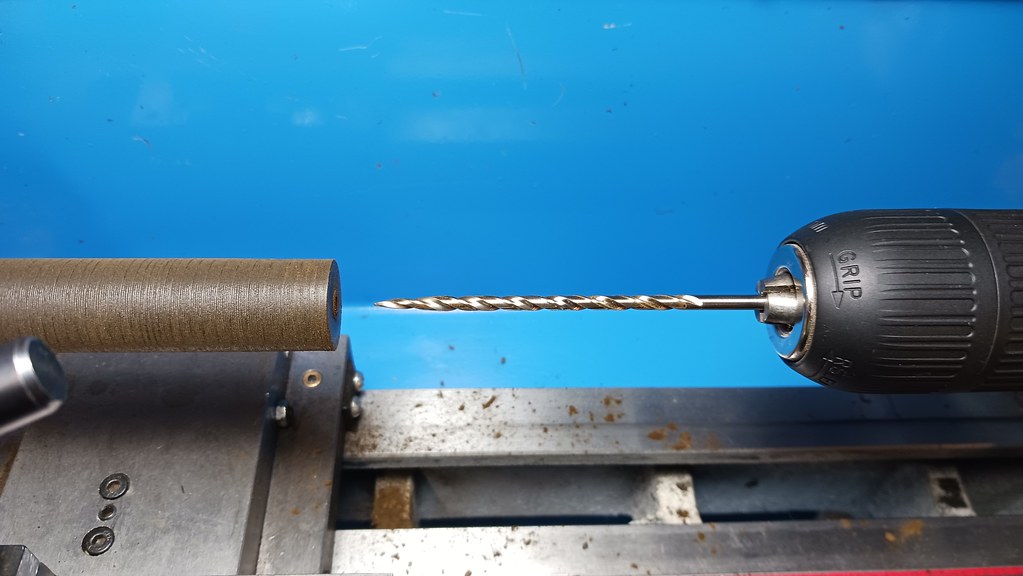
To create this tapered bore, I would need several drill bits, beginning with a long 1/8″ bit. I marked the depth to stop about 1/4″ ahead of the chuck jaws and drilled the rod out until I met my depth mark.
The straight 1/8″ bit was then followed by a taper point 5/32″ bit, which opened the airway slightly and tapered it to a point about 1cm back from the button end of the stem. I completed the through-drilling of the rod with a 1/16″ drill bit, which I forgot to take a picture of. Oops.
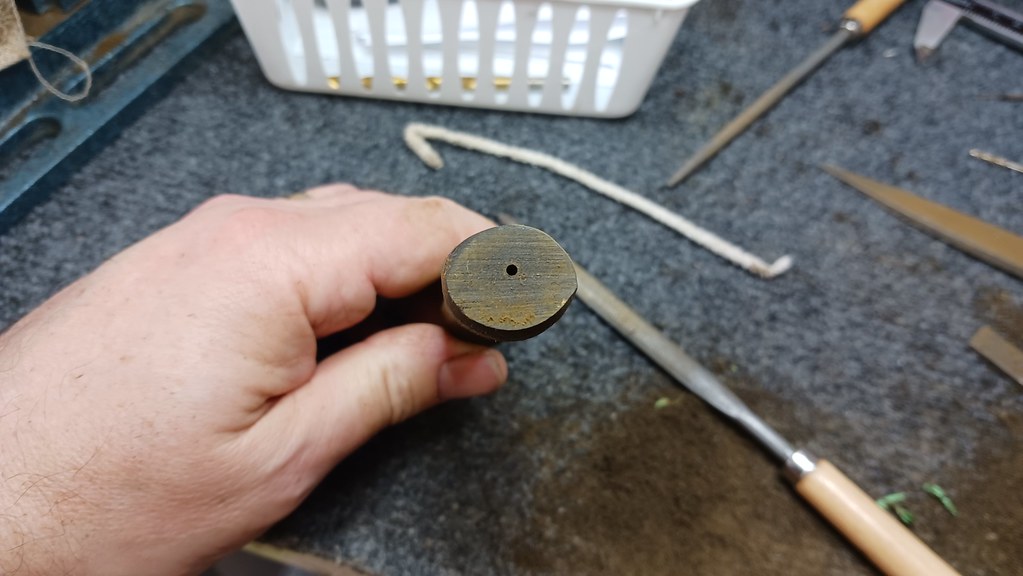
To open the tenon end of the airway to the required 7/32″, I used another taper point drill bit. The result is a smooth, snag-free and open airway from tenon to button.

With the drilling complete, I could move on to cutting the tenon end of the Army mount stem. Using a live centre in the tailstock to support the rod while I worked, I first turned the straight tenon extension before marking out and cutting the tapered tenon.
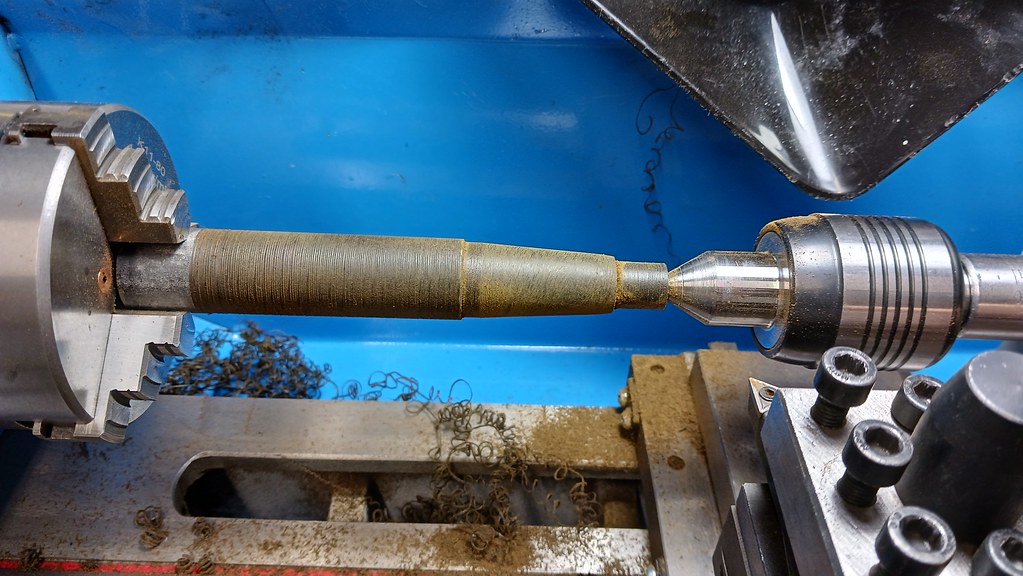
A test fit of the new Ebonite stem told me that I was on the right track. Taking all those measurements earlier had paid off.
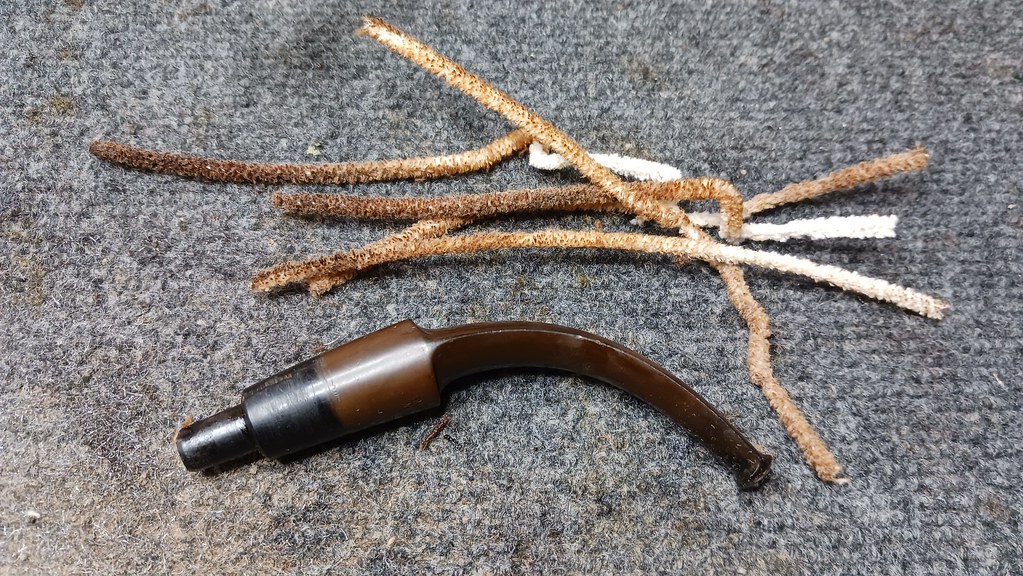
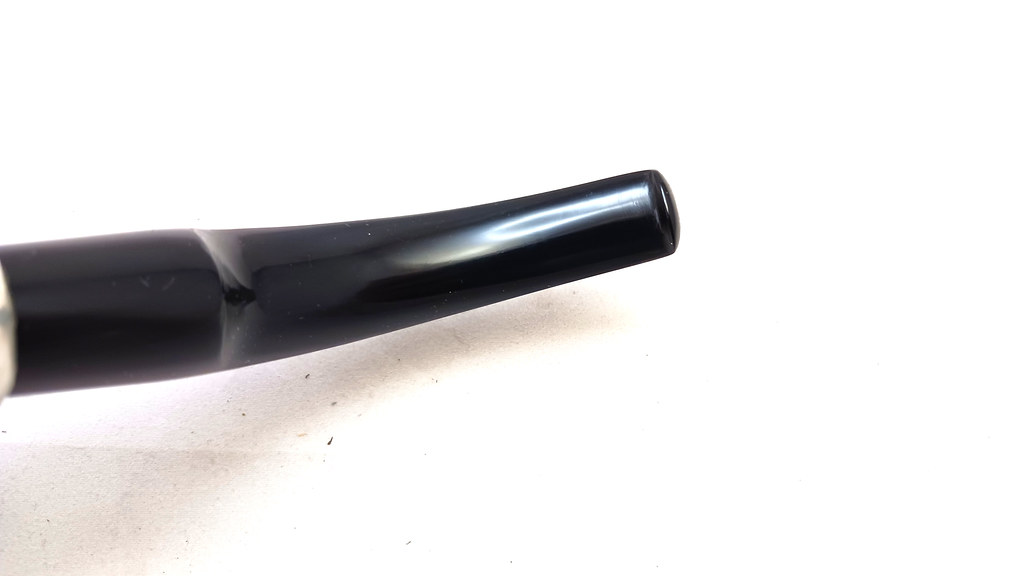
With the new stem well under way, I switched gears and retrieved the original stem from its Oxyclean bath. A quick scrub with a bit of Magic Eraser cleaned off the now soft oxidation without putting undue stress on the patent stamp. Restored to black, the stem was looking much better. A light amount of wet sanding with 600 and 2000 grit sandpapers smoothed out any stray scratches and prepped the stem for patching.
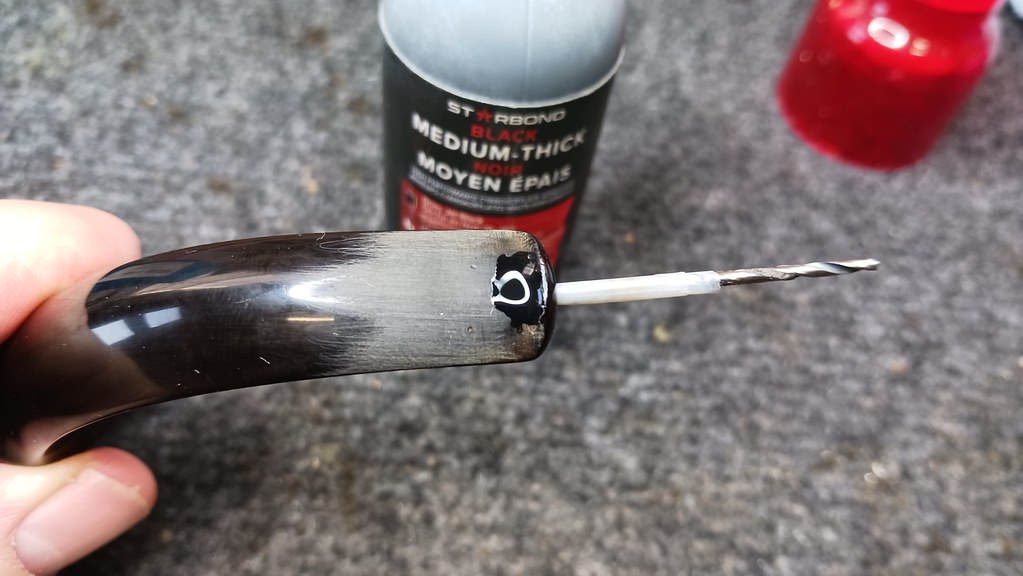
I lightly sanded the top surface of the stem with 320-grit paper to improve adhesion of the patch material, then safeguarded the airway by wrapping tape around a small drill bit, which was then inserted into the airway through the button end. The tape is key here as the black CA glue used to fill in the extra hole in the stem will not stick to it.
This pic shows the taped drill bit in place and a drop of black CA glue in the hole. I let this first application of CA glue cure completely, then gently removed the drill bit.

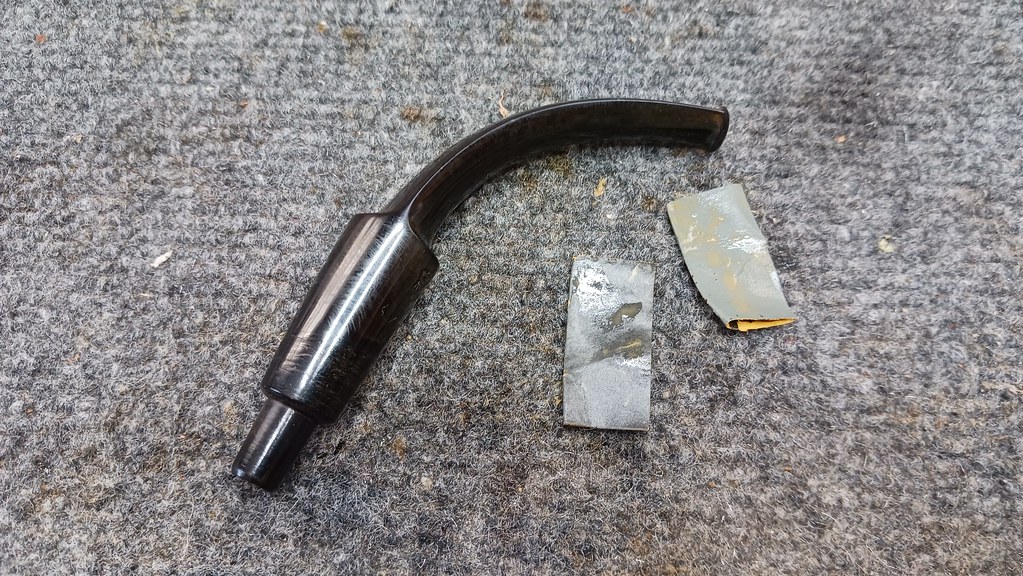
It took a few applications of the glue to build up the material filling the hole. Once filled, I again allowed the glue to cure completely before filing and sanding the patch smooth. I worked carefully here to avoid leaving glue spread across the surface of the stem; I wanted the patch material only in the hole. This is because the glue will not oxidize, but the stem will, eventually creating a scenario in which the patch shines black against the oxidized rubber stem. By minimizing the size of the patch, the pipe’s steward would be able to buff the stem back to black without having to deal with oxidized rubber under the edge of a black patch.

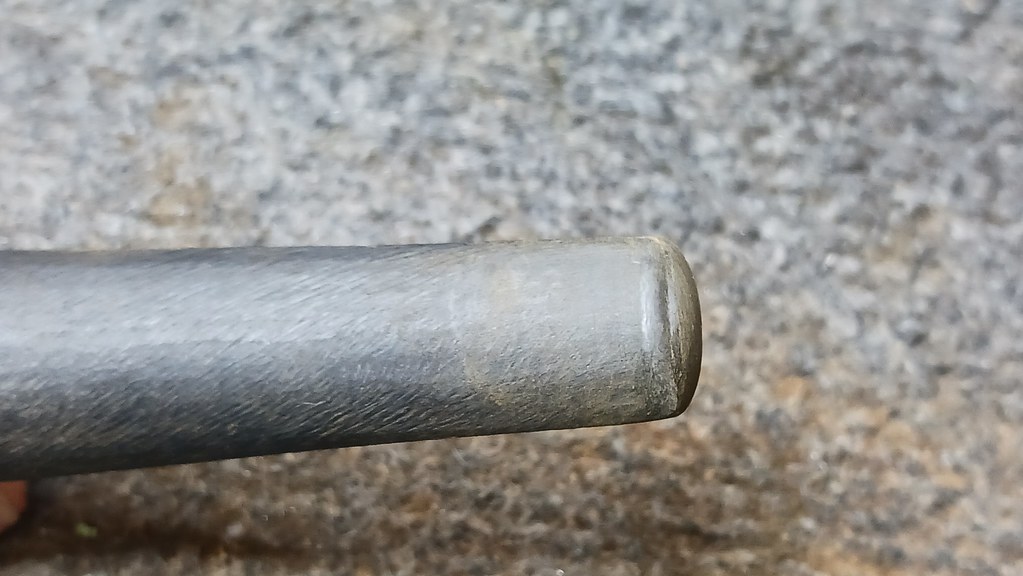
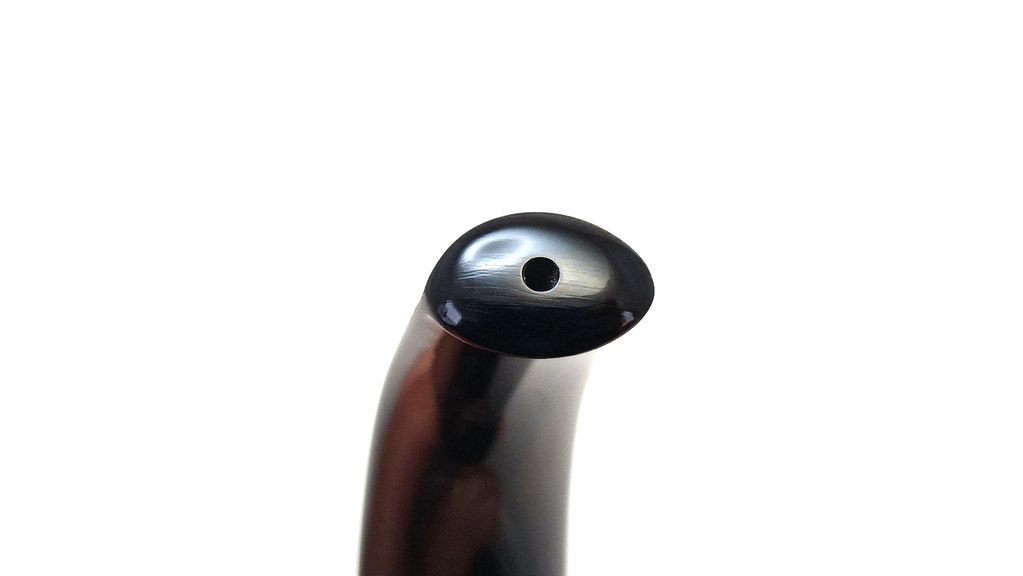
This angled view of the finished stem reveals a slight outline of the CA glue patch. It’s cosmetically imperfect, but the tiny, contained repair is barely noticeable under casual observation.

Just before setting the original stem aside, I refreshed the Patent stamp with a bit of white wax crayon.
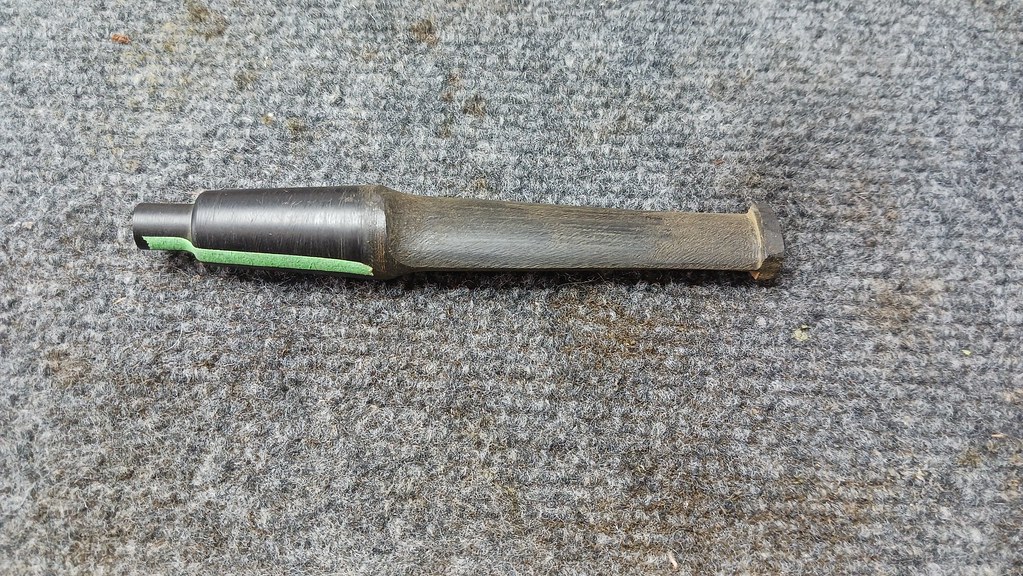
Then it was time to finish the new “daily driver” Ebonite stem. Again referring back to my sketch, I used masking tape to mark off the position of the airway down the centre of both sides of the partially shaped rod. These guide lines are there to keep the stem symmetrical as I cut the saddle portion of the stem. A bit more tape around the end of the rod marks the rear edge of the finished button.
Guide marks in place, I took the proto-stem to the belt sander where I removed the bulk of the excess material from the top and bottom surfaces of the stem.

That completed the machine work on the stem. Time to switch to hand tools. I used a large half-round file to cut the curved slope at the top of the Army mount tenon.
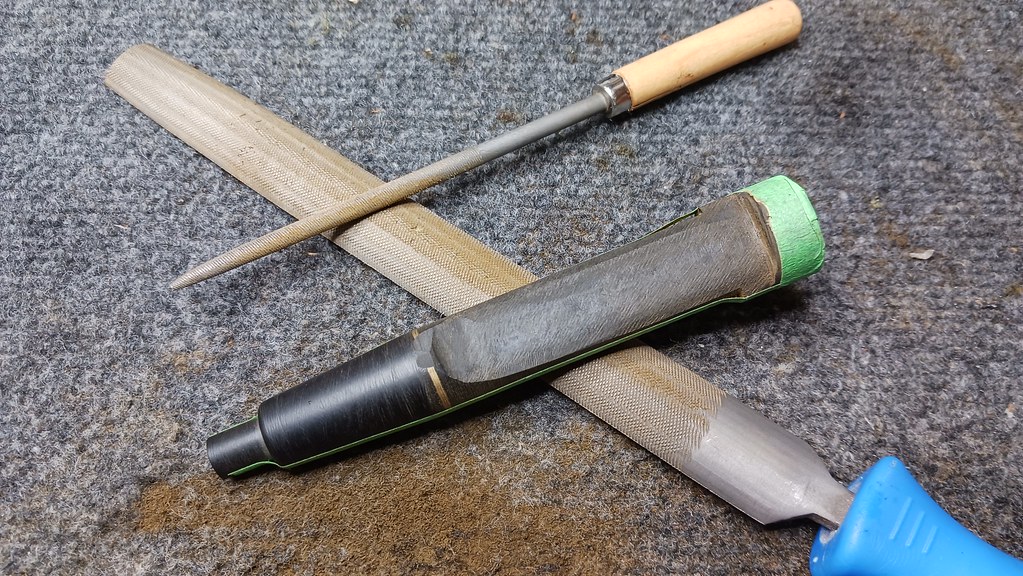
As work progressed, I moved to smaller and finer files, each one refining the shape of the new stem. Slowly but surely the lump of Ebonite began to look like a proper pipe stem.

In this pic you can see that I’ve started to rough in the button and introduce the correct curvature of the upper and lower stem surfaces.
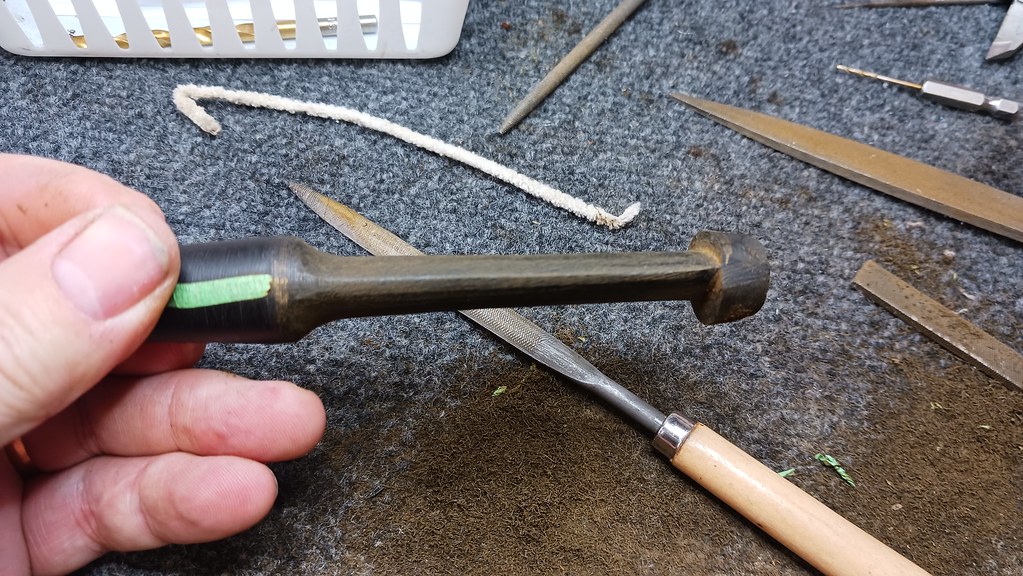
The end of the button still has a long way to go.
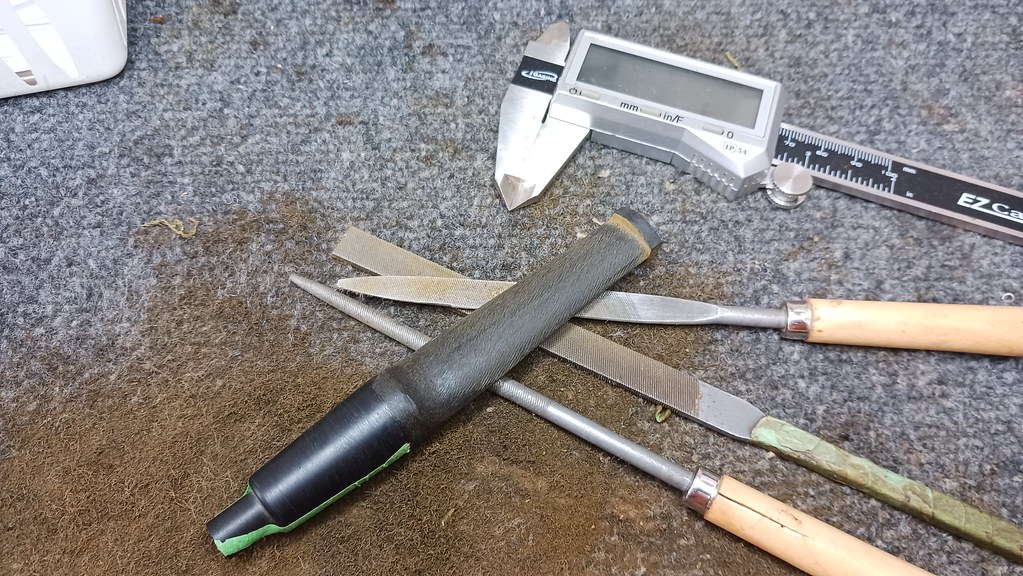
Making regular checks with my digital calipers against the measurements noted in my initial sketch, I continued to remove excess material and refine the shape of the stem, all the while taking care to keep the lines straight. It is very easy to over-file one edge of the stem and cut a twist into the Ebonite.
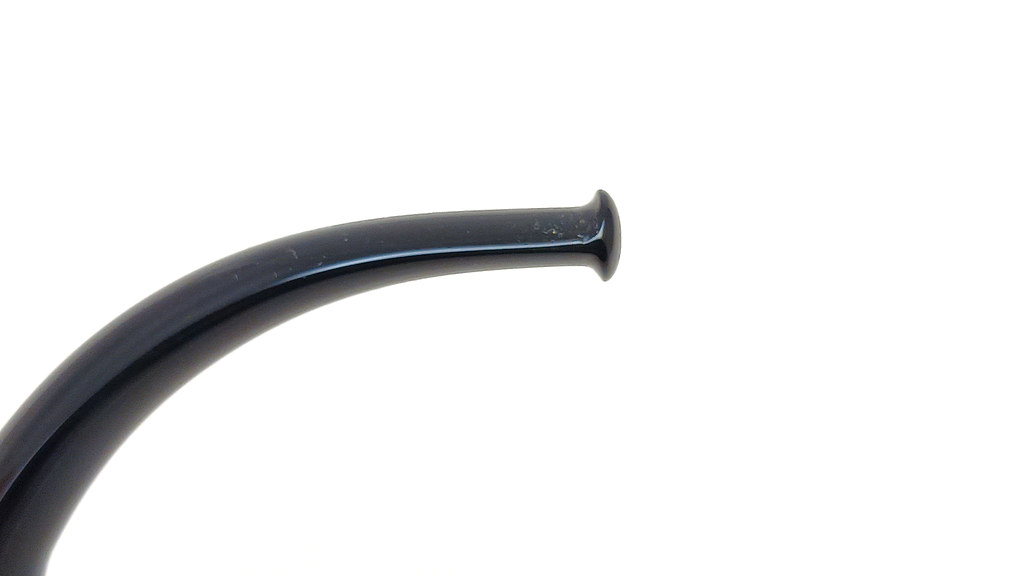
As I got close to the stem’s final dimensions, I made several side-by-side comparisons of the new work next to the original stem. In these pics, you can see that I’ve started cutting the rounded leading edge of the mushroom-shaped button. The overall width of the stem is looking good, but the height and depth of the new button are still too large.


After a bit more work, the button was looking much better.

Whne I was happy with the state of the new stem, I put away the files and sanded the Ebonite with 320 through 2000 grit sandpapers to remove the rough tool marks and prep the stem for final polishing.
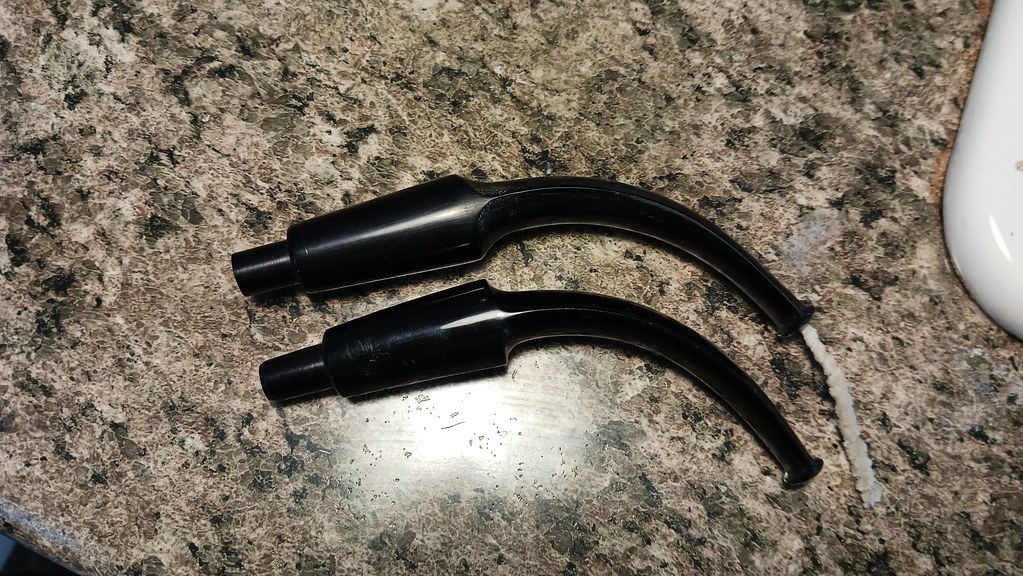
After an initial run on the Red Tripoli wheel, I traced the curvature of the original stem onto an index card, then bent the new stem to match. The bend is rather pronounced, so I slid a pipe cleaner through the airway to keep it from distorting as I heated and then bent the stem to its new shape.

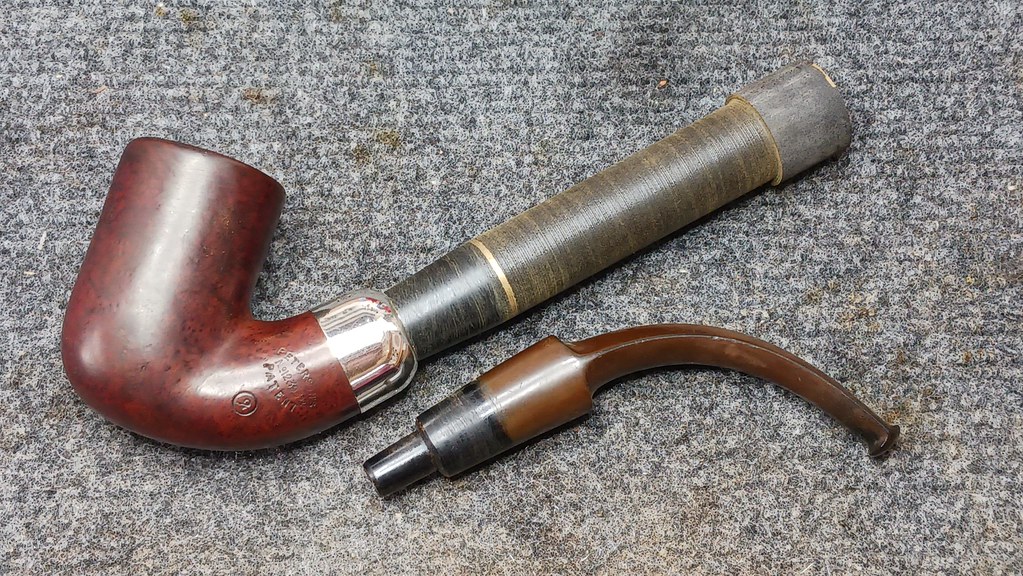
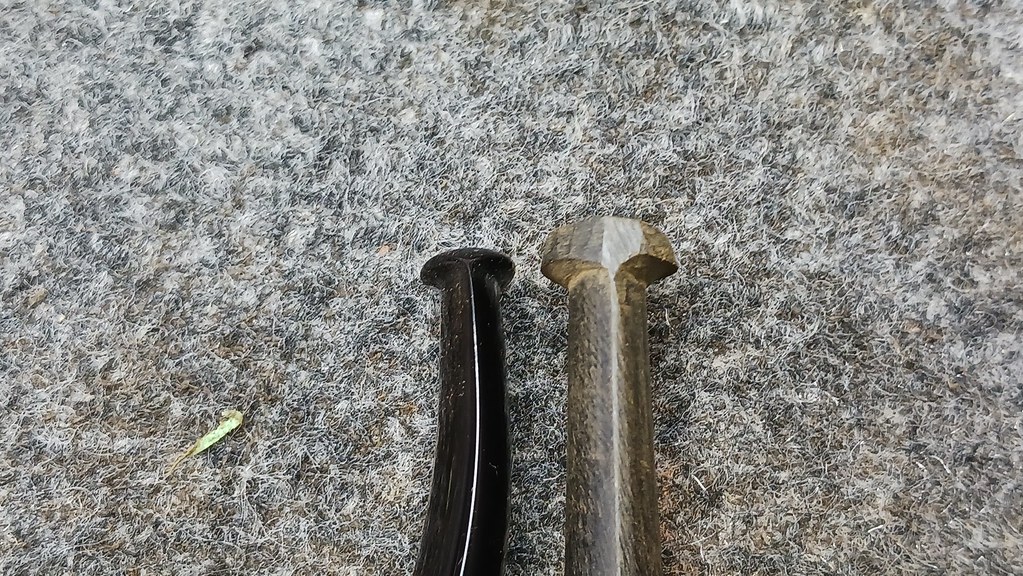
And here are both stems side by side. Looking good!
Then it was finally time to take all three parts of this pipe restoration project – the stummel and both stems – to the buffer for a run on both the Red Tripoli and White Diamond wheels followed by a few light coats of Carnauba wax to shine and protect this refreshed 130 year old beauty!
This was a really engaging project for me. I loved the challenge of making a vintage-correct reproduction 1895 Peterson Patent stem. It is a unique stem profile that sits somewhere between the rounder orific stems of the earlier 19th Century and the slotted modern buttons that came into general use in the 1920s.
I’m very happy with the results, and I hope you enjoyed following along on this truly museum-grade pipe project. It’s not every day that I get to work with pipes of this age, nor one so important historically to Peterson and its many fans.
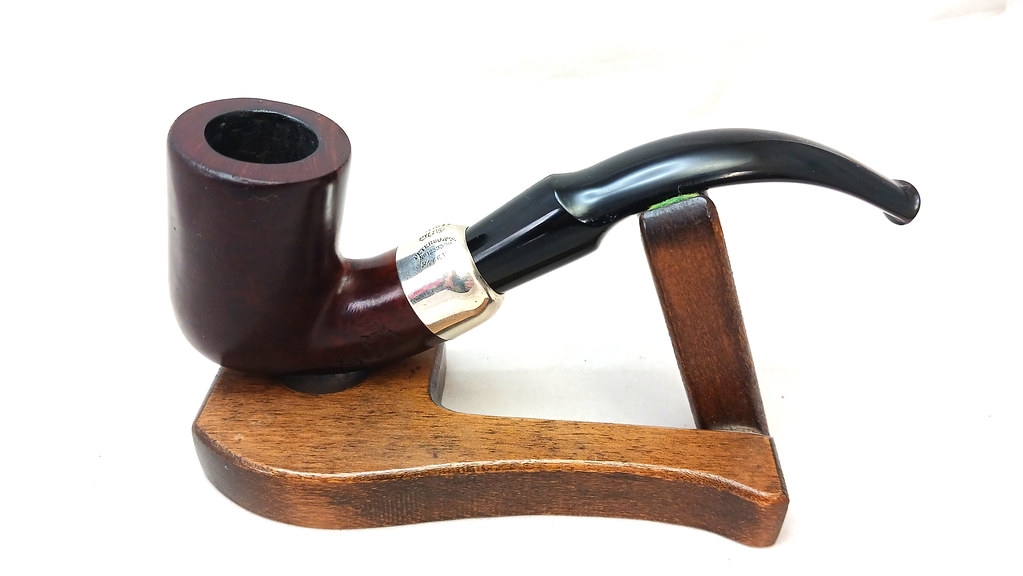
Here’s the finished pipe. Until next time, Happy Piping!


More fantastic repairs Charles, thank you for sharing.
LikeLiked by 1 person
Thanks, Jeff. It was a treat to work on a pipe with such pedigree and historical significance.
LikeLike
Now that is a restoration! Well done on the original and daily-driver stem! A Peterson stem that pre-dates the p-lip, an amazing find, its good you salvaged it as well.
LikeLiked by 1 person
Thanks! I really enjoyed this project – a real departure from the usual, and a real conversation piece. The pipe’s steward took it to the Chicago Pipe Show this year, where it went over really well. Who could ask for better feedback?
LikeLike