
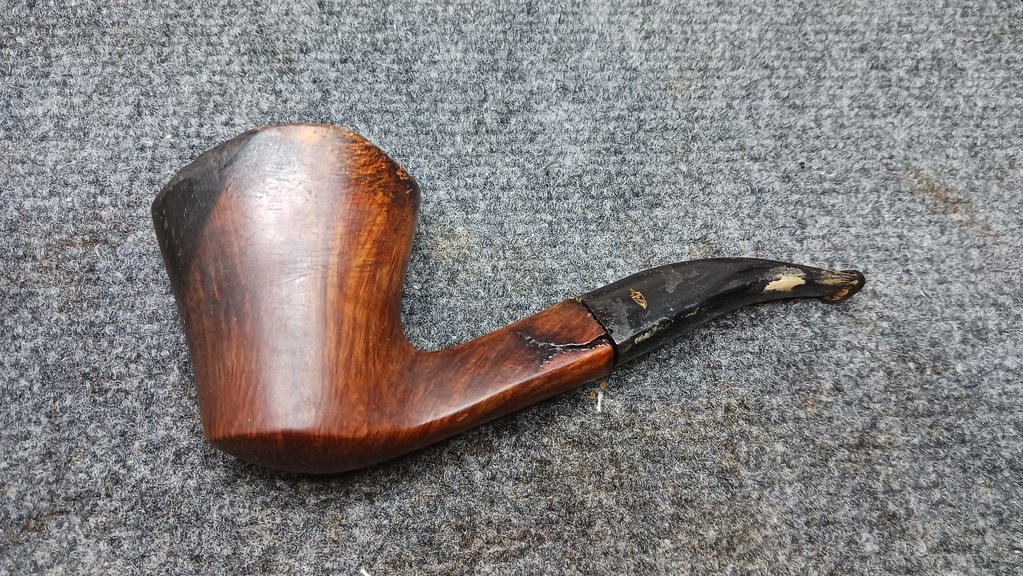
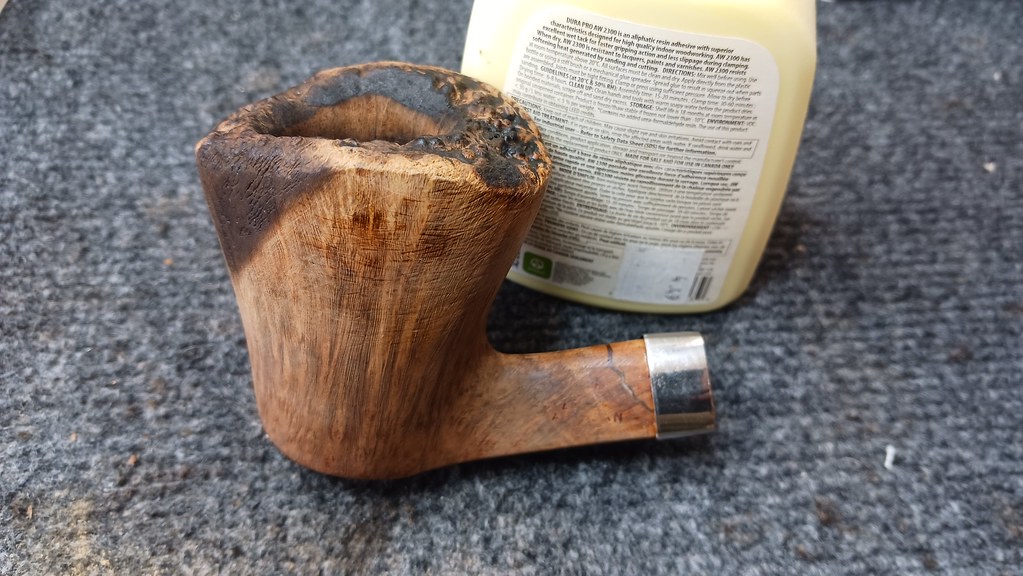
There is an old adage that tiny problems become large problems if left unattended, and the pipe on the bench this week is a prime example of this truism. This Savinelli Freehand Dublin was clearly a favourite of its steward but maintenance and repairs were put off, allowing hairline cracks down both sides of the triangular shank to grow longer and wider until at last the mortise was pushed open far enough that the stem would no longer stay mounted in the shank.
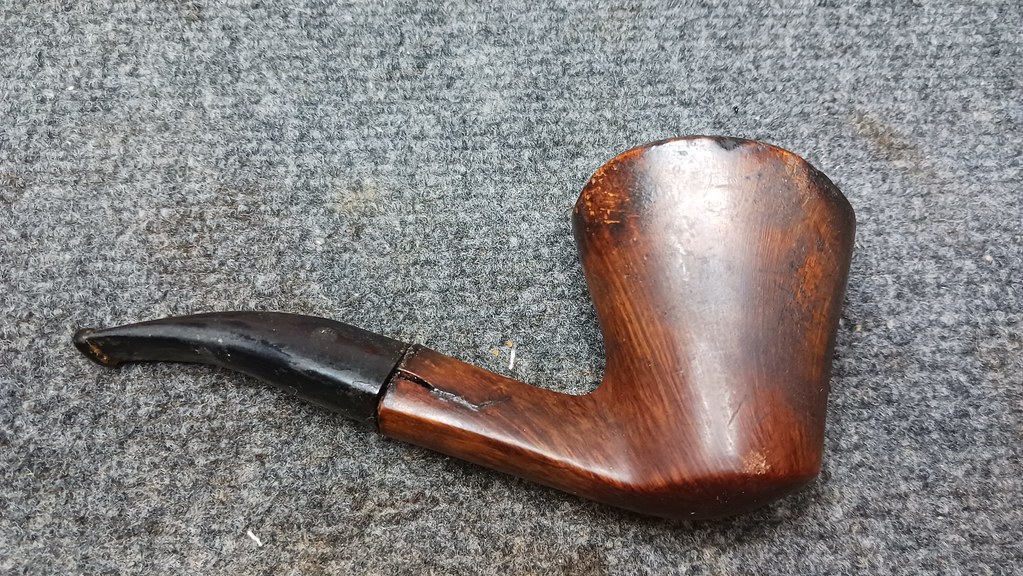
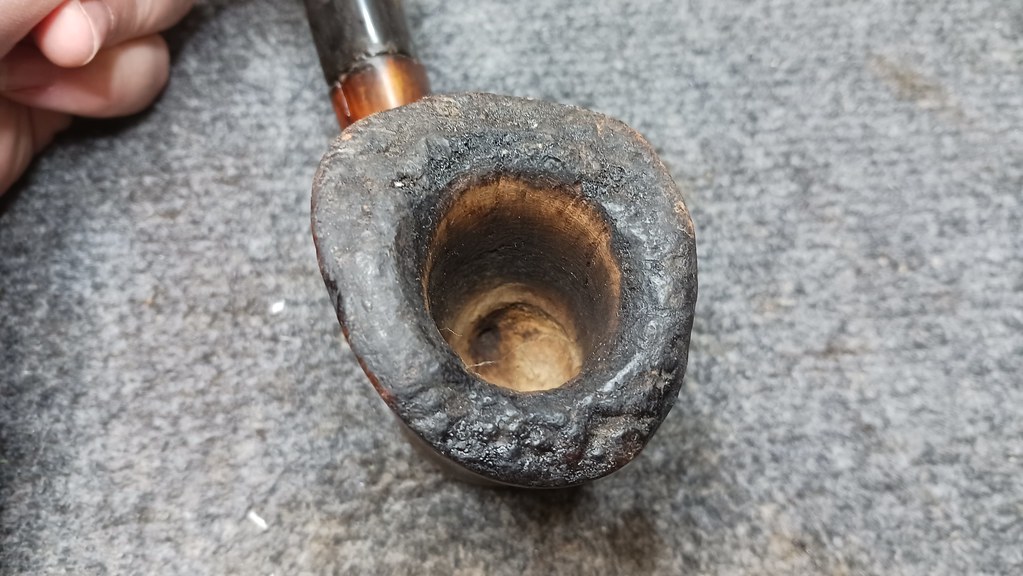
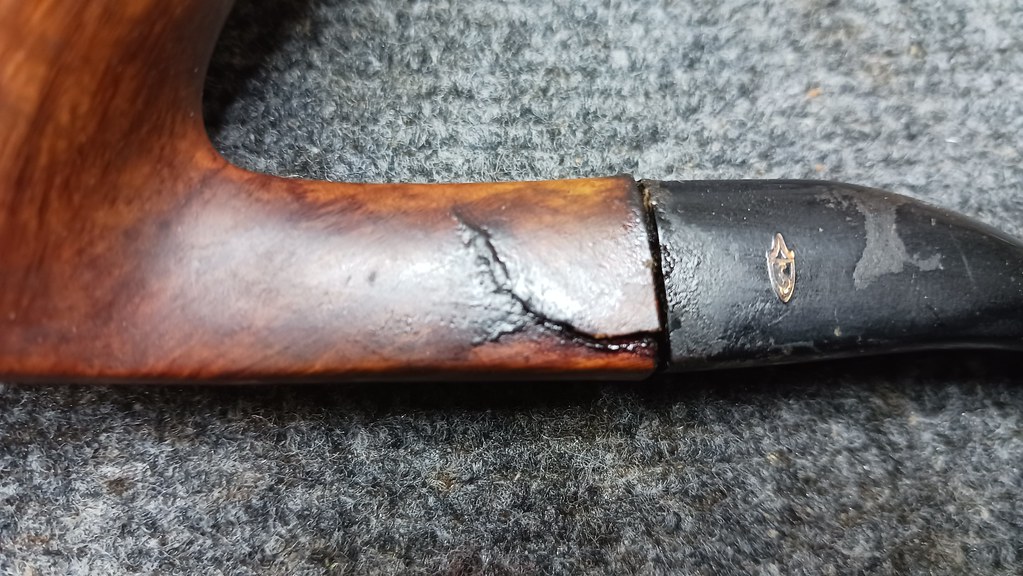
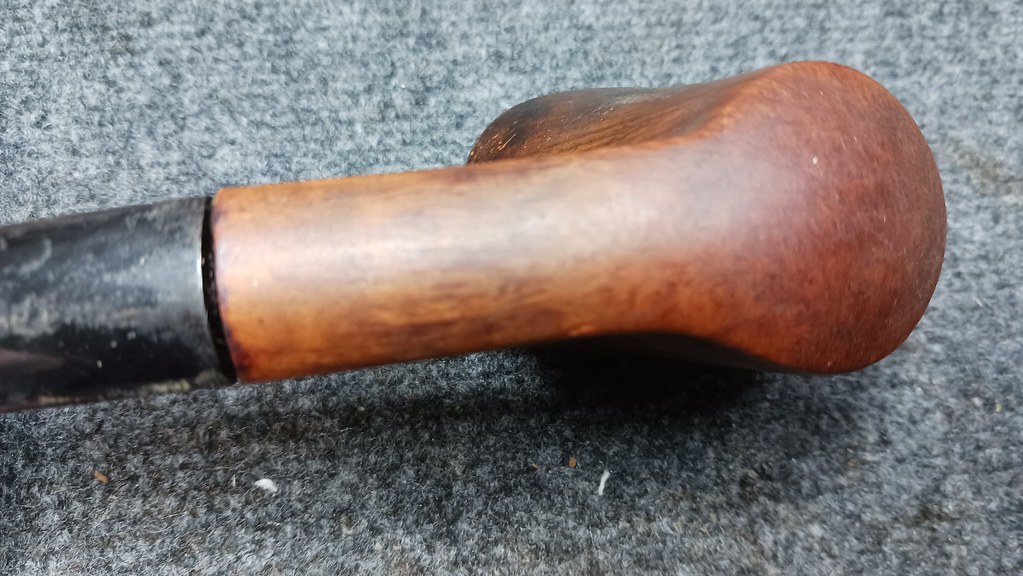
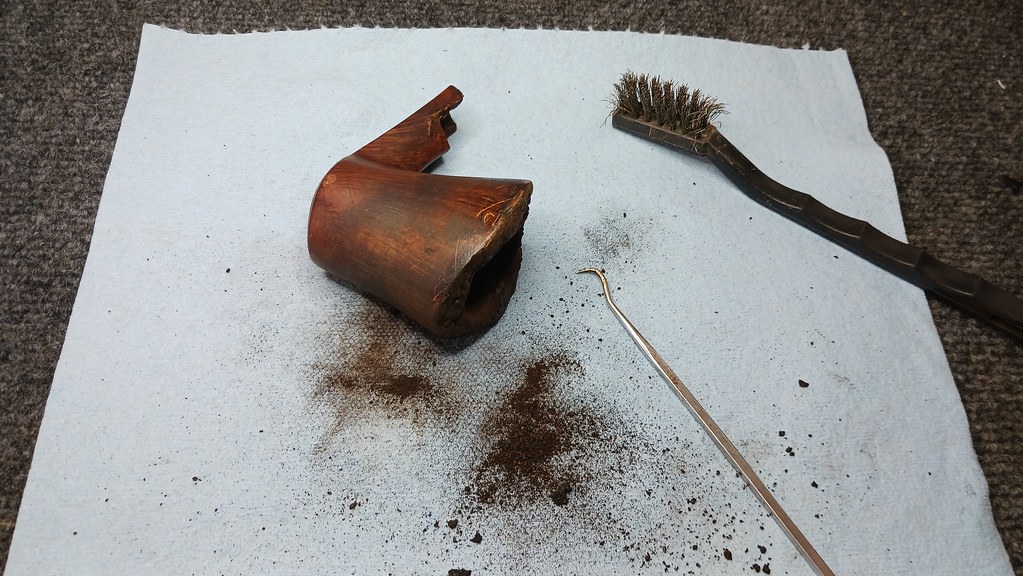
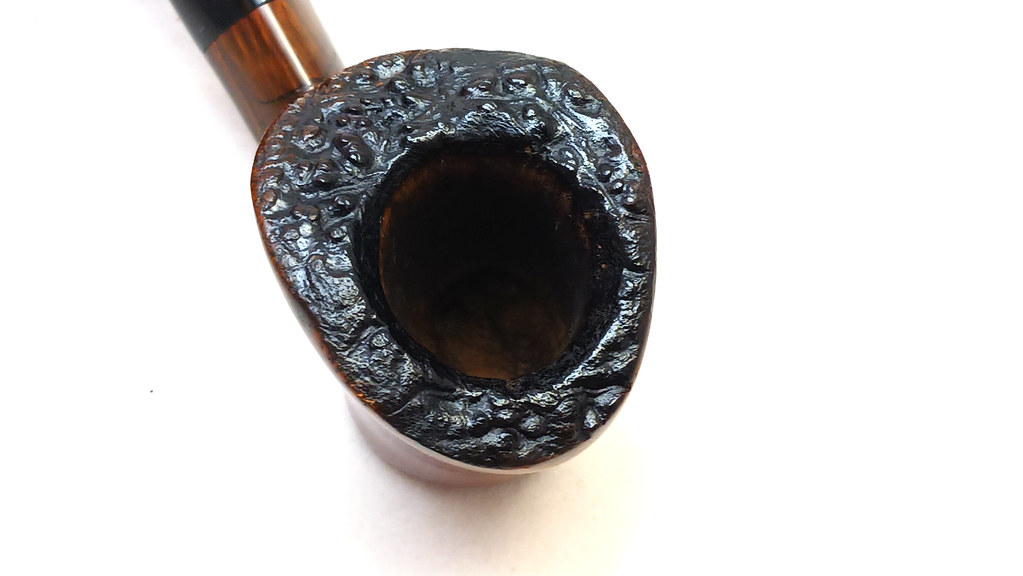
This series of pictures shows the rather sad state of affairs when the pipe arrived on the bench. The plateaux rim was completed obscured under a thick crust of carbon “lava”, which had flowed right off the front left edge and down the face of the bowl. The chamber had been over-reamed at some point, but the most serious issues were focused on the shank.
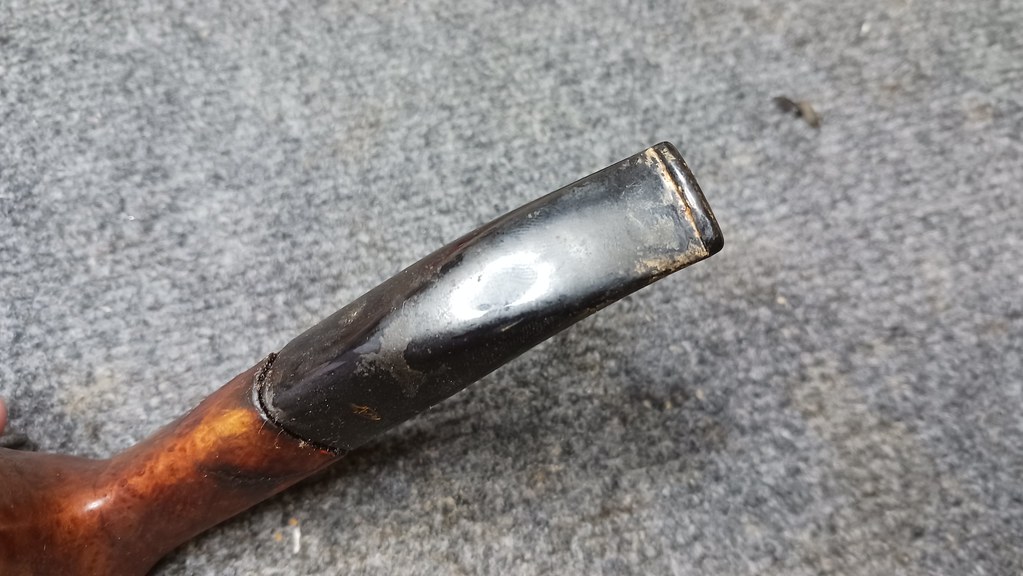
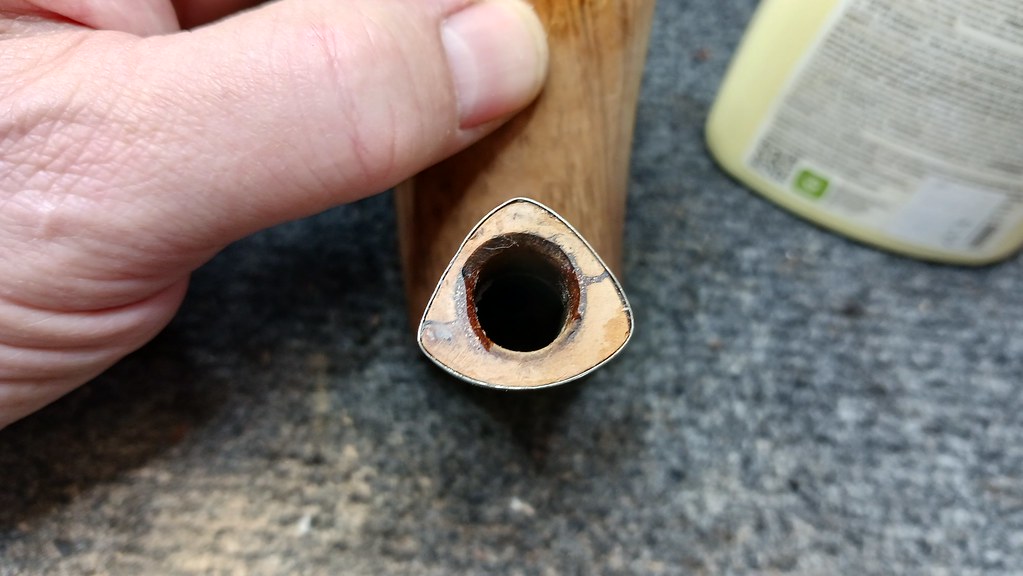
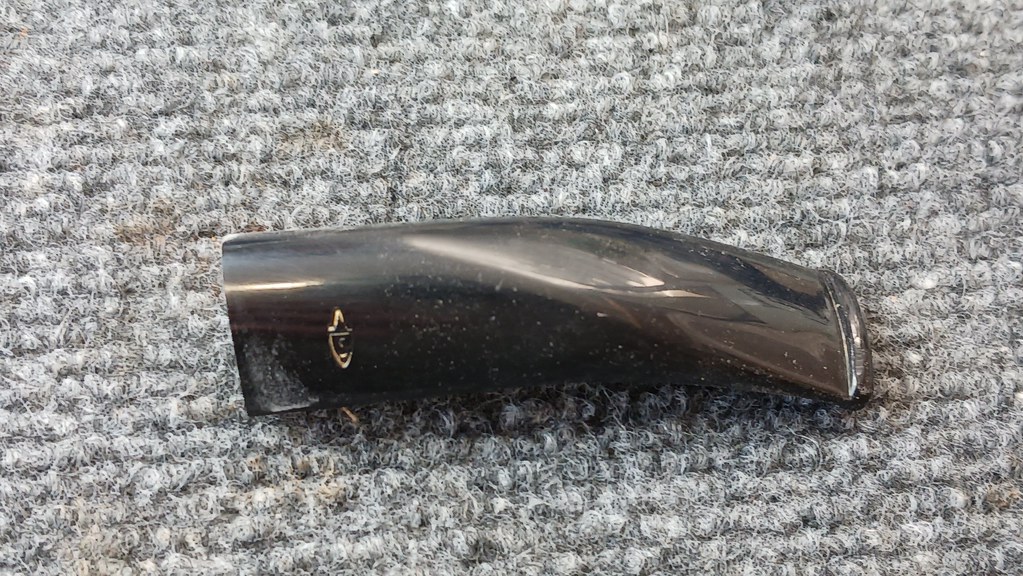
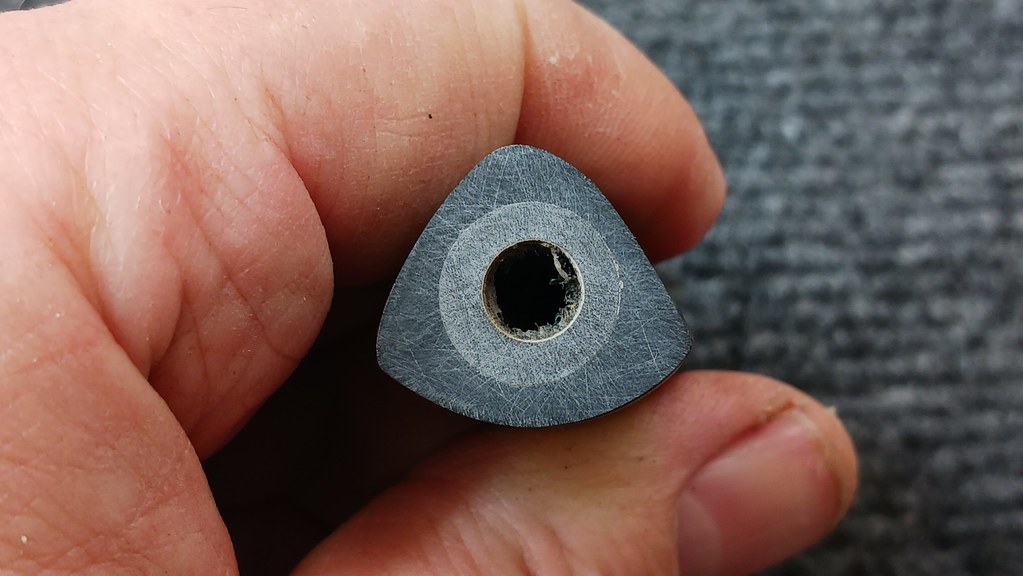
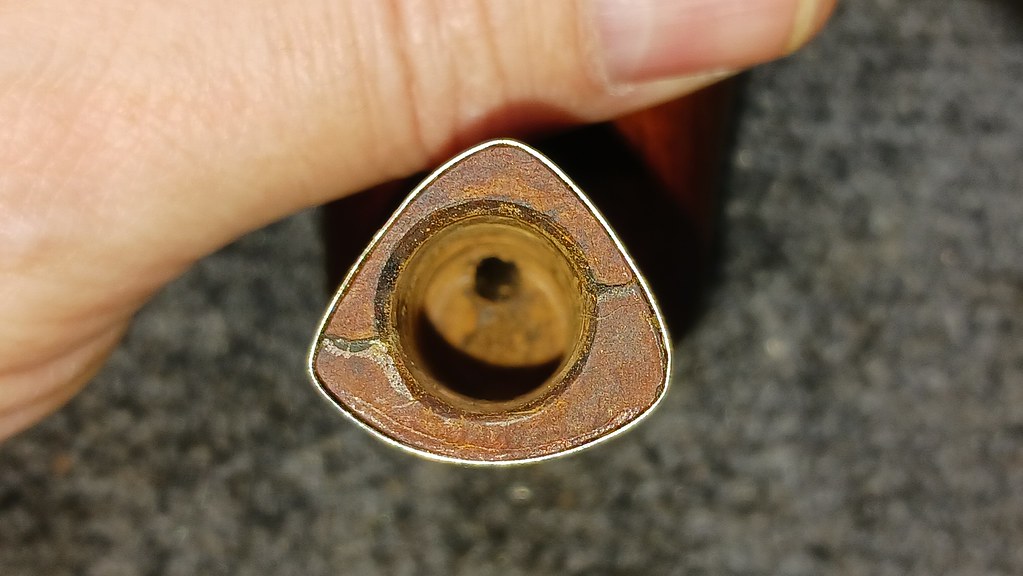
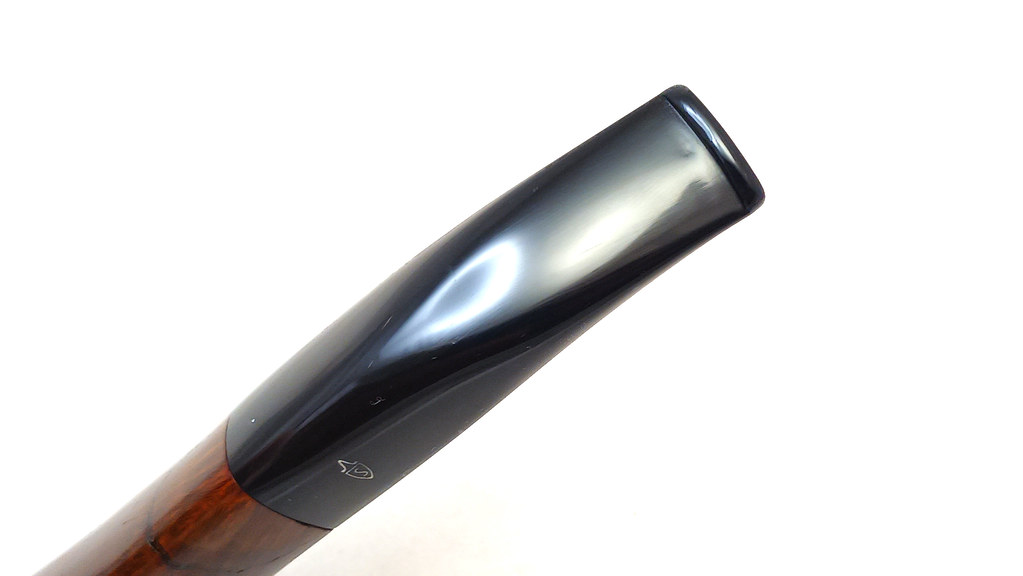
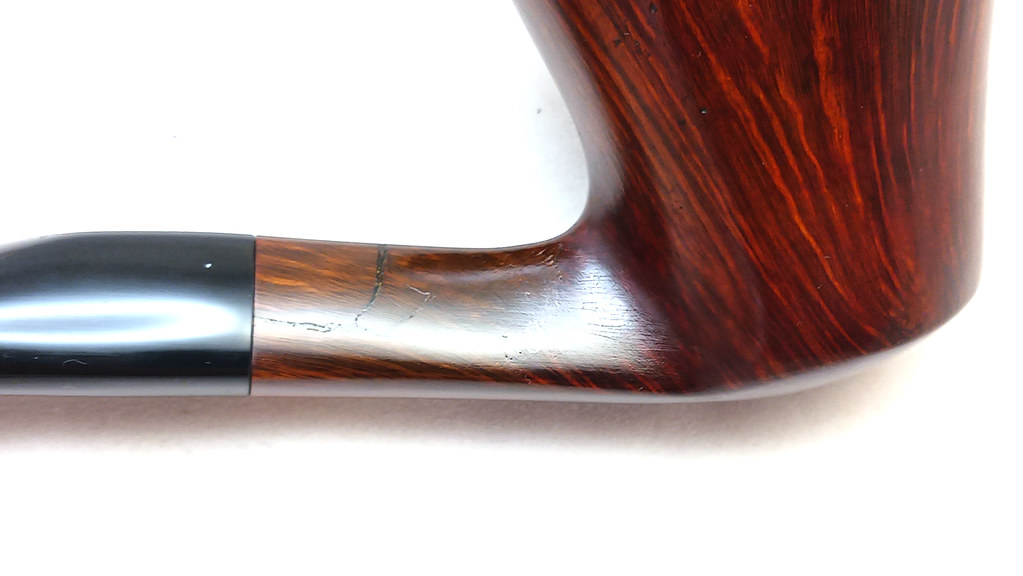
As you can see, there were two large, open cracks running lengthwise down the shank from the shank face, merging eventually into a spiderweb of hairline cracks that covered much of the midsection of the shank. The cracks were packed full of tars and debris, literally pushing the shank apart. The original acrylic stem was more or less held in place by the tars but otherwise appeared to be in decent condition under the dirt and grime. Any stamps on the shank had unfortunately been obliterated by the damage, though the Savinelli crest survived on the stem.


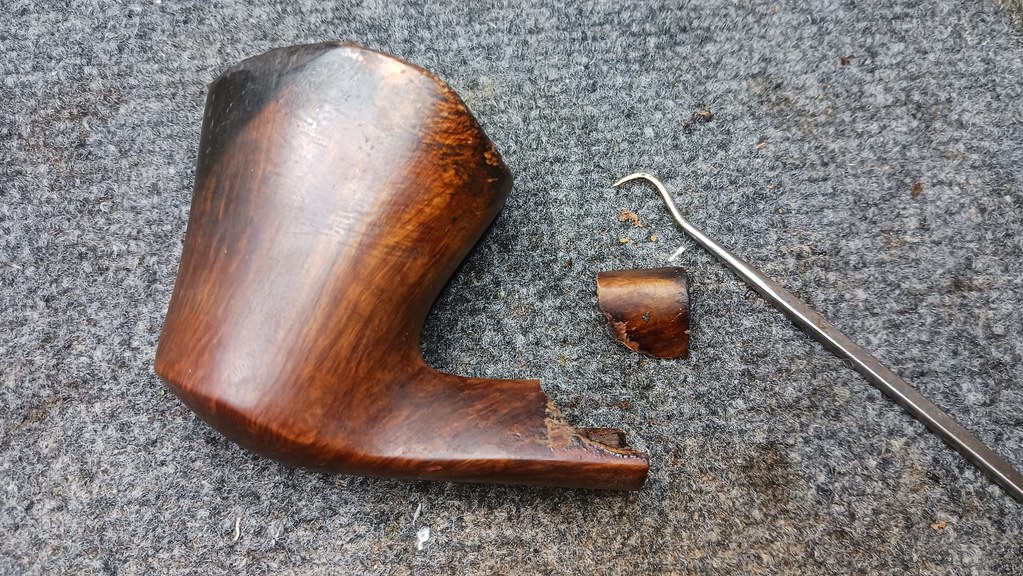
The pipe’s steward had requested that the pipe be cleaned and the shank repaired. He also wished to convert the 6mm filter stem to a standard airway. To get the ball rolling on this restoration project, I used a dental pick to gently scrape the bulk of the tars and other goodies out of the shank cracks. I had been hoping that, once cleaned, the cracks could be glued and clamped shut, but as it turned out, the thin wedge of briar between the cracks gave out and came loose. Time for Plan B.
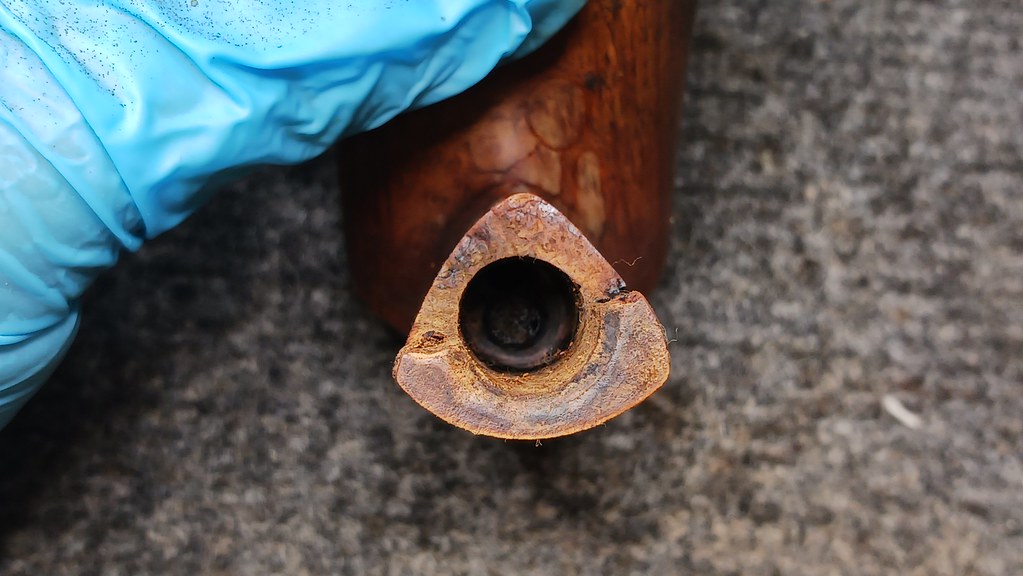
These pics show just how much buildup was lurking within the shank cracks. In the same way too much cake in the chamber can push the walls of the bowl apart, the carbon buildup in the shank cracks had slowly but surely wedged the shank apart.

Setting the broken piece of the shank aside for the moment, I carried on with the cleanup. A dental pick and brass tire brush made reasonably short work of the crust of carbon lava that covered the rim.
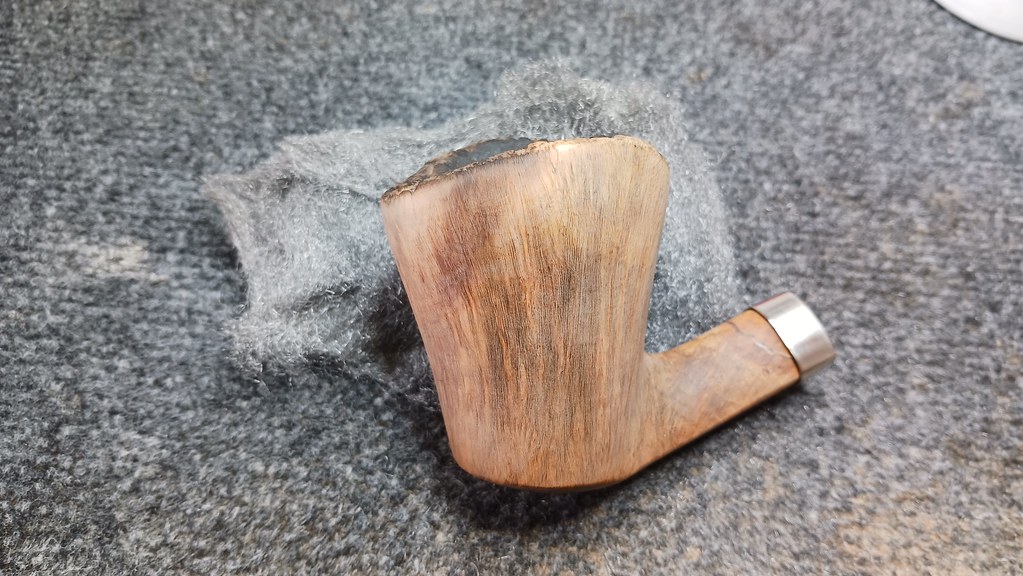
This pic shows the plateaux rim, revealed for the first time in a long time.

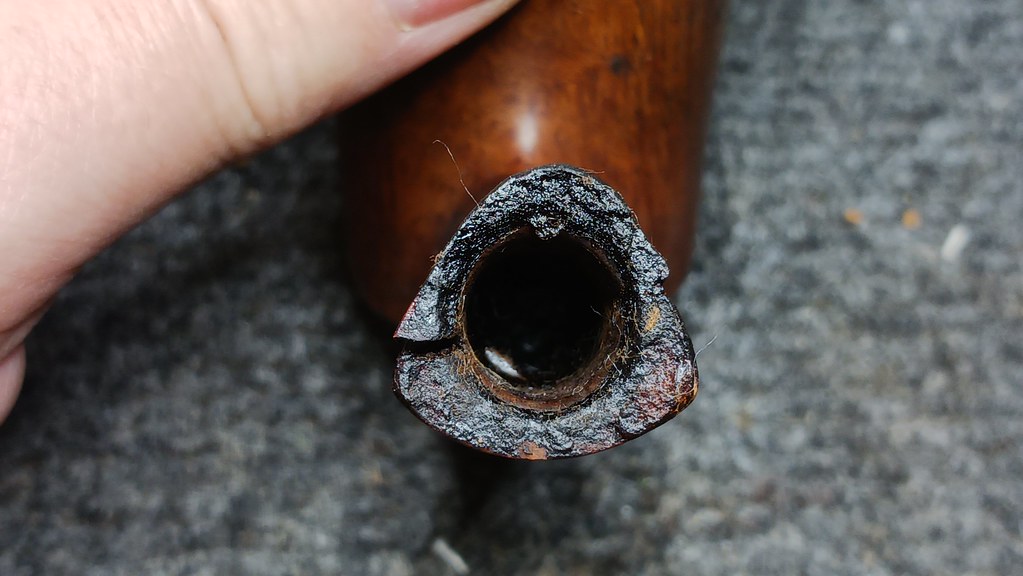
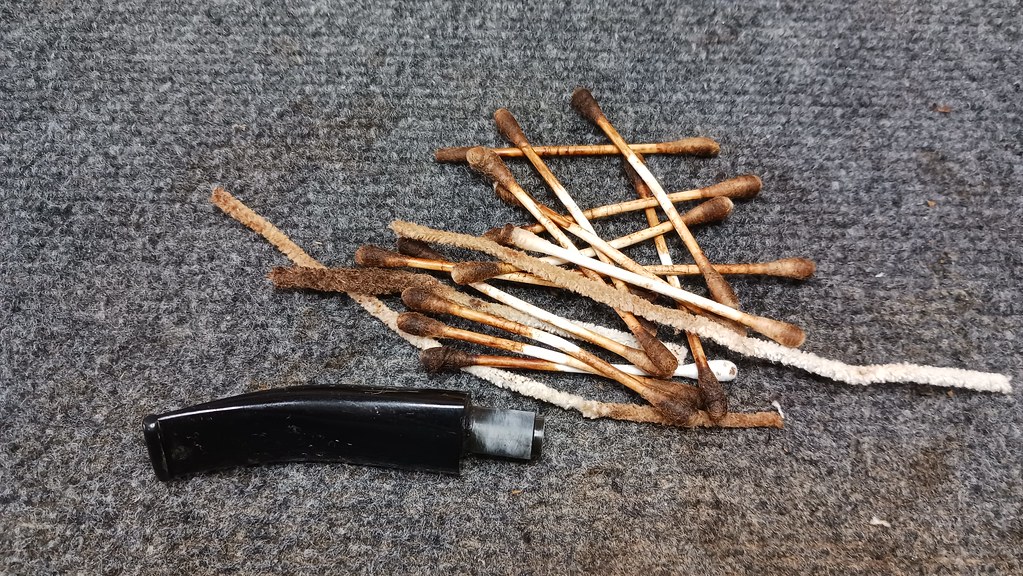
Next up was clearing the pipe’s internals. I used a good sized pile of cotton swabs dipped in 99% isopropyl alcohol to remove the tars and bits of old tobacco from the shank and airway. An appropriately sized drill bit, turned by hand, helped to get the worst of the buildup out.
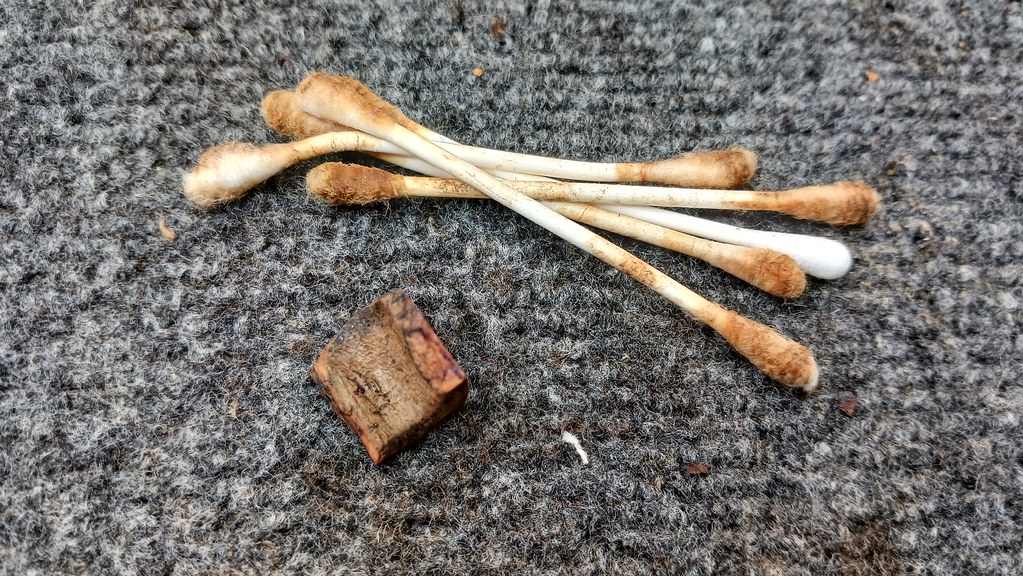
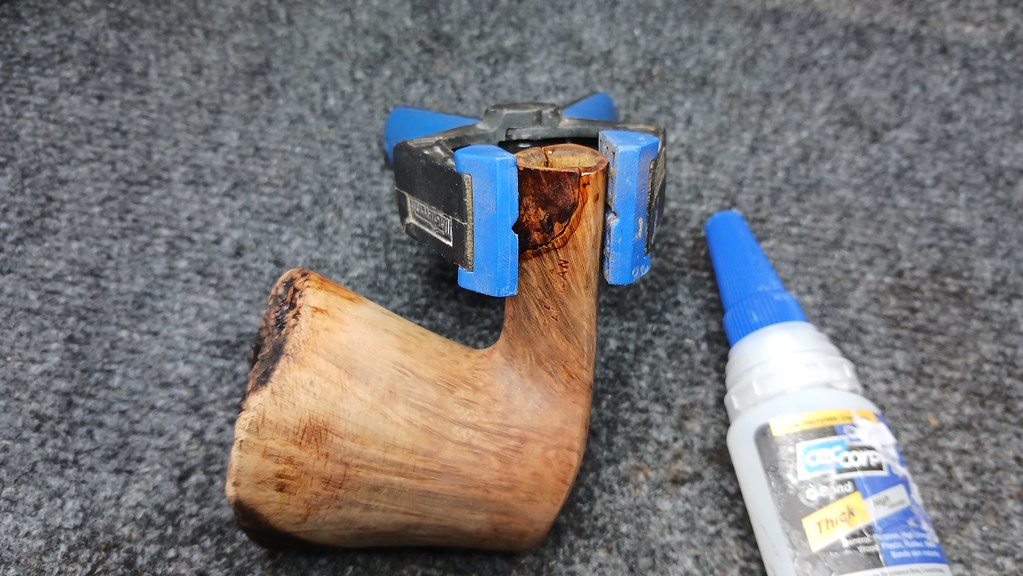
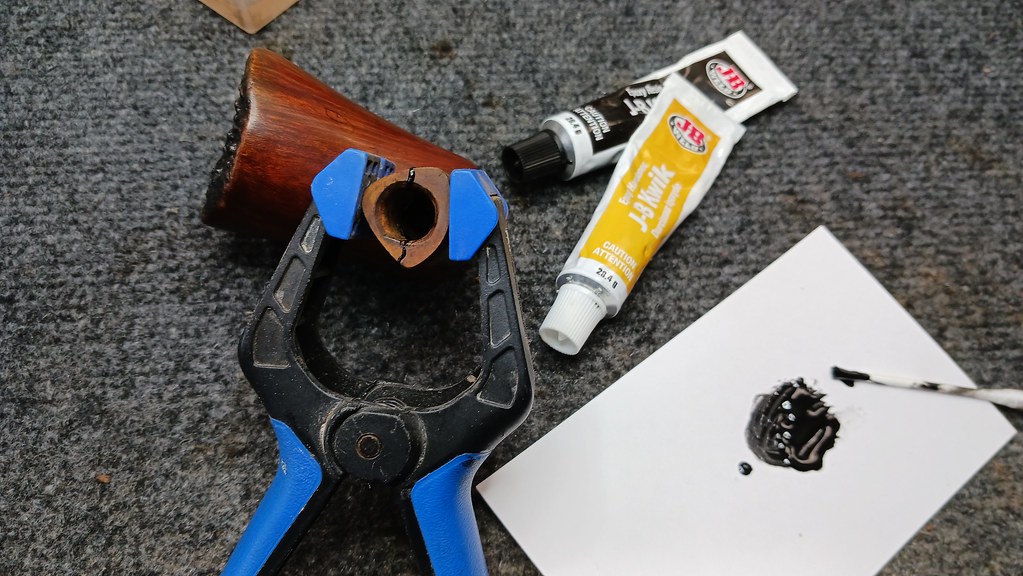
I spent some time working on the mating surfaces of the cracks shank to get them as clean as possible for a strong bond when glued back together. Here is the shank and the missing piece of briar after cleaning.
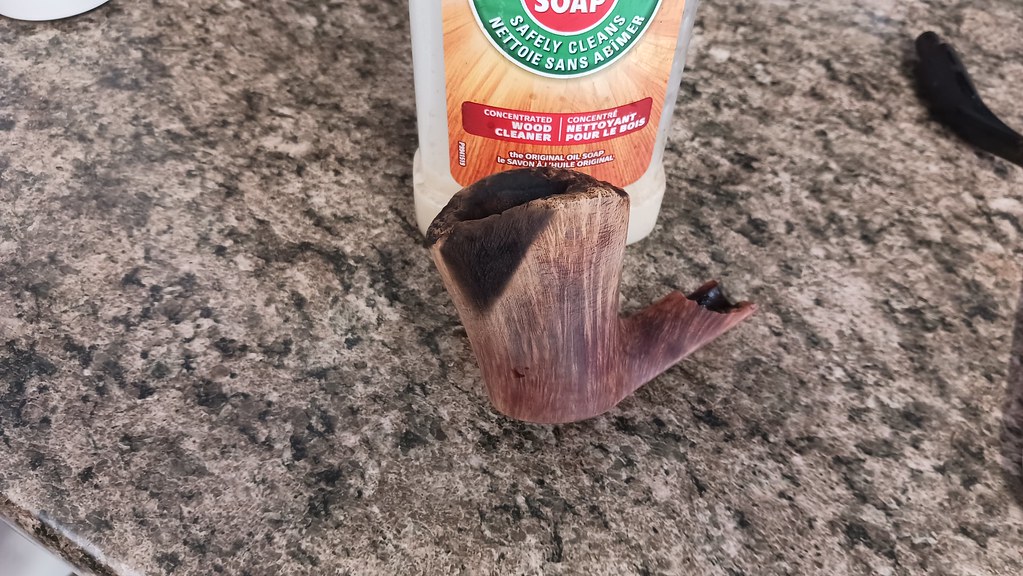
To complete the initial cleaning of the stummel, I scrubbed the exterior with Murphy’s Oil Soap and a toothbrush to gently lift away the accumulated dirt, tars and old wax from the briar. Unfortunately, this revealed a large shark’s tooth shaped patch of scorched briar on the face of the bowl. As the chamber wall in that area was sufficiently thick, I hoped to be able to remove or at least remediate the damage later.

With the stummel cleaned and prepped, I used some thick CA glue to reattached the broken section of the shank. A clamp held the piece in place while the glue cured.
While I waited on the shank repair to firm up, I cleaned the stem. The filter pocket was rather full of tars and other goodies that needed to come out.
By this time, the CA glue on the shank had cured sufficiently to allow me to top dress the cracks with a mixture of CA glue and briar dust. This filled in the voids around the cracks.
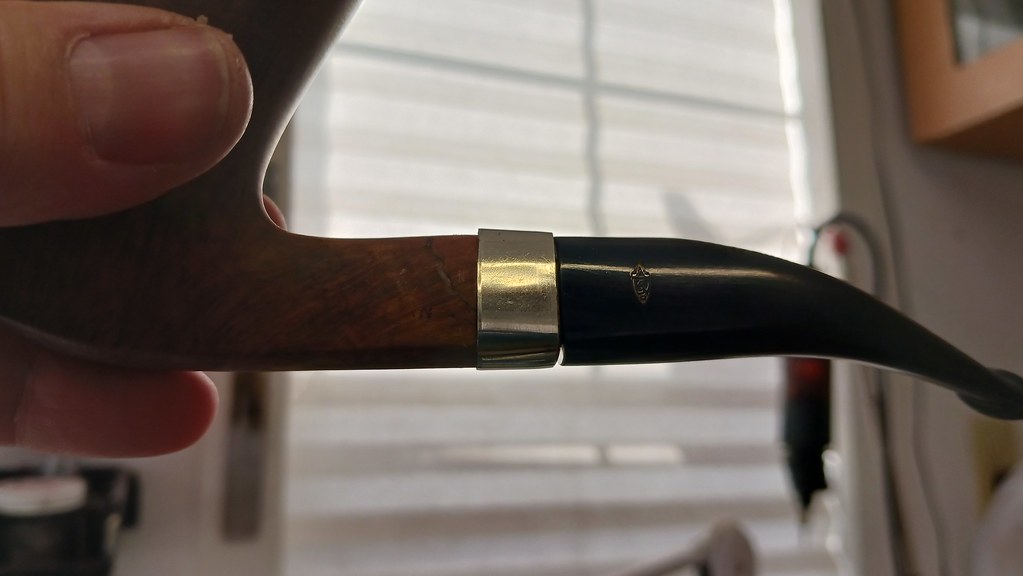
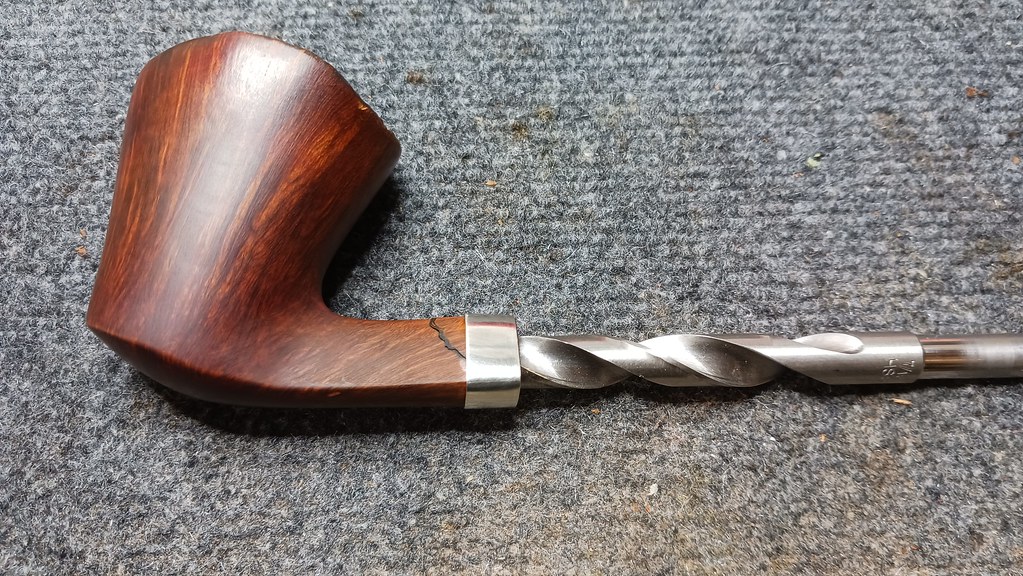
I allowed the patches to cure overnight, then filed and sanded them flush to the surrounding briar. After a bit of careful shaping, I installed a shank band over the end of the repaired shank.
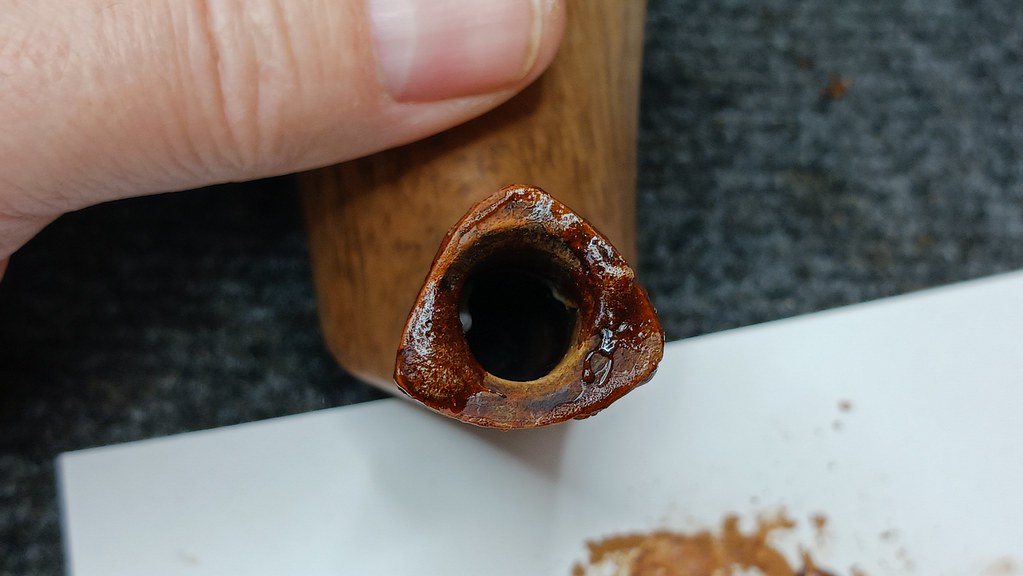
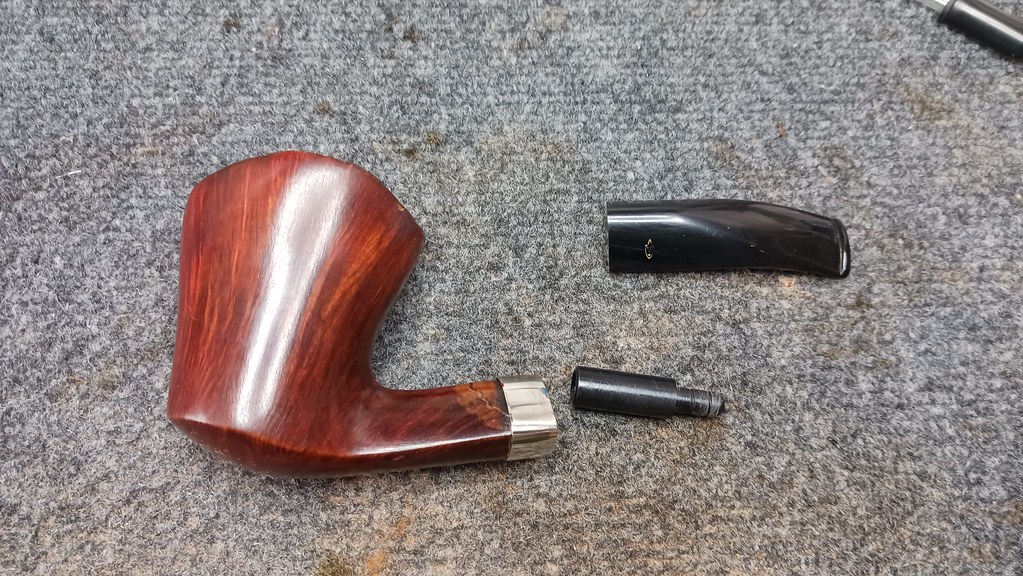
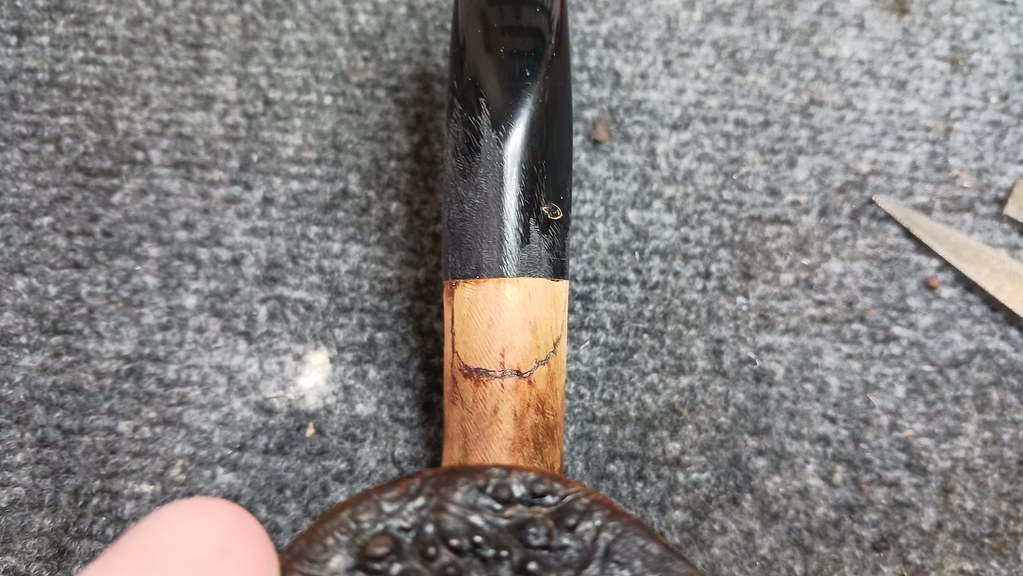
I had hoped that the shank face would revert back to its original position after gluing up the cracks, but as this image shows, that was not the case here. A test fit of the stem showed a large gap between the bottom of the stem, and the shank face.
This was not unexpected, given the extent of the damage. As I needed to convert the stem to a non-filtered setup anyway, I cut off the original tenon and sanded the stem face flat.
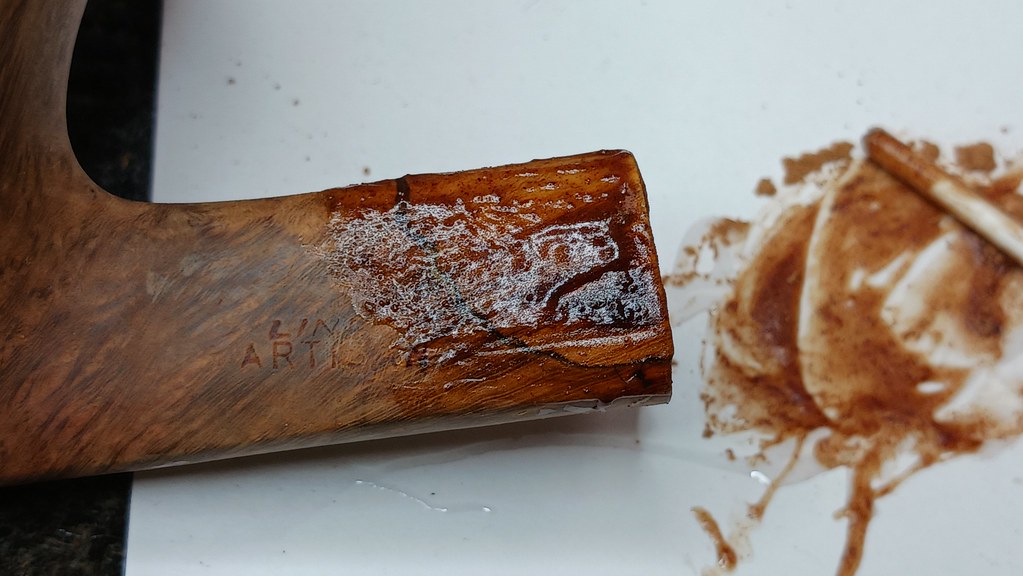
With the stem prepped for a new tenon, I turned my attention to the large scorch mark on the face of the stummel. I used a combination of sanding and bleaching to remove the darkened briar. This pic shows a paste of water and Barkeepers Friend applied to the scorched briar. The oxalic acid in Barkeepers Friend gently bleaches the wood. I let the paste sit on the wood for a few minutes before scrubbing it off with 0000 steel wool. It took a few applications, but eventually the dark patch was a merely a shadow of its former self.


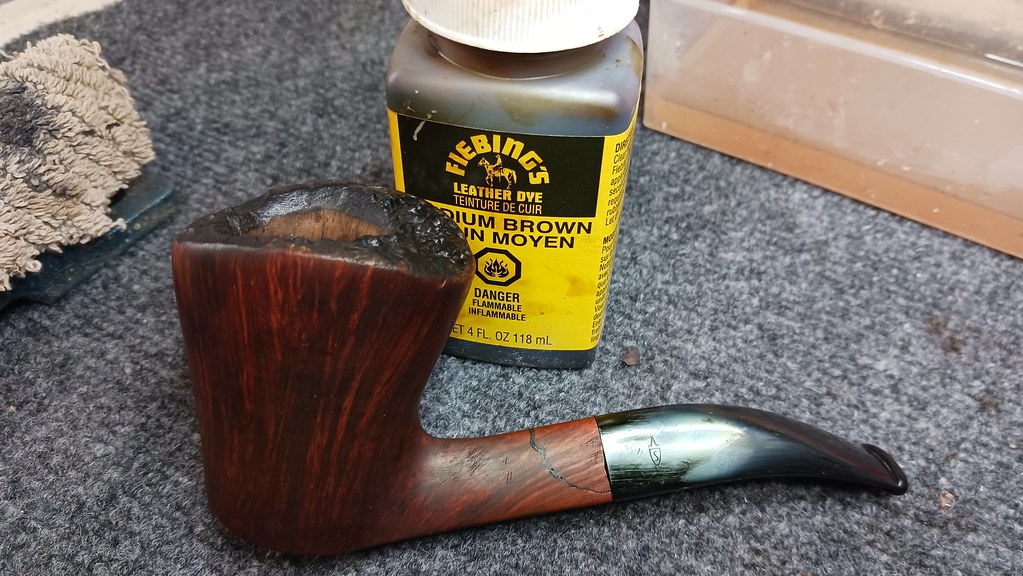
With the work on the stummel nearly complete, I applied a coat of Dark brown leather dye to the body of the stummel and Black dye to the plateaux rim for contrast.

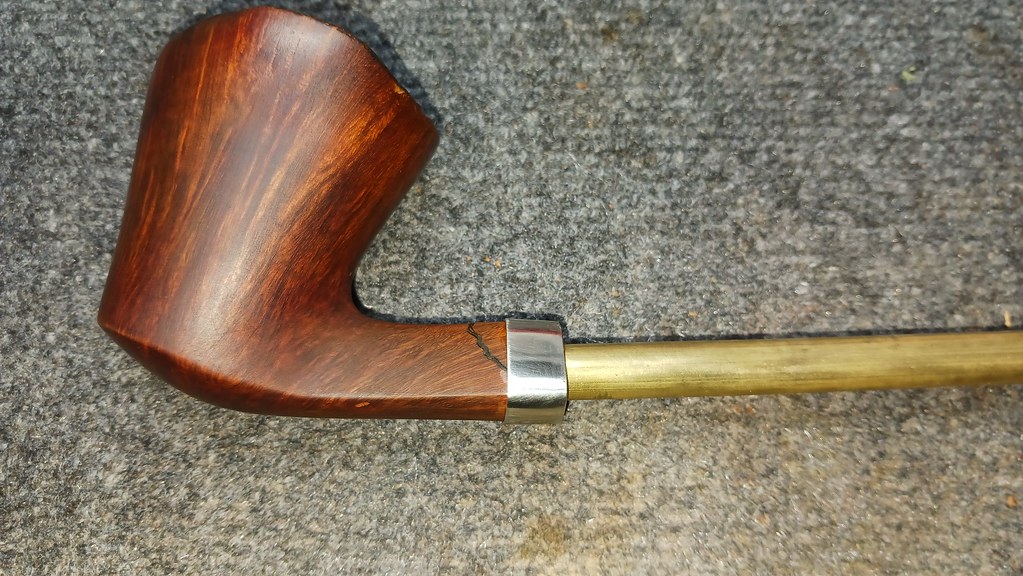
Then it was time to fit the new tenon. This pic shows the stummel next to the new Delrin tenon and the original stem.
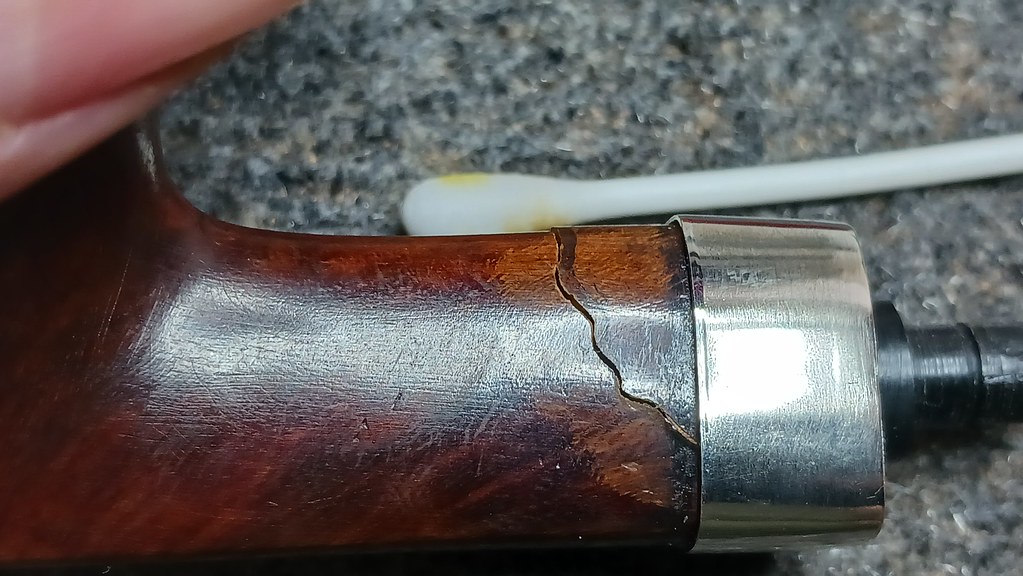
And here is where things took a turn and created a whole lot more work for me. When I inserted the new tenon into the shank, I realized quickly that the mortise had developed a kink partway down its length. The pressure of the tenon sliding over this bend in the mortise pushed the cracks open again. Doh!

The only thing holding the broken briar together at this point was the shank band, which needed to come off again before I could re-glue the shank.

For Attempt #2, I upped the ante by using JB Weld epoxy instead of CA glue. I repeated the entire repair process, cleaning the glue residue off the briar, applying the epoxy and clamping the shank while the epoxy cured.
Despite everything, the epoxy repair also failed, something that rarely occurs, in my experience. This told me that the network of shank cracks was far more extensive than it looked. A shank band would need to extend down over almost the entire shank to shore things up, but even the longest band in my stocks was not long enough.

Changing tactics, I decided to make an internal repair, splinting the shank from the inside with a length of brass tubing. Once epoxied into place underneath all the cracked and damaged briar, the shank would be completely stabilized.
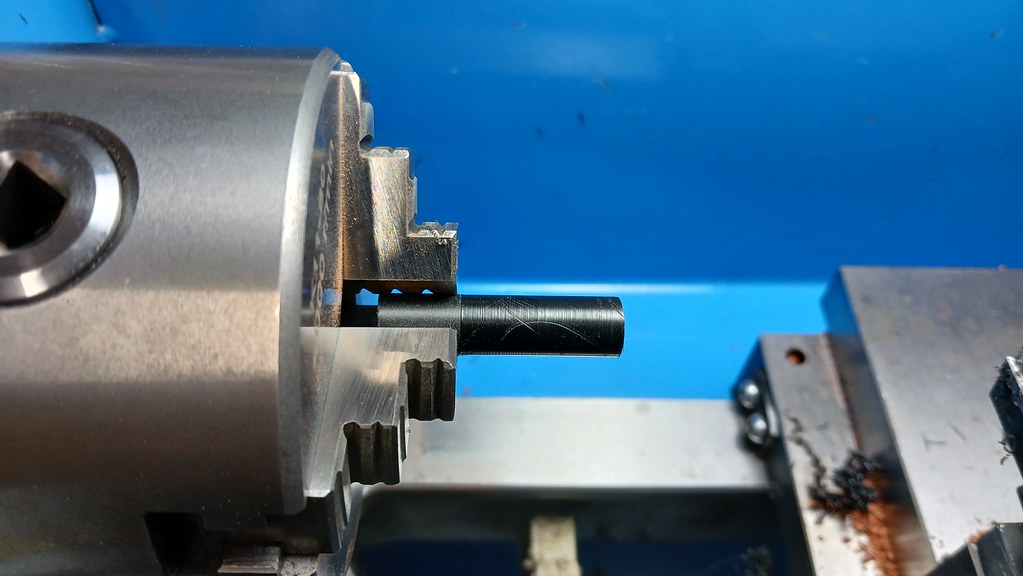
I left the shank band in place while I carefully drilled out the damaged mortise to accept the tubing.
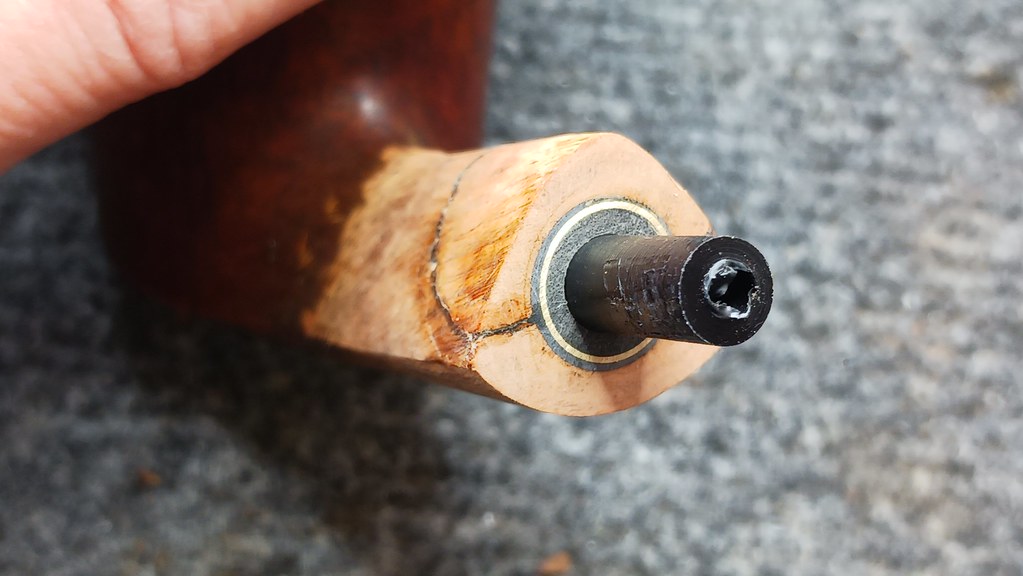
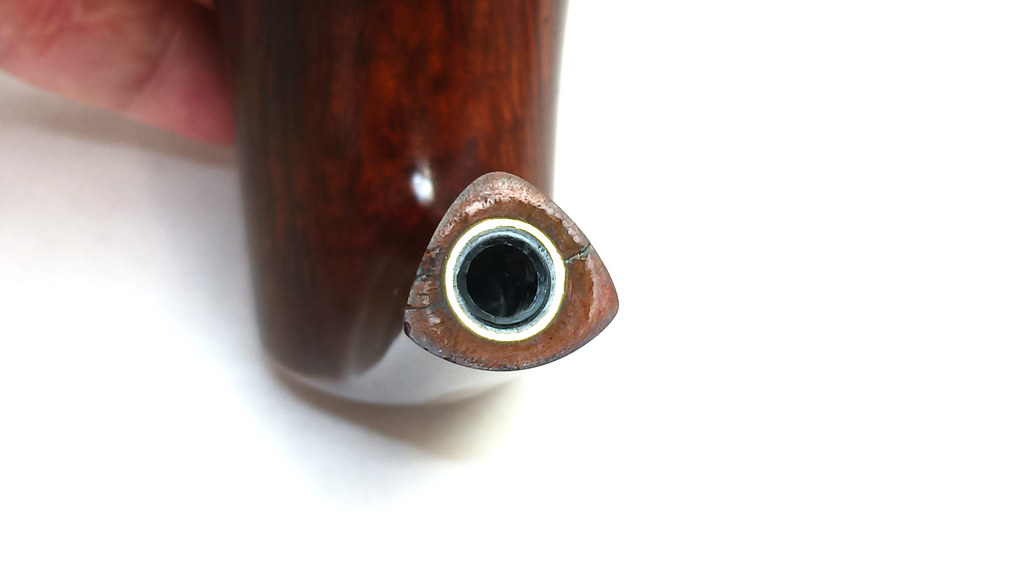
These pics show the tubing test fit in the new larger shank mortise and marked for length. The splint will run the full depth of the mortise, from shank face to draft hole.

Brass tubing is nice and rigid and while it would stop the stem tenon from pushing the cracks open again, brass makes a lousy mortise. To properly hold the stem tenon, I turned a section of Delrin rod on the lathe to fit inside the brass splint.
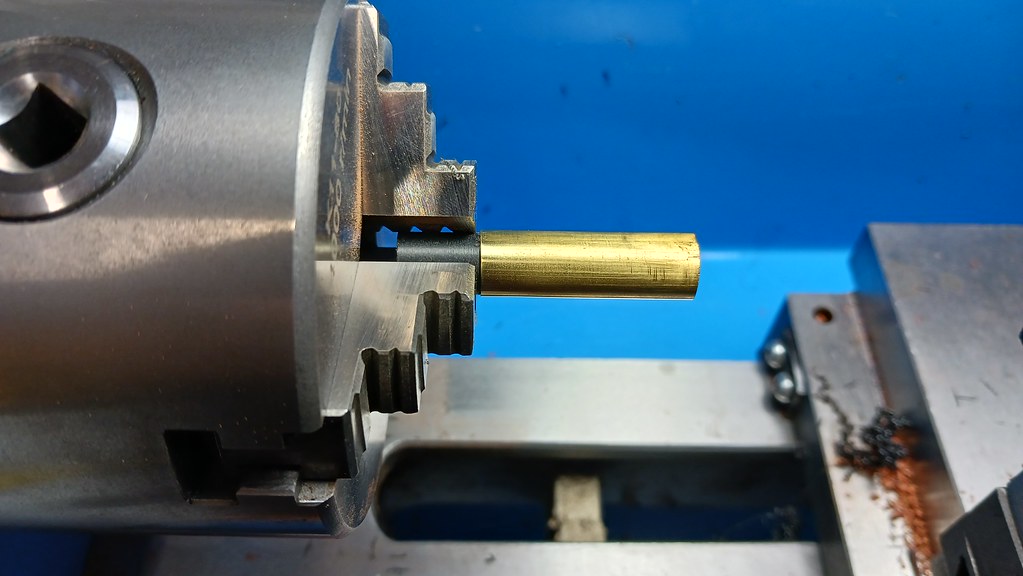
I then drilled a 1/4″ airway through the Delrin.

After roughing up both the exterior of the Delrin and the interior of the brass tubing, I mixed some two-part epoxy and bonded the parts together.
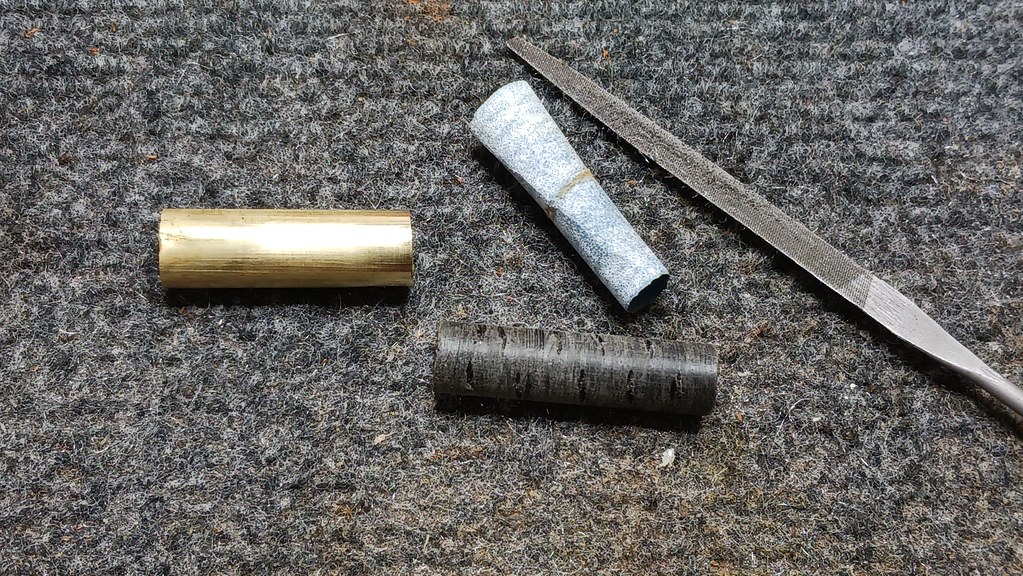

I allowed the epoxy to cure, then cut the insert to length and used a bit more JB Weld epoxy to install it permanently in the shank.
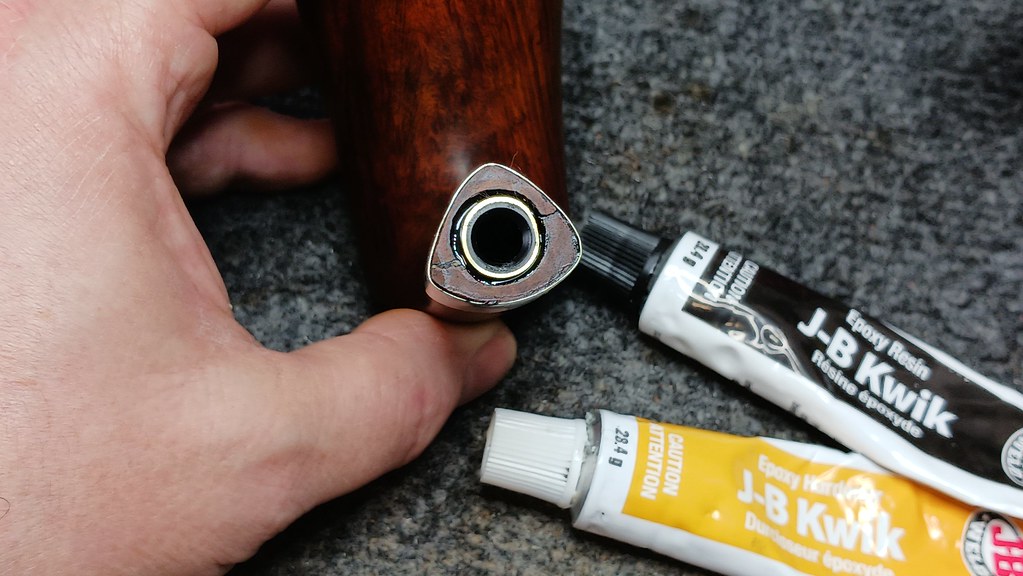
I again left the pipe overnight to allow the epoxy to fully cure. When I came back to it the next day, I removed the now redundant shank band and touched up the cracks with a layer of CA glue. When this layer of glue had cured, I filed and sanded the repair smooth again. This pic shows the repaired shank mortise with the new Delrin tenon inserted. Delrin has a bit of give to it which provides a good grip for the new tenon while the rigid brass provides structural integrity.
The last remaining hurdle on this project was achieving a light-tight fit of the stem against the shank face. Repairing the shank had changed the original geometry of the airway relative to the shank face, so I had to re-face the shank. The size and weight of the bowl made topping the shank manually rather difficult, so I slid the guide pin of my tenon-turning tool into the tenon’s airway and turned the tool by hand, cutting the shank face perpendicular to the new airway.
I could then rough up the stem end of the tenon, apply some epoxy and glue the tenon into the stem face. I held the parts in position until the epoxy started to grip, then clamped the pipe upright in a padded vise and added some masking tape to keep the stem aligned properly while the epoxy cured overnight.

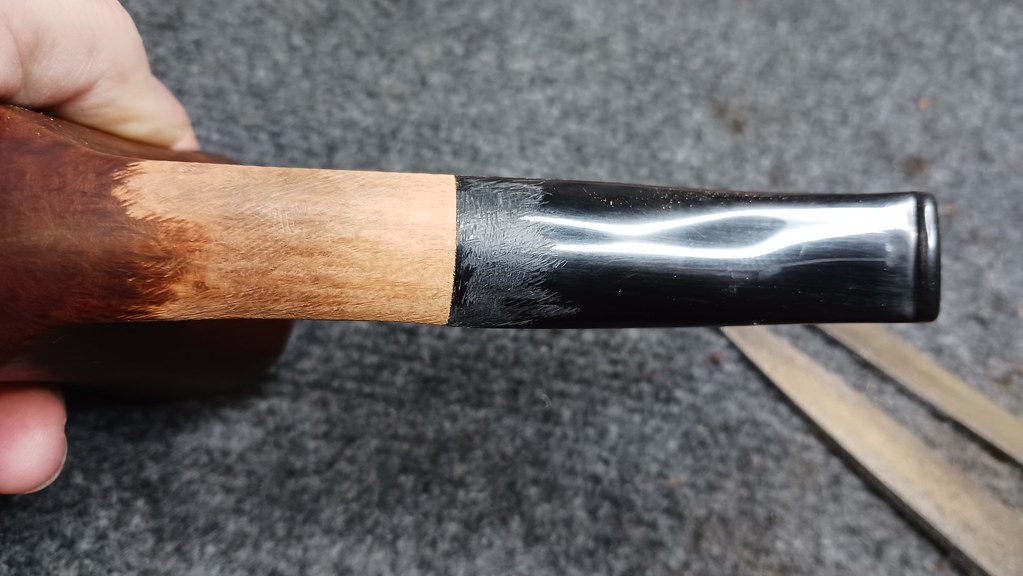
As you might imagine, the stem did not line up perfectly with the rebuilt shank. It took a bit of work with files and sandpaper to establish a smooth flow from shank to stem.

When I was happy with the shank, I refinished the sanded briar with some fresh dye followed by a wipe of mineral oil. Now on the home stretch, it was time to take the completed pipe to the buffer for final polishing.

I treated both stem and stummel to a run on the Red Tripoli and White Diamond wheels to smooth out the remaining scratches and bring up the shine. A few light coats of Carnauba wax completed the work and added some protection to the refinished briar.
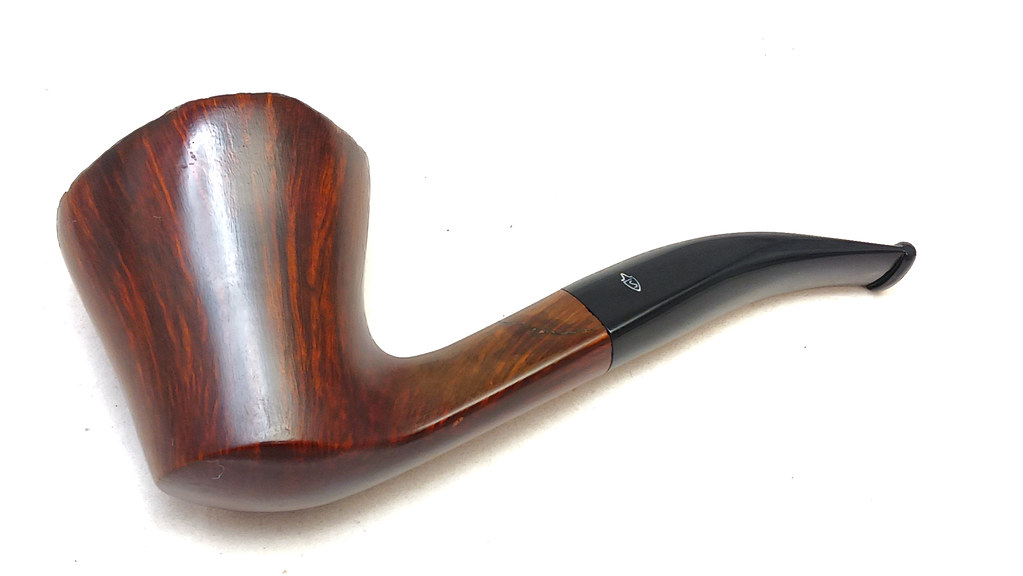
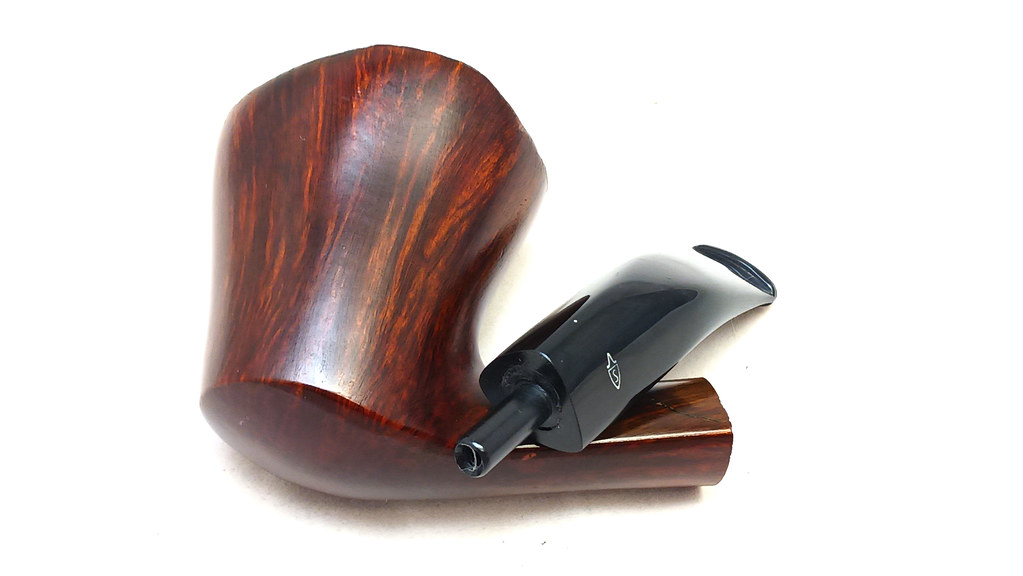
Though some scars remain, this Savinelli Freehand Dublin has come a long way since it arrived in the shop. Clean, fresh and once again structurally sound, this good looking pipe is ready to send home to its steward. With a little care and feeding, the pipe should serve faithfully for many years to come.
Thanks for following along on this repair project. I hope you enjoyed watching the transformation as much as I did.
Until next time, Happy Piping! Here’s the finished pipe.


Amazing and beautiful work as always Charles. Thank you for sharing.
LikeLiked by 1 person
Thanks, Jeff! It’s always nice when I can return an old friend to active service.
LikeLike