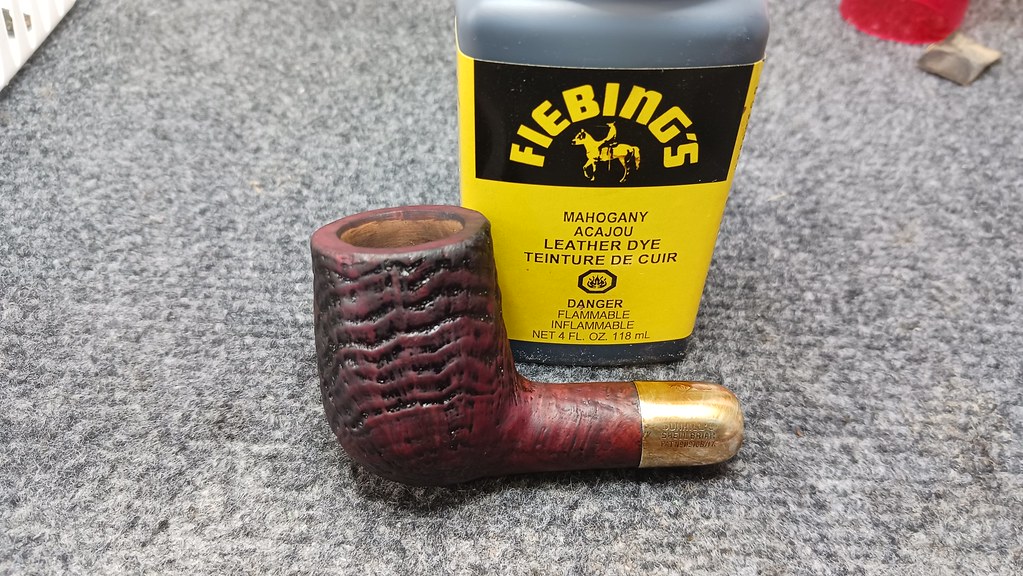
One of the fun parts of running a pipe repair and restoration business is working on pipes that I would otherwise never get to see. This early Dunhill Patent Shell Briar is just such a pipe, send in to DadsPipes for restoration as part of a larger lot of older Dunhills.
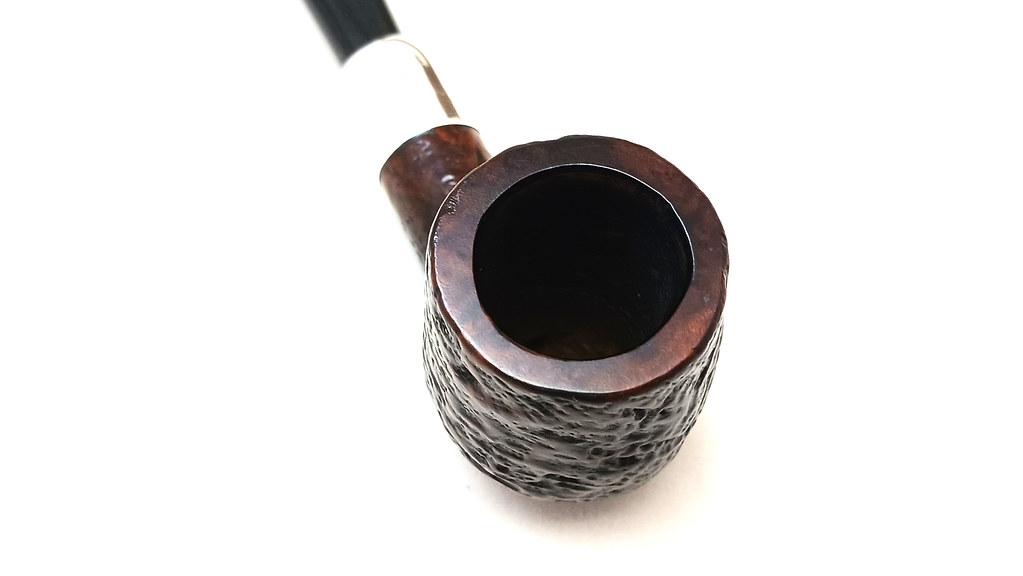
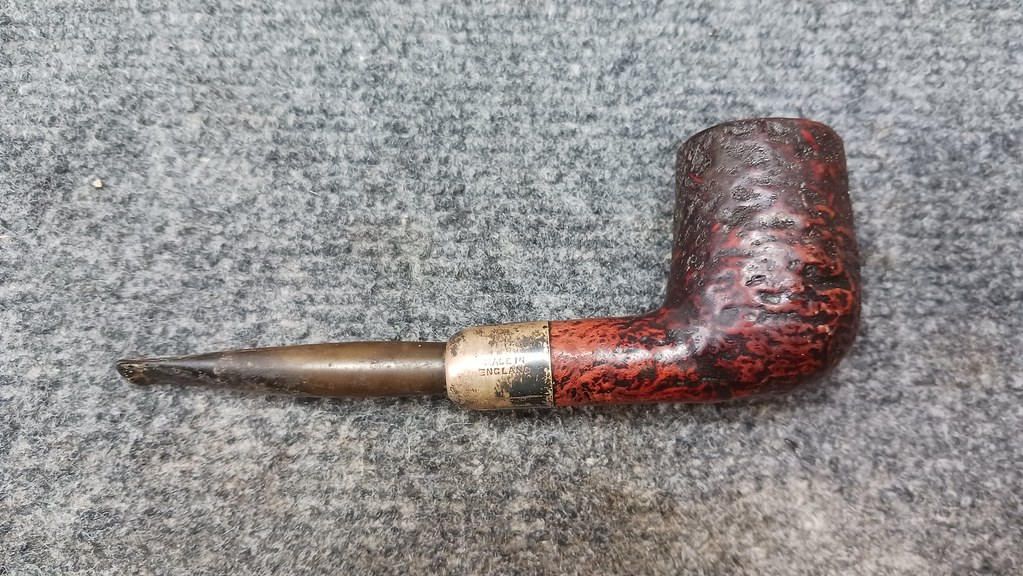
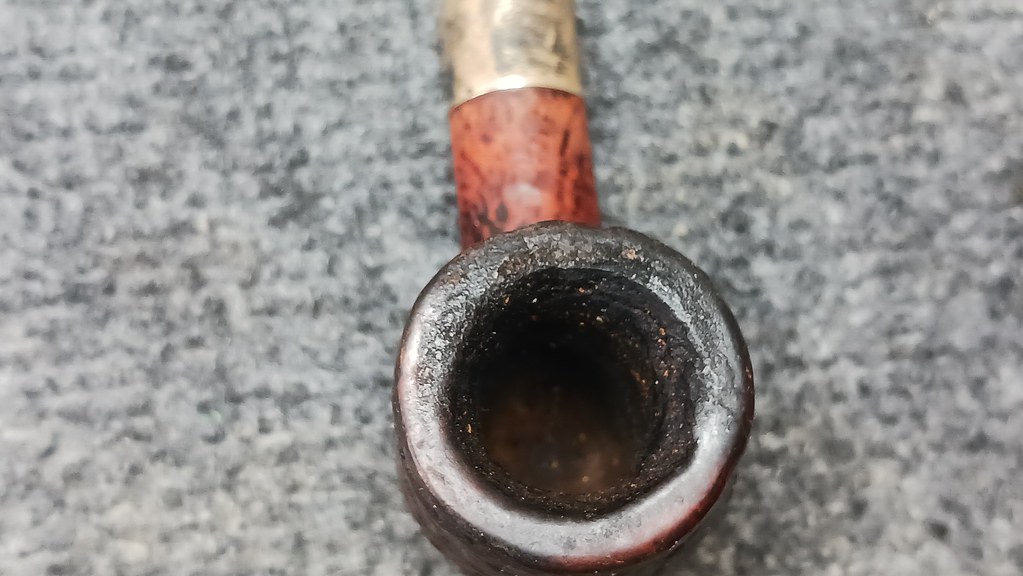
As this initial series of pictures illustrates, the pipe was definitely overdue for some TLC. The chamber carried an uneven layer of carbon cake around the walls, the rim of the bowl was also obscured by more carbon deposits, but not enough to hide an uneven and out of round inner rim, likely the result of careless reaming with a pen knife.
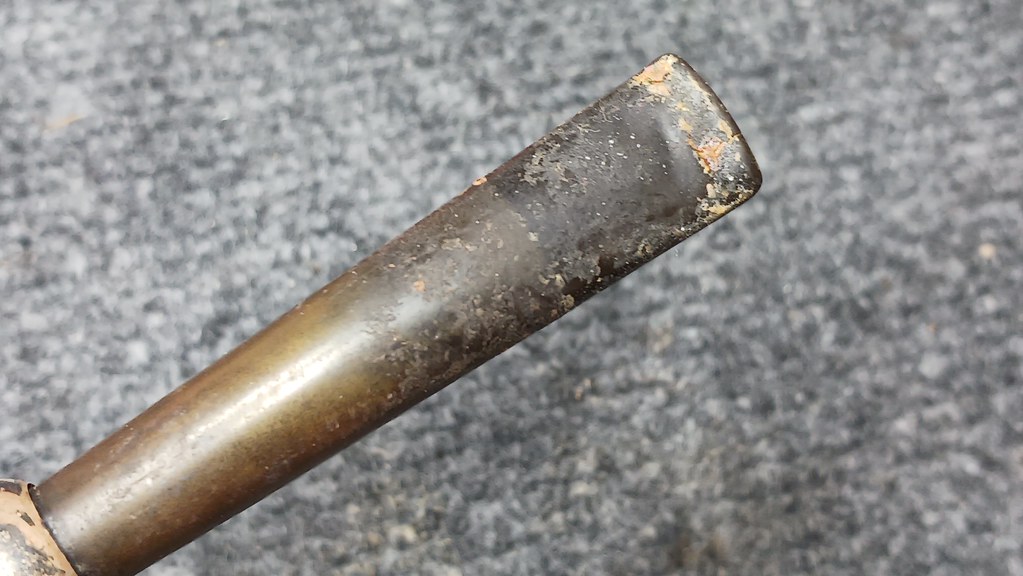
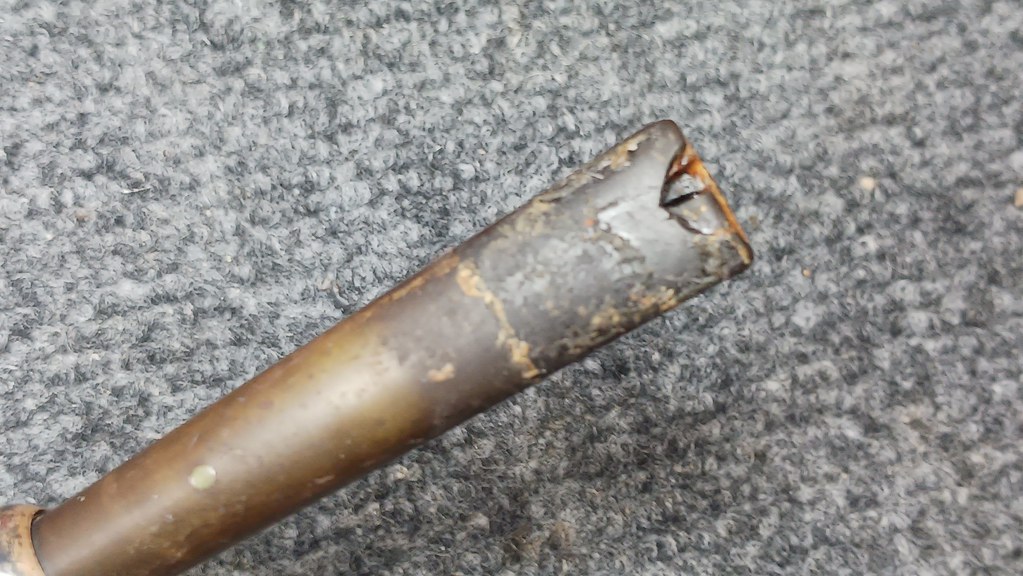
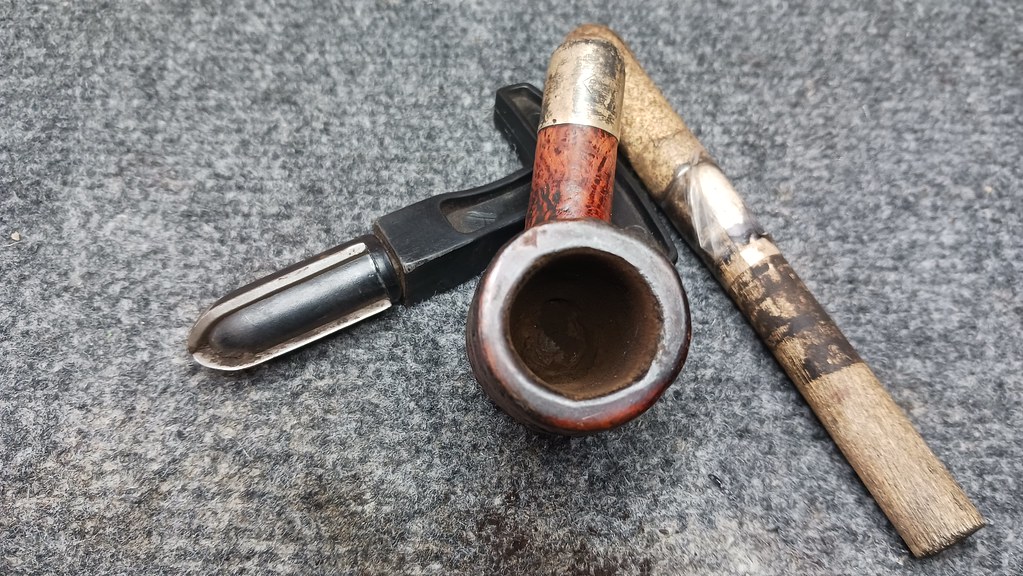
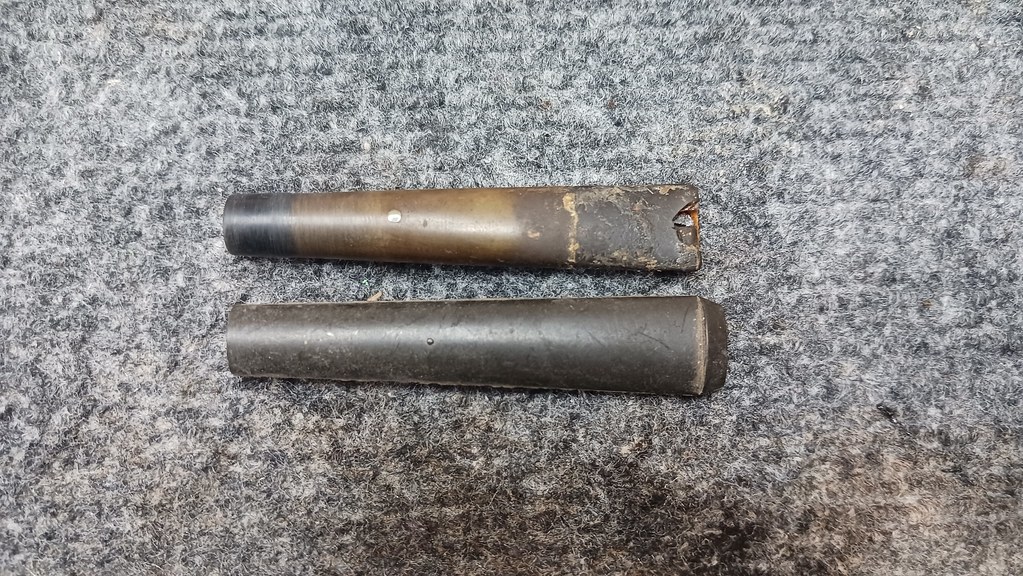
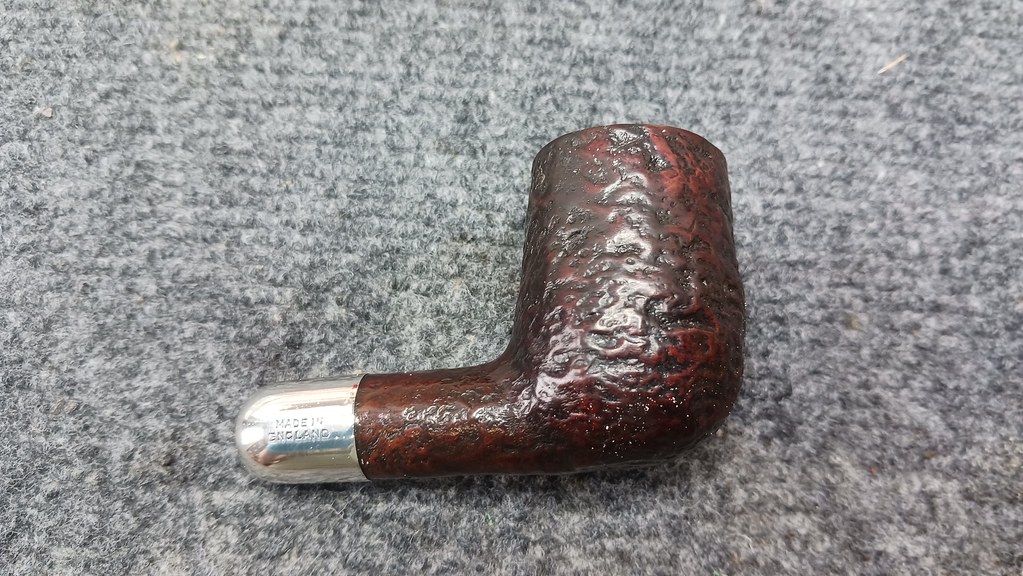
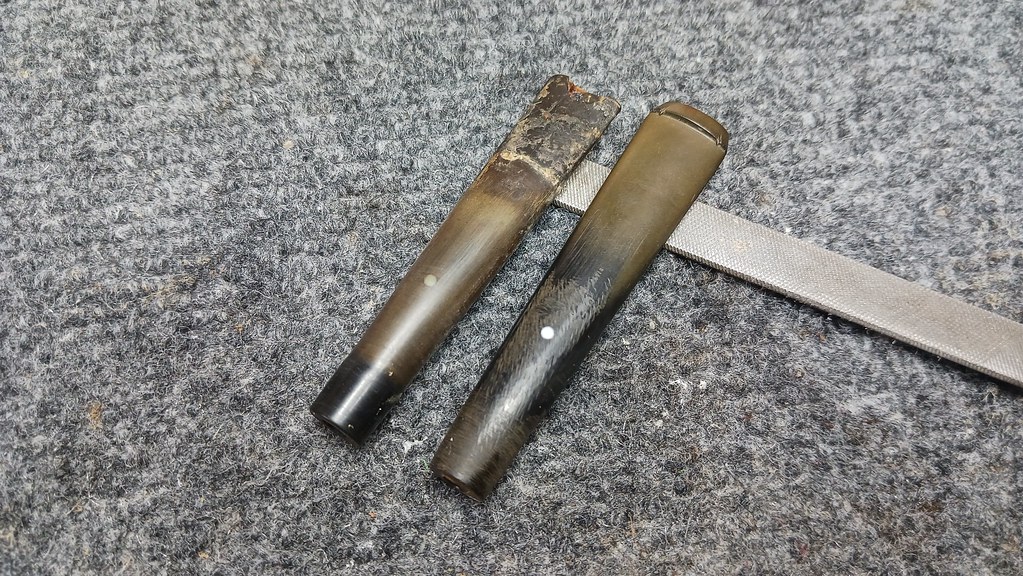
The Sterling silver shank cap was heavily tarnished, making the stamps difficult to read, but there didn’t appear to be any of the usual knocks and dents in the silver itself. The pipe’s Vulcanite/Ebonite stem had certainly seen better days. It was oxidized, dirty and missing most of the lower button, while the remaining material near the button was cracked in several places.

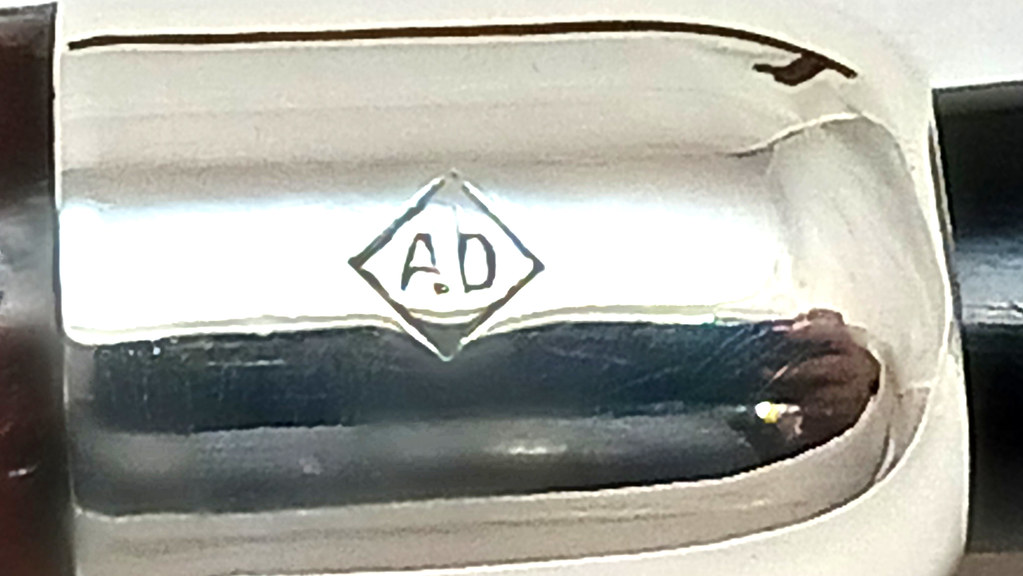
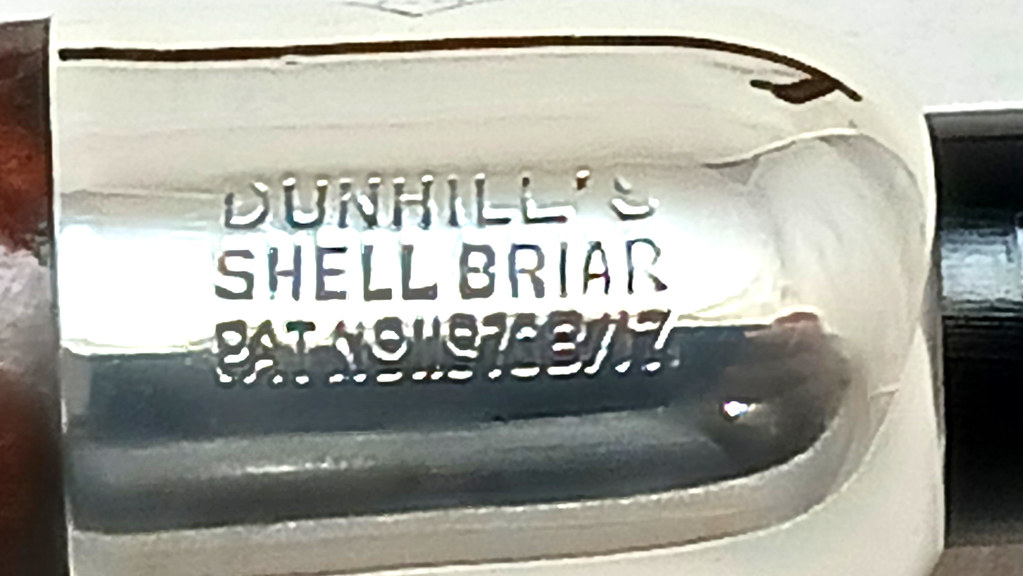
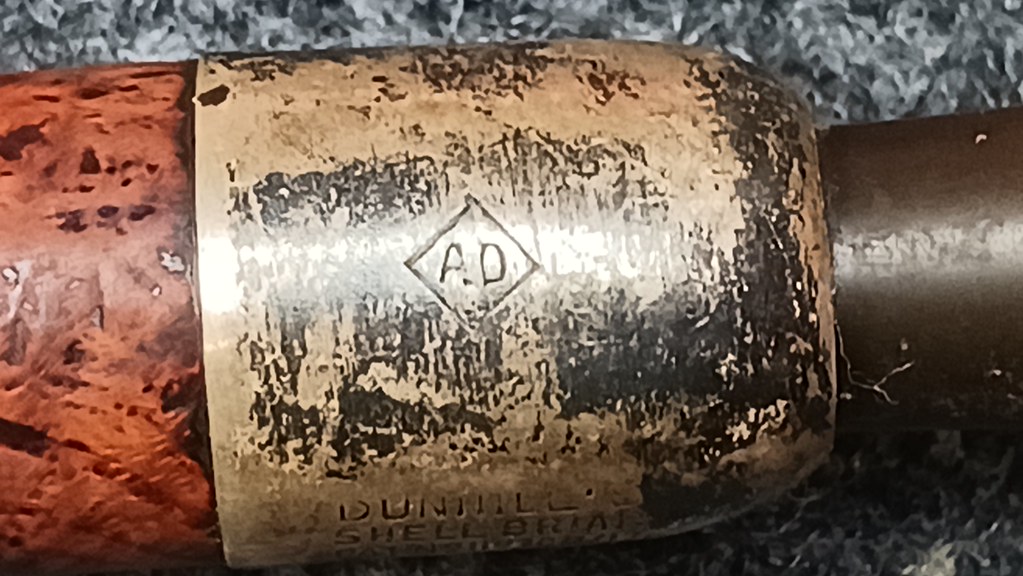
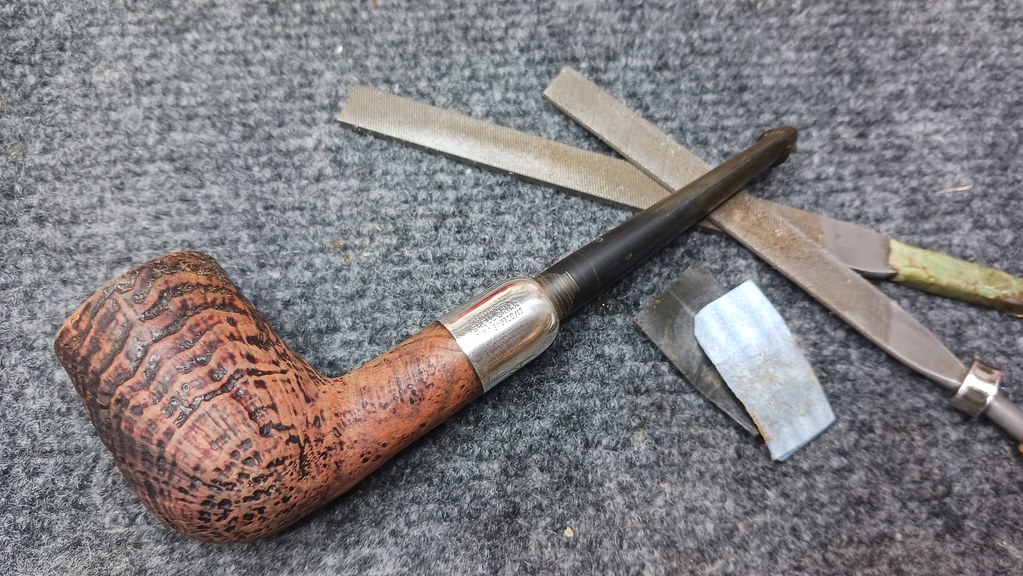
Somewhat unusual for a Dunhill, all the stamps are on the Sterling shank cap. There are no stamps on the briar. The shank cap is marked “AD” in a Diamond (for Alfred Dunhill) on the top of the cap.
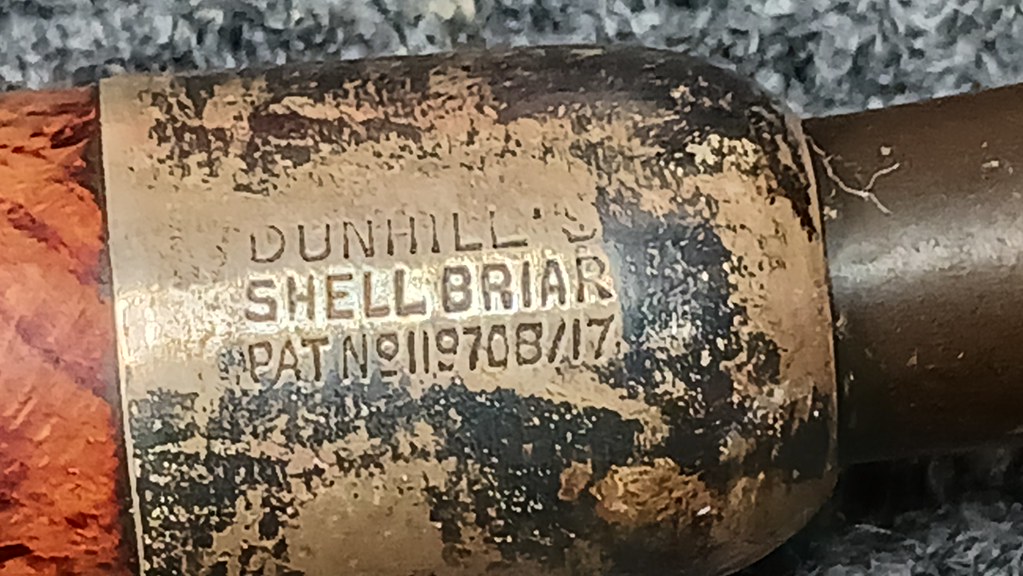
Rotating the pipe downwards, we find “Dunhill’s” over “Shell Briar” over “PAT No119708/17″ on the left flank.
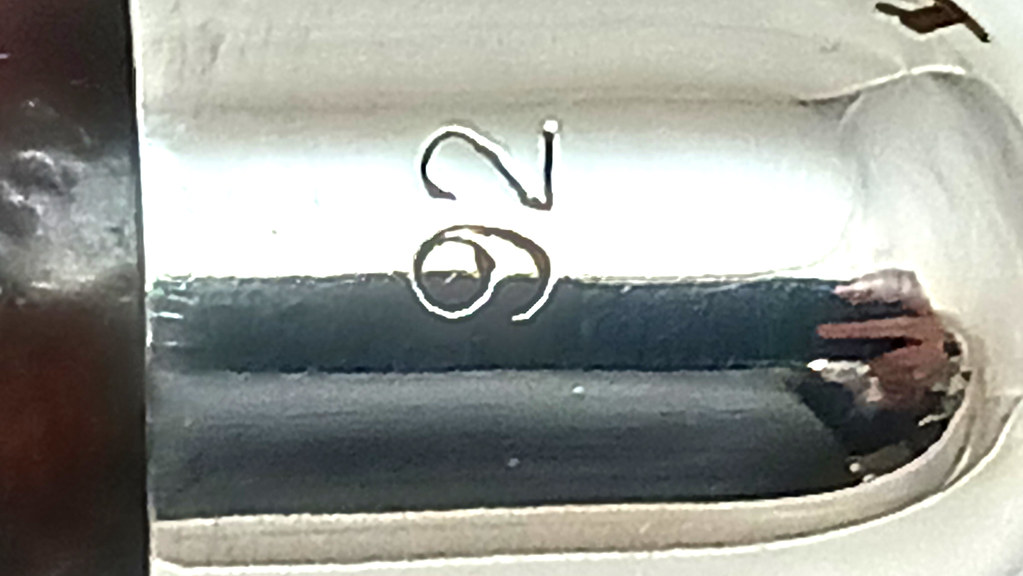
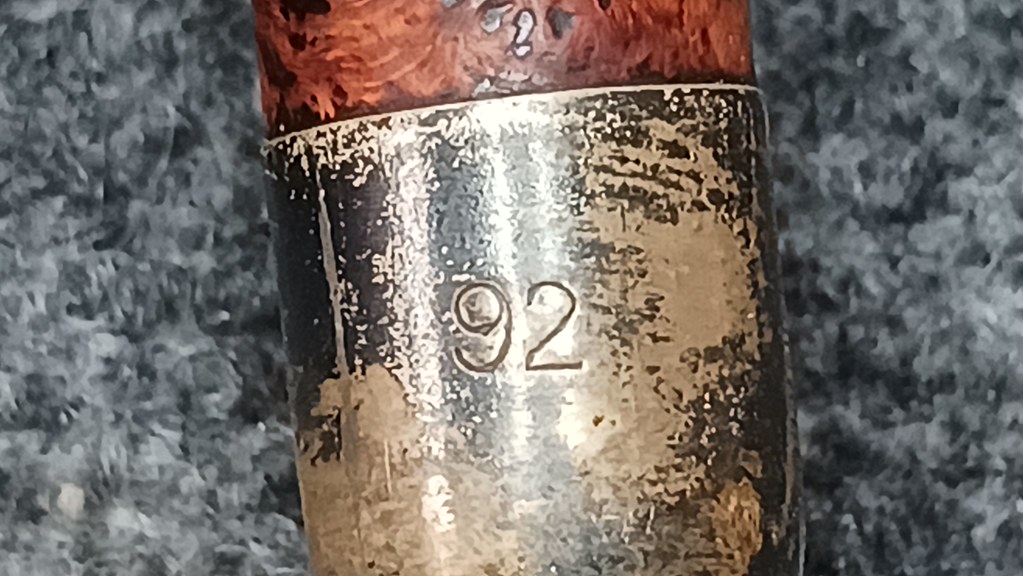
The bottom of the shank cap is stamped with a shape number, “92”, indicating an Army Mount Billiard.
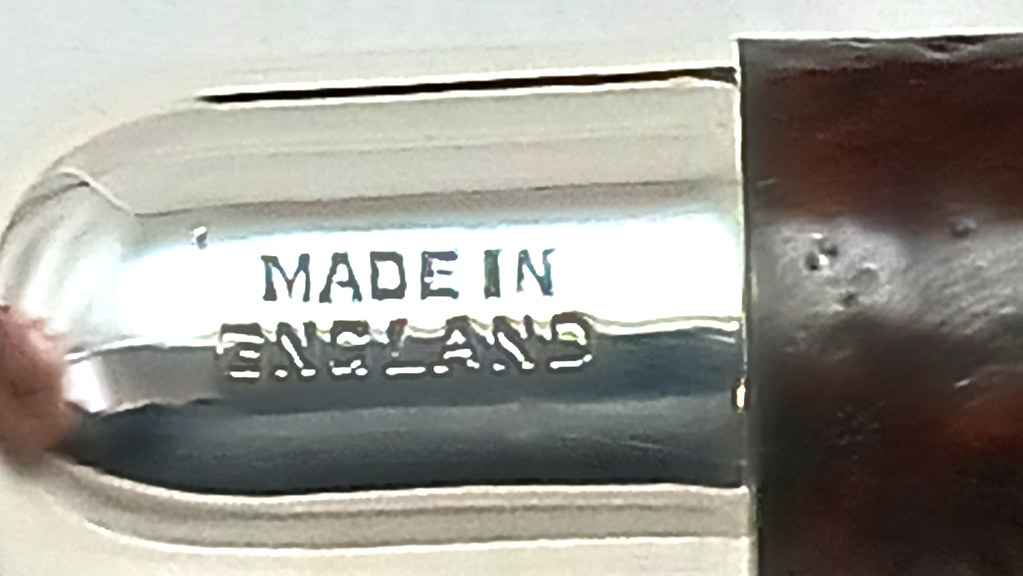
And finally, on the right flank is “Made in” over “England”.
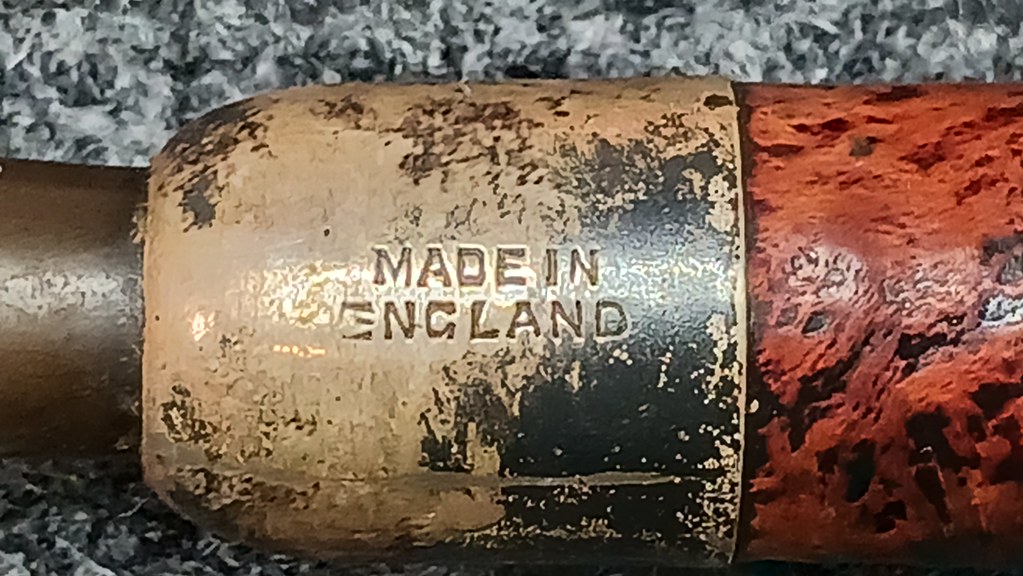
There is no date code to be found anywhere on the shank cap or shank itself, so if I’ve done my homework correctly, this Dunhill dates from between 1918, when the Shell briar was introduced, and 1921, when Dunhill began stamping date codes on all their pipes.
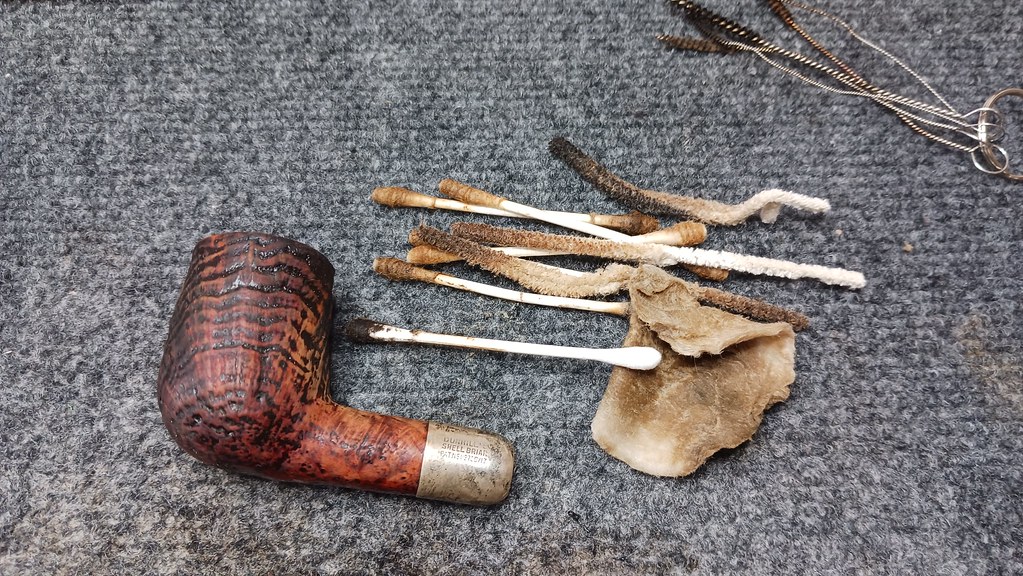
With that knowledge tucked away for reference, I began working on the pipe, starting with reaming the old cake from the chamber and cleaning the crust of carbon from the rim of the bowl. Amazingly, the chamber was in almost pristine condition underneath it all – quite rare for a 103 – 106 year old pipe!
A handful of cotton swabs and pipe cleaners dipped in 99% isopropyl alcohol removed a fairly light amount of tars and debris from the shank and airway of the stummel.
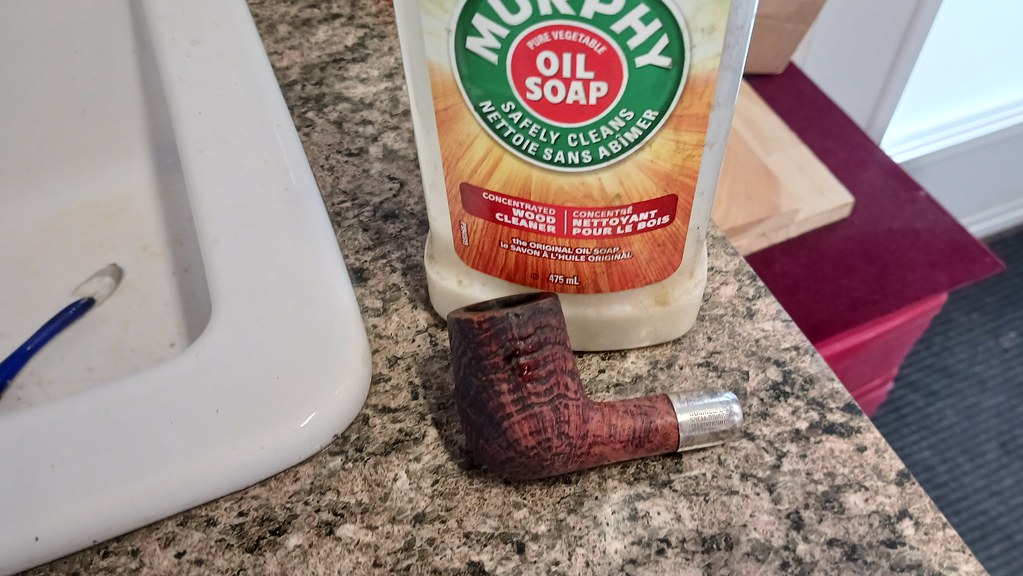
A good scrub with Murphy’s Oil Soap and a toothbrush loosened and lifted away years of dirt, dust and old wax from the nooks and crannies of the sandblast Shell Briar finish.
The last job on the stummel was to remove the tarnish and other gunk from the Sterling silver shank cap. A jeweler’s polishing cloth made short work of this without scratching the silver underneath.

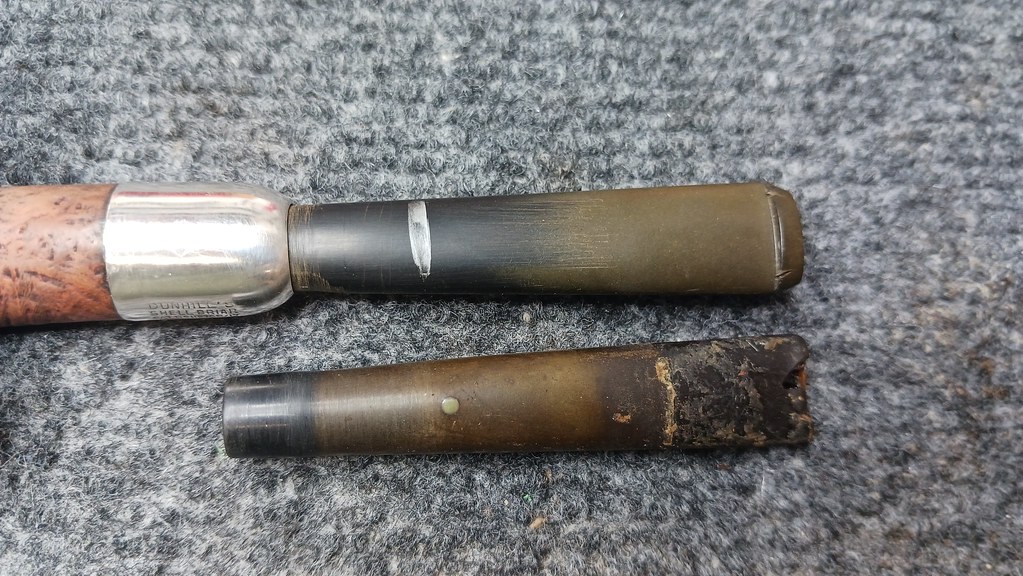
With the stummel cleaned, I set it aside briefly to work on the stem. The stem that came with the pipe was definitely passed its use-by date; time for a new stem! After a brief dig through my supplies, I came up with a Vulcanite stem blank that very closely matched the profile and length of the old one.
An Army mount stem stays in place in the pipe shank by friction, so getting both the diameter and taper of the “tenon” end correct is vital for a secure fit. Thankfully, my task was made a bit easier by having the old stem as a reference. After a bit of careful hand shaping and sanding, the new stem fit snugly into the tapered shank mortise.
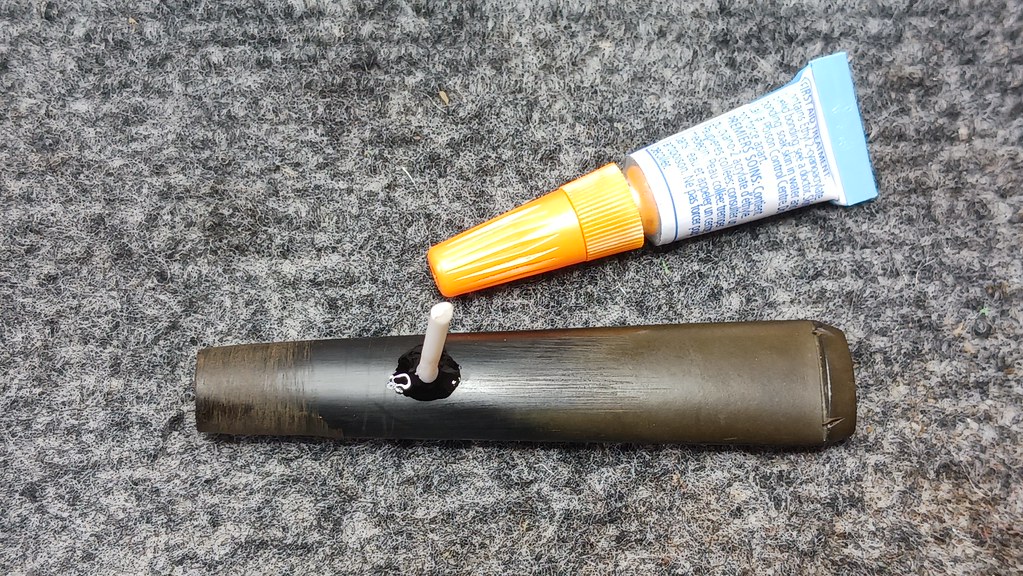
With the tricky bit done, I marked out the location for the iconic White Spot on top of the new stem, again using the old stem as a reference.
A centre punch helps here to establish a small dimple in the Vulcanite to guide the drill bit. Working freehand, I drilled a 1/16″ socket into which I glued a section of white plastic rod stock. The original White Spot would have been made from ivory, but as ivory is no longer sold, a modern plastic dot would have to do.
While I waited for the glue to cure on the White Spot inlay, I refreshed the finish on the stummel, first applying a coat of Mahogany leather dye followed by a top coat of Black dye.

To achieve the famous Shell Briar finish, I used 0000 steel wool to remove the black dye from the high spots on the stummel, exposing the red dye coat underneath.

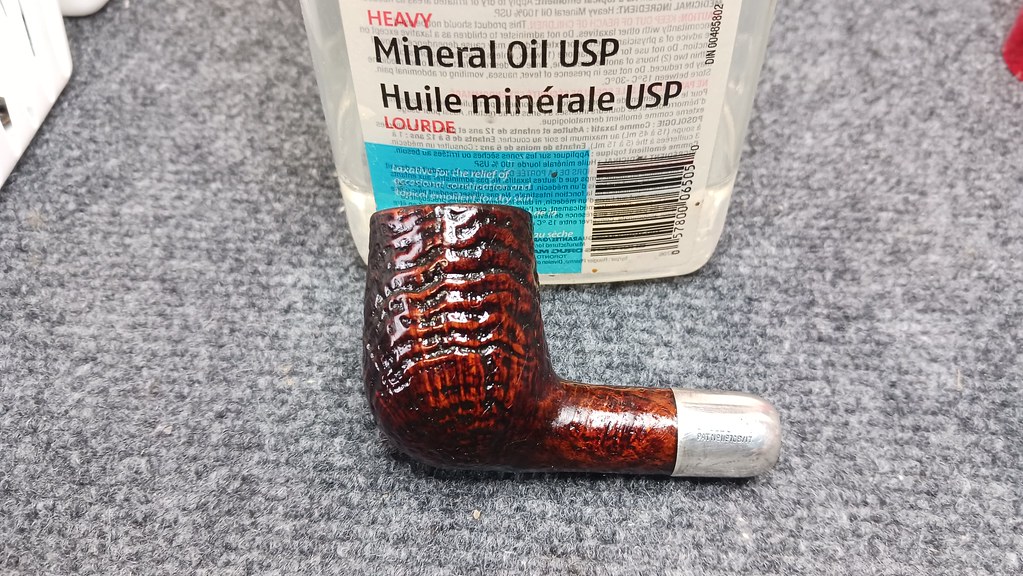
When I was happy with the look, I set the new stain and added some moisture to the briar with a wipe of mineral oil. I allowed the oil to soak into the dry wood for a minute or two, then buffed away the excess with an old terry towel.
I again set the stummel aside to rest while I completed work on the stem. With the CA glue now cured, I cut off the excess rod and filed the White Spot flush to the surrounding Vulcanite. This pic shows the inlay after filing but before final sanding.
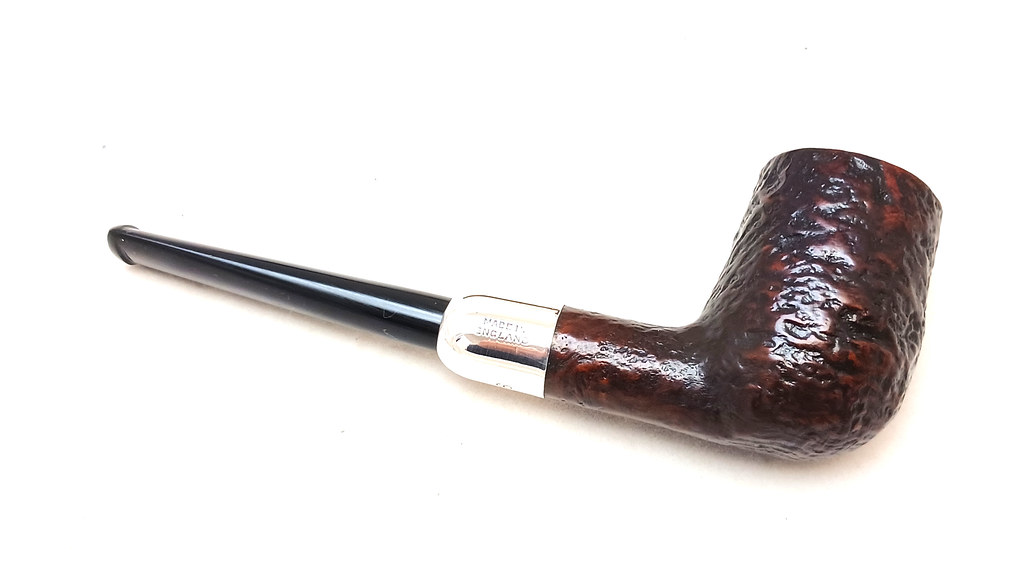
I hand sanded the stem from 220 to 2000-grit in preparation for final polishing. When I was satisfied that I had smoothed out all the sanding scratches, I took the completed pipe to the buffer where I polished the stem on both the Red Tripoli and White Diamond wheels to bring up the shine. I also buffed the stummel lightly on the White Diamond wheel, taking care to avoid jamming polishing compound into the sandblast finish. A few light coats of Carnauba wax to both stem and stummel brough up the final shine and added a layer of UV protection to the finished pipe.
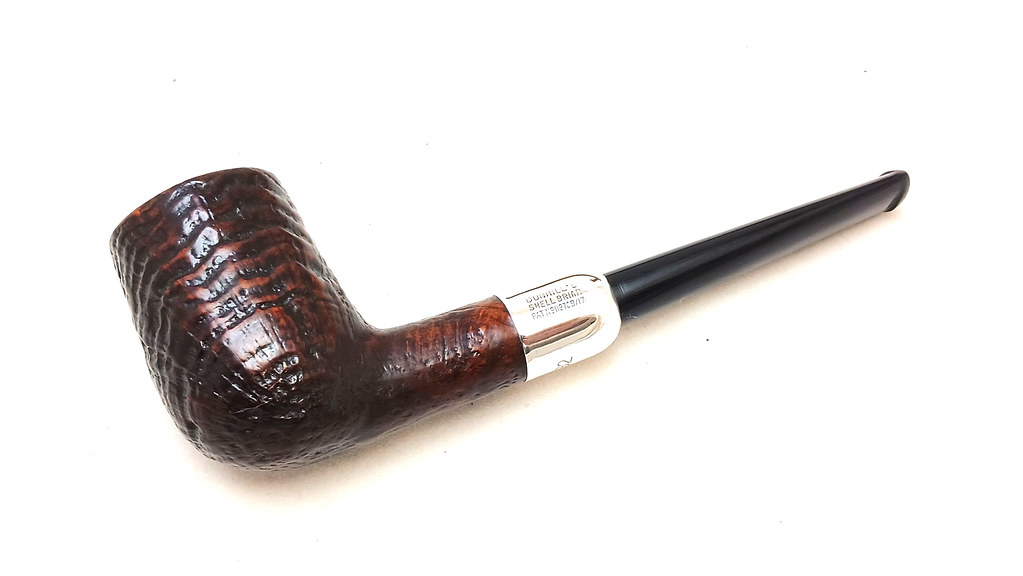
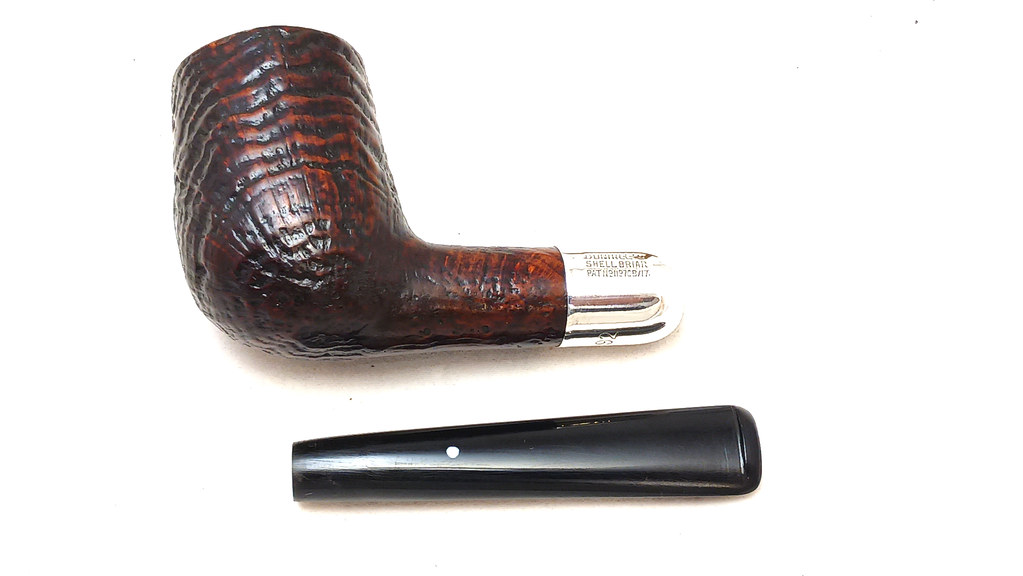
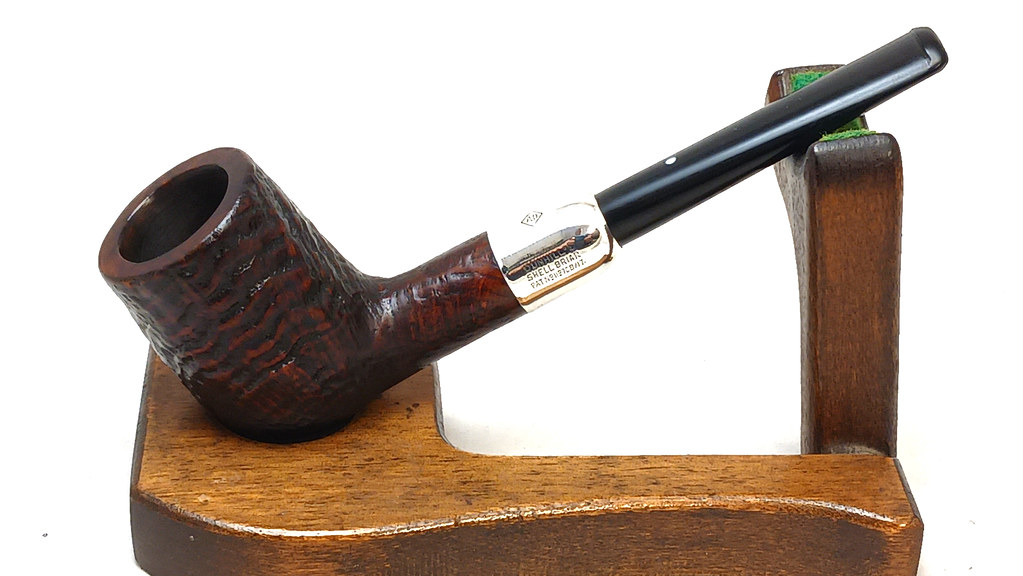
After its time on the bench, this early Patent Dunhill Shell Briar Army Billiard is looking every inch the Elder Statesman of pipes. Clean, fresh and structurally sound, this century old pipe is once again ready for active service with its new steward. May he enjoy it in good health for many years to come.
Thanks for joining me for another estate pipe restoration project. I really enjoyed watching this classic English Billiard come back to life.
Until next time, Happy Piping! Here’s the finished pipe.