
Every pipe smoker has a favourite pipe. It’s almost inevitable, I think, as people tend to find something that works for them – a particular button design, width or height, a bowl with just the right capacity or size to fit their needs the majority of the time. Have a look at any pipe lover’s rack and I’m willing to bet that a select few pipes seem to get used more frequently than the rest.
A favourite pipe is like an old friend – faithful, reliable, and consistent without making undue demands. But sometimes a favourite pipe gets over used and, often , under maintained and that’s when little problems like a spot of scorched briar or a hairline crack can turn into big headaches.
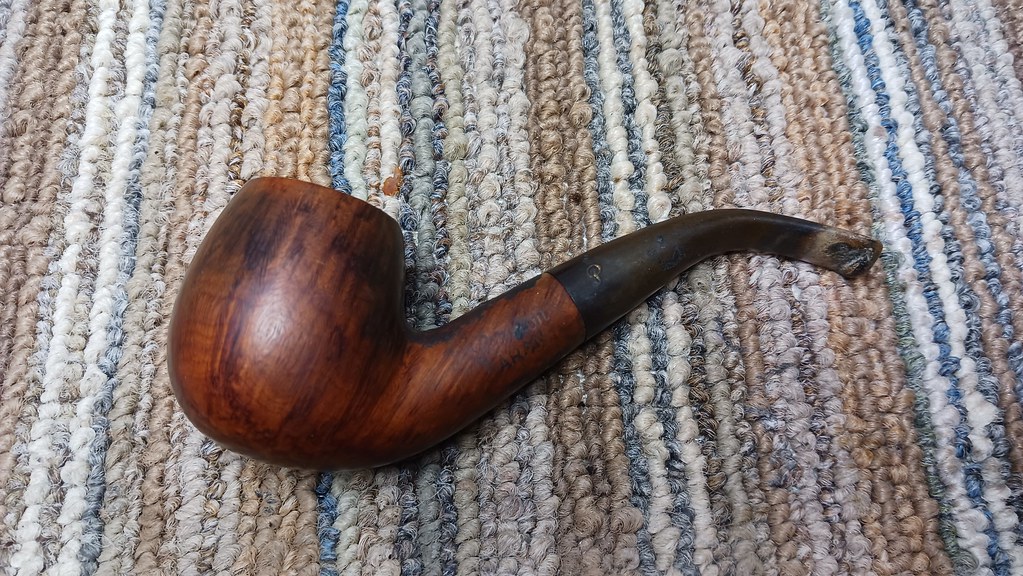
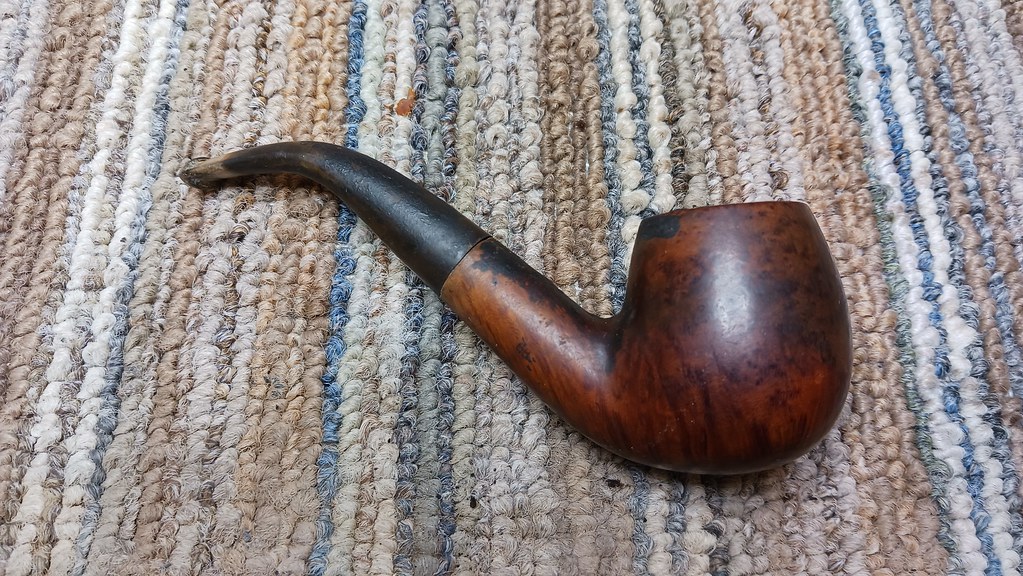
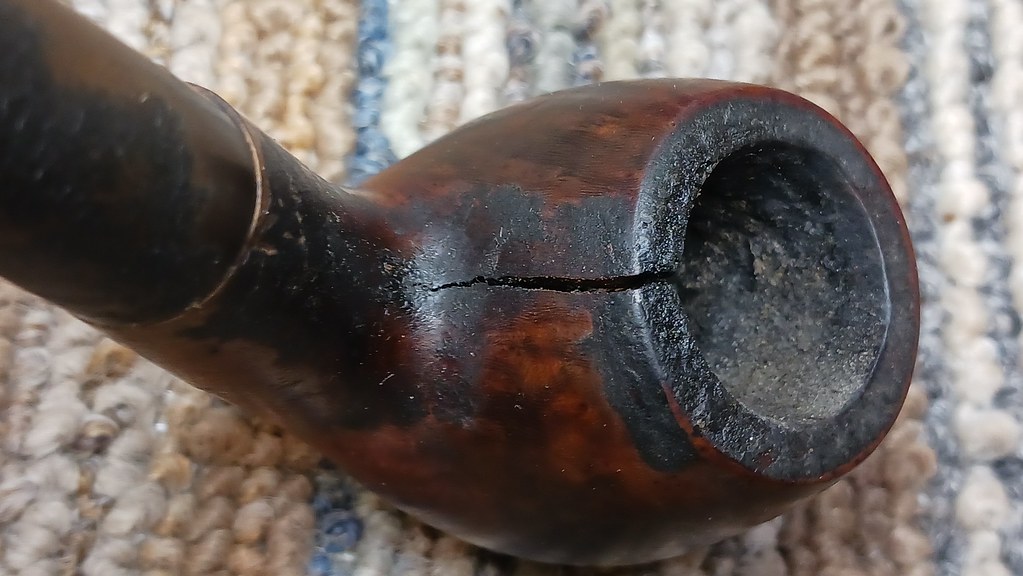
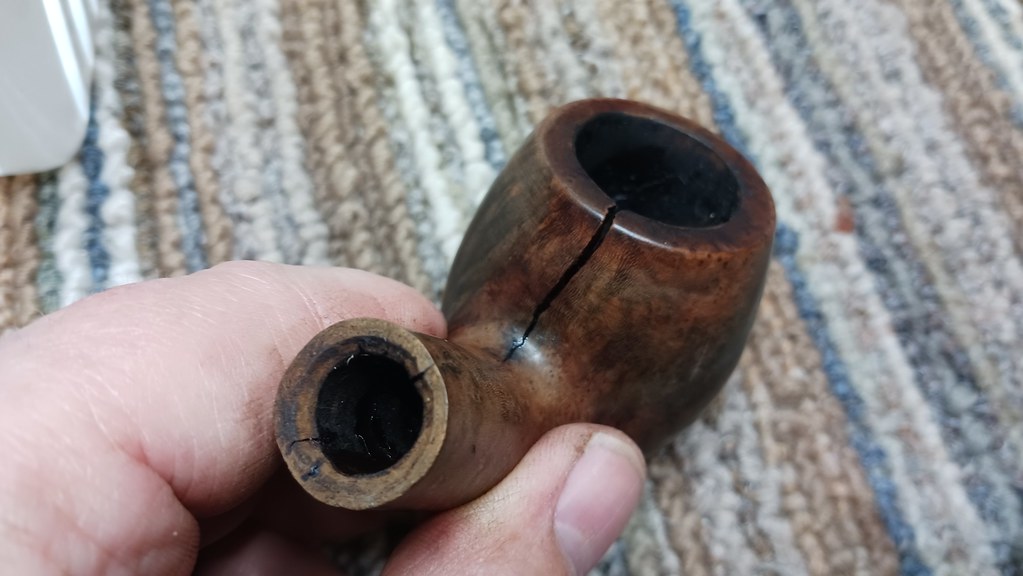
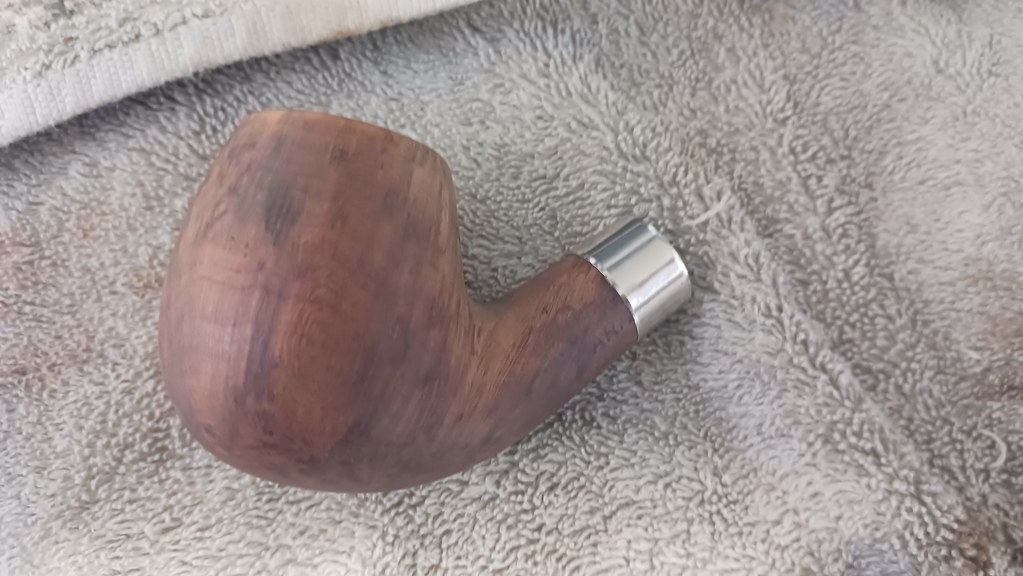
This is the case for this week’s restoration project, and it’s a doozy. I was contacted by the pipe’s long-time steward to see what might be done to save his Peterson Aran 68 Bent Billiard from the dustbin. As you will see from this initial series of pictures, the pipe was in rough shape when it arrived in the shop.
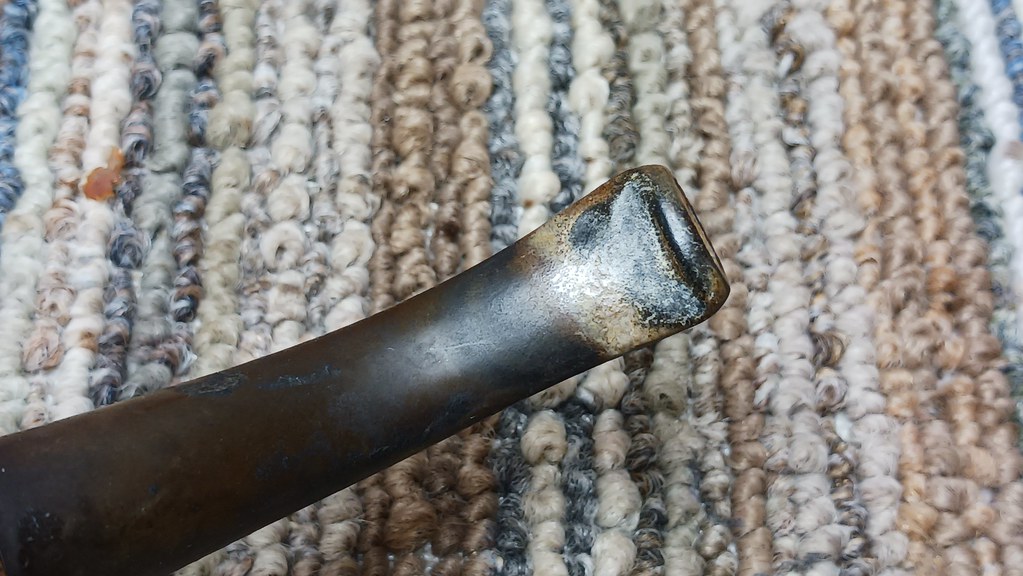
The list of issues was extensive. Besides needing a thorough cleaning, the bowl had a large crack down the rear side reaching from rim to shank. The original stem was oxidized and carried a crust of mineral buildup in the bite zone that did nothing to hide the deep tooth dents that threatened to crush the airway closed. The stem was also very loose in the shank to the point of falling out


These close shots highlight the severity of the crack in the bowl – wide open at the rim and tapering to a hairline crack at the shank. The crack was also packed with carbon cake, dirt and tars, making a visual assessment a little tricky at this stage.
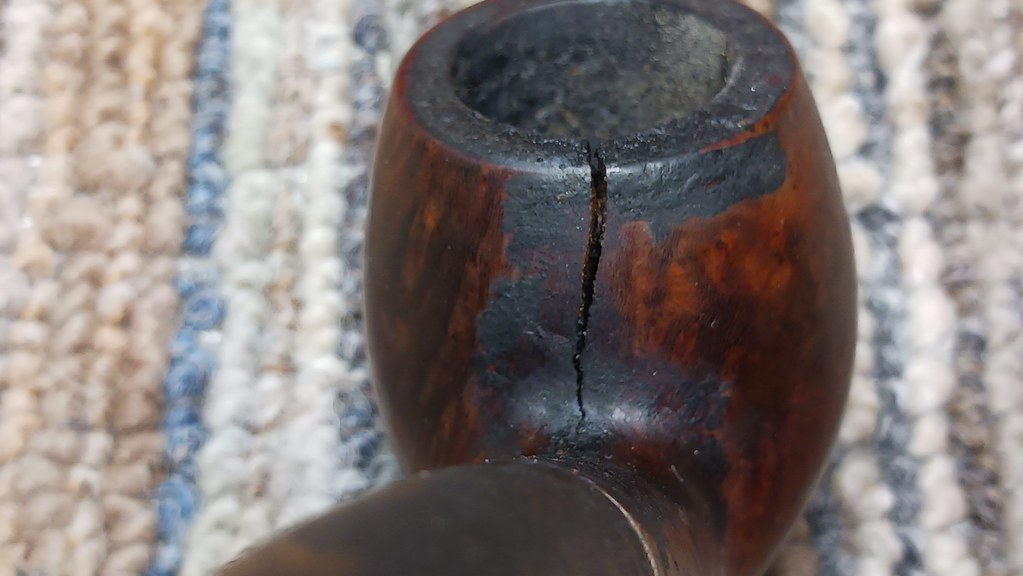
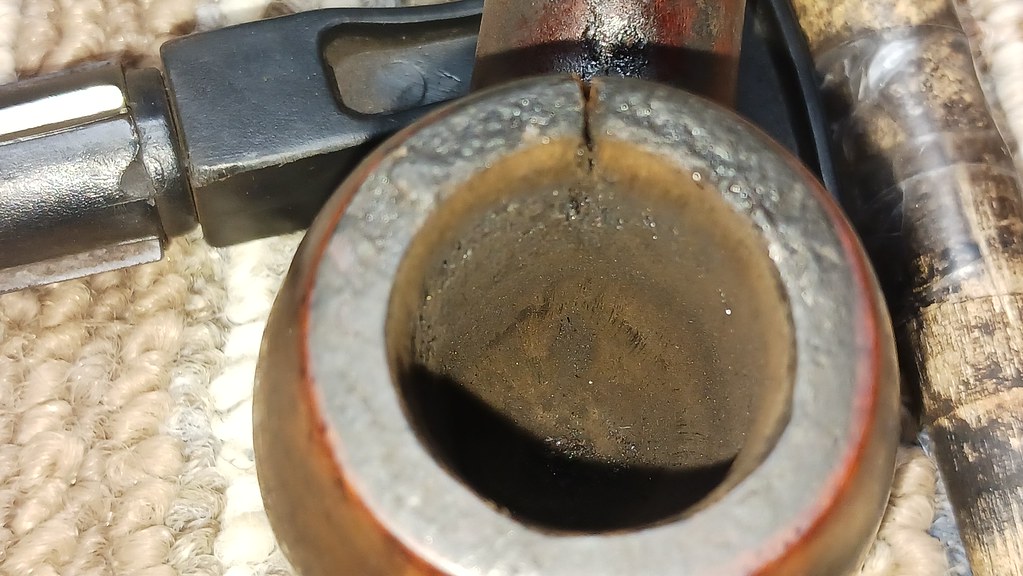
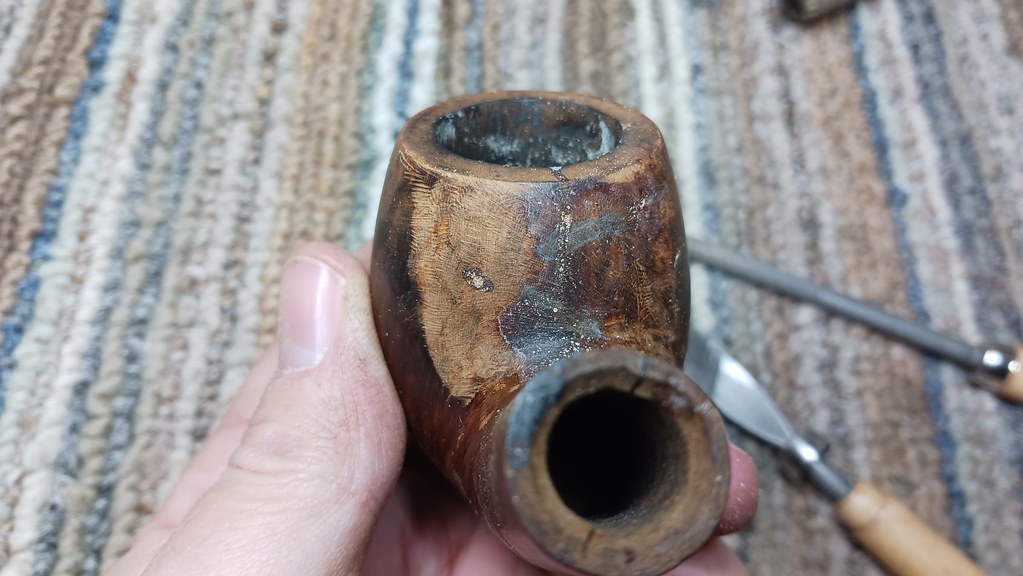
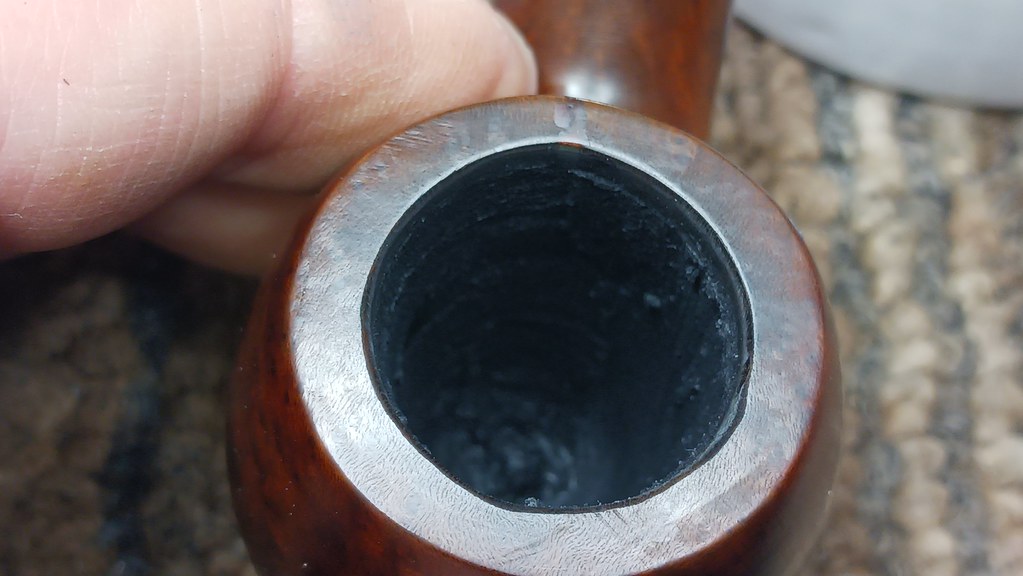
In order to get a proper look at the damaged bowl, I very carefully reamed the chamber of all the old cake. The uneven patch visible in the pic below around the middle of the chamber is scorched briar. I removed enough to see that the crack was open to just past the mid point between rim and draught hole.
After some frank discussion with the pipe’s steward concerning repair options for the pipe, I was given the go-ahead for a complete restoration. On the docket was a good cleaning, pinning the crack to stabilize the briar, complete refinishing of the stummel, a new Vulcanite stem and a shank band to take care of two short cracks responsible for the weak grip of the shank to the stem tenon.
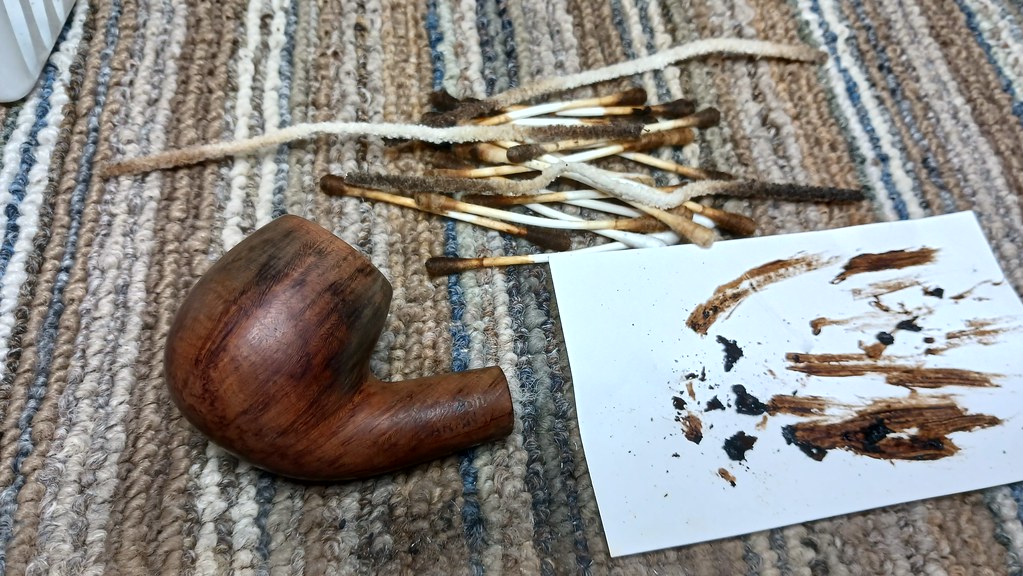
To get the ball rolling on this estate pipe rescue, I wiped the bowl down with 99% isopropyl alcohol on a cotton pad. This started the cleaning process, removing a surprising amount of surface grime.
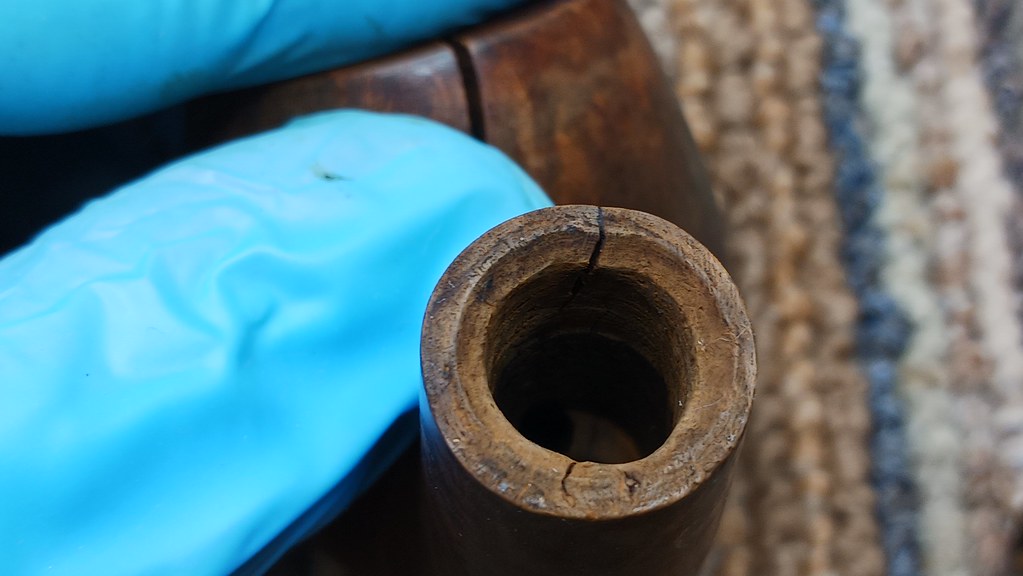
Then I got stuck in cleaning the shank and airway of a sizeable amount of tar, carbon, bits of unburnt tobacco and other goodies. I needed a good pile of pipe cleaners, cotton swabs and more alcohol before the pipe’s internals were clean.
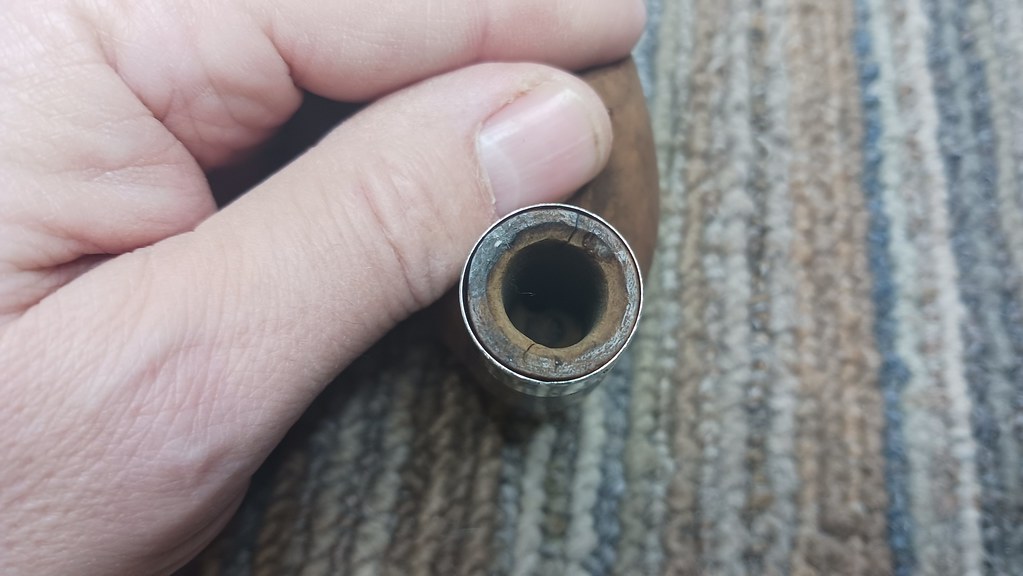
Without the grime in the way, the twin cracks at the shank face were much easier to spot.
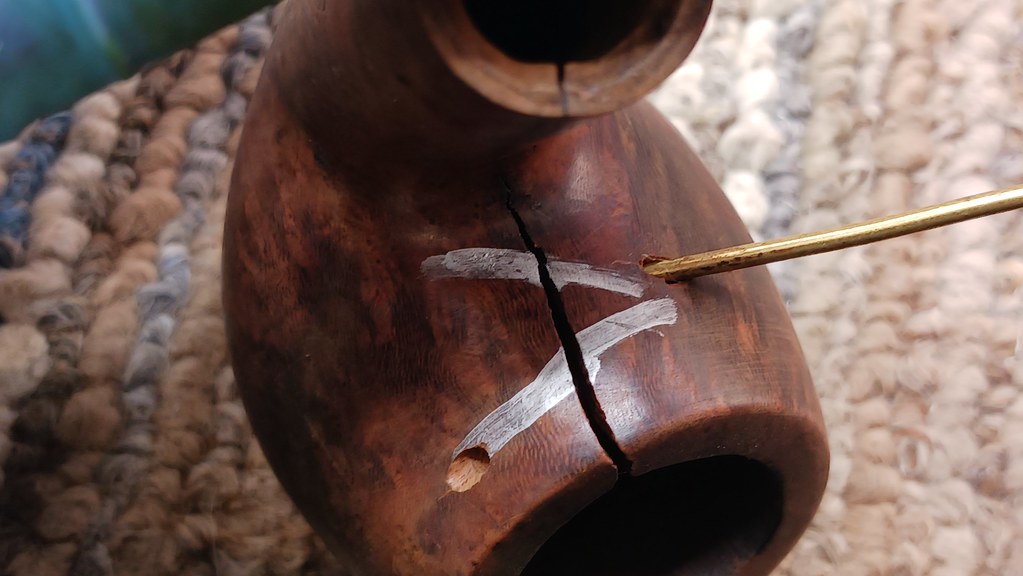
I began structural repairs by installing two metal pins across the crack down the rear face of the bowl. This process begins with laying out on the stummel the location and direction of each pin. The pic below shows this in silver marker. The pin shafts run at opposing angles to better knit the briar back together. If the shafts were drilled parallel to each other, the crack could open up again with the expansion and contraction of the wood during and after a smoke.

I usually aim to use the thinnest metal rod stock possible for the pins to keep the cosmetic work to a minimum, but the size of this crack demanded slightly sterner measures. The rod used here is about 1/16″ in diameter, and I used a corresponding drill bit to bore out the pin shafts.
The shafts are drilled such that the pins, when installed, lie completely within the fabric of the chamber wall. The shafts are drilled blind, meaning there is only one hole to fill after the pins are glued in.

With the pin shafts drilled, I cut the brass rod to length, making sure that it would tuck completely inside the shaft. I did not want to have a brass dot on the outside of the pipe after sanding the repair. I dipped the prepared pins in some thick CA glue and pushed them into the shafts until they were fully seated.

Here is a shot of the pins from the inside of the chamber after gluing them in. The brass is plainly visible where it jumps the gap but the pins will be completely enclosed soon enough.

Now that the briar was shored up, I could start filling both the crack and the holes left from the pining process. For this, I use thick CA glue mixed with briar dust. The patch mix was applied liberally to the damaged areas and allowed to cure.

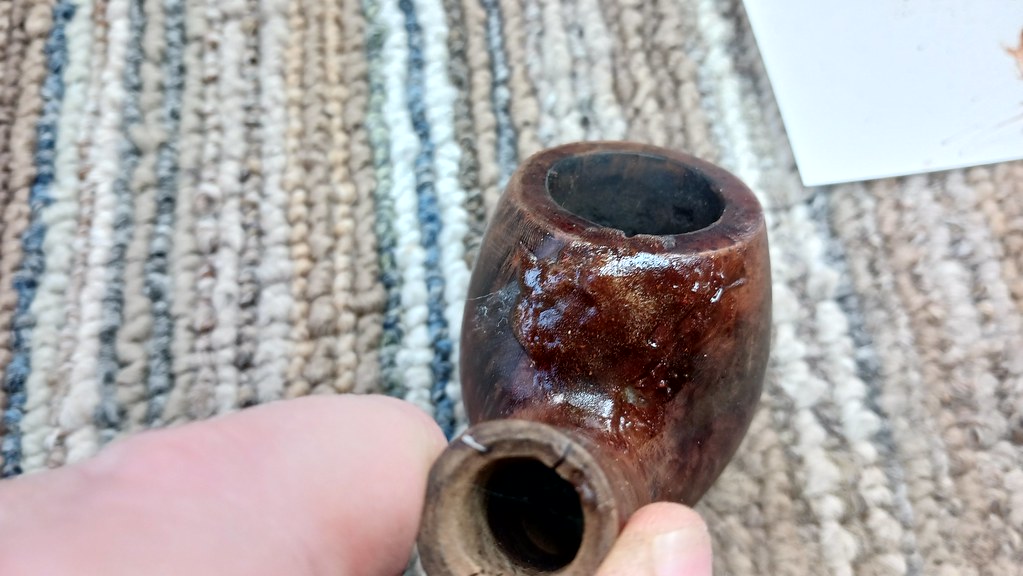
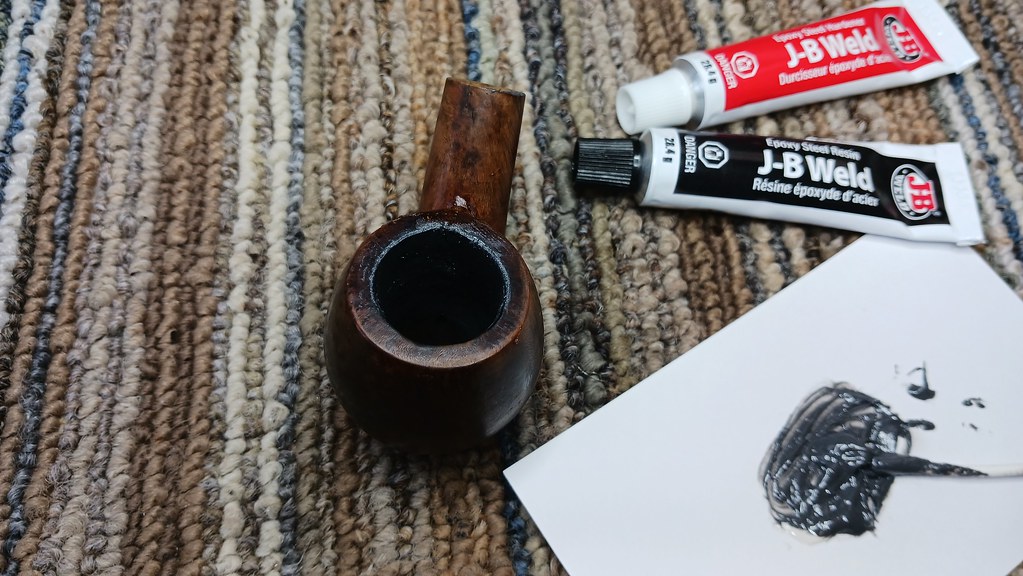
CA glue (CyanoAcrylate, aka Krazy Glue) works very well on the outside of the bowl but should not be used inside the chamber as it can vaporize when exposed to the heat of smouldering tobacco. Instead, I used JB-Weld epoxy to fill the crack on the inside of the bowl. JB Weld is completely inert when cured and can withstand very high heat, making it perfect for this application. After mixing up a batch of epoxy, I pushed it into and over the damaged area inside the bowl using a gloved finger.
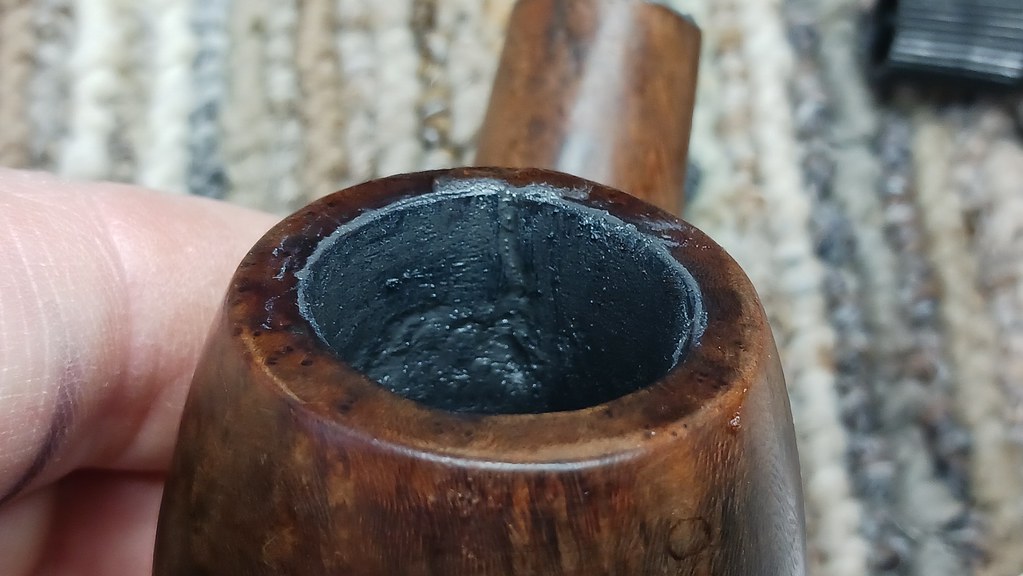
This pic shows the chamber after applying the JB Weld. I left the bowl to sit overnight to give the epoxy time to cure completely before coming back with some coarse sandpaper wrapped around a dowel and removing the excess epoxy, leaving it only inside the crack.
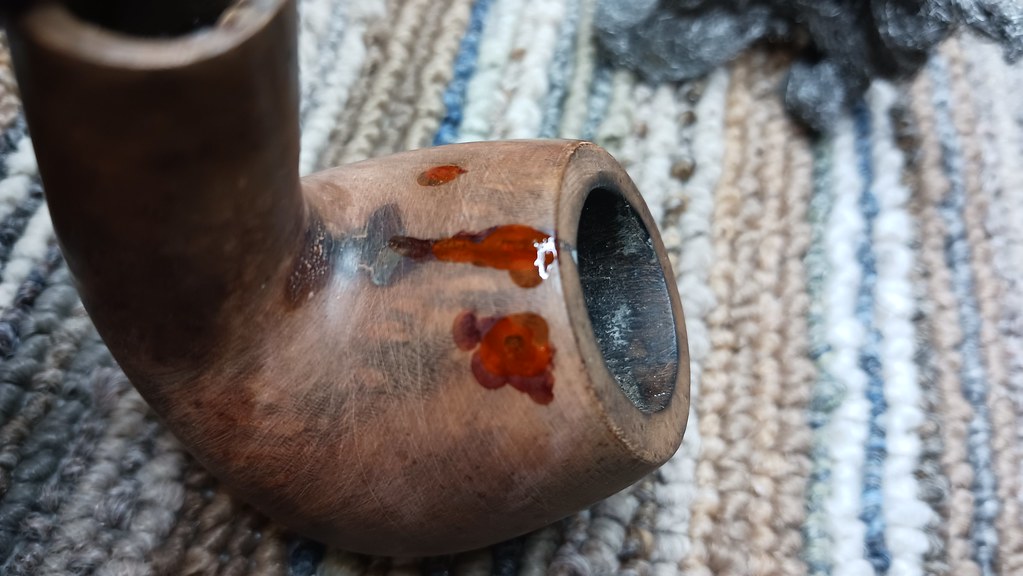
I could also now smooth out the exterior patches using a selection of files and sandpapers. The patch did a good job of filling the damaged briar, but does tend to cure with tiny air bubbles inside it. This can create a honeycomb effect when sanded. To fill in the micro-blemishes, I first coloured the repair with a stain pen before topping it with a layer of thin CA glue.
I again left the stummel to rest as the glue cured, then came back and sanded it smooth again. This pic shows the progress after sanding to 400 grit.

A few small blemishes remained which would be addressed during refinishing. To complete the structural repairs, I installed a nickel shank band to pinch the shank cracks shut and prep the stummel for a new stem.
Installing a shank band is relatively straightforward. After selecting the correct size of band, I slid it part of the way onto the shank. To seat the band fully onto the shank, I heated the band over the heat gun to expand the metal. Once hot, I positioned the shank end flat on the counter top and pushed the band into position, When the band cooled, it reverted to its original size, clamping the shank tightly.
For the record, I did attempt to salvage the original stem using heat to raise the deep tooth dents. In my experience, this works about fifty percent of the time, but the pipe gods had other plans for this Peterson Aran.
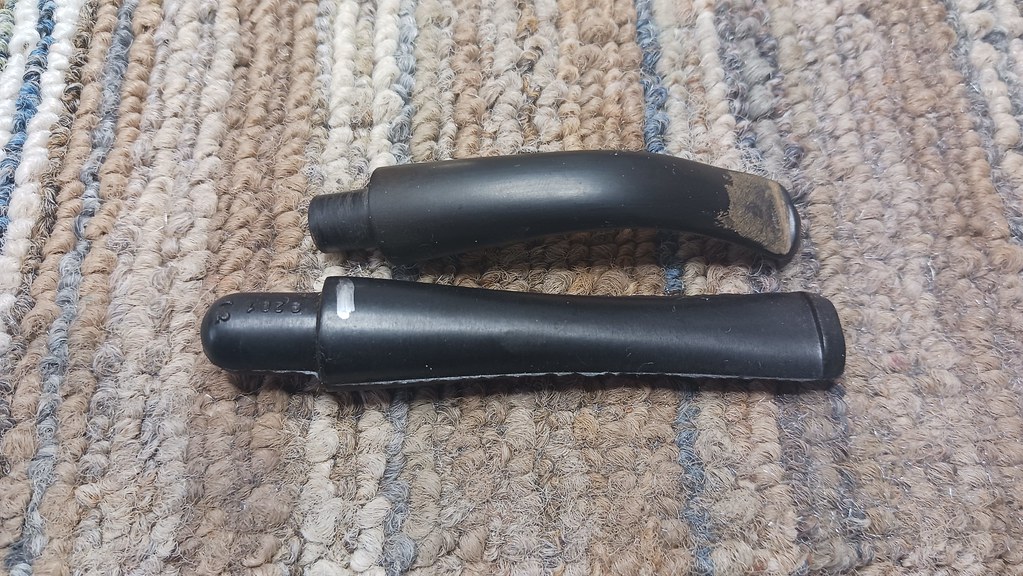
This pic shows the original stem set alongside the new Vulcanite stem blank I selected from my supplies. You can see that I marked the final length on the new stem. I spun the stem in the lathe to remove the excess material and turn the tenon to fit well in the shank mortise.

A test fit told me the tenon was sized correctly, but the stem would need some hand work to knock off the mold marks and smooth the line between shank and stem.

I like to tape off the shank to protect it from errant file strokes during this part of the restoration process. A quick bit of work with file and sandpaper had the stem looking like an integral part of this pipe.

In the home stretch of this lengthy restoration, it was time to refinish the stummel. To recreate the original reddish brown finish of the Peterson Aran line, I applied two coats of stain beginning with a layer of Dark Brown leather dye. I allowed the dye to dry then removed as much of it as I could, leaving the darker colour only in the grain. A top coat of Mahogany dye added the red hues.

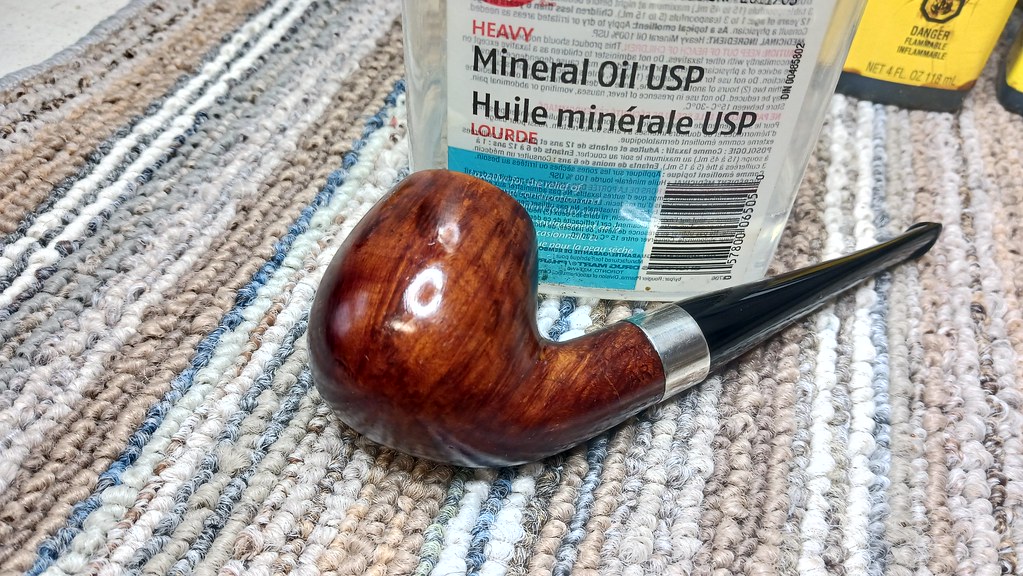
When I was happy with the colours, I wiped the stummel with a bit of mineral oil to both help set the stain and inject some much needed moisture into the briar. I enjoy this part of the restoration as the oil gives a pretty good indication of how the finished pipe will look after final polishing.
Smoothing out the JB Weld in the chamber helped even out the scorched briar somewhat, but I wanted to give the chamber an additional layer of protection with an application of pipe mud. There are many recipes for pipe mud out there, from cigar ash and water to more complex formulas. I have had good results using a roughly 50/50 mixture of activated charcoal powder and Plaster of Paris with just enough water added to form a thick paste.
I again used a gloved finger to apply the pipe mud evenly around the entire chamber to fil the damaged areas and leave a smooth finish.

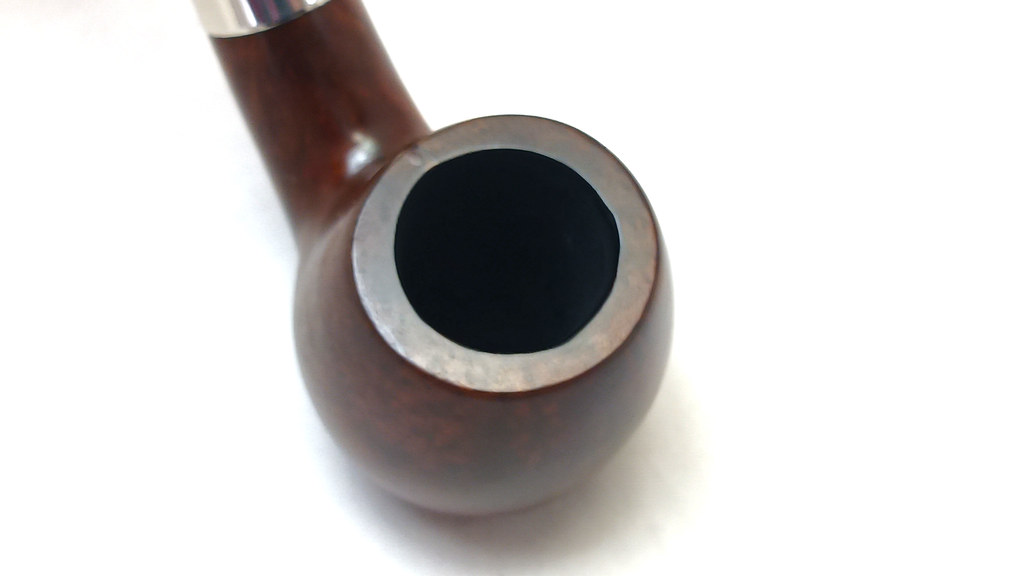
I allowed time for the pipe mud to cure, then smoothed it out with a bit of sandpaper. The pipe could be used as it was at this point, but given the extent of the repairs, I wanted to go one step further and add a bowl coating to finish off the chamber.
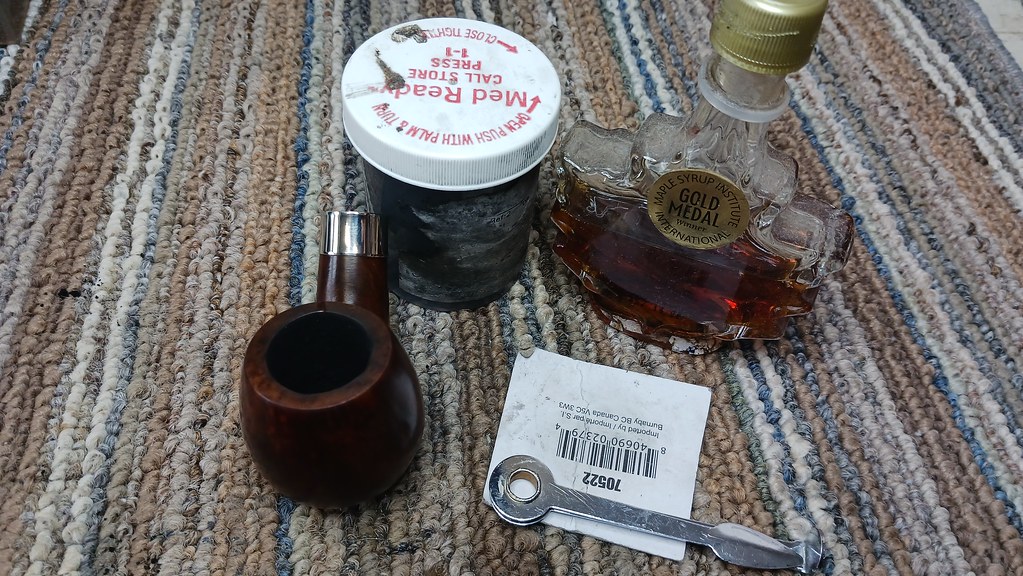
My bowl coating is again a simple formula – a light wipe of maple syrup followed by about a tablespoon of activated charcoal powder. A pipe cleaner in the airway keeps the bowl coating from clogging things up. The square of cardboard was used to cap the bowl so I could shake it vigorously for a few minutes to evenly distribute the charcoal powder around the entire chamber.
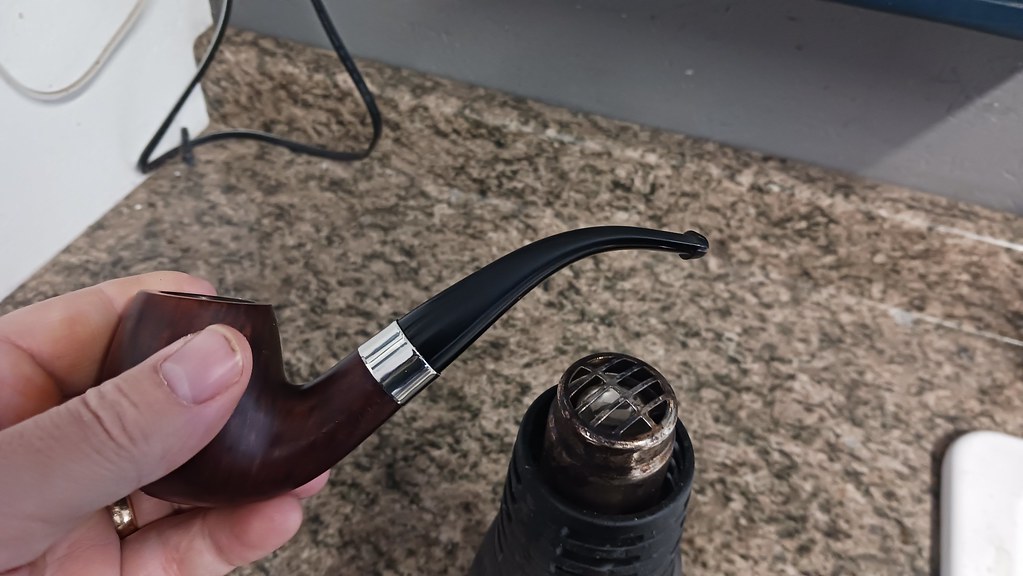
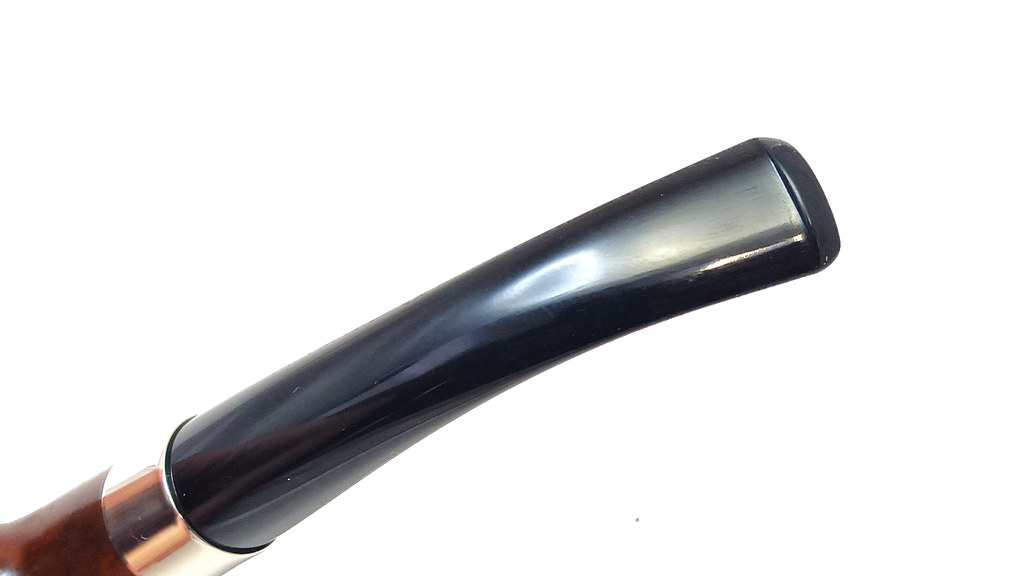
Just before taking the pipe to the buffing wheels, I introduced a bend into the new stem to match that of the original. This is done by warming the stem until the Vulcanite becomes pliable. A pipe cleaner slipped through the stem’s airway before heating (not shown below) helps keep the airway open during the bending process.
Finally, after several days worth of work, the pipe was ready for buffing and polishing. I buffed the pipe with the stem mounted to avoid rounding off the edges of the stem face, polishing away the last of the sanding marks on the Red Tripoli and White Diamond wheels. I finished the restoration by applying several light coats of Carnauba wax to the pipe to add shine and a layer of UV protection.
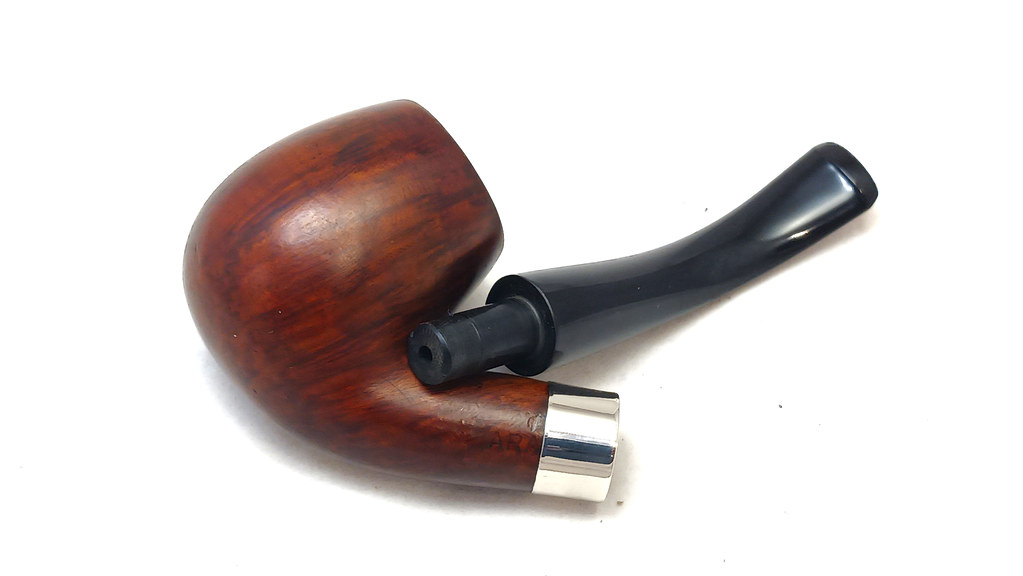
The restored pipe bears very little resemblance to the tired and damaged lump of briar that arrived on the bench earlier in the week. After much work, this well-loved Peterson Aran is once again whole and ready to provide many more years of faithful smoking companionship to its steward.
This project was considerably more complicated than the average repair, but I really enjoyed watching this beloved briar come back to life. Some clients would have retired a pipe in the condition this one was in on arrival, but I’m glad I could postpone that event and return an old friend to useful service for its steward.
Thanks for following along on this marathon restoration. Perhaps it will make you reconsider the fate of your own worse for wear favourite pipes. Until next time, Happy Piping!
Here’s the finished pipe.


Charles – I look forward to Friday mornings with your pipe repair story of the week my first cup of coffee. Of course this morning, the mention of maple syrup gives me a hankering for pancakes.
This is another amazing repair. I do not always comment but you always do a great job.
LikeLiked by 1 person
my man… holy hell what a phenomenally ambitious but successful rescue mission! Never heard of and never would have considered pins for the job. Apparently I have a lot more to learn but grateful for teachers like you, sir. Well done.
LikeLiked by 1 person
Thanks. This was a fairly extreme makeover for sure, but it’s a great example of what can be done to save a much loved pipe.
LikeLike