
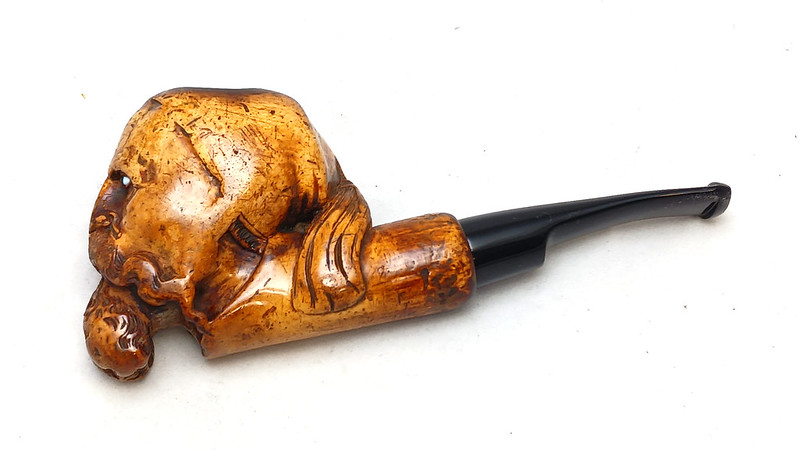
One of the joys of meerschaum is that it is fairly easy to carve and thus meerschaum pipes come in just about every shape imaginable, from basic Billiards to fantastical dragons, castles and more. The carver of today’s estate pipe project took this block of meerschaum in a very different direction – folk art.
The current steward of this rather unsettling looking figural pipe has owned it for about a decade but had never taken the time to have the pipe restored to useful condition; in fact, it spent most of the last ten years sitting on a shelf without a stem. The time had finally come, however, to bring this pipe back to life.
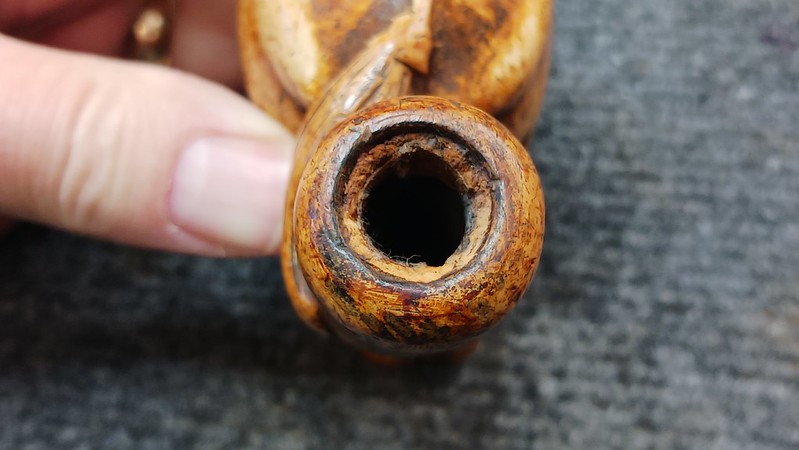
To that end, it was sent in to me at DadsPipes for a general cleanup and a new stem. This series of images shows the stummel as it looked when it first arrived on the workbench. The meerschaum was already showing some dark colouration from years of use. Other signs of heavy use included the myriad small scratches and handling marks covering the surface of the stummel and a crust of carbon around the inner rim of the chamber. What is not easily seen in these images is the thick layer of dirty, greasy wax that covered the meerschaum.


As you can see, the stummel is carved into the likeness of a man’s face, complete with goatee and long flowing moustache. The man’s hair is pulled back into a tight ponytail that drapes over his left shoulder. The arresting part of the carving is the inset eyes, likely made of porcelain. Unlike the meerschaum stummel, the eyes have not coloured with use. The result is a rather stark, creepy stare, one of those that Shaggy and Scooby would swear follow you as you move across the room – zoinks!
There is no maker’s mark of any kind on the pipe, so I am left to conclude that it is a home-made piece, possibly a one-off creation by a folk artist with some carving skills – note the relieved areas between the man’s moustache and neck, for example.
Another possible indication of a DIY carving is the cork lining the pipe’s shank mortise. Most modern meerschaum pipes are fitted with a nylon/Teflon push pull tenon set, while older pipes used a bone screw tenon to attach the stem. More commonly used to hold the meerschaum or porcelain cup in place on a gourd calabash, cork compresses slightly when, in this case, the stem is mounted, gripping the tenon firmly but gently. If the tenon is properly sized, there is minimal outward pressure exerted upon the shank.
This pic shows the cork lining inside the shank. The face end of the cork was a bit chewed up but overall it seemed to be intact. I took this as a good sign, as replacing it would be a task in itself.
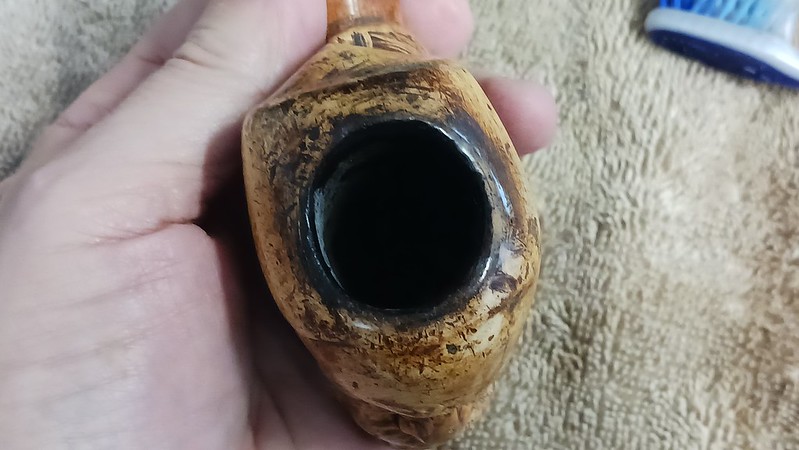
Beginning the cleaning process, I took the stummel to the sink and scrubbed the exterior with a toothbrush dipped in clean water. It doesn’t sound like much, but the damp toothbrush is very good at getting into the nooks and crannies of her carving to loosen and lift away dirt, debris and even some of the old wax jammed into the depressions.


The cleaning helped bring out the details in the carving, but did nothing to improve that unsettling stare!

I also ran a few pipe cleaners dipped in alcohol through the shank and airway, but the pipe proved to have been cleaned fairly recently so I didn’t take any pics of this process. Before I moved on to fitting a stem, I used a cotton swab to apply some petroleum jelly to the cork lining the mortise. The cork absorbs the jelly, becoming softer and more pliable – just what we need to grip a stem tenon securely.
I cut a short section of Delrin rod and brought it to the lathe for drilling and sizing. It took some trial and error to get the tenon to fit snugly without putting too much outward pressure on the old meerschaum, which could split the shank. Eventually, I found the balancing point.

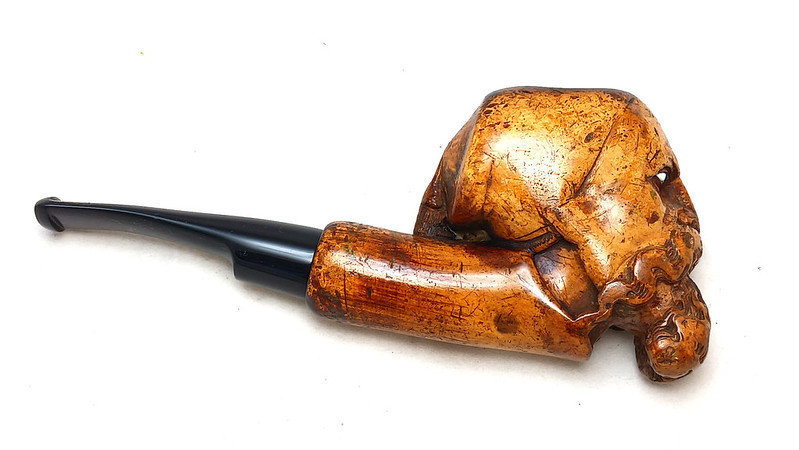
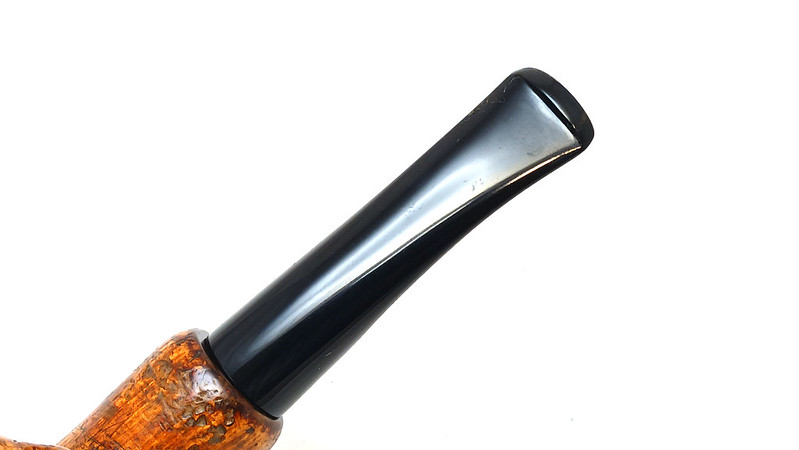
Choosing a new stem took a bit of time. As it makes up half the pipe, stem selection is an important decision and as this stummel arrived without a stem, I had no point of reference for style, shape or size. After a bit of back and forth with the pipe’s steward, a round half-saddle Vulcanite stem blank was chosen to match up with the stummel. It’s a reasonably short stem, but as the shank is fairly long, a shorter stem helps balance both the pipe’s weight and appearance.

To prepare the stem blank for the Delrin tenon, I cut off the existing 9mm tenon and drilled a mortise in the stem face to accept the Delrin with just enough room for epoxy. Delrin is a slippery material, so roughing up the outside of the tenon and the inside of the stem mortise really helps the epoxy grab onto the hold the parts tightly together.

A quick test fit of the new stem, and we’re ready to glue it up. This meer is starting to look like a pipe again!

After applying epoxy to both the tenon and inside the mortise, I slipped the stem onto the tenon and held it in place until the epoxy began to grab. Some masking tape held things in position for the rest of the epoxy’s overnight cure time.

When I came back to the pipe the next day, I twisted the stem out of the shank and chased the airway with a drill bit to remove the excess epoxy. A needle file and some sandpaper removed the casting marks from the stem blank, and after tweaking the button profile and slot slightly, I wet sanded the stem to 2000-grit to prep it for final buffing.
With the stem now ready to go, I prepared the stummel for some fresh beeswax. I picked up a small crockpot a few years back that makes a perfect wax bath for 95% of meerschaum stummels. This large piece just fit into the pot. To prevent wax from getting inside the pipe, I corked both the chamber opening and the shank before popping the stummel into the hot melted beeswax.


I let the stummel soak in the wax for a few minutes, then flipped it over and let it sit again. The idea here is to allow the meerschaum to warm up and absorb as much beeswax as it can hold. The liquified wax penetrates deep into the meerschaum’s porous structure and pulls the much-valued colouration to the surface. A side benefit of the wax bath is that it melts any old wax stuck in the pipe’s finish.
A few turns later when the stummel had taken up as much wax as it could, I fished it out of the crockpot and set it on a towel to cool enough to handle. There was quite a bit of excess wax stuck to the surface of the meerschaum. I used a few cotton swabs to dig out the heavier deposits, then hand buffed the stummel with a soft towel to remove the remaining excess wax and bring up a lustrous shine. The results were quite gratifying.


Just before final buffing, I added a slight bend to the new stem to keep the top of the chamber upright when the pipe is in use. Note the pipe cleaner slipped through the stem’s airway. There is a risk of airway collapse when bending a stem with heat. The pipe cleaner helps to keep the airway round and open while the Vulcanite is soft.

To complete this restoration, I took the new Vulcanite stem to the buffer for a run on the Red Tripoli and White Diamond buffs to erase the sanding scratches and raise the shine. A few light coats of Carnauba wax added more shine and a layer of UV protection for the new stem.
The completed pipe is just as attention-grabbing as the stummel was on its own – I swear this thing was watching me during the entire process – but it is now clean, fresh, waxed and ready to be put back into service by its steward. I hope it provides him many hours of smoking companionship in the decades to come.
Thanks for joining me for this interesting meerschaum restoration. I hope you enjoyed the journey. Until next time, Happy Piping! Here’s the finished pipe.


Beautiful job! And that stare – wow …
LikeLiked by 2 people
Wow ! Always great to see your work. R
LikeLiked by 1 person
Love the Scooby Doo reference. I knew exactly what you meant.
You spent more time with this up close and personal, but rather than a man with a ponytail, it looked to me like a Zouave wearing their distinctive cap with its tassel. I found another example of a similar pipe (click the link). Do you know anything about the age of the pipe?
Beautiful job as always.
LikeLike
Interesting comparison between those pipes. Unfortunately I don’t know the history of the pipe I worked on outside of the little details included in the blog. The piece has some age to it – meerschaum doesn’t get that colour on its own, after all – but exactly how much age is hard to determine.
LikeLike
Sorry, here’s the link. https://www.worthpoint.com/worthopedia/well-carved-zouave-french-soldier-464779691
LikeLike