
I had a bit of down time in the shop over the Christmas holidays so I decided to have a bit of fun working up a stray stummel and a few other parts into a FrankenPipe. I first came across this term on Steve Laug’s seminal pipe restoration site RebornPipes, used to indicate a functional smoking pipe made from the cast off parts of less fortunate estate pipes, much like Dr Frankenstein used a collection of mismatched human remains to create his infamous Monster.
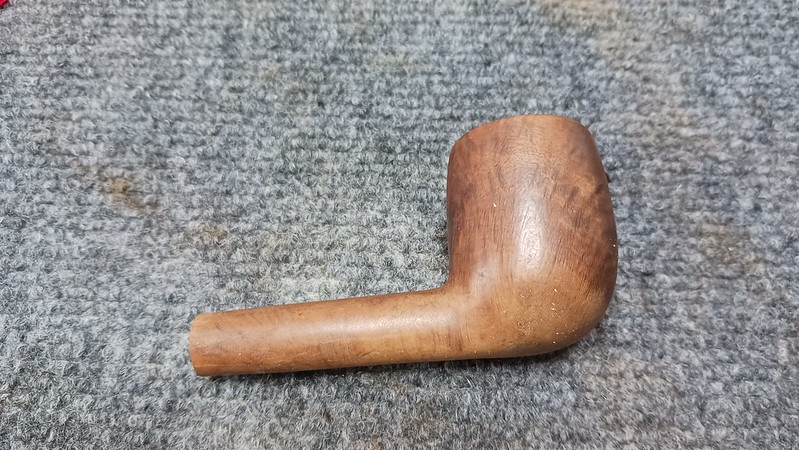
Just about every pipe repair shop has a bin, box or coffee can of used parts that might someday prove useful, or even essential, in the restoration of an estate pipe – everything from burned out stummels and assorted aluminum stingers to salvaged bone screw tenons and vintage stems. After a dig through my own little stockpile of random parts, I came up with a somewhat less than glamourous Hardcastle’s Reject stummel that I thought I could do something with.
This series of images shows the condition of the briar in its as-found state. The original stain had worn off the bottom third or so of the bowl and most of the shank, but the major issue with the stummel was the rim, which was mostly hidden under a layer of carbon “lava”, though a scorch mark at the 7 o’clock position was clearly visible. The inner rim of the chamber was also noticeably out of round.

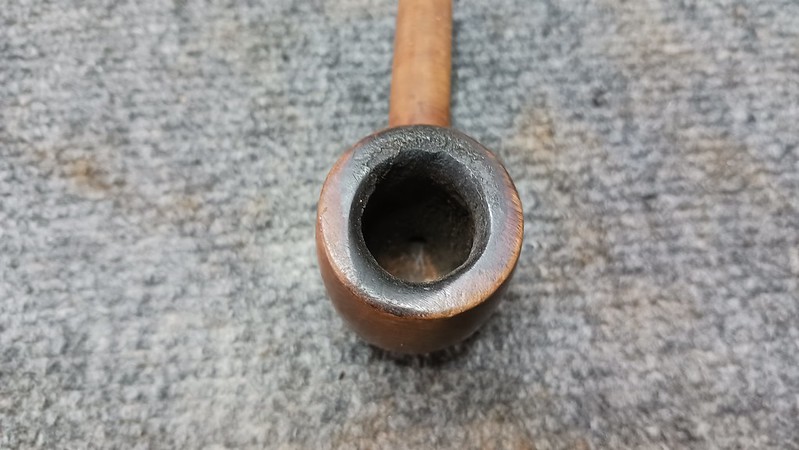

The only marking on the pipe was on the left side of the shank. Though worn, it reads “Hardcastle’s” over “London Made”. Across the entire stamp is a diagonal “REJECT” stamp in block letters, which indicates that the stummel did not make the grade when inspected at the Hardcastle’s factory, perhaps due to the small occlusion partially obscured by the stamp.

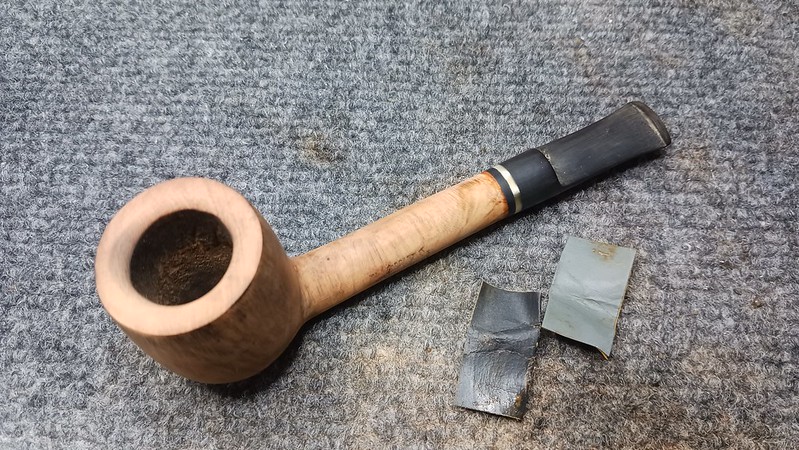
As with every other estate pipe project, I started this one by reaming the chamber of old carbon cake and inspecting for damages inside the chamber. The next two pictures show the chamber before and after reaming. I was pleasantly surprised to see that the briar was in very good shape under the cake.


With no structural issues inside the pipe to deal with, I moved on to rehabilitating the rim, starting with a light topping of the bowl to remove the carbon accretion and assess the briar underneath.

This shot shows just how out of round the rim was due to the scorching of the briar on the right front edge. This type of damage is fairly common on well used pipes, the result of the pipe smoker lighting the pipe from the same position repeatedly.

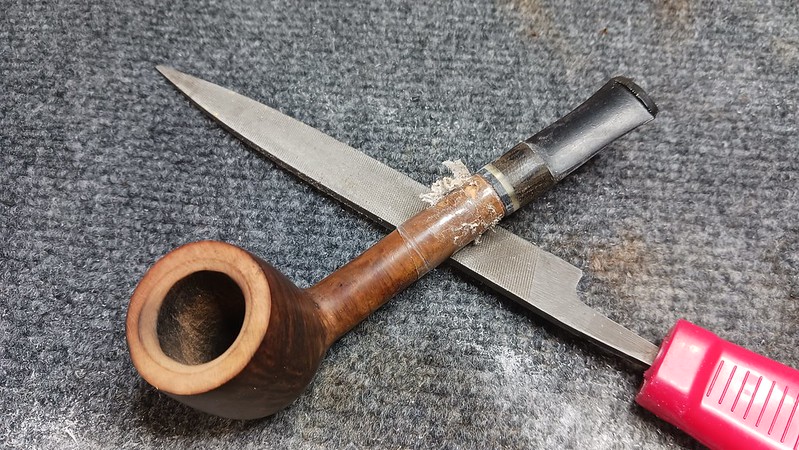
To remove the damaged and scorched briar, I sanded an even bevel into the inner rim with a scrap of 220 grit sandpaper. This took just a moment, but I think you’ll agree that the results are well worth it.

Moving from the exterior to the interior of the stummel, I ran a few pipe cleaners and cotton swabs dipped in 99% isopropyl alcohol through the shank and airway. Here again I was pleasantly surprised to find the internals to be rather clean, so much so that I forgot to take a picture – oops!
Of course a stummel is only half of a pipe. I would need to fit a stem to make this FrankenPipe complete, and Step 1 was to assess the mortise. A close examination uncovered a few dings here and there on the shank face that would make fitting a stem difficult, so I took the stummel back to the topping board and re-faced the shank end to remove the dents and square things up.

With the briar prepped, I went to the lathe and made up a tenon from a bit of Delrin rod stock. After turning the shank end of the tenon to achieve a “snug but not too snug” fit, I drilled a 1/8th inch started airway through the rod and added a countersink to the end to improve airflow from the shank to the stem.


The stem end of the tenon also needed some attention. Using my tenon turning tool I reduced the diameter of the Delrin to just under 7mm. An added bonus of using the tenon turning tool is that by touching the cutting head to the end of the shank, the tool will shave off a small amount of briar, ensuring that the shank is nicely squared to the tenon. This isn’t something I would recommend doing on a more valuable piece, but there really aren’t any rules when making a FrankenPipe.

Here is a shot of the shank and tenon from the end after using the tenon turning tool. The tenon is uniformly round and the shoulder where it steps up to the larger shank mortise diameter is exactly in line with the end of the shank.

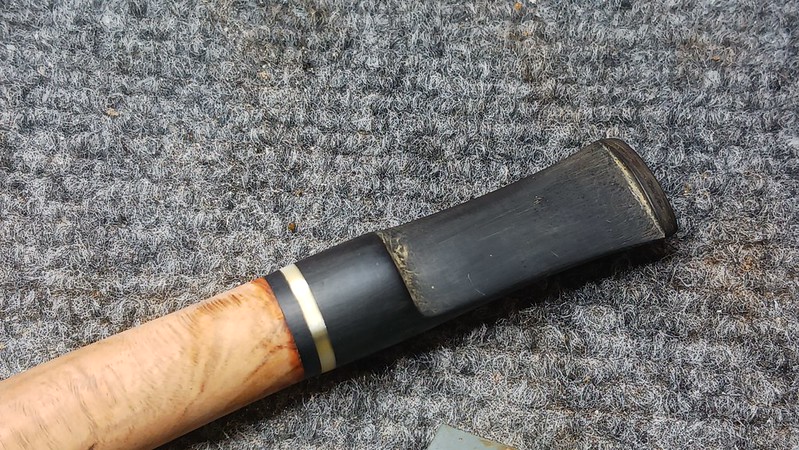
Then it was time to work up the new stem. I selected a short round saddle stem from my supplies to make this old stummel into a Lovat. To add a bit of interest, I added two trim rings to the stem made from offcuts of gold swirl acrylic and black Ebonite. My picture of the separate parts went AWOL somehow, but the layers are clearly visible in this shot of the pipe taken after using a bit of epoxy to glue the whole assembly together.

I let the pipe rest overnight to give the epoxy time to cure completely, then twisted the new stem off of the shank and chased the airway with a drill bit to clear the excess glue and open up the airway.

Before filing the trim rings to size, I added a protective layer of clear hockey tape to the shank. As you can see in this pic, the tape came in handy to keep the file away from the briar.
With the stem roughly sized to the shank, I moved from files to sandpaper to further refine the shape of the new Lovat. As shown in this pic, I also lightly sanded the stummel to remove the old finish and even out the colour of the briar.
As this FrankenPipe had moved significantly away from the Hardcastle’s stummel it had begun life as, the factory stamp had to go, so I used a small round carving burr in my rotary tool to rusticate the stummel. Note the clear hockey tape protecting the new stem and the rim of the pipe, which I chose to leave smooth.

Just as it probably did for Hardcastle’s, that small natural flaw on the shank came back to haunt me. I had hoped that it would disappear after rusticating the briar, but I didn’t get that lucky. The pit extended deeper into the shank. To firm up the potential weak spot, I drop filled the flaw with some clear CA glue and retouched the area with the carving burr after the glue had cured.


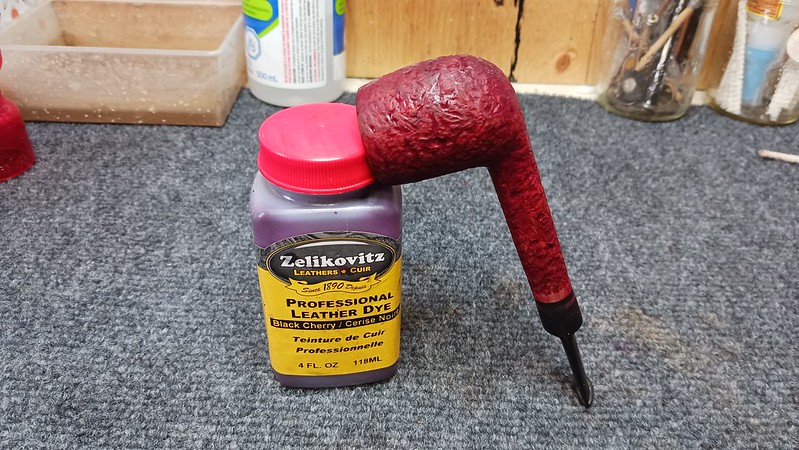
Departing further from the pipe’s original look, I chose to stain this one with a healthy hit of Black Cherry leather dye. I use water-based dyes for simple cleanup, so I applied the colour and let the stummel sit until the dye had dried. After a quick hand buffing to remove the excess solids form the surface, I followed the dye coat with a wipe of mineral oil to help set the colour and inject some much needed moisture into the briar.

I let the oil sit on the briar for a few minutes before again hand buffing with a towel to remove the excess. Then the pipe was set aside again to rest overnight to allow the wood to find its new equilibrium before final buffing and polishing.
I gave the pipe a light run on the Red Tripoli and White Diamond wheels, treading lightly on the rusticated sections and more heavily on the smooth aeras and stem to bring up the shine. A light coat of Carnauba wax finished off this project.
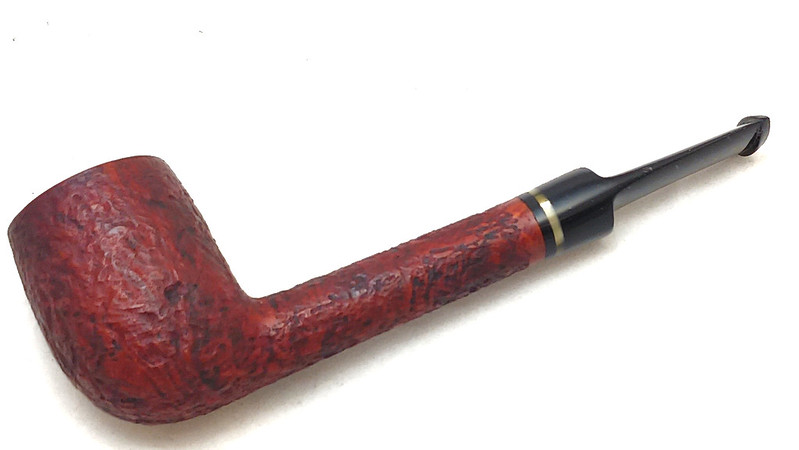
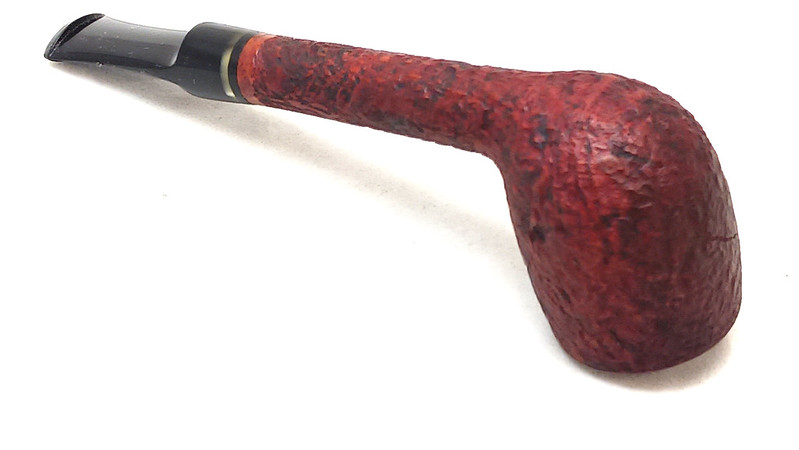
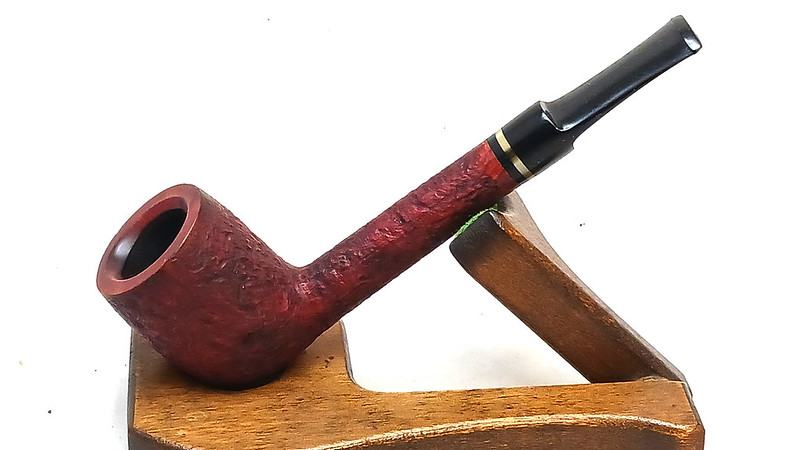
The finished FrankenPipe bears little resemblance to the Hardcastle’s Reject stummel it started as. Gone is the heat damage and faded finish, replaced by a beveled rim and a lightly rusticated exterior. I enjoy these little projects. There is very little intrinsic value here, but as the pipe is likely to be used around the shop and yard, that’s just fine with me. A FrankenPipe project also provides the freedom to experiment with shapes, colours and techniques before using them on a more expensive pipe. If you haven’t tried one yourself, I highly encourage you to do so. Who knows – you may end up creating your next favourite pipe!
Thanks for joining me for this fun New Year’s project. Until next time, Happy Piping!
Here’s the finished pipe.


What great rebuild, Charles! That leather stain created a great looking pipe. Well done.
LikeLiked by 1 person
Thanks Dennis. Leather dyes are the way to go for pipes. Readily available in both alcohol and water based formulas and can be mixed to create custom shades. 👍
LikeLike
Wow! What transformation! Too bad I didn’t read this blog before coming down with my pipe. I’d have liked to see the Frankenpipe in hand.
LikeLiked by 1 person
Thanks, Marlowe! This was a fun little project. 😁
LikeLike
Charles, your Frankenpipe is beautiful! The stain, rustication, and stem are perfect. All combined to make a great looking pipe. Thanks for sharing this project with us.
LikeLiked by 1 person
Thanks very much, Dave!
LikeLike