
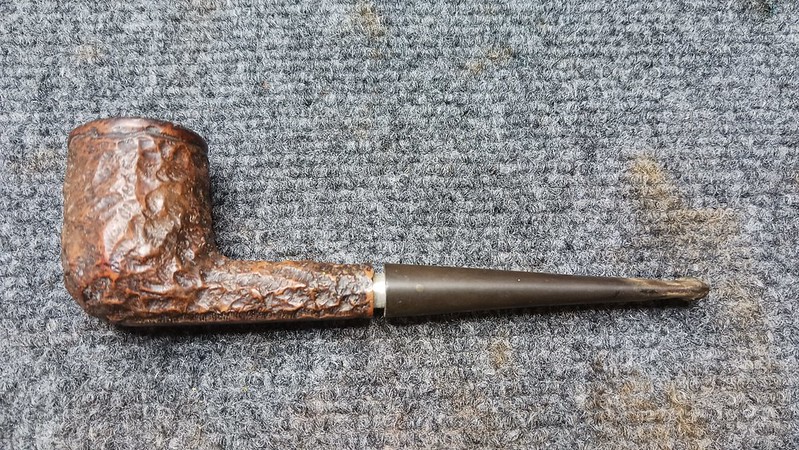
Over the years, I have worked on many older pipes passed down from one generation to the next. For their stewards, these pipes are tangible links to the past, evoking memories of significant people, places and events in their lives. The pipe on the bench today is just such a pipe, this time in the form of a Brigham Standard (1-Dot) Billiard originally owned by the current steward’s grandfather.
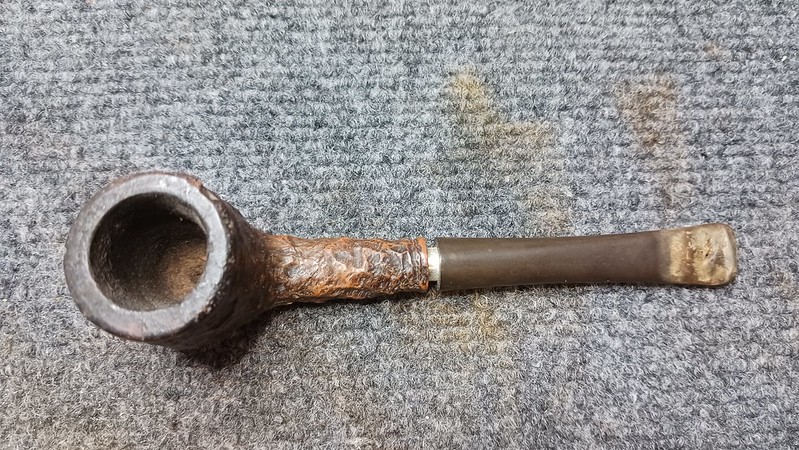
As this series of pics shows, the pipe had been well used over its career, and showed the telltale signs – a worn finish, dented and damaged briar on the rim, and a pair of impressive tooth dents on the oxidizes stem. The stem fit would also need addressing as the stem sat about 3/16″ out from the shank face.


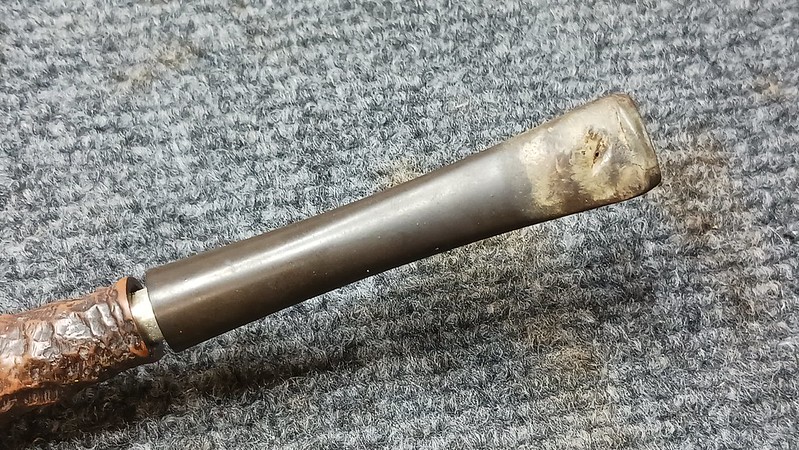

The aluminum tenon/filter holder on the stem was in excellent condition for its age, with just a bit of surface oxidation to contend with.

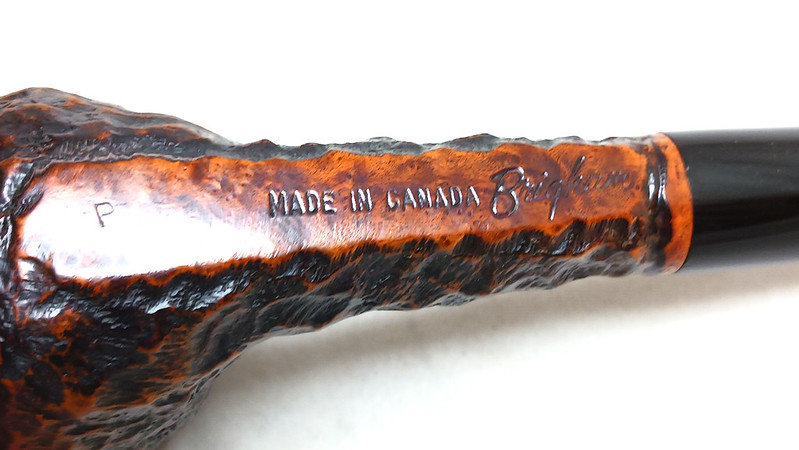
The smooth underside of the shank is stamped “MADE IN CANADA” and “Brigham”. This tells me that the pipe was made by Brigham Pipes in Toronto between 1955 and about 1969, the production period immediately following Brigham’s Patent Era.

Interestingly, the pipe is missing the traditional Brigham 3-digit shape code stamp; instead, it is marked with a “P”. This indicates a “promotional” pipe , aka one that does not fit the standard specifications of a regular production pipe, often due to the use of a slightly undersized briar block. In the case of this pipe, I suspect the shortfall was the length of the shank, which seems slightly curtailed to my eye.

The truncated shank theory gained a bit of ground when I took a closer look at the stem. This shot, taken looking down the stem from the tenon end, shows the remains of a filter of some sort lodged in the airway.

I managed to push the blockage out of the stem using a combination of a pipe cleaner and a length of brass rod. When unrolled, the “filter” turned out to be made from a scrap of what looked like industrial paper towel. Perhaps the original steward found it difficult to fit a standard Brigham Rock Maple filter in the stem and resorted to a more homegrown solution?


After discussions with the pipe’s new caretaker, it became clear that this project would be treading the line between restoration and preservation. The pipe would be smoked so it would need to be structurally sound, cleaned and sanitized but I was also tasked with preserving the vintage character of this family heirloom that made it distinctly “Grampa’s Pipe”.
This dichotomy created a slight problem. If the pipe’s new steward wanted to smoke the pipe regularly, it would need some stem work (the tooth dent on the upper bite surface had gone deep enough to poke a pinhole into the airway), but those same tooth dents were part of the distinct character of Grampa’s Pipe. The solution was to fit a second. structurally sound stem to the pipe for regular use while cleaning and preserving the original stem for display.
As many of you know, I hold on to just about everything and over the years I have built a small stock of vintage Brigham stems in various states of repair. A dig through the pile produced exactly what I was after – a straight Brigham System stem, pinned with a single brass Dot, with an aluminum tenon the same length as the original stem. The “new” stem, however, was in near-new condition under a layer of dirt, with no tooth damage or structural issues.
This pic shows both stems, with the original stem under the selected replacement – about as perfect a match as I could hope for!

Before I could start to fit the replacement stem to the shank, however, the pipe needed a good cleaning. I started by reaming the chamber of a light amount of old carbon cake. Apart from some scrapes on the chamber floor, the briar under the cake was in very good condition.

A brass bristled brush removed the carbon “lava” from the rim, bringing into focus a fair few dents, dings ands scratches. You can also see that the inner rim has sustained some damage as well. The decision was taken to smooth out the worst of the damage but leave the larger dents intact – splitting the difference between preservation and restoration.

A quick spin on the topping board with some 800-grit sandpaper made short work of the light scratches


Then it was time to deal with the stummel’s internals. Surprisingly, the pipe was rather clean already. It only took a few cotton swabs and pipe cleaners dipped in 99% isopropyl alcohol to clear out the remaining tars. I did find the typical buildup of tars at the end of the mortise, which was partly responsible for the poor fit of the stem to the shank. I used an appropriately sized drill bit, turned by hand, to remove this buildup and also deepen the mortise by a hair to allow the pipe to accept a full-sized Rock Maple filter.

With the internals clean, I moved to the exterior, scrubbing the briar with Murphy’s Oil Soap and a toothbrush to remove decades of oil, dust and old wax from the rusticated finish.

After rinsing and drying the briar, I found several deeper pits in the rustication packed full with wax. Thankfully these surrendered easily enough to a dental pick.

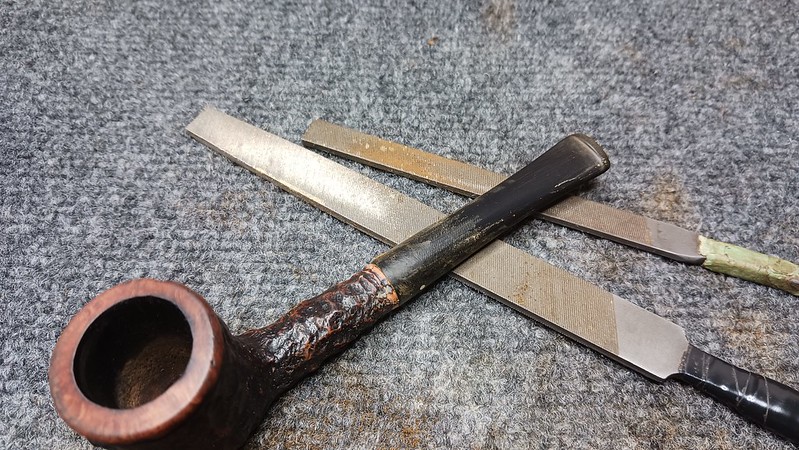
With the cleaning complete, I could finally test fit the new stem. Here again the Pipe Gods smiled on me and the vintage replacement stem fit very nicely, seating flush against the shank face. As you can see in the second pic below, the new stem was slightly larger in diameter than the shank. It would need a bit of attention with files and sandpapers to get it just right.


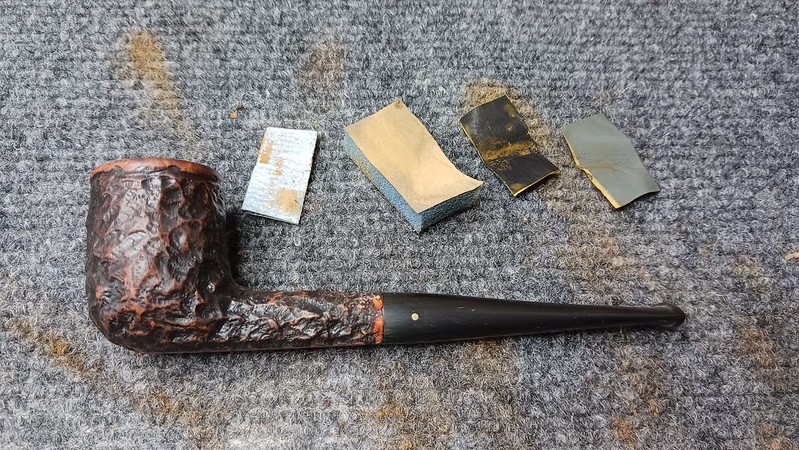
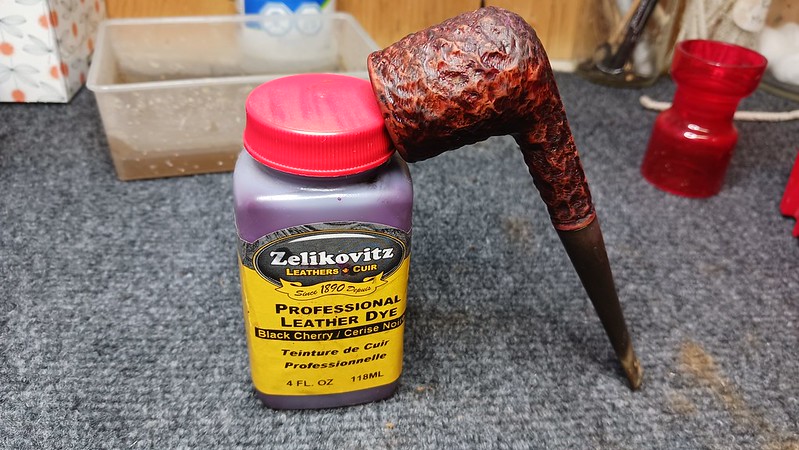
To restore the pipe’s original finish, I first applied a coat of Black Cherry leather dye as a base coat, followed by a top coat of black dye when the base coat had dried.

I let the black dye coat dry, then carefully removed it from the rim and the smooth portion of the shank to allow the red undercoat to show. A wipe with mineral oil helped to set the new finish and inject a bit of moisture into the old briar.

All that was left at this point was to take the refreshed pipe to the buffer for a run on the Red Tripoli and White Diamond wheels, followed by a few light coats of Carnauba wax, taking care not to jam excess wax into the rustication. I also cleaned the internals and buffed the oxidation from the old stem in preparation for its new life as a display stem.
The finished pipe is a nice balance between old and new. Clean, fresh and ready to enjoy, the refinished briar looks great and along with the “new” vintage stem, this 1950s/60s Brigham promotional pipe is ready to serve its steward for another lifetime. At the same time, the original stem maintains the essential tangible link to the steward’s grandfather. May it evoke beautiful memories with each bowl.
Thanks for following along with this interesting estate pipe project. I think those of us fortunate enough to have heirloom pipes in our collections or rotations will appreciate the delicate balance struck here between restoration and preservation.
Until next time, Happy Piping! Here’s the finished pipe.


Charles, do you normally apply mineral oil over a fresh dye? Great job, grandpa’s pipe looks like new.
LikeLiked by 1 person
The water-based dyes that I use seem to benefit from the oil, and it makes the briar look great. The time between dye and oil can vary but as long as the dye is dry I don’t have any issues.
LikeLiked by 1 person
I use aniline dyes, and will have to to give it a try when I’m doing a dye wash and not flaming.
LikeLiked by 1 person
Thanks Charles. I enjoyed reading this. I’ve been smoking Brigham’s for fifty years. Back when they had a fully operational shop, I would take the odd pipe back to them to be refurbished. It looks to me like you did as good a job at that as they did.
LikeLiked by 1 person
Thanks, Lowell. I do have a soft spot for these old Brigham pipes!
LikeLike