
In modern times it would be difficult to think of anything that has benefitted the pipe smoking community more than the advent of the internet. Indeed, while there has been a pipe renaissance of sorts over the last five years or so, the number of pipe smokers and collectors remains a relatively tiny percentage of the global population. We come together online through various internet forums, order pipes and tobaccos through online vendors and seek out help with repairs in the same manner.
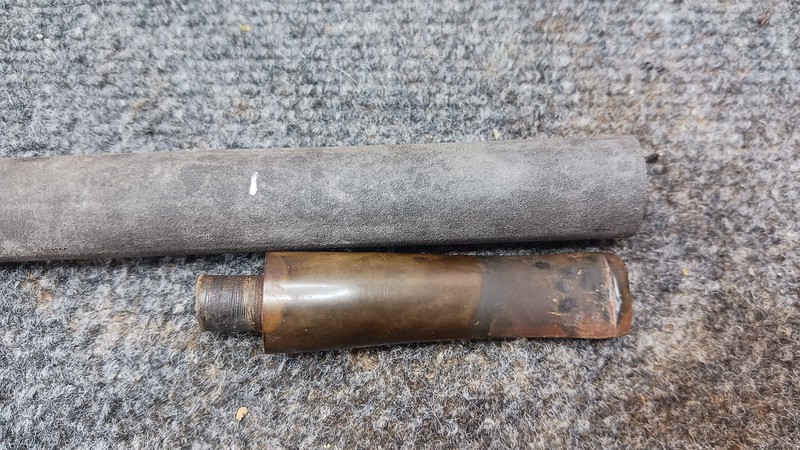
As an example, I likely would not have had the opportunity to work on today’s pipe, a 1968 Dunhill LB Root Briar, without the power of the internet. It was made in England and sent to me in Canada by an American gentleman living in Sweden. A birth-year Dunhill is a great first estate pipe by any account, but like most estate pieces, the pipe needed some TLC. As this short series of images shows, the pipe arrived, like many estate pipes, looking just a little unloved.
The rim was hidden under a thin crust of carbon “lava”, the bowl was dirty and greasy feeling in the hand, and the stem was likewise dirty, oxidized and carried a patch of white-ish mineral buildup in the bite zone. There was also something wonky about the shank to stem fit – the stem face would not sit flat against the shank. This, and the lack of the iconic Dunhill White Spot, identified the stem as a replacement.


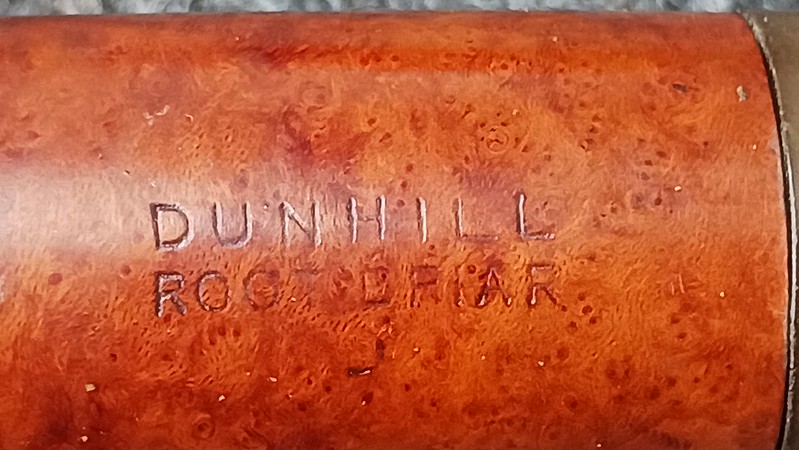
The stamps were all fairly worn but still readable under good light. On the left shank, the pipe is marked “LB” (the old shape code for a Large Billiard) then “F/T” (indicating a Fishtail stem) followed by “Dunhill” over “Root Briar”.

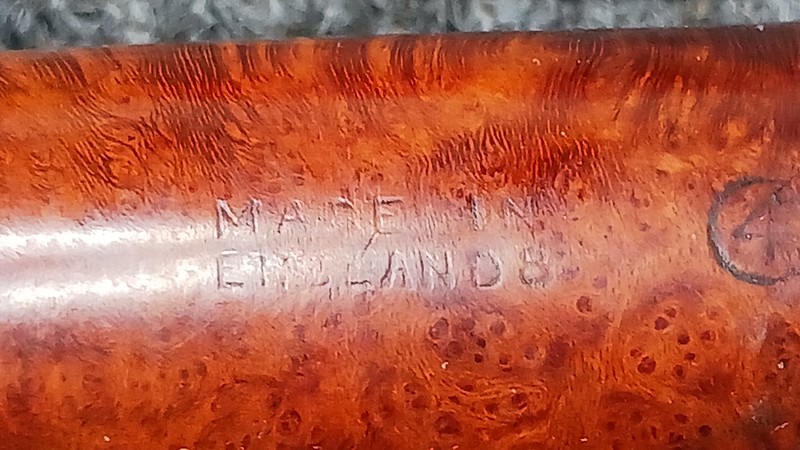
On the right shank appear the stamps “Made In” over “England8” followed by an encircled “4” and the letter “R”. The “8” after the D in “England” dates the pipe to 1968, while the encircled “4” indicates a Group 4 bowl size while the “R” stands for Root Briar.

After a bit of back and forth over email with the pipe’s new steward, the restoration brief was nailed down to include a good cleaning and sanitizing of the stummel and a new hand cut Ebonite stem, complete with the missing White Spot. As always, I started by reaming the old carbon cake from the chamber using my reamer set and a bit of sandpaper wrapped around a dowel to tidy things up.

There is an adage in the world of restoration to undertake any work using the least invasive techniques possible to get the job done. An overly-aggressive approach can lead to unintended damage so rather than using the topping board to quickly clear the lava crust from the rim, I spent about 15 minutes removing the carbon buildup with a few cotton swabs wetted by good old saliva. It sounds a bit gross, but human saliva contains natural enzymes that gently but effectively break down quite a range of compounds without removing the original finish from the briar.
In the pic you can see that the lava crust is gone, revealing a number of small dents in the rear rim, most likely the result of careless dottle-knocking. The pipe’s steward elected not to have these marks sanded out but left as found as a testament to the pipe’s long history.

The stummel’s internals were actually quite clean. It only took a few pipe cleaners and cotton swabs dipped in 99% isopropyl alcohol to clear out a small amount of old tars and debris from the shank and airway.

I completed the basic cleanup by scrubbing the exterior of the briar with Murphy’s Oil Soap and a toothbrush. This lifted away decades of dust, dirt, grease and old wax, leaving the briar fresh and clean.

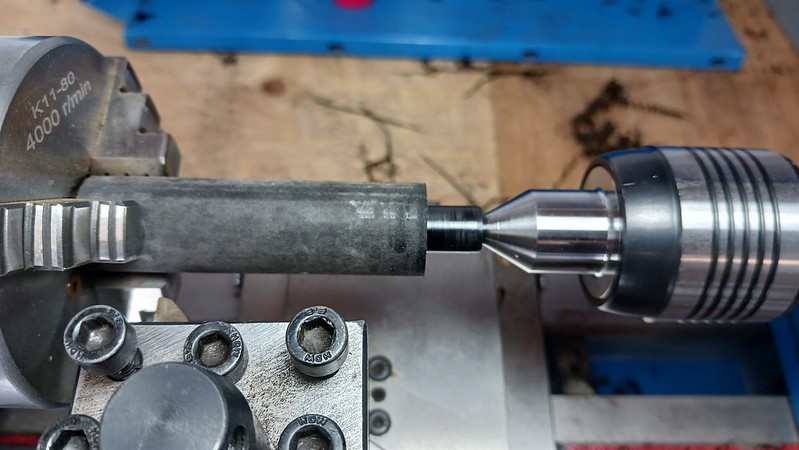
With the stummel all but complete, it was time to turn my attention to the new stem, beginning with a Delrin tenon. These shots show a short section of Delrin rod mounted in the lathe, turned to size and with airway drilled. I used a countersink bit to funnel the end of the tenon for better air flow through the pipe.

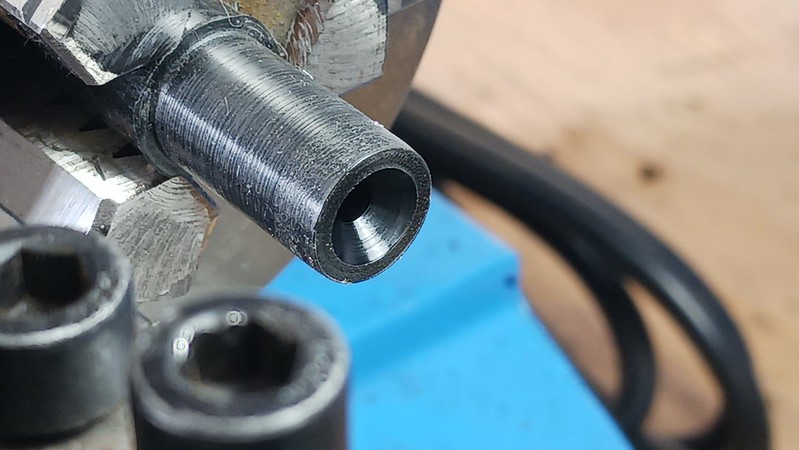
A quick test told me I had sized the tenon properly for a snug-but-not-too-snug fit in the shank mortise.

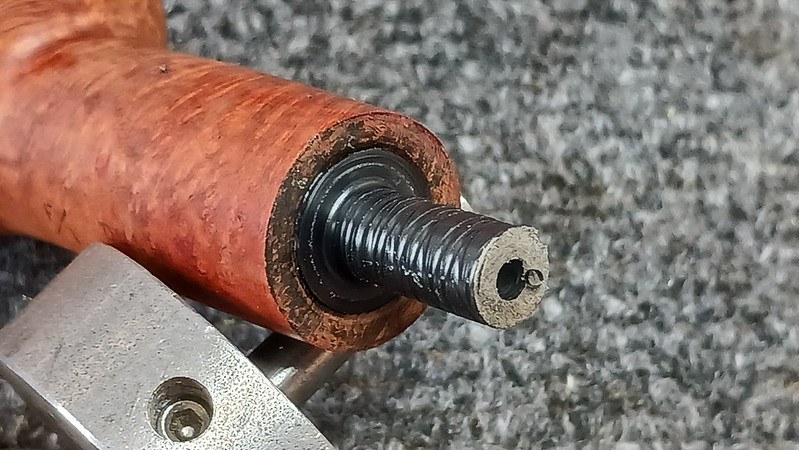
I finished the tenon by turning the stem end down to 7mm in diameter, which is conveniently the smallest size possible using my tenon turning tool. As you can see in the closeup pic, I roughed up the tenon to improve the grip of the epoxy when it gets glued into the stem.

With the tenon ready, I got on to making the stem itself. I used the old stem as a rough guide to cut a section of Ebonite rod stock to length. Then it was back to the lathe to face the ends of the rod (ie cut the ends square and flat) and drill the airway. Drilling is done using several different bits – first a 1/16″ spotting bit to dimple the centre of the rod to provide a pilot hole for the long 1/8″ drill bit that cuts the majority of the airway from the shank end to about 5/8″ shy of the button. A 9/64″ taper-point bit is then used to chase and widen the 1/8″ airway and taper it down to a sharp point. The third drill bit, a long 1/16″ bit, completes the job from the pointed end of the airway through to daylight at the button. Finally, I used a 7mm bit to drill a short mortise in the stem face for the tenon.

While the Ebonite rod was still mounted in the lathe, I used a bit of two-part epoxy to glue in the Delrin tenon. A live centre mounted in the tailstock of the lathe makes a great clamp to hold everything in position while the epoxy cures.
When the tenon was secure in the stem face, I removed the rod from the lathe and used a small round cutting bit (this one is made by Dremel) to cut the beginning of the slot in the button end. It take a bit of time to line up the cutting head with the 1/16″ airway but the actual cut is quick and provides a guide for finishing the slot with a series of small files.

The next stage of making the new stem was to mark out a few important lines with masking tape on the rod stock. Below you can see that I taped off a section at the shank face as well as a thin section at the button end. The horizontal tape lines (cut to 9/64″ to match the diameter of the airway drilling) run from the slot in the button end along the path of the airway to the tenon. These give me a reasonably precise indication of how much material I can safely remove without cutting into the airway – something I’d very much like to avoid.
With the stem marked out, I used my 1″ belt sander to remove the bulk of excess material and rough in the basic shape of the stem. From this point on the work would be done completely by hand with files and sandpaper.

Starting with a fairly coarse file, I tidied up the rough Ebonite and began to refine the shape. It’s beginning to look like it might become a pipe stem!

Before I got too far along with final shaping, I took a moment to mark out and install the iconic White Spot on the top of the stem. I drilled a short 3mm diameter shaft in the designated spot and glued in a short section of white plastic rod. After the glue had dried, I levelled the Spot off flush with the surrounding Ebonite.
QUICK TIP: For those of you looking for small rod stock for these or other dot logos, do a quick Google search for “guitar side dot markers”.
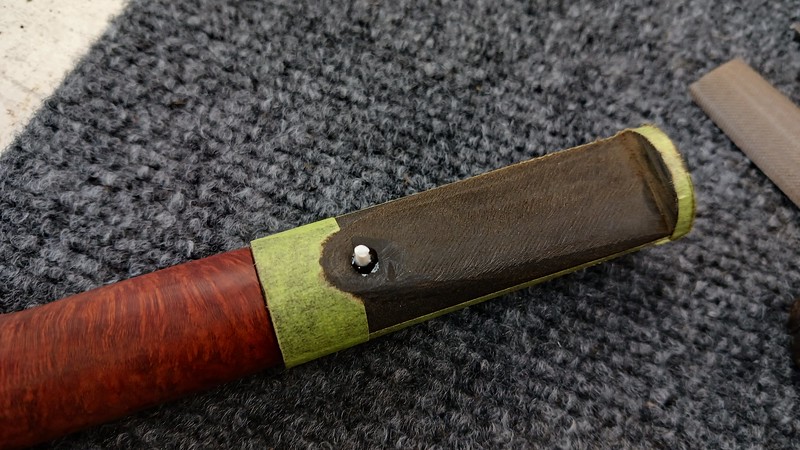
You can see in this photo how the files get progressively smaller and finer as work on the stem progresses. The tape on the pipe’s shank is there to protect the already faint stamps from errant file marks.
Note that despite appearances, I have not sanded into the briar of the shank. The colour difference here is caused by 800-grit sandpaper removing the very top layer of finish as I work to achieve a smooth transition from shank to stem.


And here is a quick shot of the button end in progress. I used a steel slot cutting file and a small diamond grit burr to cut the “V” shape of the slot. I’ve also started to remove the excess Ebonite from the button itself.

A further progress shot showing the button tasking shape. Symmetry is key in stem making, so it pays to stop and check your work often. In this pic there is still a small bulge in the stem about 5/8″ in from the stem face. That will have to come off.

When I was happy with the size and shape of the stem, I put away the files in favour of sandpapers ranging from 220 through to 2000 grit to smooth out the file marks and begin the polishing process. This stage always takes longer than I think it should for some reason.

Finally it was time to take the complete pipe to the buffer where I polished stem and stummel with Red Tripoli and White Diamond compounds before applying several thin coats of Carnauba wax to shine and protect the restored briar and new Ebonite.
This iconic Dunhill LB has come a long way since it arrived on the bench. The dirt, grease and carbon lava crust are all gone, replaced by fresh, clean briar. The new Ebonite stem gleams richly and complements the darker grain of the stummel. Though some “character marks” remain, this pipe is looking every inch the classic English Billiard again!
Thanks for following along on this estate restoration project. I hope you enjoyed watching this 54-year-old Dunhill LB Root Briar come back to life as much as I did. The pipe has since been returned to its steward in Sweden. He was pretty excited to get it back and posted a video about it on his YouTube channel, which he has graciously allowed me to add in below as a sort of video epilogue. I hope you enjoy it.
Until next time, Happy Piping! Here’s the finished pipe. (My apologies for the last shot – I apparently left a smudge of polishing compound on the button end of the stem – oops!)


That is a lovely restoration Charles. I’m always amazed at these transformations. You really covered the globe in this blog!
LikeLiked by 1 person
Hi Charles – what a wonderful tour through the rehab process for this Dunhill. Thank you again for sharing.
LikeLiked by 1 person
Glad you enjoyed it!
LikeLike