
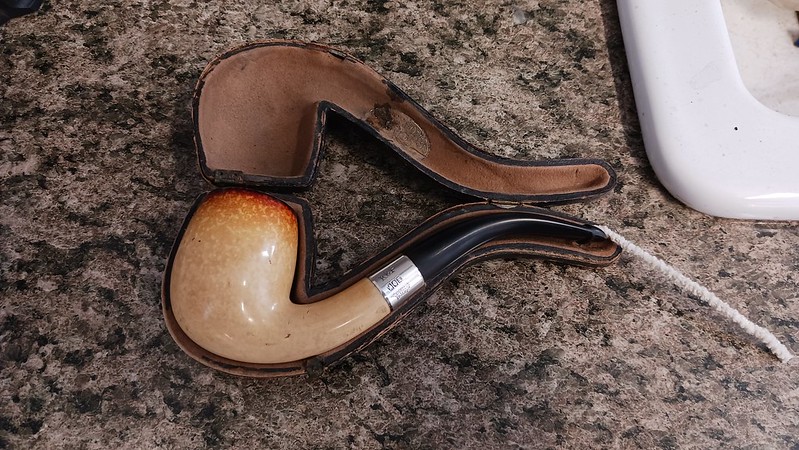
Half the fun of doing pipe repairs and restorations is seeing what arrives in the mail. Many pieces sent in for refurbishment date from the 1960s and forward, while every now and again a real antique crossed my bench. This 1906 Peterson Bent Billiard Meerschaum is just one such example.
Like many pipes from this era, the pipe came in a custom hard case and was fitted with a stem made of Bakelite, one of the first plastics. As this series of images shows, the pipe was in reasonably good condition on arrival, but the stem had broken in several places. and showed evidence of previous repair attempts.
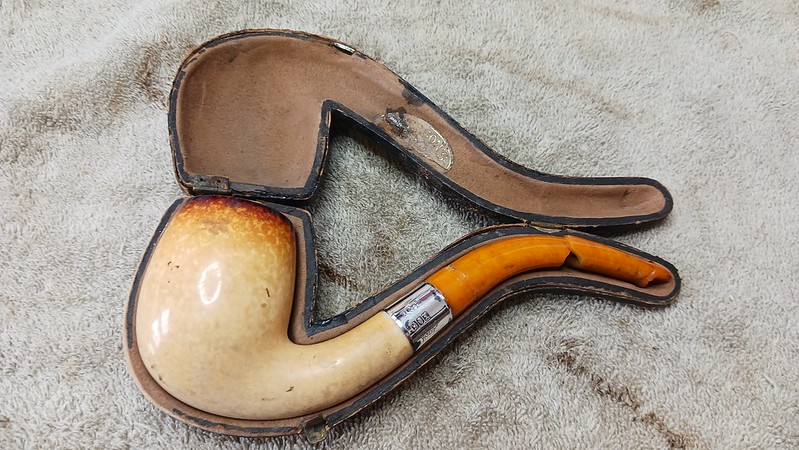


On the inside of the upper half of the pipe case was a very faded sticker. If you squint slightly and tip your head just right it its possible to make out the words “Peterson’s” over “Patent”.
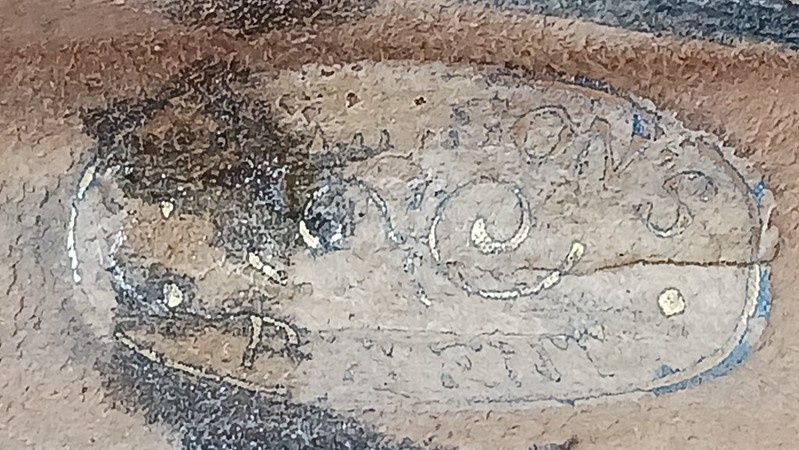
The silver shank band carries much clearer evidence of the pipe’s provenance. The band is stamps “K&P” over a trio of silver hallmarks over “Peterson’s Patent”. A closer look at the hallmarks tells us that the band was assayed in the City of Dublin (Hibernia), is made of Sterling Silver (Crowned Harp) in 1906 (date letter ,”L”). Though there can be exceptions, the date code on the band generally correlates with the year the pipe was made, so this meerschaum is a sprightly 116 years old(!).

Here is a better shot of the damaged stem. As you can see, the Bakelite had snapped in two places – once at the tenon end and again just after the apex of the curve. A short section of metal tubing poking out of the broken end of the stem shows that someone in the past had tried to glue Humpty Dumpty back together again.
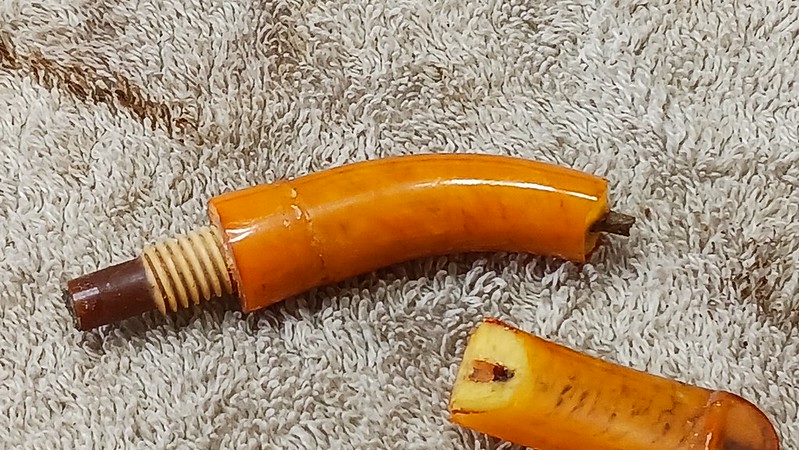
I had already received a request from the pipe’s current steward to fit a new Vulcanite P-Lip stem to the pipe, reusing the original bone screw tenon if at all possible. Sometimes these old tenons come out of the stem fairly easily, and other times the bone is so old and brittle that the tenon shatters under the strain. This time I got lucky. After warming the Bakelite over the heat gun for a few minutes, the glue holding the tenon gave out and I was able to extract the bone tenon in one piece.
This pic shows the tenon, still in need of a cleanup, next to the chosen Vulcanite stem blank.

To fit the tenon, I cut off the molded Vulcanite tenon from the stem blank, squared up the stem face and drilled and tapped a short mortise into which I screwed the bone tenon.

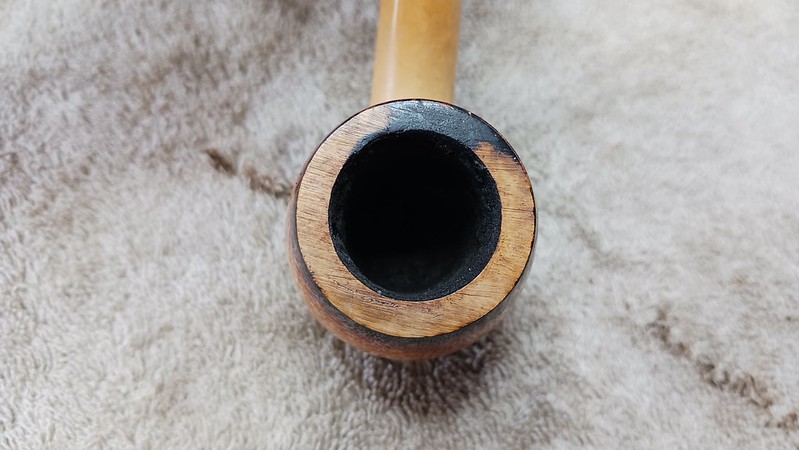
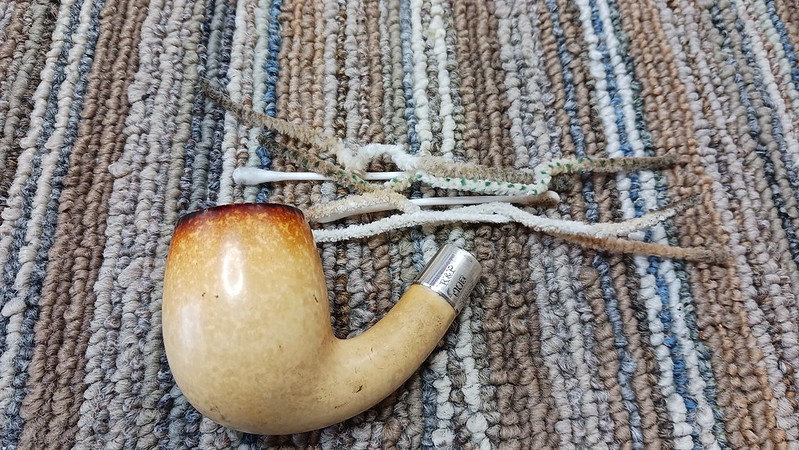
Before I got too far into the stem work, the stummel needed a bit of cleaning. I used a few pipe cleaners and cotton swabs dipped in 99% isopropyl alcohol to clear out a small amount of old tars and debris from the pipe’s shank and airway.
I also used a bit of sandpaper wrapped around a dowel to remove a light amount of carbon cake from the tobacco chamber. Meerschaum pipes, unlike those made from briar or other woods, do not need a layer of cake to protect the chamber from burnouts. In fact, too much carbon buildup can cause the bowl to crack, so it’s best to keep your meers clean.
I screwed the new stem into place to assess the overall fit. There was a bit of sanding and polishing to do to, but things were looking good.

Pre-cast stem blanks can vary in fit and finish; this stem arrived fairly clean, with only a bit of excess material to remove from the edges. It did not come fully drilled, however, and needed the airway drilled open at the button end. A P-Lip stem has the airway outlet on top of the button, which requires drilling a short, angled shaft to connect to the main airway. This pic shows the results of my freehand drilling, once with a 1/1`6″ drill bit to provide a pilot hole, the again with a slightly larger bit to get to the finished diameter.


With the airway drilling complete, I used a combination of files and sandpapers to smooth and polish the Vulcanite, from 220 through 2000 grit. Now ready for buffing on the wheel, I used the pipe’s original case as a template for applying the correct bend. With a pipe cleaner in the airway to prevent its collapse, I warmed the stem over the heat gun until pliable, then gently bent the Vulcanite until the pipe fit nicely in its case. A quick run under cold water set the new stem shape permanently.
The pipe was now mechanically complete, but before I sent it back to its steward I wanted to refresh the meerschaum and bring out the sought-after colouration with a good waxing.
Waxing a meerschaum stummel is fairly straightforward, but does require a bit of preparation. To keep the wax out of the pipe’s internals, I plugged the chamber and shank openings, then popped the entire thing into a small crock pot I keep full of beeswax.

Here is the stummel in the wax pot. The hot wax is readily absorbed by the porous meerschaum and pulls the colouration from within the meerschaum to the surface. After soaking for several minutes on each side, I fished the stummel out of the wax, removed the corks and laid it on a clean towel to cool.


When the stummel was cool enough to handle comfortably, I used the towel to hand buff the excess wax away, leaving the meerschaum looking smooth, shiny and smelling gently of honey.


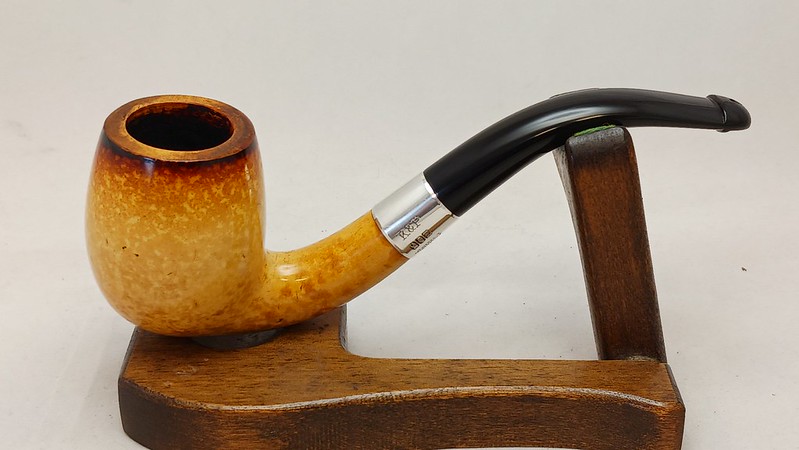
All that was left to do was to reassemble the pipe and take it to the buffer where the stem received a run on the Red Tripoli and White Diamond wheels to erase the last sanding marks. A few applications of Carnauba wax added even more shine and a layer of protection against oxidation.
One final buffing by hand with a microfiber cloth completed this restoration project. The finished pipe is whole again and ready to provide many more decades of smoking companionship. The new Vulcanite stem looks great and is, I think, a quite suitable replacement for the damaged Bakelite original.
This pipe has been returned to its current steward. May he enjoy it in good health for many years.
Thanks for joining me for another estate pipe restoration project. Until next time, Happy Piping!
Here’s the finished pipe.


Wow,fantastic save on a great job! I’m surprised you were able to get the bone tenon out of the old stem and into the new, the ones I’ve handled have been pretty fragile. The pipe sure does look good with the vulcanite stem. I didn’t know the blanks weren’t drilled!
LikeLiked by 1 person
Thanks! The old bone tenons can go either way when you try to remove and reuse them. This one, thankfully, decided to cooperate. 😁
Vulcanite stem blanks seem to come in various (random?) states of completion. Some need only a final polishing while others need a lot more work. The stem I used here was really quite clean but needed that final drilling. Glad my hand is still steady!
LikeLike
Charles, fantastic work and I enjoyed reading about the process. I have never seen a beeswax pot with submersion. That gets the job done. One question: when you ‘squared up’ the stem face before drilling and tapping, how did you get it squared? With all my hand held tools, and tapered stems it can be a challenge getting a true consistency in drilling 😊.
LikeLiked by 1 person
Hi Dal. I generally square up a stem face on the topping board with 220 and 600 grit sandpaper. I check the fit against the shank face and check for any gaps or misalignment of the stem and shank. If the freehand approach doesn’t pan out (or my eyes go crooked), I will check the length of the stem with calipers at multiple points to find the high spots.
As for drilling consistent mortises by hand, the best way I have found is to enlarge the airway in small steps using multiple drill bits until I get to the required diameter. Skipping a size is tempting but not worth it, imho. Otherwise, a small drill press and a pen vise makes it a lot easier if you have space for one.
LikeLiked by 1 person
Thanks!
LikeLiked by 1 person