
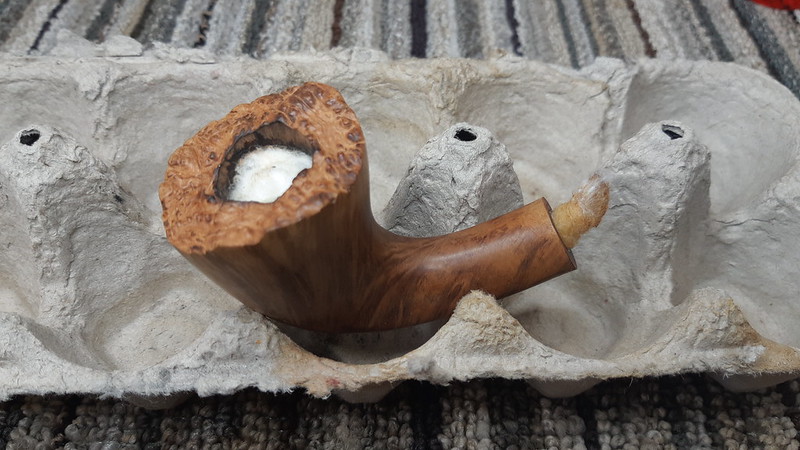
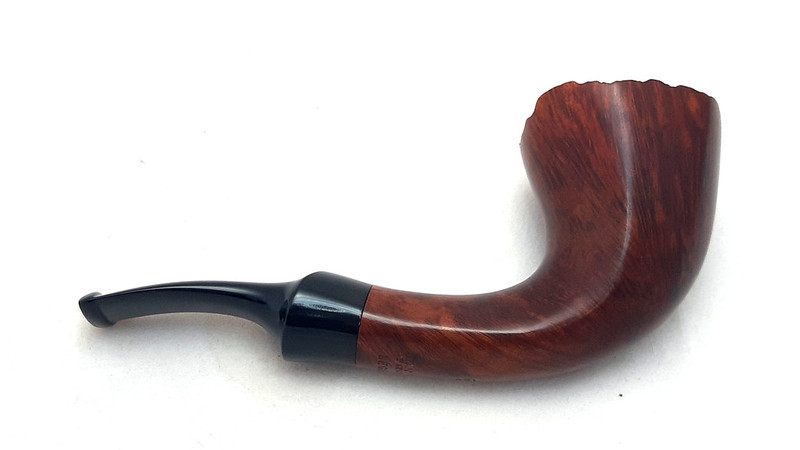
The pipe on the work table today was sent to me for some TLC. Its steward was concerned about the condition of the stem and the fading finish around the upper third or so of the bowl. As you can see from this first series of images, the pipe is Stanwell Legend 126, a shape described on Pipedia as “Freehand, slightly bent, with plateaux top, and saddle mouthpiece by Tom Eltang”. Overall it was in rather good estate condition but it did have some issues – a heavily oxidized stem, a thick crust of carbon “lava” over most of the plateaux rim, and the aforementioned faded finish.


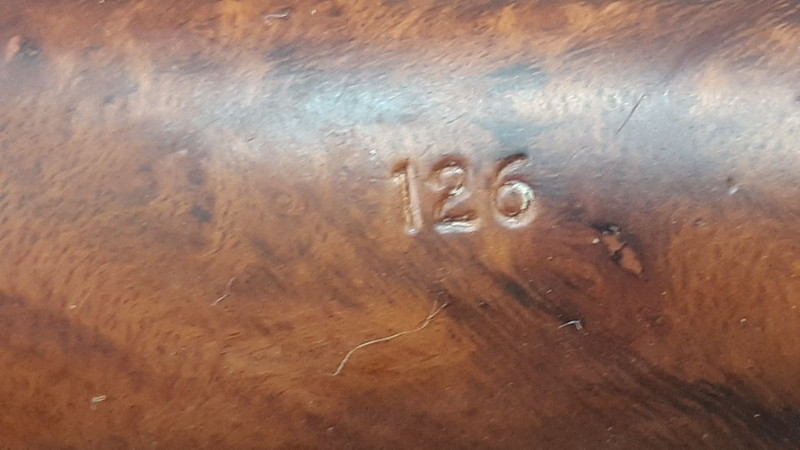
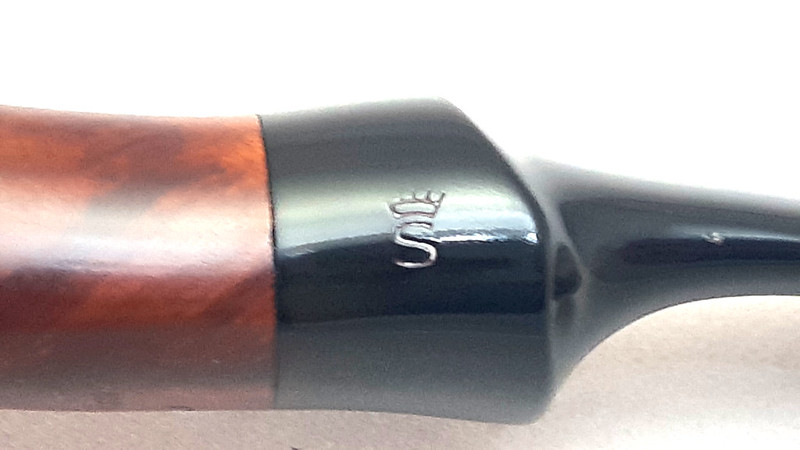
The pipe is stamped “Stanwell” over “Made in Denmark” over “Legend” on the underside of the shank near the stem junction, and “126” a bit further up the shank. The original stem carries the Stanwell “Crowned S” logo.


Getting to work on the cleanup, I took a close shot of the crusted rim which also showed a thin and somewhat uneven layer of cake in the chamber, giving the chamber a slightly out of round appearance.

A light reaming removed the bulk of the cake, and I finished up the chamber rehab with sandpaper wrapped around a dowel. Underneath it all, the briar was in excellent condition, with no sign of any heat stress or cracks.


I cleaned a small amount of tarry buildup from the shank and airway with pipe cleaners and cotton swabs dipped in 99% isopropyl alcohol. The internals were already quite clean, so this didn’t take much time.

The rim, on the other hand, needed a bit more effort to pick the crust of carbon out of the nooks and crannies of the plateaux top. This is a slow and meticulous process, but usually once the crust starts to lift, the rest comes away relatively easily. When I was finished with the dental pick, I gave the plateaux a gentle scrub with a brass tire brush to tidy up the remnants. Looking much better!


Moving on to the exterior of the stummel, I wiped the briar down with alcohol on a cotton pad to remove a thin layer of dirt and dust as well as the old wax. The alcohol also helped to even out the faded finish somewhat, making refinishing that much easier.


Before closing the shop for the night, I set up the stummel with an alcohol treatment to freshen the internals and remove any lingering tars. I packed the shank and bowl with cotton wool and filled the pipe with more alcohol until cotton in the shank showed damp, then set the stummel aside to sit overnight.

When I came back to the bench the following day, the alcohol had done its work, dissolving the deep-seated tars in the pipe’s airway and trapping it in the cotton wool. I discarded the spent cotton and gave the airway one last going-over to remove the last of the residue, then set the briar aside to rest while I dealt with the stem.
As was the case with the stummel, the stem’s airway was already quite clean. I only needed one pipe cleaner dipped in alcohol to clear out a light amount of dust.

My default for deoxidizing Vulcanite is a soak in Oxyclean and water, but I decided this time to give the stem an exploratory wet sanding with 800-grit sandpaper to determine how bad the oxidation really was. Working by hand also gave me the latitude to work carefully around the stamped logo, which I did not want to damage.
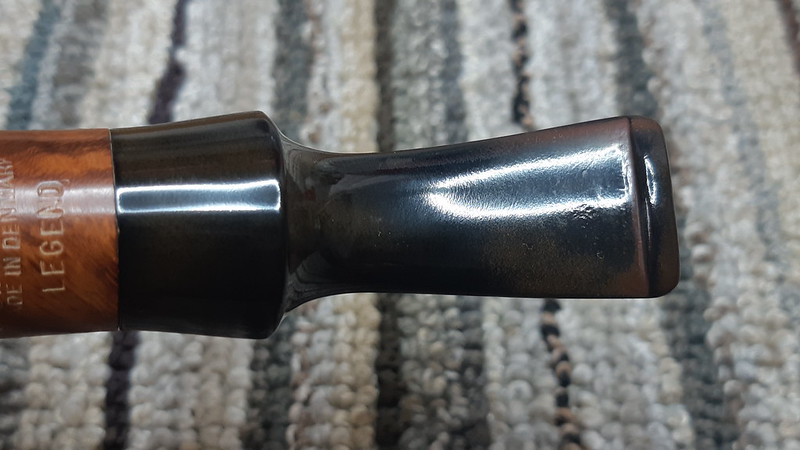
I was pleasantly surprised when the initial sanding returned about 90% of the stem to black. It would need more work to really bring it back to life, but the stem itself was in much better condition than its steward and I had originally thought. What I had initially taken for tooth chatter was mostly mineral buildup in the bite zone of the stem.


I gave the stem a quick buffing on the Tripoli wheel to see how much more of the oxidation would come away. This pic shows the stem after the buffing. The orange peel texture would need to be smoothed out, but the only major flaw (if it can be called that) was a short linear tooth dent in the top of the stem.

A bit more hand work followed as I sanded the stem with increasingly finer grits of abrasive, from 220 through to 2000 grit. This erased almost all of the imperfections except a small portion of the tooth dent, which I filled with a drop of black CA glue.


I let the glue cure completely before once again working through the same grits of sandpaper, removing the excess fill material and prepping the stem for final polishing on the wheel.


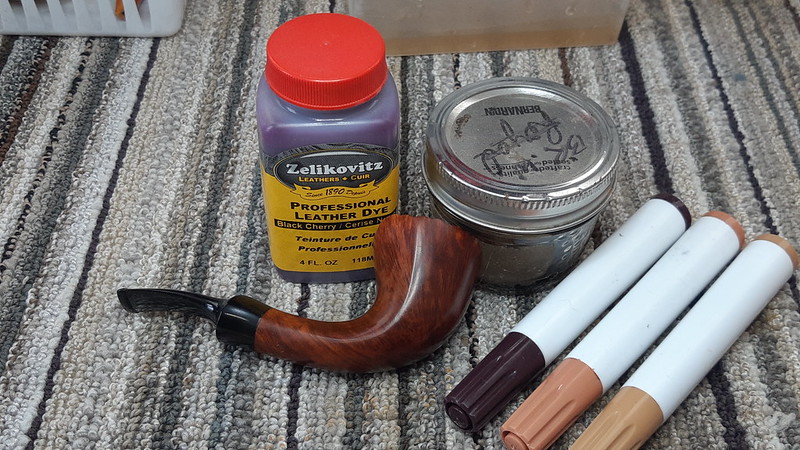
When I was happy with the stem, I spent a few minutes applying a new finish to the briar. Using a combination of Black Cherry leather dye, a diluted wash coat of Brown dye and a few stain pens, I evened out the old worn finish and refreshed the slightly reddish colour inherent in the briar.
A coat of mineral oil over the entire pipe helped to set the new finish and inject some moisture into both stem and bowl while giving the new finish depth and pop.

I let the oil sit on the pipe for just a minute or two before hand buffing away the excess with a soft towel. I let the pipe rest for a bit, then hand buffed it again to remove any more oil that may have come to the surface. Then it was time to take the refreshed and renewed pipe to the buffer for a run of Red Tripoli and White Diamond polishing compounds followed by a few light coats of Carnauba wax to shine and protect the restored pipe.
This Stanwell Legend 126 seems to have enjoyed its time on the bench, and the refreshed pipe is really quite a looker. The stem shines a deep glossy black, and the refreshed finish really brings out the grain on the briar. Better yet, we can now see and enjoy the plateaux rim that had been hiding under its carbon crust for years.
The pipe has been returned to its steward, who is very happy with his “new” Stanwell!
Thanks for joining me for this estate pipe restoration. This post is a great example of the power of a good cleaning and a bit of TLC. Perhaps it will inspire you to take on a similar project of your own.
Until next time, Happy Piping! Here’s the finished pipe.


What a great piece of work, Charles. Fascinating how you detail every step and with the accompanying photos you show a well loved pipe has its former appearance restored. Bravo
LikeLiked by 1 person
Thanks, Neil. I too love watching the “real” pipe emerge as the restoration unfolds.
LikeLike