Ask any pipe smoker, maker or collector and they will all tell you that the weakest part of a pipe, and thus the part most prone to damage, is the stem tenon. Most often cut as an integral part of the stem itself, the tenon holds the stem securely in place at the end of the pipe shank but can be subjected to quite a lot of pressure when the stem is dismounted and remounted to the pipe. An accidental fall from a counter can be enough to snap the tenon or damage the thin walls of the shank mortise.
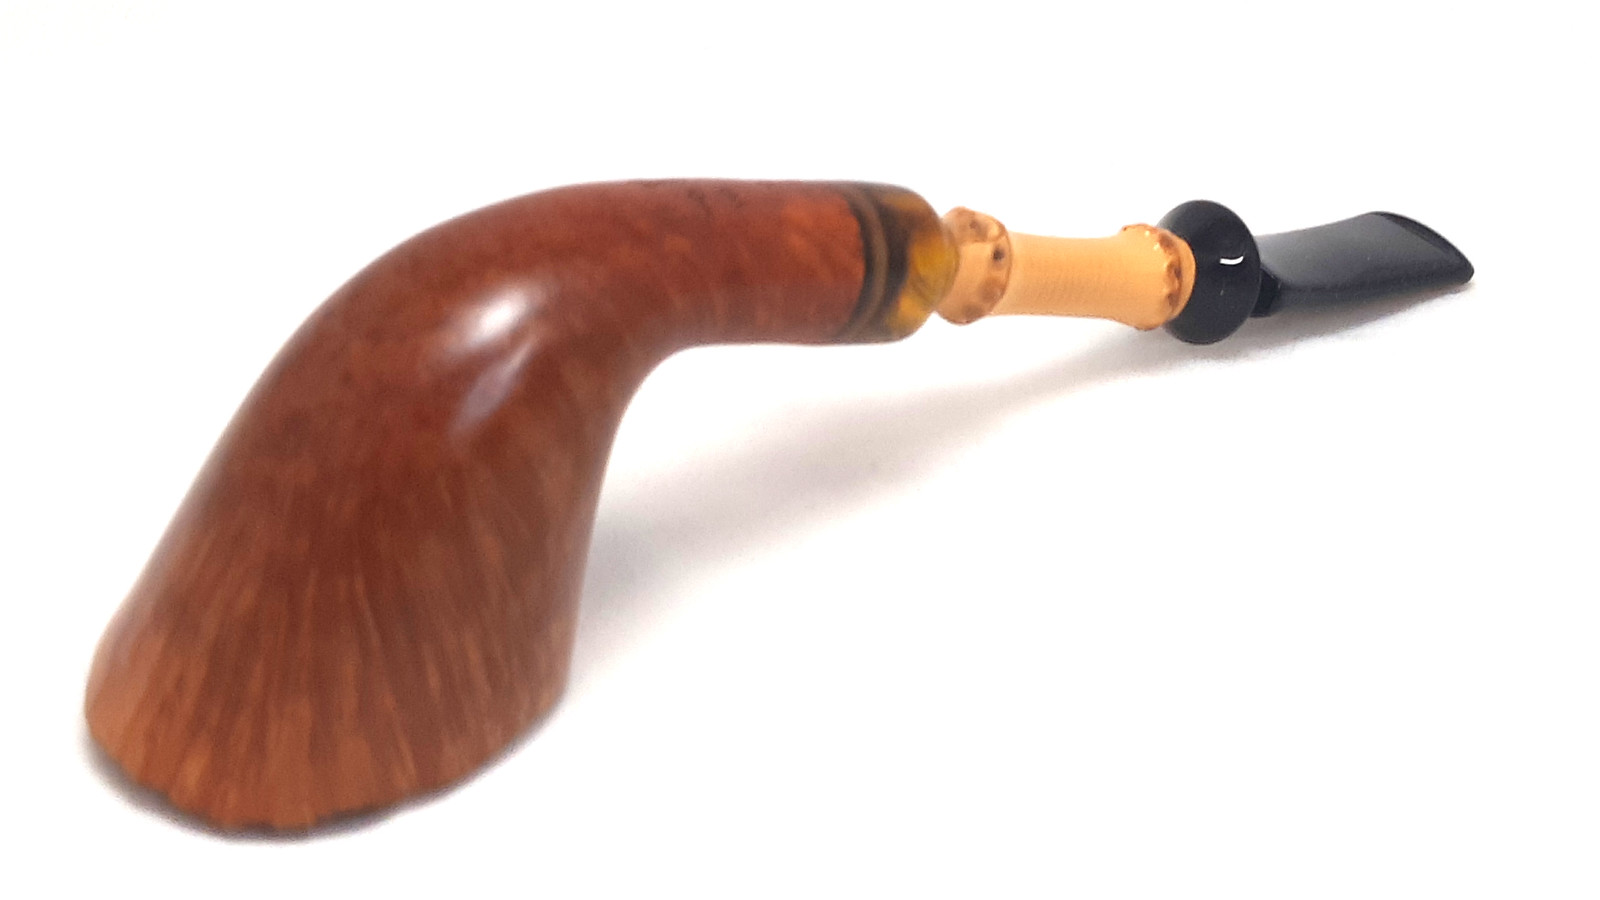
This is exactly the kind of damage we’re dealing with today. This handsome Tom Spanu Bamboo freehand pipe came into the shop with a broken tenon. Interestingly, the stem of this pipe is made up of both the acrylic mouthpiece and the bamboo extension. A small, slightly bullet-shaped acrylic fitment at the shank end of the bamboo originally included an integral acrylic tenon, which was now firmly lodged in the shank.
As you can see from this initial series of pictures, the pipe was in excellent condition other than the broken tenon. I imagine that either the pipe wasn’t smoked very much before the tenon was broken, or the damage happened after the pipe was cleaned.


The underside of the shank is stamper “Tom Spanu” over “F” then “3” followed by “2005”.

Now let’s take a closer look at that unique stem arrangement. This first pic shows the entire stem, from black acrylic mouthpiece at the far right end to the tortoise-ish acrylic fitment on the far left. Sandwiched in the middle is a section of bamboo.

This shot shows the stem face, with the broken stump of the integral tenon.

A quick look at the bite surfaces of the mouthpiece show almost no signs of use. All this needs is a good buffing to bring up the shine.


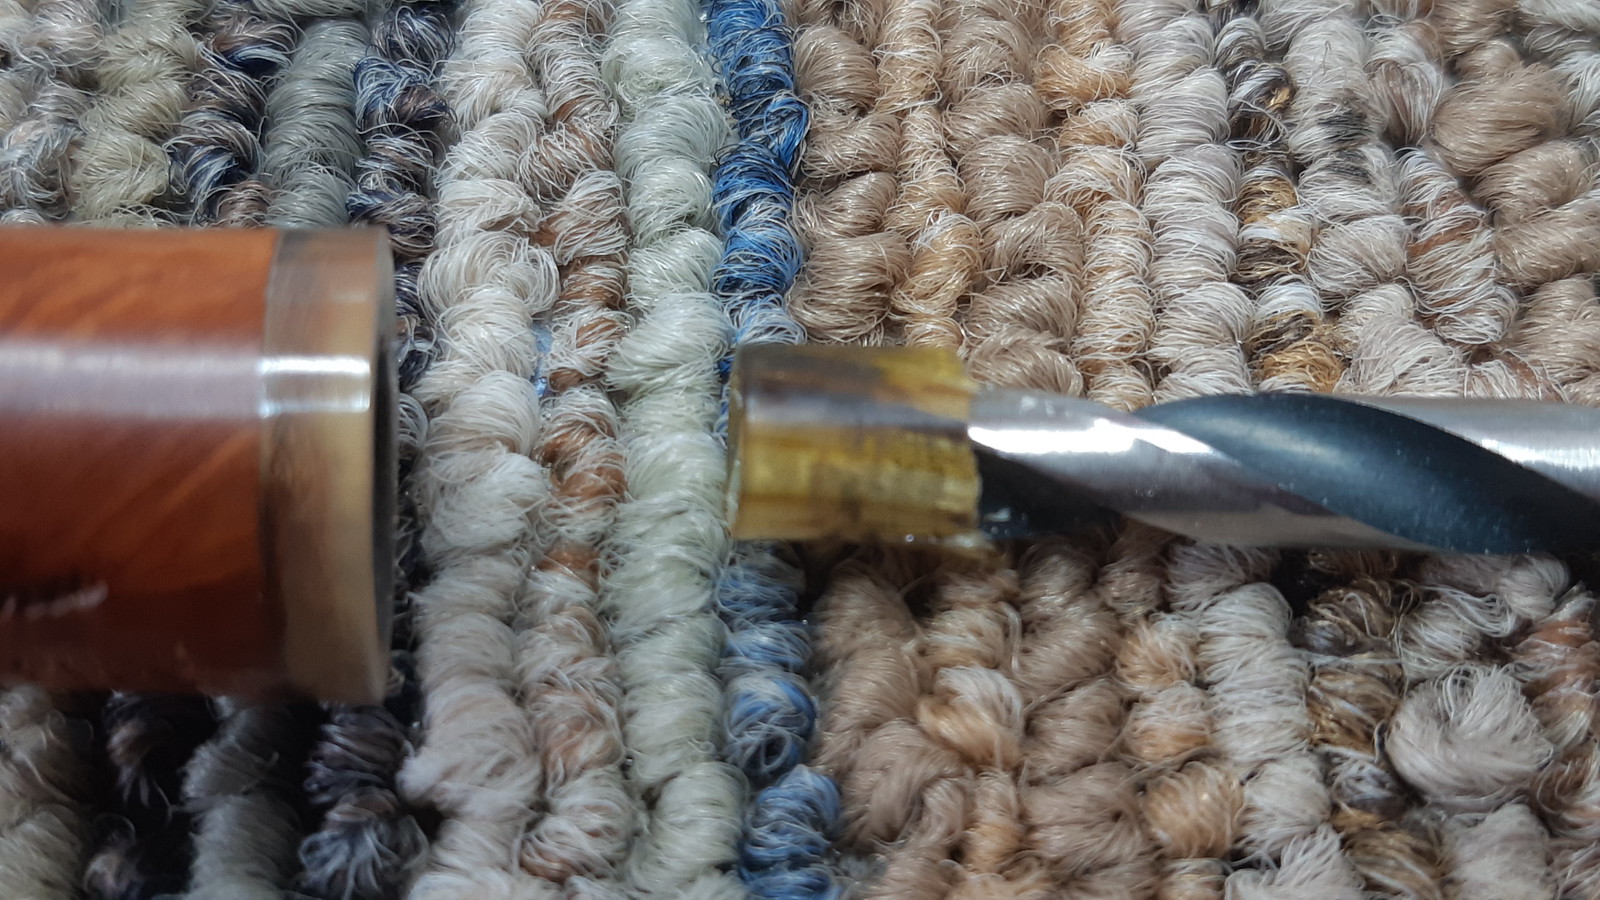
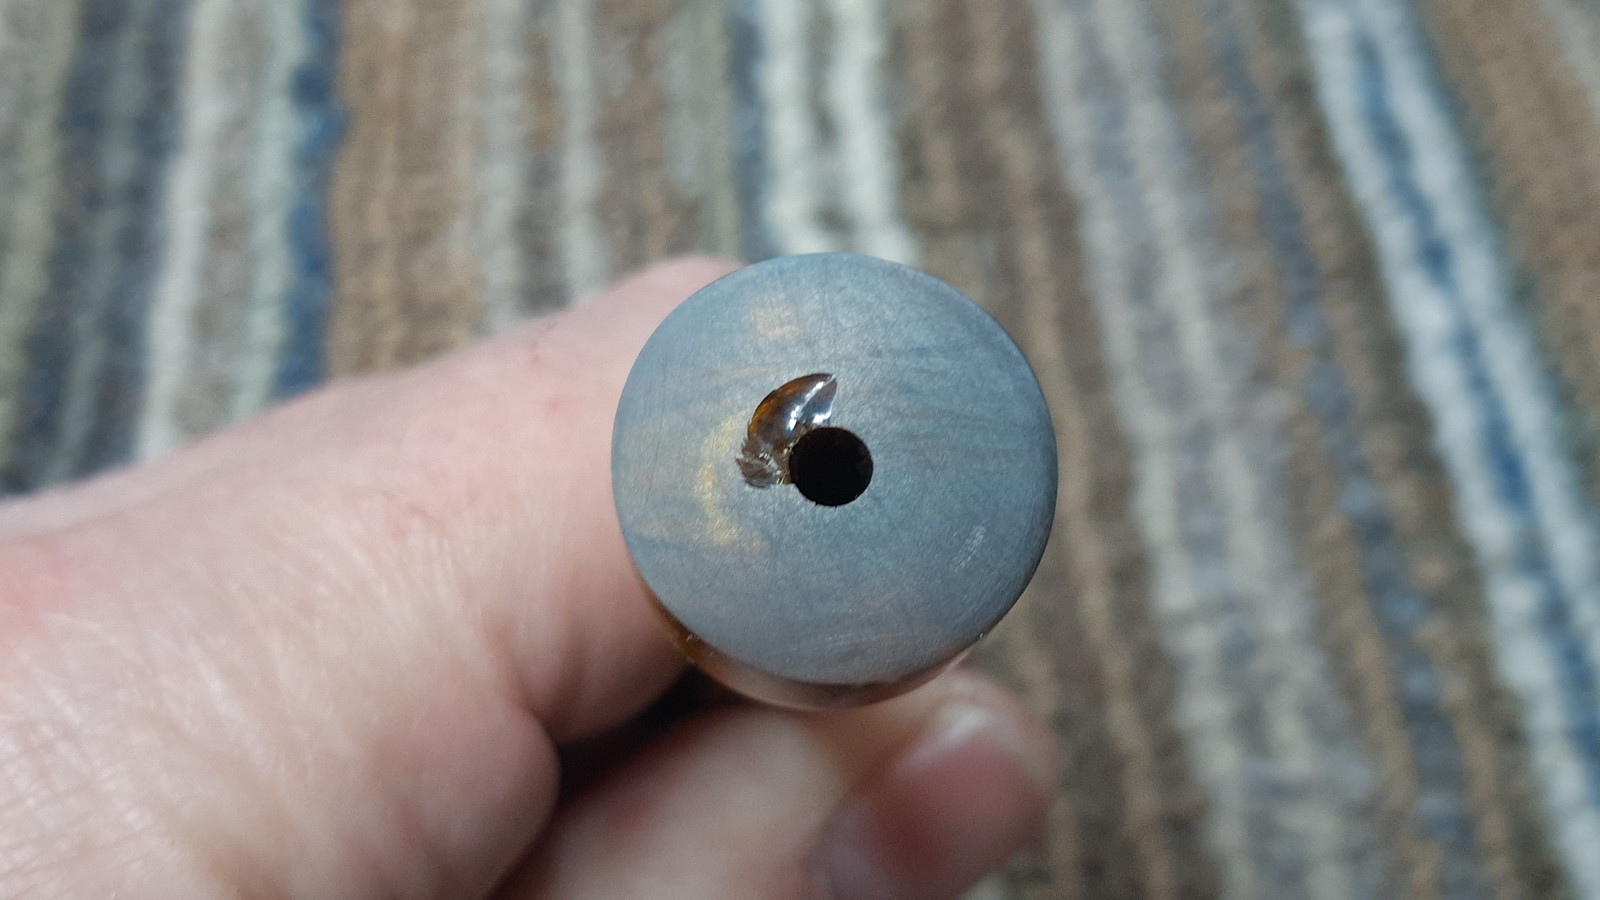
The remains of the tenon were lodged in the shank of the pipe. My normal trick of using a wood screw to catch and extract the section of tenon did not work here. I ended up drilling out the broken part, working through several sizes of drill bit to avoid damaging the mortise.

I used a file to flatten the broken stump of the original tenon, then moved to the topping board where 220 and 500-grit sandpapers did the rest of the work. It’s important here to maintain the same flat plane of the stem face in order to achieve a light-tight fit at the stem/shank junction later.

Happy with the stem face, I again used a number of progressively larger drill bits to open up the airway in the stem face to make a mortise into which the new Delrin tenon would fit.

Before I got too far ahead of myself, I took a step back and gave the stummel a basic ream and clean. I used my Castleford reamer and sandpaper wrapped around a pen to remove the light cake from the chamber. The briar underneath was in excellent condition.


A few cotton swabs and pipe cleaners dipped in 99% isopropyl alcohol confirmed that the pipe was actually very clean already, though there was a small deposit of tars lurking within.

With the shank and mortise clean, I could fit the new Delrin tenon. I make up my own tenons here in the shop from a few common diameters of Delrin rod stock, drilled with a 1/8″ starter airway. A PIMO tenon-turning tool makes short work of sizing the shank end of the Delrin tenon for a snug fit. I turned the stem end of the tenon down to just under 1/4″ in diameter to fit neatly into the mortise drilled into the stem face.


To help the epoxy hold on to the slippery Delrin, I used a small half-round needle file to cut notches around the end of the tenon. This creates a physical, interlocking bond between the stem and tenon when the epoxy is fully cured.

After applying epoxy to both the tenon and the inside surfaces of the stem mortise, I slid the stem into place and centred it on the shank as best as I could. As you’ll see in the close-up pic below, the match was not perfect; I’d need to do a bit of work after the epoxy cured to smooth this transition.


I clamped the pipe upright in the vise overnight to give the epoxy ample time to cure while gravity helped keep it in the correct position. When I came back to the pipe the following day, I used a 1/8″ drill bit to open up the airway, followed by a countersink bit to funnel the end of the tenon. This helps to smooth the flow of air through the pipe, cutting down on turbulence and the gurgling it can produce.

Remounting the stem to the shank, I used needle files and sandpaper to carefully smooth the transition between shank and stem. The trick here is to avoid gouging or scratching the finished shank; it’s also important to keep the placement of any stamps in mind to avoid damaging the nomenclature.


When the transition was once again smooth, I did some final hand polishing with 2000-grit wet sandpaper before taking the finished pipe to the buffer. Runs on both the Red Tripoli and White Diamond wheels erased any last stray sanding scratches and brought up the shine. A few light coats of Carnauba wax to the entire pipe added more shine and some UV protection.
The repaired pipe is once again whole and looking its best. It has been returned to its steward, who can look forward to decades of smoking companionship from this Tom Spanu Bamboo.
Thanks for joining me for this quick restoration post. Tenon replacement is a very common repair, though there are quite a few variables that must be taken into consideration to get the best results. If you’ve got a pipe stashed away waiting for a similar repair, perhaps this post will encourage you to try your hand at a little DIY restoration of your own.
Until next time, Happy Piping! Here’s the finished pipe.