
Cost is almost always a prime consideration when it comes to estate pipe repairs. As I and other pipe restorers have proven more than once, virtually every estate pipe is repairable if the will to do so exists; whether the repair is worth the cost is a very different question, and the answer is very often “It depends.” Is the pipe a sentimental favourite or family heirloom? What is the cost of replacement compared to repair? Does the pipe have intrinsic value to other pipe smokers or collectors? Will the repaired pipe be used personally or sold on to a new steward?
These are some of the questions that ultimately led to the decision by its steward to discard today’s estate pipe project. With a long list of needed repairs and a Canadian retail price of about $80CAD, the cost of the work simply outpaced the value of this Lorenzetti Titus. In the end, the pipe was given to me to use for a future blog post, which brings us to today’s project.
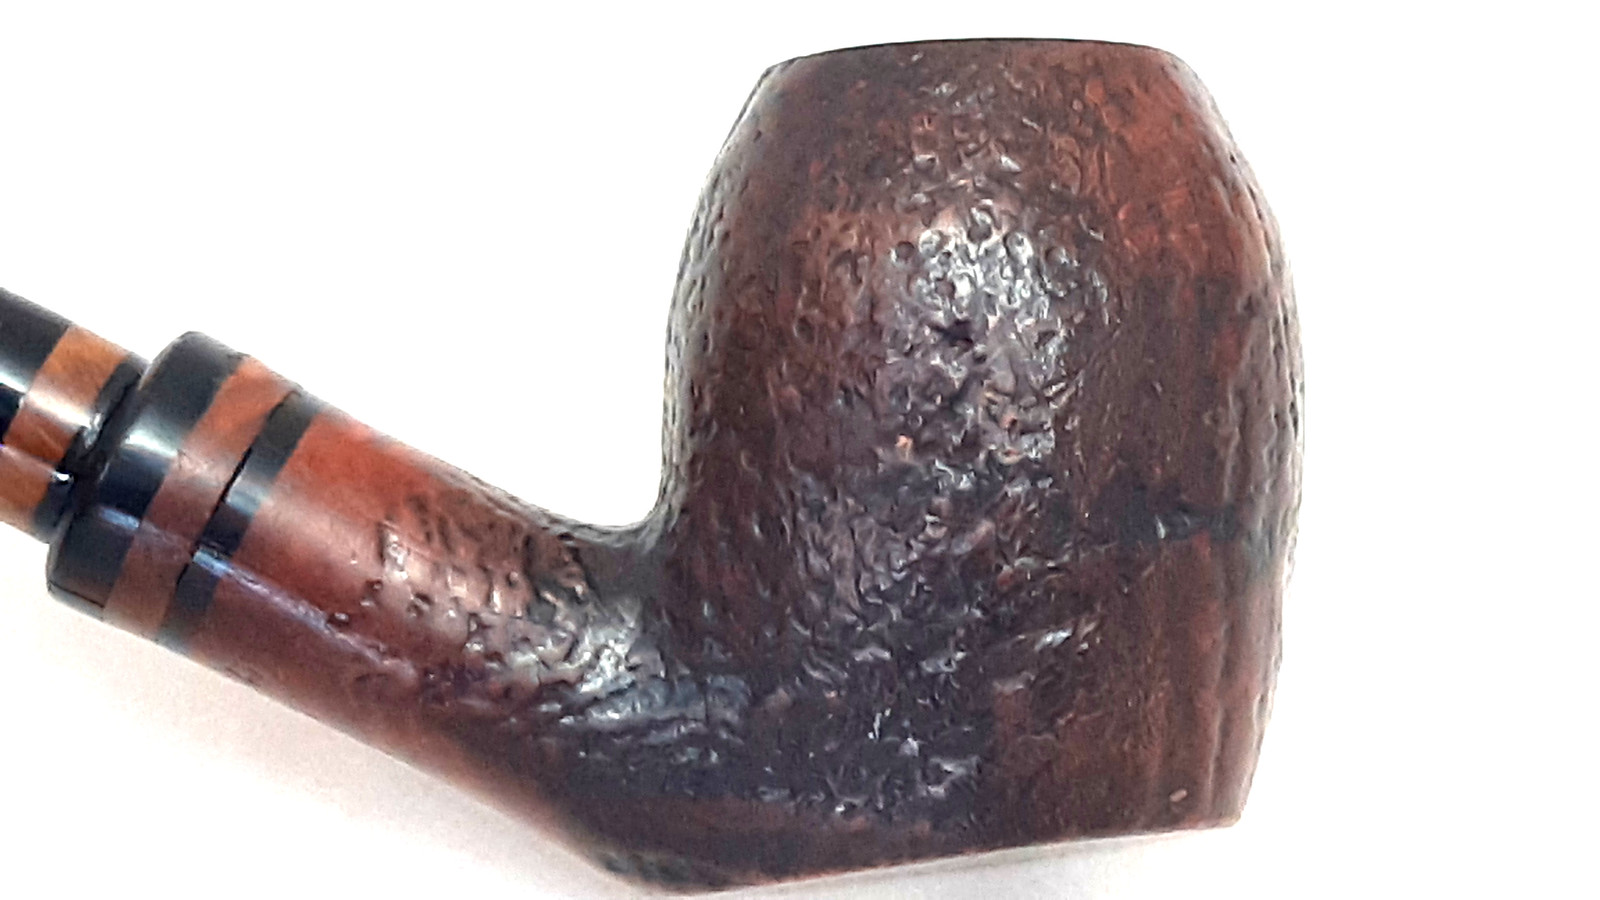
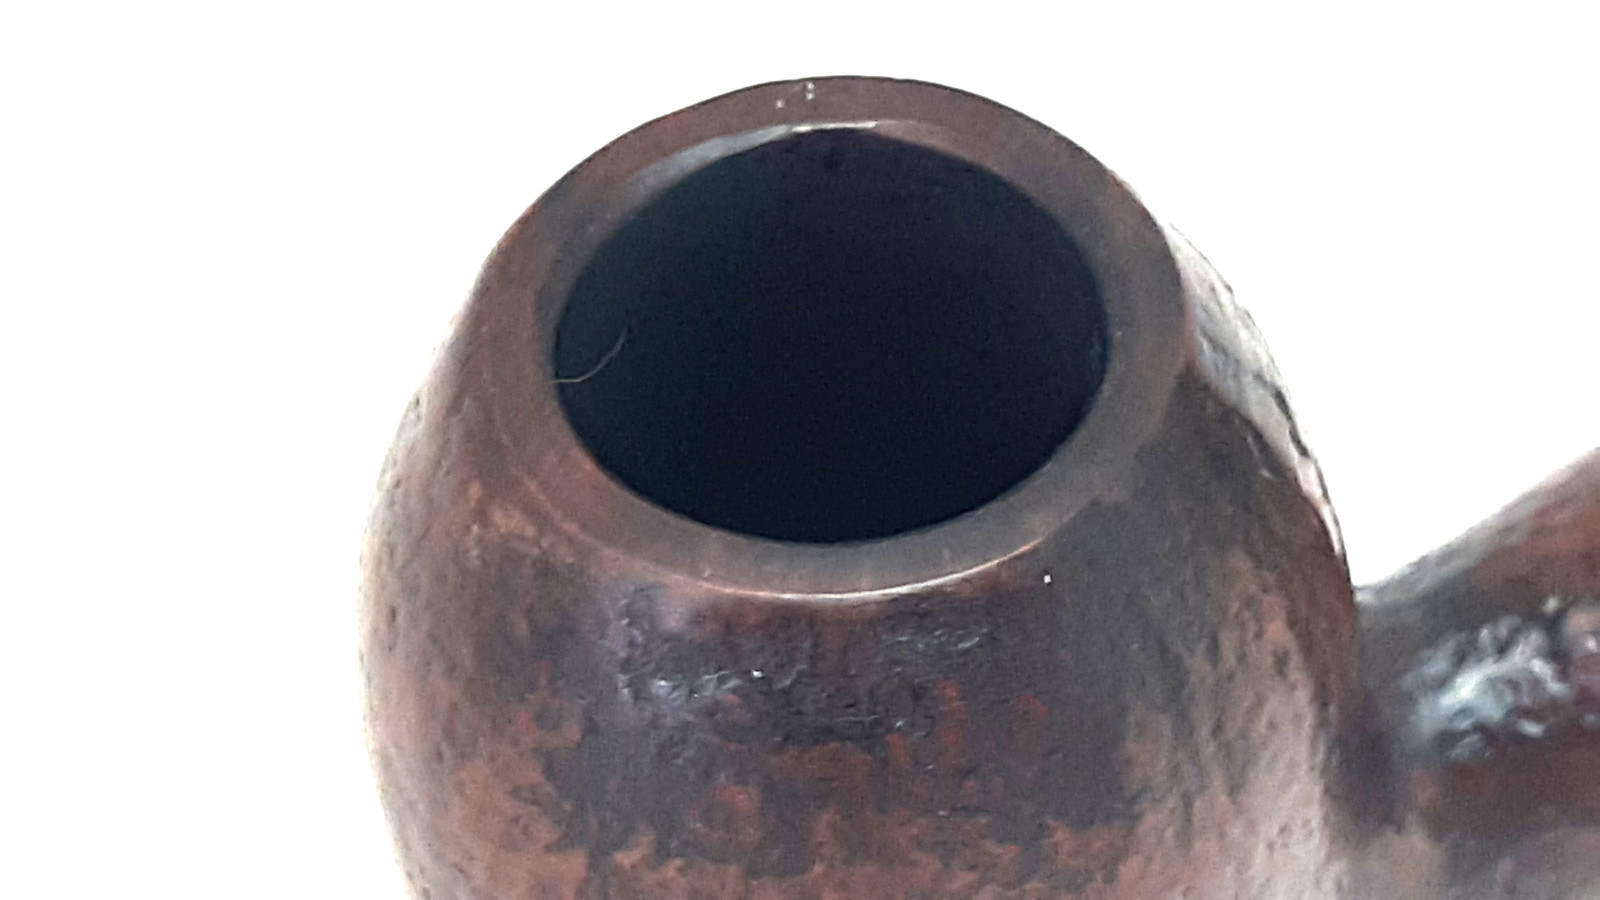
As this first series of images show, the pipe was not in the best of shape, with the eye immediately drawn to the long, open crack stretching down the right side of the bowl from the rim down to a spot roughly equivalent to the chamber floor. Other woes included a lumpy and uneven cake in the chamber, a worn and spotty finish, several tooth dents in the acrylic stem and a good layer of grease and dirt on every surface.


The stamps on the underside of the shank are worn but legible. They read “Lorenzetti” over “Italy” over “Titus” followed by a shape number, “27”. Not pictured below is a capital “L” in script on the left flank of the stem.

Taking a closer look at the damaged bowl, these pics show that the crack went straight through the chamber wall, and was open on both sides. Daylight could easily be seen through the gap in several places. Yikes!


To begin the cleanup process and get my first good look at the interior of the chamber, I spent a fair amount of time carefully reaming the old carbon cake form the bowl. This took a bit of doing as the cake at the bottom of the bowl was very dense and hard. In the end I used my reamer, pen knife and sandpaper wrapped around a dowel to get through the thick cake and find the briar underneath. I took my time here as I half expected the bowl to shatter during the reaming process.


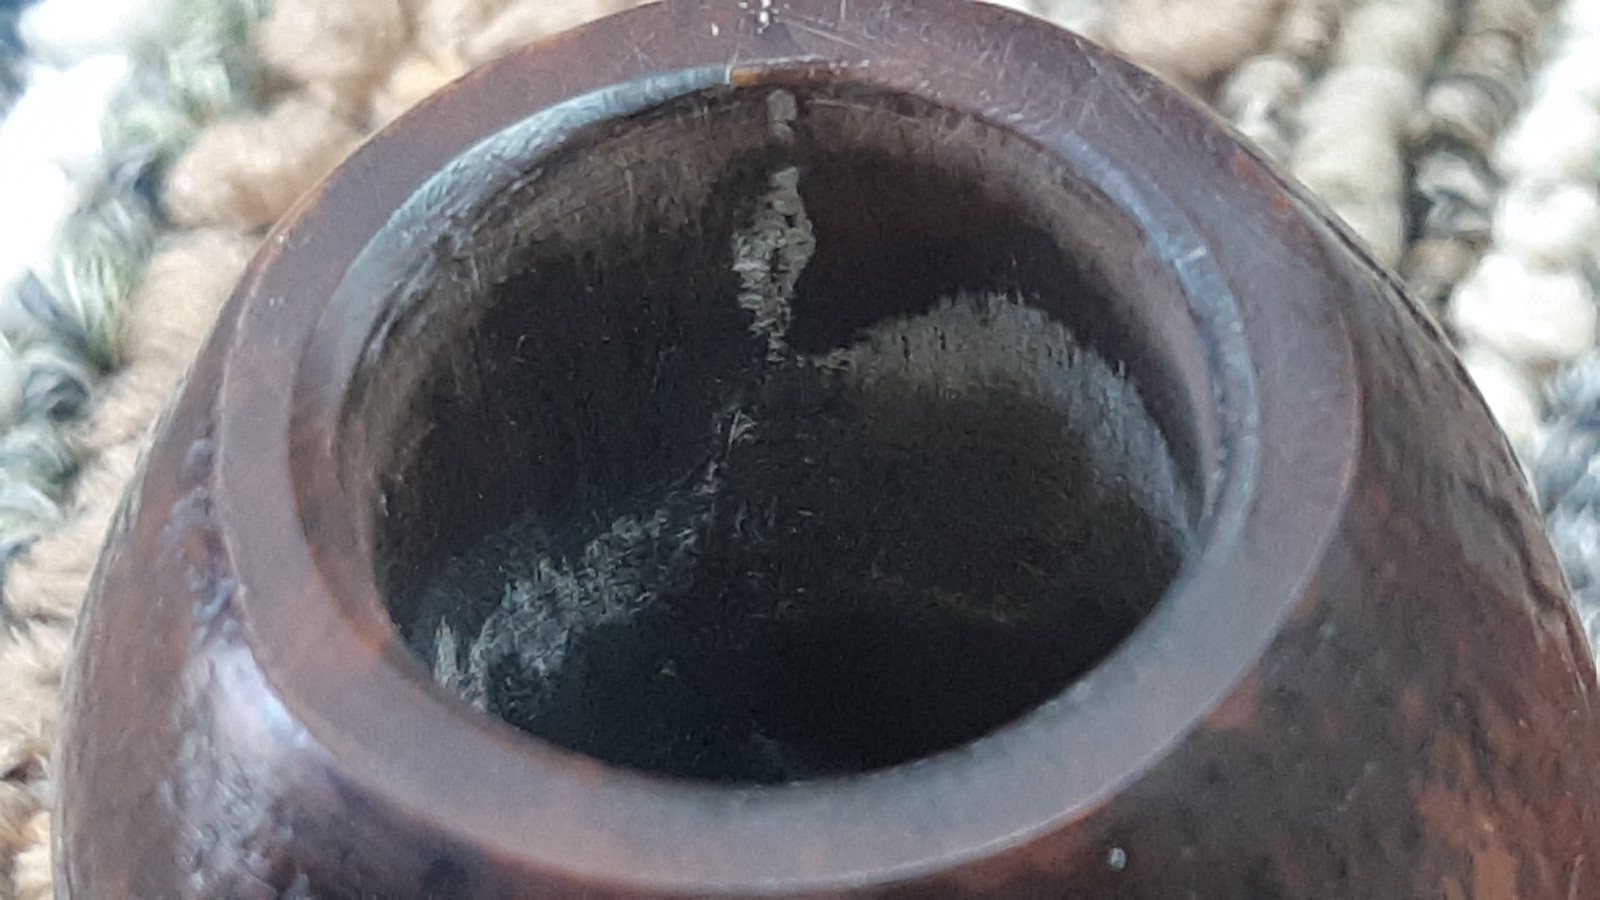
A bit surprisingly, the chamber walls and floor were in very good shape except for the crack. Reaming the chamber revealed that the crack extended all the way to the chamber floor.

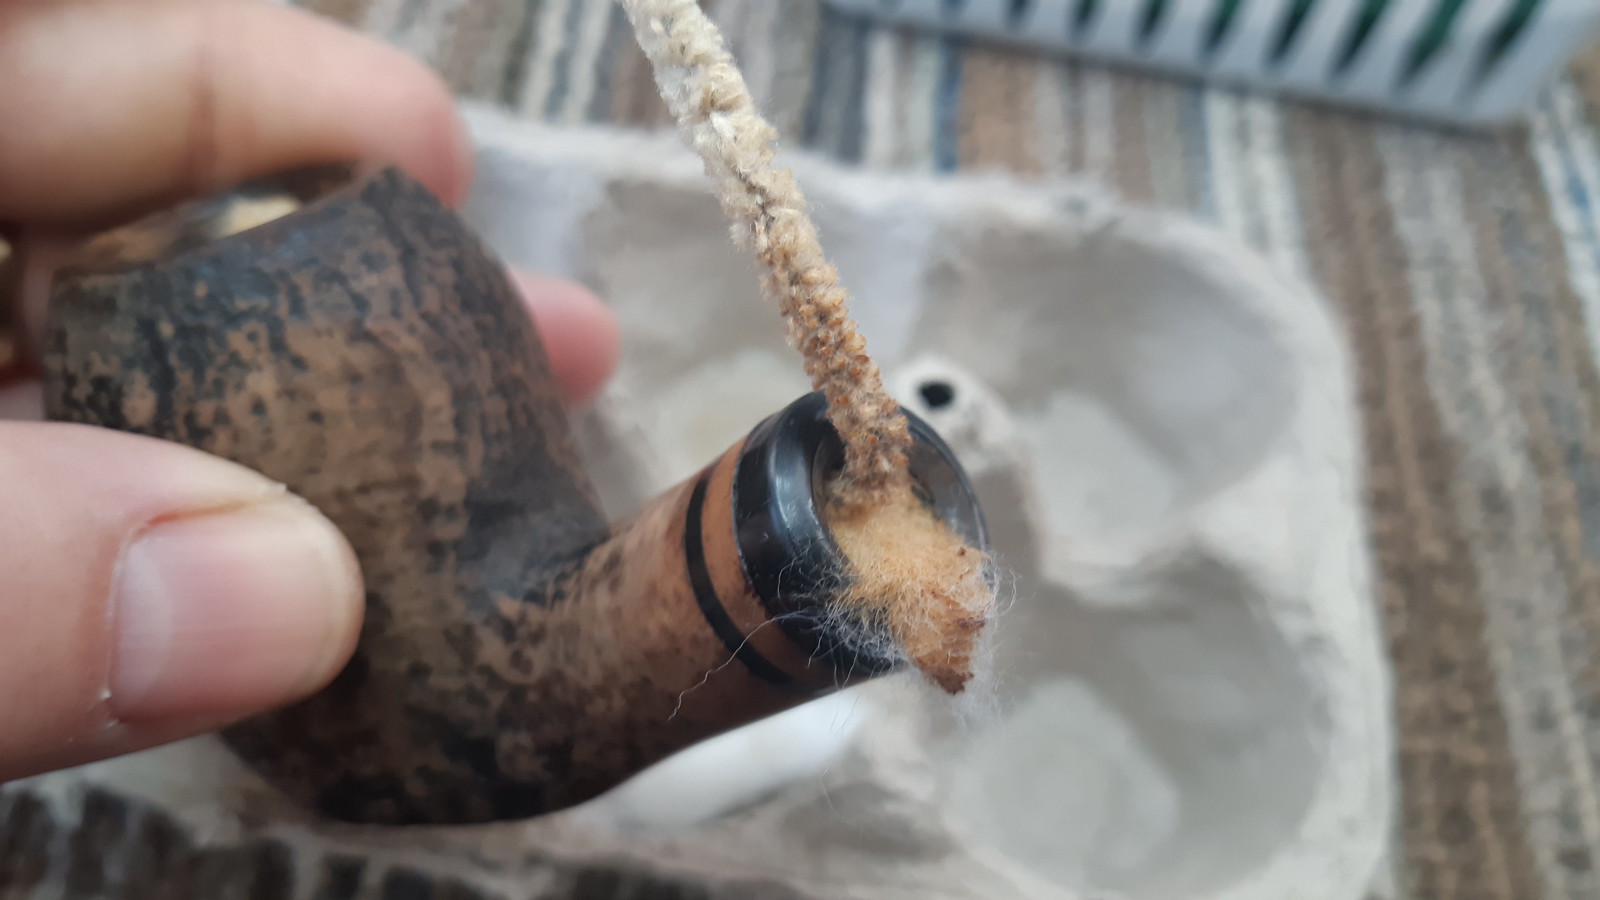
What I was NOT surprised to find was a lot of tarry gunk lurking inside the stummel’s shank and airway. This 9mm pipe was evidently smoked without a filter or adapter in place, which led to a heavy buildup of crud in both the shank and the filter pocket in the stem face. I used shank brushes, a scraper, and many cotton swabs and pipe cleaners dipped in 99% isopropyl alcohol to soften and remove what was likely years of tar from the pipe’s internals.


Finally, I scrubbed the exterior of the briar with Murphy’s Oil Soap and a toothbrush to lift and remove the layers of dirt, grease, oils and wax from the briar.

After rinsing the stummel well and drying it off, I packed the bowl and shank with cotton wool and filled the bowl (as best I could with the huge crack in it) with alcohol and let the pipe sit overnight. For those wondering, the pipe cleaner in the shank helps wick the alcohol from the bowl up the bent shank.

As this snap shows, the alcohol treatment worked, dissolving the deeply-seated tars inside the pipe and collecting them in the cotton. I discarded the spent cotton and gave the internals one final scrub to remove the last of the offending tars.
With the stummel clean and fresh, I could now turn my attention to the meat of this restoration – the crack repair. I began by sketching out the paths for what ultimately would be four brass pins inserted across the crack to stitch the briar back together. Note the opposing angles of the pencil lines – if the pins were installed parallel to each other, expansion and contraction of the briar during use could pull one or more of the pins free and allow the crack to reopen later.

Drilling the pin shafts can be a bit tricky as the pin needs to stay firmly within the boundaries of the chamber wall. This pic shows the first of the pins dry fit into its shaft. The crack is so wide at this point that the pin is visible where it passes across the crack.

Here you can see all four pin shafts have been drilled and pins glued in. I cut the pins about 1/8″ shorter than the drilled shafts, which allows me to dip them in thick CA glue (epoxy would also work), then push them all the way into the shaft, burying the pin within the briar. You will also spot a fifth hole, this one drilled at the end of the crack to stop it from creeping any further across the stummel.

To fill the pin shaft holes and the crack from the exterior, a mix of thick CA glue and briar dust was mixed to form a paste that I pushed into the pin holes and the gap of the crack, deliberately over-filling the repair area to ensure complete coverage of the damaged area.

I also used the CA glue patch mix to fill the crack where it crossed the rim of the bowl.

I let the CA and briar dust patch set before snapping this next shot. It shows just how open the crack was on the interior of the chamber.

To provide a permanent internal repair, I mixed up a small amount of JB Weld epoxy, which is highly heat resistant and inert when cured. I used a gloved finger to push the JB deep into and over the crack, then let the bowl sit overnight to allow both internal and external repairs to cure completely.

When I came back to the pipe the next day, I scraped and sanded away the excess JB Weld from the interior, leaving it only in the crack. JB does not “breathe” like briar, so its best to keep it to a minimum.

A few minutes with files and sandpaper removed the excess fill material from the exterior of the bowl. My goal here was to redefine the outer contours of the bowl’s original shape and identify any areas that might need a second layer of patching.


A light topping redefined the rim of the bowl.

Then I used a small round carving burr in my rotary tool to texture the repaired area in an effort to blend it into the surrounding shallow sandblasted finish. Not too shabby!

Sanding out the excess JB Weld had exposed some small pits and irregularities in the walls of the tobacco chamber. A little bit of pipe mud smeared around inside the bowl filled these nicely. When it was dry, a quick sanding left a nice, smooth surface.

I finished up the stummel rehab by applying a coat of Dark Brown leather dye to the briar. This helped to even out the worn original finish and pushed the crack repair into the background visually.


Before leaving the stummel altogether, I spruced up the appearance of the chamber with a quick bowl coating of maple syrup and activated charcoal powder.

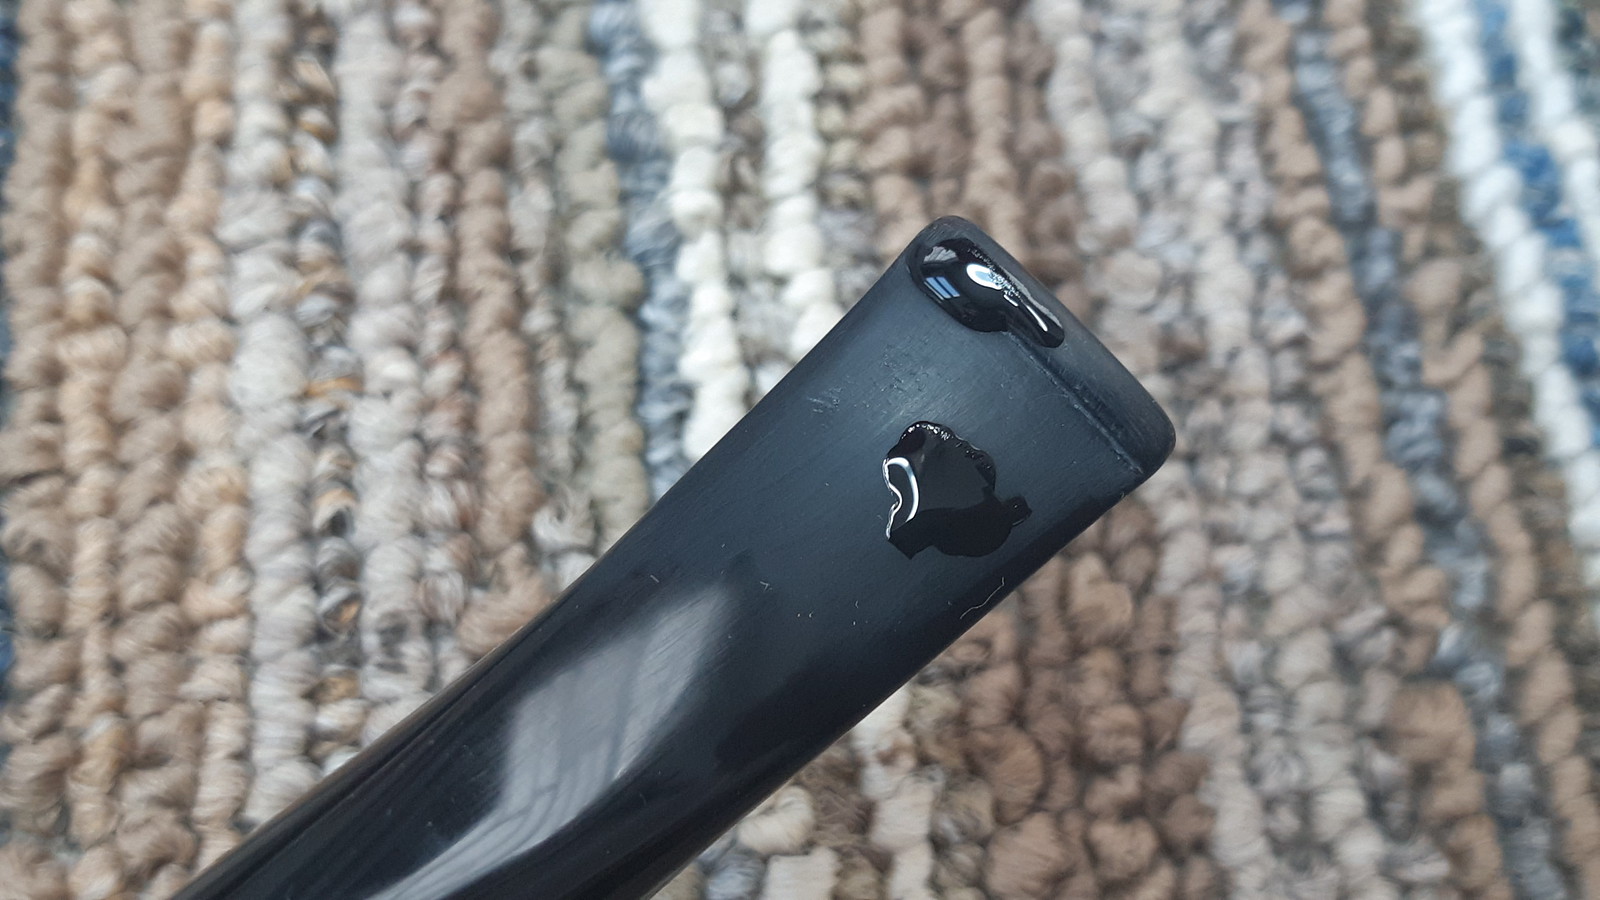
Last, but not least, I drop filled the tooth dents in the acrylic stem with a bit of black CA glue. When the patches were fully cured, I filed and sanded them smooth.

Finally, it was time to take the complete pipe to the buffer for a run of Red Tripoli and White Diamond polishing compounds followed by several light coats of Carnauba wax to shine and protect the revived briar.
The restored pipe bears little more than a superficial resemblance to the damaged briar that arrived on the bench a few days ago. With the large crack permanently repaired and the pipe cleaned, deodorized and polished, this Lorenzetti Titus is once again ready to be put back into a pipe smoker’s rack and rotation. But was it worth it?
As established earlier, the pipe’s previous steward decided not to repair it. The cost simply came too close to the pipe’s retail price, at which point it was arguably better/easier to replace the broken pipe with a new one. From a repair shop point of view, this heavily damaged Lorenzetti was a great candidate for a restoration blog post, but I’ll be lucky to break even on it when the pipe finds a new steward.
However, if a pipe smoker is doing his or her own repairs, on pipes they intend to keep for themselves, the balance quickly tips the other way. Material costs for this project were nominal, so if one is capable of doing the work, DIY repairs are a viable way to add pipes to one’s rack and rotation while saving older or heavily used estate pipes from the scrap heap.
Thanks for joining me for this restoration. I hope you enjoyed watching this Lorenzetti Titus come back to life as much as I did. Until next time, Happy Piping!
Here’s the finished pipe.


Artful repair on a worst-case scenario damage!
LikeLiked by 1 person
Thanks! With nothing riding on the outcome of this one, the repair was actually rather fun!
LikeLike
Very impressive ! I do enjoy you posts. Thank you. R.Compton
LikeLiked by 1 person
Reblogged this on rebornpipes and commented:
Charles I love the way you sewed the crack together on this one. The methodology is unique and I wanted to share it with the readers on rebornpipes. Thank you!
LikeLiked by 1 person
Thanks, Steve. This was one of those Can I Do It projects for sure. Very pleased with the results! 🙂
LikeLike