
An estate pipe can be a lovely and thoughtful gift for new and experienced pipe smokers alike, but sometimes estate pieces need a bit of TLC before they can be added to a pipe lover’s rack and rotation. Such is the case with this Peterson’s Kapruf, which, as you can see in this initial series of images, arrived in a somewhat neglected state.
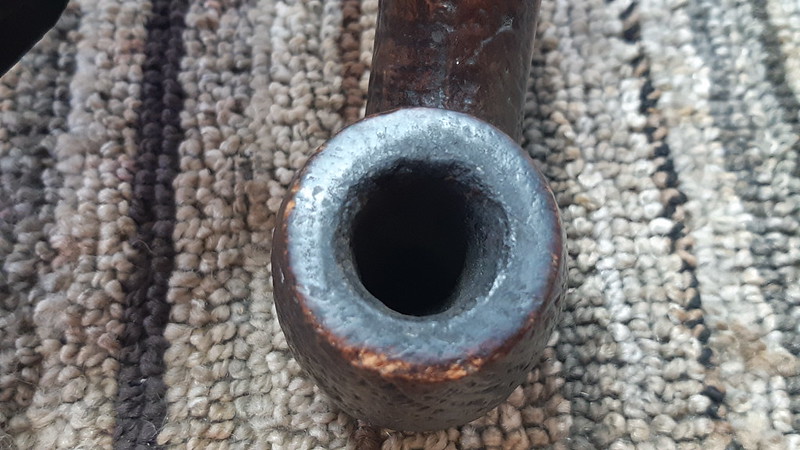
Overall in good estate condition, the pipe certainly needed a good cleaning – the chamber carried a fairly thick layer of carbon cake, the rim was almost completely covered with a crust of carbon “lava”, but not quite enough to hide the battered leading edge of the bowl, and the stem was lightly oxidized with a rather chewed up button.


In addition to the many tooth marks and missing chunks of Vulcanite, the stem was very loose in the shank mortise, so much so that it would fall out if not held in place manually. One more thing on the To-Do list for this restoration!

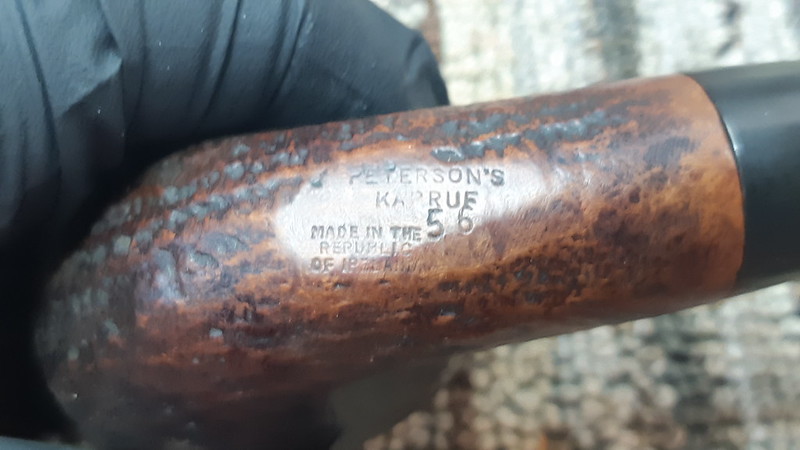
The smooth underside of the thick shank was stamped “Peterson’s” over “Kapruf” over “56”, then with the three-line “Made in the Republic of Ireland” COM stamp.
While examining the pipe, the Chubby Billiard shape reminded me of another Peterson’s pipe I worked on some years ago, a Shamrock 9BC. A little digging made it clear that my brain wasn’t playing tricks on me. This article by Mark Irwin and Al Jones, posted to Mark’s Peterson Pipe Notes blog in 2019, identifies Shape 56 as the evolution of the 9BC, assigned to the Chubby Billiard in the 1950s. According to the article, the only difference between the 9BC and Shape 56 is the use of a slimmer button profile on the 56.
With the provenance of the pipe established, I started the cleaning process by reaming the old carbon cake form the chamber. My reamer heads got me close to the original briar chamber walls, and sandpaper wrapper around a dowel took me the rest of the way. Underneath it all the briar was in good shape, although the chamber floor was dimpled from overenthusiastic reaming sometime in its past.

I used a handful of cotton swabs and a few pipe cleaners, both dipped in 99% isopropyl alcohol, to clean the tars and other gunk from the mortise and airway.

The stummel was still a bit aromatic after the initial cleaning, so I stuffed bowl and shank with cotton wool and filled the briar with more isopropyl alcohol before setting it aside to sit for the night.

When I came back to the workbench the following day, the alcohol had done its job dissolving the deeply ingrained tars which then were trapped in the cotton wool.

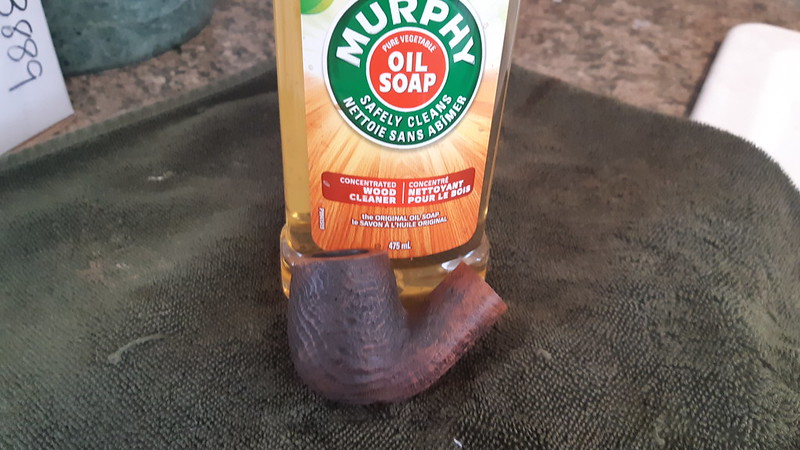
I removed and discarded the spent cotton wool and ran a few pipe cleaners through the stummel to make sure I had removed all the old tars. Happy with the state of the internals, I switched gears and scrubbed the exterior of the briar with Murphy’s Oil Soap and a toothbrush. This removed a surprising amount of dirt, grime and old wax from the sandblast finish.

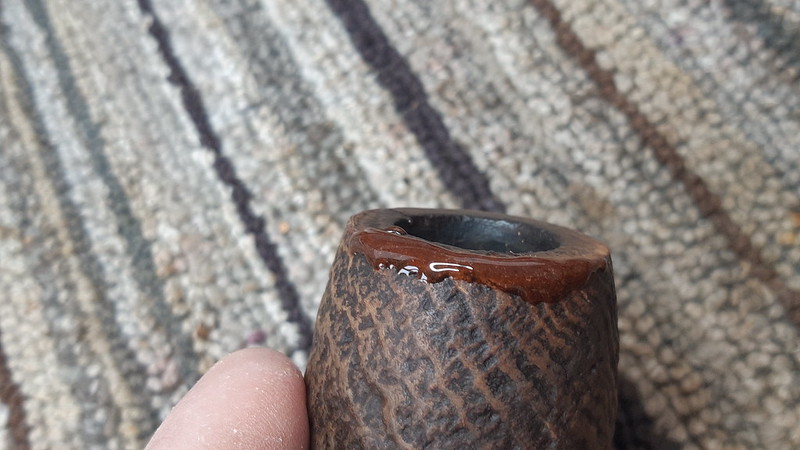
Without the thick crust of carbon obscuring everything, the extent of the rim damage became clear. A large swathe of the rim at the front of the bowl and extending nearly halfway around the perimeter was chipped and beaten down, clear evidence of careless dottle-knocking.

To rebuild the rim, I mixed up a roughly 50/50 blend of thick CA glue and briar dust to make a paste filler which I applied to the damaged areas. I was not delicate about this, adding filler until it overflowed the dents and dings, filling and covering them completely.

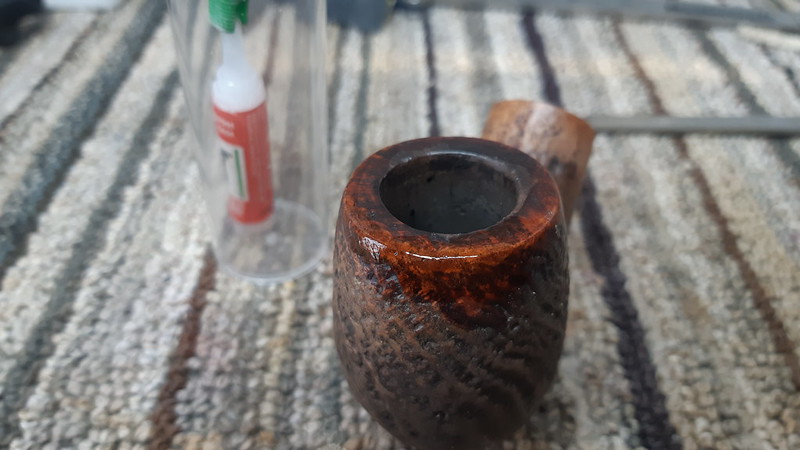
Again I left the stummel to sit overnight to allow the patch to cure completely before filing and sanding away the excess. This pic shows the results after rough shaping, sanding with 220-grit paper and polishing with 0000 steel wool. The brass brush was used to knock the sharp edges off the patch material.


The rim was much improved, but the patch was covered by a constellation of tiny pits created by sanding through the bubbles that form in CA glue as it cures. A skim coat of thin, clear CA glue filled these microbubbles. A light sanding after the glue had cured produced a smooth finish ready for stain and polish.

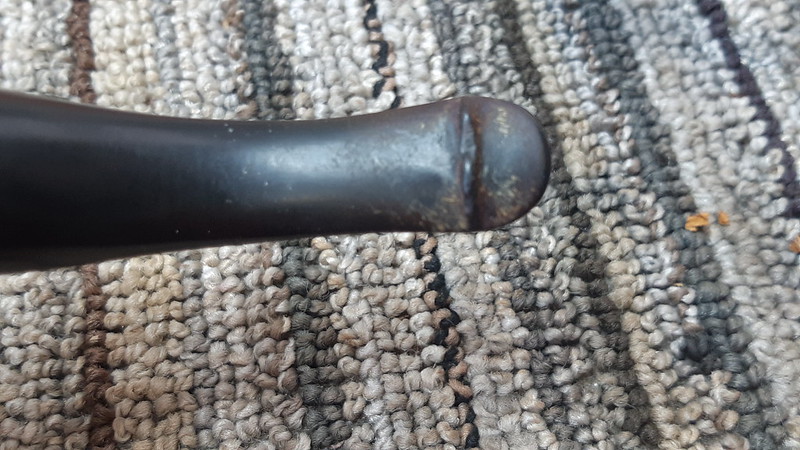
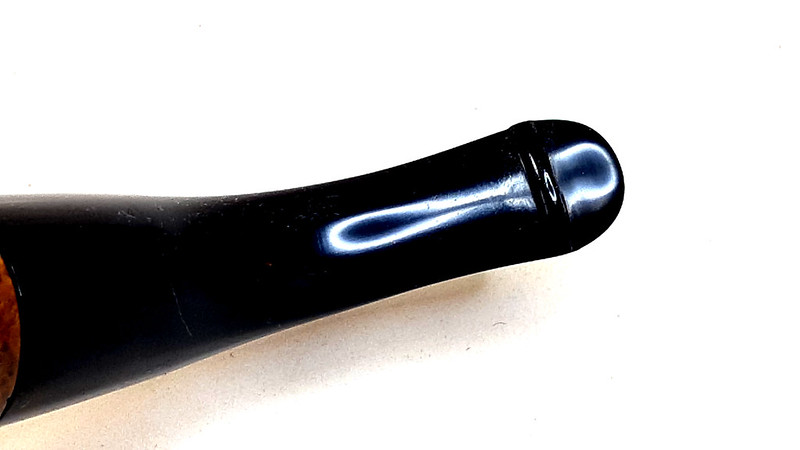
Before moving on to final polishing, however, the stem needed to be cleaned and rehabilitated. These closeup shots illustrate the sorry state of the button on both upper and lower bite surfaces. The upper surface isn’t too bad, but the lower portion of the P-Lip would need to be reconstructed almost entirely.


Similar to the process with the stummel, rebuilding the button started with a good cleaning of the entire stem, inside and out. A few pipe cleaners dipped in alcohol sorted out the airway, and a light wet-sanding with 500 through 2000-grit sandpaper removed the light oxidation from the stem’s exterior.

I could then apply a patch mix of thick CA glue and activated charcoal powder to the damaged areas, again overfilling the dents and dings to provide enough material from which to carve the new button.


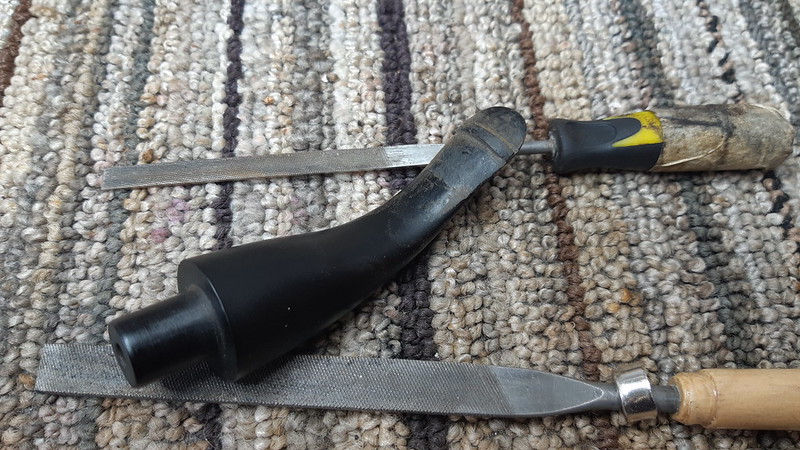
After an overnight rest to give the patches time to cure, I used a variety of needle files and sandpapers to shape the patch to the proper contours.

Almost inevitably, I had to go back over a few areas with thin CA glue to fill small imperfections before sanding everything smooth to 2000-grit in preparation for final buffing and polishing on the wheel.

When I was happy with the new button, I took a few minutes to correct the loose stem fit. Very often, simply heating the tenon over a lighter flame and allowing it to cool naturally is enough to expand the tenon and achieve a good fit at the shank. This time, however, I had to go one step further and physically expand the tenon by pushing the smooth end of a drill bit into the airway while the Vulcanite was warm and pliable.

With the light at the end of this restoration tunnel visible ahead, I hit the briar with a coat of Dark Brown leather dye. For those who may be interested, I recently purchased a half dozen or so colours of leather dye made by Ottawa, Canada-based Zelikovitz. Their web store carries a wide selection of dyes, including their own brand and the more widely used, but more expensive, Fiebing’s brand.

I let the pipe sit until the dye had dried, then removed the excess by hand-buffing the stummel with an old towel. A light wipe with mineral oil helped to set the new stain, inject some moisture unto the briar and give the new finish depth and pop. I let the oil sit on the entire pipe for just a minute or so before hand buffing away the excess.

Just before taking the refurbished pipe to the buffer, I filled the dimple in the bottom fo the tobacco chamber with a small blob of pipe mud to bring the chamber floor up the the bottom of the draft hole. I applied a bowl coating of maple syrup and activated charcoal powder over the dried pipe mud. This tidied up the look of the chamber cosmetically and provided a slightly grippy surface onto which a new protective cake layer could be developed by the pipe’s new steward.

Finally it was time to give the entire pipe a run on both the Red Tripoli and White Diamond buffing wheels, followed by a few light coats of Carnauba wax to add shine and a layer of protection to the pipe’s refreshed exterior.
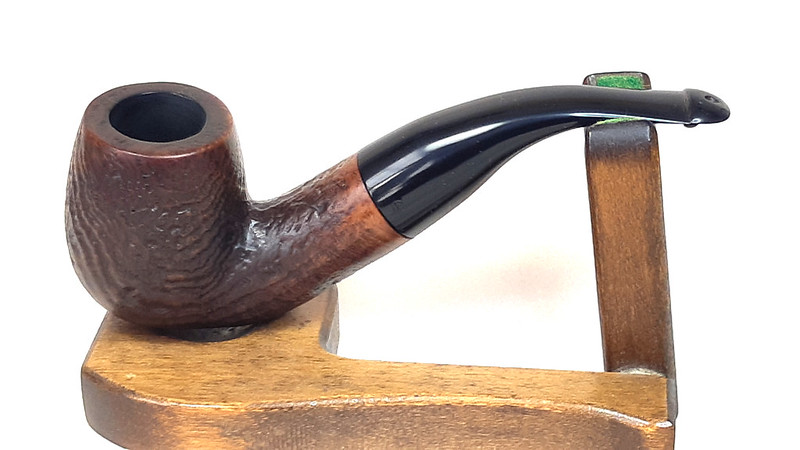
The restored Peterson’s Kapruf 56 Chubby Bent Billiard is looking great after its time on the bench and is once again whole, fresh, sanitized and ready to be put back into active service by the lucky pipe smoker to whom this estate pipe was gifted.
Thanks for joining me for this restoration project. I hope you enjoyed following along with me and hope that this post as inspired you to give your own pipes a bit of TLC to keep them looking and performing their best.
Until next time, Happy Piping! Here’s the finished pipe.


Reblogged this on rebornpipes and commented:
One of my favourite Peterson’s shapes – that and the 9B. Well done Charles.
LikeLiked by 2 people
Nice work on that bowl top! The 56 shape is starting to pop up now and again.
LikeLiked by 2 people
Charles, another first class restoration! The whole process is fascinating and I am certain there is one very happy pipe owner.
LikeLiked by 2 people