
This intricately carved meerschaum figural pipe came to me as part of an estate lot. It had waited patiently for restoration for a few years before I managed to get repairs underway, and even then it took me months to complete the work, picking away at it in the spaces between other jobs.
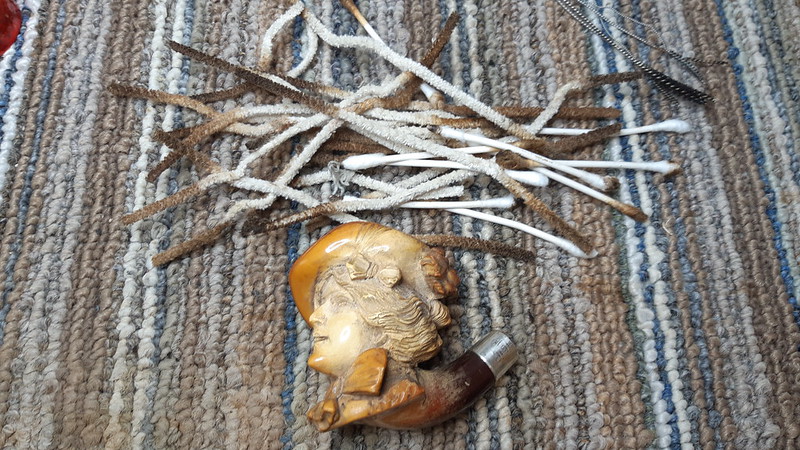
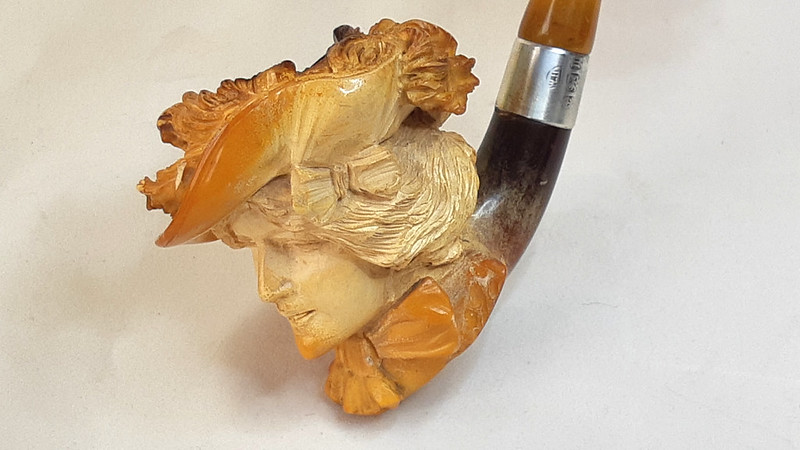
As you will see in the following series of images, the pipe is carved in the shape of a decidedly Edwardian lady, complete with a rather large hat perched atop a pile of Gibson Girl hair. A similarly large bow tied under her chin balances the look, while the sweet, contented expression on the lady’s face speaks of many hours of peaceful smoking for the gentleman lucky enough to call her his own.
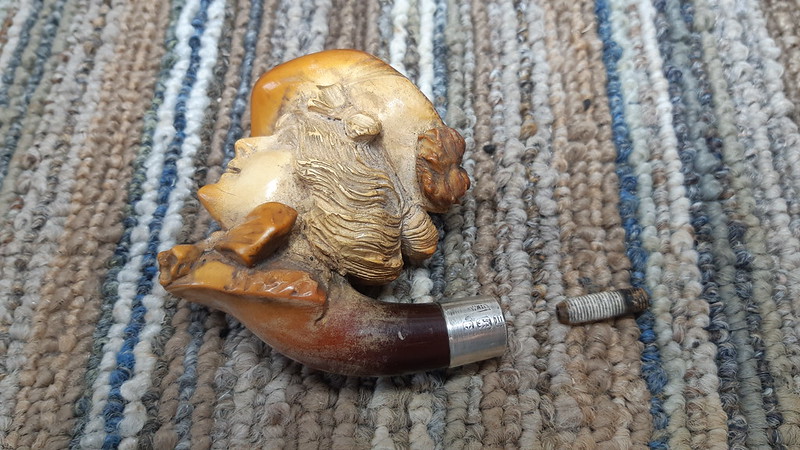
The stummel arrived in dirty but undamaged condition, a testament to the care shown by its stewards over time. Alas, the stem was not quite so lucky – it had snapped off just above the threaded bone tenon, leaving a jagged and uneven edge along both sides of the break.


These closeup shots show just how much dirt, grease and carbon was packed into the delicate lines of the carving.


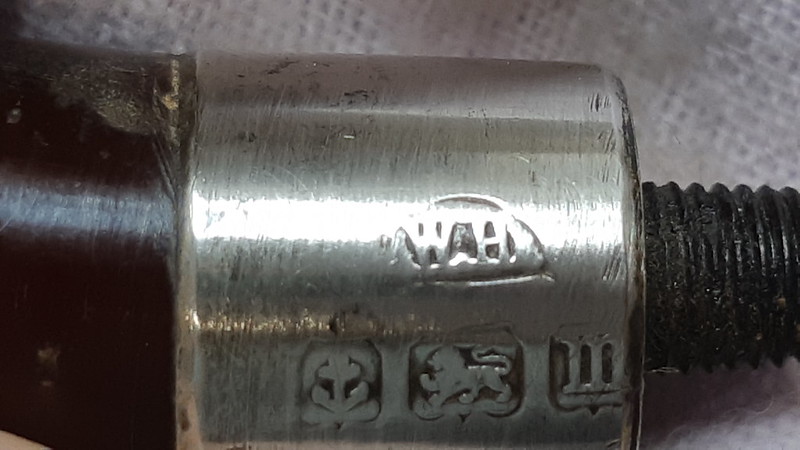
The silver shank band was heavily tarnished, but a scrub with a jeweller’s cloth removed it quickly enough. Without the tarnish, the silver hallmarks became much easier to read.

The stamps include a maker’s maker consisting of a semicircle inside which is stamped “W.H”. Under the maker’s mark are hallmarks of an Anchor, a Lion Passant and a lowercase “m”, all in cartouches. Matching these up with information available on silvermakersmarks.co.uk, the hallmarks tell us that the band, at least, was made by William Harrison, a Pipe Mounter active between 1906 – 1912 in Birmingham, England. The band is Sterling Silver, assayed in 1911.
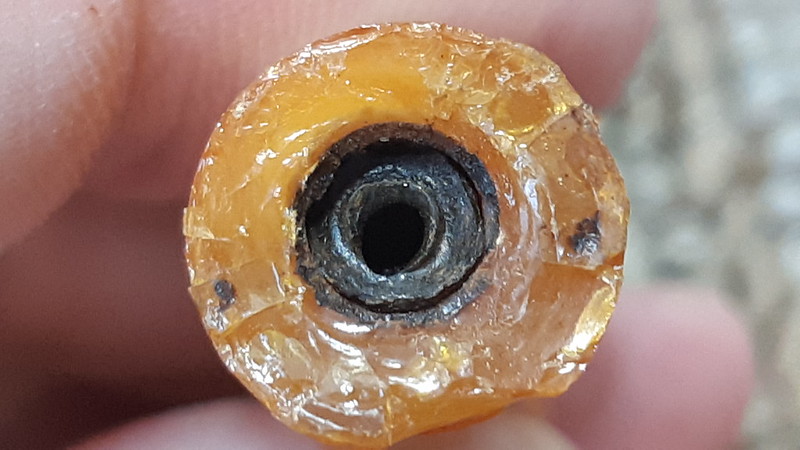
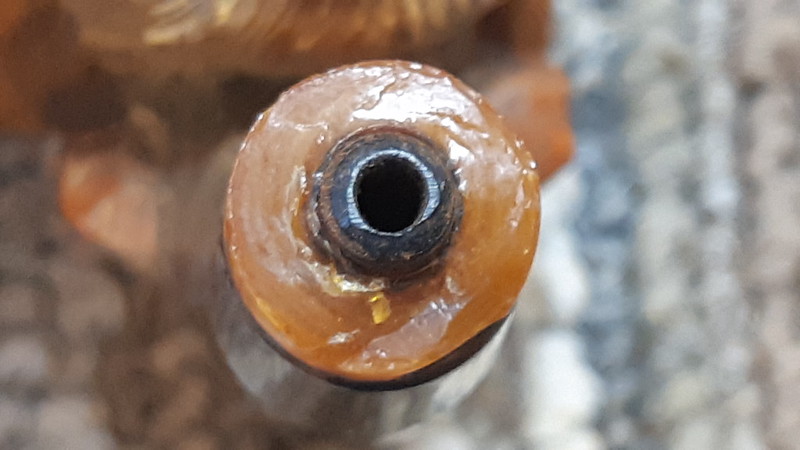
The hallmark is really all I needed to date this pipe to the late Edwardian period (though officially 1911 was the first year of George VI’s reign), but the stem also provides a few clues to the age of the pipe. The first is the orific bit – a simple round airway at the button, rather than a more modern slotted bit. This style of mouthpiece was used into the early to mid-1920s, so we know the stem is no younger than that. The material used to make the stem is also telling – while amber stems were still in use around the turn of the 20th century, I am confident that this stem is synthetic, made of Bakelite, an early synthetic plastic invented in 1909, or possibly Amberite, a Bakelite derivative.

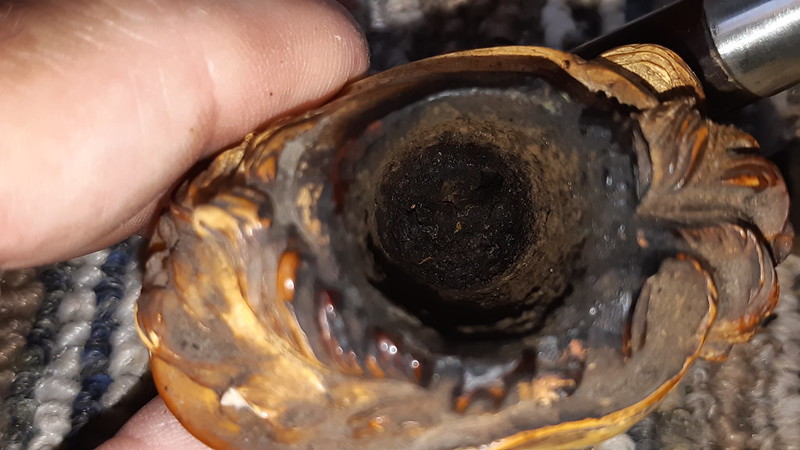
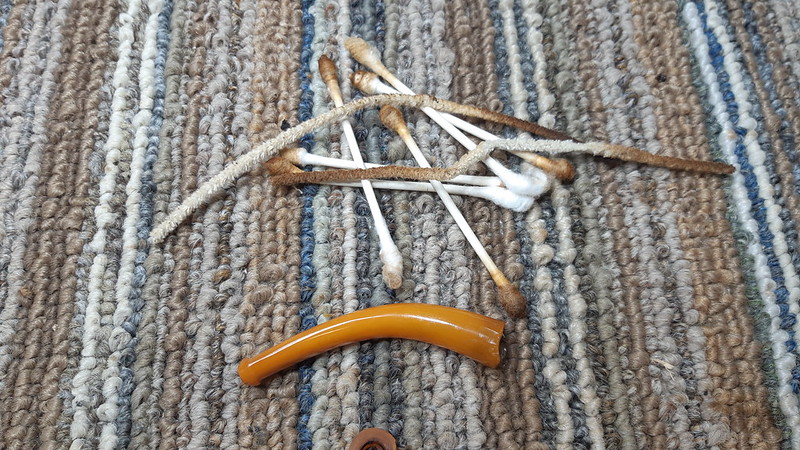
Continuing my inspection of the pipe, I discovered an interesting aftermarket addition to the tobacco chamber – a half-round wooden (presumably briar) plug lodged in the chamber floor. My first thought was that I was going to find some sort of damage to the meerschaum underneath the plug, but after removing it and reaming the chamber (very carefully), I found nothing seriously alarming, though the airway had been scraped up a bit. Perhaps the pipe’s original steward had noticed this as well and had made the plug in an effort to avoid further damage? We’ll never know for sure, but as I didn’t see a need for it, I removed the plug and carried on with the cleaning.


To access the years of tars built up in the shank, I very carefully unscrewed the old bone tenon. This pic shows what looks like some old glue in the threads, which were rather worn.
I used a small heap of pipe cleaners and cotton swabs dipped in 99% isopropyl alcohol, along with a few different sizes of shank brushes, to clear the shank and airway of tars and debris. The modern pipe cleaner was invented around 1900, so many pipes of this vintage were never really cleaned as we understand the term today. If you tackle an old meerschaum pipe like this, you’d best be prepared for some serious grime!
When I was happy with the state of the pipe’s internal workings, I moved on to the exterior of the stummel. For this job, I took the least invasive approach, gently scrubbing the nooks and crannies with a toothbrush dipped in a little clean water. Too much water (or alcohol, for that matter) will soften the meerschaum, which could lead to inadvertent deterioration of the carving, so a cautious approach is called for here.
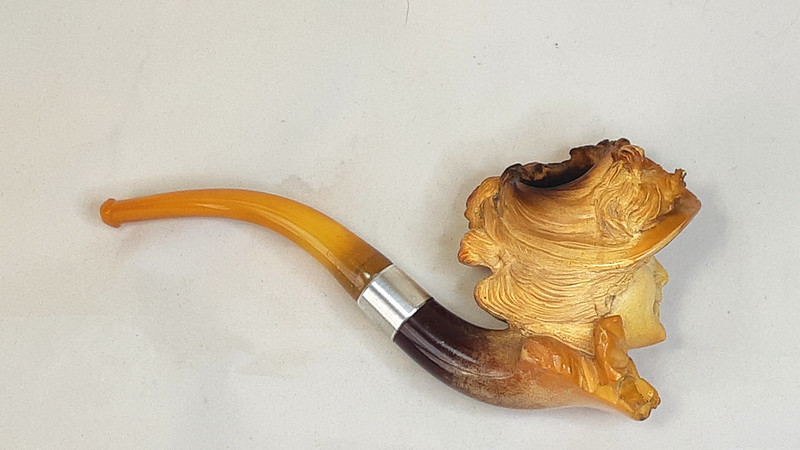
The results were, to be honest, quite spectacular. With the grime of 110 years removed, the details of the carving were revealed in all their intricate glory. The water also brought the meerschaum’s colouring temporarily to the surface, running from a honey gold to a deep amber.


This colouring was brought out permanently through a fresh dip in hot beeswax. Unfortunately I forgot to photograph the process, so you’ll have to wait to see the results in the final photos below.
With the stummel work complete, I moved on to the more onerous task of rebuilding the broken stem, starting with a cleaning.
To confirm my theory that the stem was synthetic, I dug out a genuine amber stem from my collection of parts and examined the two side by side. This pic shows the difference in colour and opacity – the amber stem is on top, with the broken Bakelite/amberite stem underneath. In isolation, it might be easy to confuse one for the other, but side by side like this, the difference is obvious.

Repairing a genuine amber stem is quite difficult as amber is very fragile. A synthetic stem, on the other hand, responds well to CA glue to both join the broken parts and fill the gaps where shards are missing. The downside to this repair is time. Each layer of CA glue needs time to cure completely before adding the next layer, and as you can see in the first pic below, there were a LOT of missing chips to fill in.
As I mentioned at the beginning of this post, I worked on this restoration over a period of many months, adding a layer of CA glue, allowing it to cure, then sanding things smooth before repeating the process. This series of pics shows a sort of time lapse of the process, at the end of which the stem was whole and smooth again.


After a lot of work, the final task was to reconnect the repaired stem to the shank of the pipe. The original bone tenon was quite worn, as were the threads in the shank mortise; the threads in the stem face had been obliterated when the stem had cracked. To solve the problem and assure a solid connection point between stem and stummel, I made a new, slightly larger, tenon from Delrin rod and re-cut the threads in the pipe shank to match. This pic shows the new Delrin tenon in place.

Due to the age and fragility of the Bakelite stem, the stem end of the tenon would have to be glued into place using the same technique I use to install Delrin tenons into Vulcanite or acrylic stems. I filed the tenon down until the stem slipped easily over it and sat flat against the shank face, and a wipe of petroleum jelly on the shank protected it from any glue squeeze-out.
I used a two-part epoxy to bond the Delrin to the repaired stem, holding it in place until the glue took hold. To keep the stem in position, I added a bit of tape, then propped the pipe upright in an egg carton and left it for a day to allow the epoxy to cure completely. It was a rather undignified position for our Edwardian Lady, but it was a necessary discomfort.


This pic illustrates the importance of the petroleum jelly in the glue-up process. The epoxy had run down the airway and hardened slightly proud of the end of the tenon. Without a release agent, the stem could have been bonded in place permanently. Yikes!

Thankfully, the epoxy drilled out easily, though I still handled the stem carefully. As you can see, the airway opened successfully. I was able to pass a pipe cleaner through the stem without impediment.

After just a little last-minute tweaking of the stem fit, I took the completed pipe to the buffer where I polished the repaired stem to a high gloss, finishing off with a coat of Carnauba wax and a hand-buffing with a microfiber cloth.
And with that, our Edwardian Lady was whole again! The repair is visible as a darker line through the amber-coloured Bakelite, but the imperfections are not glaring. if anything, they celebrate this pipe’s 110th birthday – we should all look this good at that age! Much more noticeable, in my opinion, are the things we no longer see – the dirt, grime and carbon packed into the meerschaum, the thick tarnish on the sterling silver shank band, and even the interesting but unnecessary DIY briar bowl insert. Instead, the renewed and refreshed meerschaum highlights the tiniest detail of the figural carving, and judging by the expression on her face, the Lady agrees!
Thanks for joining me for this estate pipe restoration. I don’t get the opportunity to work on many pipes of this age or intricacy, so despite the lengthy stay on my worktable, I really enjoyed the process. I hope you did too.
If you’d like to add this Edwardian Lady to your pipe collection, it is available on the Pipes Inventory page now.
Until next time, Happy Piping! Here’s the finished pipe.


Reblogged this on rebornpipes and commented:
I have been waiting for this write up. As Charles noted Bakelite is highly repairable when this happens. However he also experienced many of the pains of doing this… thanks for sharing this restoration Charles.
LikeLiked by 1 person
Thanks, Steve. To be honest the hardest part about the Bakelite repair was waiting for each layer of CA glue to cure before piling on the next. I tries to speed it up at one point. It did not go well. 😀
LikeLike
Been there done that! Great job though!
LikeLiked by 1 person
Well done once again. I really enjoyed your careful explanation of how you identified the age as well as the material for the stem. I would have (did) assumed it was amber, but the side by side view gave me a little education in how to differentiate between that and other materials.
LikeLiked by 1 person
Thanks! I have to look at these stems carefully each time myself. I can pretty much recognize Vulcanite and acrylic on sight now. 😆
LikeLike
Beautiful restoration! Would you smoke this pipe or just have it out as a display piece?
LikeLiked by 1 person
It is definitely smokable, though you’d want to be somewhat careful with it. Not a yard or shop pipe, for sure. 😁
LikeLike
Well Charles, this is interesting. I have a very intricate Meerschaum pipe that I believe was my grandfather’s. The stem, which I had thought to be amber but having read this blog may be synthetic, was smashed many years ago and my mom tried to glue it back together (many pieces) and as you can imagine it was a huge mess. I might just send it down to see if here is any remote possibility of a restoration. I’d guess it will be one of your biggest challenges.
LikeLiked by 1 person
By all means, send it along! If the stem can’t be rebuilt, it can be replaced with a nee Bakelite or Acrylic stem. 👍
LikeLike