
Finding a parcel in the DadsPipes mailbox is always a bit like Christmas morning – I never quite know what I’ll find, but I’m usually excited by it! This Savinelli 616KS No-Nik pipe arrived with a few others some months ago but I’m only now getting around to writing them up. They belonged to the current owner’s father, and my brief was to repair and restore these family heirlooms.
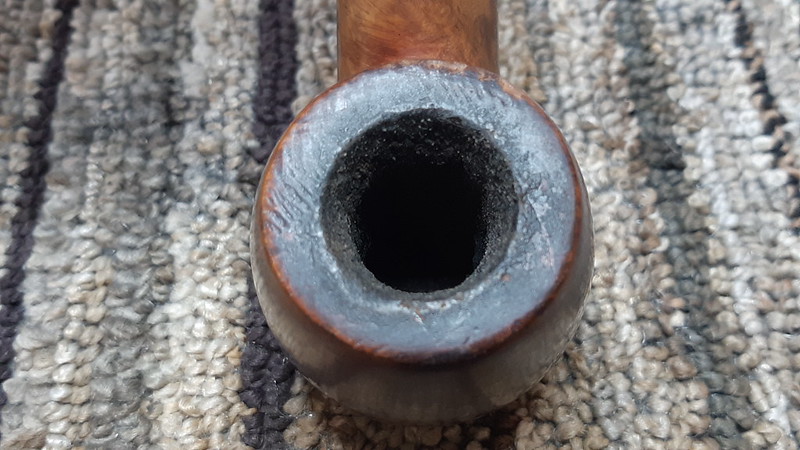
This Italian briar was obviously a favourite pipe – the kind that is always close at hand, in a pocket or even clenched in the teeth whether it is lit or not. The marks of this love affair were evident from the outset. The briar was dirty and showed a grayish cast on the sides of the bowl where its last steward held it in his hand. The rim was covered in a thick layer of carbon lava that didn’t quite hide a constellation of nicks and dings around the outside edge. The chamber sported a thick layer of old cake, and the stem was oxidized and had a good layer of yellow/white mineral accretions built up in the bite zone.

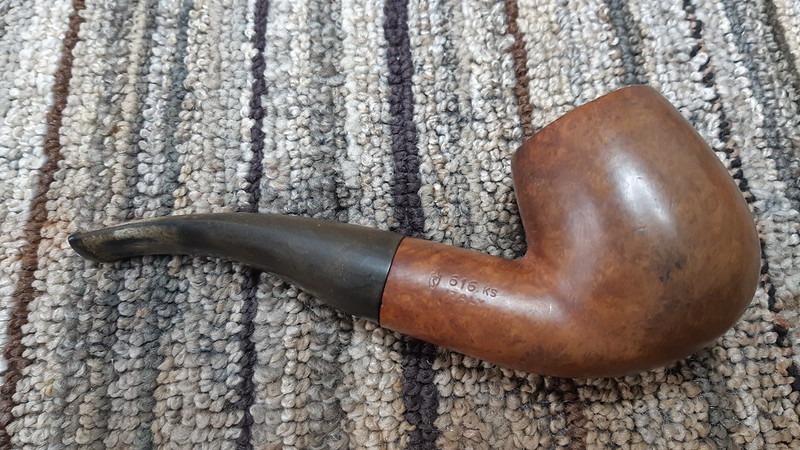


The stummel was stamped with “Savinelli” over “No-Nik” on the left shank. The right shank carried the Savinelli “S” shield followed by “616 KS” over “Italy”. A single letter, “A” was stamped on the underside of the shank near the stem junction.


There is not a lot of information out there about the No-Nik series of pipes. I found this tidbit on VKPipes.com:
“The No-Nik series was in fact the same Savinelli Milano but adjusted for the 9 mm filter. The name No-Nik comes from “No Nikotine”.”
https://vkpipes.com/pipeline/savinelli-no-nik-101-ks/
The pipe on the table was indeed set up to accept a 9mm filter, though the large tenon had come loose from the vulcanite stem at some point. The tenon mounted reasonably snugly in the shank mortise, but the stem could be spun around it freely – not exactly in best fighting shape for a pipe! This pic illustrates the issue – and the camera found something I had missed on my initial inspection – the Savinelli shield logo stamped (faintly) on top of the stem.

To get the ball rolling on this restoration, I dropped the stem into an Oxyclean bath and the loose tenon into some isopropyl alcohol. While the parts soaked, I worked on the stummel. First up was a good reaming of the chamber to get rid of all that old cake.

It took a bit of time to get the chamber cleared back to briar, but the walls and floor were in excellent condition underneath the cake. With no burnouts or over-reaming to contend with, I moved on to cleaning the old tars and other goodies out of the shank and airway. Given the amount of cake I just reamed from the bowl, I was hardly surprised to find a bonanza of tars and old muck lurking in the shank. I worked away at the internals with pipe cleaners, cotton swabs, shank brushes and more alcohol until I was reasonably certain that I had expunged the worst of the old gunk from the briar.

By virtue of its soak in alcohol, the 9mm tenon cleaned up with relatively no effort.

I let the stem sit in the Oxyclean a bit longer before pulling it and scrubbing away the now soft oxidation with 0000 steel wool and Magic Eraser. A few pipe cleaners dipped in alcohol sorted out the stem’s airway.

With the parts cleaned, it was time to glue the tenon back into the stem face. A dab of thick CA glue did the trick.

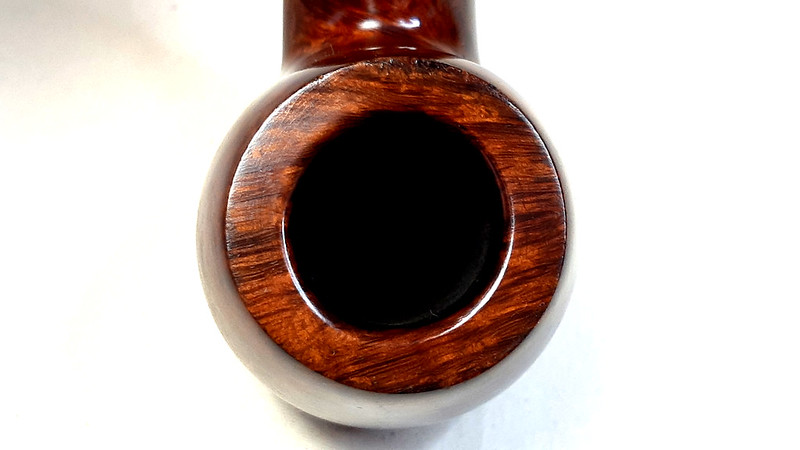
I set the stem aside at this point in favour of addressing the lava-crusted rim on the stummel. I used the topping board and some 400-grit sandpaper to skim off the lava and reveal the briar underneath. As predicted, there were a lot of dents and dings that needed smoothing out, so it was back to the topping board for a bit more sanding to get the rim smooth again.
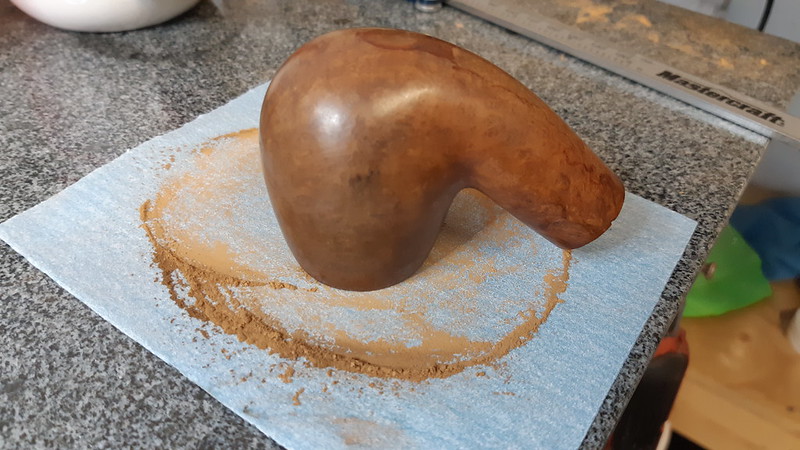
Sanding out all the rim dents would have significantly altered the height of the bowl. To avoid this, I hit the outer edge of the rim with a mix of CA glue and briar dust to rebuild the worn and battered areas. The first application always looks like heck, but a bit of filing and sanding after the patches had cured effectively restored the round shape of the rim.


The rim in the pic above needs a bit more work to fully smooth things out. The patches appear dark against the freshly sanded briar, but after final smoothing and refinishing, the patches will be nearly invisible. After touching up the rough spots in the last pic, I wet-sanded the briar to 2000-grit, being careful not to damage the nomenclature.

I remounted the stem in the shank at this point to get a sense of where things stood, and was instantly reminded that even round things can be, well, not quite round. It seems I glued the tenon into the stem on a different alignment than the factory. This showed itself in the slight overhang of vulcanite on the front side of the shank, and a slight step down on the opposite side. A bit annoying, but easily dealt with using a few scraps of sandpaper.


I worked on the shank/stem junction slowly and carefully, sanding both the stem and the shank until the line of the pipe flowed smoothly from bowl to button. I took only one picture during this process, which makes the work look quick and easy. In reality, I spent the better part of an hour on the task.

Then it was time to refinish the pipe. To reproduce the original finish, I first applied a coat of Fiebing’s Black leather dye. I let the dye dry, then scrubbed the stummel with some damp Magic Eraser to remove as much of the colour as I could, leaving the black only in the grain. A top coat of Dark Brown dye followed, the a wipe of mineral oil to refresh the briar and give the new finish depth and pop.


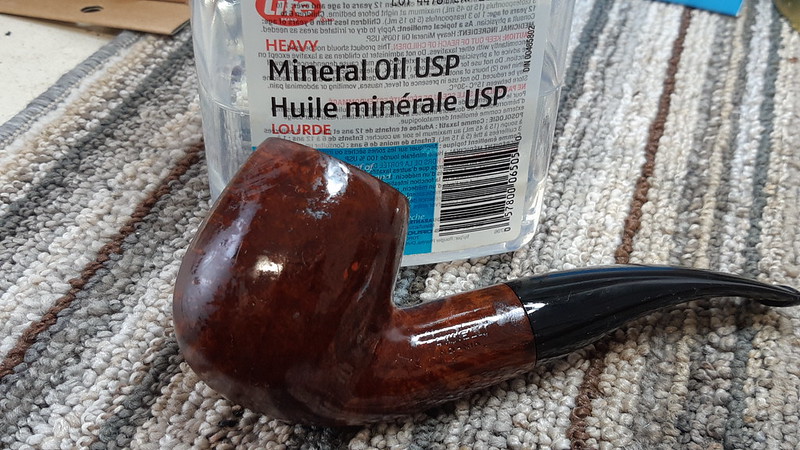
I allowed the oil to sit on the pipe for just a few minutes before hand buffing away the excess with an old towel. Then it was time to let the pipe rest for a bit to find its equilibrium. After a few hours, I took the finished pipe to the buffer where I gave it a run on both the Red Tripoli and White Diamond wheels to bring up the shine. A few light coats of Carnauba wax added more shine and a modicum of protection against oxidation.
The finished pipe looks miles better than it did when I first brought it to the bench, though there are a few battle scars here and there that tell the pipe’s story. Clean, deodorized, sanitized and renewed, this Savinelli No-Nik 616 KS is once again looking like the cherished heirloom that it is. I am happy to report that this pipe has been returned to the family.
Thanks for following along with this estate pipe restoration. It was an interesting project for me. Until next time, Happy Piping!
Here’s the finished pipe.


That’s one I wish was going on your inventory page, Charles. It looks very comfortable/practical; a good pipe for the front porch here on the escarpment. It sure cleaned up nice. 👍
LikeLiked by 1 person
Yes David, this one is a nice handful of briar for sure!
LikeLike