I was recently sent a box of pipes for refurbishment that really worked out my restoration muscles. All of the pipes were very dirty and smelled strongly of OTC aromatic blends, and all needed new stems as the originals had been chewed up or bitten through. They also, as it turned out, were heat damaged to varying extents.
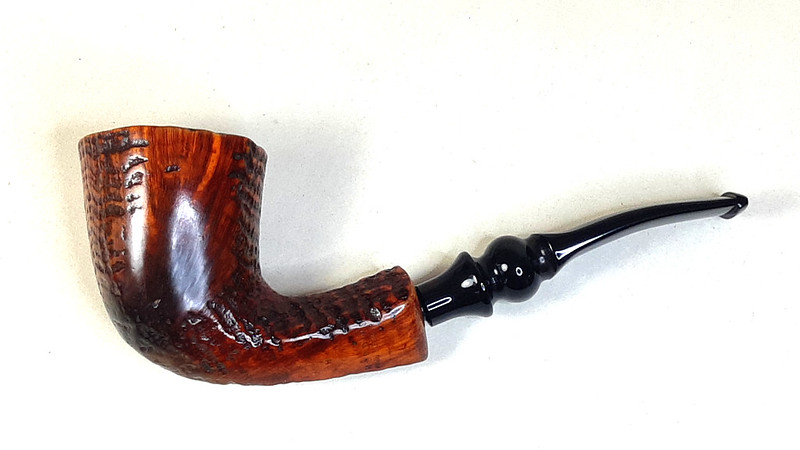
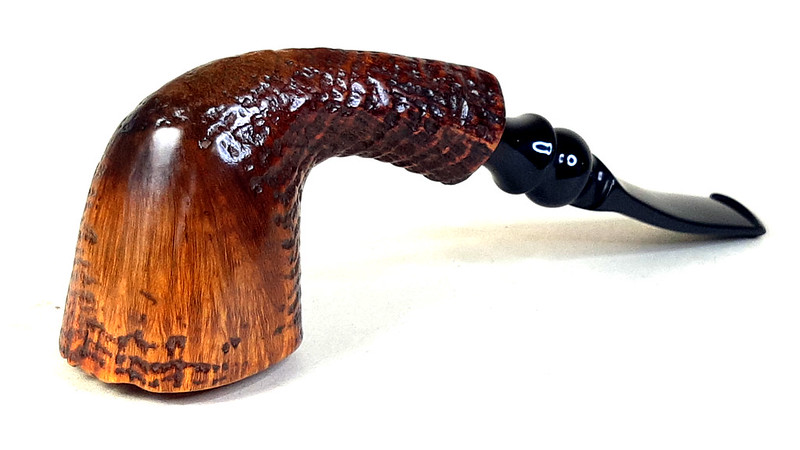
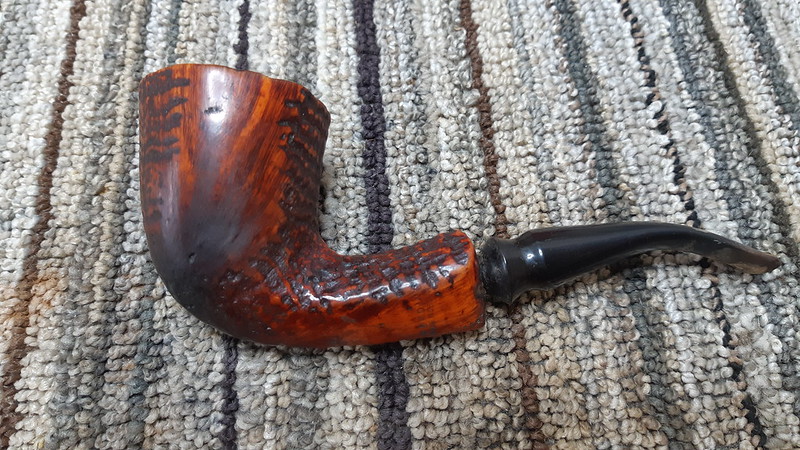
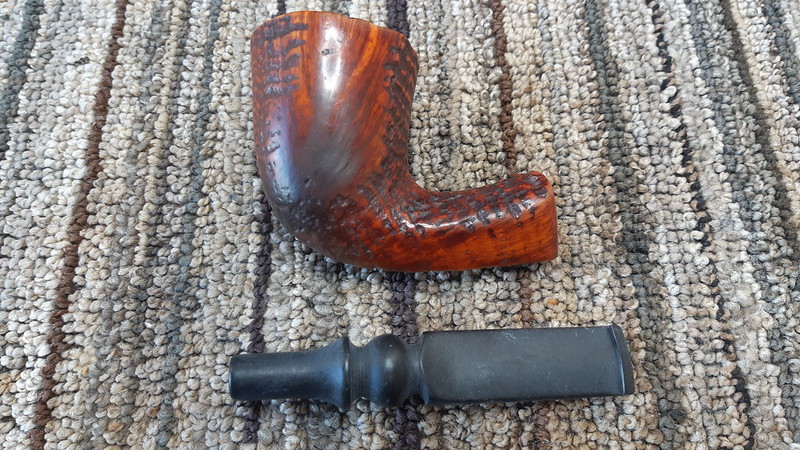
The pipe on the worktable today is a hand-made Nording 4 freehand that had definitely seen better days, and, with a bit of work, should see many more. This series of pics shows the pipe as it looked when it arrived. The rim was covered with a layer of carbon “lava”, and a telltale dark patch on the lower left face of the bowl spoke of heat damage in the chamber. The stem, a twin-bore fancy Vulcanite affair, showed a chewed up button and deep tooth dents on both upper and lower surfaces.


The pipe is stamped “4” over “Nording” over “Made in Denmark”.

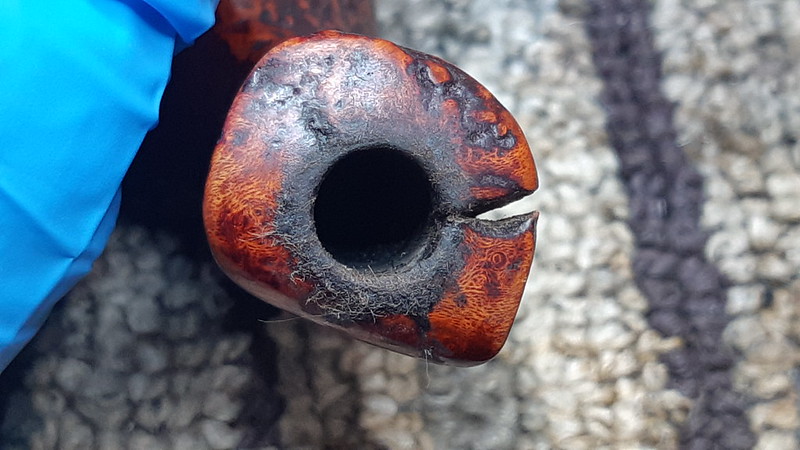
The stem was in bad shape, but more urgent was a crack running about an inch up the shank, the result of a poor decision at the Nording factory. A close look revealed that the crack was a natural flaw in the briar that had been filled with putty. The flaw had not originally penetrated the shank mortise, but years of use, expansion and contraction had finished what Mother Nature had started.


I used my dental pick to scrape the old putty out of the crack and took these pics to show the extent of the damaged area. It’s a doozie!


While I had the pick in hand, I used it to clear the carbon lava from the rim. A cotton pad dipped in alcohol helped clean the rest of the lava off the briar.

Then it was time to get into the meat of the cleanup. I reamed a lot of carbon cake from the bowl and tidied up the briar walls with sandpaper wrapped around a dowel. The chamber walls appeared to be in good shape, but the floor had sunk about 3/16″ below the draft hole. That would need some attention after I got the cleaning and shank repairs done.

The airway through the shank was almost completely plugged with tars. I used a 5/64″ drill bit, turned by hand, to auger out the worst of the crud, then spent a fair amount of time with alcohol, shank brushes, pipe cleaners and a LOT of cotton swabs to clear what seemed like decades of tar, tobacco remnants and other goodies from the mortise, shank and airway. The tissue in the second shot below shows how much gunk I scraped out with the end of a needle file. Yuck.


In a way, I wish that you could smell the photo above, but you’re probably better off only imagining the aromas swirling around the shop as I worked on the stummel. To eradicate the ghosts of tobaccos past form the pipe, I packed the chamber and shank with cotton balls and filled the stummel with alcohol. I left it to sit overnight to let the alcohol work its magic, penetrating deeply into the briar to dissolve the old tars, which were then trapped in the cotton wool. Sadly I forgot to snap a pic of this process but regular readers will have seen me do this many times.
When I came back to the pipe the next day, I removed the cotton balls and let the stummel air out while any leftover alcohol evaporated. Then it was time to get into the shank repair. In the past I have reinforced a cracked freehand shank with brass or aluminum tubing, but I have found that getting the stem fit correct afterwards can be a bit tricky. For this pipe, I am using a Delrin replacement tenon instead, which is strong enough to hold the briar in place but also has a tiny bit of give to it, which should help with stem fit.
The first step was to drill out the mortise to fit the Delrin rod plus a bit of room for epoxy. For this, I clamped the stummel into the drill press. I use a drill bit with the same diameter as the airway to line up the drill properly, then switch to a larger bit to bore out the mortise.

When I was happy with the fit of the Delrin sleeve, I used a half-round needle file to cut a series of notches around the Delrin tube. These help to improve the mechanical bond between the epoxy and the slippery Delrin. I applied a small amount of epoxy to both the exterior of the Delrin and the inside of the mortise, then slid the tenon home.


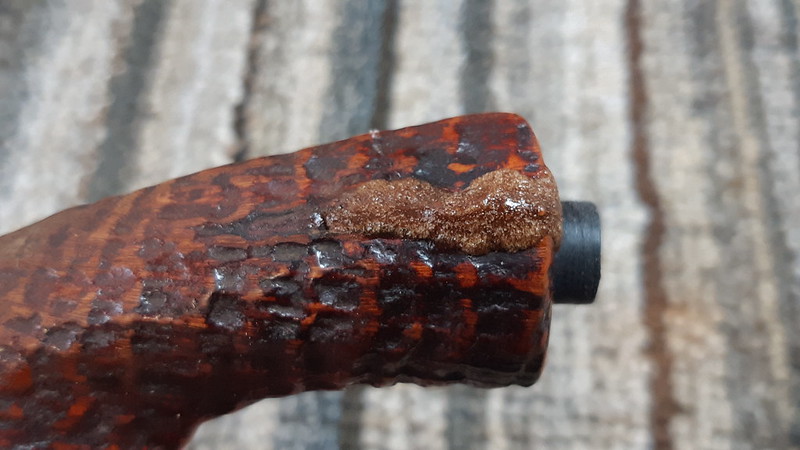
I set the stummel aside while the epoxy cured, then filled the crack from the exterior with a mixture of thick CA glue and briar dust, pushing the filler deeply into the crack to avoid air gaps and achieve a good bond. As you can see, I overfilled the area, allowing the patch mix to overlap both sides and ends of the crack.

I again set the stummel aside, this time waiting overnight for the CA glue to fully cure before continuing. When I came back to the worktable, I used sandpaper and files to remove the excess Delrin and set it flush with the surrounding briar.

Working through progressively finer sandpapers, I polished the end of the shank to 2000 grit. Note how the briar darkened from the polishing. A quick hit of stain pen matched the end of the shank to the original finish.

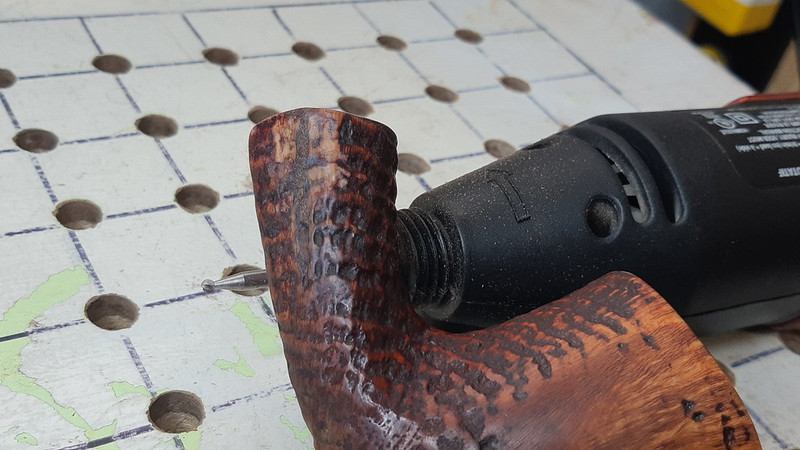
The next step was a bit tricky and could have easily gotten out of hand if I lost focus. Working on the down-draft table to minimize airborne dust, I used the Dremel fitted with a small round carving burr to remove the excess filler and blend the repair into the surrounding finish.

A few patches of tiny air bubbles are visible in the filler in above shots. To fill these tiny divots and smooth out the appearance of the fill, I applied a skim coat of thin CA glue, allowed it to dry then sanded away the excess before again using the stain pen to colour-match the finish.
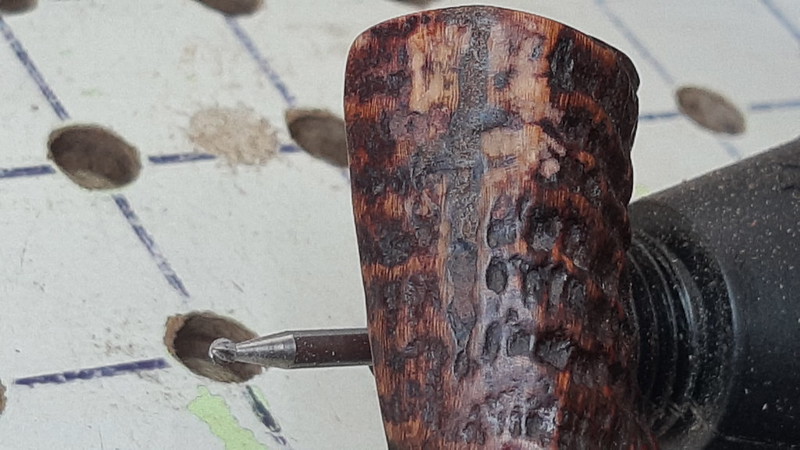
The last part of the shank sleeve repair was to drill out the 1/8″ airway in the Delrin insert to a more suitable size and re-drill the airway through to the draft hole. The first part I accomplished with the help of the drill press, while the second, and more anxiety-producing, step was done freehand with a 5/64″ drill bit mounted in my cordless drill. The second pic below shows the drill bit run through the airway after drilling.


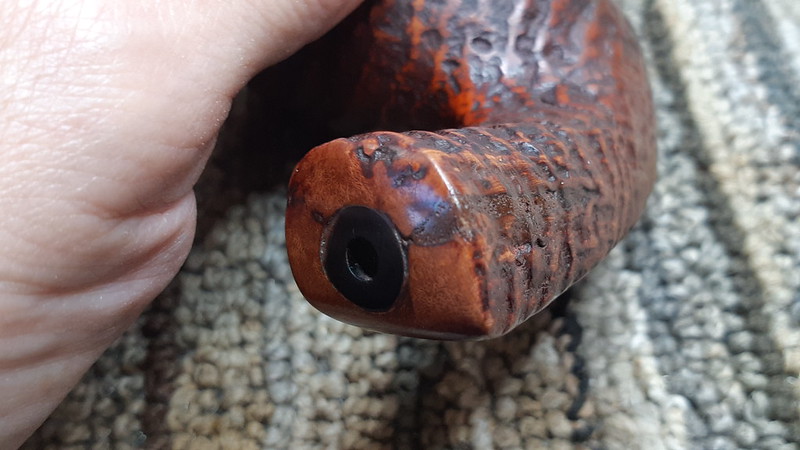
I was well on the way to the finish line on this restoration now, and could finally focus on fitting a replacement stem to this Nording. I had ordered in a variety of acrylic stems for this lot of pipes as they would hold up much better to this piper’s hard clenching than Vulcanite stems. Here is the new black acrylic fancy stem I chose for the pipe.
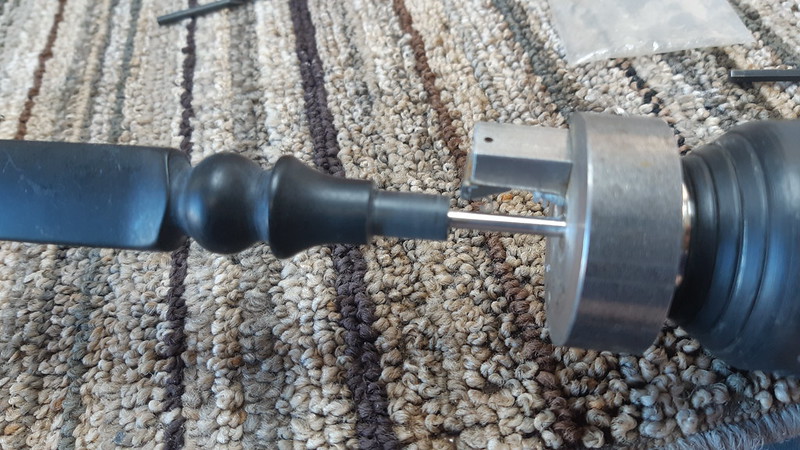
Sizing the tenon was quickly accomplished using my Tenon Turning Tool. I left the tenon slightly oversized and finished the fitting by hand using sandpaper to achieve a nice smooth, snug fit.

I bent the stem using the same technique I use for rubber stems. After sliding a pipe cleaner through the airway to hold it open, I heated the stem over the heat gun just until it became pliable. I bent the stem to the desired shape and held it there until the acrylic cooled down enough to hold the bend. I ran the stem under cold water to further cool it and permanently set the shape.

The last repair for this pipe was to address the thinned chamber floor. I elected the traditional, tried and true method for this task – pipe mud. This product has somehow developed a mythos of its own in the pipe community, but it is simply a dry-ish mix of cigar ash and water which forms a sort of cement and dries to form a hard insulating layer inside the tobacco chamber. It should be noted here that pipe mud is a good way to mitigate heat damage inside the chamber, but it does not bring the chamber back to as-new condition. Pipe mud is a patch job that needs to be treated gently. The pipe should be smoked slowly and coolly at least until a new cake layer has formed.
I’m not much of a cigar smoker, but keep a handful of sticks on hand for just such occasions. I enjoyed a cigar while watching a video in the shop and collected the ash in an empty tobacco tin. I let the ash cool overnight before crushing it finely and removing any pieces of rogue tobacco. This pic shows the prepared ash, perhaps a few teaspoons worth, loaded into a plastic shot glass.

I used an eye dropper to add a few drops of water to the ash and stirred the mixture until it was uniform in appearance and looked a bit like cold, grey oatmeal. This is a potential failure point in this process, as too much water will turn the ash to sludge while too little water will fail to bring the mixture together. I knew I was on the right track when a small amount of mud pressed between the fingers held its shape without crumbling to dust.

Packing the pipe mud into the chamber of the pipe was the easy part. I used a needle file to scoop the mud into the pipe, then reversed the file and used the end of the handle to pack it firmly into the damaged areas. I added pipe mud until it was even with the bottom of the draft hole, then set the pipe aside for a few days to let the mud dry at its own pace.

Then it was finally time to take the finished pipe to the buffer where it received a run on the Tripoli and White Diamond wheels followed by several light coats of Carnauba wax to shine and protect the revived finish.
While the dark char mark on the exterior is still there, the transformation of this Nording freehand is quite remarkable. Gone is the lava slipping over the rim and the large, ugly crack in the shank is all but invisible to the casual eye. The new acrylic stem shines like polished glass and should hold up well under use. Best of all, the hidden repairs to shank and chamber should keep this beautiful Danish freehand in its owner’s rotation for years to come.
Thanks for following along with me on this rather lengthy restoration journey. This one really got into the weeds of some more advanced repair techniques which I hope you enjoyed seeing in action.
Until next time, Happy Piping! Here’s the finished pipe.