
I have had this late-1960s or very early 1970s Brigham 3044 Oversize Billiard in my box of refurbs for at least the last year if not longer. I’ve checked on it several times over that period, but I’ve never been able to tackle the work it needed until now.
The problem has not been a lack of time but rather the inability to source a suitable replacement stem for this brute of a pipe. As you can see from this series of pics, the pipe was in pretty good condition except for the bitten-off stem.

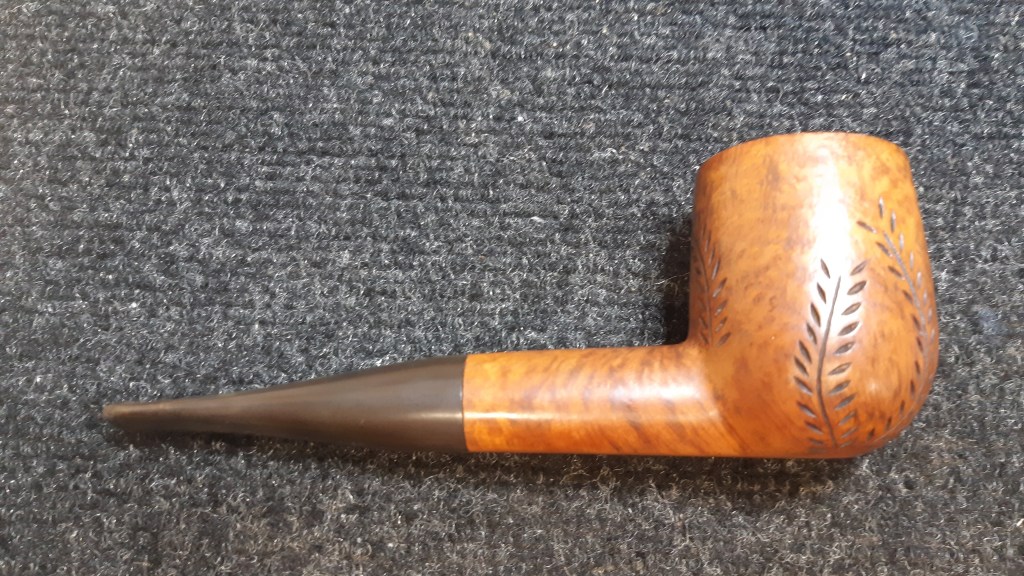


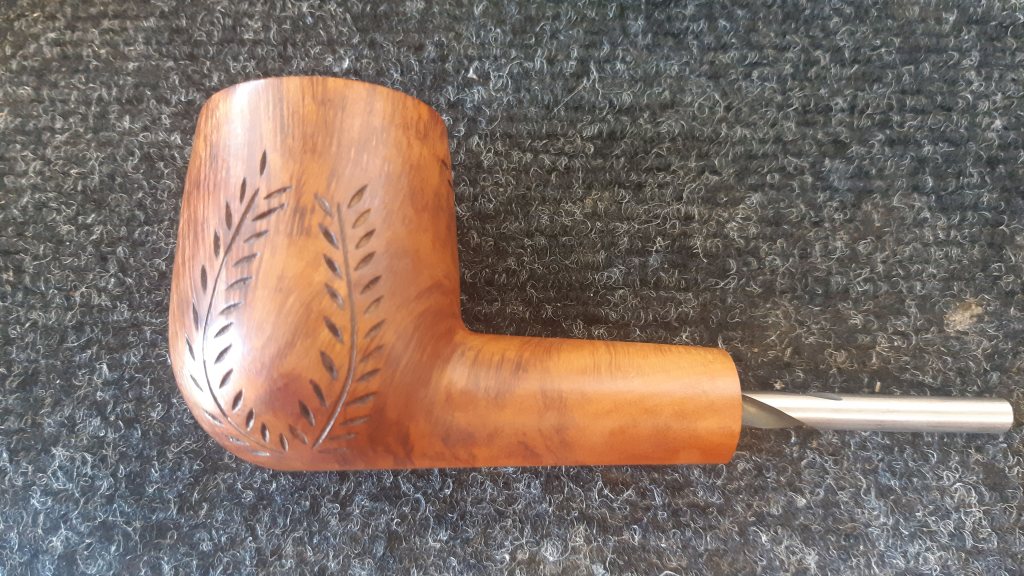
This is a BIG Billiard – the stummel alone is 3-1/2″ long, 2″ tall and 1-1/2″ wide. The chamber bore is a whopping 1″ in diameter with a depth of just under 1-3/4″. If ever there was a pipe suitable for Paul Bunyan or maybe Hagrid from the Harry Potter books, this is it!
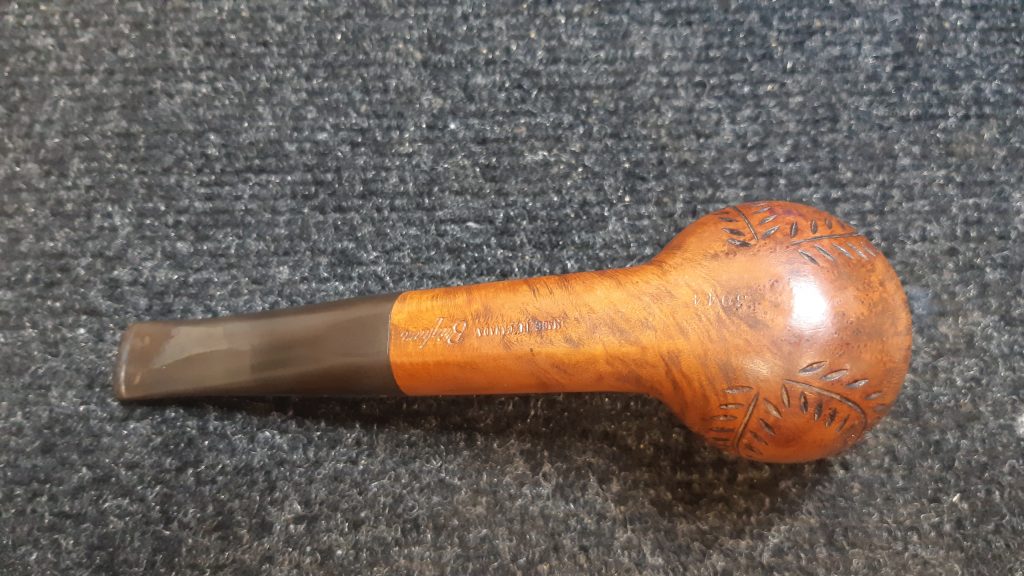
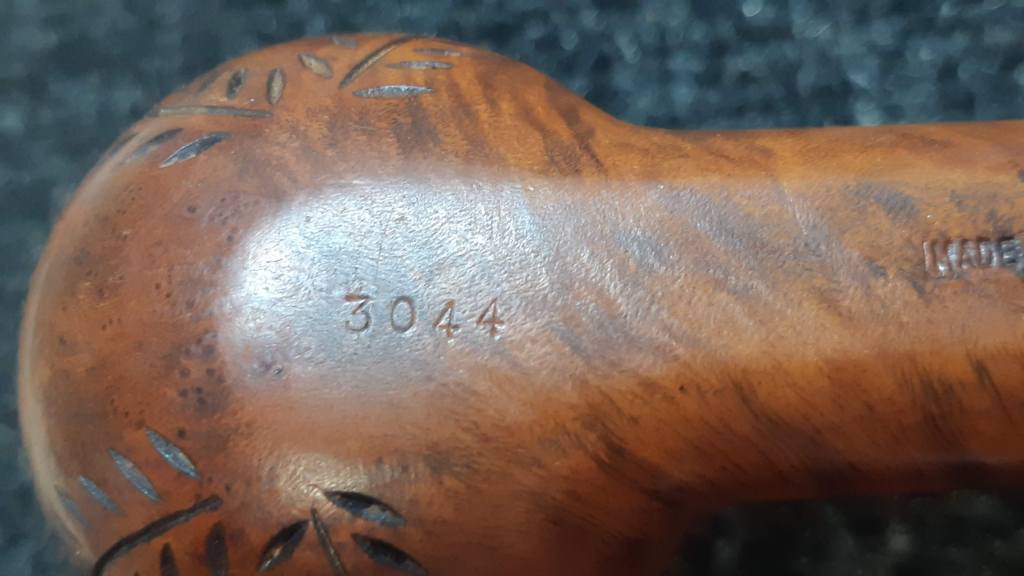
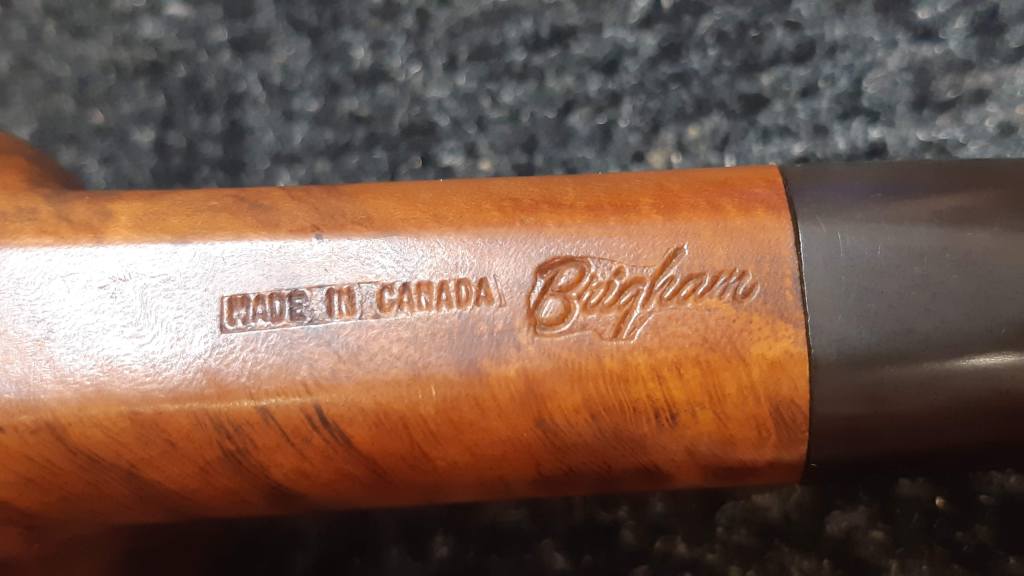
The last two pics above show the stamps on the underside of the stummel. The shape number, 3044, indicates a 3-Dot grade in an Oversize Shape 04 Large Billiard. The “Made in Canada” block letter stamp and the style of the Brigham logo date the pipe to the end of the 1960s or the early 1970s.
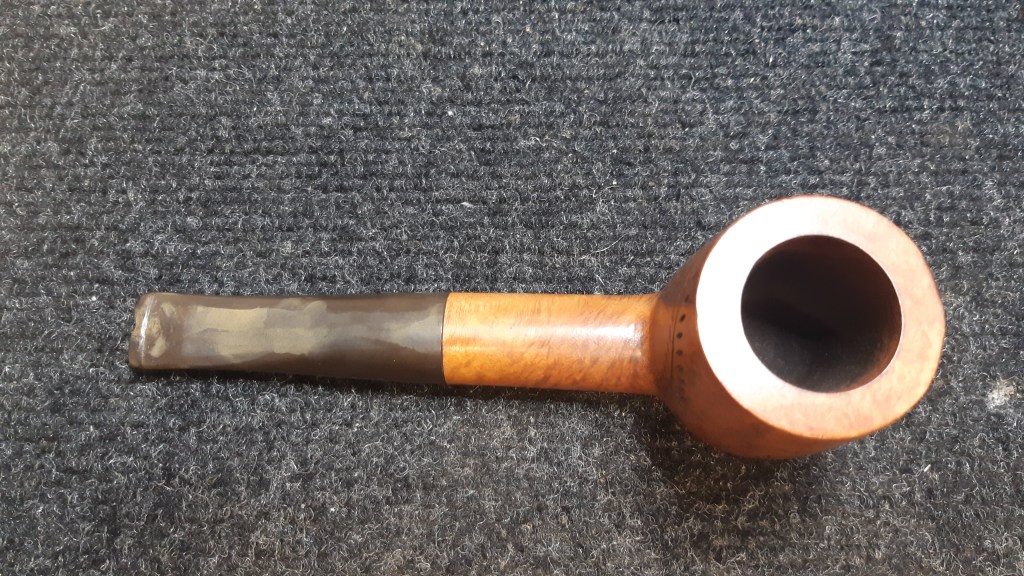
The briar was in really good shape, needing only a quick cleanup and polishing to get back in action. The original stem, on the other hand, was toast. Someone with bionic jaws had apparently attempted to hold this monster pipe in his teeth and had managed to bite about a half inch of stem. A crudely carved button had given that piper a few more bowls, perhaps, but ultimately the pipe needed a new stem.
I had ordered several replacement stem blanks over a span of months in my attempt to get this repair under way, but matching a stem blank to a 3/4″ diameter shank is difficult enough. Add in the need for just over three inches in stem length and the job gets even trickier.
When I pulled the pipe from the refurb box this time, however, I vowed to see the project through. It would take quite a bit of doing, however, as the only stem I had found that could fit was, ironically, too large for the shank at slightly over one inch in diameter and about a half inch too long.
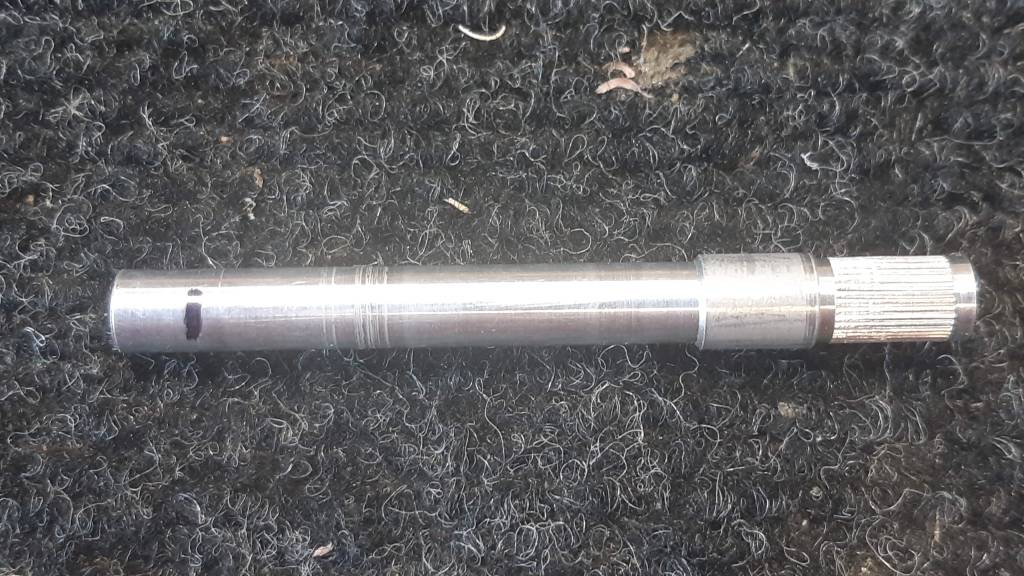
Here is the stem blank alongside the original stem.

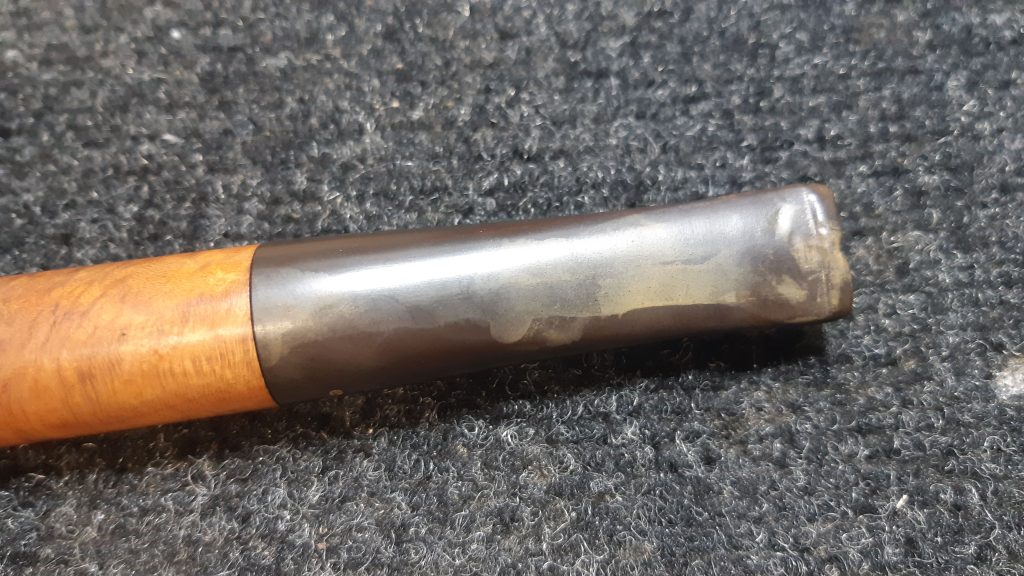
Let me acknowledge at the outset that the replacement stem is not historically accurate for this pipe, as Brigham only issued pipes with acrylic stems for a short period between about 1989 and 1992. The new stem is also a saddle stem while the original is a taper stem, though both stem styles were available when this pipe was carved.
I went a little off the reservation with this red and black swirl acrylic stem, but I knew it would fit (after a lot of work!) and I thought it would look great when all was said and done.
The first task was to cut off the excess length from the new stem. Thankfully, I was going to transplant the original aluminum tenon/filter holder into the new stem, so losing the precast tenon wasn’t an issue.


I salvaged the aluminum tenon from the original stem by heating the stem over my heat gun until the vulcanite softened and loosened its grip on the aluminum. When the stem was soft enough, I simply twisted the aluminum tenon out with a pair of pliers.
Before I got any farther into the stem work, I slipped a Brigham Rock Maple distillator into the tenon and test fit the assembly into the shank. Hmm. Something’s a bit hinky here – the tenon should slide in another quarter inch or so….
A quick look down the airway with a bright light uncovered the culprit – the aluminum head from an old distillator was jammed in there, right up against the draft hole.

After trying to loosen the distillator head with alcohol to no avail, I resorted to sterner measures and carefully drilled out the rogue aluminium fitting.

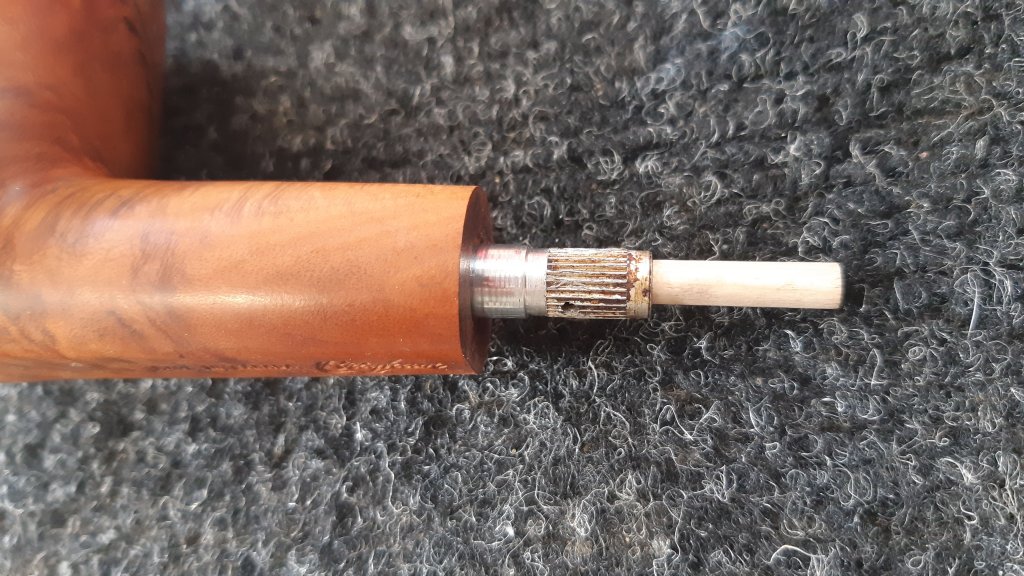
I retried fitting the tenon assembly in the shank. This time it slid all the way in but the distillator rattled back and forth in the shank when I shook the pipe. This told me that the original aluminum filter holder had either corroded or been cut short at some point in the past, possibly to allow the stem to be mounted in the blocked airway.
The only way to remedy this situation was to replace the original tenon/filter holder with a longer one. I dug through my small supply of salvaged Brigham tenons but none of them were long enough. In the end, I grudgingly decided to use an exceedingly rare and jealously guarded New Old Stock Brigham aluminum tenon for the job. At least I got to add the used tenon to my stocks. It will come in handy on another project.
The NOS tenon, of course, was too long, so I marked a line and cut the excess off slightly longer than necessary. I could then do the final fitting of tenon and filter by hand with sandpaper.

With all the component parts now ready and waiting, I drilled out the new stem, first widening the airway to accept the Brigham distillator, then again to create the mortise for the knurled end of the tenon. A dry fit of everything showed that I was ready to glue things up!


To protect the shank end from any glue squeeze-out (and help avoid gluing the stem to the shank permanently), I wiped the shank face with a bit of petroleum jelly, then slid the tenon into the shank’s airway and lined it up properly with the shank face.
A small amount of JB Weld epoxy was applied to both the inside of the stem mortise and the knurled exterior of the aluminum tenon before I carefully assembled the pipe. I held the parts in position until the epoxy started to grip the pieces, then I clamped the pipe upright in the bench vise to keep everything in place while the epoxy cured fully.


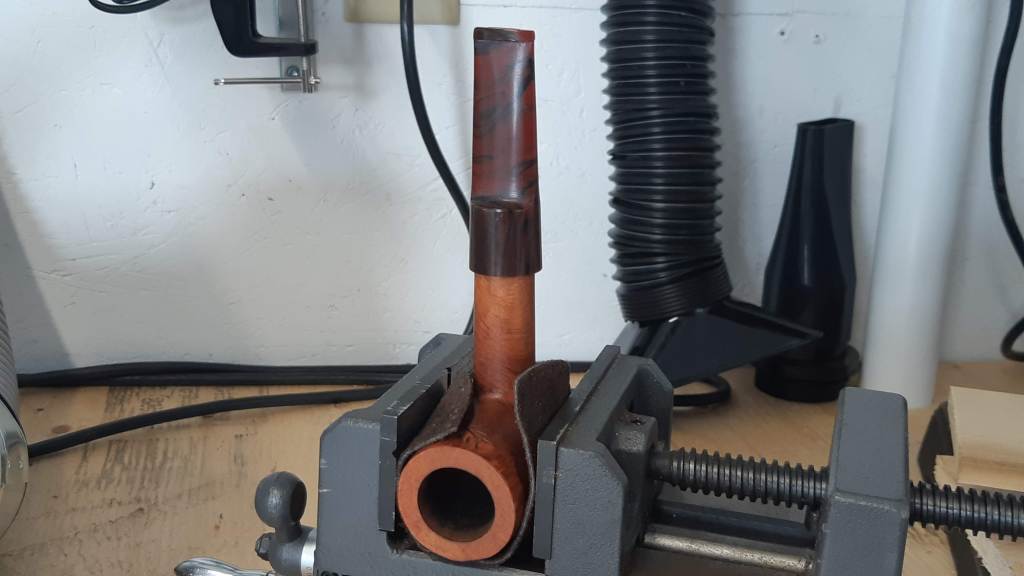
The moment of truth came when I twisted the stem out of the mortise for the first time. Success!

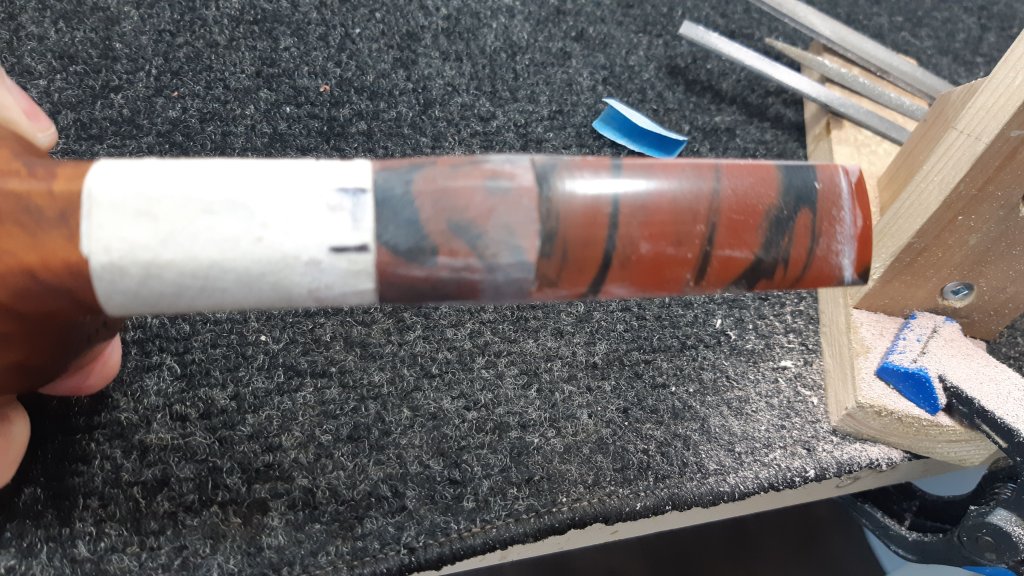
With the tenon installed, it was time to shave away the excess acrylic and fit the stem to the shank. Using a tracing of the shank outline as a guide, I used a sanding wheel to roughly remove the bulk of the extra material. From there the work was all done by hand using files and sandpaper to slowly but surely reduce the stem diameter to match the shank. The tricky bit was shaping the stem evenly, maintaining a cylindrical shape at the shoulder while also thinning down the saddle portion to match.

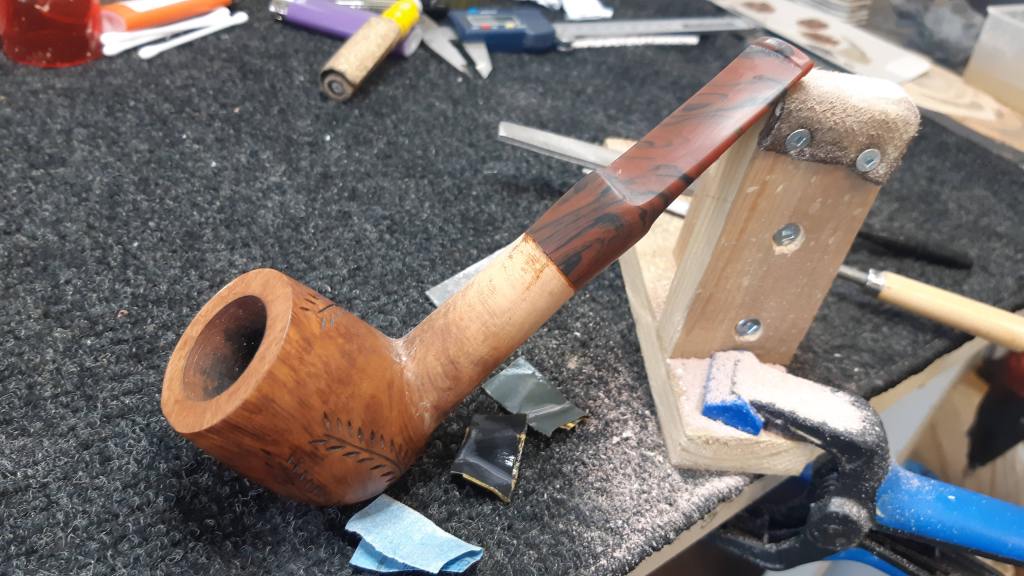
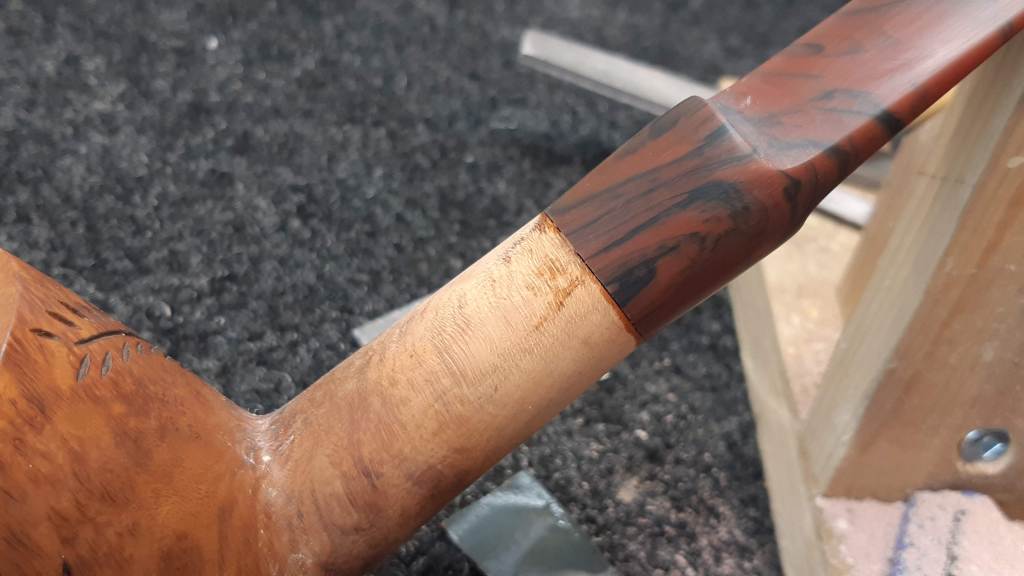
In the last pic above you can see that I managed to sand out some of the finish on the shank during the final fitting. To repair this, I applied a quick coat of Fiebing’s Black leather dye to the affected area. When it was dry, I removed as much of the dye as possible, leaving it only in the grain. A wash coat of diluted Dark Brown dye evened out the finish, while a light coat of mineral oil brought the briar back to life.


The last thing to do was to install some brass Dots on the side of the stem. I marked out the rough placement of the pins on a bit of masking tape applied to the stem, then used the drill press to bore three 1/16″ diameter holes to accept short segments of brass rod, secured with a bit of CA glue. When the glue had cured, I filed off the excess brass rod and sanded the stem to 2000-grit.


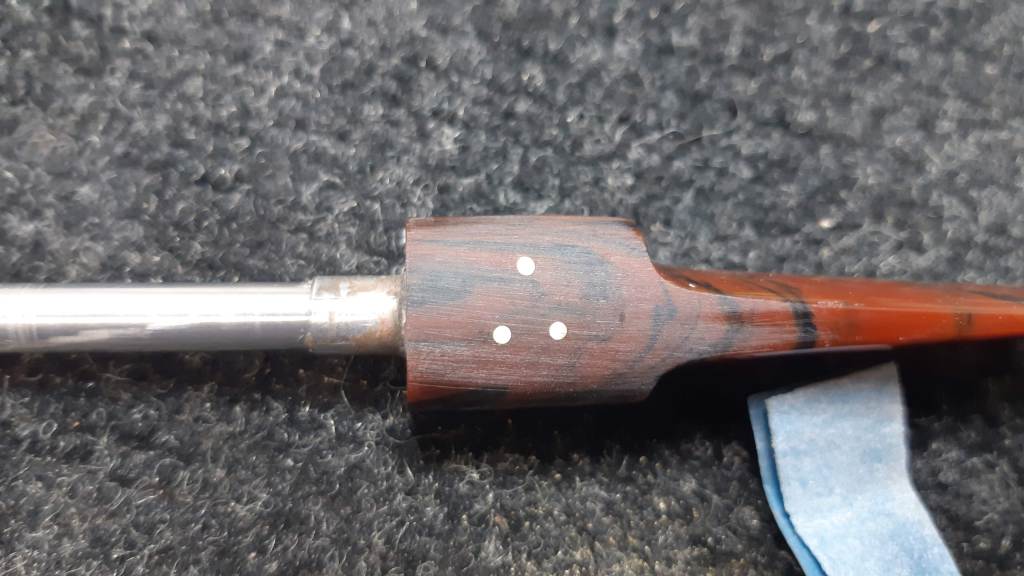
My Dots are slightly off, in my opinion, but a survey of Brigham pipes will show that no two pipes have quite the same pin placement as the drilling was all done freehand. I’m in good company.
With all of the structural and cosmetic work done, it was finally time to take the pipe to the buffer. A run of both Red Tripoli and White Diamond compounds erased the sanding scratches and brought up the shine. A few light coats of Carnauba wax finished things off with a glossy protective layer.
The finished pipe looks great, in my opinion, though I also think it is almost comically oversized at 6-1/2″ long and weighing in at 77 grams or about 2-3/4 ounces.
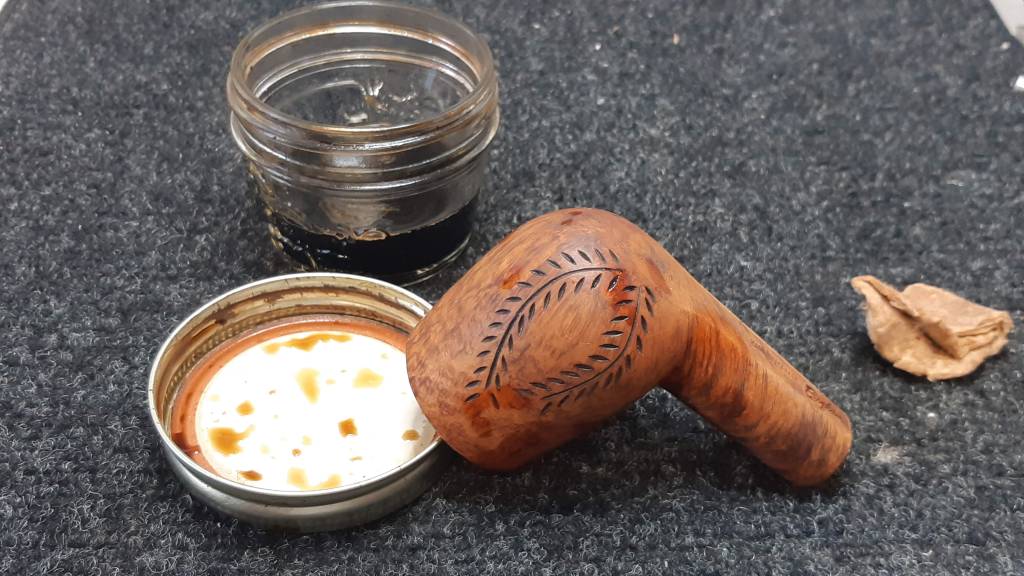
It is a unique collectible on several counts. There couldn’t have been many of these briar behemoths made in the Toronto factory, for one, and I have never seen another Brigham pipe decorated with the surprisingly delicate fern leaf/laurel design used on both sides of this 3044’s bowl.
I have added this Oversize Billiard to my personal collection.
Thanks for following along on what has been for me an engaging and long-awaited restoration. I hope you enjoyed the journey.
Until next time, Happy Piping! Here’s the finished pipe.


