
This pipe is another one of those that has been languishing in my refurb box for quite some time – long enough that I can’t remember exactly when or where I acquired it! High time to give it some attention.
Here is how the pipe looked when I brought it to the worktable. It was hardly the worst looking estate pipe I’ve ever dealt with, but it needed a bit of TLC. The finish was worn in a few places and a number of pinhead sized fills had fallen out but the briar grain still shone through strongly and the stamps were all crisp and well-struck. The electrical tape on the stem was a bit of an indicator of other issues, though.

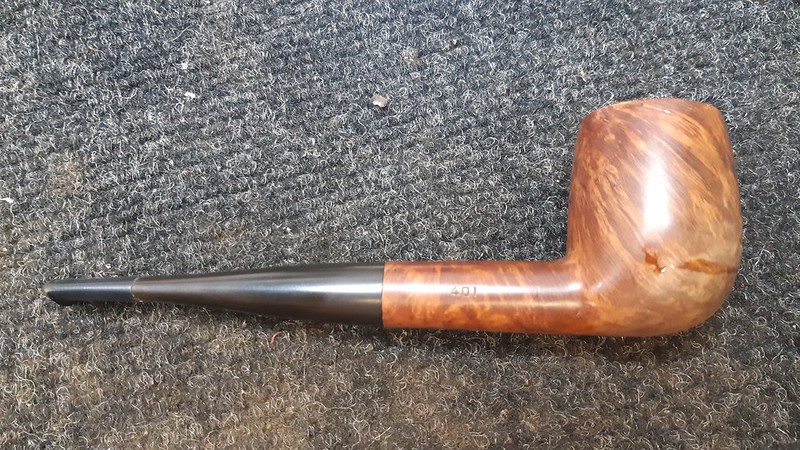
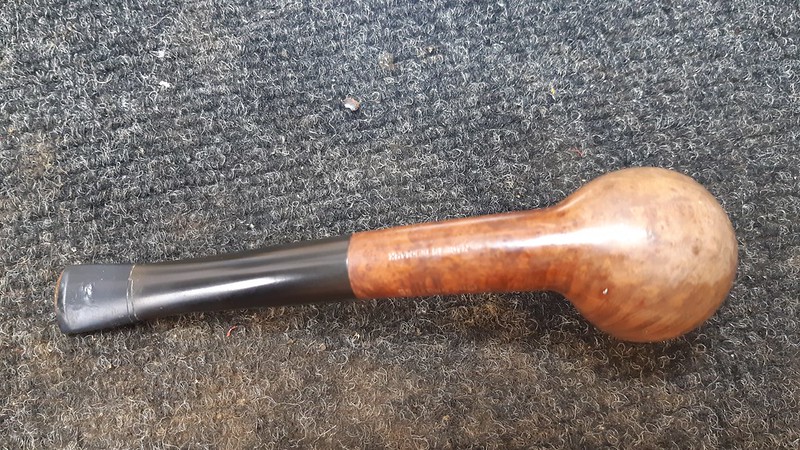

The pipe is marked “SCANTIC” over “FINE BRUYERE” on the left shank, and “MADE IN DENMARK” on the bottom of the shank. The right shank carries the shape number, “401”. The stem is also marked “SCANTIC”.


The biggest issue was the stem – a large piece of the upper button had broken away, and been rather crudely DIY “repaired” with electrical tape wrapped around the end of the stem. Here’s a closer look at the damaged area.


My research into the Scantic marque hit a dead end, I’m afraid. Though I have found other Scantic pipes on eBay and other sites, I have been unable to identify the maker at all. If anyone can send any light on the issue, please comment below.
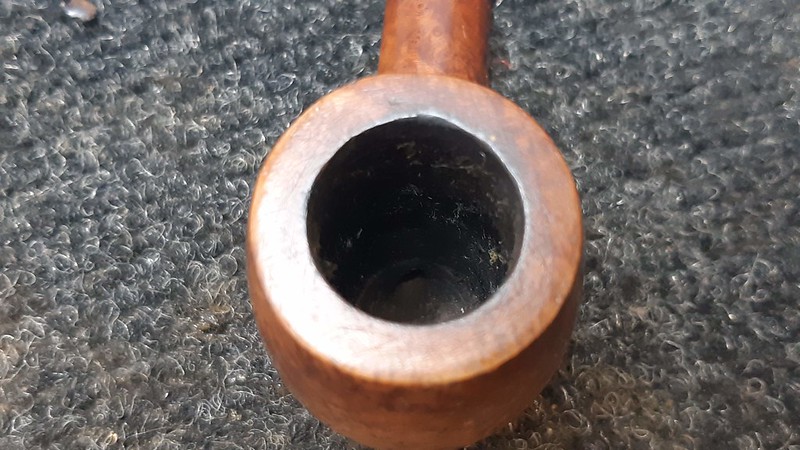
As I usually do, I decided to deal with the stummel first. I reamed the old cake from the chamber and ran a few alcohol-dipped cleaners through the shank to remove any old tars or debris hiding in there. The airway was surprisingly clean – so much so, in fact, that I completely forgot about taking pics of the cleaners and moved straight onto other work. Oops!
I wiped the exterior of the briar with alcohol on a cotton pad to lift the light coat of dirt, grime and old wax from the surface, revealing more of those tiny pinhead flaws I mentioned above.


I dropped some clear CA glue into each fill and let it cure completely before smoothing things out with some wet 400-grit sandpaper. This effectively removed the excess glue without doing too much damage to the finish around the fills.
I followed up by polishing the entire stummel with a full course of Micrmesh sanding pads from 2400 – 12000 grits. This erased the small scratches left by the 400-grit paper, removed a thin film of residue from the rim surface and brought up the overall shine on the pipe.


I bounced around a little here, so the sharp-eyed among you may spot the repaired stem in these pics, but I finished up the work on the stummel by refreshing the finish with a wash coat of diluted Dark Brown dye. When the wash coat had dried, I gave the briar a light wipe of mineral oil to inject some moisture and give the finish some depth and really bring out the grain.


Now let’s backtrack a bit and have a look at the stem repair.
The stem was only lightly oxidized so I skipped my usual Oxyclean soak, knowing that the oxidation would come off during polishing. I did hit the stem logo with a bit of white acrylic paint to refresh the lettering. I left the excess paint in place while I did most of the heavy lifting on the button repair.

To rebuild the missing button, I covered a cardboard wedge with clear tape and pushed it into the end of the stem as a form for the new slot. A mix of thick CA glue and activated charcoal powder was then generously applied into and over the damaged area. I left the patch to cure overnight before roughing out the shape of the new button with files and sandpaper.


As you can see in the last pic above, the patch mixture has a tendency to bubble as it cures. Surface bubbles generally get erased during the shaping stage of the repair, but tiny micro-bubbles often get caught inside the patch when the CA glue initially sets up. These pics show several applications of a skim coat of regular thin CA glue over the repair area to fill these tiny air pockets. Final sanding and polishing will blend the patched area into the surrounding Vulcanite.

When I was happy with the stem I reunited both halves of the pipe and took it to the buffer for a run on the Red Tripoli and White Diamond wheels followed by several light coats of Carnauba wax.
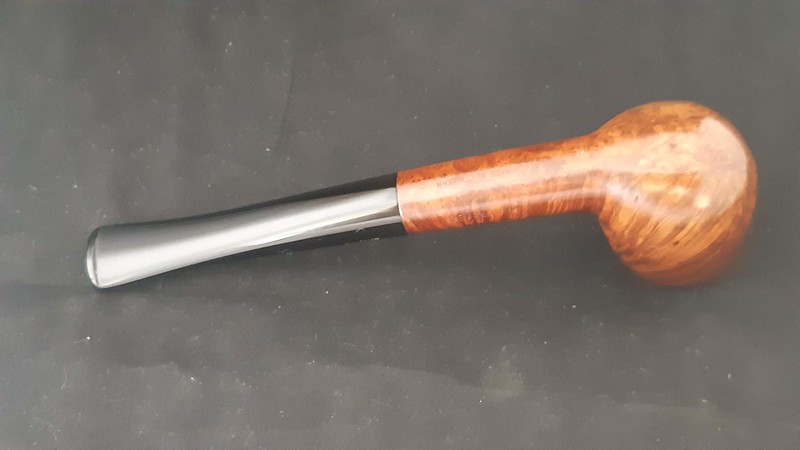
The finished pipe is a real looker, boasting swathes of flame grain on both sides of the bowl and fields of Birdseye on front and back. The tiny fills are still visible in spots, but I don’t think they detract too much from the overall impact of the lovely grain in this piece of briar. The repaired stem is now a deep, glossy black. Inevitably, a close examination will reveal the line between original Vulcanite and my CA glue and charcoal patch, but more importantly, the stem it is whole again and will hold up just fine under normal use.
This Scantic Denmark 401 Billiard is ready and waiting for a new piper! If you’d like to add it to your rack and rotation, it is available on the Pipes Inventory page now.
Thank for joining me for this estate pipe restoration. I hope you enjoyed the journey. Until next time, Happy Piping!
Here’s the finished pipe.


That’s one of the first pipes I acquired when I began piping, Charles. I had no repair skills at that time. I remember the stem was so closed that I was trying to open it (probably with heat and a screwdriver) when it broke. I wrapped it with tape and put a bit over it and kept it in the garage. It was a great smoker. Looks perfect now. Maybe I should buy it. 👍
LikeLiked by 2 people
Thanks for sharing your story, David! It’s great to know a bit of the pipe’s history. 😁
LikeLiked by 2 people
It’s done flown off your shelf. Hope the new owner enjoys it.
LikeLiked by 2 people