
I was rummaging around the shop the other day and rediscovered a handful of odd parts that have been lurking around for some time. I didn’t have anything pressing on the worktable, so I decided to have a bit of fun and see what I could create.
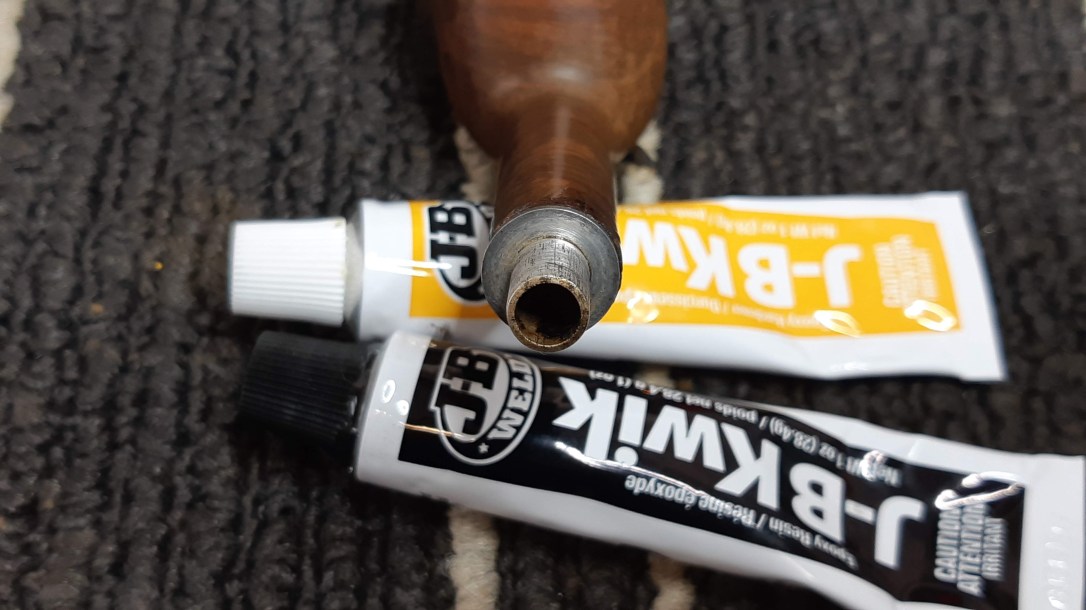
The stummel is an oldie, though exactly how old is unclear as any stamps on the briar have long since worn away. I know that it was made in the USA, based on the threaded shank mortise, sized to fit an aluminum screw-type mortise and tenon joint (a la Dr Grabow and others). With that info in mind, I dug out an old Kaywoodie saddle stem that seemed to pair nicely with the shank. It too was broken – the aluminum screw tenon/stinger had broken off, leaving only a remnant of metal lodged in the stem face.
This pic shows the parts as they looked when I brought them to the table. The stem was oxidized and tooth-dented, and the stummel certainly needed some help – the shank had fractured into several pieces which had been rather messily glued back together. There were also rim dents and old cake to contend with.


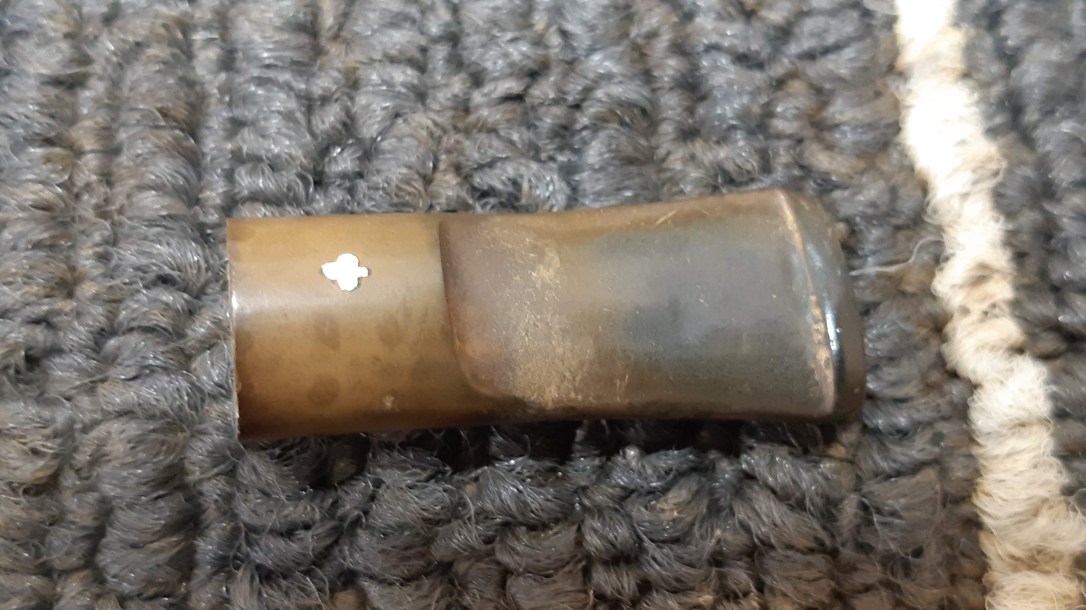
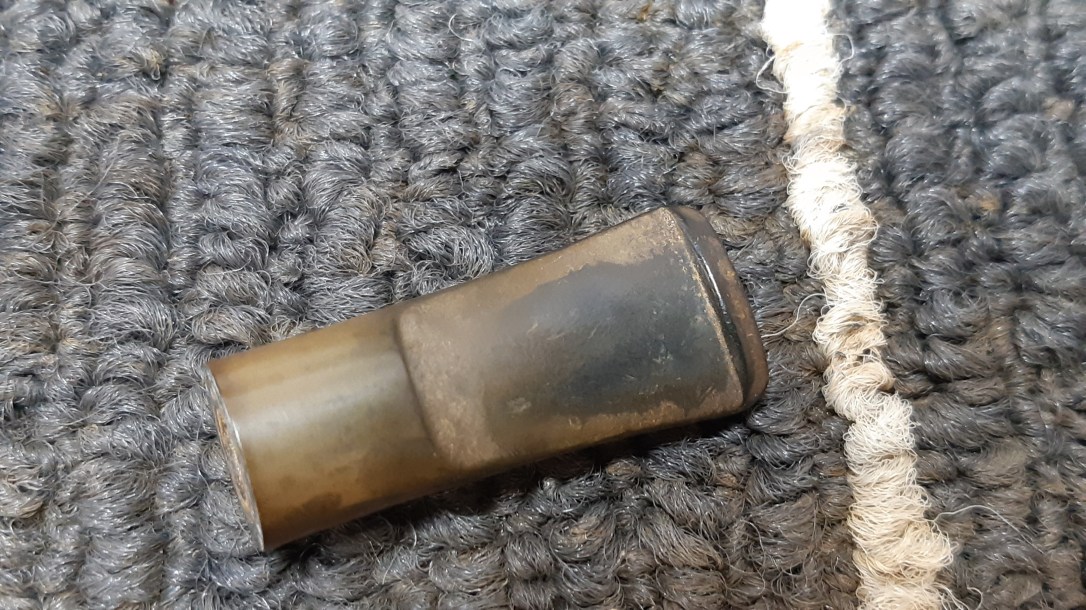
These close shots of the shank damage illustrate the situation there. Though Humpty Dumpty had been reassembled (sort of), the shank would need serious reinforcement if it was to hold up to daily use again.


The obligatory close shots of the stem. It wasn’t in the worst condition but would need an overhaul, to be sure.

A bit more digging through old parts turned up this threaded aluminum tenon.
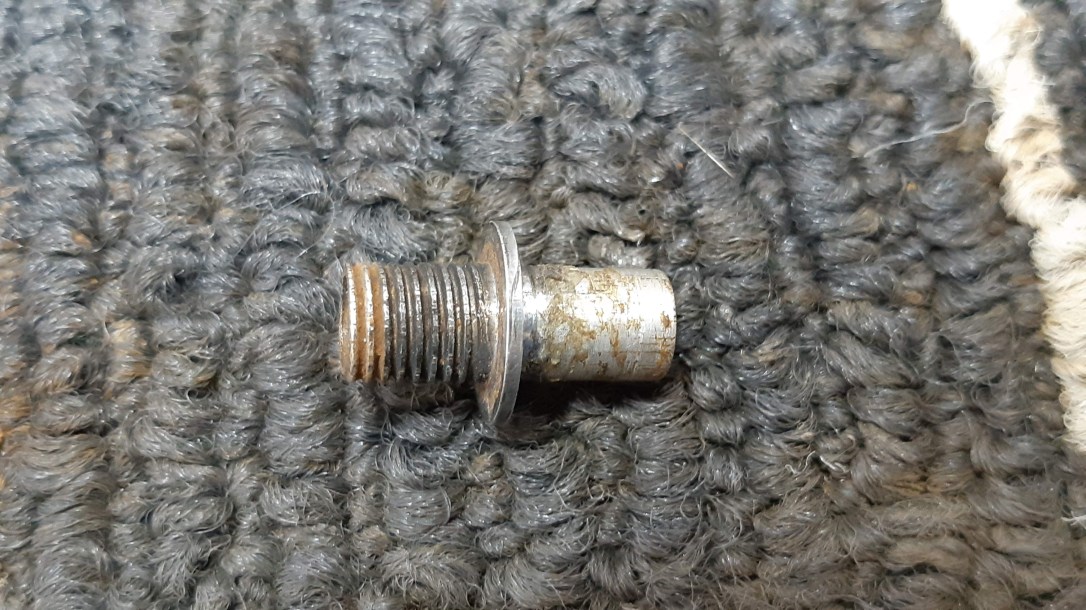
The threaded end was a bit too large for the stem face (drilling a mortise large enough would have left the walls perilously thin), but if I turned the fitting around….. Eureka! A reverse tenon setup would kill two birds with one stone – the stem I had chosen could handle being drilled out to fit the tenon end of the fitting, while gluing the threaded end into the shank would provide the much needed structural integrity I was looking for.

I cleaned up the aluminum fitting with a bit of alcohol and steel wool, then drilled out the stem to remove the broken aluminum remnants and create the mortise.
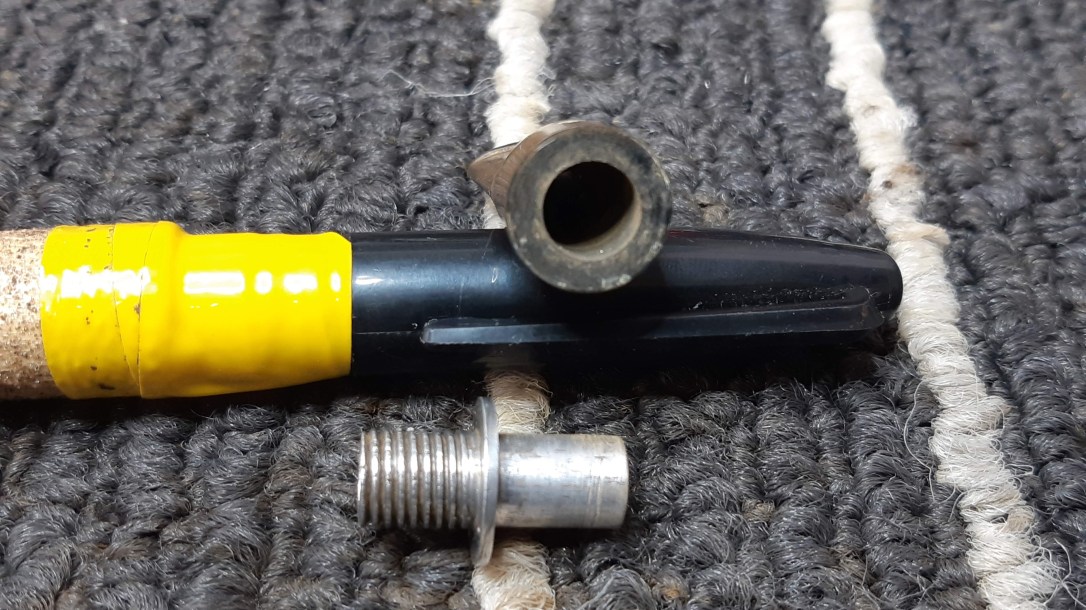
A dry fitting of the parts showed that everything was fitting as intended – so far so good! This Frankenpipe was shaping up to become a nice nosewarmer at 4-3/4″ long.

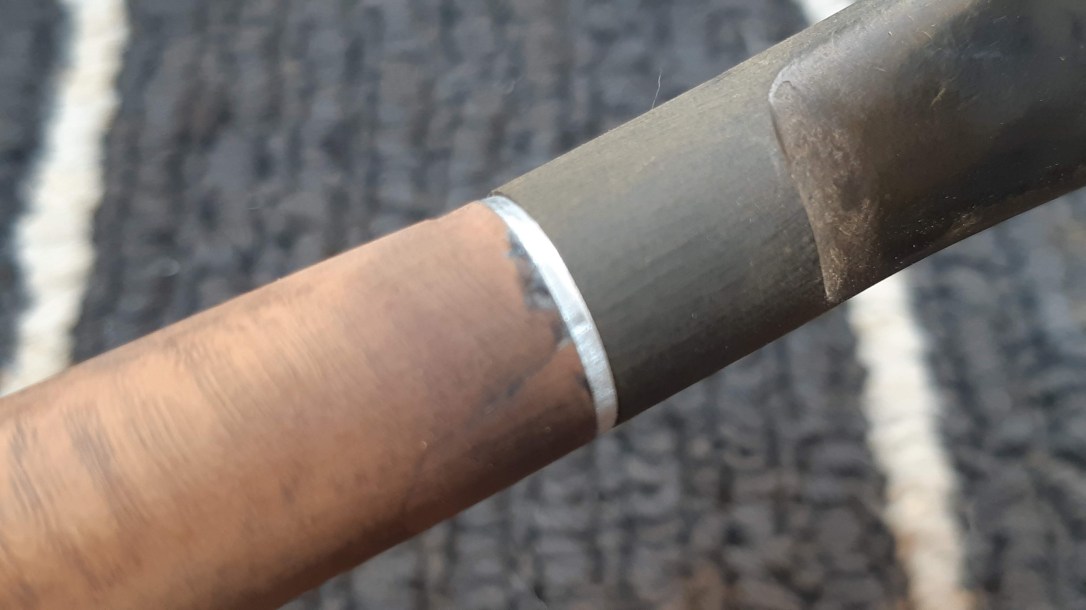
I mixed up a small amount of JB Kwik-Weld to glue the aluminum fitting into the shank mortise. As the pics below show, the fitting wasn’t quite a perfect match for the shank, but it was pretty darn close for an unrelated part.

I used files and sandpaper to remove the excess glue from the shank and size the aluminum fitting to the pipe. I tried to do as much work as possible with the stem mounted to avoid filing a bevel into the aluminum “washer”.

The stem was a bit wobbly on the tenon, so I clamped the stummel into my bench vice and used a hacksaw to cut a slot down the centre of the tenon. Adjusting the stem fit is now easy – if the fit is too tight, I can squeeze the two halves of the tenon together; too loose and I can pry the halves apart slightly to increase the effective diameter of the tenon.

There were still a few divots and depressions around the end of the shank where it met the aluminum fitting, so I applied a bit of CA glue mixed with briar dust to level things out.

Then it was back to filing and sanding when the patch had cured. There was a bit of work yet to do, but things were progressing nicely.


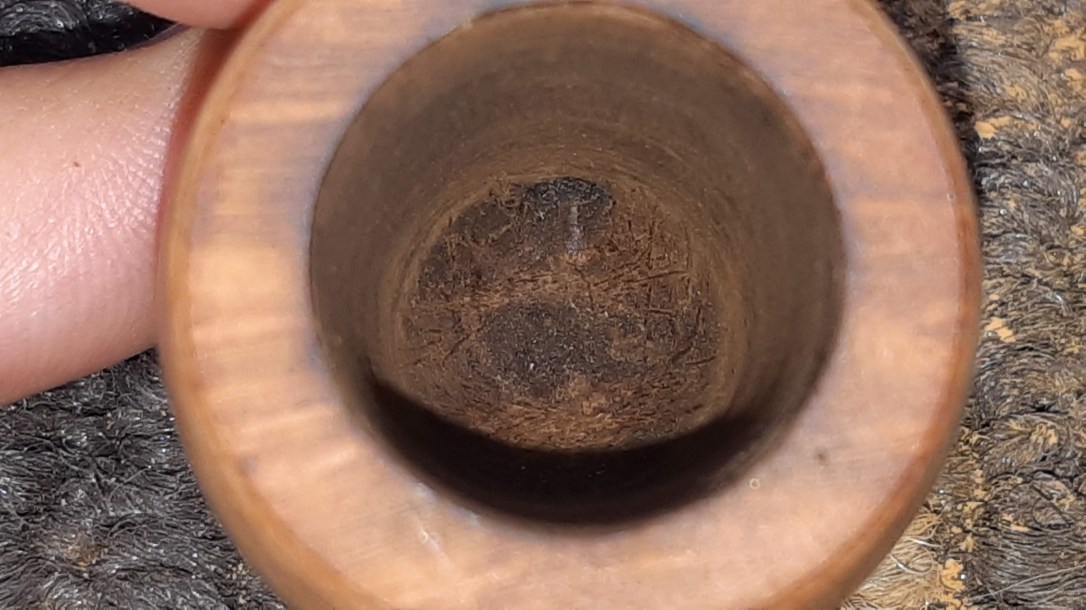
I took a break from the shank to ream the old cake from the tobacco chamber. Though the walls were in pretty good shape, the chamber floor had been slightly over-reamed at some point. You can just make out a deeper dimple in the center of the chamber floor in this pic:
Still working on the briar, I topped the bowl lightly to smooth out a handful of small dents. I also introduced a small bevel into the outer rim edge to remove some deep dents there.


When I was happy with the general state of the briar, I sanded the entire stummel to 2000-grit, again with the stem mounted to keep the edges crisp. The stem still needed some attention, but the little pipe was coming together. There is some very pretty Birdseye grain on both sides of the stummel, with cross-grain on front and back.


The stem had a few deeper tooth dents to deal with. They weren’t overly large, so I drop-filled the depressions with clear CA glue and sanded things smooth after the glue had fully cured.


A bit more sanding with 320 through 2000-grit papers tidied up the stem and prepared it for buffing.

Happy with the stem, I moved back to the stummel and hit the briar with a coat of Fiebing’s Dark Brown leather dye. The dark finish is both in keeping with the age of the pipe and would help to hide the shank repairs while giving the rest of the pipe a cosmetic boost.

A light wipe with mineral oil injected some much needed moisture into the old stummel and gave the new finish depth and pop.

Then it was time to take the completed nosewarmer to the buffer for a run of Red Tripoli followed by White Diamond compound. A few coats of Carnauba wax finished up this project.
The finished pipe is now ready to pack and enjoy. I had fun building this little Frankenpipe from spare/broken parts I had lying around the shop, and the end result is certainly respectable. I hope you enjoyed following along. Maybe this post will inspire you to use up some of your own spare parts.
Here’s the finished pipe. Until next time, Happy Piping!


PS: Alert readers will be wondering about the over-reamed chamber floor. As I’ll be holding onto this nosewarmer as a shop pipe, I decided to leave the chamber as is. If I find there’s too much unsmoked tobacco left over after a bowl, I’ll go back and deal with it then.

A Dr. Graywoodie perhaps?
LikeLiked by 1 person
I like it! 😁
LikeLike