
Most often when I am sent a pipe to work on there are physical issues to deal with – a damaged stem, cracked shank, heat fissures, etc. This Bertram pipe is one of the exceptions to this rule. This time I was asked to make changes to the pipe to better suit the preferences of its owner. In this case, the owner was not a fan of the twin-bore stem with which the pipe was fitted.
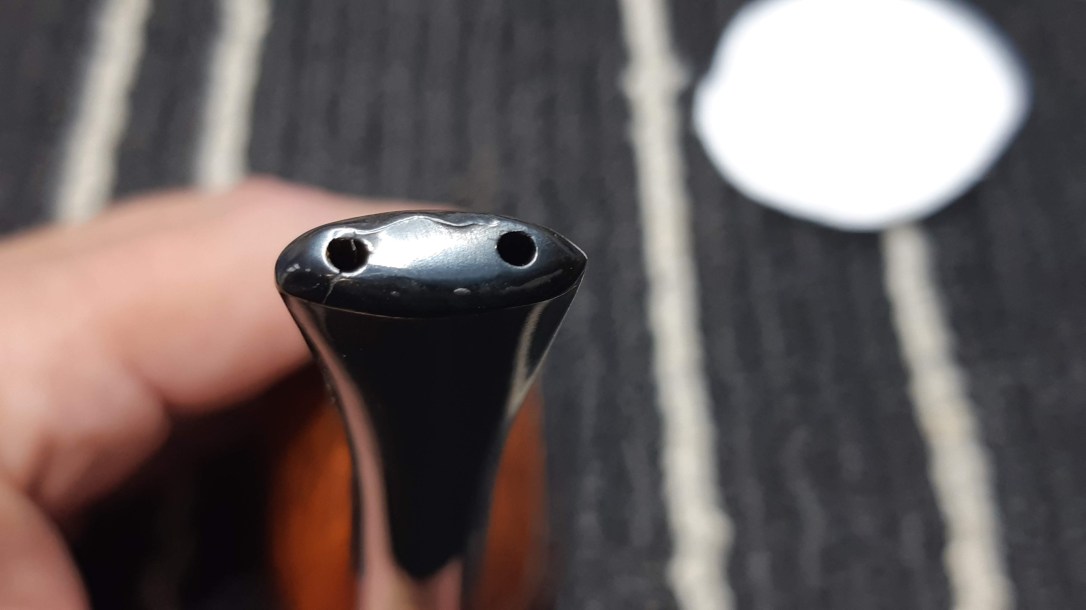
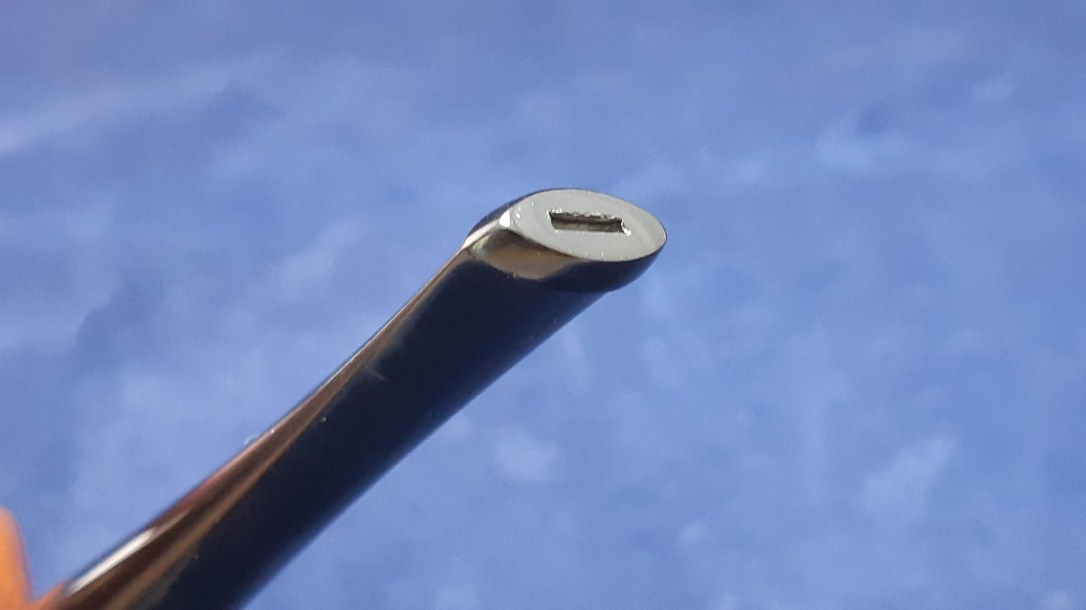
The twin-bore design, in which the more common V-shaped slot at the bit is replaced with two angled holes that converge on the stem’s airway, is a great stem option for heavy clenchers as the solid Vulcanite between the draft holes makes it nearly impossible for the piper to crush the airway closed.


The down side of a twin-bore stem is that it can be rather awkward to clean. A regular pipe cleaner is often too fat to slide easily through the narrow openings, and when it does, it can bind up at the junction with the main airway.
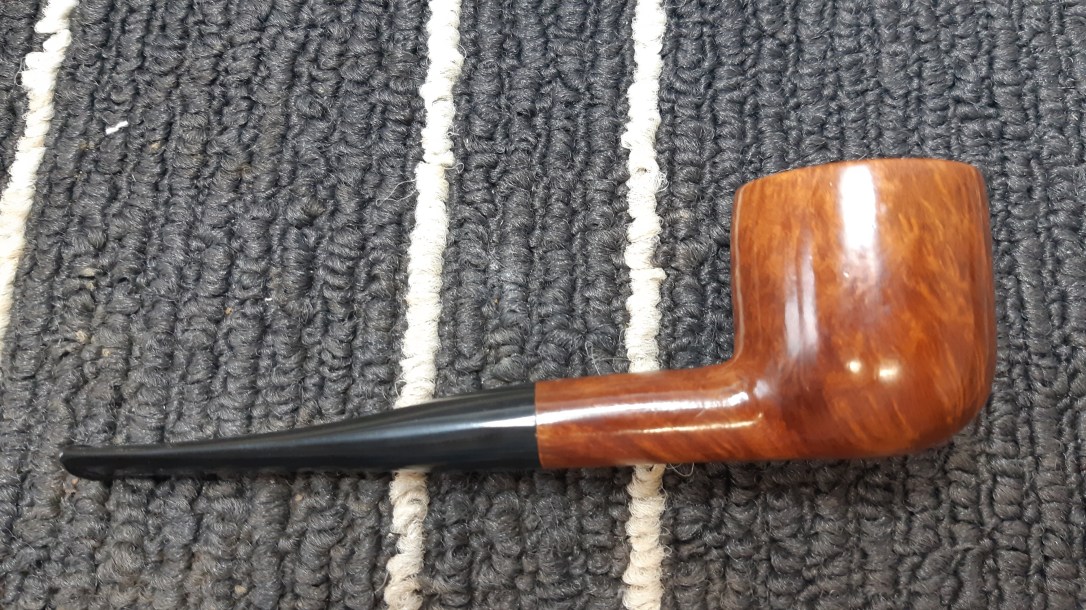
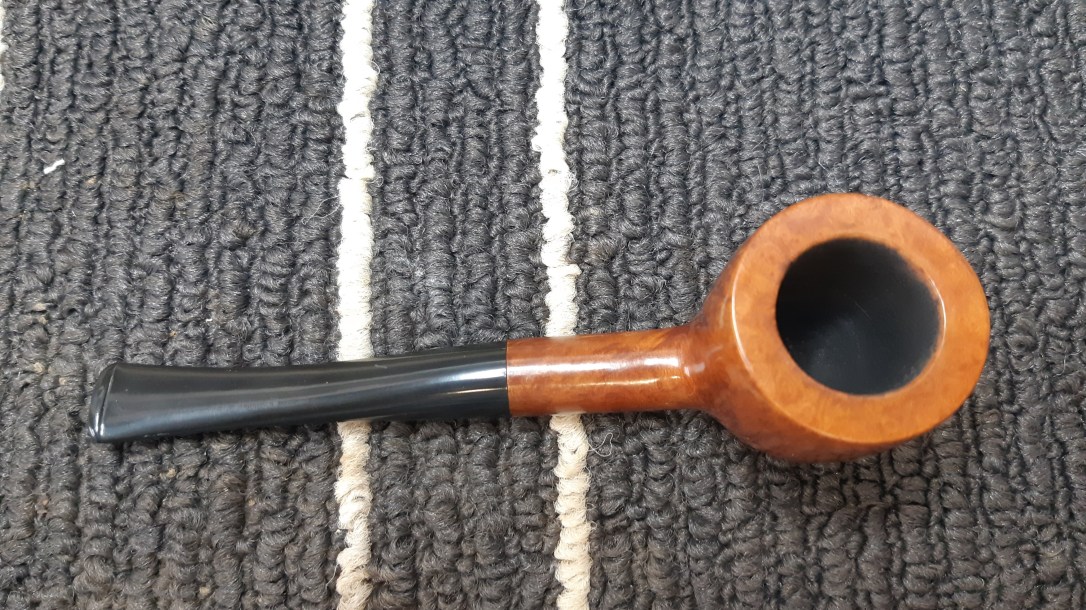
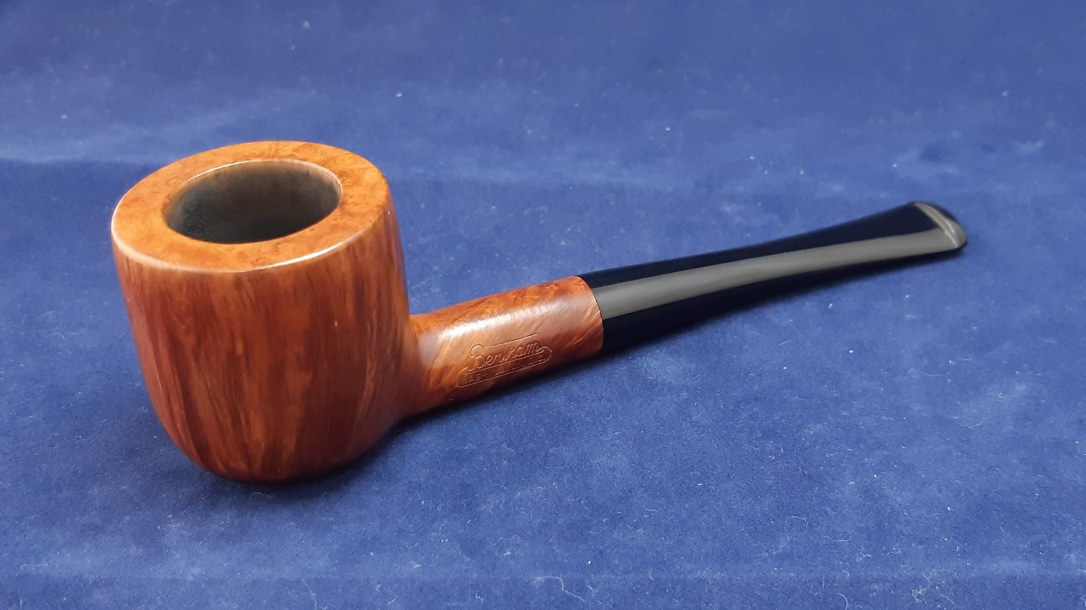
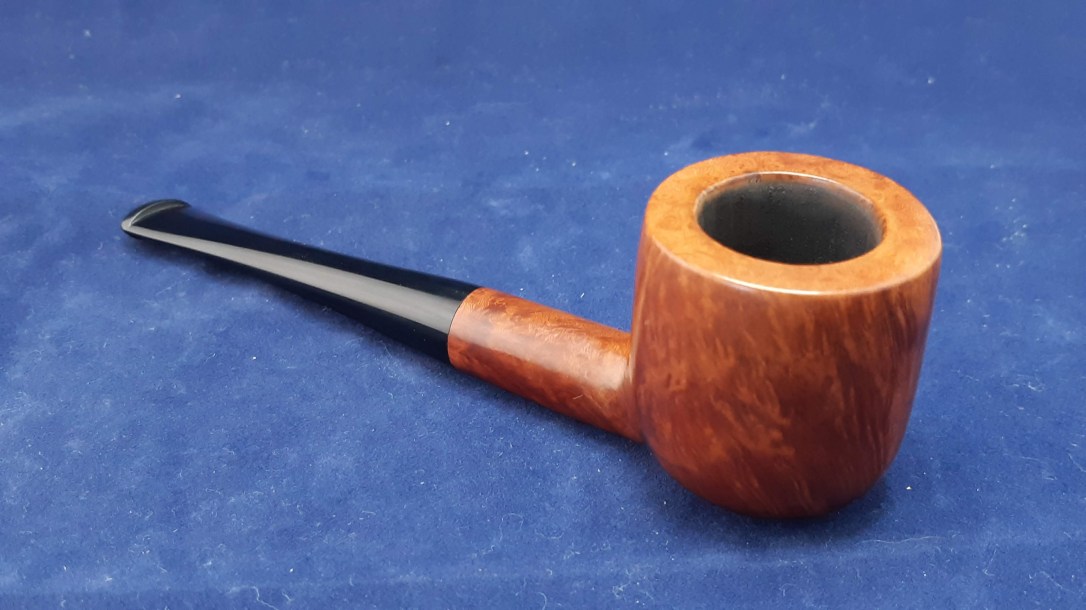
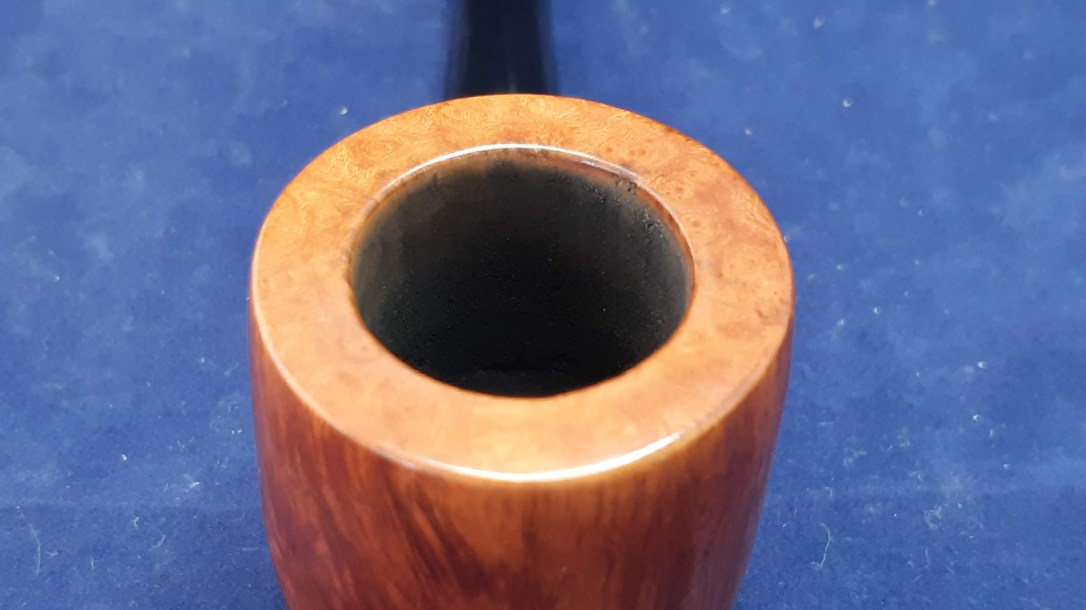
My goal with this pipe was to replace the troublesome twin-bore stem with a standard slotted stem. As you will see from this series of pics, the pipe was in excellent estate condition when I received it. In fact, it appeared to have been recently cleaned and polished. It’s a lovely piece of briar, with some really striking vertical grain.
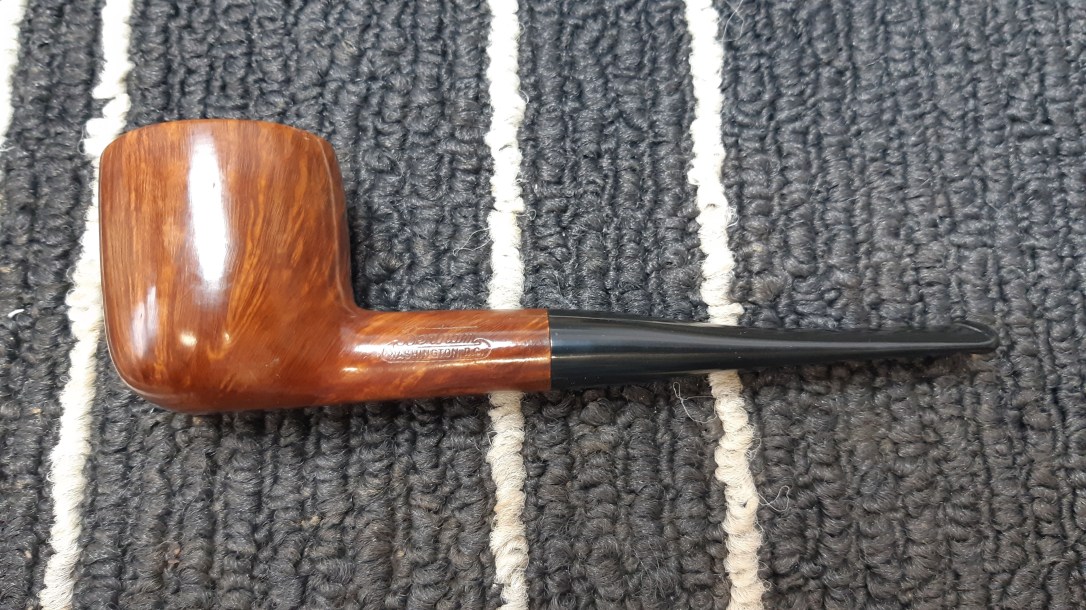

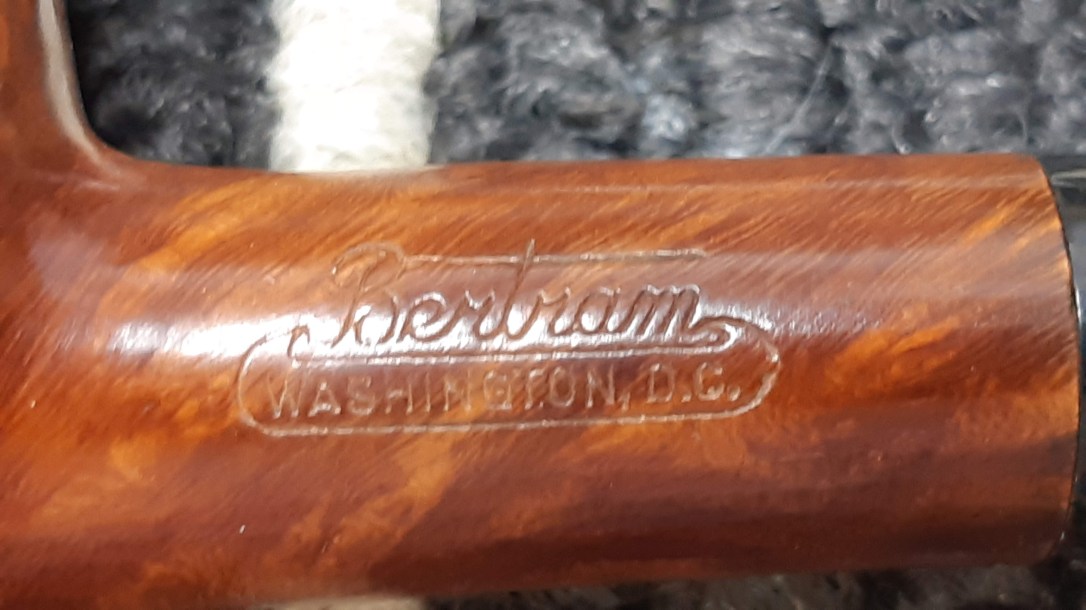
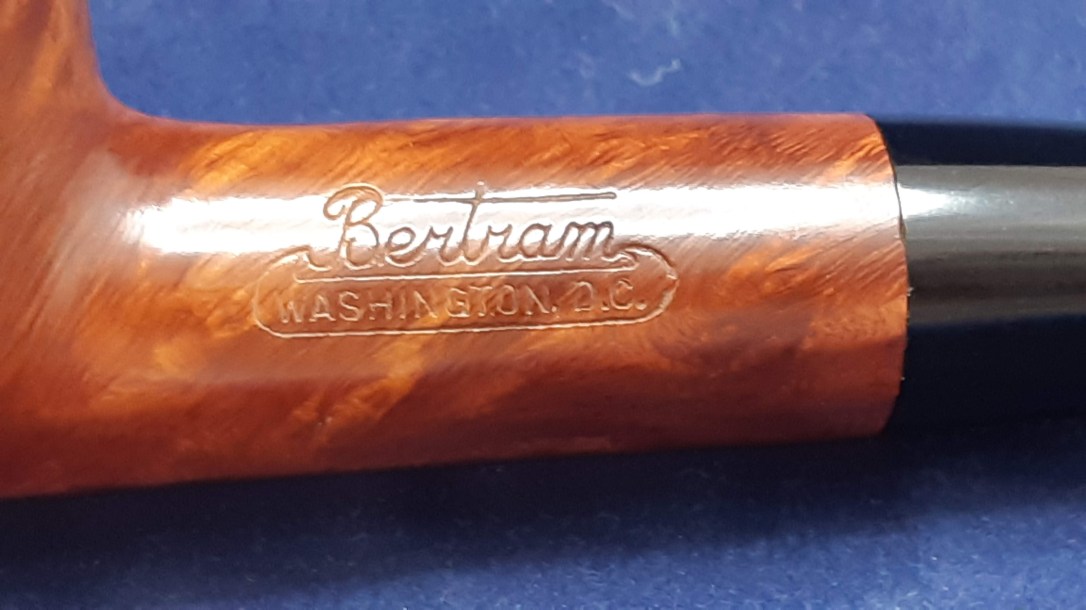
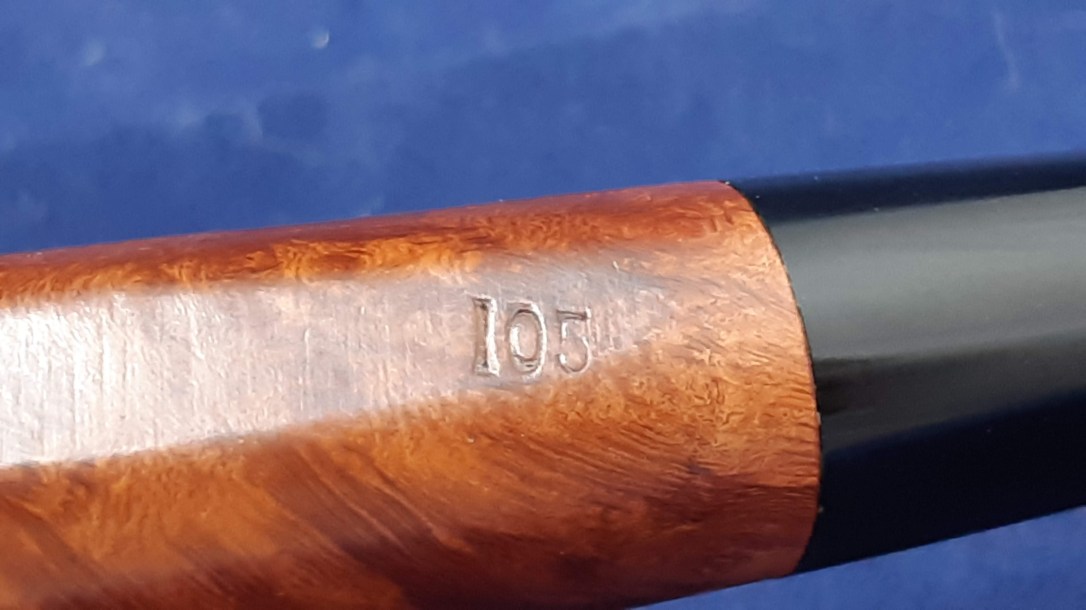
The stummel is stamped “Bertram” over “Washington, D.C.” on the left shank, and “105” on the underside near the end of the shank.
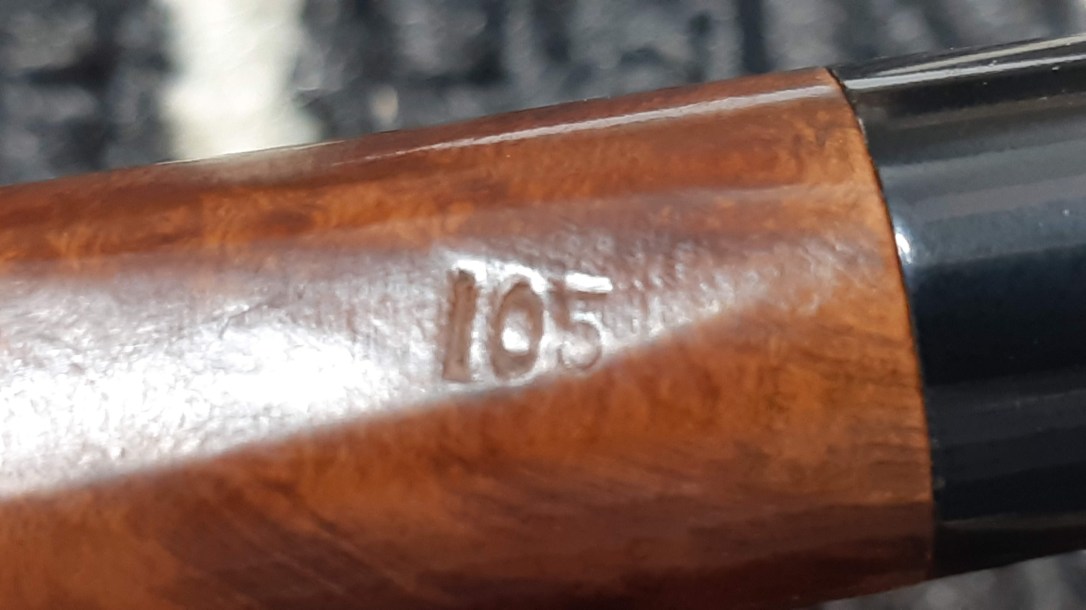
I was unfamiliar with the brand, so I took a quick trip to Pipedia to look it up. According to the article there, the Bertram Pipe Shop was opened in Washington, DC in 1927 by Sydney Bertram Goldman and closed three generations later in 1977. Unfortunately I was unable to find any hints as to the age of this Bertram pipe, though I suspect it hails from the last decade or so of the company’s history.
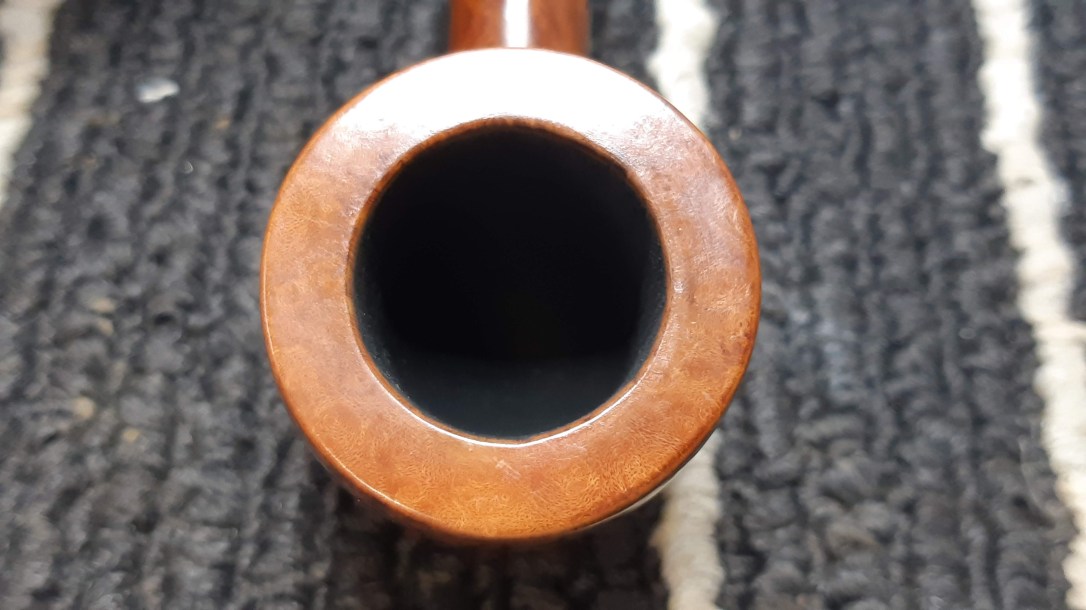
Moving on to the job at hand, I gave the pipe a quick once over with a pipe cleaner dipped in alcohol to double check that the condition of the internals matched that of the exterior. They did, so I moved quickly on to selecting and fitting the new stem.
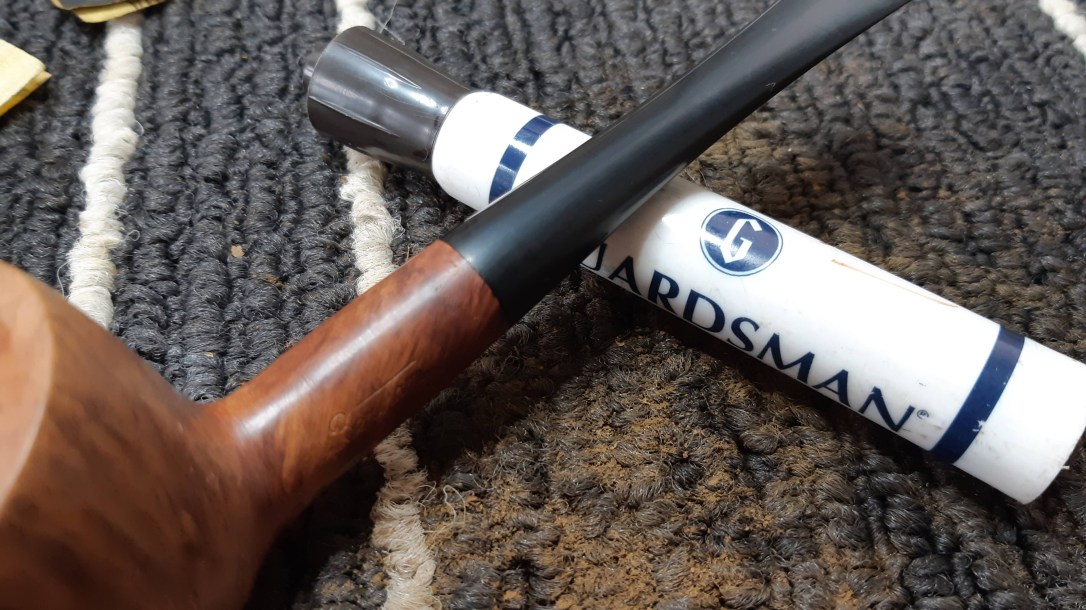
This pic shows the old stem (top) next to the new replacement stem (bottom). As you can see, I’ll have to install a tenon as part of this repair.
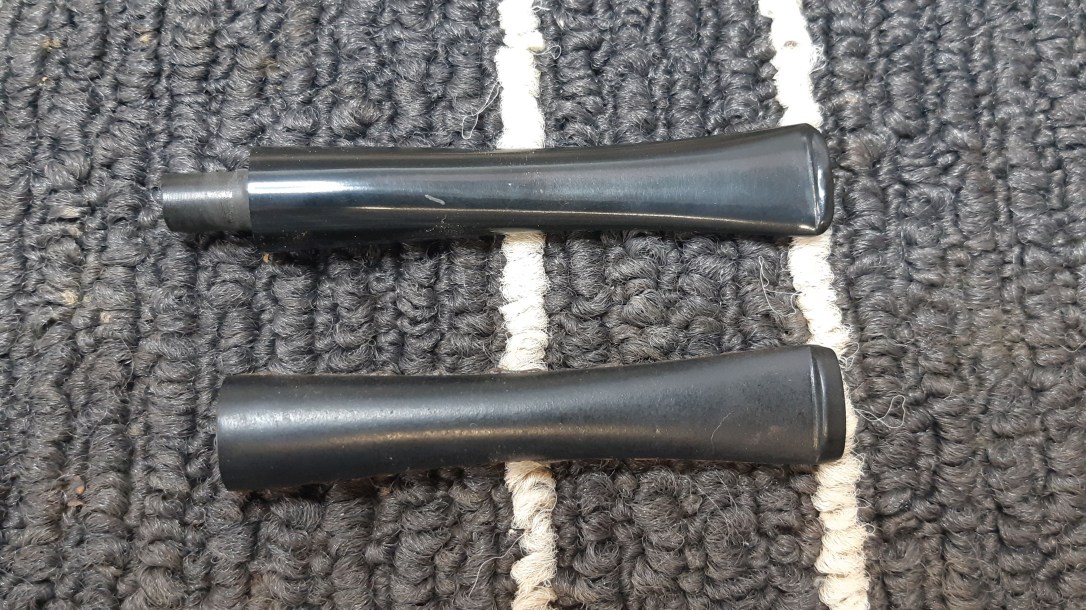

I’ve said this before several times in various blog posts, but I feel obliged to repeat it for the benefit of new readers. There is no such thing as an off-the-shelf replacement stem for any given pipe, with the exception of cobs. Every new stem, whether hand cut from rod stock or, as in this case, made from a pre-cast stem blank, must be custom fitted to its stummel.
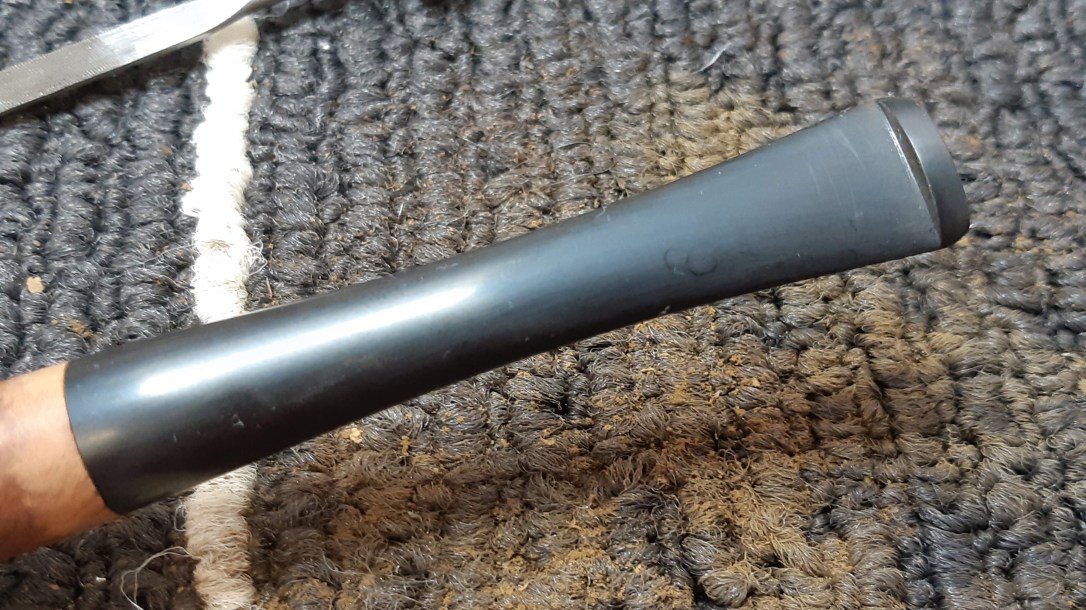
To start the process, I first faced the stem blank on the topping board using 400-grit wet/dry sandpaper to remove the casting marks and ensure a perfectly flat stem face that would sit tight to the end of the shank.
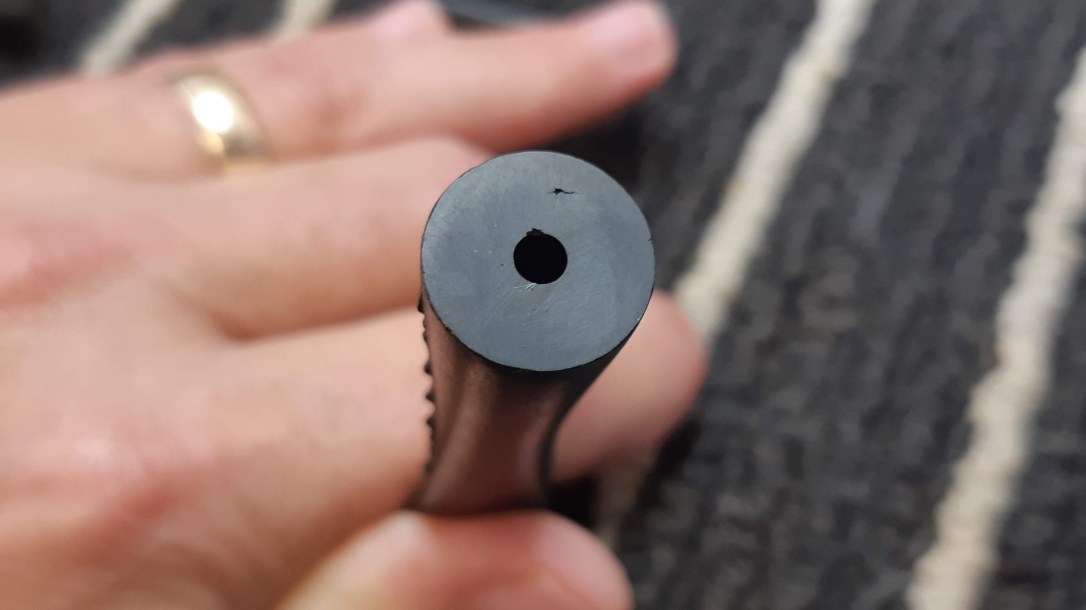
I then clamped the stem into place on the drill press and enlarged the airway to form a mortise into which I could glue the Delrin tenon. The mortise is slightly larger than the diameter of the tenon to allow space for epoxy.
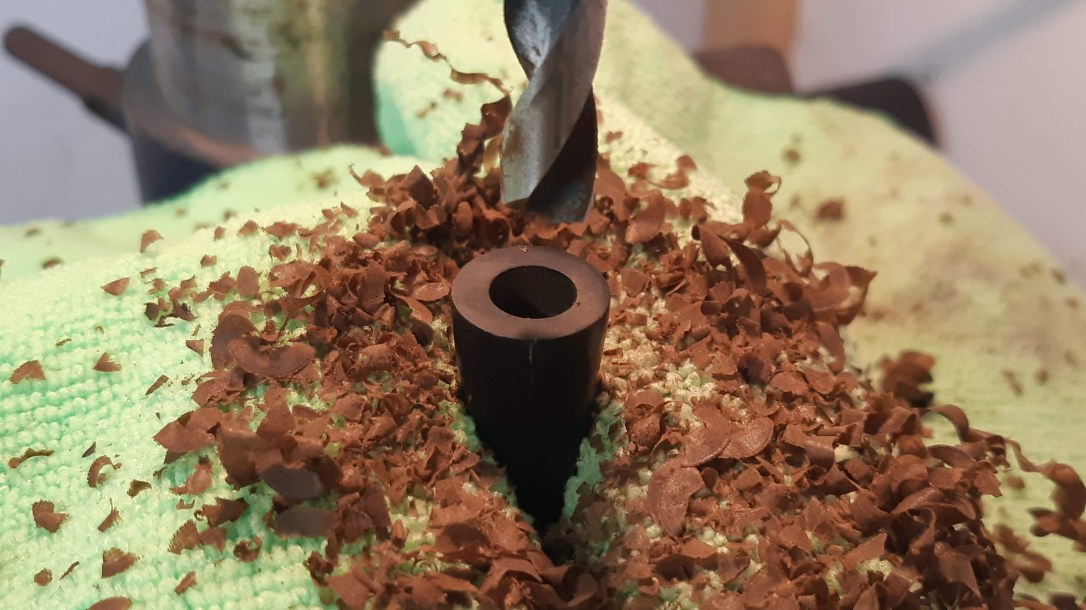
To give the epoxy something to grip onto I tapped the stem mortise, cutting threads into the smooth walls. I cut similar grooves into the stem end of the Delrin tenon
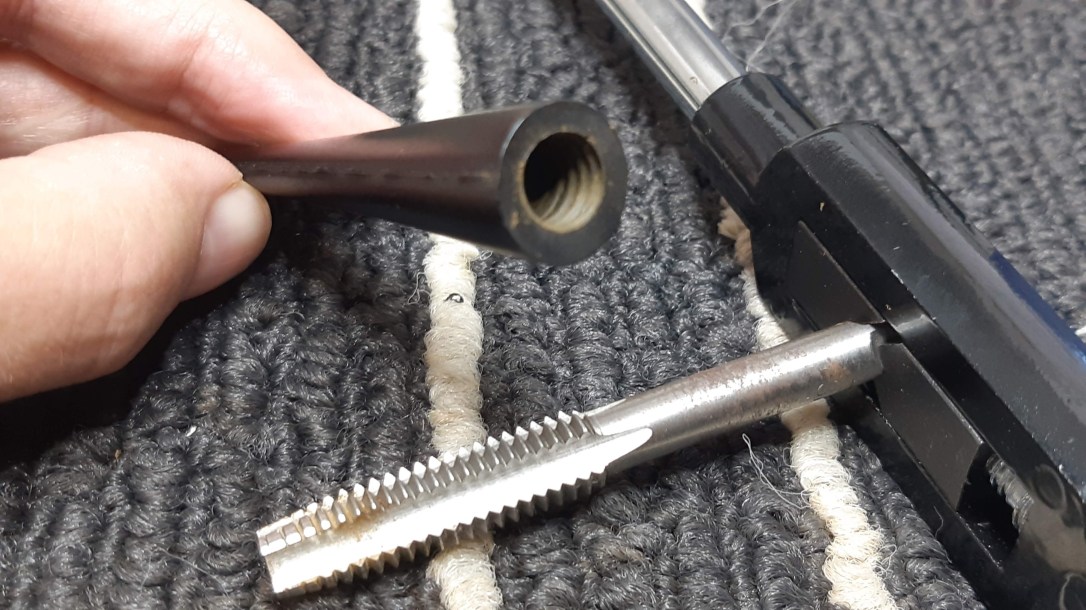
I forgot to take pics while I sized the tenon to the shank mortise, but as the tenon was only slightly too fat, it only needed a quick sanding to achieve a snug fit. At the stem end where the epoxy would go, I filed the tenon down slightly to allow the stem to slip into place easily with a bit of wiggle room to adjust alignment after the epoxy was applied.
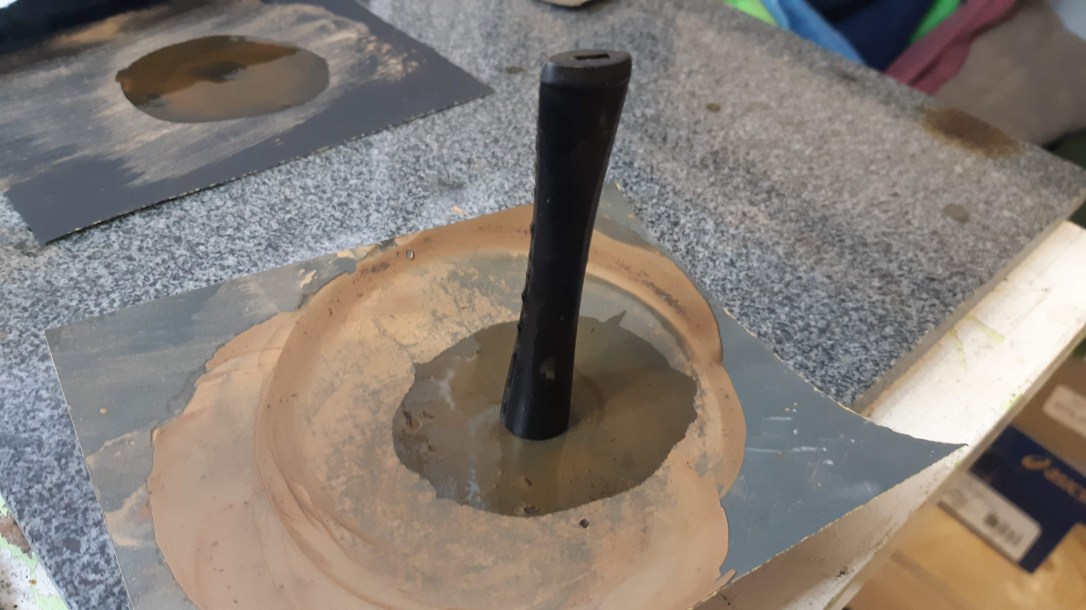
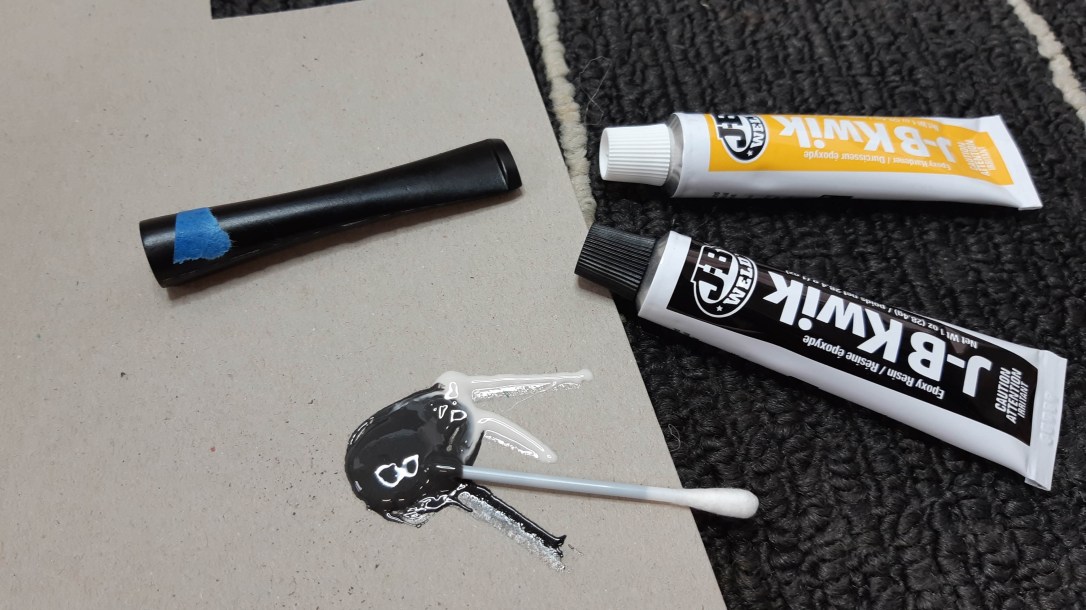
I mixed up a small amount of JB-Kwik, which sets in 4-6 minutes and cures completely in a few hours. I cut one end off a cotton swab to make a stir stick to mix the epoxy and apply it to both the end of the tenon and the interior of the stem mortise. As you can see in the second pic below, I used just enough epoxy to fill the grooves in the mating surfaces. Keen observers may also notice a thin layer of petroleum jelly on the shank face. This is a bit of added insurance against accidentally bonding the stem to the shank due to squeeze-out of excess epoxy.
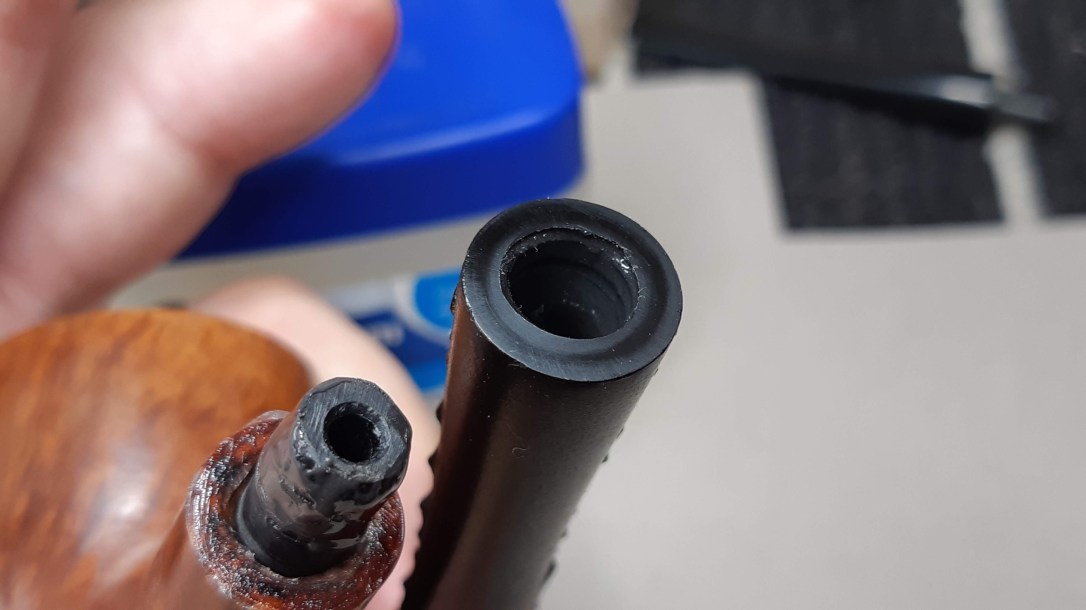
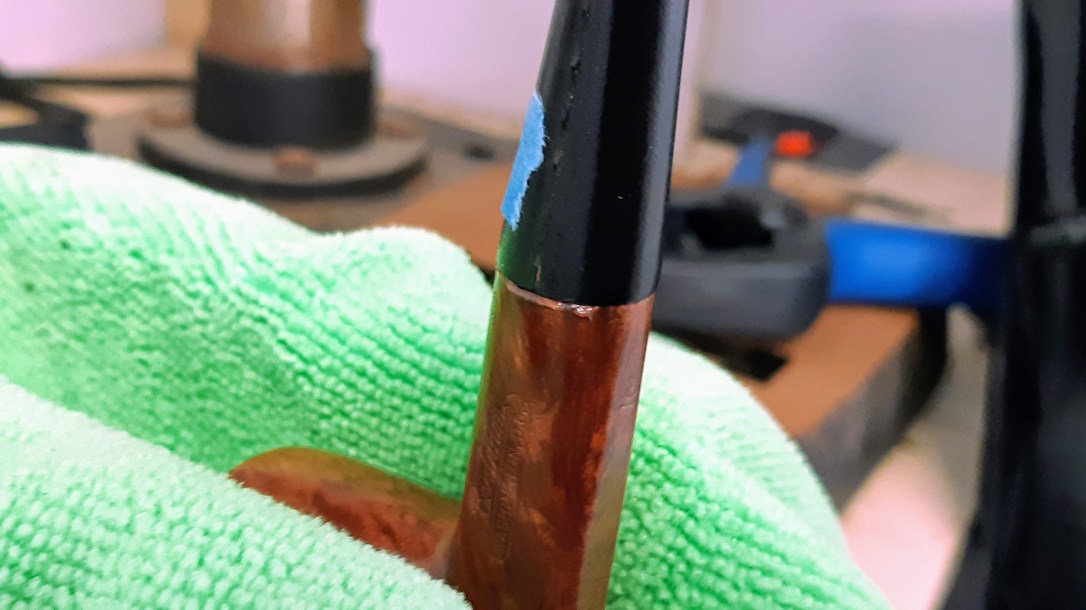
After carefully sliding the stem over the end of the tenon, I clamped the pipe upright in the padded jaws of my bench vise and adjusted its position flat against the shank face and more or less centred. This is where that tiny bit of wiggle room comes into play as not all pre-cast stem blanks are drilled perfectly on centre. The scrap of blue tape on the stem reminds me which side is the top.
I left the pipe in the vise until the JB had fully cured. Though it’s tempting to fiddle with things earlier, I advise against the urge to rush the glue. More often than not rushing leads to a misaligned stem, which means starting over from scratch.
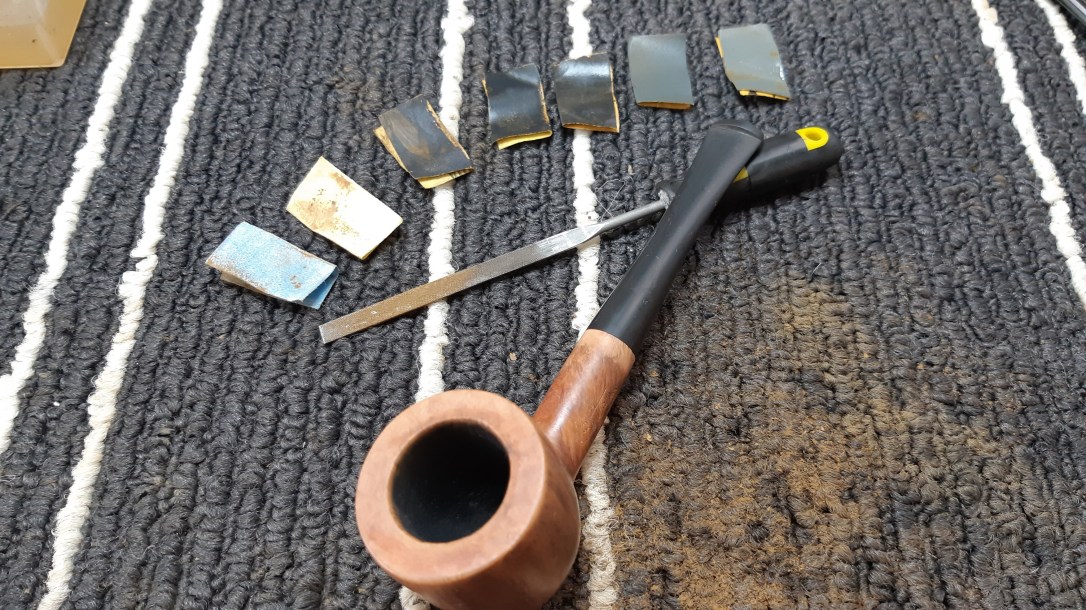
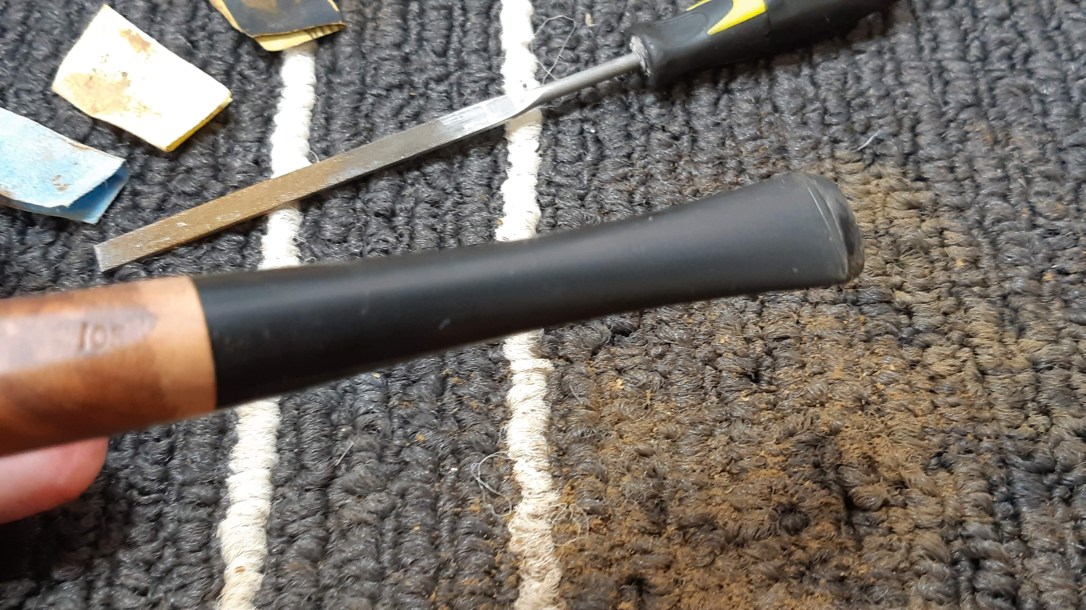
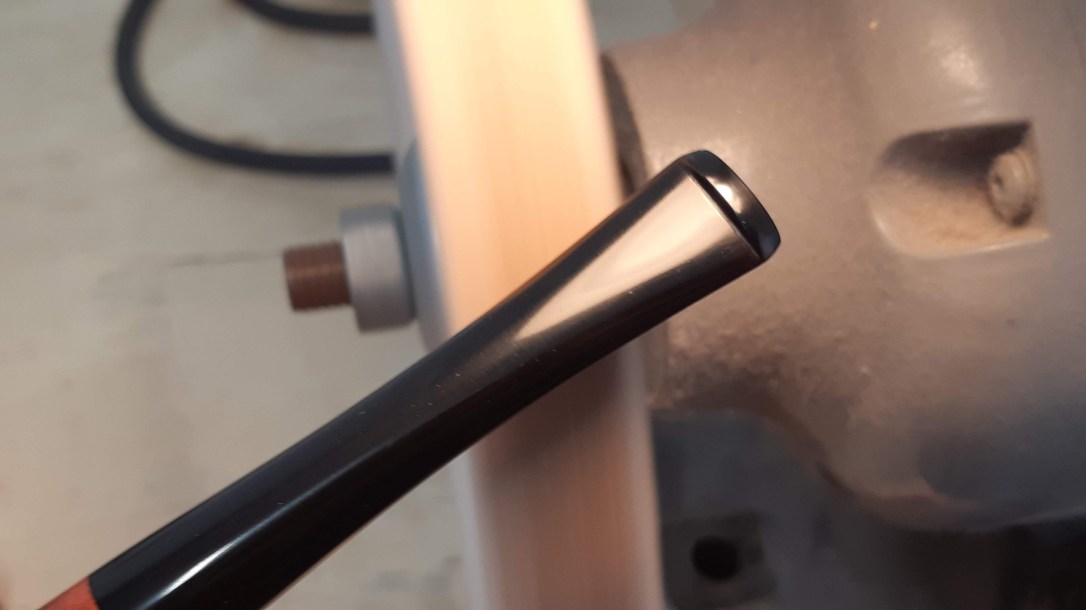
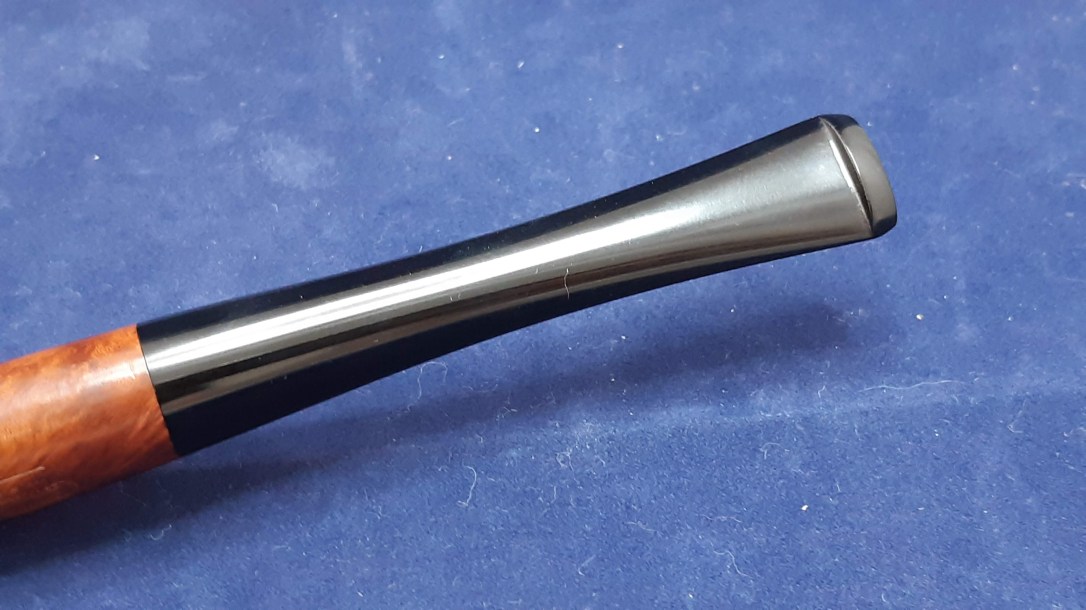
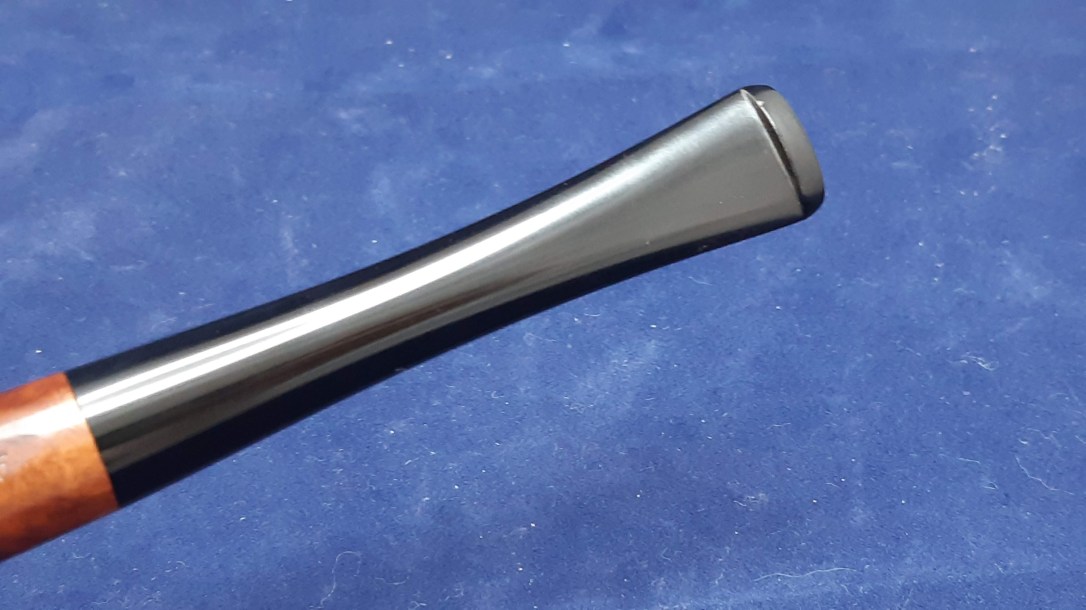
The new stem was a very close match to the original but it still required a fair amount of work to make it look like a factory fit. After taping off the shank, including the stamps, I used my flat needle file to knock off the rough casting marks and remove the bulk of the excess material. When the stem diameter was close to matching that of the shank, I switched to sandpaper, working my way through seven grades, from 220 to 2000 grit. Each grade of abrasive removed the sanding scratches left by the previous grade and brought the stem closer to its final polish.
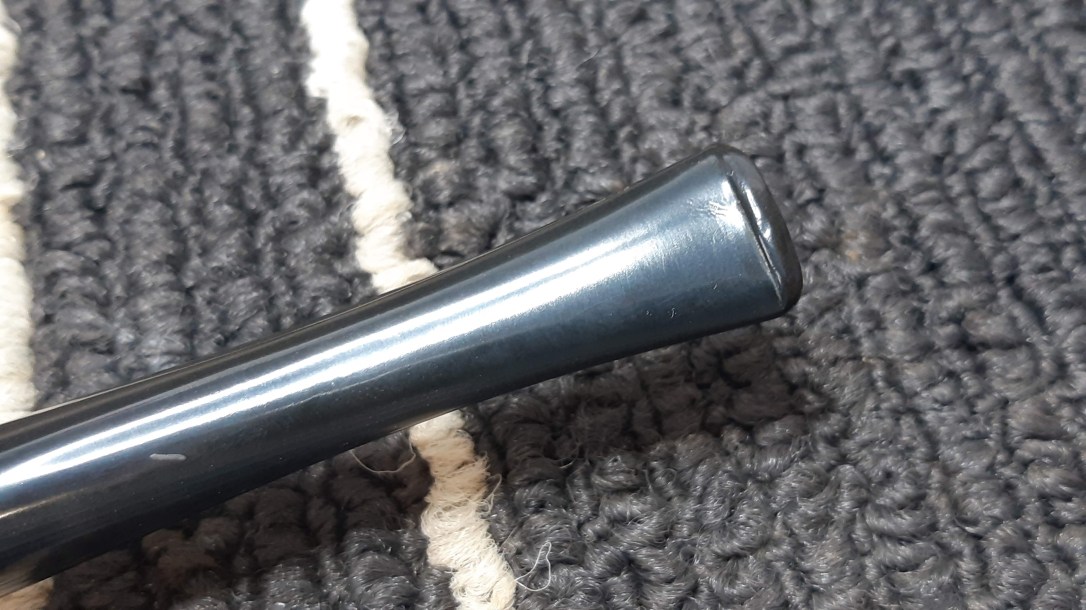
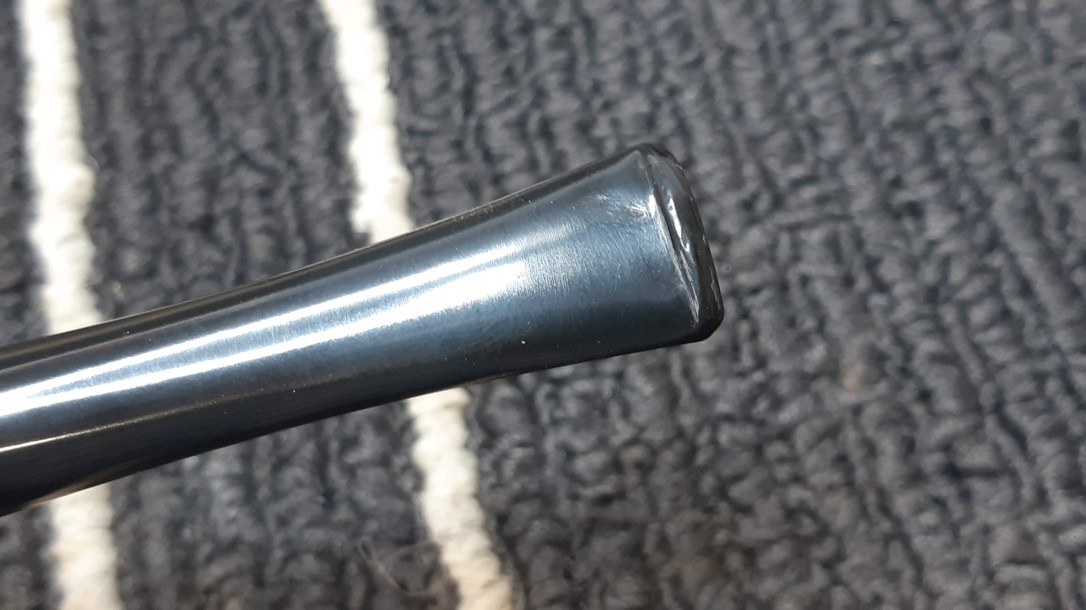
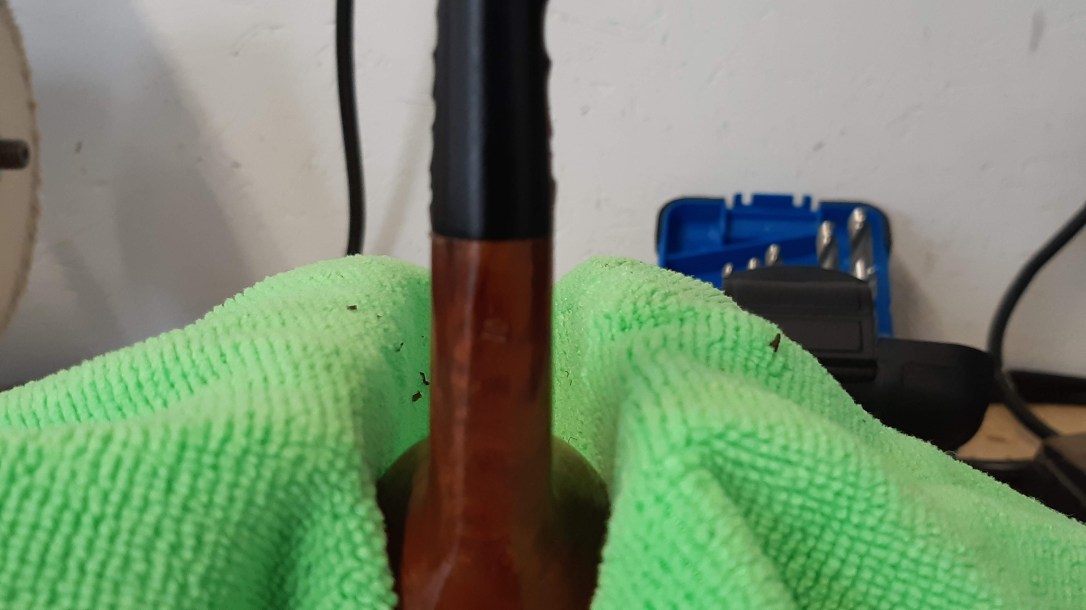
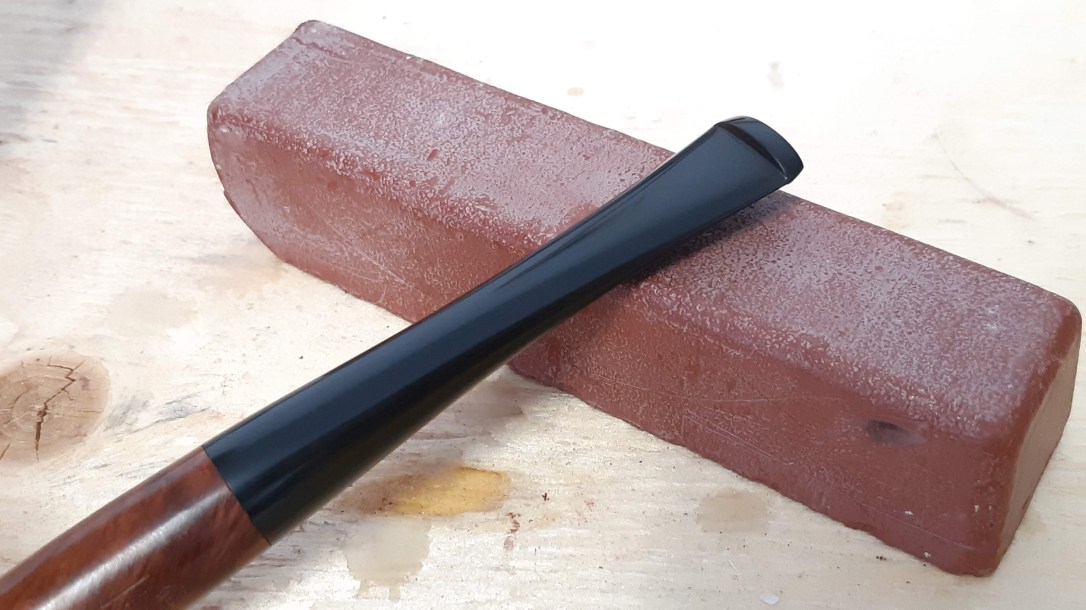
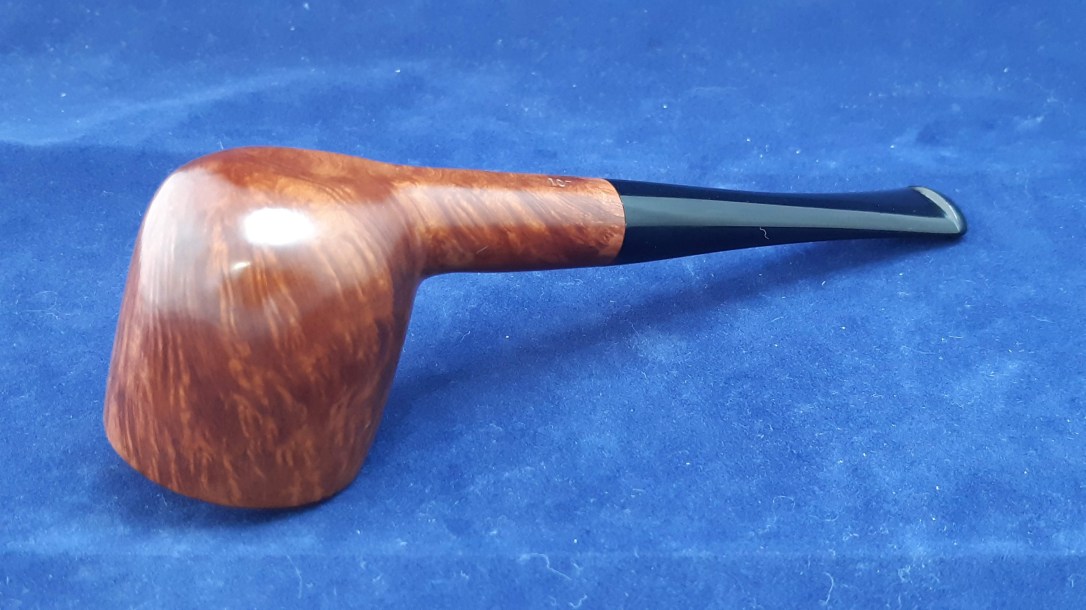
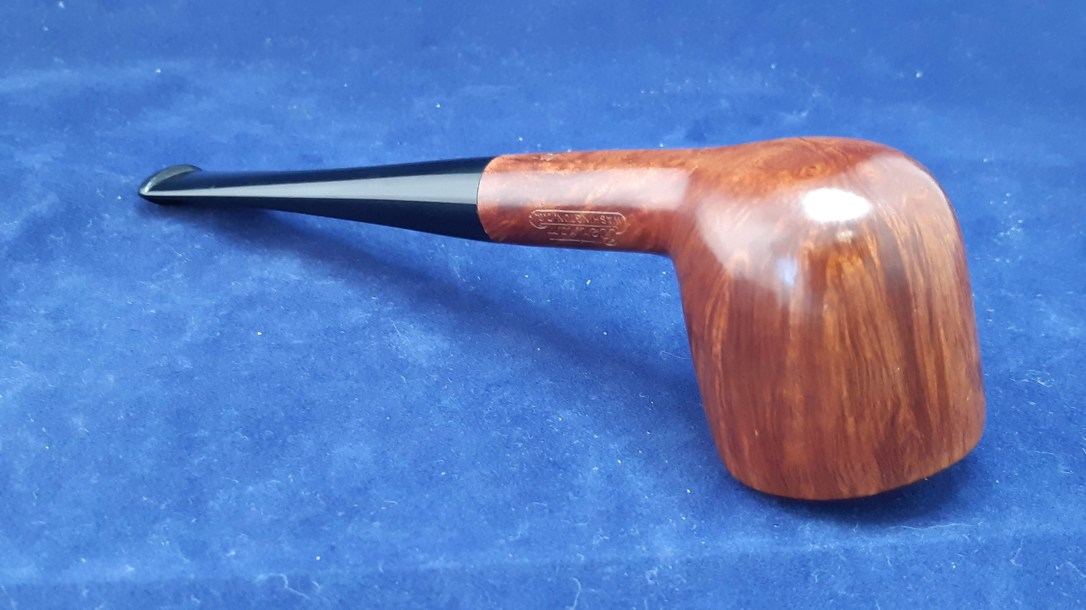
This series of pics shows the state of the shank/stem junction after sanding to 2000 grit. The briar and vulcanite meet tightly and the flow of the shape is smooth across the transition. Additionally, the new stem shows no sign of the casting marks and is uniformly smooth from stem face to button. The pale briar at the end of the shank is the section of shank not covered by the tape during sanding.
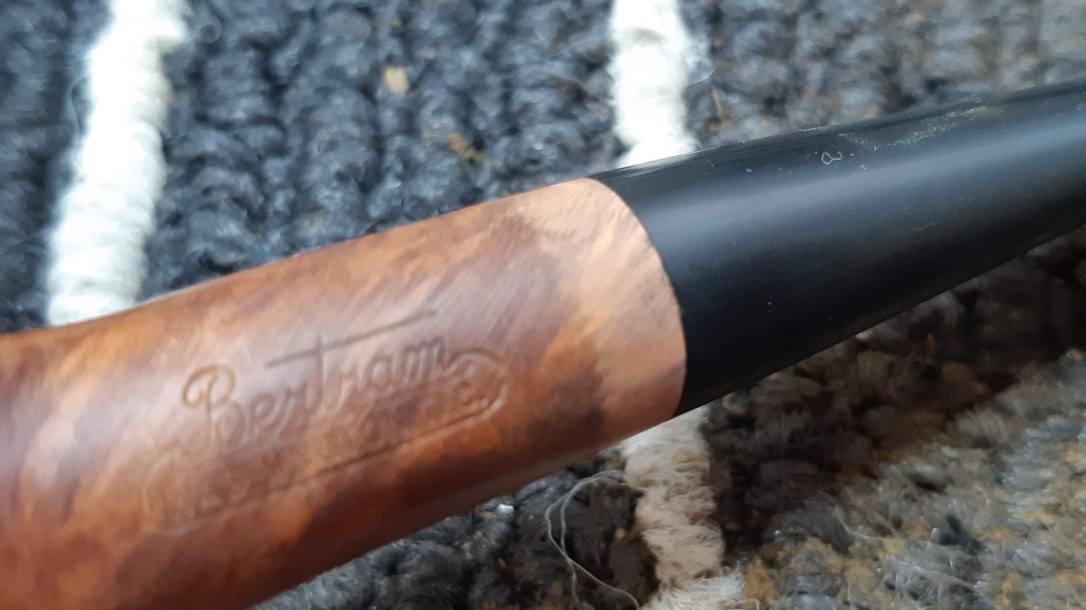
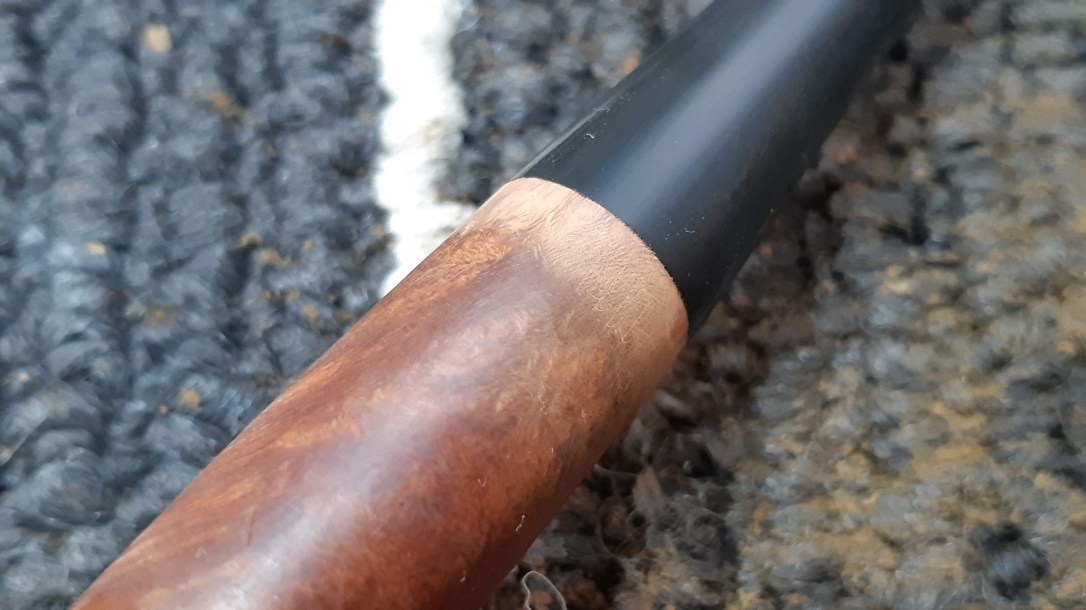
A quick touch-up with a stain marker colour matched the sanded briar to the original stain. Here’s a tip – the colour of this stain pen was much darker than the pipe’s finish when first applied. To lighten it up, I wiped the shank lightly with a cotton pad moistened with alcohol.
Now in the final stages of this repair, I took the pipe to the buffer for polishing, starting with Red Tripoli compound to erase the last of the sanding scratches and bring up the shine.
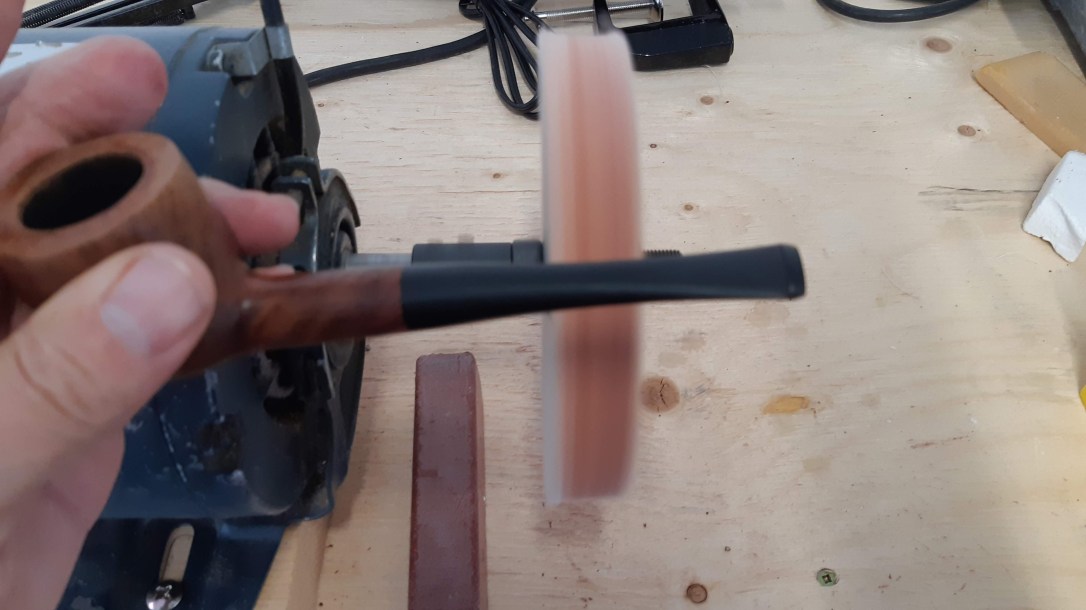
I followed the Tripoli buff with a run on the White Diamond wheel. This finer compound puts the final shine on the stem. I also polished the stummel lightly while I was at it.
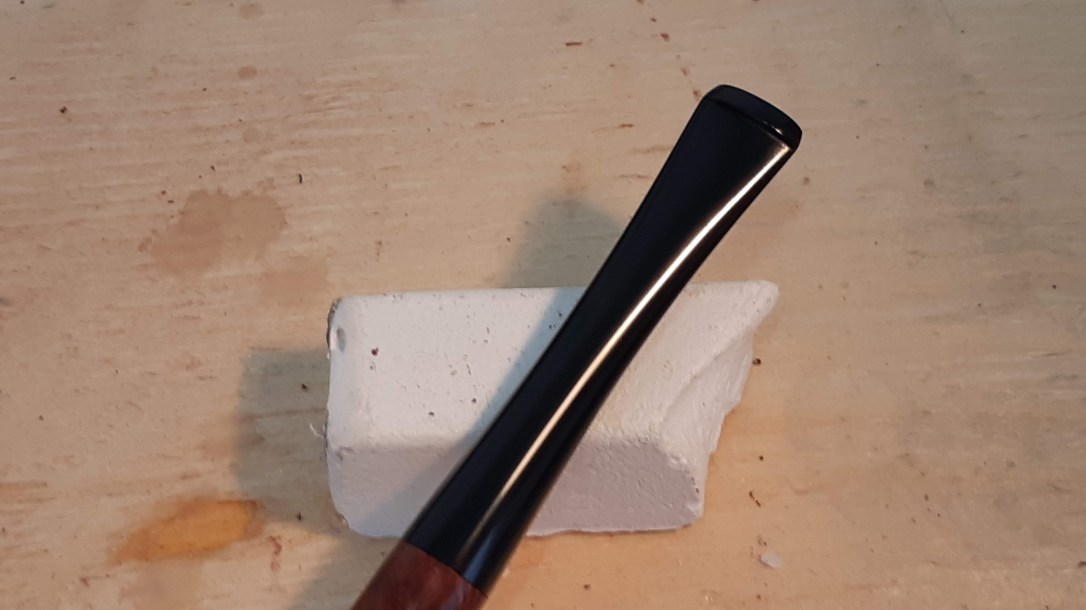
The last stage of polishing is to apply a few light coats of Carnauba wax to the entire pipe. This not only adds gloss and shine but also adds a layer of protection against oxidation.

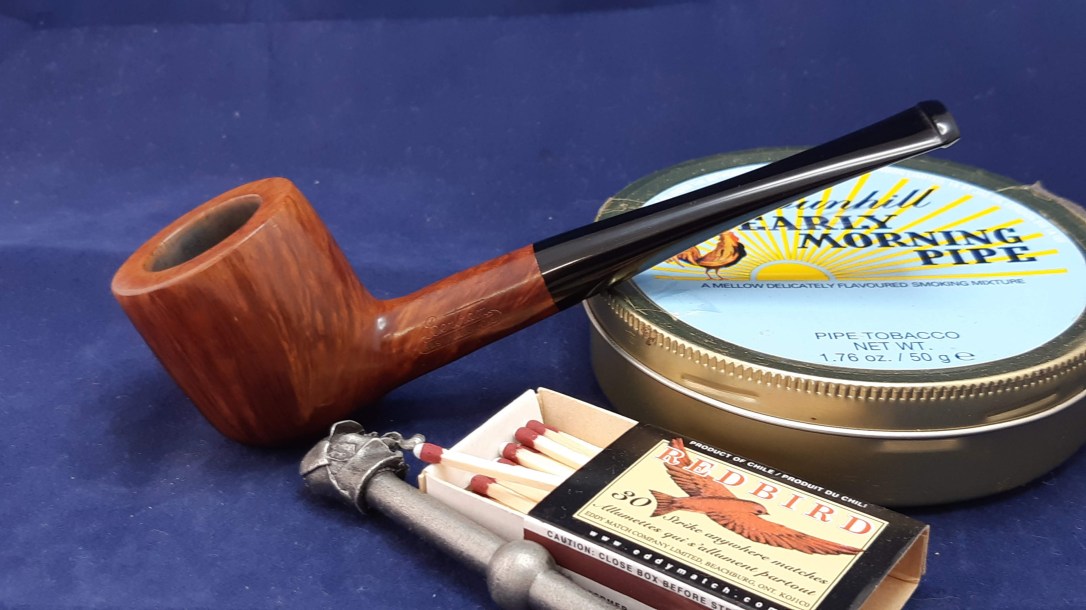
This Bertram 105 Billiard is now ready to send home to its owner who will no doubt appreciate both the factory appearance of the new stem and the improved ease of cleaning that a V-slot stem provides over the twin-bore design.
Thanks for joining me for this re-stemming adventure. I hope it has provided some insight into the process of fitting a new stem and perhaps encouraged you to tackle a similar project yourself.
Until next time, Happy Piping! Here’s the finished pipe.

Is there any repair you can’t make? That question was rhetorical. Really neat work, Charles. That pot makes my mouth water thinking of it packed full of Northwoods and sitting on my porch on a summer evening…and a scotch.
LikeLiked by 1 person
Thanks, David. I do feel lucky to get the chance to work on some lovely pipes!
LikeLike
That was an insightful read Charles. I went back and did a double take on the end of the shank… indistinguishable. Wow. The stem is a perfect fit and the pipe smokes English blends like a champ.
Oh, and it’s pretty easy to clean too.
Excellent work and it’s made this pipe one I reach for on the regular.
LikeLiked by 1 person
Thanks, Elliott! So glad you’re happy with the work! It’s a lovely pipe. Thanks for sending it my way. 😁
LikeLike