
Welcome to Part III of this series about a “lost” line of unfiltered Brigham pipes. This time, I’m working on the second of two Brigham “Canuck” prototype pipes circa 1940s or 1950s.
As I wrote about in Part I, the Canuck line was produced until the 1960s. Production pipes were fitted with a non-filtered Vulcanite stem with either a black anodized aluminum tenon or a screw tenon fitment similar to that used by Dr Grabow, Kaywoodie and others. The pipes were marked “Canuck” instead of “Brigham” to differentiate them from pipes fitted with the then-new Brigham System.
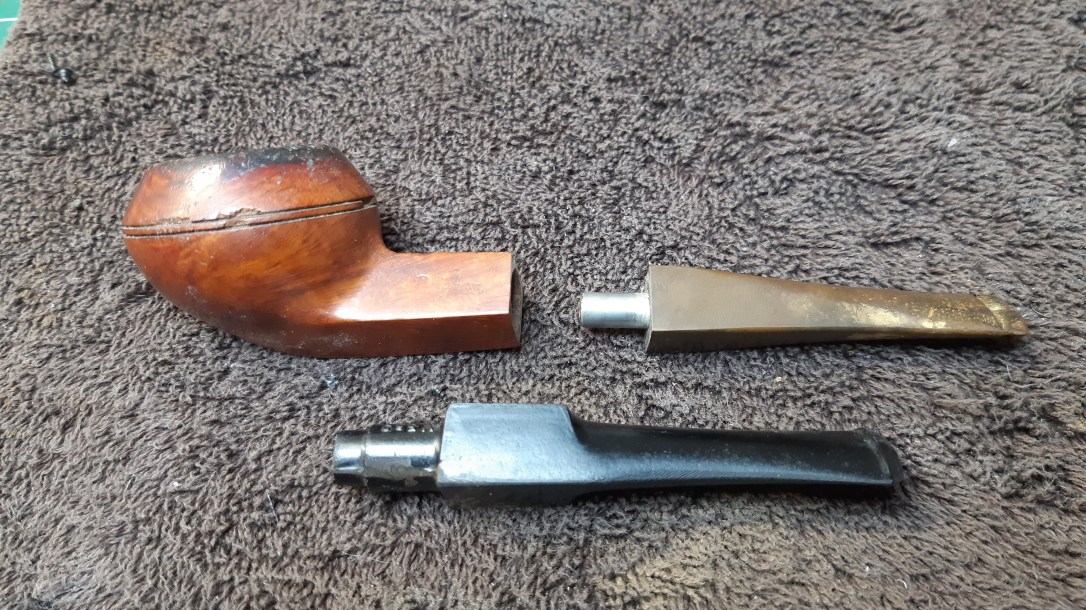
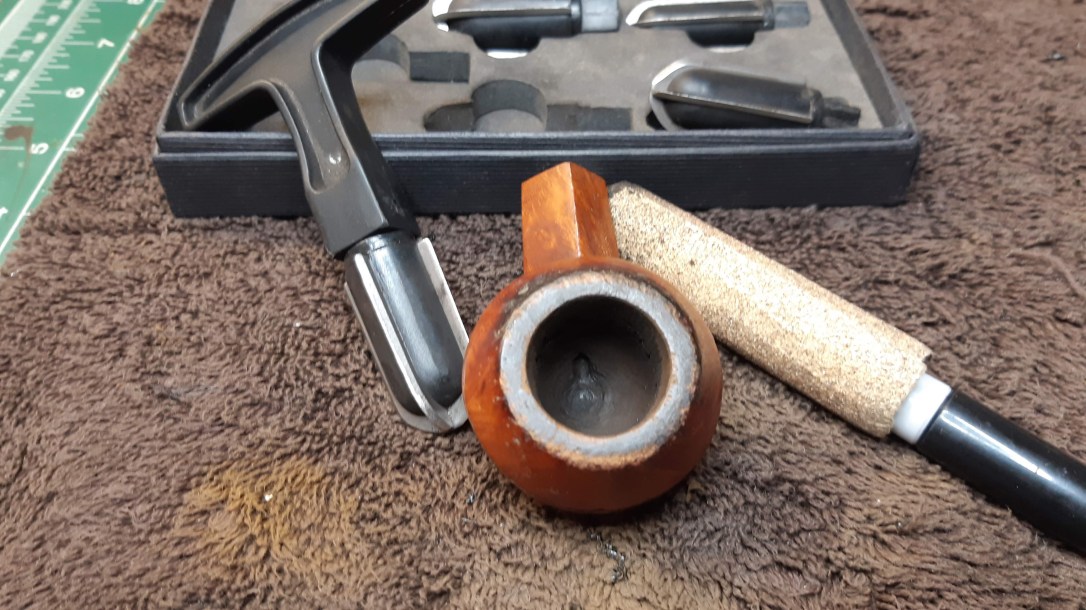
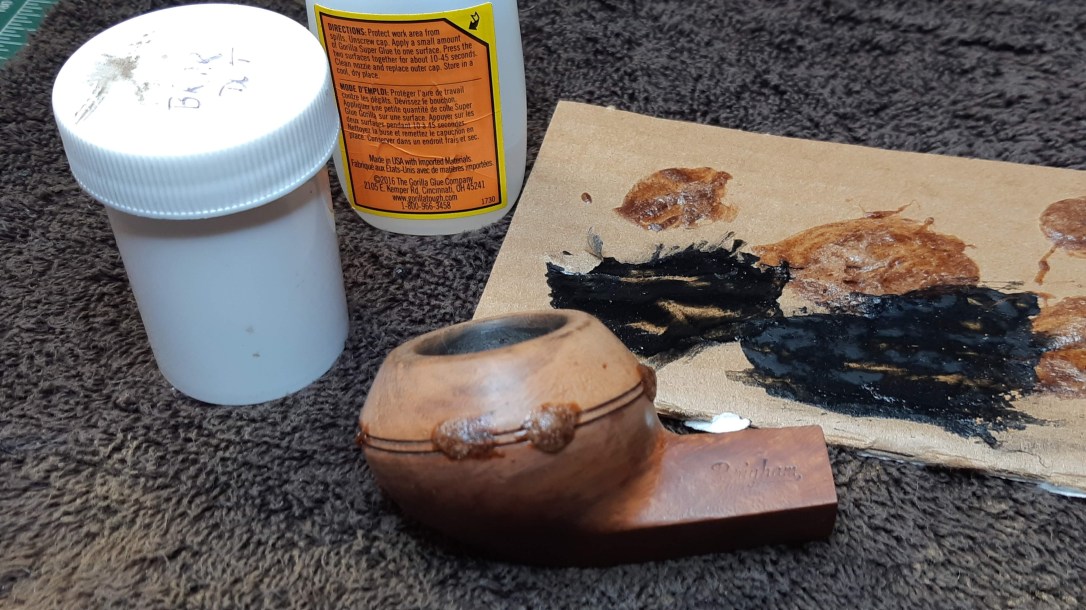
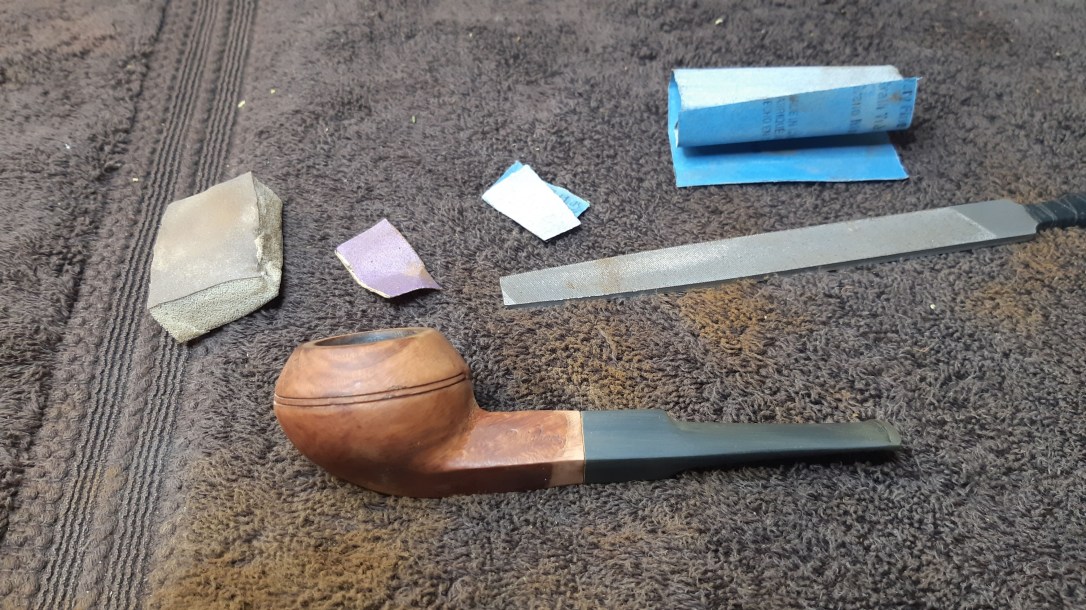
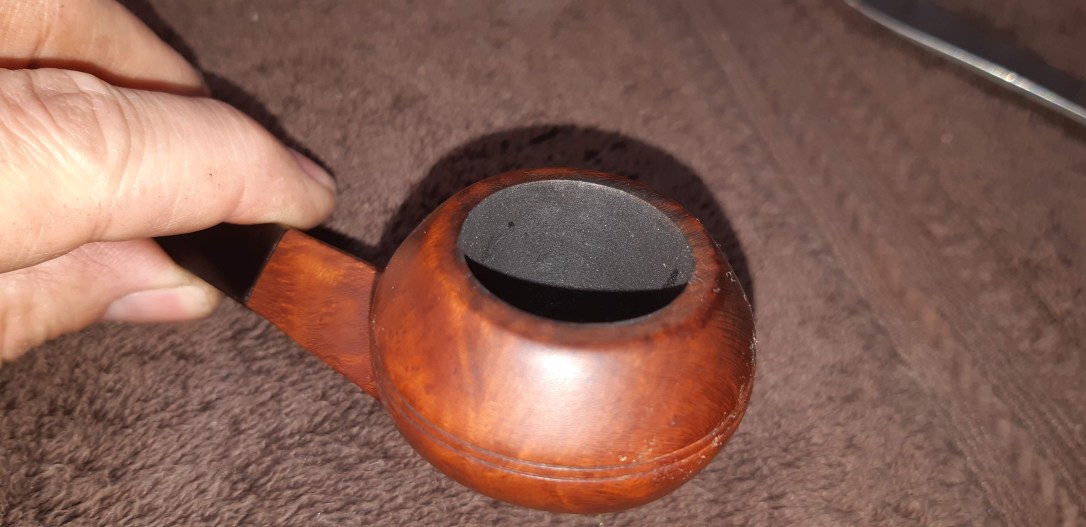
I managed to acquire two early Canuck prototype pipes. Last week’s post covered the rehabilitation of the Pot shaped pipe; this week, I’m working on the Bulldog. These pics show the pipe (top) as it looked when it first arrived in the workshop.
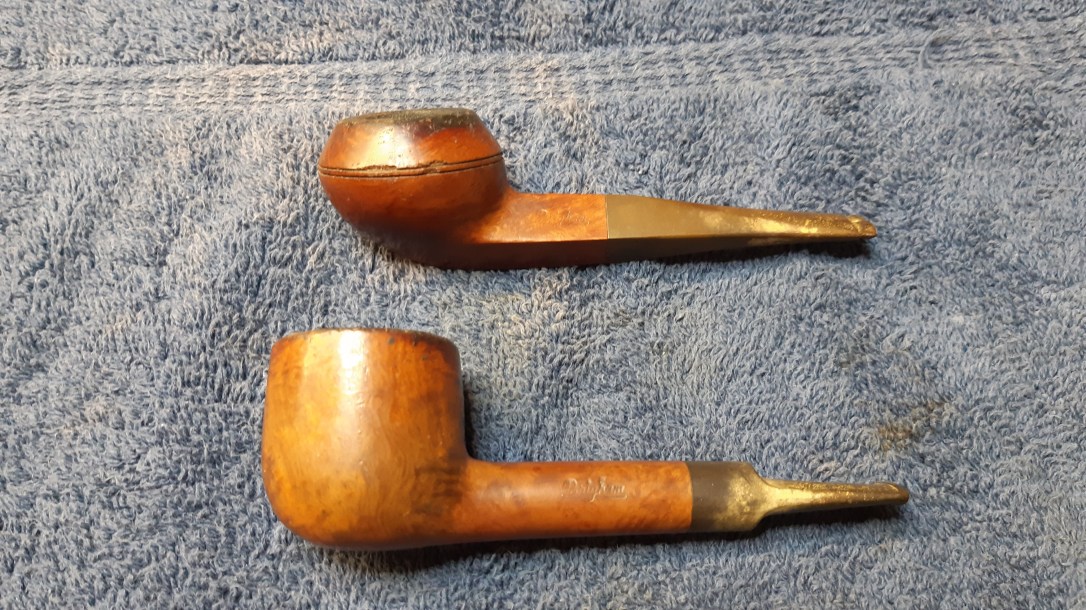
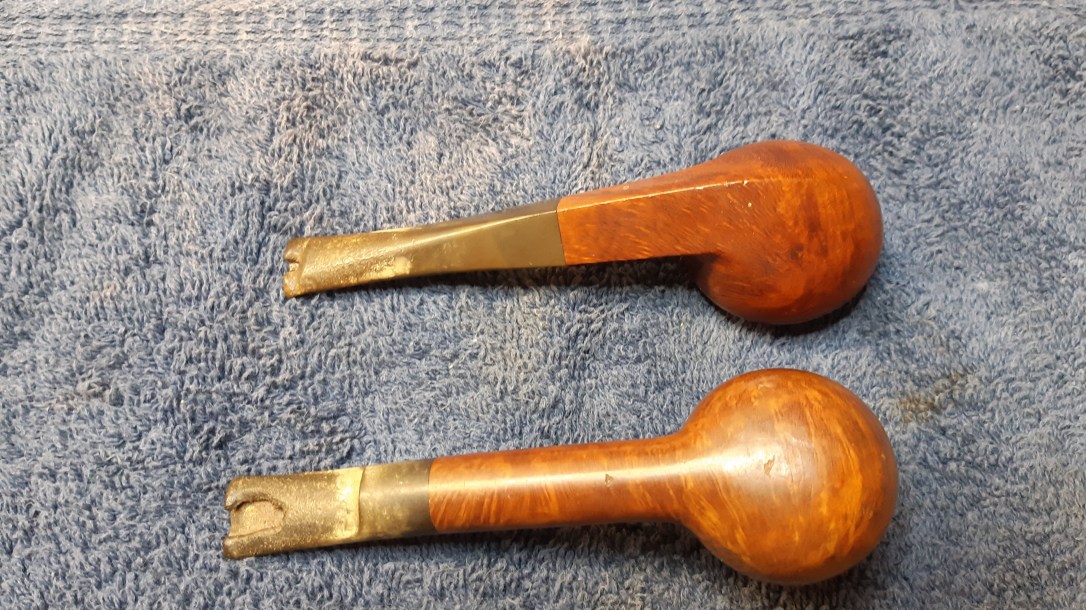
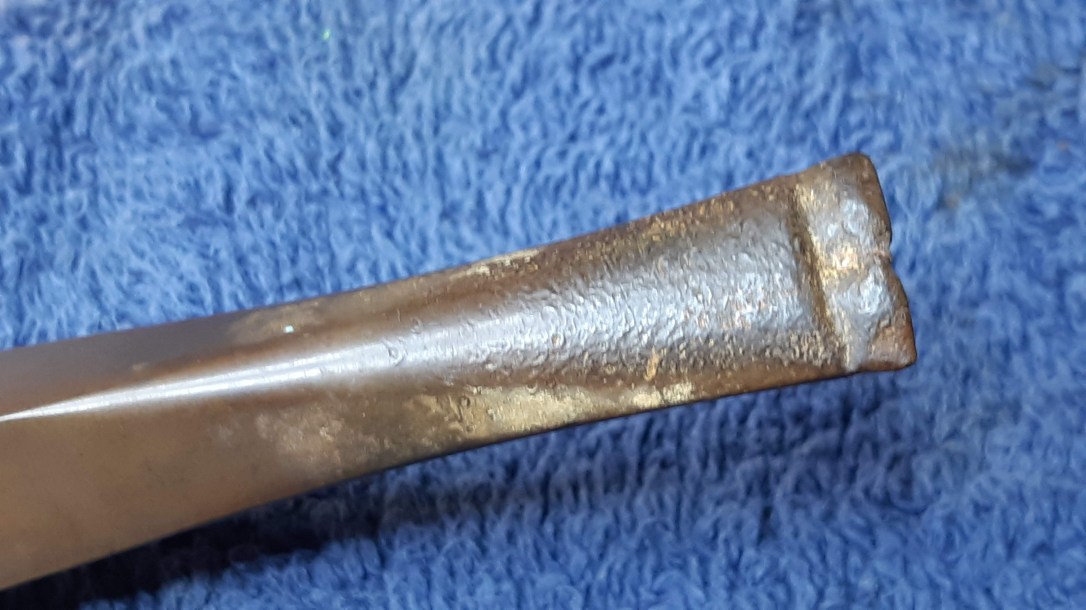


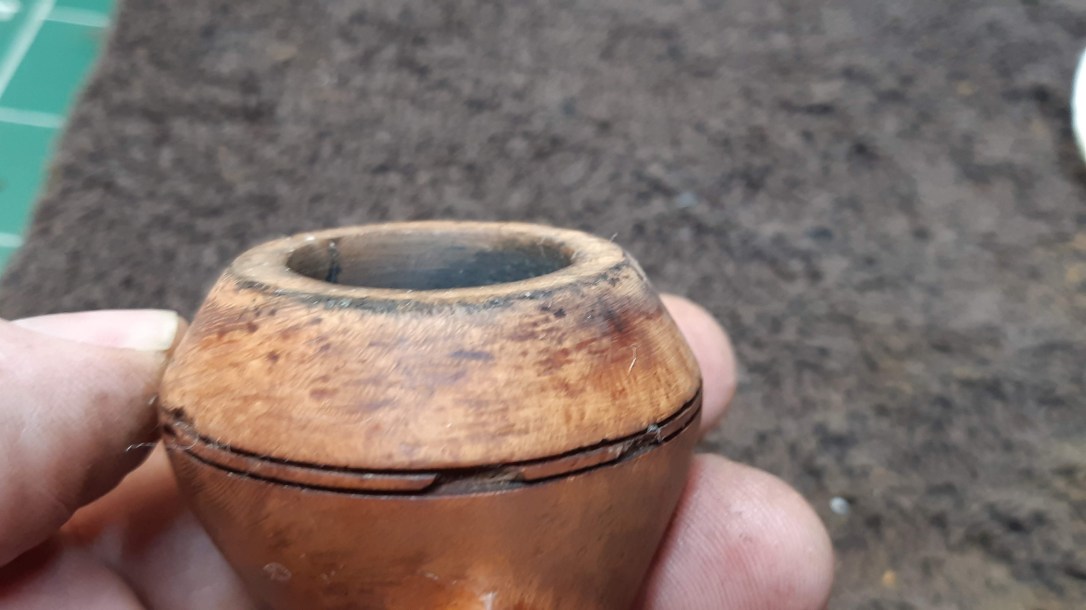
As you can see from the above pics, the pipe had seen its fair share of action over its 70+ years, and was due for a bit of a spa day. The rim of the bowl was dirty and crusted with lava. The twin rings around the bowl were damaged in several places, and the stem had been cut short and a crude button filed into the raw end of the stem. The Vulcanite was also heavily oxidized, though the plain aluminum tenon was no worse for wear under a coat of tars.
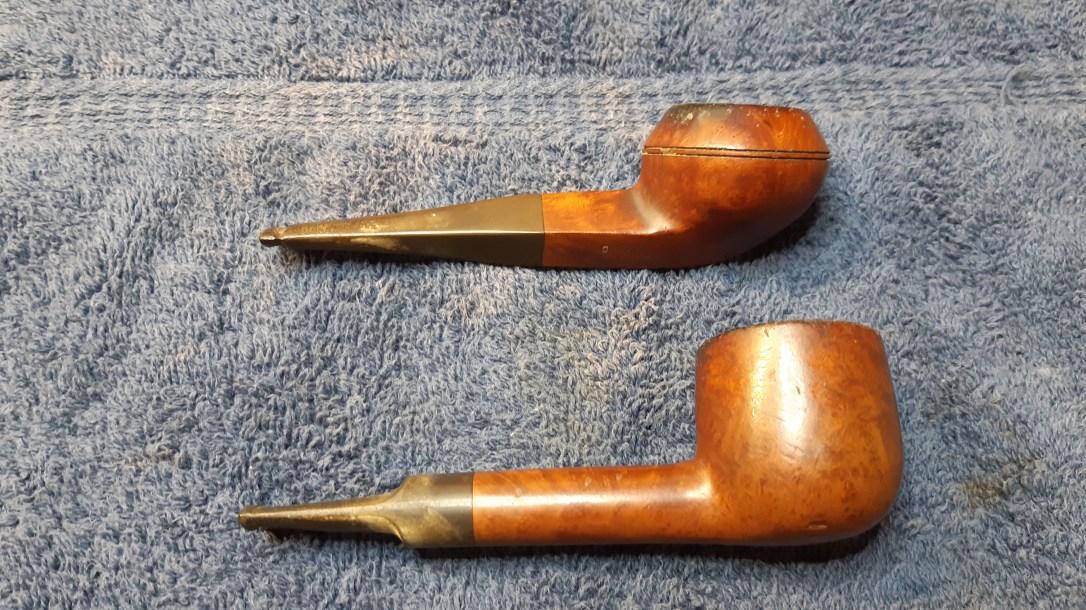
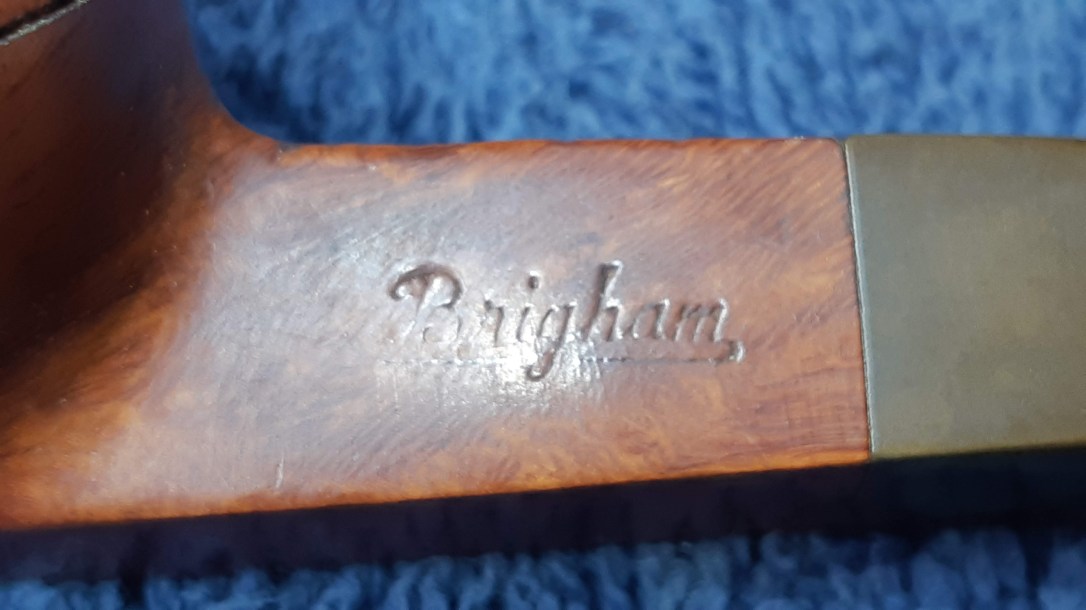
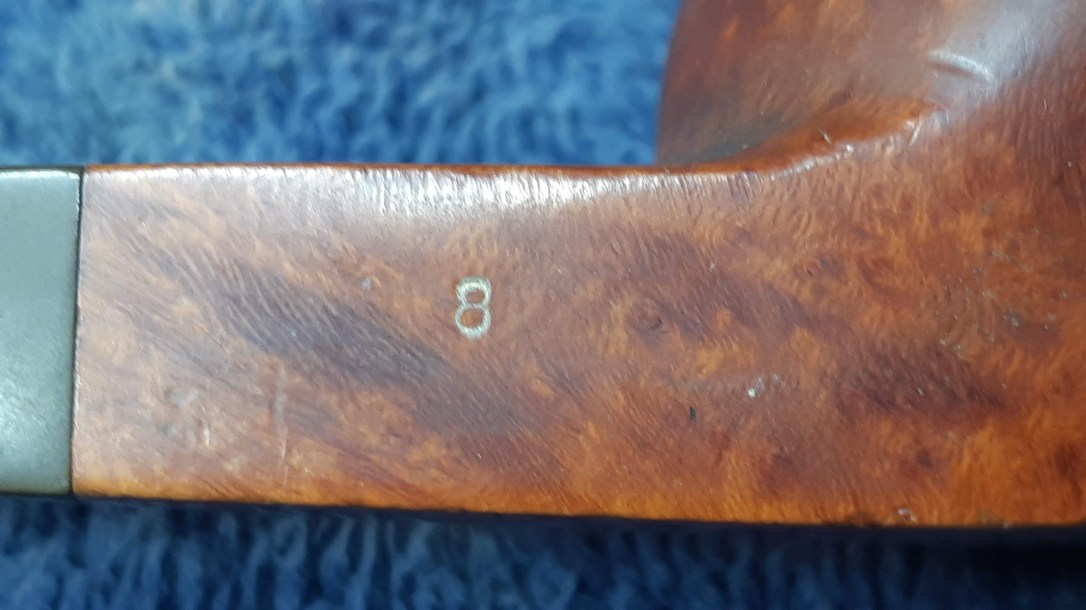
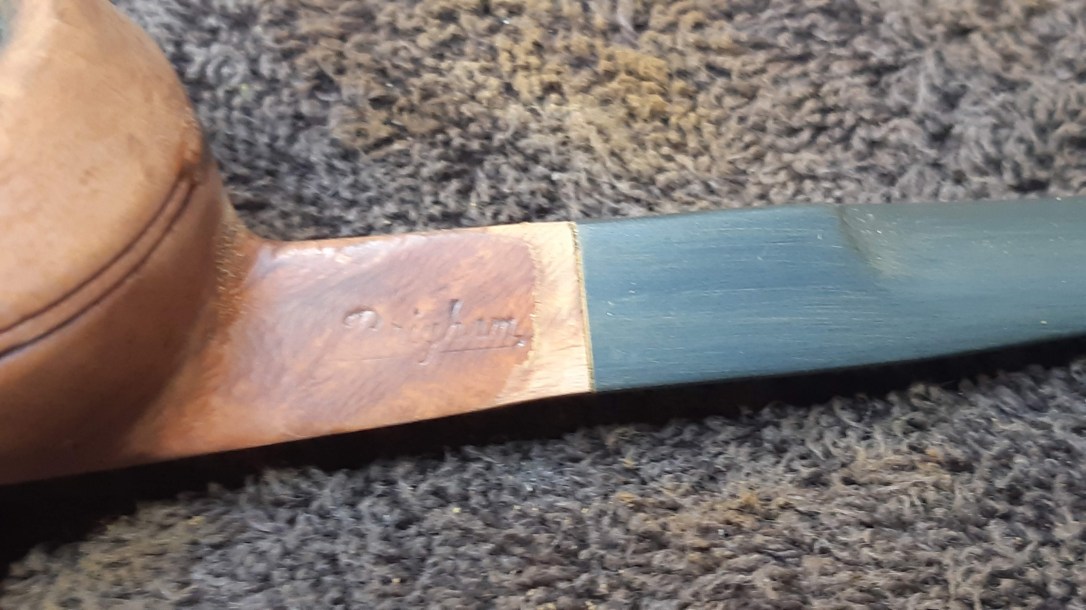
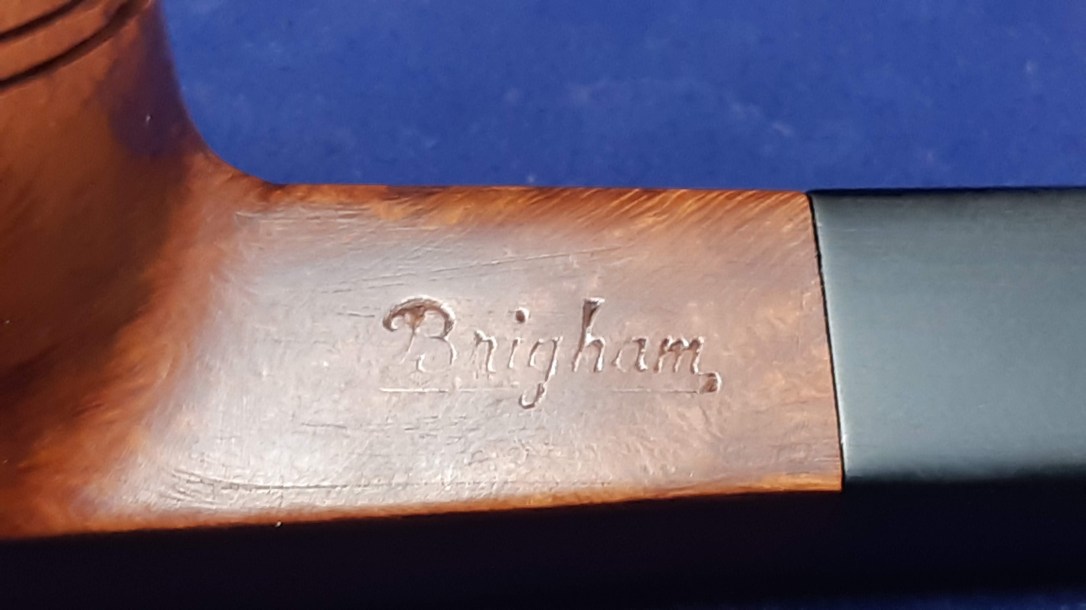
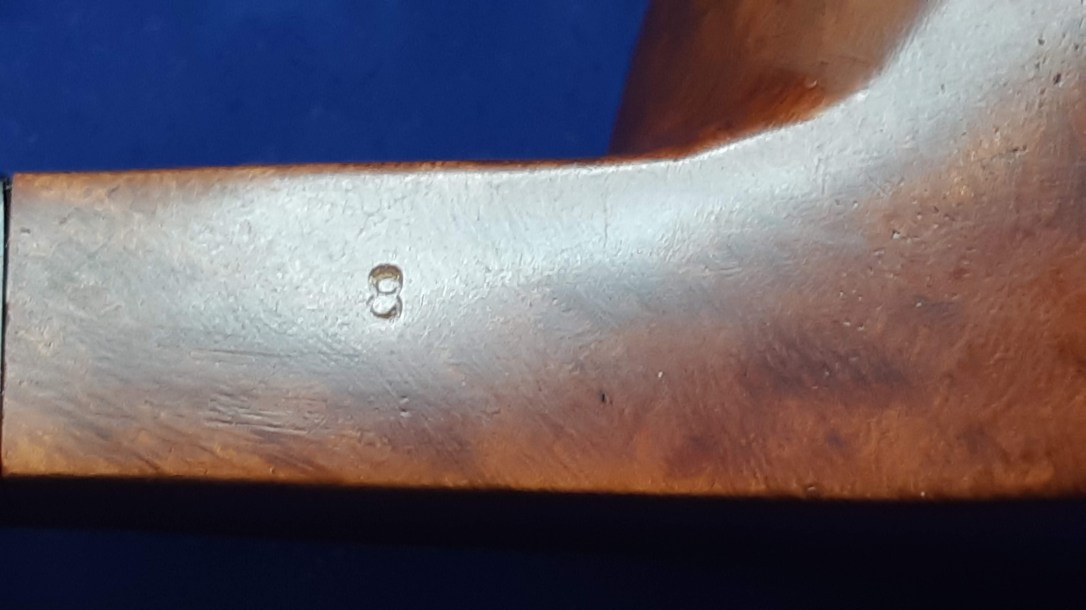
The pipe is stamped with the old “Brigham” script logo and the number “8”. As explained in Part I, the significance of the “8” is unknown – it’s not a shape number or a grade stamp, but appears on some (but not all) Canuck pipes. The plain aluminum tenon and Brigham logo are what mark this pipe as a forerunner of the Canuck line.
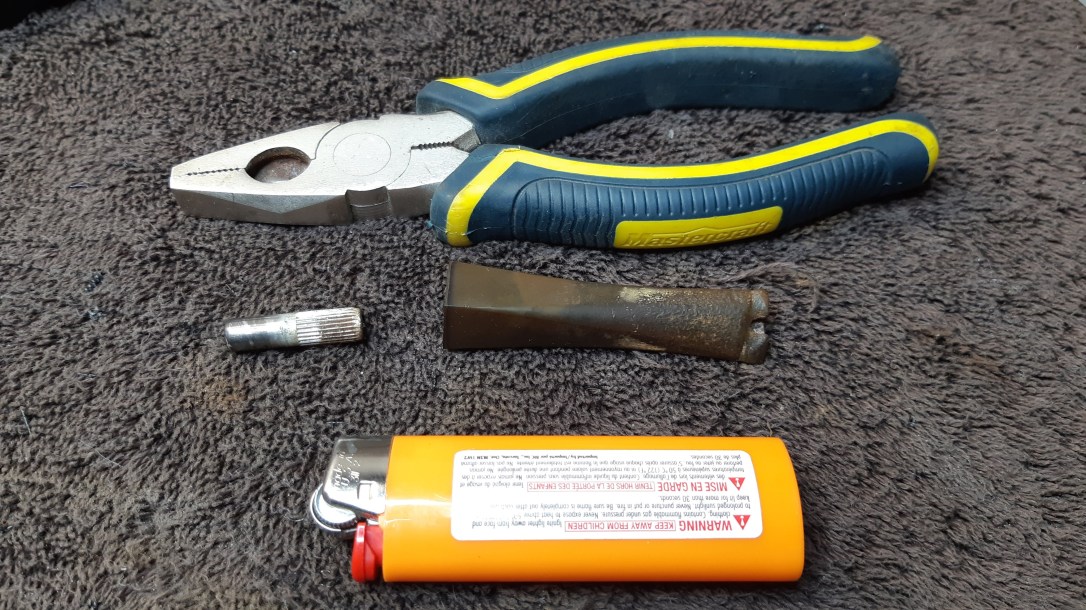
Moving on to the actual restoration, my first decision was what to do with the gnawed and shortened stem? After a bit of consideration, I decided that too much material was missing to simply patch the Vulcanite. I would, instead, replace the stem altogether.
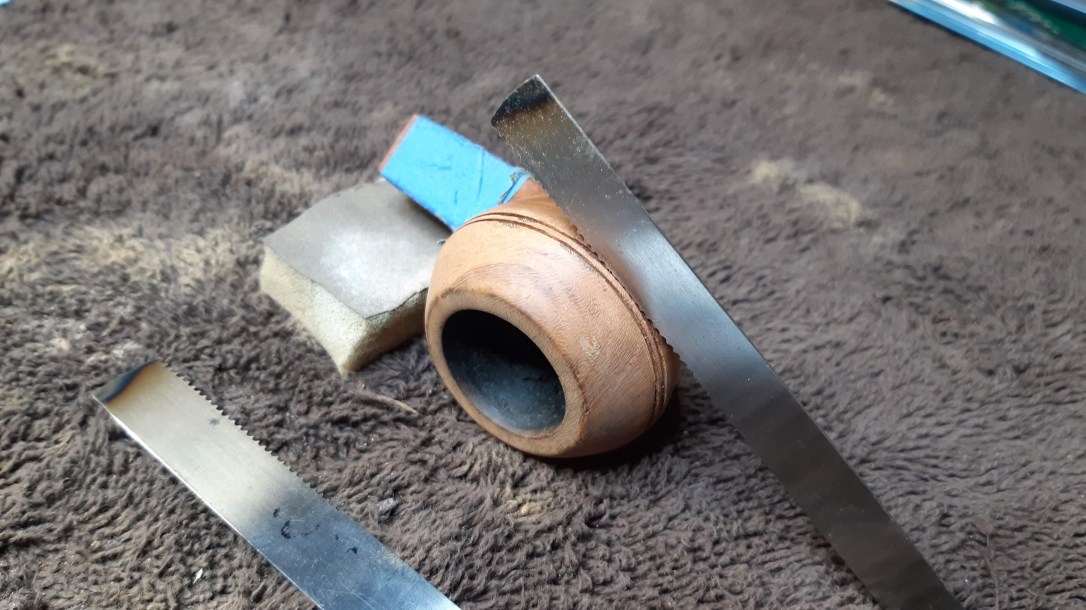
I had to order in a few different sizes of stem blanks as I didn’t have anything in my stocks that would suit. In the end, the blank that worked best with the vintage stummel was the diamond shank saddle bit shown below. Moving to a saddle stem changes the original factory look of this Bulldog, but the tapered stems I had access to were either too long or significantly oversized for the pipe shank. This saddle stem was bang on the desired length and would only need a bit of filing and sanding to match the shank dimensions.

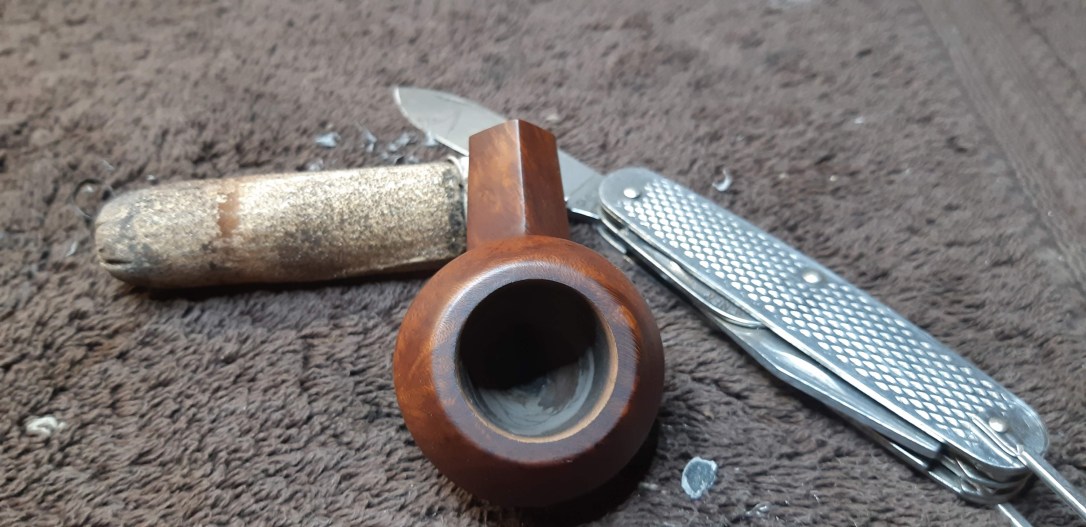
Now that I had a replacement stem lined up, the next task was to salvage the aluminum tenon from the original stem. I extracted the tenon by heating the aluminium over a lighter flame until the Vulcanite released its grip.
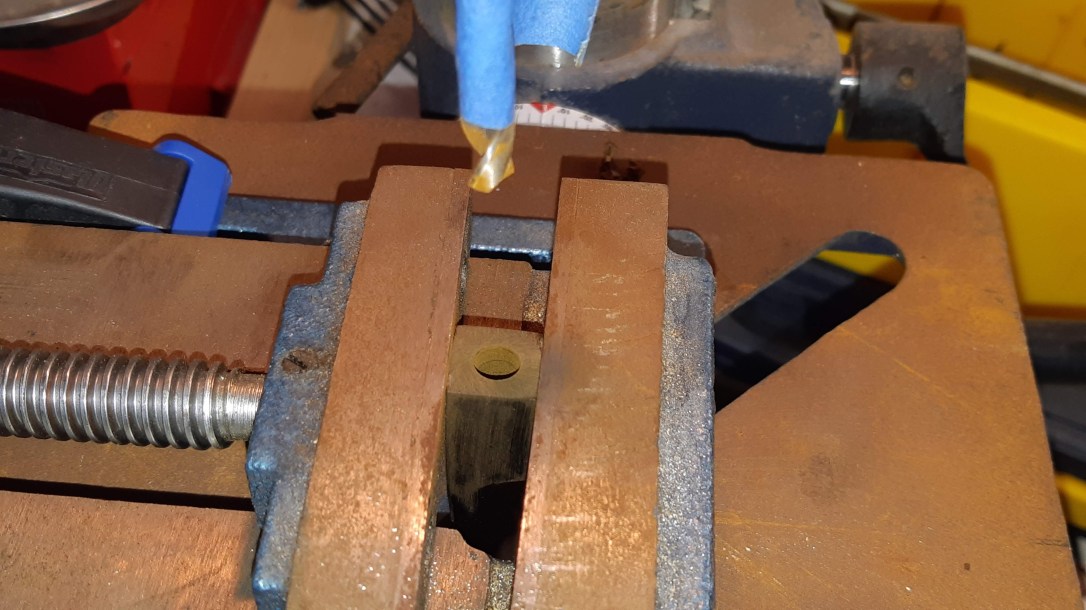
Now to fit the tenon to the new stem. I cut off the pre-formed tenon and sanded the stem face flat and smooth, then clamped the stem into the drill press vise and drilled out the airway to accept the tenon.
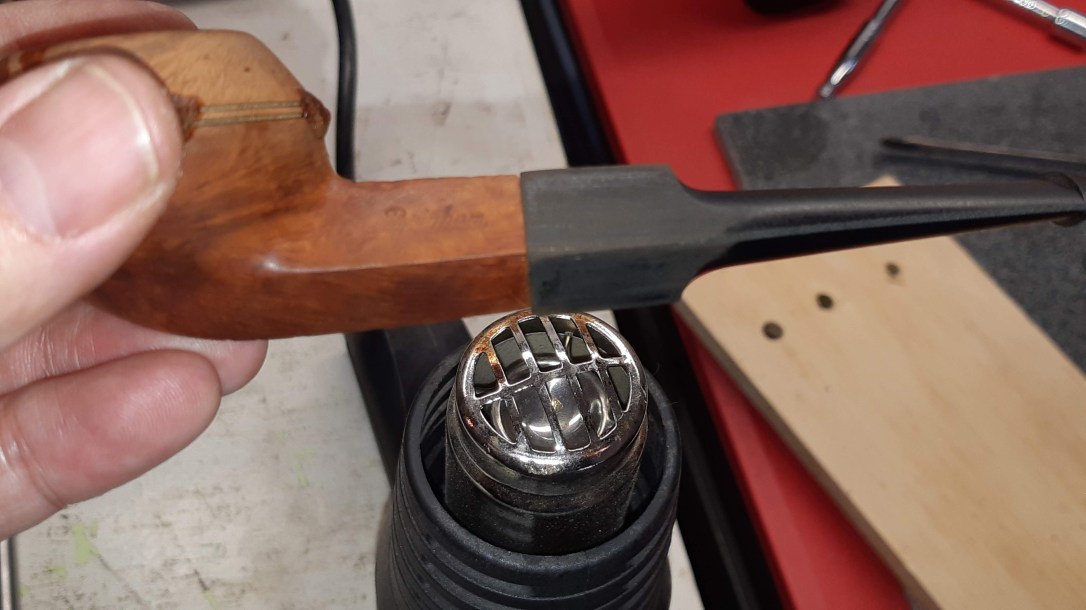
I deliberately drilled the mortise slightly small, then pushed the tenon into the pipe shank and warmed the vulcanite over my heat gun. When the end of the stem became malleable, I pushed it over the knurled end of the tenon and lined everything up. I held the stem in place until the Vulcanite cooled enough to grip the tenon tightly on its own.
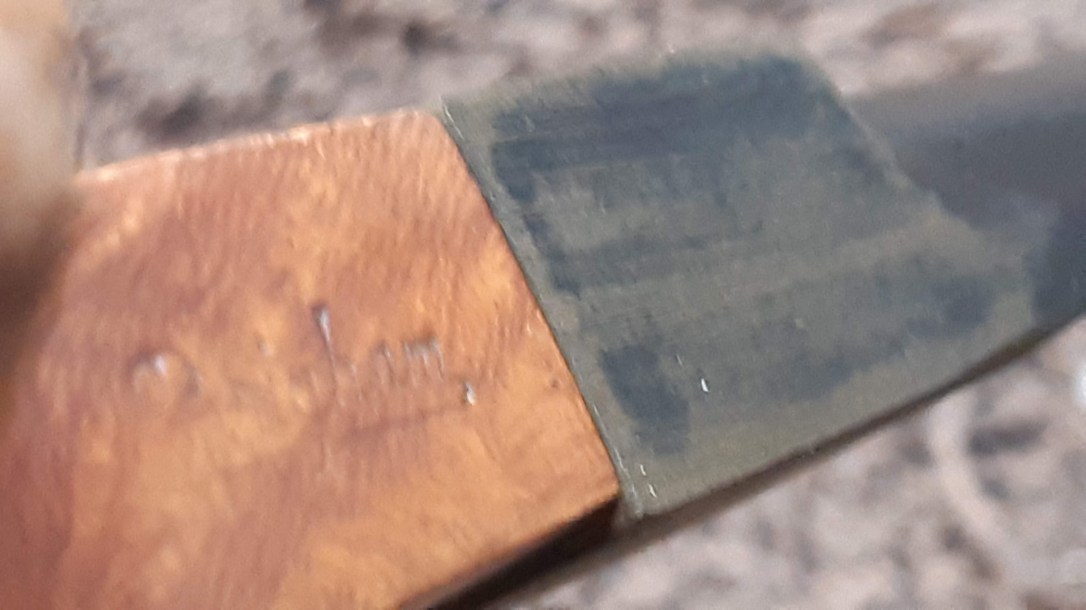
As with any stem replacement, the new stem didn’t fit the shank exactly. It would need sanding and filing on all four sides of the diamond to true things up. This pic illustrates the situation.
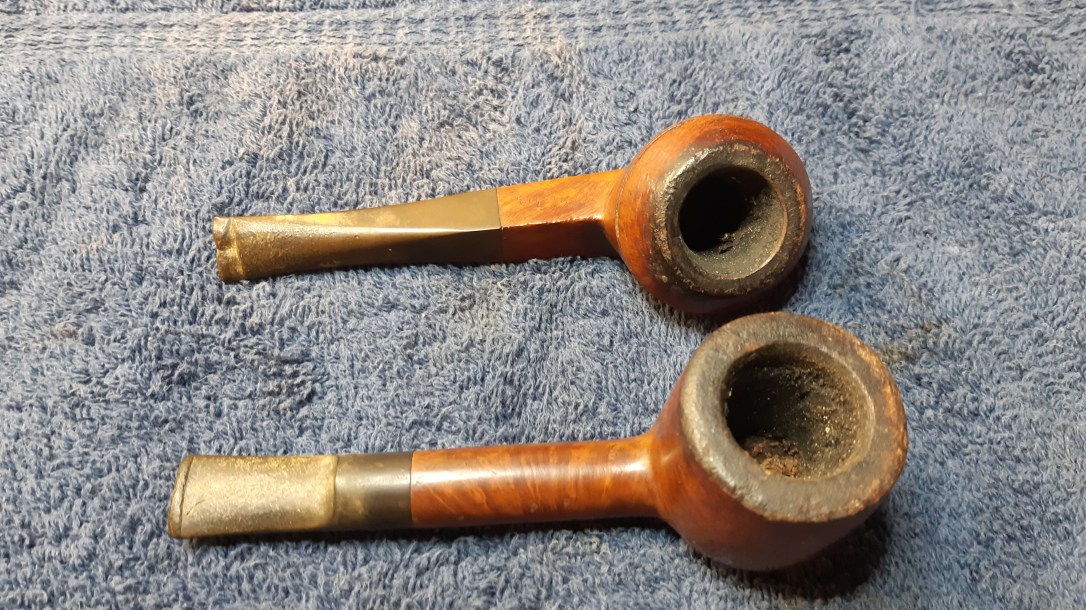
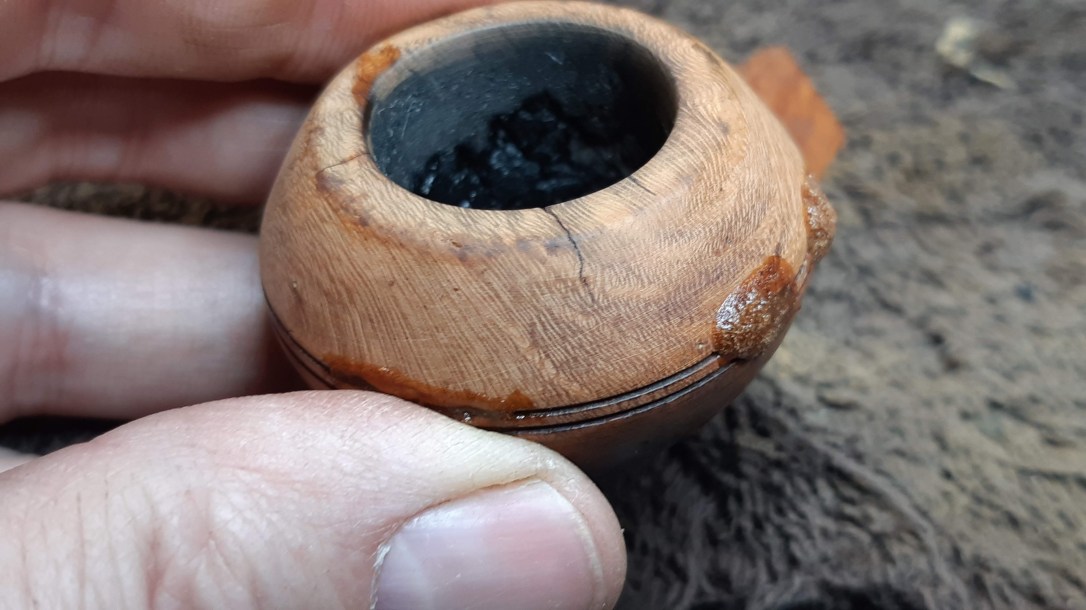
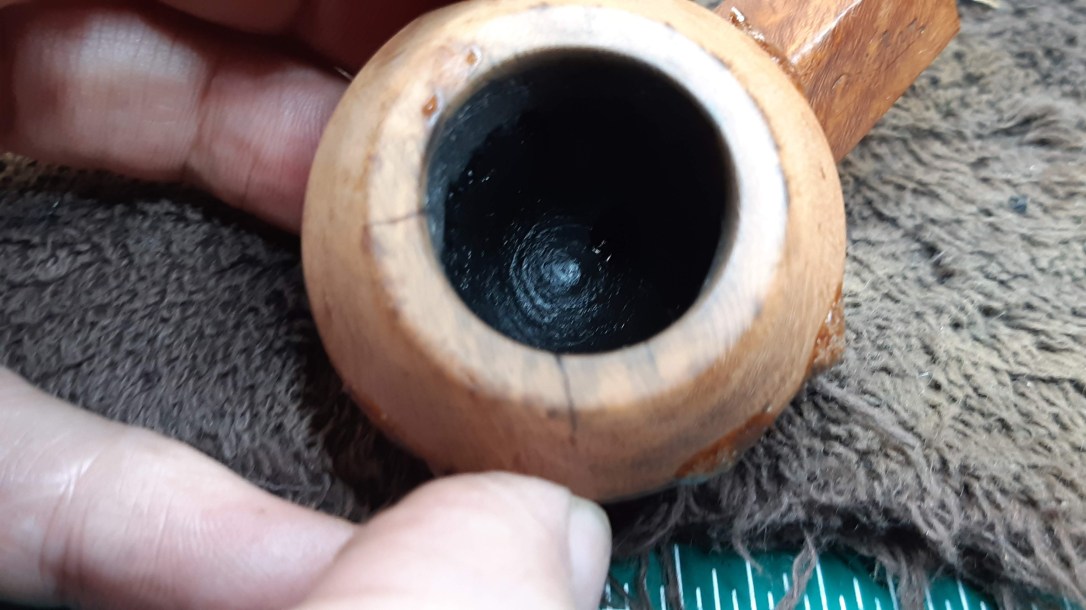
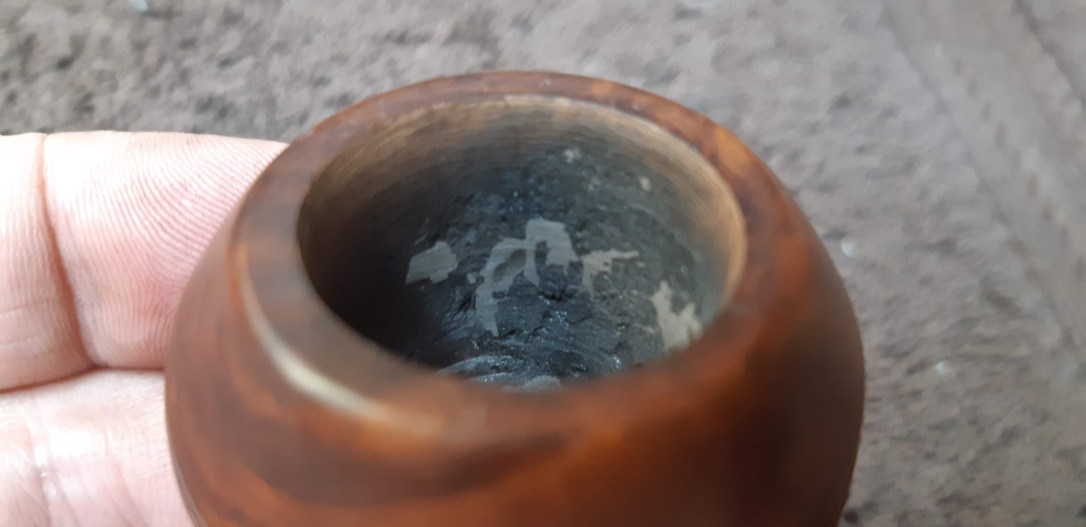
I set the stem aside at this point to work on the stummel for a while, starting with a good reaming. The old cake came out of the chamber easily enough under the reamer and sandpaper, but revealed some deeply scorched briar underneath.
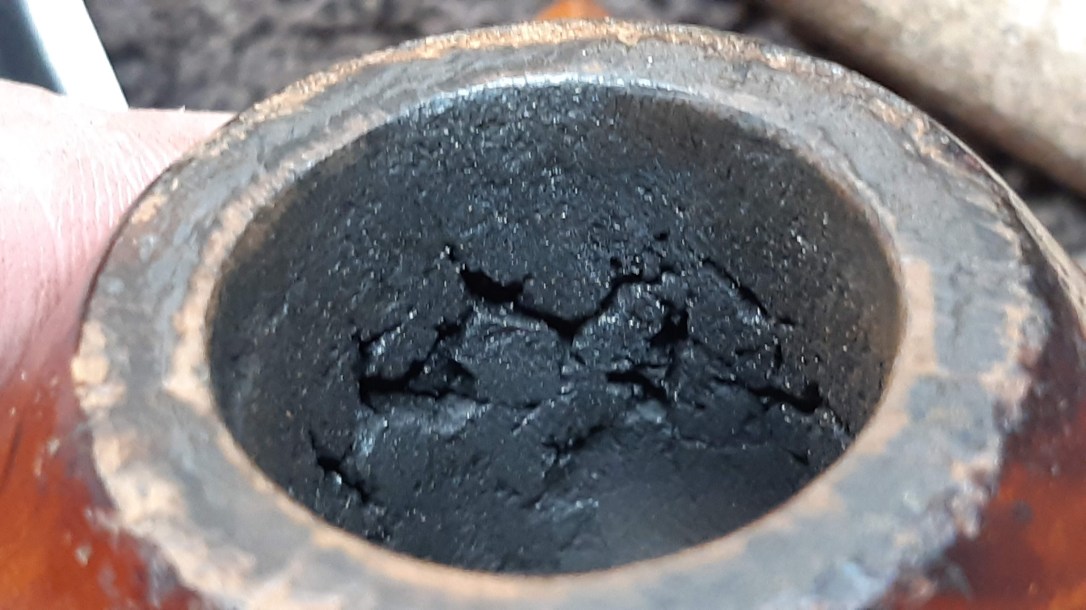
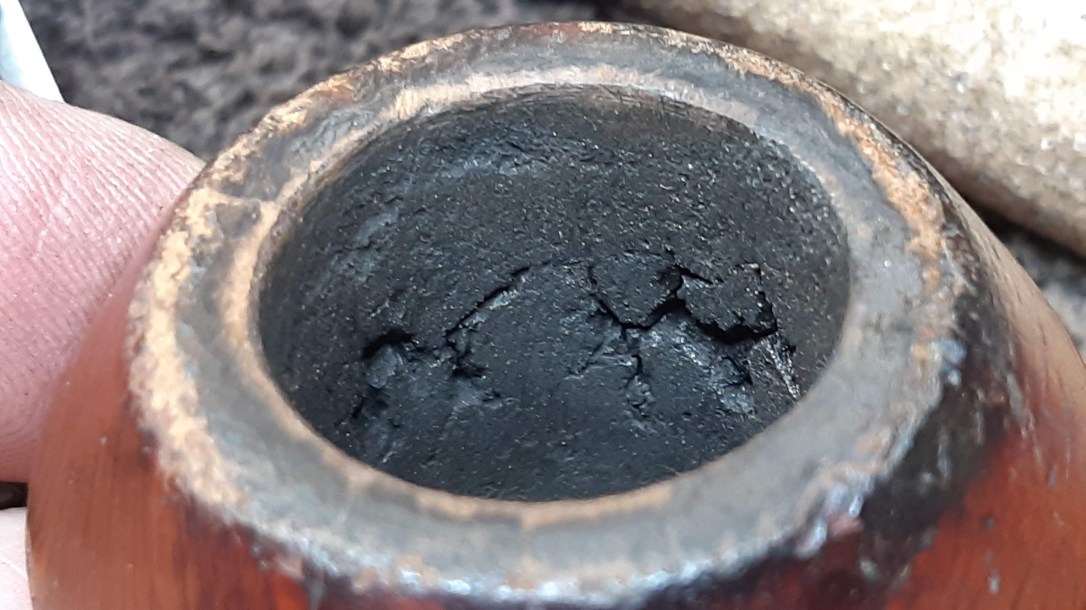
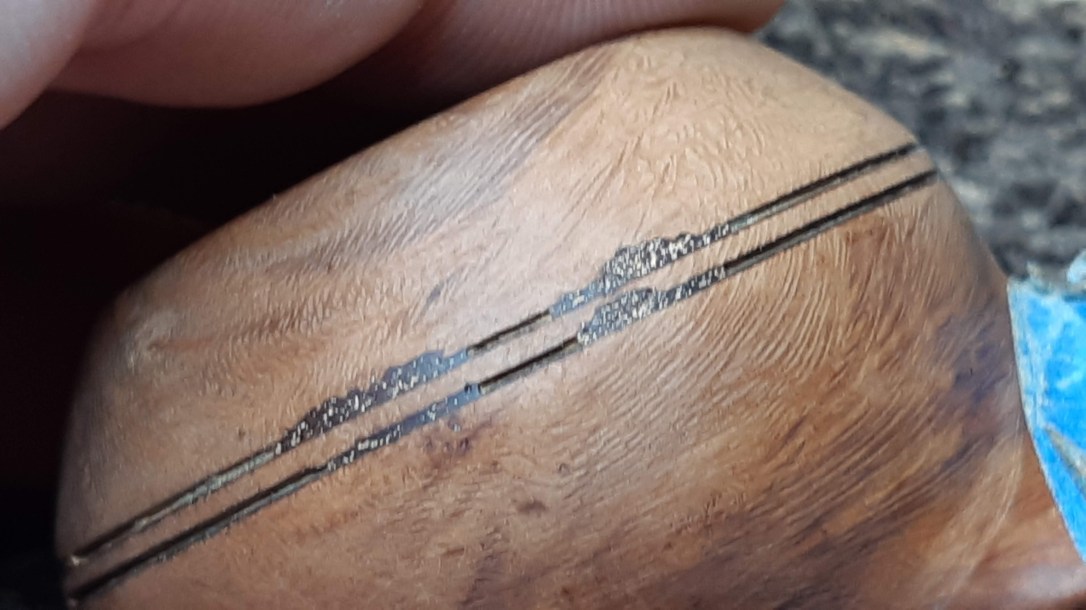
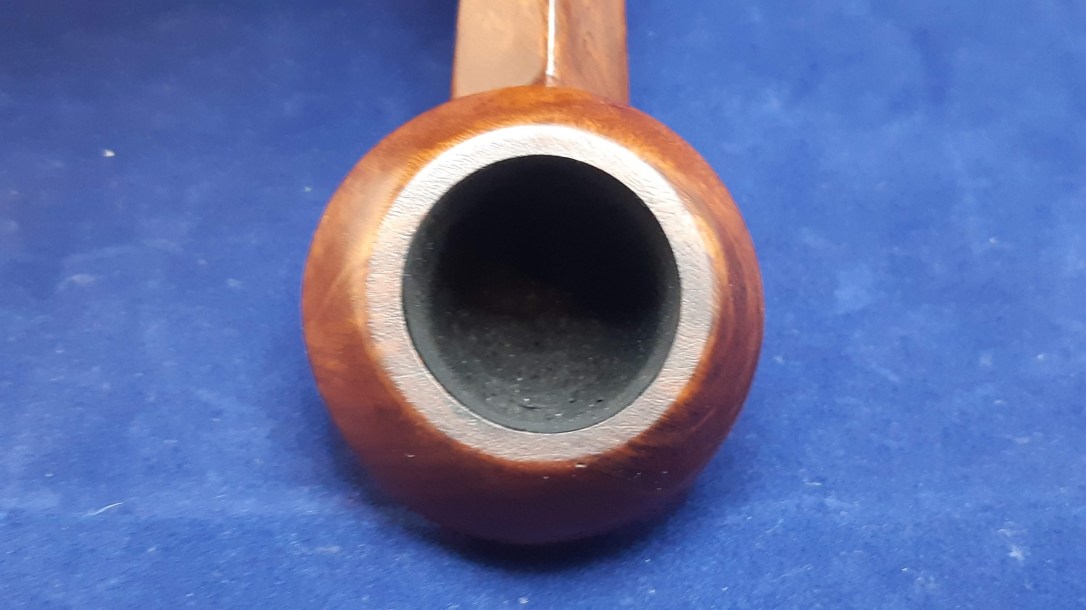
I cleaned up the rim a bit, removing the lava crust with sandpaper and clearing up the residual tars and dirt with alcohol on a cotton pad. As this series of pictures show, there were a few small cracks running across the rim. I also got a better look at the damage to the twin bowl rings.
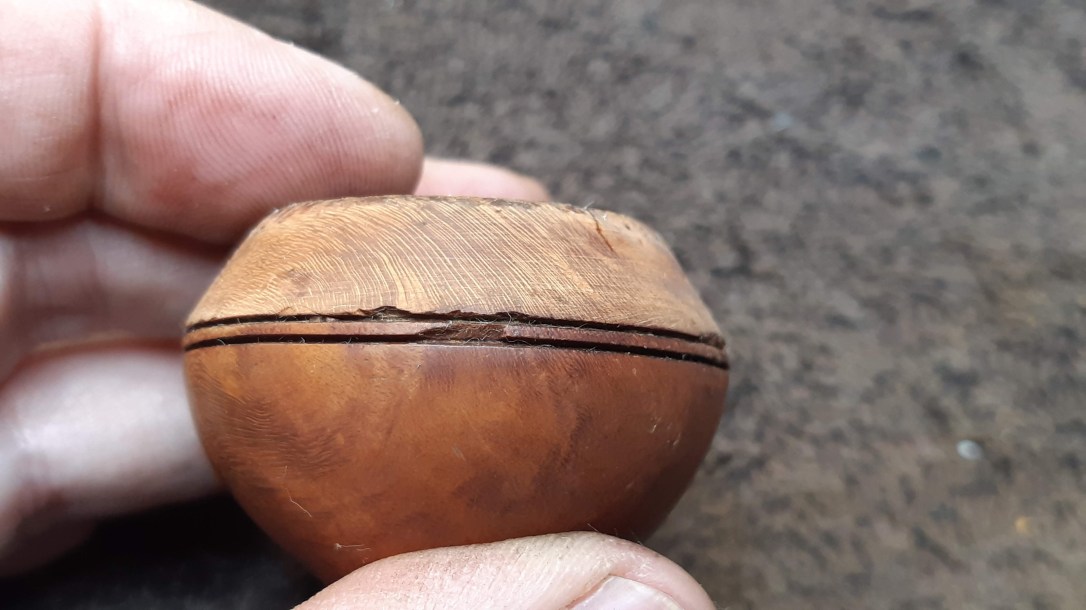
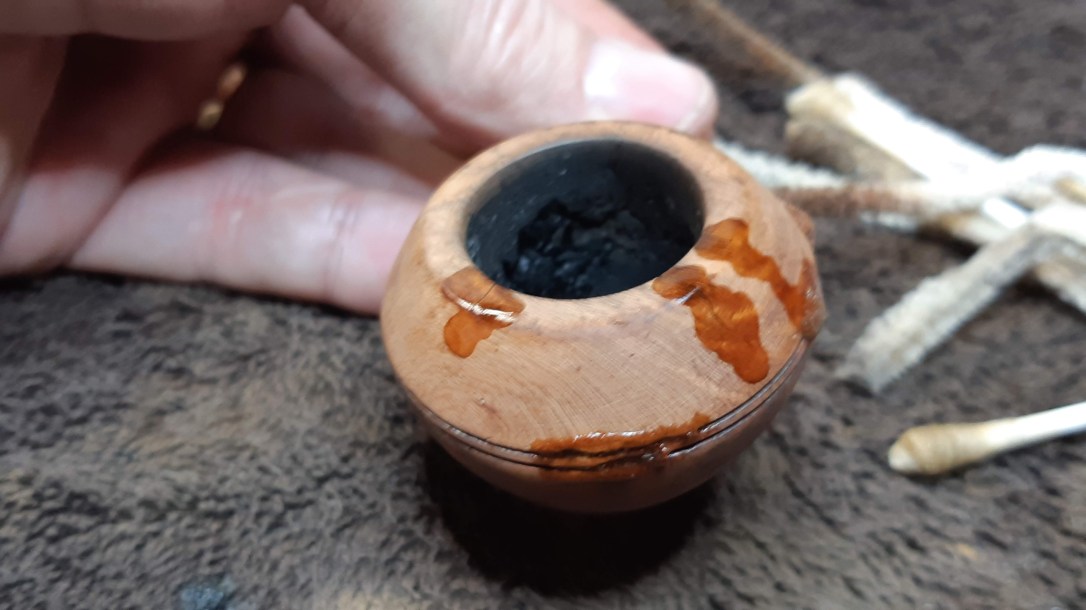
I used various grades of sandpaper to tidy up the worst of the dents and dings around the outside edge of the rim before filling the damaged areas with CA glue mixed with briar dust. The small surface cracks got hit with thin CA glue. The glue flowed into the cracks and sealed them up easily.
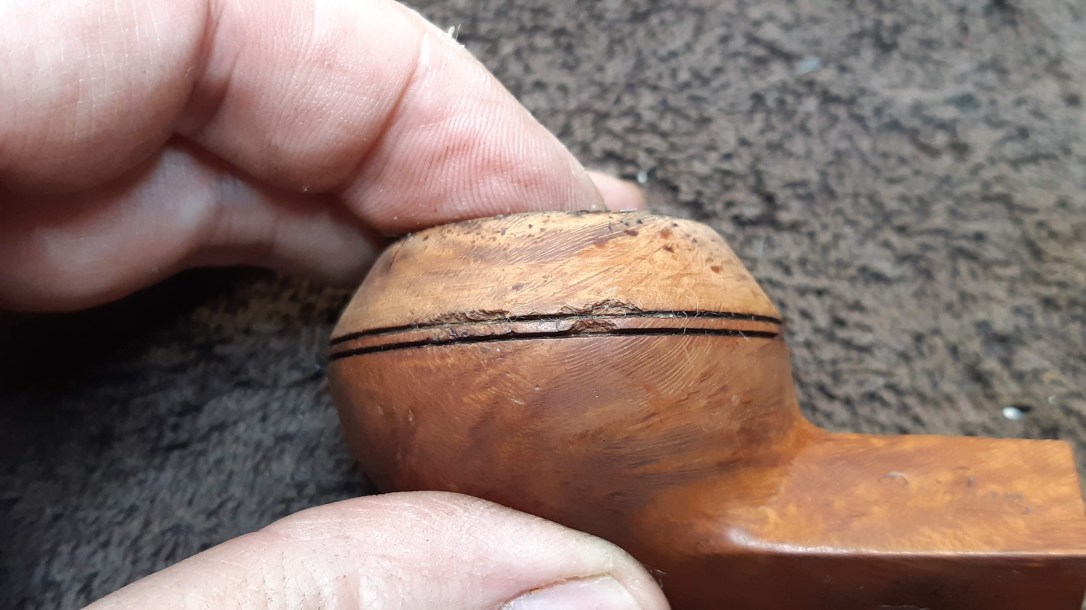
When the patches had cured, I filed and sanded them flush to the surrounding briar. The ring patches filled in the missing briar, but also filled in the rings. To reopen them, I used a 0.012″ guitar nut file to cut through the patch, and followed up with a 0.017″ file to widen the ring to match the original.
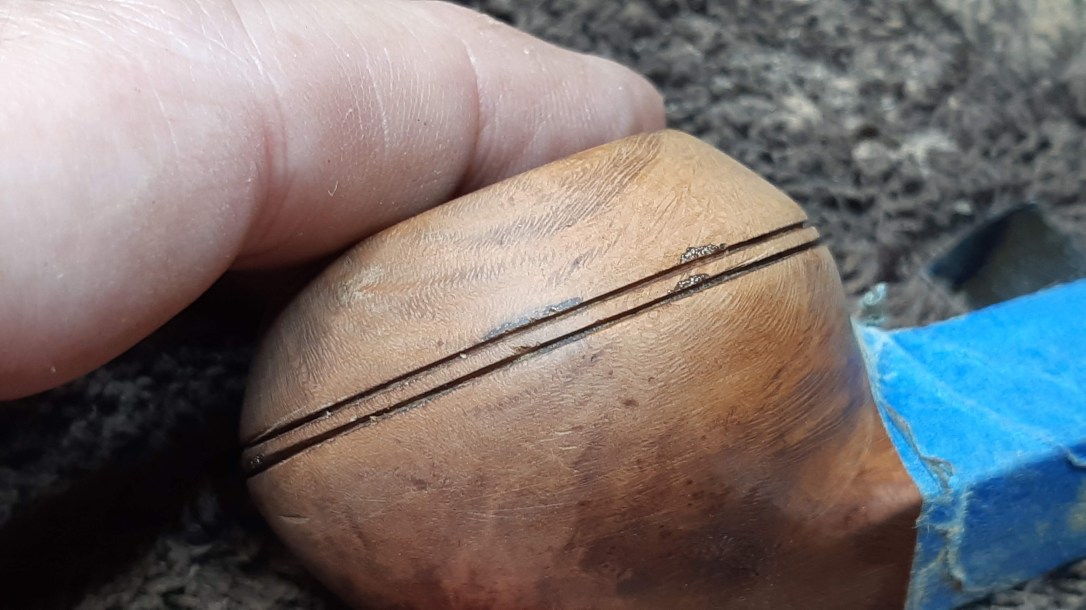
You can see a bit of blue masking tape wrapped around the shank in the above pic. i put it there to protect the shank and stamps from the file when I started working on sizing the stem down to match the shank. It took a fair amount of time and care to sand down each facet of the diamond stem, but eventually I got there. As you can see, I also sanded the stem blank, removing the casting marks and prepping the stem for final polishing.
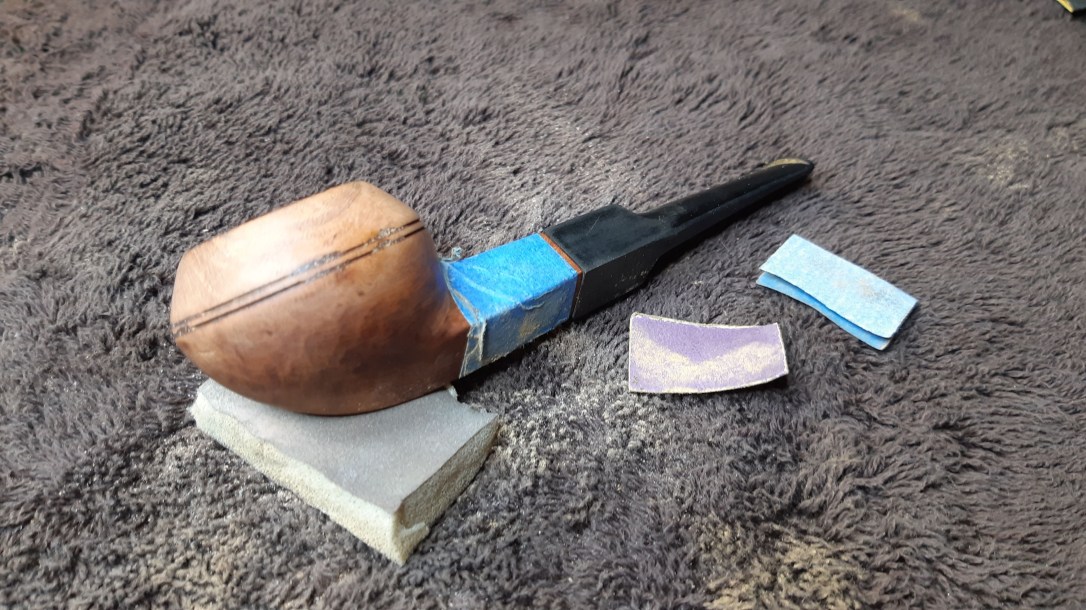
When I was happy with the flow of the shank/stem junction, I gave the stummel an overall sanding, taking care not to damage the stamps, and then hit the briar with a coat of Fiebing’s Dark Brown leather dye.
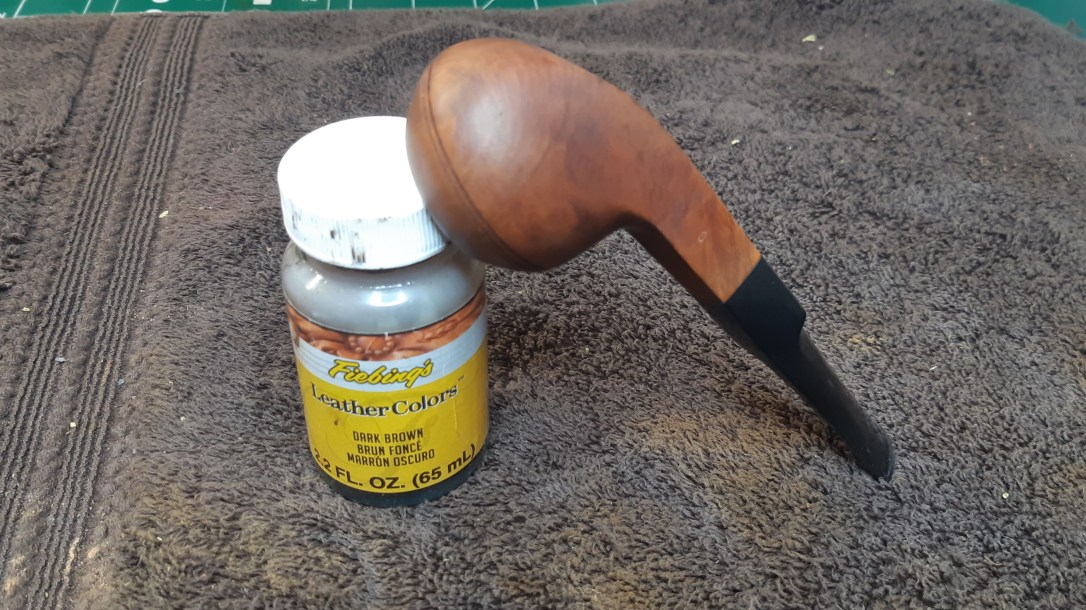
A wipe of mineral oil after staining helped lock in the colour and bring out the grain while providing a bit of much-needed moisture to the briar.

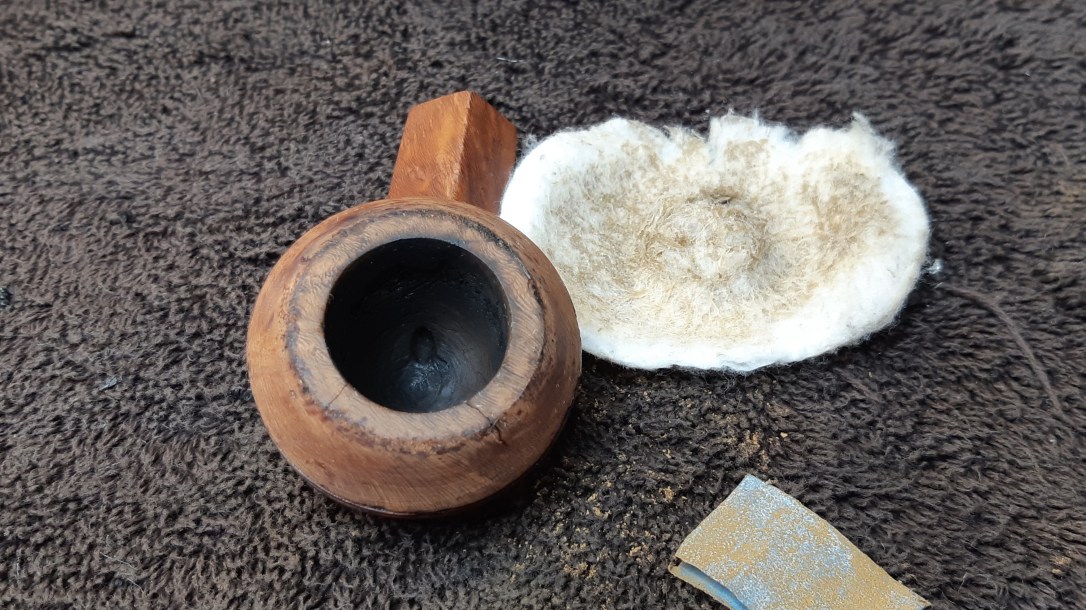
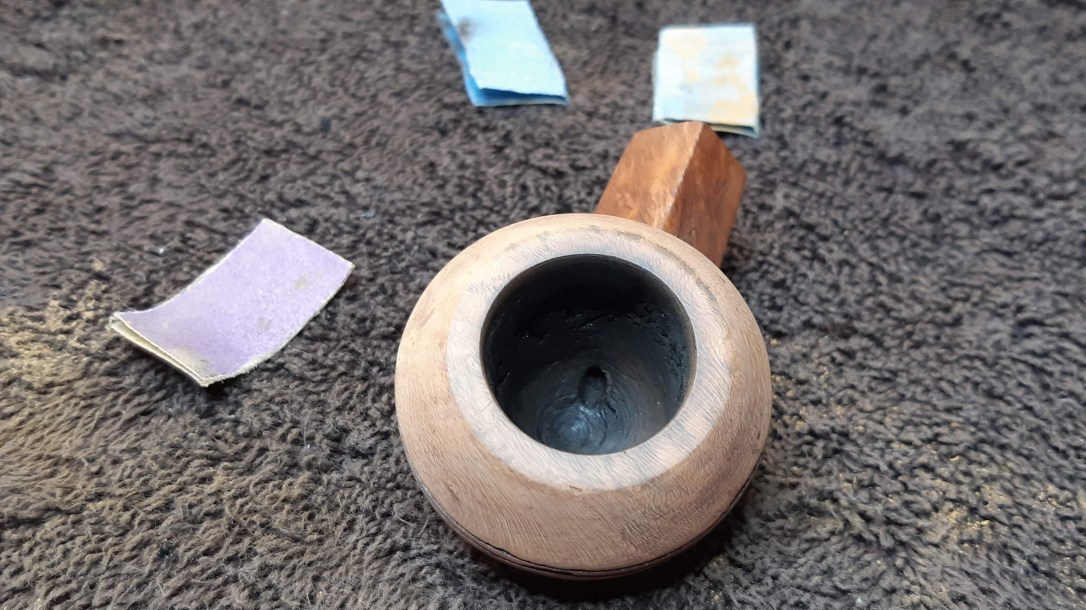
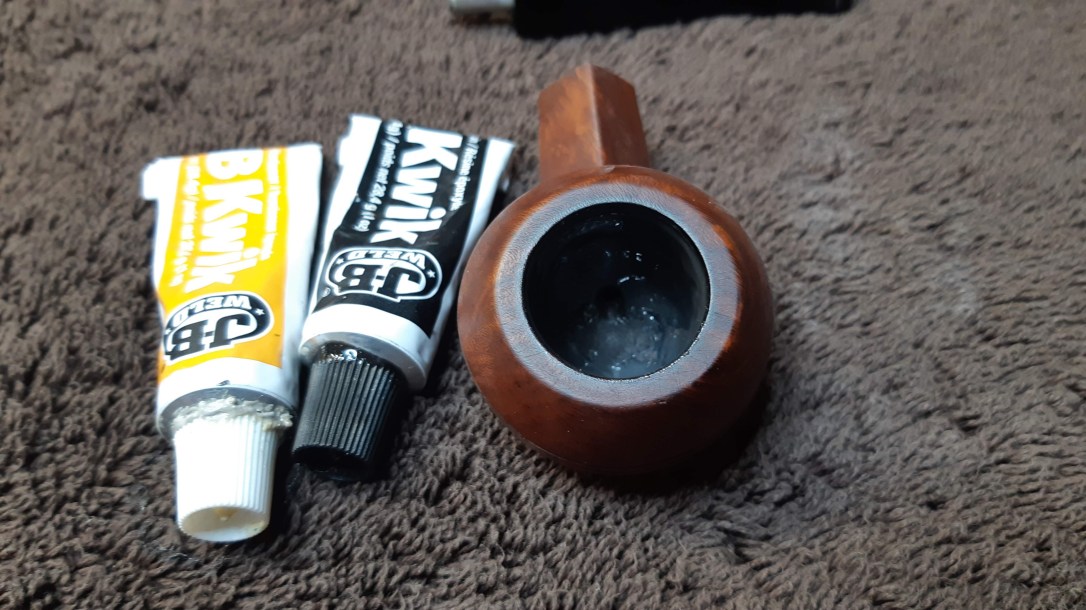
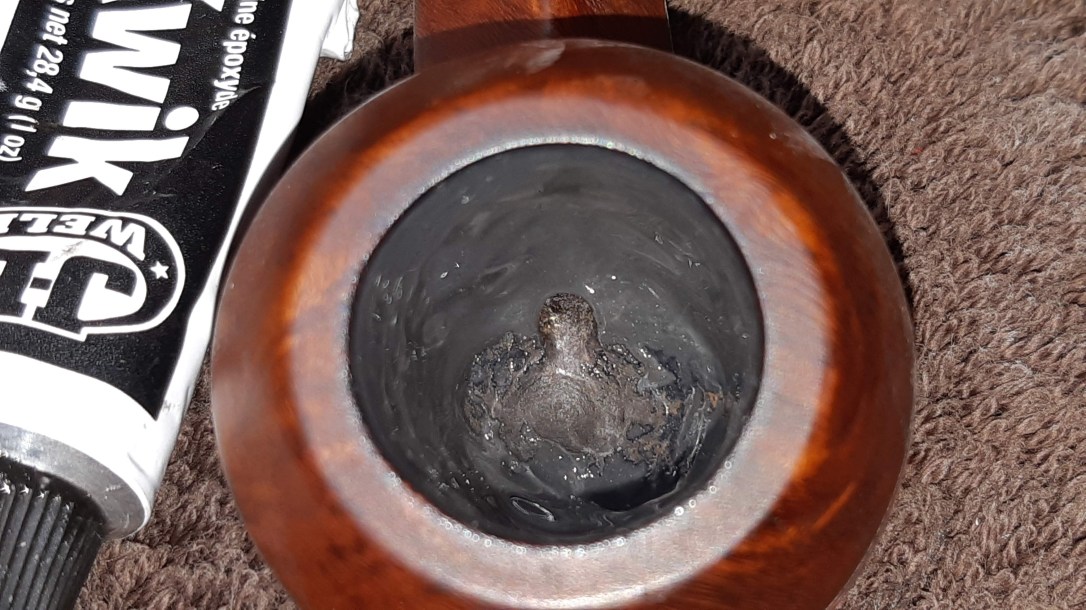
Before final buffing and polishing, I repaired the chamber walls with a bit of JB Weld epoxy. Regular DadsPipes readers will have seen me use this technique on many other pipes. Once cured, the JB is completely inert and highly heat resistant. Its also a really easy way to repair any part of a briar pipe exposed to high heat.
I mixed up a small amount of epoxy, then spread it around the chamber walls with a gloved finger, pushing the material deeply into the burnt areas. When it had cured overnight, I scraped and sanded away the excess epoxy, leaving it only in the repaired spots.
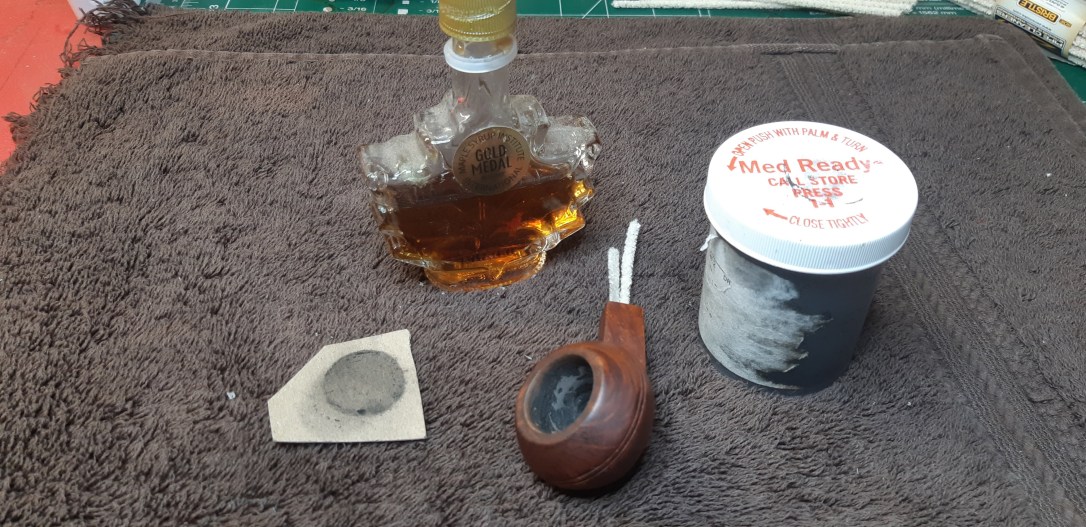
A quick bowl coating of maple syrup and activated charcoal powder covered up the somewhat unsightly repairs and provided a nice grippy base on which to build a new cake layer.

With the structural work complete, I took the pipe to the buffer for a run of White Diamond compound and several coats of Carnauba wax.
Like its sister pipe, I deliberately avoided erasing all signs of age and use from this Canuck prototype. These vintage pieces deserve to have a bit of their history told by small handling marks. At the same time, though I have no plans to smoke these pipes regularly, I wanted them both to be ready to use should I or a future owner decide to do so.
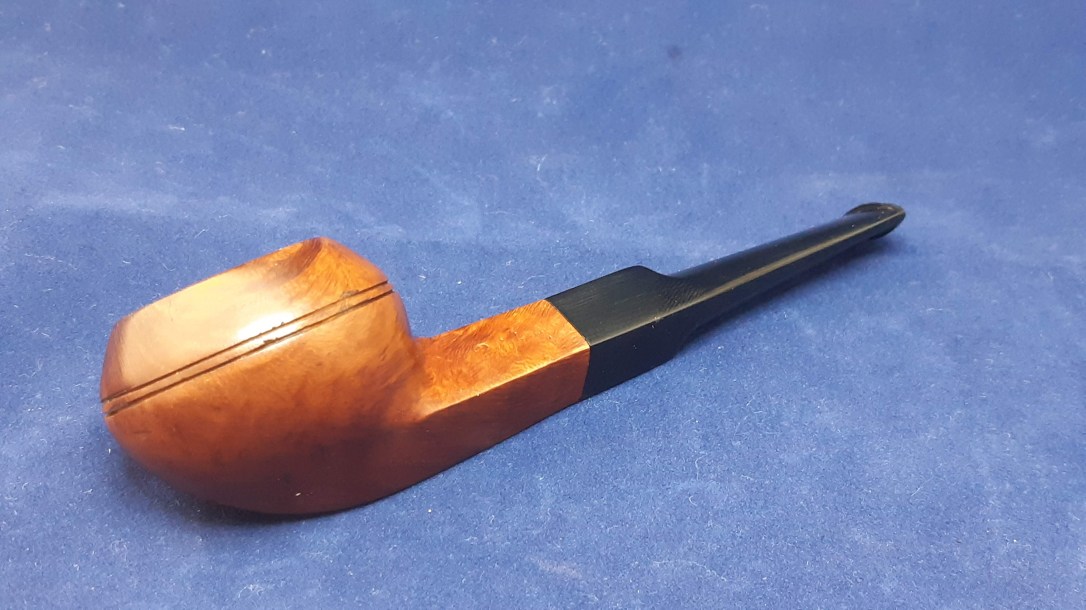
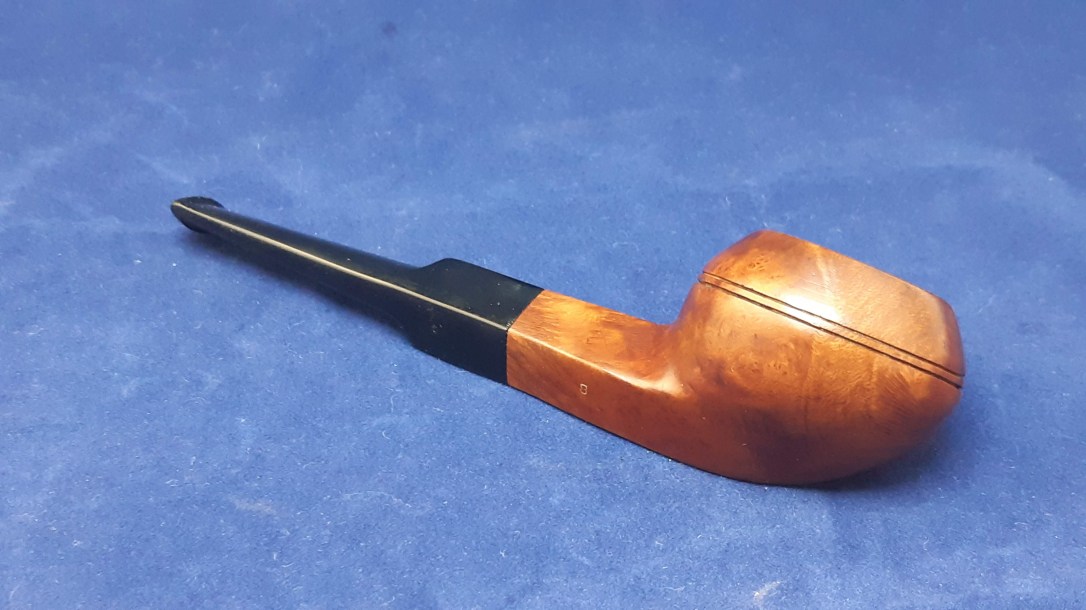
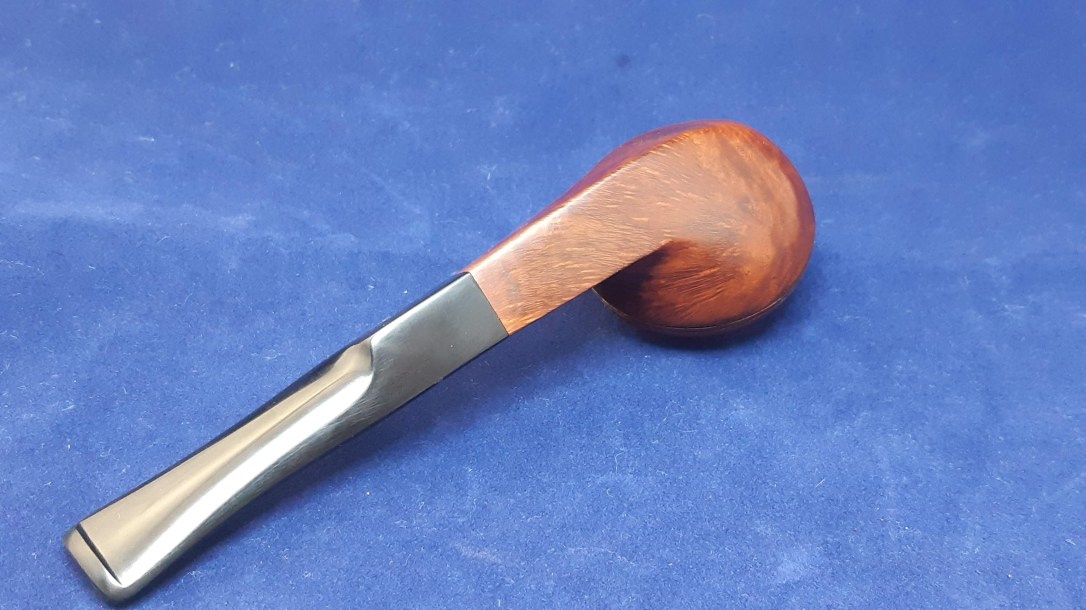
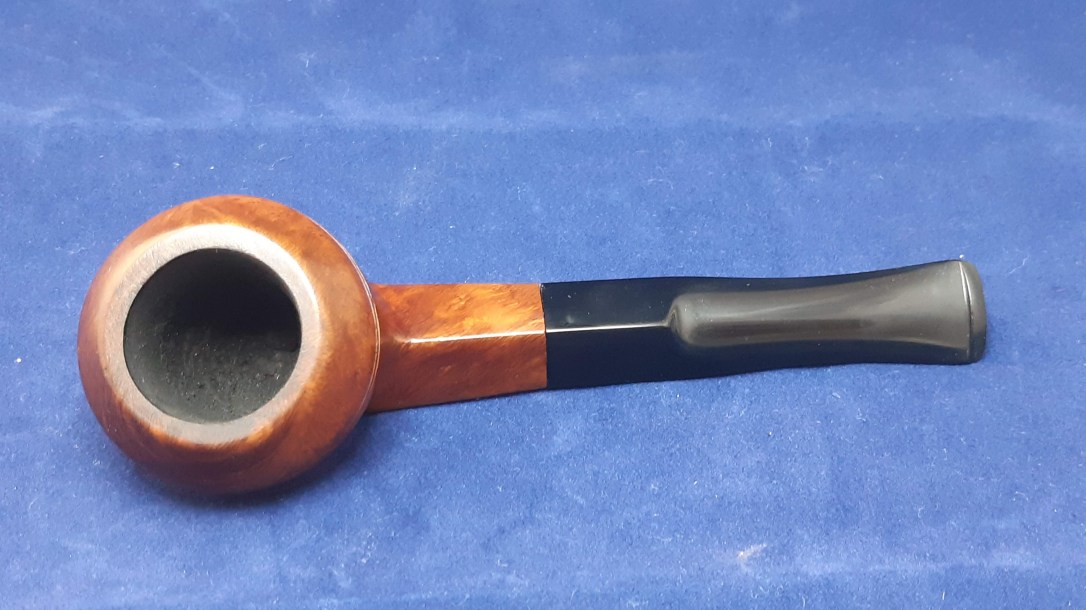
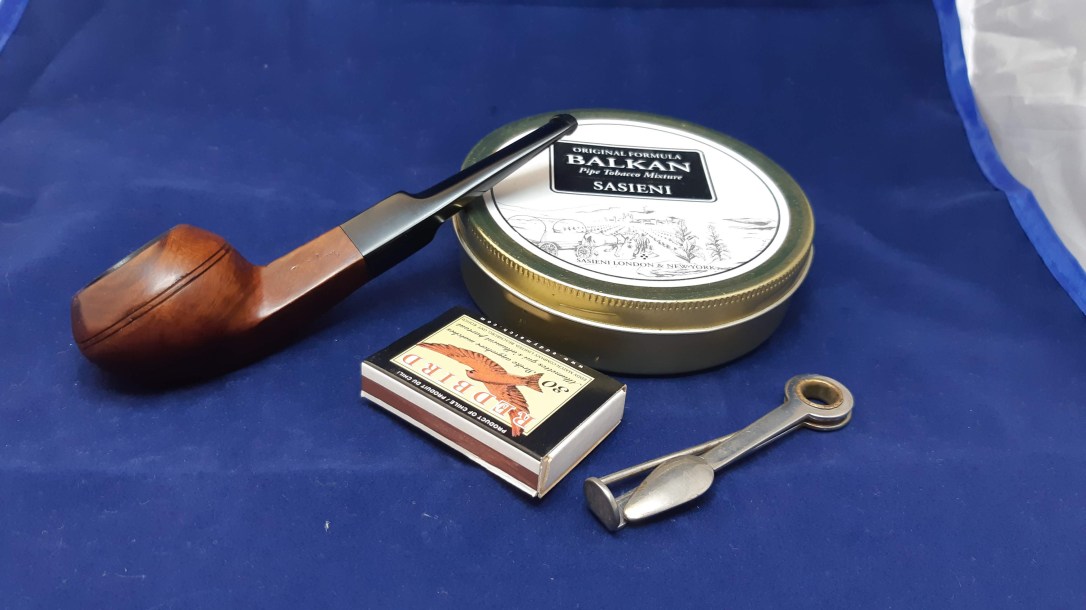
This 70-plus year old Canuck prototype is ready to take its place in my personal collection. The new stem looks good, the repaired and refreshed briar has a healthy glow, and probably more importantly, this piece of pipe history is once again structurally sound and can proudly represent an interesting chapter in the history of one of Canada’s oldest pipe-making firms.
Thanks for joining me for this third and last instalment of the Brigham Canuck story. I hope you enjoyed learning about the Canuck line of pipes as much as I did.
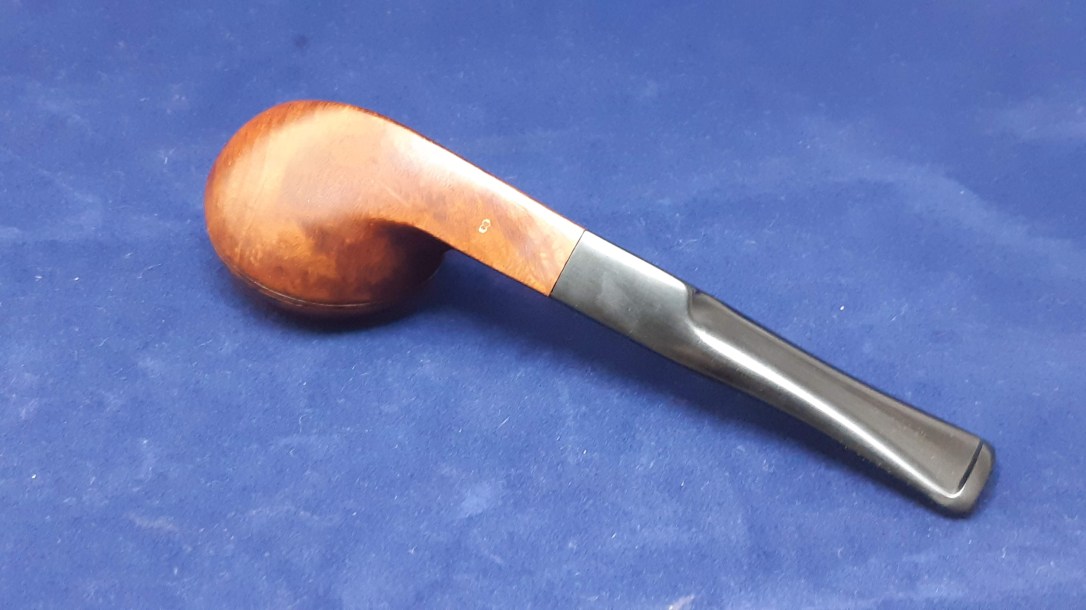
Until next time, Happy Piping! Here’s the finished pipe.


Reblogged this on rebornpipes and commented:
Here is the final installment of Charles restoration of the two pipes from the Canuck Line of Brighams. Nice job on the restem!
LikeLiked by 1 person