
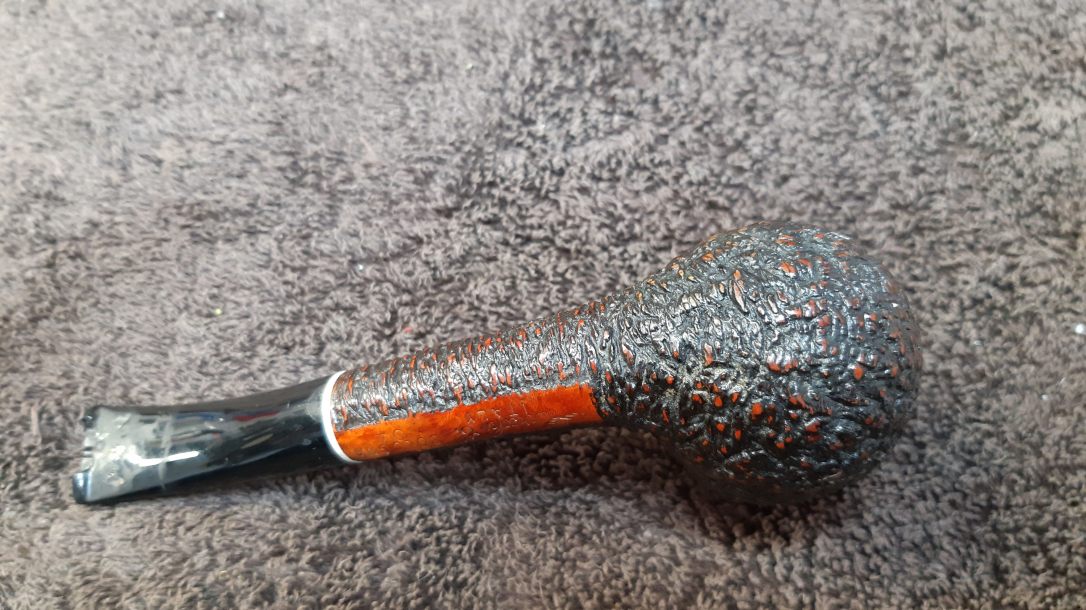
This is the second pipe sent to me by the owner of the Ardor Urano S. Holmes pipe I wrote about recently. This time I’m working on repairs to a very nice Claudio Cavicchi Bologna 04 Bent Billiard.
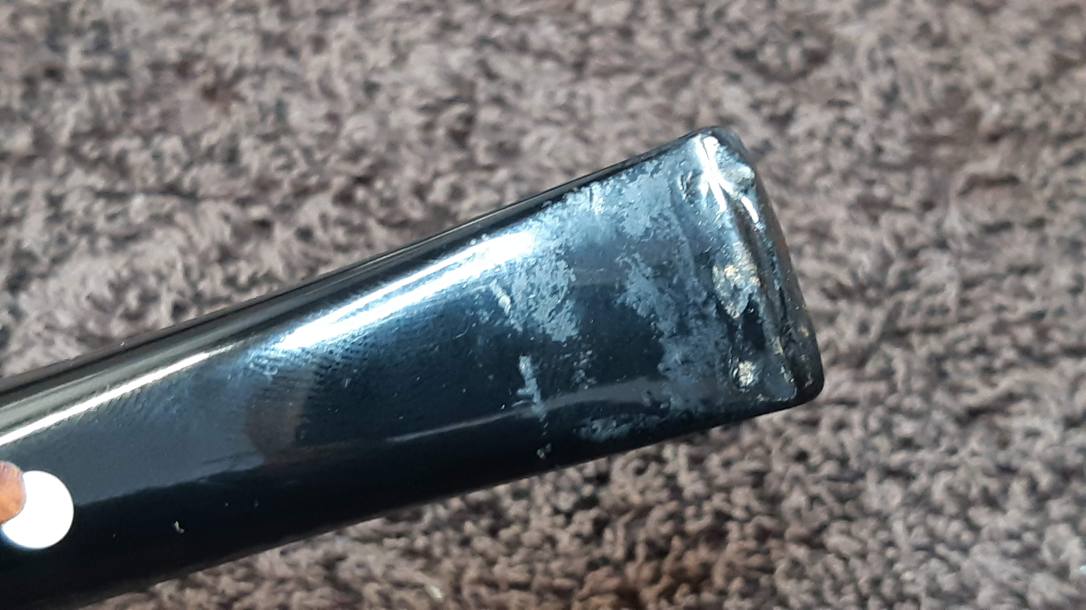
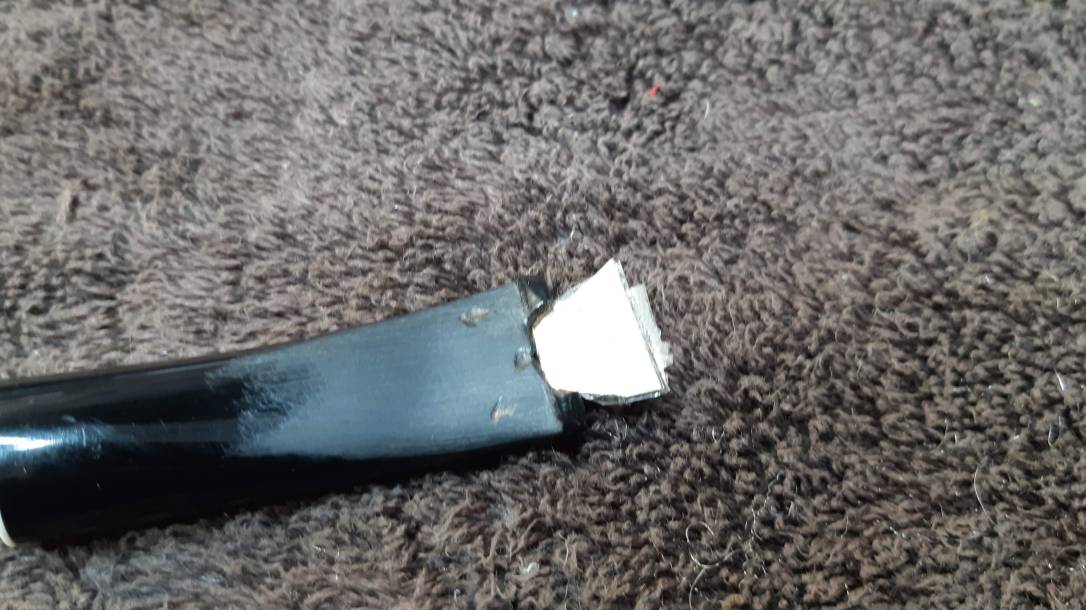
It’s a larger pipe, the owner’s tastes tending heavily towards over-sized Italian briars. Unfortunately for the stem on this Cavicchi, the size and weight make the pipe difficult to clench without really laying into the bit with the teeth. At some point the lower button waved the white flag and snapped off under the pressure.
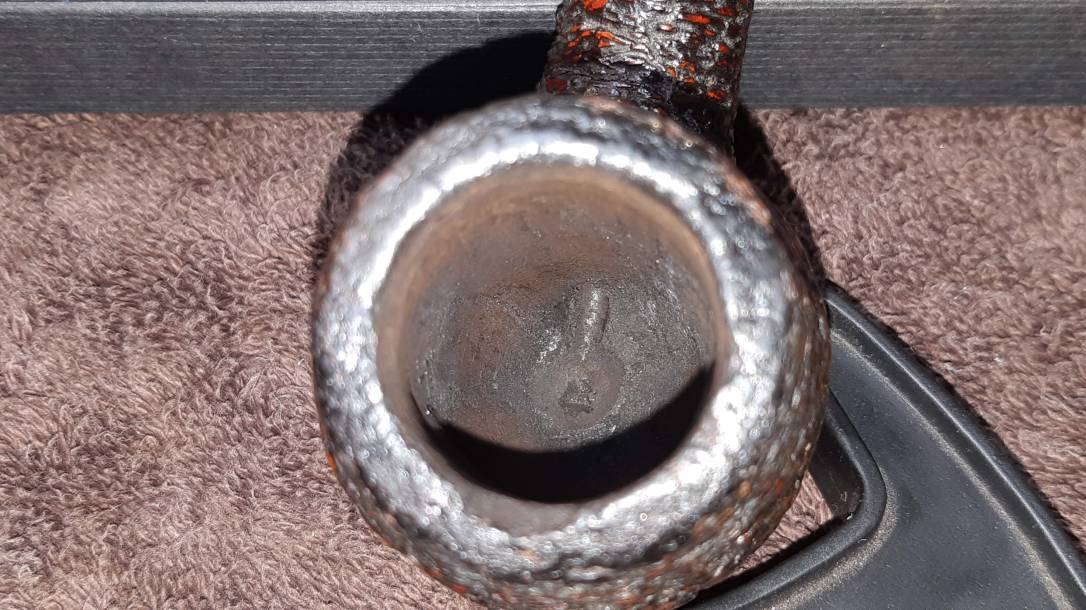
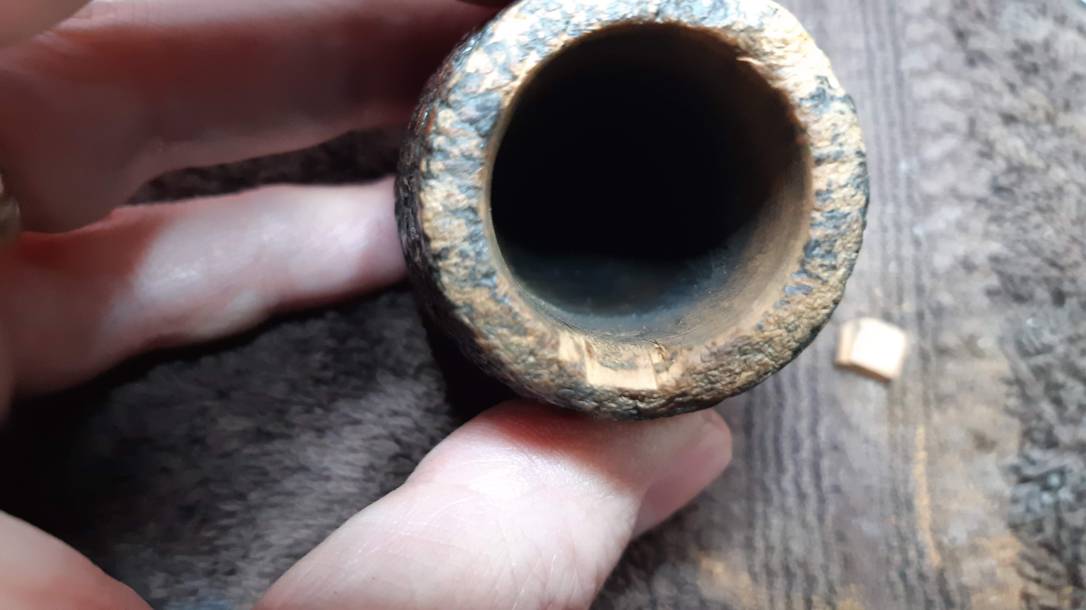
Apart from the button, the pipe appeared to be in good shape except for a 1/4″ wide chunk of briar that had somehow chipped off the inner rim right at the front of the bowl.


The smooth patch on the underside of the shank is stamped “Cavicchi C.” in script over “ITALY” in block letters, then “BOLOGNA” over “04”.

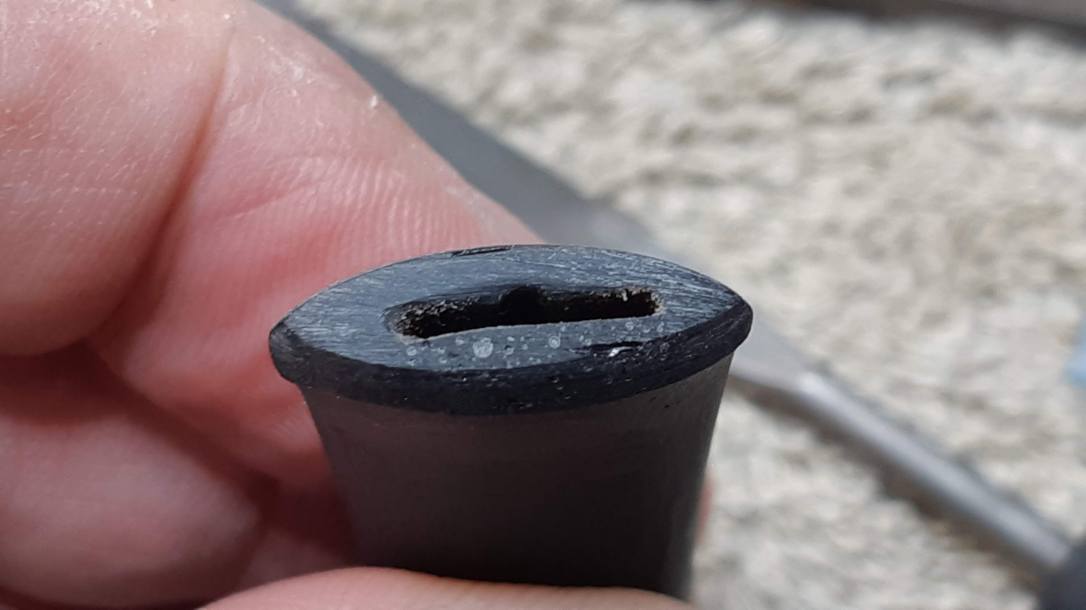
I decided to start this restoration by tackling the most obvious damage, the broken button. I ran a pipe cleaner dipped in alcohol through the stem to clean out any old tars and debris, paying special attention to the slot at the button end and the broken edges of acrylic. I wanted the repair area as clean as possible to ensure a good bond between the original stem and the repair.
As I’ve done before with button repairs, I made a cardboard wedge that fit tightly into the stem slot and covered it with clear tape. I sanded the bit end of the stem with 220-grit sandpaper to give the repair more grip, then pushed the wedge firmly into place and applied a patch mixture of thick CA glue mixed with activated charcoal powder to the area, completely filling the damaged area and overlapping the solid acrylic on either side.

I set the stem aside to let the patch cure completely before I fiddled with it further. There was a time when I would have hit the patch with a shot of accelerator to speed up the curing process, but I’ve found that doing so increases the number of bubbles caught in the CA glue as it hardens. I wasn’t in any rush with this repair, so I simply let it do its thing at its own pace.
While the stem cured, I worked on the stummel, starting with a good cleaning. I reamed the chamber to remove the old cake and get a good look at the chamber walls. Sometimes I find heat damage inside the chamber, but in this case the briar was in good shape.

The stummel’s internals were pretty clean. It only took a few minutes with shank brush and pipe cleaners dipped in alcohol to sort out the mortise and airway.

I used a brass-bristled tire brush to gently scrub the rim clean of old carbon “lava” and other goodies so I could get a good look at the chipped area on the inner rim. With the dirt out of the way, the chip really stood out.

For damage to the exterior of a briar pipe I often rely on a fill mixture of CA glue and briar dust. In this case, as the damage was essentially inside the chamber where it would be subjected to the high heat of burning tobacco, CA glue would be a poor choice. It’s not particularly heat resistant and likely to burn away.
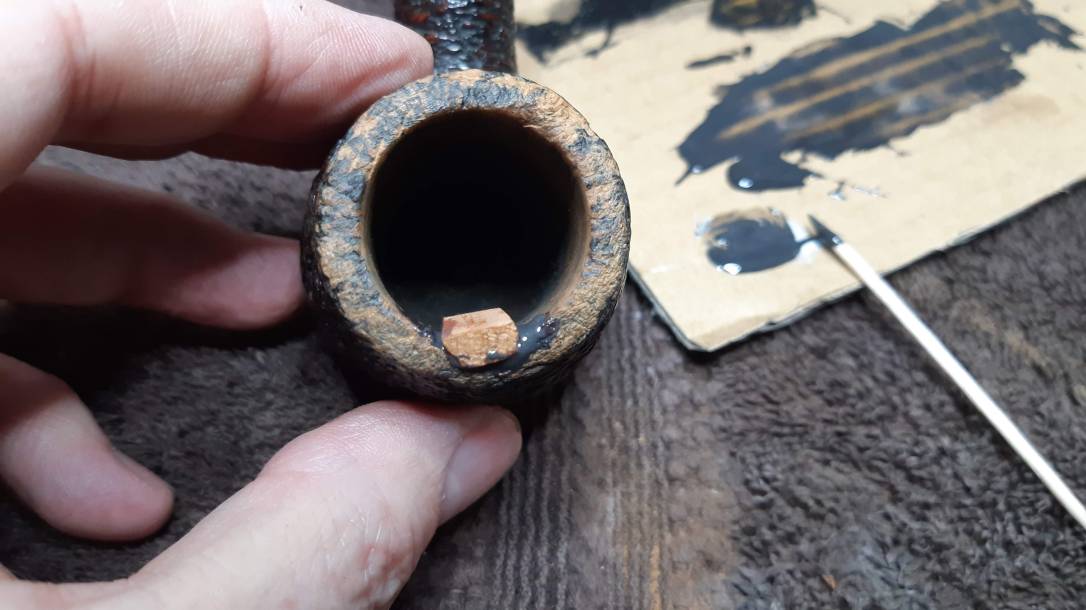
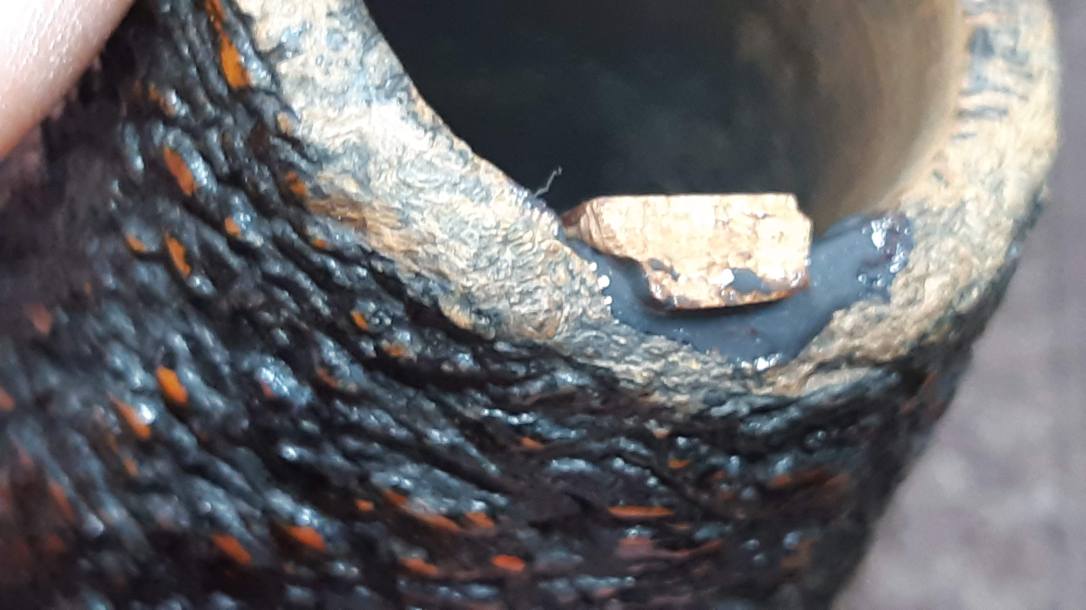
Instead of a glue patch, I cut a small piece of briar to fit the damaged area and fixed it in place with a small dab of JB Weld high-heat epoxy. Unlike CA glue, JB Weld will not burn off during a smoke, and is completely inert when cured. As these pics show, there was a bit of excess JB that flowed out of the repair. I’d clean this up after the epoxy cured.
I let the patch cure overnight, then used a scrap of 220-grit sandpaper and my needle files to remove the excess briar and blend the repair into the surrounding area.


The smooth patch needed to be textured to blend into the rusticated rim. I accomplished this with a few passes with a small carving burr mounted in my rotary tool.


Happy now with the look of the rim repair, I scrubbed the exterior of the stummel clean with Murphy’s Oil Soap and a toothbrush, lifting a surprising amount of dirt and oils from the rustication.

The original finish on this Cavicchi pipe was a black-over-red stain in which the high points of rustication have had the black overcoat removed to allow the red beneath to shine through.
I refreshed this finish by staining the briar first with Fiebing’s Saddle Tan leather dye, then with a coat of Black dye. Buffing the pipe on the wheel would take the black off the high points, revealing the red underneath.


I set the stummel aside now to rest and turned my attention back to the stem repair. The CA-and-charcoal patch had cured fully and was ready for me to rough out the new button shape with my needle files and sandpaper.

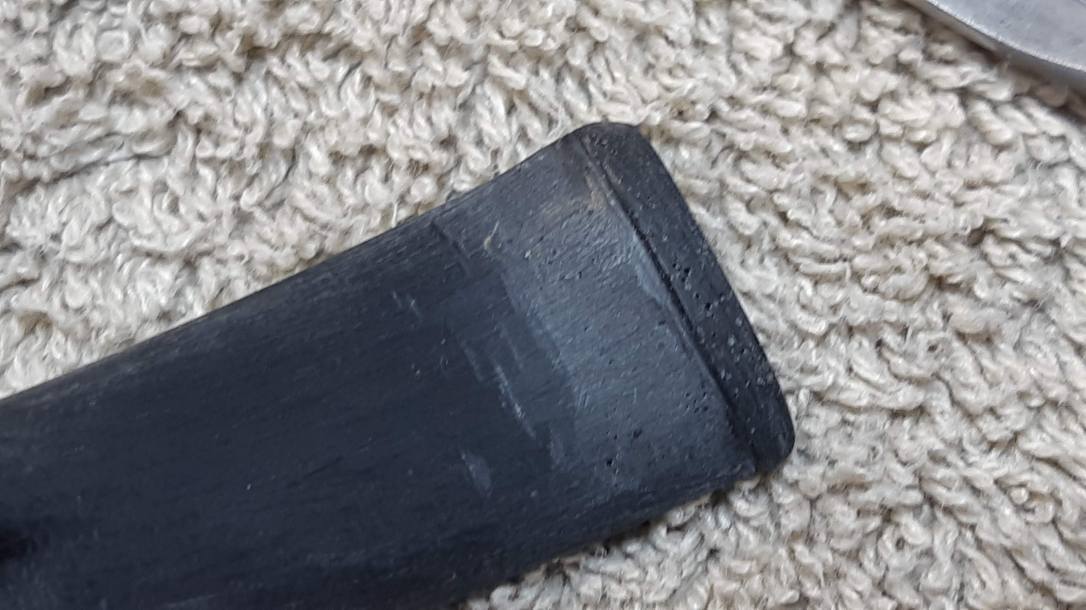
You’ll notice in the pics above the field of small bubbles exposed when I filed the repair. I’m beginning to think that this is inevitable with this repair process. It can be a bit annoying sometimes, but the remedy is simple enough – just add more CA glue.
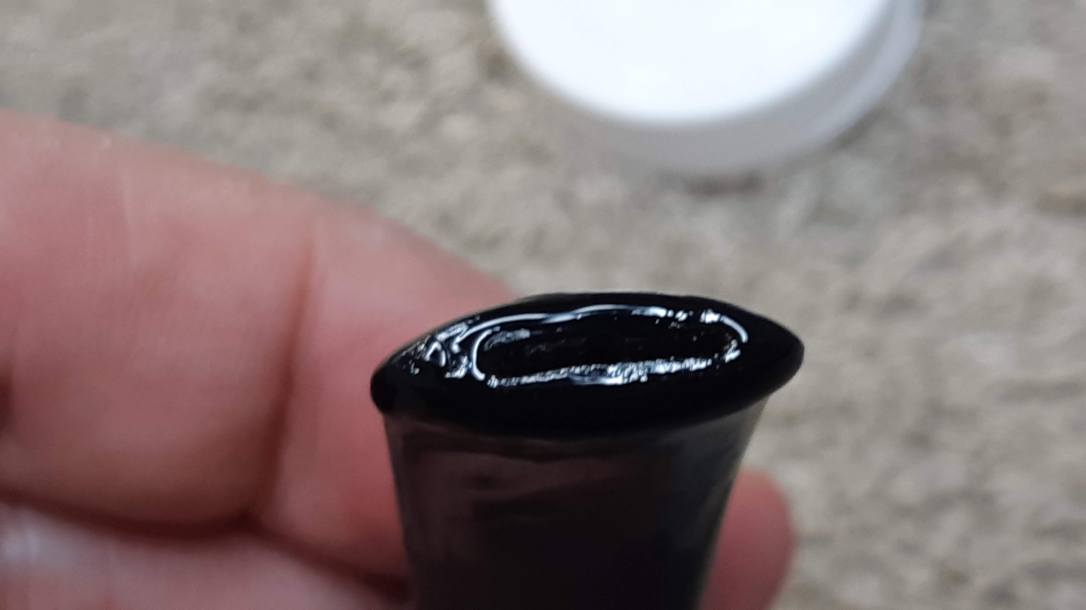
These pics show the button area touched up with a skim coat of clear CA glue. For this job I use regular, thin Krazy Glue. The lighter viscosity allows the glue to flow into those tiny bubbles, leaving a smooth surface behind (eventually) after sanding.

With the stem sorted and the rim chip repaired, the last thing to do before taking the pipe to the buffer was to add a bowl coating to the chamber to both hide the repair and provide a grippy surface on which to grow a new layer of cake.
My bowl coating consists of two simple ingredients – pure maple syrup and activated charcoal powder. I plug the airway with a pipe cleaner, then wipe a small amount of syrup around the interior of the chamber. Too much syrup will result in a sagging coating; just like the old Brylcreem ads say, “Just a dab will do ya!”
With the syrup applied, I scooped about a half teaspoon of charcoal powder into the bowl, covered the opening with a scrap of cardboard, and gave the stummel a good shake for a few minutes to spread the charcoal evenly around the chamber walls and floor. I dumped out the excess charcoal and then let the coating dry overnight. When it’s completely dry, the coating is smooth, hard and slightly coarse to the touch.


It was finally time to reunited stem and stummel and go to the buffer for a run of White Diamond compound and several light coats of Carnauba wax – light on the rusticated finish, heavier on the smooth areas and stem.
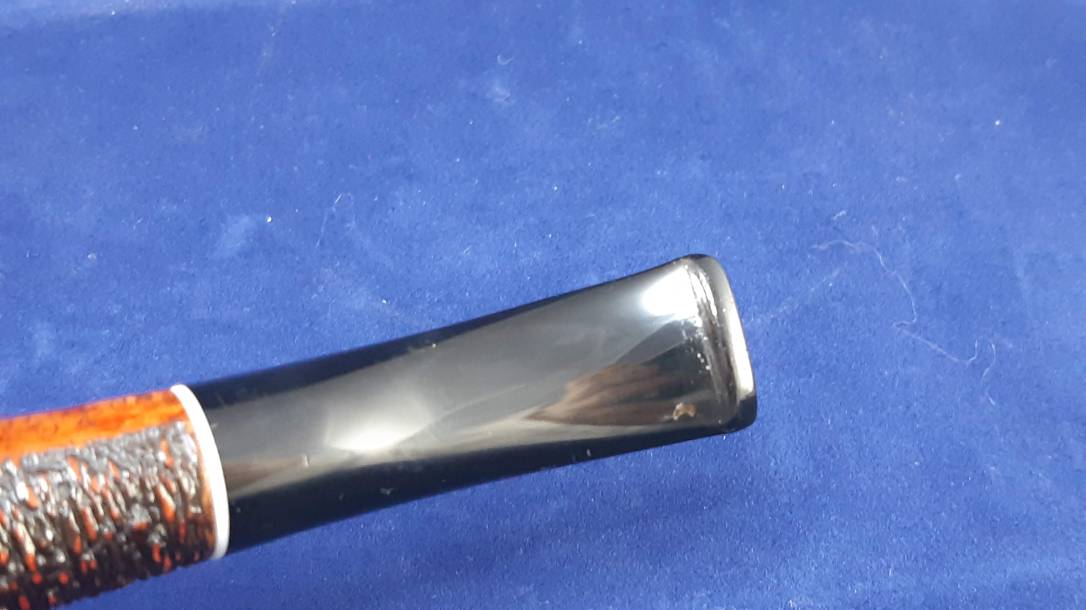
The finished pipe is now looking nearly new again. The dented, damaged and chipped stem is whole again, and the patched rim looks like it came straight from the factory.
A close examination of the new button does show a few spots where the colouring isn’t quite an exact match for the original acrylic. This is due both to small differences in colour between the original stem and the patch mixture and to the way light refracts through the CA glue. The stem, however, is smooth to the touch and will feel like new in the mouth. In the balance of things, I think a few not-quite-black spots are an acceptable price to pay to retain the original stem on a beautiful pipe like this Cavicchi.
This Claudio Cavicchi Bologna 04 will soon be back with its owner, who is keen to see it and the rest of the pipes he sent me to work on. I think he’ll be pleased with the results.
Thanks for following along with this restoration. Here’s the finished pipe.
Until next time, Happy Piping!


Thank you Charles for another great repair. It is glad to be home and back in my rotation.
LikeLiked by 1 person
You’re very welcome, Jeff! Happy piping!
LikeLike
Thank you for outlining the briar patch + JB weld repair process on the bowl rim chip – again, what wonderful work on this lovely pipe.
Lee
LikeLiked by 1 person
You’re very welcome, Lee. It’s a great option in the repairer’s toolbox.
LikeLike
Reblogged this on rebornpipes and commented:
Great work on this one Charles… (as usual) I am reblogging it because of the creative insertion of briar to repair an inner edge. Well done.
LikeLiked by 1 person
Thanks, Steve! It really helps to have “donor briar” in the supply cupboard! 😁
LikeLike