
Today’s pipe is an interesting dive into the history books. I hope you enjoy the journey as much as I did!
I’ve had this John’s Silver Mount pipe in my refurb box for some time but rediscovered it just before Christmas when I was sorting through things in the shop. The stamps are rather worn, so I didn’t really know what I had until I started the cleanup and associated research, but the pipe’s shape caught my attention straight away.
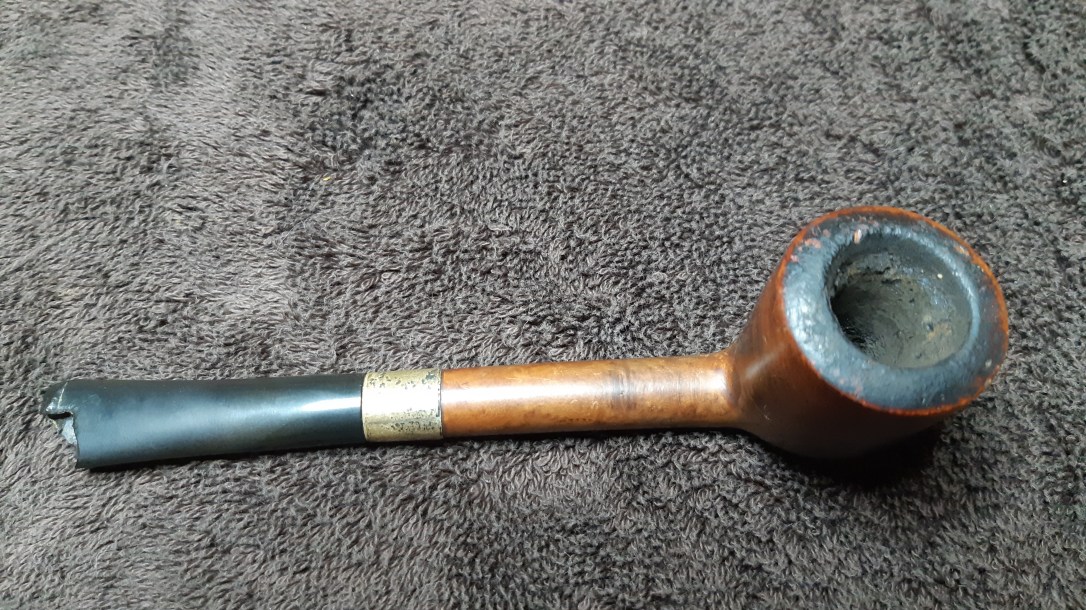
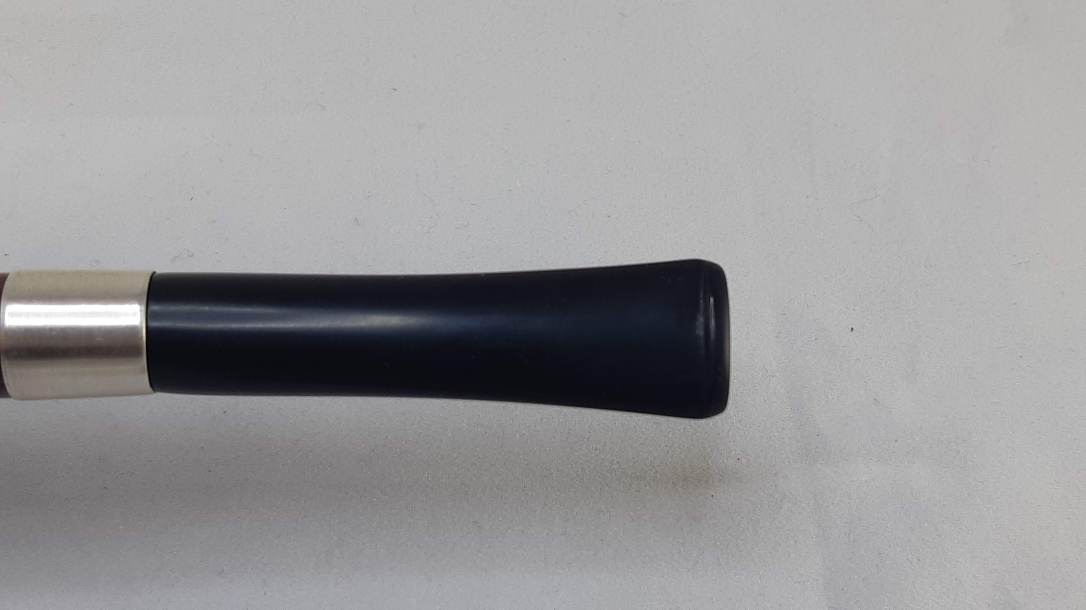
Though covered in dirt and lava and sporting a damaged stem, I could see the overall lines of the pipe and liked what I saw – gently flared bowl walls, crowned rim, and a long, round pencil shank flowed elegantly through to a (well tarnished) Sterling silver band and a short tapered stem.

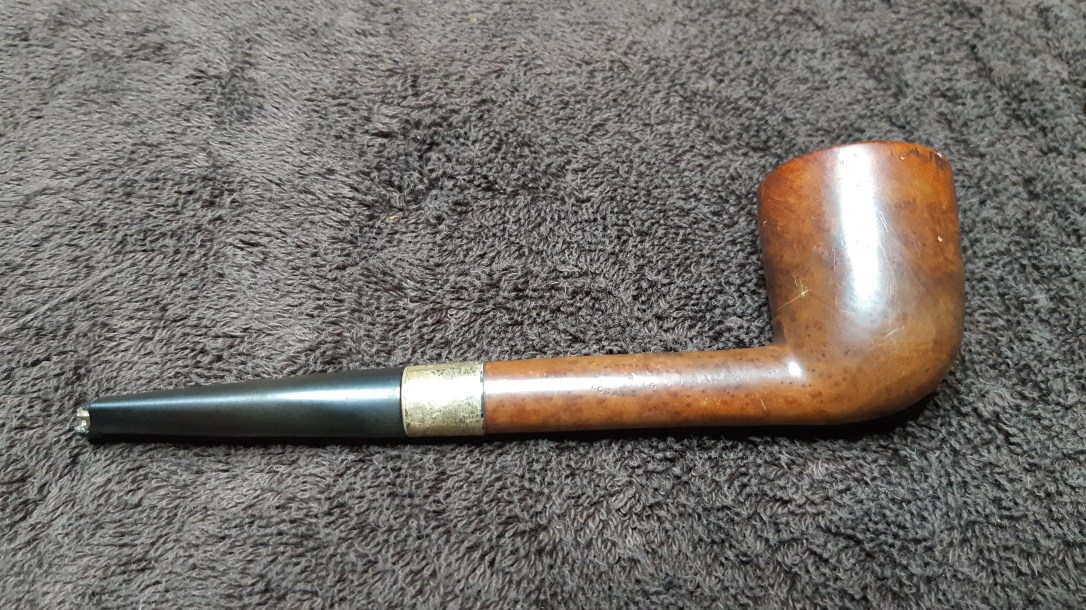


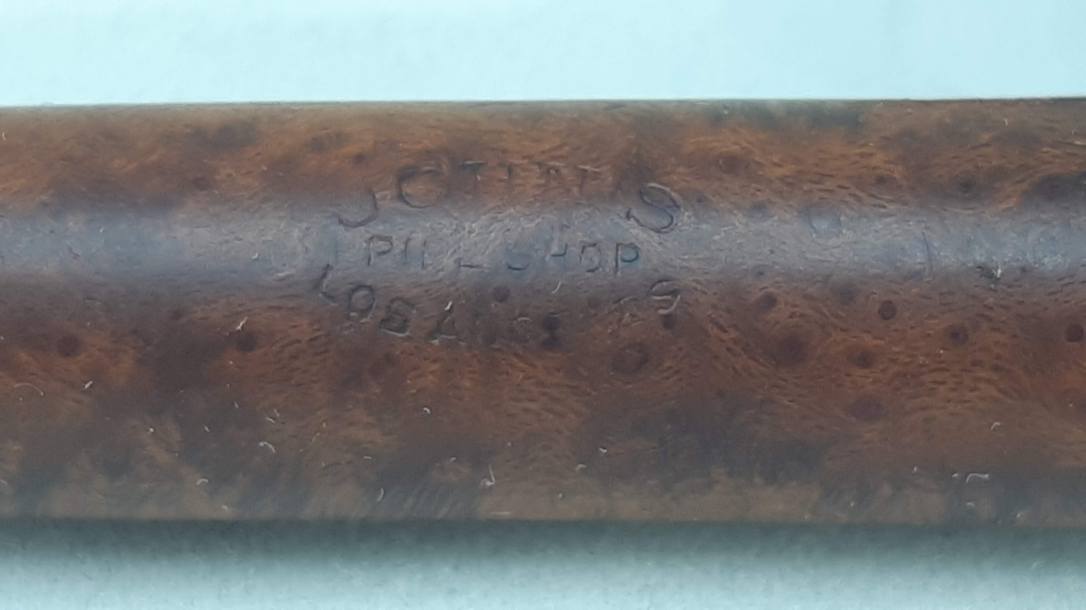
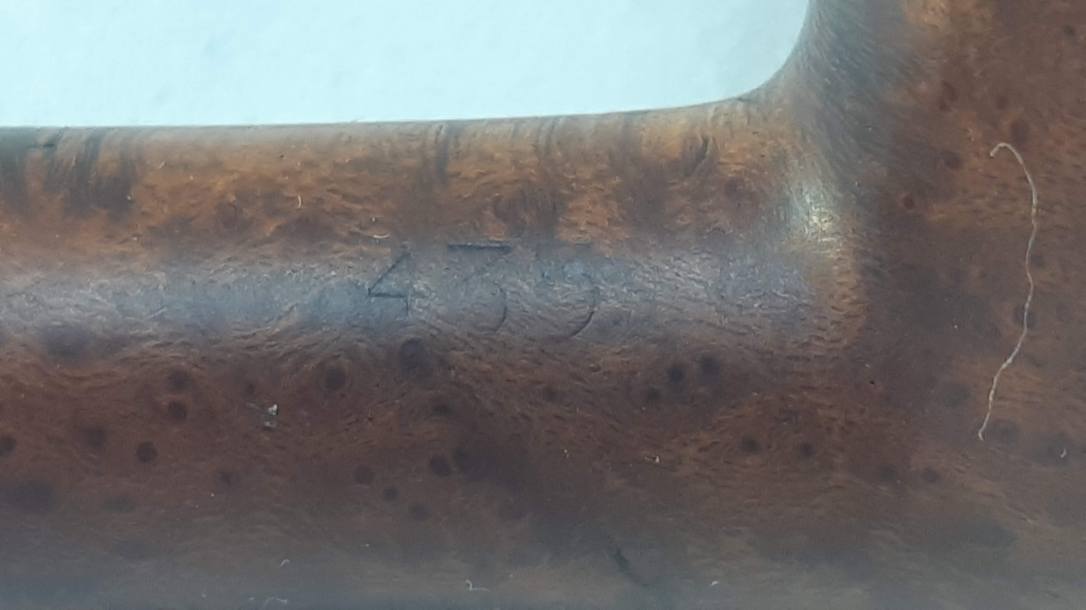
With the help of a good light and a magnifier, I was able to read the stamps. The left shank is marked “JOHN’S” over “SILVER MOUNT”, while the right shank is stamped “JOHN’S” over “PIPE SHOP” over “LOS ANGELES”. On the underside of the shank near the band I found a round COM stamp that reads “MADE IN ENGLAND”. The final marking is a shape number, “433”, stamped on the right shank at the junction with the bowl.


Not to be forgotten, the shank band is stamped “STERLING” over “LONDON”.

Hoping to uncover some hallmarks, I cleaned the accumulated tarnish, wax and grease from the shank band with a bit of 0000 steel wool and a jeweler’s cloth. Sadly, there were no more stamps hiding there. The band came loose in my hand during the cleaning, so I set it aside for the time being while I worked on the rest of the cleanup.


I spent some time researching John’s Pipe Shop, which was a fixture of Old Downtown Los Angeles since opening in 1908 until its closure in 1980. John’s didn’t make any pipes themselves; instead, they contracted with existing pipe houses for their products, which then got stamped with the John’s logo.
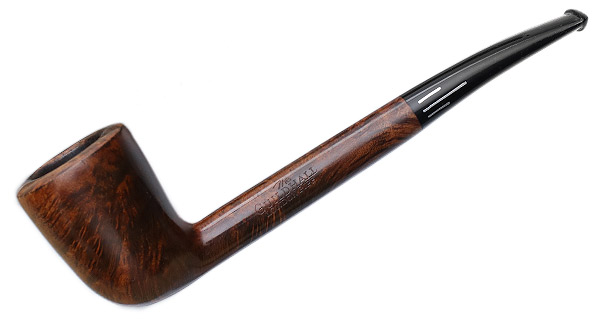
On a hunch based on the pipe’s Made in England stamp, I pulled up the Comoy’s Shape Chart and looked for shape number 433. Sure enough, shape 433 is recorded as a “Dublin, 1/8 bent”.
I would have called this pipe shape more of a Lumberman than a Dublin, so I kept digging. All doubts of its Comoy’s heritage were erased when I found this picture of a Comoy’s “The Guildhall” 433 on Smokingpipes.com. It’s clearly the same shape as the John’s pipe on the table.
Things got even more interesting when I looked into dating the pipe. According to Pipedia.org, the circular ‘Made in England” stamp was first used by Comoy’s about 1910, (two years after John’s Pipe Shop opened) but was more frequently used in the 1930’s. That puts this pipe solidly in the Pre-WWII category, though it could potentially be up to 20 years older than that.
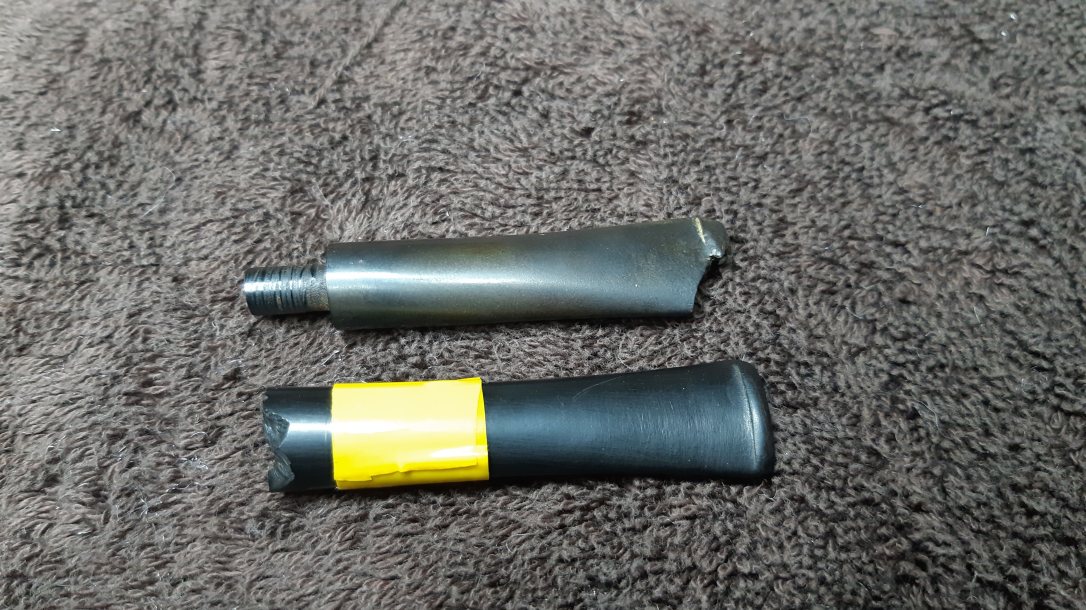
Now that I had a good idea of what I was working with, I began the refurbishment. After considering my options, I decided that the pipe would be best served by replacing the broken stem that came with the pipe instead of attempting to replace so much missing material with a CA glue and charcoal patch.
I dug into my box of stems and came out with a vulcanite stem that could be made to work. It was damaged at the shank face, but it was also longer than the broken stem. Cutting the “new” stem down to length would remove the broken portion. These pics show the stems side by side before and after cutting the replacement stem to length.

I picked out a replacement Delrin tenon from my stocks and drilled the stem to accept it. Notice in the second pic below that I drilled the mortise slightly larger than the stem to allow room for the epoxy.
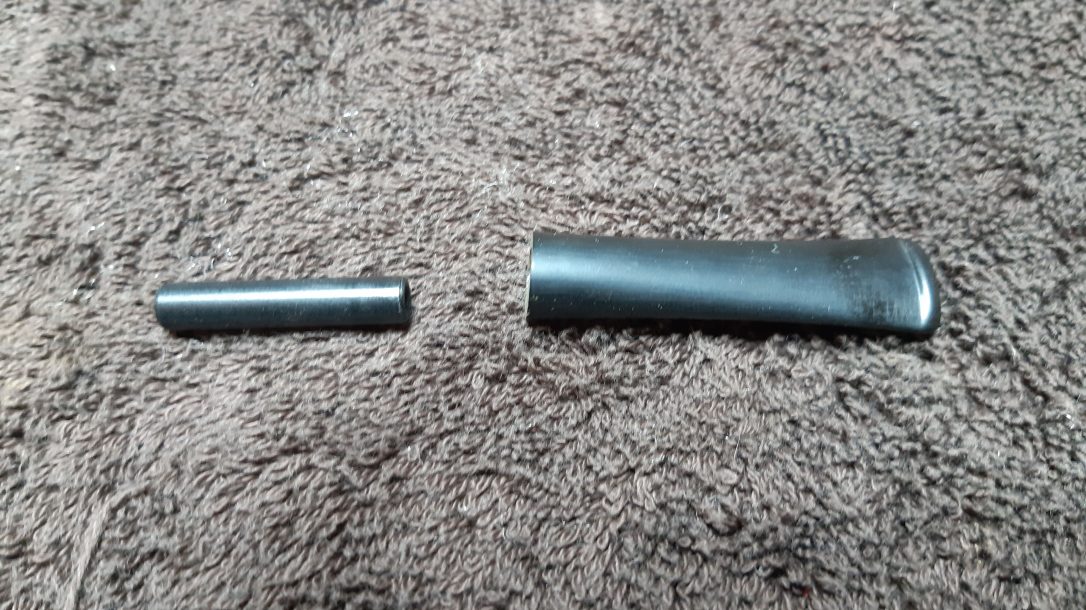

I used a bit of sandpaper to size the tenon to fit the shank mortise. This pic shows the tenon in the shank with the stem slipped over the other end. I’d come back and cut the tenon to length later, after cleaning the stummel.
With the stem plan firmly in hand, I set the parts aside for a bit and concentrated on cleaning the stummel. I reamed the thick, hard cake out of the chamber using my Castleford reamer and sandpaper wrapped around a dowel. I got lucky – the cake had done its job defending the briar from damage.


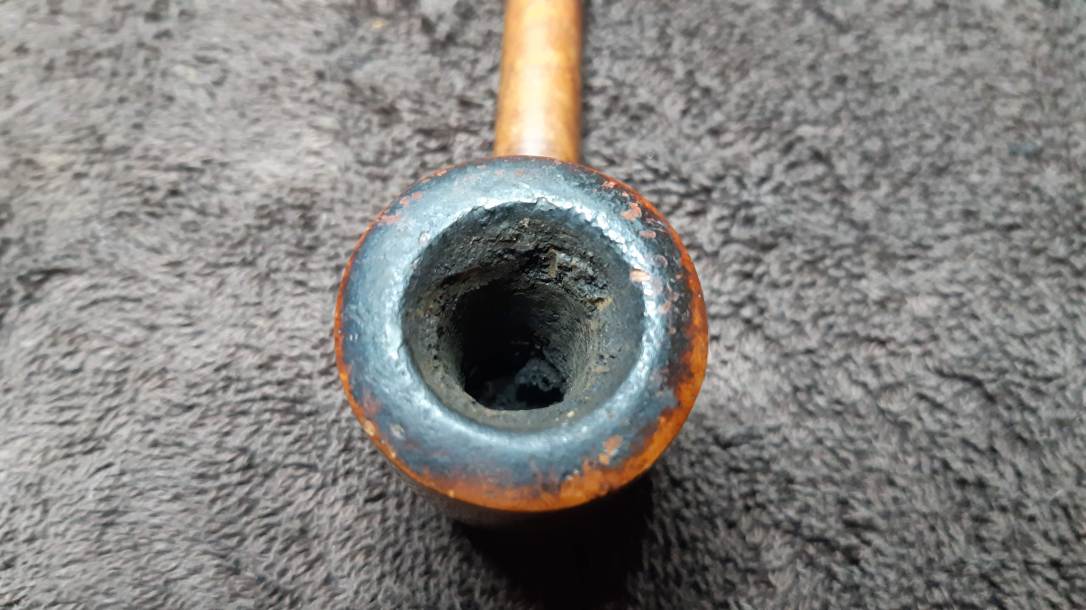
I used 0000 steel wool and 220 and 320-grit sandpapers to remove the lava crust from the domed rim, working carefully to avoid sanding a flat spot on the curved surface.

With the rim clear, I used pipe cleaners, cotton pads and alcohol to clean the stummel inside and out.


The bowl rim was peppered with tiny, pinhead pits. To smooth them out, I drop-filled the marks with clear CA glue and sanded everything smooth after the glue had cured. Here is the rim after applying the glue and again after sanding to 2000-grit. The fills are virtually invisible.


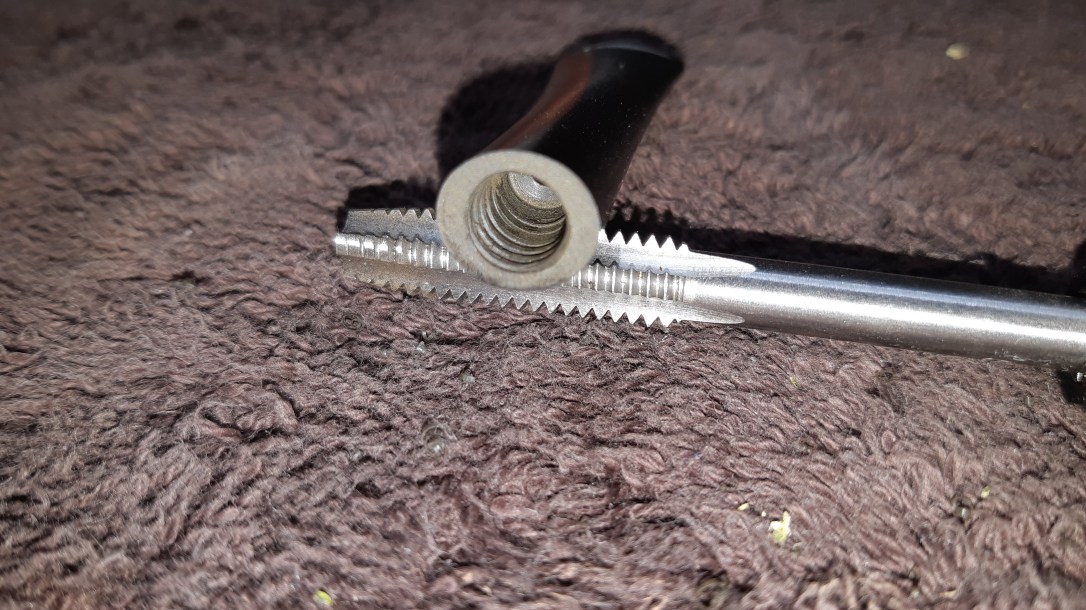
Now that the briar was clean I could move ahead with fitting the stem. Delrin is very slippery, which makes it great for tenons but tricky to glue up. To ensure good adhesion with the epoxy, I needed to introduce some grip to the situation. This was accomplished by first tapping the stem mortise with threads and then roughing up the end of the tenon with a needle file. When packed with epoxy, the slots and gouges form a mechanical bond far stronger than simply using epoxy on a smooth surface.

When I was happy with the dry fit of the stem, I mixed up some two-part epoxy and applied it to both the tenon and the threaded mortise. I’ve found it easiest to mount the stummel upright in my bench vise when gluing tenons. This gives me both hands free to position the stem over the tenon without getting glue everywhere. A few strips of painter’s tape held the stem in its final position while the epoxy cured.

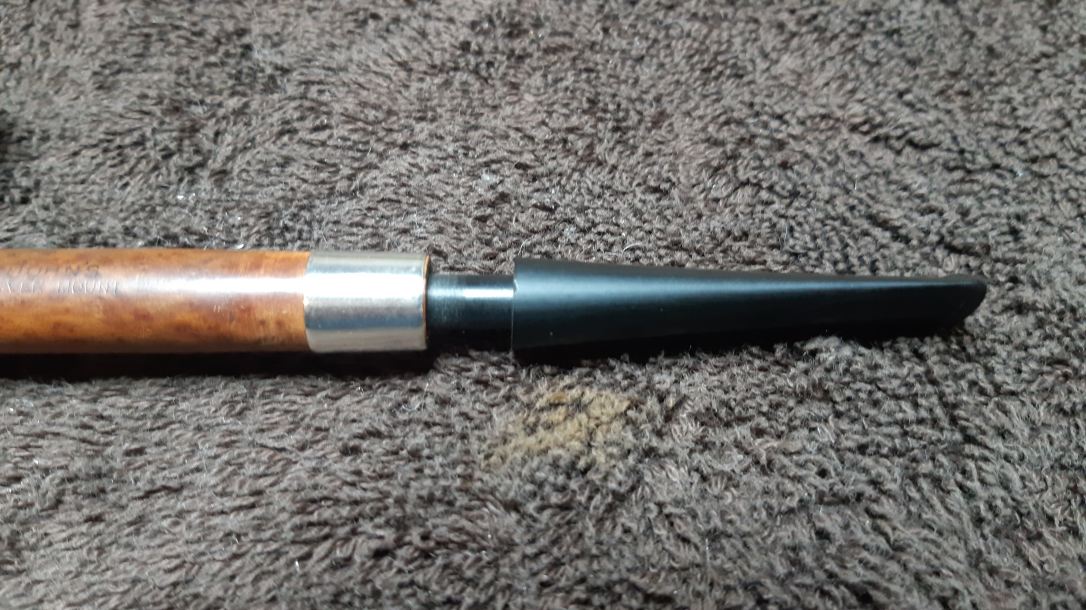
I had turned the corner on this restoration at this point. With the stem work done, I glued the silver shank band back in place before refreshing the pipe’s finish.
I applied a fairly standard red-over-black contrast stain by applying first a coat of Fiebing’s Black leather dye then removing most of the dye, leaving the black in the softer grain. A wash coat of diluted Fiebing’s Saddle Tan dye revived the red/brown colour of the briar, and a wipe of mineral oil finished things off, refreshing the briar and giving the new finish depth and pop.


I buffed away the excess oil with an old towel after a few minutes then let the stummel rest for a bit before taking the pipe to the buffer. A run of White Diamond compound and several coats of Carnauba wax soon had this old pipe shining like a new penny.
I’ve really enjoyed working on this John’s pipe and discovering the shop’s history and its link to Comoy’s. This 1930’s 433 Dublin is looking fine after its day on the worktable and is ready to provide many more decades of service to a new piper. It’s a beautiful piece of briar, showing lots of interesting cross and birdseye grain in a classic Comoy’s shape.
If you’ve been wanting to add a “between-the-wars” Comoy to your pipe rack but haven’t quite managed the budget, this John’s Silver Mount by Comoy may be just the ticket. It’s available on the Pipe Inventory page now.
Thanks for following along on this restoration. Until next time, Happy Piping! Here’s the finished pipe.


Ow that looks like a lot of hard work with this one.
LikeLike
Thanks Stephen. It was definitely worth the effort. It’s a lovely old pipe.
LikeLike
Looks great. I love seeing old pipes shine again
LikeLiked by 1 person