
Today’s post is a bit different than usual; instead of a complete restoration, I’m going to focus on a repair that is surely one of the most common when presented with a damaged meerschaum pipe – replacing a Push-Pull fitting, the small plastic/Delrin parts used to create a strong mortise and tenon joint between stem and shank. Before getting into the repair itself, let’s talk about meerschaum.
Meerschaum is an almost ideal material from which to carve pipes. It is highly heat resistant, lightweight and its porous nature allows for the absorption of water vapour and liquid tars created during the smoking process, leaving the smoke stream dry and cool. Meerschaum’s major limitation is durability. It is easily cracked.
Barring a drop onto a hard surface or other similar accident, a meerschaum pipe is most likely to crack at the shank where the material is typically the thinnest. Lateral force can easily over-stress the shank walls, resulting in a crack. This is why the joint between stem and shank must be reinforced in some way.
I’ve worked on older meers that have been simply fitted with a threaded rod as a fitment, glued into the mortise and onto which the stem is threaded. The problem with this style of fitment is that it is easy to over-clock the stem, either cracking the pipe or leaving the stem out of line with the shank. This is where the modern push-pull fitting comes into play.
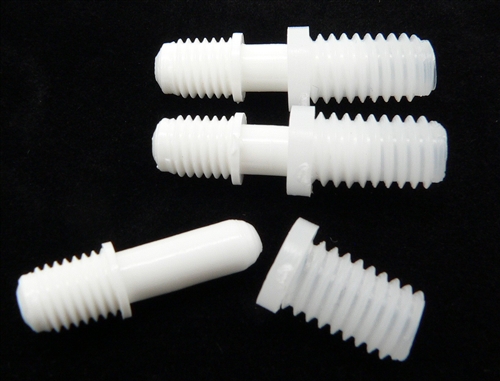
With this style of fitment, both the shank and the stem faces are drilled and tapped with threads and the fitments are screwed into their respective mortises to create a push tenon joint. If the fitting breaks, it’s usually not a big task to remove the old one and screw in a new one. Here is a pic showing a few push-pull fittings.
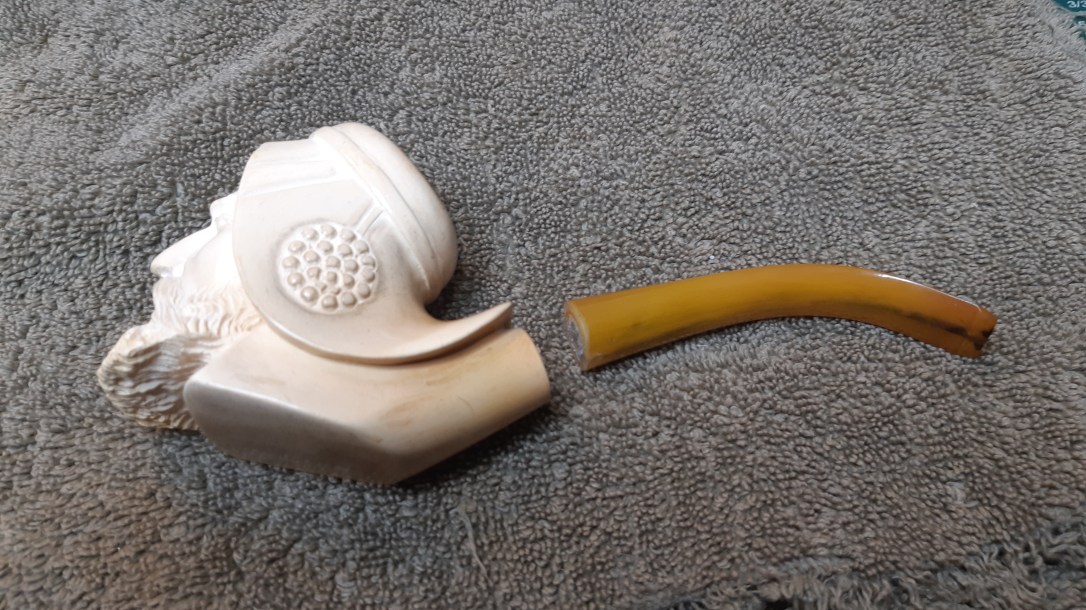
I say it’s usually an easy task to replace the fittings – unless the pipe in question has been the subject of some well-meant amateur “repair ” attempts. That is the case with the pipe before me here. The previous owner had made a sloppy and ultimately futile attempt to repair the damage with a more than generous application of contact cement. The ends of both the stem and the shank were completely covered with the rubbery mess.


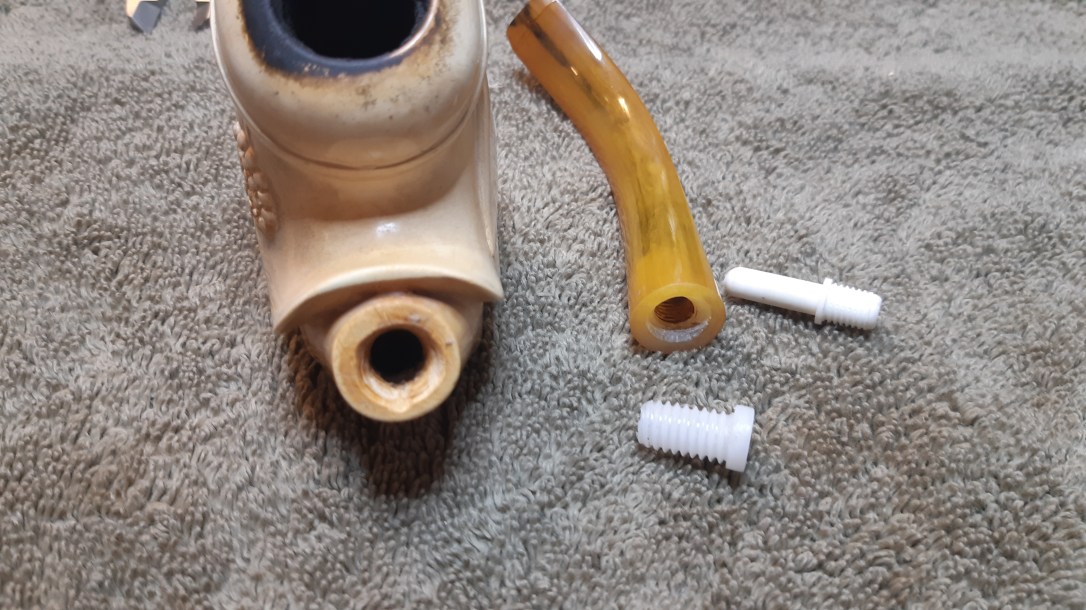
Before I could install the new fitting, of course, I had to get the old one out. I used a pen-knife to scrape the worst of the old glue off the face ends of stem and shank and then drilled out the old fittings. I started with a drill bit only slightly larger than the airway in both fittings and worked my way through successively larger drill bits until I could pick out the remains of the fittings with a dental pick.
Here’s a shot of the pipe at this point, all cleaned up and with the fittings ready to go in.
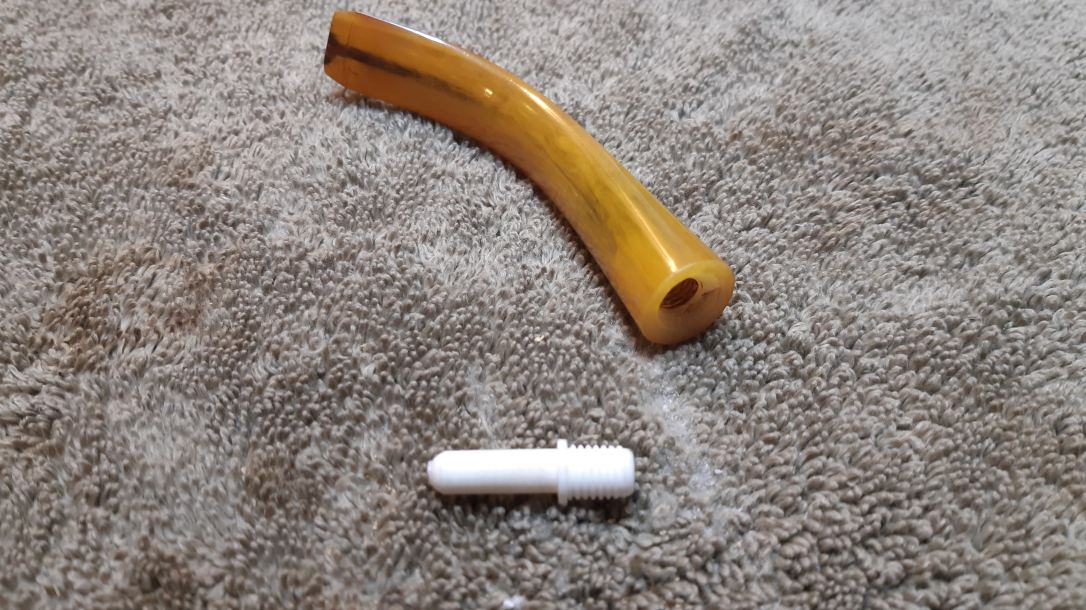
I chased the threads in both stem and shank with a properly sized tap to clean out any remaining glue. This pic shows the tap used for the stem, with the new tenon fitting twisted into place.

It’s a bit hard to see in the pic above but the mortise threads in the pipe shank were in rough shape, so I dabbed a bit of 2-part epoxy onto the threads of the fitting before spinning it into place. The epoxy ensures a good bond between the fitting and the meerschaum shank, but its use also means that the fitting will need to be drilled out again if the new mortise is ever damaged.

The threads in the stem were in better shape. The tenon fitting threaded in smoothly. To prevent the fitting from backing out of its socket I put a small amount of white glue on the threads before seating the fitting completely.
And here’s a picture of the repaired pipe. The stem sits flat against the shank face, and the Delrin tenon slides firmly but easily out of its mortise. One reminder here – when removing the stem from a pipe using this fitment system, always twist it clockwise to avoid unscrewing the push-pull fitting from stem or shank.


With the pipe back in one piece, it is ready for further cleaning, repair, waxing or simply to be packed and enjoyed.
Thanks for joining me for this short tutorial. I hope you come away with at least a few tips for tackling the next meerschaum pipe that crosses your worktable!
Until next time, Happy Piping!

Reblogged this on rebornpipes and commented:
Charles did a great job of detailing the replacement of a push tenon set on a meerschaum. It is like a how to manual. Wanted to share it on rebornpipes. Thanks Charles
LikeLiked by 1 person
Thanks, Steve! Much appreciated.
LikeLike
Hello, I have a question. My mortise and tenon are both in really bad shape but the actual threads in both the stem and the shank are good. Do I just buy a mortise and tenon online? Are all the same sizes? How do I know which one is the replacement I need?
LikeLike
Mortise/tenon sets are available in 2 sizes so you’ll need to measure the diameter of the one you have, or order one of each to be safe. They aren’t expensive sets. 👍
LikeLike
can a snapped tenon fitting be safely unscrewed and replaced with the standard part you mentioned or are the threads unique? the insert snapped off from the stem side but the female portion secured in the body of the pipe is still intact, so theoretically should i only need to remove the tenon from the stem and screw in an identical replacement?
much love ❤
LikeLike
Hi Blaire. You’ve got the idea 👍 These fittings are isually available in 2 sizes; just make sure you order the correct size for your stem.
LikeLike
Where are the Mortise/tenon sets available from?
LikeLiked by 1 person
Hi Ralph. You can order push-pull sets from Vermont Freehand and Jhlowe.com 👍
LikeLike
what are the Mortise & Tenon made of?… nylon?\
LikeLike
According to the product listing on jhlowe.com, the push-pull tenon sets are made of a combination of Teflon and Nylon
LikeLike