
Pipe makers and restorers use various types of bowl coatings for a variety of reasons. Some coatings are factory-applied to new pipes in the belief that they help protect the briar wood of the bowl from burnouts and assist in the formation of cake – that even layer of hard ashy stuff that insulates the briar from the heat of the burning tobacco. Sometimes a bowl coating is used to repair a cracked or otherwise damaged pipe bowl. And some pipers are dead set against bowl coatings of any kind, arguing that they stop the briar from “breathing” and thus could actually cause cracks from heat stress. So the debate is still very much open.
I personally tend towards the former position, namely that a bowl coating can be useful to help protect repaired areas inside the pipe bowl until a decent layer of new cake is formed through use. I also tend towards coatings that are not water or air tight, for much the same reason I avoid lacquer or other barrier type finishes on the outside of a pipe. I prefer to allow the briar to expand and contract naturally as it heats and cools through use.
So that leads me to this bowl coating process shared with me by a fellow member of the Brothers of Briar pipe forum (thanks Riff Raff!). It’s about as simple as you can get – just 2 ingredients: maple syrup and activated charcoal powder.
I originally posted my hunt for a bowl coating that worked after I bought an estate pipe that, after a proper cleaning and reaming, turned out to have many tight, thin fissures/cracks that followed the grain on the inside of the bowl. I assume the cracks are evidence of heat stress in the wood, caused simply through smoking the pipe, if perhaps a little too fiercely.
Here are a few close-up pics of the pipe bowl after cleaning/reaming.

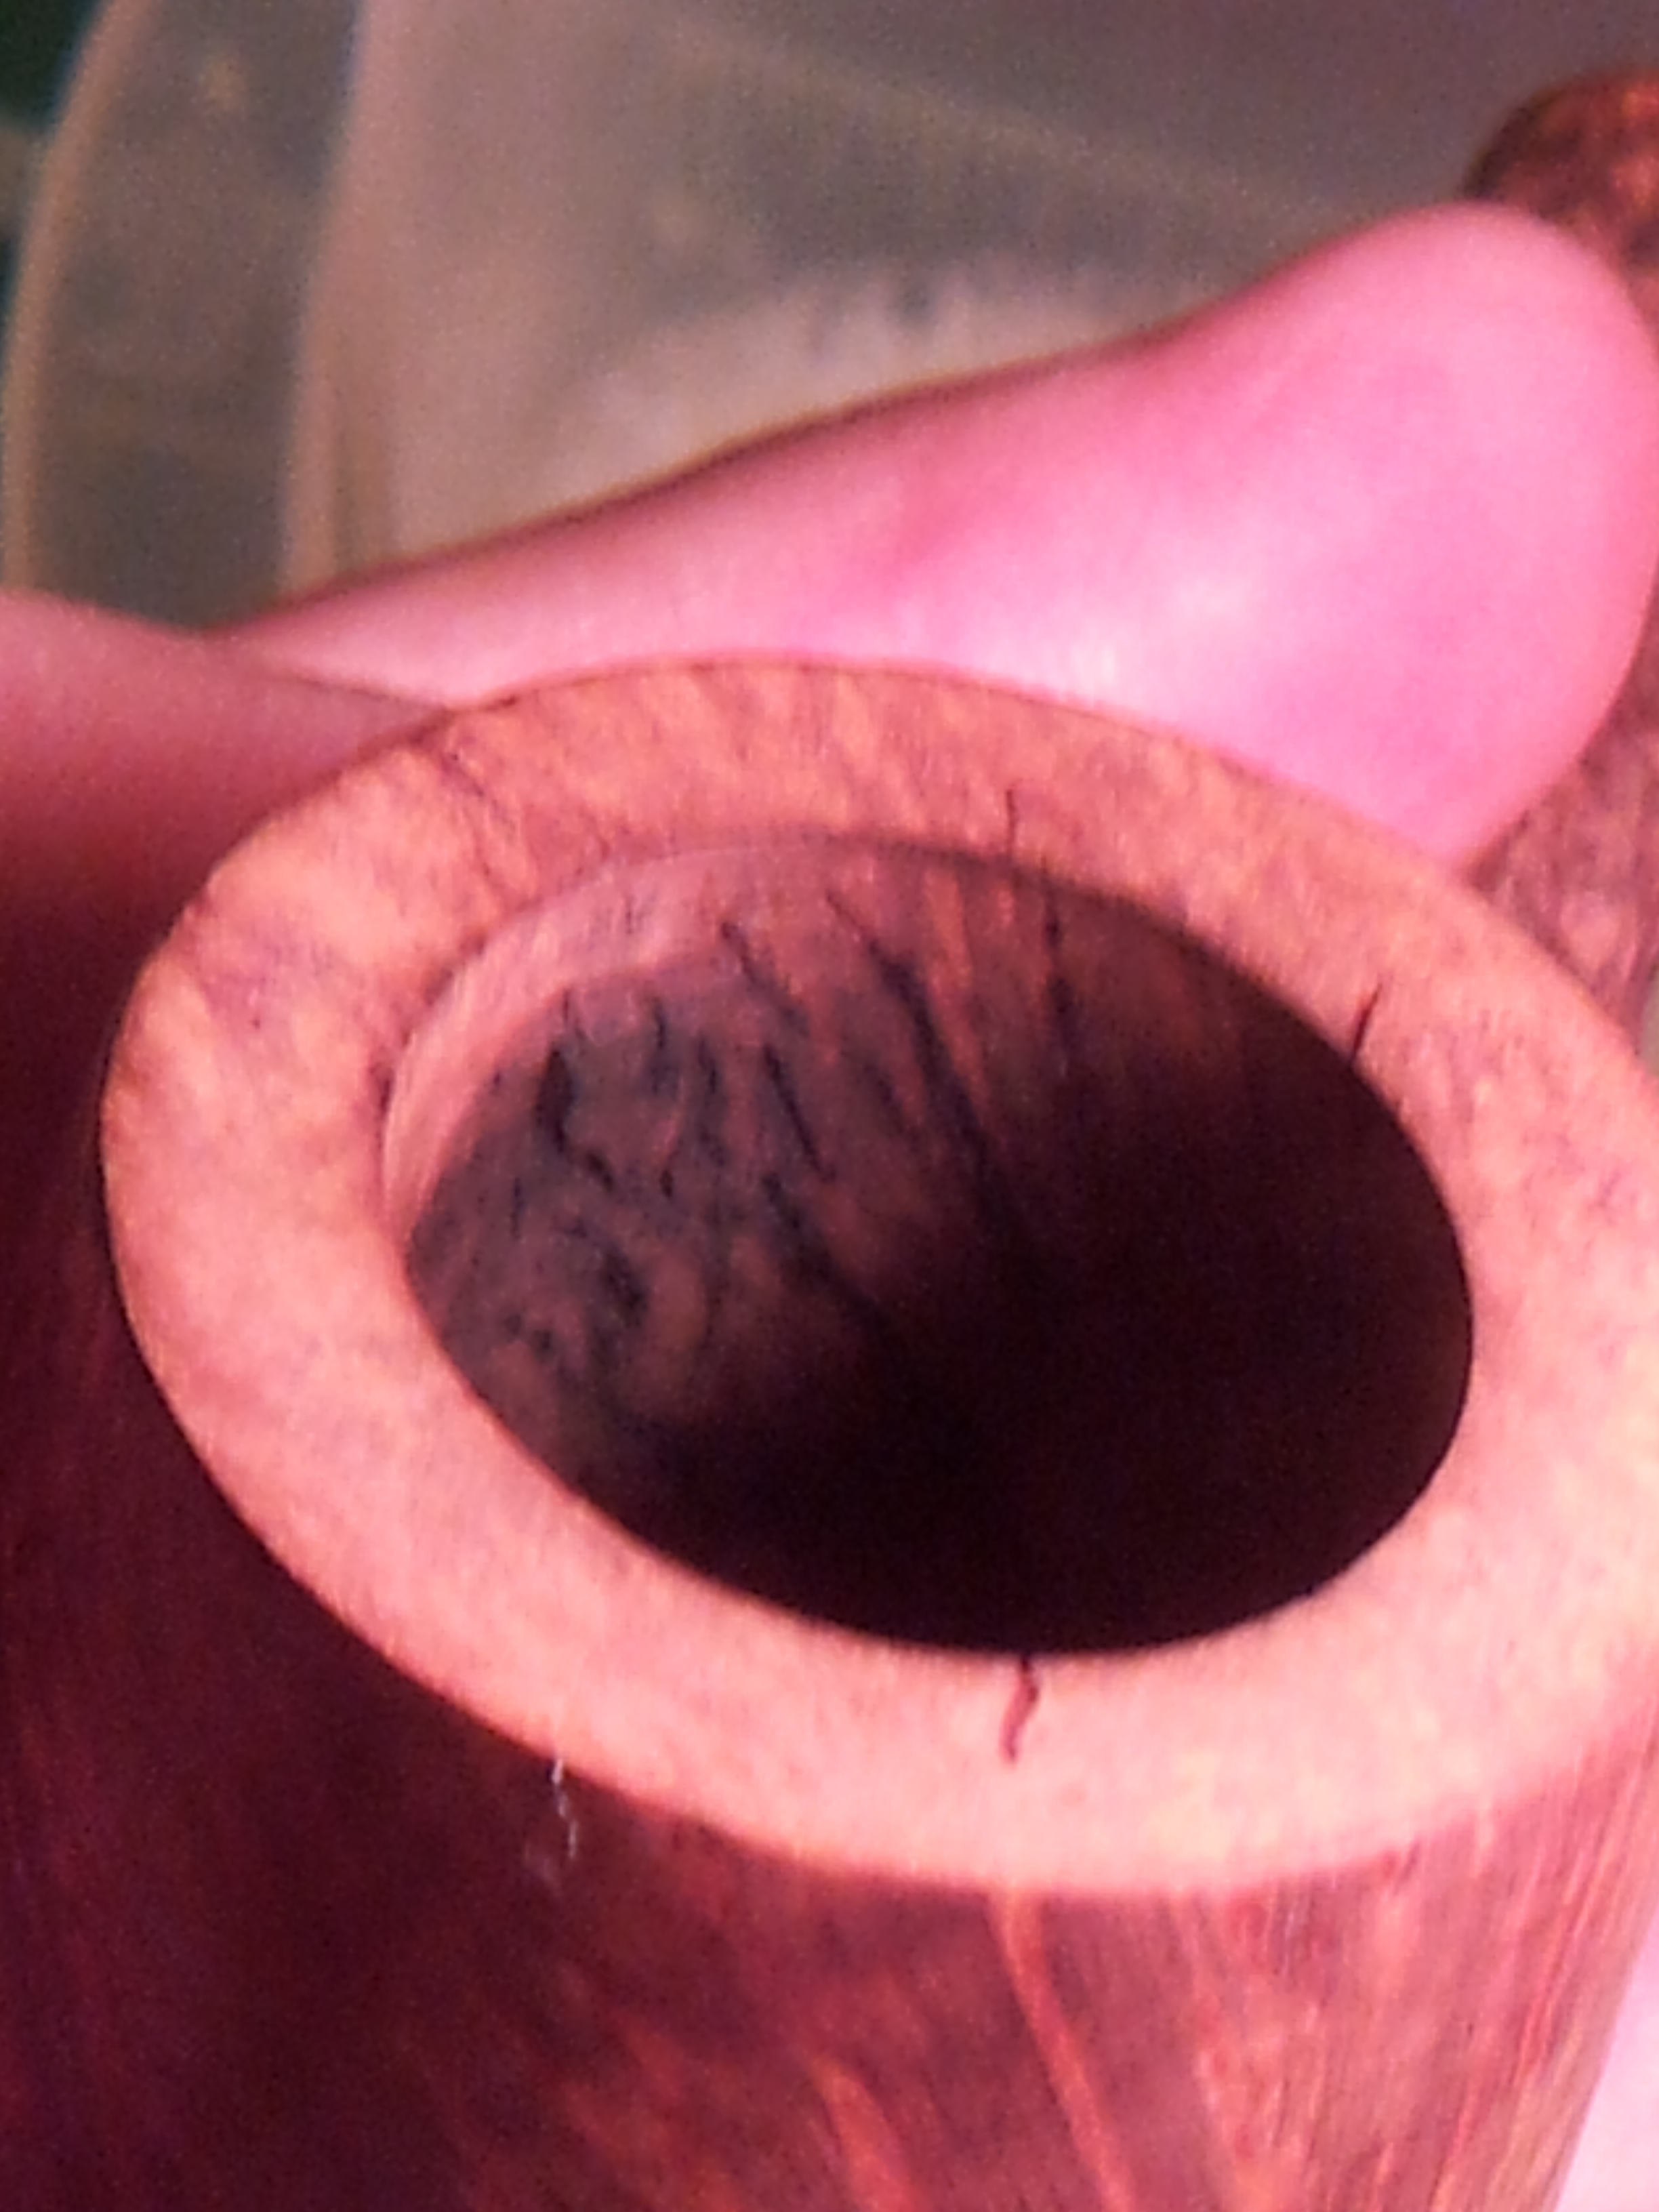
There were 3 cracks that extended up onto the rim of the pipe. CA glue was flowed into these and sanded smooth after curing. They’re nearly invisible in the finished pipe. I was warned off about using CA glue inside the bowl, so these were left alone. As I said before, the fissures are all tight, without any indication of movement, so they should be ok once covered with the bowl coating. If they open up down the road, I will seal them with JB Weld, which dries/cures safe and inert.
Now onto the bowl coating. The directions are simple:
- Insert a pipe cleaner in the stem of the pipe to keep the airway open.
- Wipe maple syrup around the inside surfaces of the bowl. Try for a nice even layer.
- Pour activated charcoal powder into the bowl right up to the rim.
- Allow the pipe to sit for an hour or more. This gives time for a layer of charcoal powder to be absorbed by the syrup.
- Dump out the excess charcoal powder, remove the pipe cleaner from the stem.
- Now the hard part. LET THE PIPE SIT FOR 5-7 DAYS. The bowl coating will cure smooth and hard.
- After curing, your pipe is ready to go!
Here is a quick pic of my work table set up to apply the coating to today’s patient – a Patent Era Brigham 3-Dot 390 shape Canadian. Is it too much irony to point out that I’m using Canadian maple syrup to repair a Canadian-made Canadian-shape pipe?

And after the coating has cured:


I hope this bowl coating recipe helps you as much as it did me. It’s all-natural, cheap, easy and reversible if something goes sideways or another bowl repair is required down the road.
Until next time, happy piping!

I like this very much . Simple and easy is always the way to go if at all possible . Thanks for sharing this tip on bowl coatings .
LikeLiked by 1 person
Hope you dont mind but i went ahead and shared this on my new blog .
https://baccypipes.wordpress.com/2015/08/20/a-simple-effective-bowl-coating/
LikeLike
Thanks, Troy. No problem at all. And best of luck with your new blog!
LikeLike
As always, Charles, thanks for being there with the solution.
LikeLiked by 1 person
Thanks Mark!
LikeLike
I found the link (and a brief explanation) for this on another blog but came to see the entire post a little late. I either missed or there wasn’t anything about the pipe cleaner in the stem on the article I read so I have a bit of a mess LOL but am really excited about this solution. I ordered some activated carbon power and am looking forward to trying it again properly. Thanks for sharing, Charles.
LikeLiked by 1 person
Thanks Greg! Yes, the pipe cleaner in the airway keeps things a bit tidier. 😁
Let me know how you like the results!
LikeLiked by 1 person
Will do!
LikeLiked by 1 person
Hi. I am from Spain, and the maple syrup is not found here. Could you substitute it for honey?
LikeLiked by 1 person
Yes, honey will work. 👍
LikeLiked by 1 person