
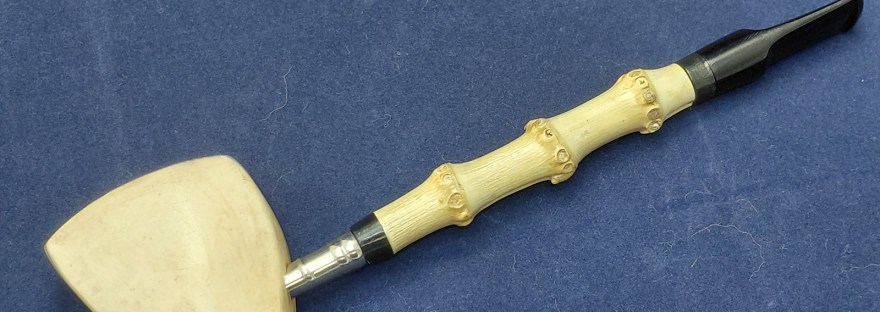
The use of Bamboo in pipe making became popular in the middle of the last century, between the end of the Second World War and about the mid-1950s. Dunhill’s Wanghee pipes, featuring briar bowls, bamboo shanks and Ebonite stems, are one well-known example.
Bamboo as a pipe material is really quite ingenious. Bamboo is very lightweight, absorbent and renewable, creating pipes that are easily clenched in the teeth and provide a very dry smoke. As anyone who has planted bamboo in their own gardens will tell you, bamboo grows quickly and easily in the right conditions, ensuring a steady ongoing supply to the pipe maker.
The pipe on the bench this time was sent to me by an American pipe smoker who wanted to have a Bamboo shank and Vulcanite stem made for it. As you can see in this initial series of pictures, the pipe is an interesting piece featuring a petite meerschaum bowl mated to a pencil thin Cherrywood shank and the smallest Bakelite stem I’ve come across.


The shank is friction-fit into the rear face of the meerschaum bowl, a nickel shank cap helping to preserve the conical end of the cherry shank.


I’ve made a few bamboo shanks over the years, but never for such a small pipe. Clearly, I couldn’t taper a piece of bamboo to fit into the stummel, so I launched a dig through my supplies for ideas. And that’s when the Pipe Gods smiled on me and I scrounged up a tapered nickel shank cap that was a perfect match to the original, albeit a bit tarnished and dirty.
This pic shows the nickel cap next to the original shank. I couldn’t get a better match if I tried!

I also selected a small Vulcanite Round Saddle stem blank to fit the opposite end of the bamboo shank, both of which you can see in the pic below. The stem tenon had been turned at some point for a previous project before being rejected for whatever reason, but that didn’t matter as I’d be cutting off the integral tenon anyway in favour of a tenon made form stainless steel rod.
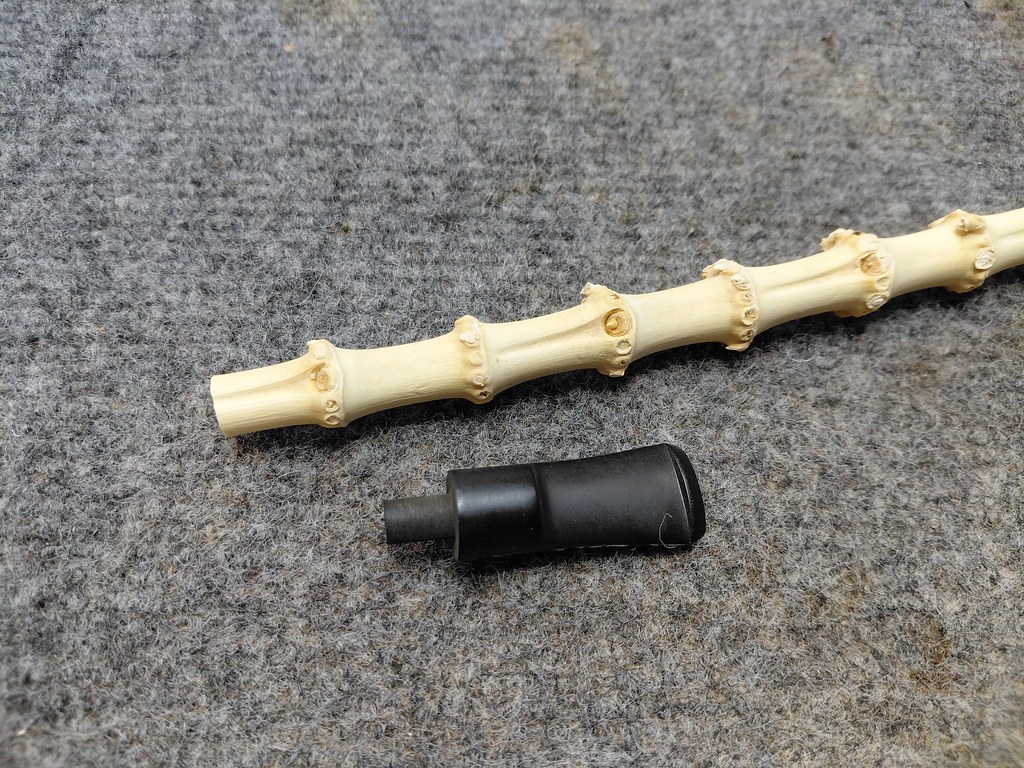
For the bowl end of the shank, I needed to make up a part that would support the nickel shank cap without becoming fragile when sized to the dimensions needed for this project. Delrin fits the bill here nicely, as it is easily machined and remains almost impossible to snap even when turned to very thin tolerances.
I chucked a section of Delrin rod in the lathe, drilled a 1/8th inch airway through it, then cut a tapered endthat fit snuggly inside the nickel cap with just enough room for epoxy.
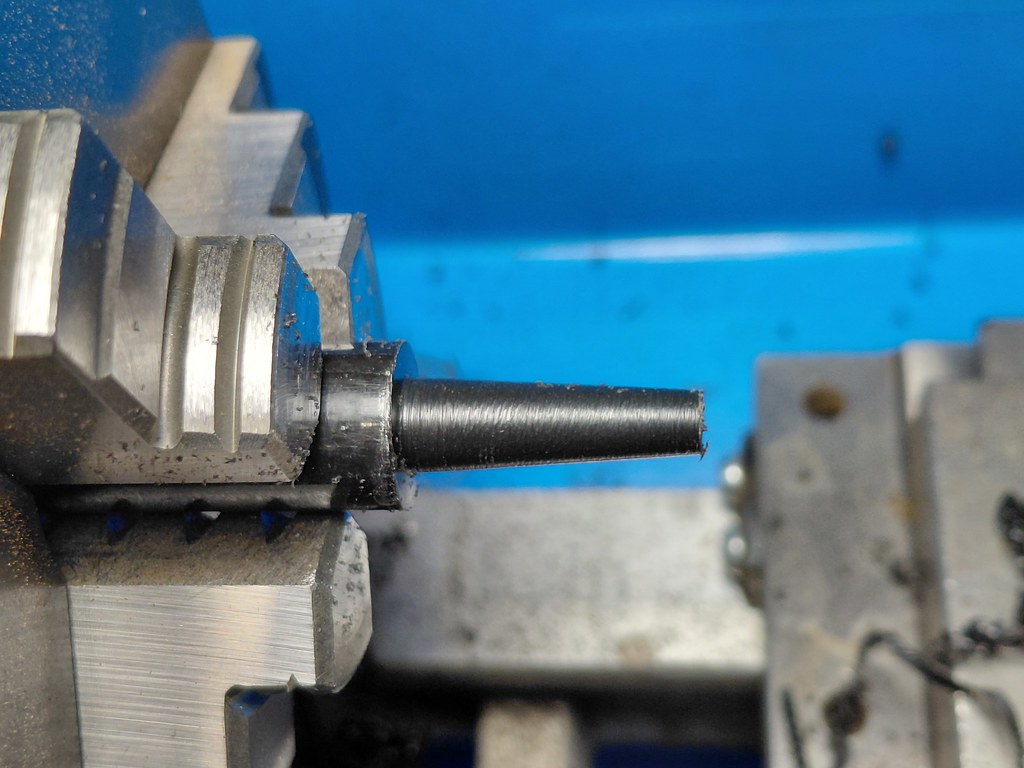

Here are a few shots of that “nose cone” piece after it came off the lathe. As you can see, I left a roughly 1/4 inch section at the base of the cone to serve as a transition between the bamboo and the cap.


Next up on the task list was to cut and drill a section of bamboo for the shank proper. I cut the bamboo to length between the knuckles to provide flat end faces onto which I’d later mount other parts, then drilled a 1/8th inch airway through the centre of the bamboo. This is fairly easy as bamboo has a central capillary running lengthwise through it. Using a taper-point drill bit, it is easy to follow this capillary from end to end.


After a bit more prep work cutting and shaping other parts, I had collected all of the required pieces to assemble the new shank. Pictured below is an exploded view of the assembly.
From left to right is the shank cap, Delrin nose cone, a short connecting section of stainless tubing, the drilled bamboo, a second Delrin transition piece, a second connecting section of stainless tubing that would form the stem tenon, and the Vulcanite stem blank. I’ve cut off the integral tenon and drilled a mortise into the stem face that will accept the stainless tubing.

To assemble the parts permanently, I mixed up some standard 5-minute two-part epoxy. The first parts to be glued up were the two Delrin transition pieces on either end of the bamboo shank. The first short section of stainless tubing bridges the gap between the Delrin nose cone and the bamboo, ensuring a solid assembly.

As this picture illustrates, the Delrin parts were a fair bit larger in diameter than the bamboo. They would need to be reduced and shaped to match the contours of the bamboo shank.

As you can see below, I also glued the stainless tenon into the stem face. Then I let the glued-up parts rest overnight to allow the epoxy to fully cure.
When I came back to the project, I taped off the bamboo to protect it from any errant file strokes, then began carefully shaping the Delrin sections, reducing them to meet the bamboo.

There was also quite a bit that had to come off the precast stem blank to achieve the desired shape. To make it easier to keep the parts lined up correctly while filing the Vulcanite and Delrin parts together, I marked a reference line running from the shoulder of the stem down through the Delrin transition and onto the taped shank.

This pic shows the stem almost completely shaped. I’ve also shaped the Delrin nose cone piece at the bowl end of the shank and glued the nickel cap into place.


When I was happy with the rough shaping of the parts, I moved to sandpapers, refining the final shapes and removing the filing marks. As with all of my stem projects, I sanded the parts from 220 through 2000 grit to prepare them for final buffing.
When working with bamboo, it is really important to keep files and sandpaper away from the exterior of the bamboo itself. The outer layer or skin of the bamboo plant is fairly thin, making it very easy to accidentally damage it with an over-aggressive file. Damaging the outer layer of the bamboo would mean starting over from scratch, something I really did not want to have to do.

With all the parts cut, assembled, shaped and sanded, all that remained was to take the complete shank and stem to the buffer for a careful polishing on both the Red Tripoli and White Diamond wheels. This smoothed out any remaining sanding scratches and brought up the shine. A few light coats of Carnauba wax added more shine and a touch of UV protection for the Vulcanite stem.
Then it was time to assemble the pipe and take some final pictures. I really like the combination of meerschaum and bamboo here. The pipe is very light, easily clenched and can be broken down to carry safely in a pocket if necessary. It also looks great!
This was a fun but challenging project and one that, I am happy to report, the pipe’s steward is thrilled to have brought to fruition. The new bamboo shank and Vulcanite stem not only make the pipe easier to enjoy over the tiny Bakelite stem on the original shank while also giving the pipe a definite design upgrade. The bamboo shank is, I think, a decided improvement in every way.
I hope you enjoyed following along as this bamboo shank came together. Making a bamboo shank isn’t intrinsically difficult but there are a good number of potential failure points, especially when also integrating a friction-fit tenon.
Until next time, Happy Piping! Here’s the finished pipe.


