
I have worked on pipes of all makes and models over the years, and I’ve enjoyed them all, but every now and again I am given the opportunity to work on truly vintage pipes. I find these projects particularly exciting, as I get to restore pieces of pipe history.
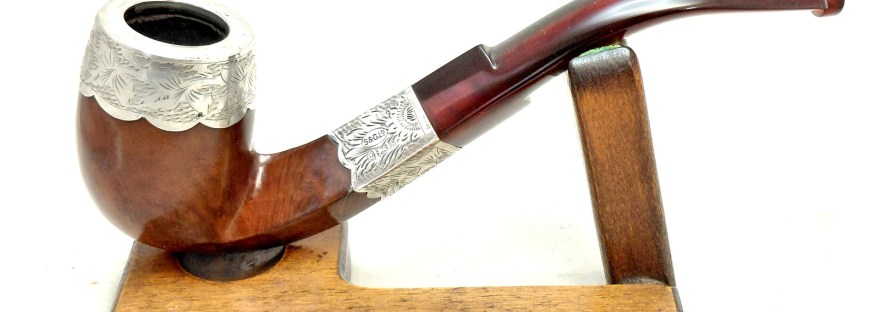
Such was the pipe on the bench for this post – a 1901 S&G Ltd Diamond Shank Bent Billiard that its current steward acquired as a lonely but reasonably well cared for stummel. The stummel is decorated with what I refer to as “bed-skirt silverwork” at rim and shank. The shank decoration is stamped “S&G.LD” over a trio of silver hallmarks: an Anchor, Lion Passant and a lover case “b”. The Anchor tells us that the silver was assayed in the city of Birmingham, England, while the Lion Passant indicates Sterling Silver. The last stamp, the lower case “b” indicates the year, 1901.
According to this Wikipedia article, S&G Limited was the short form of Salmon & Gluckstein Ltd, formed in 1873 in London, England. The firm, a tobacco distribution and retail chain, had 160 stores to its name in 1901. The firm’s entry on Pipedia.org tells us the pipes sold in the S&G shops were likely made by La Bruyere out of St Claude, France. That firm later became Chapuis-Comoy & Cie.
Most of the “before” images of this restoration project were lost, unfortunately, when I migrated computers but this pic shows the stummel alongside the stem material options I sent to the pipe’s steward.

From top to bottom in the pic above, the stem options are Ebonite, Amber Acrylic and Red Amber Acrylic. After some back and forth, the pipe’s new steward settled on the Red Amber Acrylic rod, which finishes to a deep wine red similar to Redmanol.
The modern V-slotted button design didn’t become the standard for pipes until the early to mid 1920s. When this pipe was made in 1901, it would have almost certainly been fitted with an Orific stem – one with a simple round airway all the way from stem face to button, and a rounder, football shaped button. Drilling the Acrylic rod for the airway, therefore, was quite simple. I chucked the rod in the lathe, faced off the ends, then drilled a 1/8th inch round airway all the way through.
While cleaning the stummel, I discovered that the shank mortise was threaded – another design holdover from the 19th Century. Getting more difficult to find these days, I sifted through my stock of threaded bone tenons and came up trumps with a tenon that fit the shank well. After drilling and tapping a mortise in the stem face for the other end of the tenon, the project looked like this:

Here you can see why a Hand Cut stem was necessary. The diamond shank of the stummel measured a hair over 20mm (0.8in) point to point with the silver shank decoration in place (it’s really too thin to qualify as a shank band, in my opinion). This was far too large for any of the precast stems available to me. A Hand Cut stem is really the only option to put this 125 year old pipe back together again.
Even then, it was slightly touch and go. Acrylic rod is nominally 20mm in diameter. A close look at the pic below shows that the rod just barely reaches the tips of the diamond shank points. Thankfully, the threaded tenon sits exactly in the center of the shank. If it had been offset in any direction by more than a fraction of a millimetre, I would have had to scrap the Red Amber Acrylic and run with a larger diameter section of Ebonite rod.

Also of note in the pic above is the masking tape marking out the raw rod. This stem would be a Diamond Saddle profile, so the tape at the shank end marks the depth of the diamond shoulder. Beyond that point, the stem would be cut much thinner before reaching the button. The lines of tape running from end to end indicate the left and right sides of the stem as well as the location of the stem’s airway.
Besides delineating the “no-fly zone” for my files while I shape the new stem, these lines are crucial for keeping the stem straight. It is surprisingly easy to cut a twist into the stem as the tendency is to cut more heavily on the near side of the stem when working with hand files. I’ve learned to check my work frequently.

The first task when shaping any Hand Cut stem is to remove the bulk of excess material. This differs slightly from stem to stem based on the size and design – another reason for making out my tape guide lines before taking the pipe to the belt sander.
Here you can see the results of a few minutes’ work on the sander. I’ve roughed in the shoulder of the saddle and have begun to thin out the blade of the stem. I’ll leave the button area bulky for now.

Then it was off with the power tools and on to the hand tools, beginning with a fairly aggressive Pillar file that removes material quickly. Dual safe edges on the file protect the shoulder and button areas from accidental file strikes. The larger half-round file under everything in this pic is useful for removing the larger irregularities left by the belt sander.

In this close-up shot, you can see that I’ve begun cutting the diamond shape into the shoulder of the stem. The silver shank decoration came loose while I was handling the pipe, so I put it carefully aside to reinstall later. To protect the briar shank from damage, I added a wrap of clear hockey tape where the silverwork was. The tape is tough enough to withstand accidental file marks while I work.

Diamond stems are a step or two above round stems in difficulty. The facets of the diamond must line up perfectly with those of the briar shank and the points must also meet perfectly. Establishing and maintaining those lines during the shaping of the stem can be challenging, so patience is key.
I continued to refine the shape of the new stem, thinning out the stem in a gentle taper, thicker at the shank end and finishing at about 5.5mm at the button end. As I got close to the final dimensions, I took a few minutes to rough out the new button profile. This is another key checkpoint in the process as it becomes readily apparent if the stem has become twisted. In the pic below, you can see that I need to straighten out the button slightly to get the points of the football shape level.

This pic shows the difference between the almost fully thinned stem and the edge of the button. I prefer to use a number of smaller, finer files for button work as they are easier to control than larger tools in these confined areas.
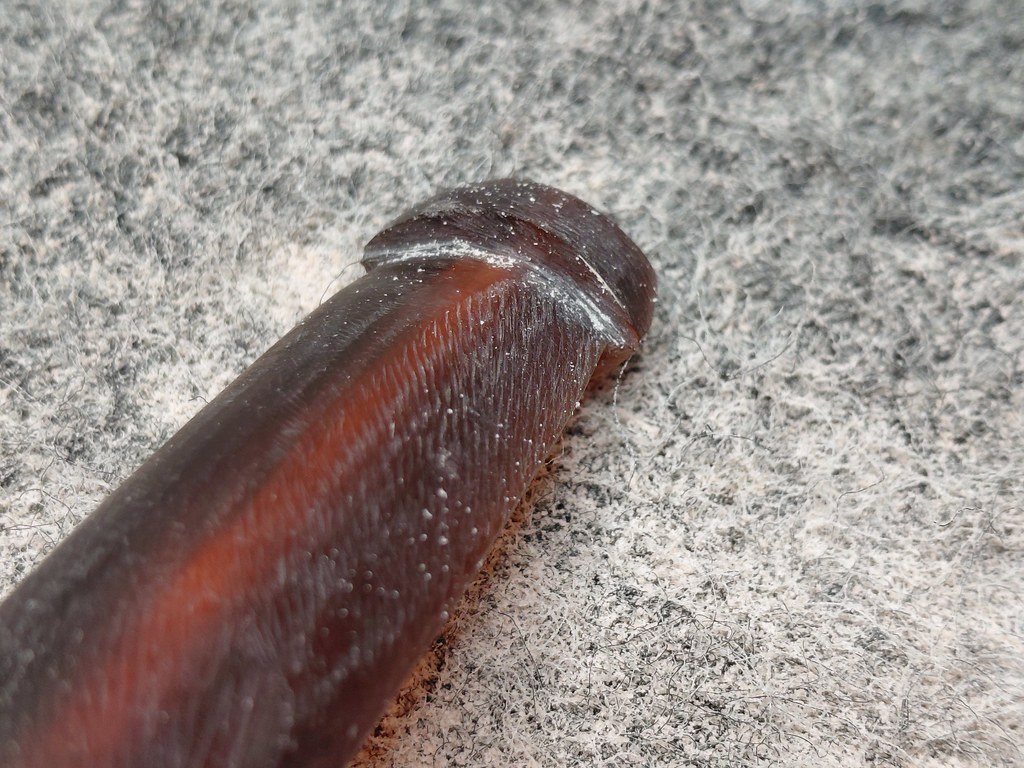
I continued to reduce the button both in height and depth until I was happy with the look and feel of the new stem. When I was within striking distance of the finish line, I put away the files and switched to sandpaper, sanding the entire stem with increasingly finer grits from 220 through to 2000 in preparation for final polishing. Just before taking the stem to the buffer, I added the required bend.
Bending a pipe stem, whether Acrylic or Ebonite, follows the same process. After slipping a pipe cleaner through the airway to prevent it from kinking or collapsing during bending, the stem is heated over my heat gun until it becomes pliable. I can then introduce the bend and set the new shape by running the stem under cold water.

The last task before final polishing and waxing was to reinstall the errant shank decoration. I applied a small amount of wood glue to the inside of the silver band and slid it into position on the shank, taking care to position the engraved logo on the upper left side.

I let the pipe sit long enough for the glue to dry, then took the completed pipe to the buffer where I buffed the new stem with Red Tripoli compound before giving the entire pipe a light buff with finer White Diamond compound. A few light coats of Carnauba wax brought up the shine even more and gave the refreshed pipe a bit of UV resistance.
The finished pipe is whole, sound and ready to take its place in its steward’s collection, rack and rotation. Looking every inch a turn of the 20th Century pipe, this lovely 1901 Diamond Shank Bent Billiard should, with some care and maintenance, be a steady smoking companion for perhaps another 125 years!
Thanks for joining me for this truly vintage pipe restoration project. With quite a few balls in the air to manage, attention to detail is paramount when cutting a Diamond Saddle stem. I’m quite pleased with the way this one turned out, as it the gentleman who commissioned the work. I hope you enjoyed watching it all take shape.
Until next time, happy Piping! Here’s the finished pipe.
My apologies for the lint in these pics. Buffing can generate a lot of static electricity, and while I do wipe down the pipes before taking final pics, lint has a way of jumping right back onto the stems!


After getting the finished pipe back, the pipe’s steward very graciously sent me a thank-you note and this pic, used with permission. I’ll keep him anonymous to protect the guilty, but he sure looks like a happy guy!


Wow, fabulous pipe and outstanding work! Creating a diamond shank stem on a pipe of that edge must have been a nail-biter. It looks perfect!
LikeLiked by 1 person
Thanks very much! There’s not much of a margin for error when working on one of a kind pipes, for sure. Slow and steady is the way to go! 😁
LikeLike