
Working on estate pipes can present a unique series of challenges at the best of times, but when presented with a very old pipe the restorer needs as many tools in the repair arsenal as possible. I really had to consider all the options when this vintage meerschaum Devil Anse (ish) pipe arrived at the shop.
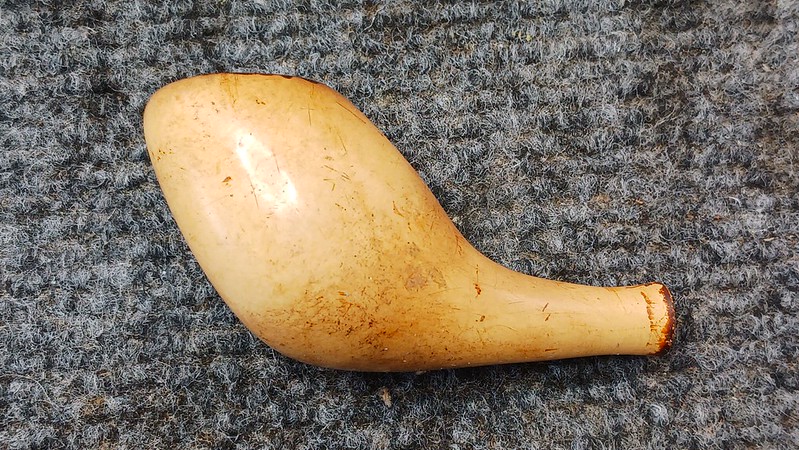
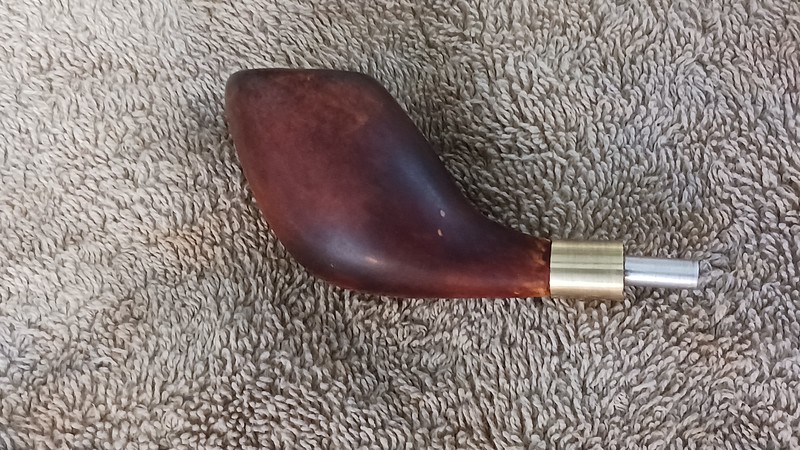
As you can see in this initial series of pictures, the pipe was definitely on the small size at just under 4 inches in overall length and an outer shank diameter of a scant 3/8″. The original bone screw tenon had snapped off, leaving a small threaded section in the stem face and the rest firmly lodged in the pipe shank. The bowl was dirty and very waxy feeling in the hand, while the faux amber (Redmanol?) stem had been somewhat clumsily glued back together after a previous break.


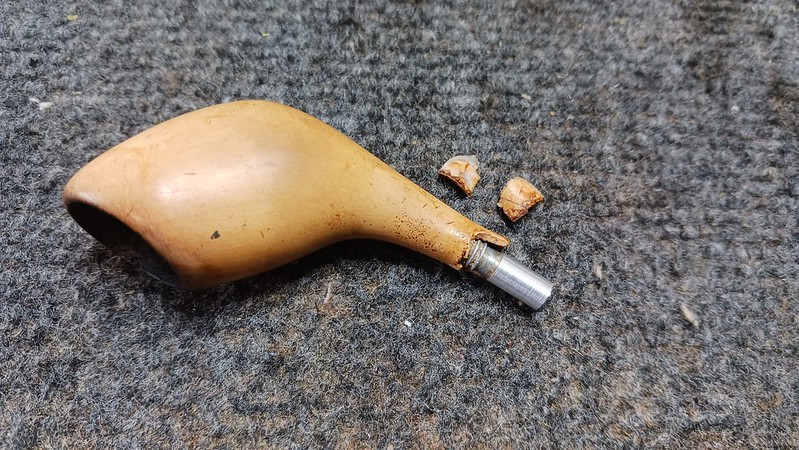
Unfortunately, this pipe didn’t quite make the trip to the shop unscathed. During the preliminary examination several hairline cracks on top of the shank gave up the ghost, resulting in this mess. Ouch.

While repairing the shank certainly added a level of complication to this job, there was one silver lining – I now had open access to the tars and other goodies locking the bone screw tenon in place. A little 99% isopropyl alcohol dissolved enough of the crud to let me gently unscrew the tenon from the mortise.

Options for the shank came down to basically two choices – rebuild the shank to its original length or cut off the broken meerschaum and redrill the mortise. While I considered which route to go, I worked to get the stummel clean. Using a reamer on a meerschaum is not advised as the torque can crack the delicate bowl, so I used a bit of sandpaper wrapped around a dowel to remove a light amount of cake from the chamber.
As a reminder, a meerschaum pipe, unlike its briar cousin, does not need a cake layer in the bowl to protect it from the heat of burning tobacco. In fact, too much carbon buildup can push the bowl apart, so it’s best to keep those meerschaum chambers clear of cake.

The interior of the chamber was in pretty good shape for its age, slightly worn but without any red flag trouble spots, so I moved on to cleaning the stummel’s internals. I used a small pile of cotton swabs and pipe cleaners dipped in more alcohol to remove a fair amount of old tars and debris from the shank and airway.

With the meerschaum clean, I took another look at the damaged shank. This close-up pic shows just how thin the shank walls are at the break – about 1mm. Yikes!

The pipe’s steward wanted to maintain the original length of the shank if at all possible, so I carefully reassembled the broken pieces of meerschaum using some thick CA glue. My hope was to find or make a threaded tenon that would make use of the original threads after the repair was complete.


I let the repair cure overnight, then gently chased the threads with a tap to clear out any lumps of glue. I also found a suitable aluminum tenon in my box of odds and ends. The threads matched the original bone tenon, but as you can see in this pic, the glued-up repair gave out when I tried to screw the new tenon into the mortise. Ugh.
Time for Plan B! Clearly the delicate meerschaum was not structural enough on its own to handle the repeated force of mounting and dismounting a threaded tenon. I could, however, still make use of the aluminum part as a combination tenon and shank reinforcement.
Using a bit of two-part epoxy, I coated the threaded end of the aluminum tenon, then reassembled the pieces of meerschaum around the metal. I held the shank together until I felt the epoxy begin to grab, then carefully set the stummel aside for the night to give the repair time to cure.

As you can see in the pic above, the pieces of broken shank didn’t line up perfectly during the second glue-up. I used files and sandpaper to even out the diameter of the shank and remove the excess epoxy.

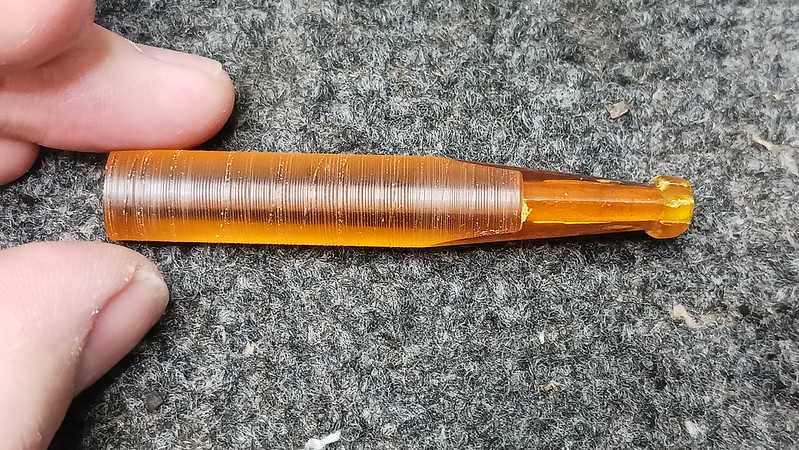
While discussing stem options with the pipe’s steward, he expressed a desire for a slightly longer amber-coloured stem to make the pipe less of a moustache-burner. Another dig through my parts bins came up with the used amber acrylic stem shown below. The sharp-eyed among you will notice immediately that this was a Diamond Taper stem, designed to fit a Straight Bulldog pipe. It would need some work to fit the round shank of the old meer.

Thankfully the shank diameter was rather small and a quick measurement showed that the diamond taper stem could be turned round on the lathe with a bit of room to spare. Here is the stem after a quick minute on the lathe.

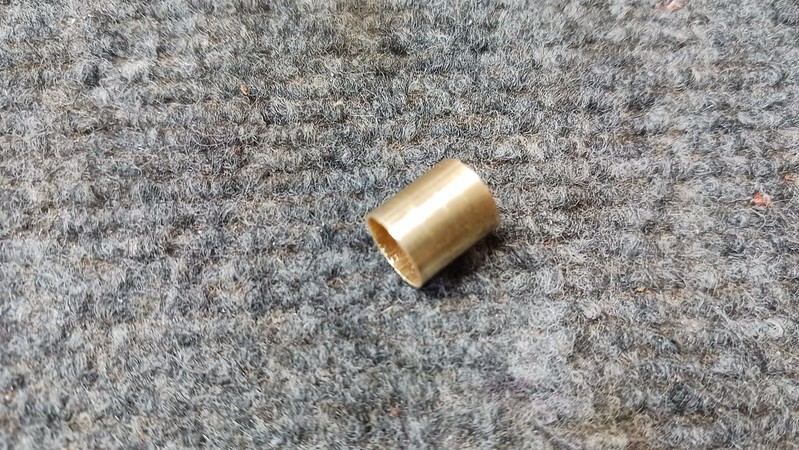
The other request from the pipe’s steward was the addition of a shank band to cover up the repaired area and add a bit more mechanical reinforcement to the pipe. The shank was smaller than even my smallest nickel shank band, so once again it was DIY time. I made up a quick band from a short section of brass tubing and glued it into place over the shank repairs.
After cutting the replacement stem to its final length, I drilled a mortise into the stem face to accept the smooth portion of the aluminum tenon. This type of reverse tenon arrangement should work well for this pipe, as it moves the stress from the shank to the stem, which is more easily replaced should it crack.
It took a bit of careful fitting to get the stem face to sit flat against the shank, but eventually the amalgam of parts began to look like a pipe.

The next task was to refine the shape of the replacement stem. After filing and sanding the diameter to match the shank, I had to flatten the top and bottom surfaces somewhat to achieve a gentle round taper profile. This pic shows the stem after the rough shaping but before final sanding and polishing.

I hand sanded the stem to 2000-grit, but before taking the pipe to the buffer I gave the old meerschaum stummel a fresh waxing. As mentioned at the beginning of this post, the stummel had a fair amount of beeswax on it but I wonder if it had been applied cold as the wax had brought very little colouring to the surface of the stummel.
To bring out the best from the meerschaum and give the refreshed pipe a warm glossy shine, I warmed the stummel over the heat gun and brushed on a light layer of melted beeswax. The result was both immediate and quite dramatic. The hot wax was drawn deeply into the meer where it gathered colour from the decades of tobacco tars locked within and carried that deep brown colour to the surface.
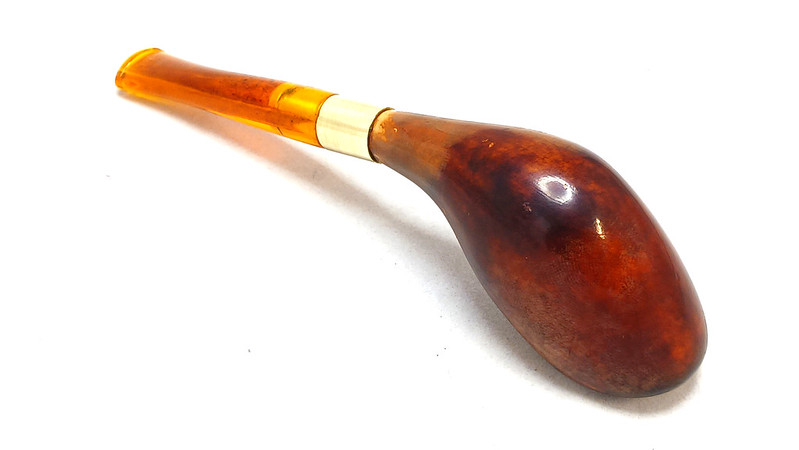
I continued to apply wax until the meerschaum could absorb no more, at which point I set the stummel aside on a clean towel to cool. When I could handle it again without burning myself, I hand buffed the excess wax away using the towel, revealing the new mahogany-toned stummel shown below. A bit of a difference!
I finished this rather technical restoration by buffing the acrylic stem and brass shank band on the Red Tripoli and White Diamond wheels. Acrylic really doesn’t need a coat of Carnauba wax but I gave it a quick buff on the wax wheel as well to bring up the shine even more.
The finished pipe is almost unrecognizable as the damaged stummel I brought to the bench a few days previously. The meerschaum stummel is clean, fresh and rocking the new colouration, while the shank repairs are nicely tucked away under the shank band. The “new” acrylic stem is structurally sound, fits well and looks like it belongs on this vintage stummel – a win all around, I think!
This revived Devil Anse meerschaum pipe has been returned to its steward, who has already put it into his regular rotation.
I hope you enjoyed following along on this interesting estate pipe rescue. Until next time, Happy Piping! Here’s the finished pipe.


Wow Charles! That was an amazing bit of work. I love the new chestnut colour of the pipe.
LikeLiked by 1 person
Thanks, Marlowe. Waxing a meerschaum pipe is my favourite part of its restoration. I’m always surprised by the colour change.
LikeLike