
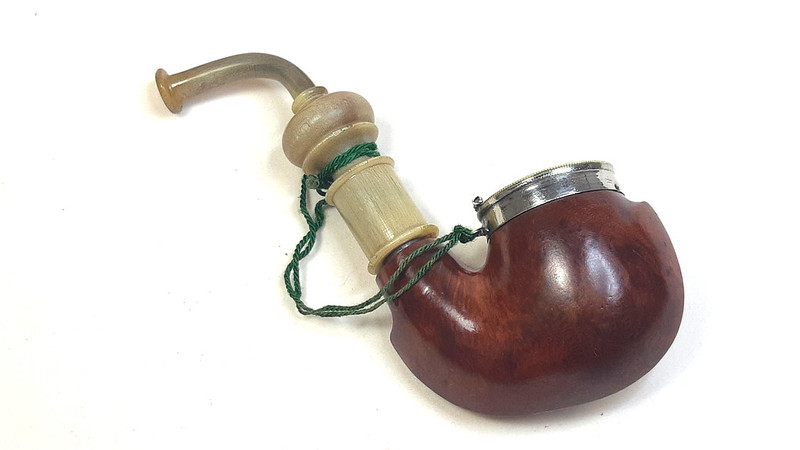
Every now and again I get the particular pleasure of working on a family heirloom pipe, a treasured part of someone’s family history they wish to preserve for display or their own use. This Made in Czechoslovakia Bavarian style pipe is one such piece, first owned by the current pipe steward’s grandfather.
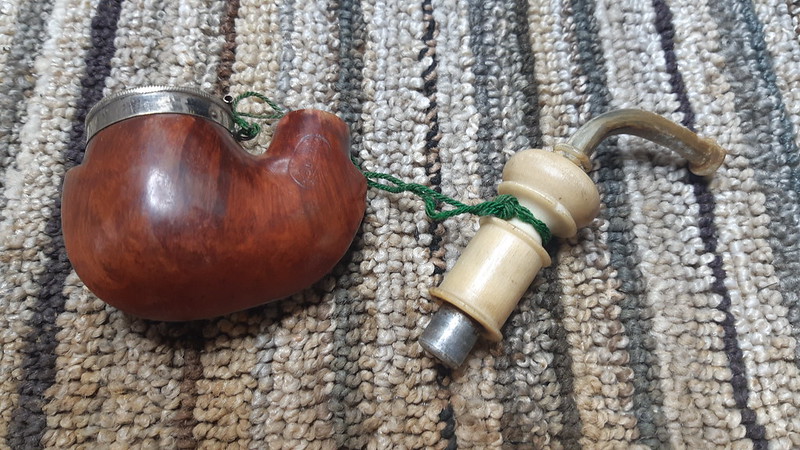
As this first series of photos shows, the pipe was in fairly good shape for its age, though there were certainly signs of wear and tear. The nickel bowl cap had been lost , though the rim ring and half of the hinge were still present. A layer of carbon covered most of the rim ring, but it didn’t appear to be dented or otherwise damaged.
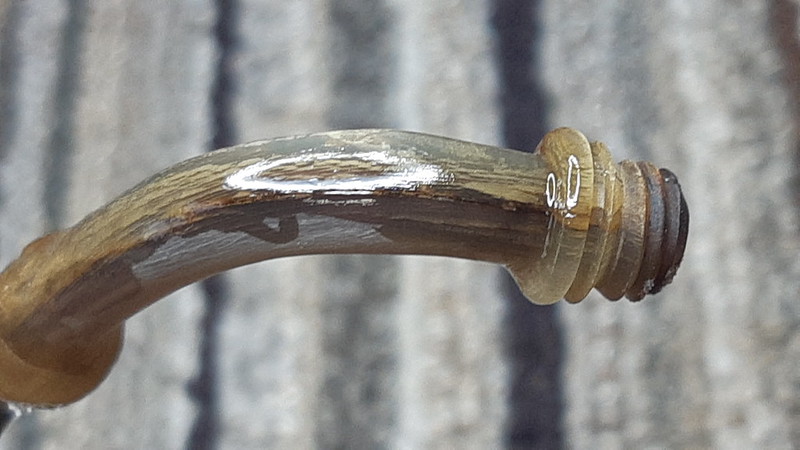
The varnish coat on the stummel was flaky, with patches worn off here and there, which gave the pipe a rather unloved look. The stem, attached to the bowl ring by a bit of embroidery floss, was made in two parts – a turned straight section of what I believe to be faux ivory, and a short bent horn mouthpiece that showed tooth chatter on top and bottom. A crescent-shaped piece of the button was also missing, possibly bitten off accidentally long ago – the damage certainly did not look fresh.


The only stamp on the pipe is on the left flank of the stummel, an oval surrounding the words “MA***T” over “Real Briar” over “Czechoslovakia”. After a bit of research, I think there is a good chance that the pipe can be attributed to Richard Machát, but I have been unable to uncover any more information. If anyone has a source for Czech pipemakers, please let me know in the comments below.

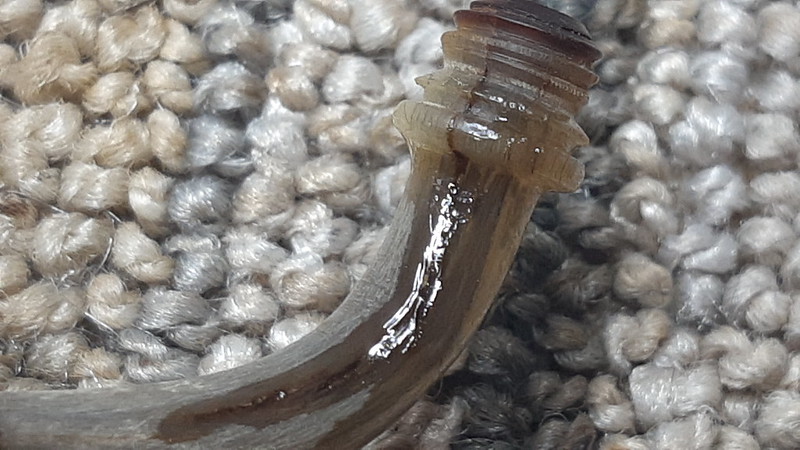
A closer inspection of the horn stem revealed some slightly alarming cracks running up the curve of the horn from the threaded base where it meets the faux ivory shank. I missed them on my first once-over of the pipe as they were somewhat disguised by the tooth chatter and what appeared to be tobacco residue (or good old-fashioned dirt) packed into the fissures. The first close-up pic also clearly shows the missing piece of horn button.

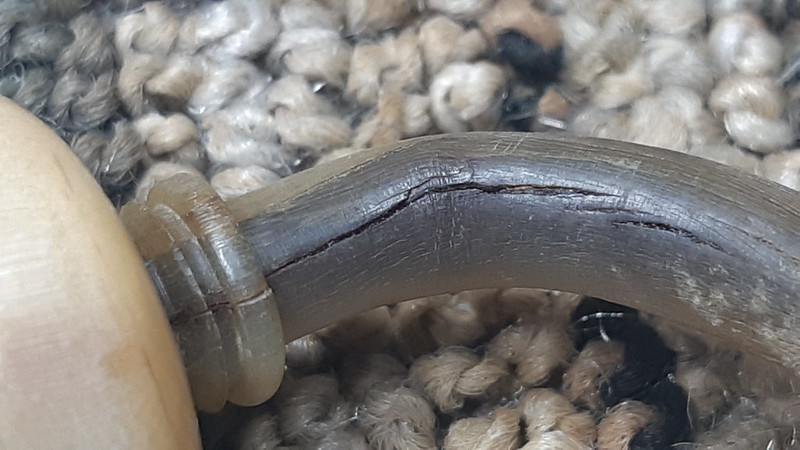

The cracks follow the natural grain of the horn and are most likely a product of age and disuse. Thankfully, it is a straightforward repair.
Before I got into the stem repair, though, I needed to clean the pipe and separate it into its component parts. After untying the cord holding the stem to the stummel, I set the stem aside for a minute while I reamed and cleaned the stummel.
The light layer of old carbon cake in the bowl surrendered easily to my reamer, after which I tidied up with some sandpaper wrapped around a marker.

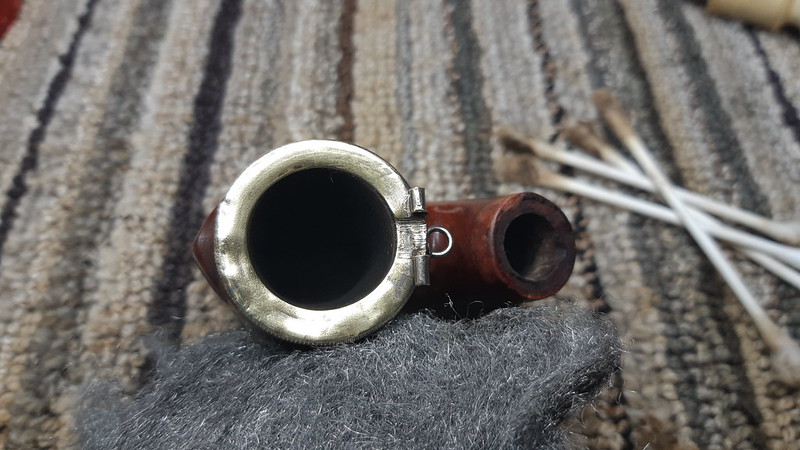
To quickly clean the nickel rim cap and remove the old carbon lava, used a combination of alcohol on cotton swabs to soften the carbon and some 0000 steel wool to scrub it away and shine up the nickel. I was pleased to find the rim free of dents and scratches.
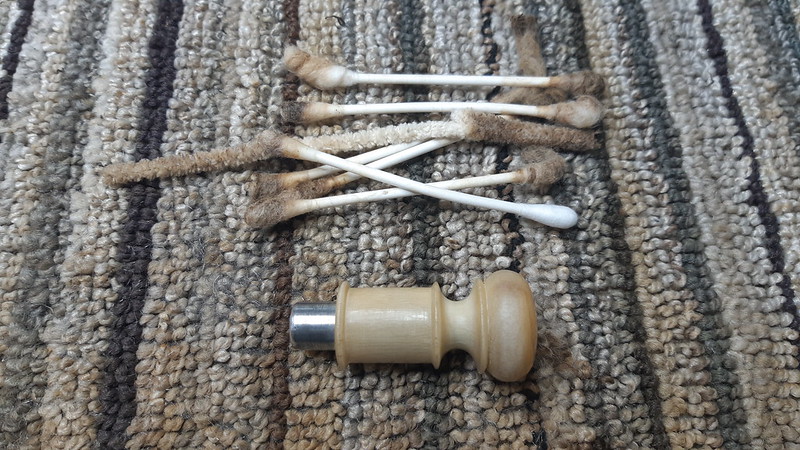
More cotton swabs, pipe cleaners and alcohol cut through and removed tars and bits of tobacco from the shank and airway.

Then it was back to 0000 steel wool to gently scrub away the loose, flaking varnish coat from the briar. A quick wipe with alcohol on a cotton pad took care of any bits the steel wool left behind.

To finish off the basic cleaning of the stummel, I packed some cotton wool into the shank and bowl and filled the stummel with 99% isopropyl alcohol. Note the pipe cleaner poking up out of the shank mortise – a useful trick for full-bent pipes like this.

I set the stummel aside to allow the alcohol to work overnight on the more stubborn tars lurking within. While it sat, I cleaned up the shank and mouthpiece. Initially, the horn mouthpiece did not want to unscrew from the shank piece, and given the cracks, I did not want to force it. Thankfully, cleaning the two pieces together removed most of the old tars and allowed the alcohol to gently soften the gunk that was holding the mouthpiece in place. A bit of careful, gentle pressure freed the mouthpiece so I could finish cleaning both pieces separately.


After cleaning the remaining tars form the horn threads, I could finally move on to the repairs. A wipe with a cotton swab dipped in alcohol cleared the dirt from the cracks, and a quick pressure test confirmed that the cracks did not penetrate the airway. To fill, seal and bond the horn permanently, I used a bit of regular CA glue, flowed into and over the cracks.
While I had the glue out, I also touched up the deeper tooth chatter near the button, but I made no attempt to rebuild the missing piece of horn button as the idea was to repair and preserve this heirloom pipe rather than make it look new again.

Carefully setting the horn mouthpiece aside, I left it overnight to give the glue ample time to cure completely. When I returned to the worktable the following day, I sanded away the excess CA glue with 500 and 1000-grit wet sandpaper. This left the glue only in the cracks and began the process of polishing the horn.


With the mouthpiece and shank ready to go, I moved back to the stummel. The alcohol treatment had done its job, dissolving the deep-set tars inside the briar and capturing them in the cotton wool.

I removed the cotton and ran a fresh pipe cleaner through the airway to catch any errant bits, then moved on to refreshing the somewhat tired finish on the stummel’s exterior. To bring back the original red colour and even out the patchiness, I applied a coat of Fiebing’s Saddle Tan leather dye to the briar. When it was dry I hand-buffed the excess dye from then surface with a bit of old towel, then gave the briar a wipe with mineral oil to both help set the new colour and add some moisture back into the wood.


I let the oil sit for just a minute or so on the briar, then again hand buffed the stummel with the towel to remove the excess. After a rest period, during which the briar found its new equilibrium, I took all three parts of the pipe to the buffer where they each got a run on the Red Tripoli and White Diamond wheels. A few light coats of Carnauba wax completed this restoration. All that was left to do was to reattach the embroidery floss and take some final pictures.
The refreshed and repaired pipe has been transformed from one of “Grandpa’s old things” to the cherished family heirloom it is. Gone are years of dirt and a flaking finish, and more importantly, gone are the cracks that threatened to snap the horn mouthpiece in two. This Czech-made Bavarian style pipe should last another few lifetimes of use, given a modicum of care and respect due to an Elder Statesman of the pipe rack.
Thanks for joining me for this estate pipe rescue. I really enjoy reviving these heirloom pipes. They are almost always a technical challenge and interesting historically, but it is their unique ability to connect us to people and places we love that makes these restorations special.
Until next time, Happy Piping! Here’s the finished pipe.


That’s a beautiful pipe, Charles, and a nice story for these times. Grandpa is pleased I’m sure. It seems you can handle anything thrown your way. On a personal note, Merry Christmas to you and your family. Stay safe and be content. 🎄 🎅
LikeLiked by 1 person
Thanks, David. Merry Christmas to you and yours!
LikeLike
What an amazing process , fascinating work and, as ever, a beautiful piece of work. Merry Christmas Charles and here’s wishing you a Happy New Year. Keep up the good work!
LikeLiked by 1 person
Thank you! Have a wonderful Holiday Season!
LikeLike
Reblogged this on rebornpipes and commented:
I am a lover of horn stems and also pipes that come with identifiable stories. Thanks for sharing this one Charles and thanks for the preservation work on it. Well done.
LikeLiked by 1 person