
The Dr Plumb’s brand has been around since 1925 when it was introduced by GBD as a budget line aimed primarily at the North American export market. First produced in France, Dr Plumb’s pipes are now made in the UK and stamped accordingly.
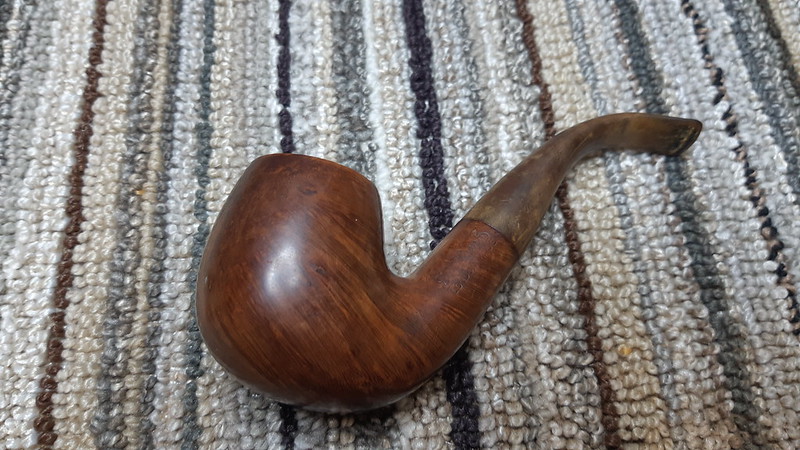
This Dr Plumb Bent Billiard arrived on the worktable for a basic Ream, Clean & Polish in fair estate condition. The most pressing issue was a heavily oxidized Vulcanite stem. Apart from the discolouration, the stem had a layer of buildup in the bite zone that gave the button end of the stem a crusty appearance. The stummel was in relatively good shape, with some attractive grain showing through a layer of old wax, dirt and grease. A thin layer of carbon “lava” had spread across most of the rim, but not far enough to conceal a few small dents and handling marks around the outer edge.


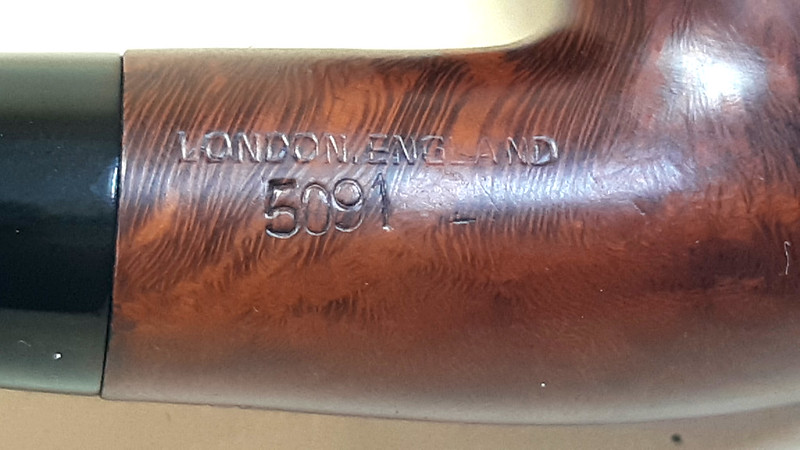
The pipe is stamped “Dr Plumb’s” over “London Made” on the left shank, and “London, England” over “5091” on the right shank. The stem is also marked with “Plumb” in block letters near the stem face. A red dot logo is inset under the name stamp on top of the stem.


I slid an exploratory pipe cleaner through the stem to make sure that the airway was open, then dropped the discoloured Vulcanite into a bath of Oxyclean and warm water to soak. While the Oxyclean worked to soften and raise the oxidation, I began work on the stummel.
I reamed a thin layer of old carbon cake from the chamber and tidied up the remnants with some sandpaper wrapped around a marker. With the chamber clear, I could see that the briar was in good condition inside the bowl, without any crazing or heat damage, so I moved on to clearing a fair deposit of old tars and debris from the shank and airway using cotton swabs, pipe cleaners, a scraper and isopropyl alcohol. Despite the look of the first couple of swabs, the gunk came out without too much effort.


I removed the ugly crust of carbon lava from the rim the old-fashioned way, with a couple of cotton swabs wetted with saliva. The enzymes in human saliva do a great job of breaking down the deposits without stripping the original finish.


With the dirt and tars gone, I set up the stummel with an overnight alcohol treatment to both deep clean the internals and sanitize the pipe. I more often than not do this using cotton balls rather than kosher salt; the cotton is tidier than salt (and harder to spill) and the results are comparable. I stuffed the bowl and shank with cotton and added isopropyl alcohol until the cotton in the shank became damp. You can see in this pic, taken just moments after filling the stummel with alcohol, that the tars left inside after a regular cleaning dissolve quickly and get caught in the cotton.

I set the stummel aside to let the alcohol treatment do its work, and closed up for the night. When I came back to the bench the next day, I removed the spent cotton and finished cleaning the stummel by scrubbing the exterior of the briar with Murphy’s Oil Soap and a toothbrush. Murphy’s is gentle o the wood but does a great job lifting away the layers of old wax, dirt, and grease that typically build up on pipes through use and handling.

I rinsed the stummel under fresh running water, then toweled it dry. Now clean inside and out, I set the bowl aside to rest and find its new moisture equilibrium. While the stummel rested, I rescued the stem from the Oxyclean bath and scrubbed away the now soft oxidation using 0000 steel wool followed by Magic Eraser. A few pipe cleaners dipped in alcohol made short work of the light tars hiding in the stem’s airway.

Now clean and back to its original black colour, the stem was looking pretty good except for a few light tooth dents at the button. A light sanding removed most of the damage, but left a couple of deeper marks showing. Rather than thin the bit too much with more sanding, I applied a skim coat of clear CA glue to the area to fill the dents. After the glue cured, I sanded the stem to 2000-grit in preparation for final buffing and waxing.


After reassembling the pipe, I took it to the wheel where the entire piece was buffed with Red Tripoli and White Diamond compounds. I finished off the work with a few coats of Carnauba wax to shine and protect the refreshed pipe.
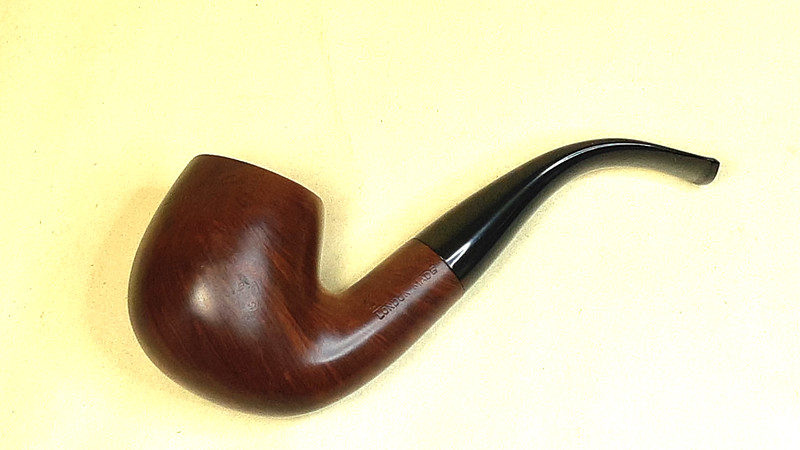
The before and after comparison of this Dr Plumb’s Bent Billiard is really quite striking. Gone is the sickly looking yellow-green oxidation that covered the stem and obscured the stamps. Instead the Vulcanite shines a glossy deep black that complements the darker grain in the briar. That grain is now easily seen through the clear wax finish. A few small fills are evident on closer examination, but this economical English export pipe is now proudly displaying its GBD heritage and has been returned to its current steward for many more years of service.
Thanks for joining me for this estate pipe restoration, which showcases the power of a little TLC. This refreshed Dr Plumb’s 5091 Bent Billiard is certainly more diamond than rough after its time on the bench.
Until next time, Happy Piping! Here’s the finished pipe.


I haven’t seen curves like that since Rachel Welch in 1,000,000 BC. Another brilliant transformation, Charles. It’s quite an attractive piece.
LikeLike
Ah, 1,000,000 BC – the good old days! 😄😄
LikeLike
Reblogged this on rebornpipes and commented:
Great job by Charles bringing a fresh look to this Dr. Plumb pipe. Give his blog a read.
LikeLiked by 1 person