
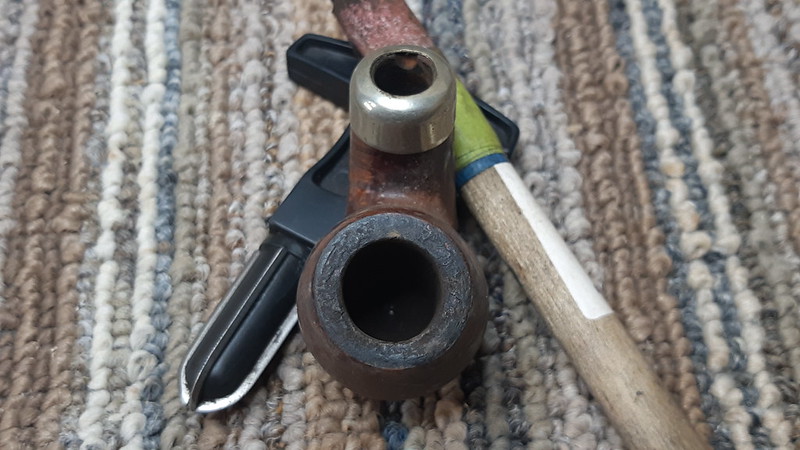
I have been kept busy this summer with repairs and restorations for other pipe smokers and collectors, so when I finally had a bit of free shop time, I decided to work on one of my own. This Peterson-esque full bent stummel came to me in a lot of about a dozen loose bowls. My eye was drawn to the flowing curve of the bowl and the Army mount shank, and I thought I detected some attractive grain hiding under what seemed like decades of dirty and grime.
This series of pics shows the stummel as it looked when I started working on it. Visibly dirty everywhere, the exterior needed a good cleaning, and the chamber was packed nearly solid with old cake in the bottom half of the bowl. I was pretty sure that the airway and any moisture sump in the shank were completely blocked up with old tar and debris.


The left shank is stamped “WELBOR” over “Made in France”. The nickel shank cap is marked “EP” in a diamond, over a trio of faux hallmarks. The “EP” mark indicates that the cap is electroplated (usually nickel over brass). The faux hallmarks are, well, faux. They add visual interest to the cap but tell us nothing about the pipe. Unfortunately, I didn’t find any other information on the brand online either. If anyone can share any details on the Welbor line, please comment below!

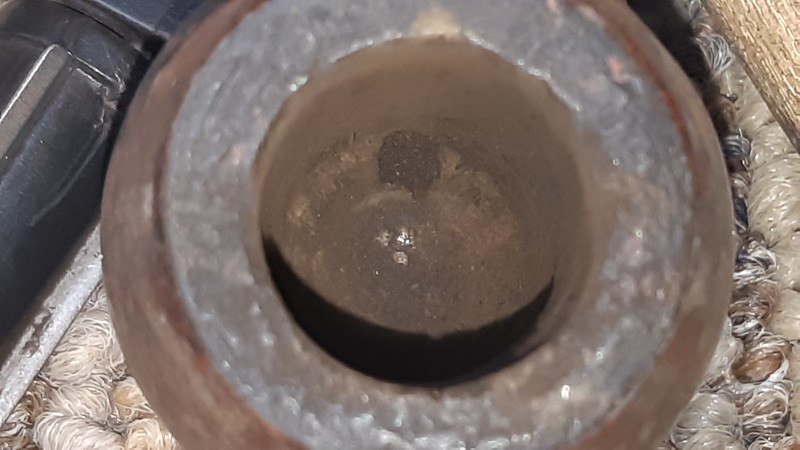
Getting started on the cleanup, I reamed the chamber clear of all the old cake and tidied up with some sandpaper wrapped around a dowel. Impressively, the chamber walls and floor were in nearly pristine condition under it all.
I forgot to snap a pic after cleaning the shank, but there was nothing extraordinary about that process – lots of cotton swabs and pipe cleaners dipped in 99% isopropyl alcohol went in and lots of old tars came out. I also confirmed the existence of a moisture sump in the shank, so this Welbor was certainly inspired by Peterson’s System pipes.
I also scrubbed down the exterior of the briar with Murphy’s Oil Soap and a toothbrush. It took several applications to cut through the thick layer of dirt and grease covering the briar, but it did eventually come away. The cleaning also loosened the old glue holding the shank cap in place. I set it aside to clean separately while I carried on with the stummel’s refurbishment.

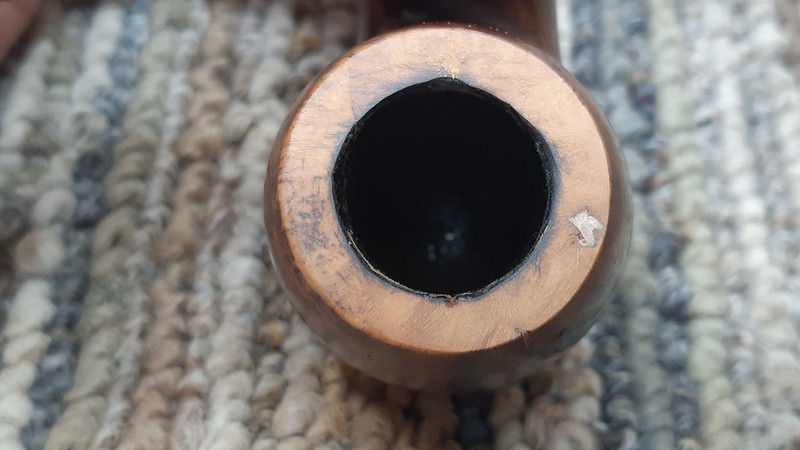
The rim was in a bit of a state, with both a crust of lava and several larger dents and dings. To smooth it out and regain a flat profile, I topped the bowl lightly on 220-grit sandpaper.

As these pics show, the toping revealed two sizeable fills on the rim, the larger of which wrapped over the edge of the rim and carried on down the face of the bowl. The inner rim edge was also rather out of round.
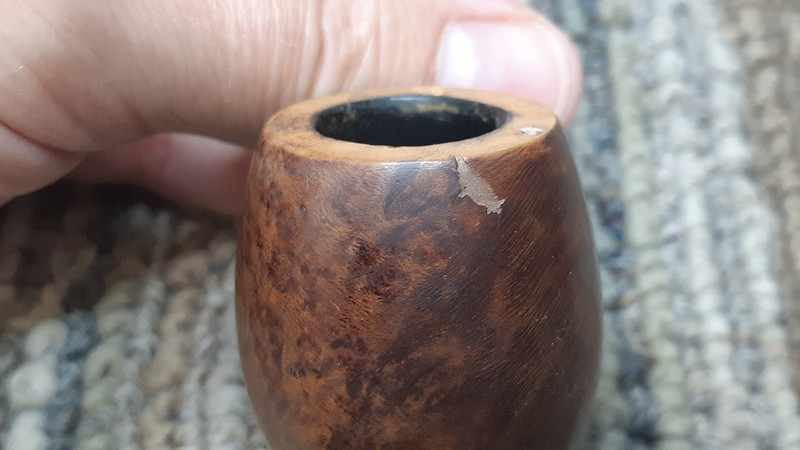
I used a scrap of 220-grit sandpaper to cut a bevel into the inner rim edge. This reestablished a round look and removed the worst of the jagged edges left behind by scraping the chamber walls with a knife blade.

Here again my camera managed to avoid me while I worked to first dig out the old putty fills before refilling the flaws with a mixture of CA glue and briar dust. This pic shows the bowl after the initial sanding of the new fills.

With the briar restored, it was time to reinstall the nickel shank cap. I used a few drops of CA glue to bond it in place, and a bit of 0000 steel wool to gently remove a bit of squeeze-out and polish up the cap at the same time.

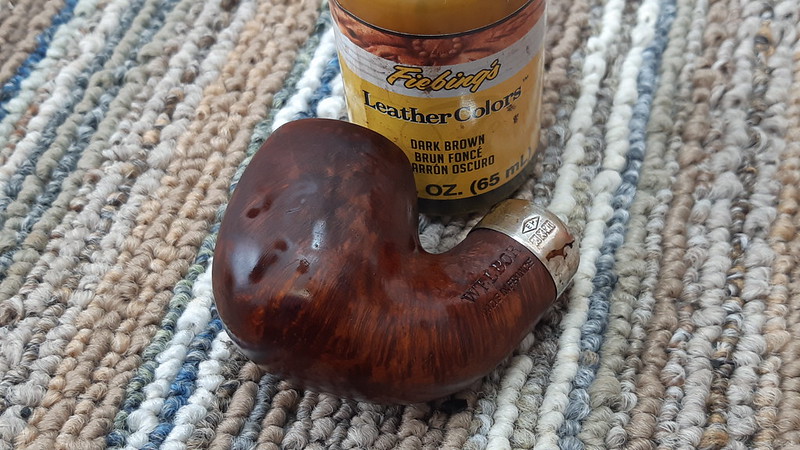
Now in the home stretch for the stummel restoration, I hit the briar with a fresh coat of Dark Brown leather dye to even out the finish. I let the dye dry on the stummel, then buffed the excess away by hand with a towel. A wipe of mineral oil helped to set the new stain and add depth and pop to the new finish.

I let the oil sit on the briar for just a few minutes before buffing away the excess by hand. Then it was time to fit a new stem.
As you can see in this pic, I started with a new pre-cast Vulcanite stem blank that fit the pipe’s aesthetic and size. The tapered tenon had to be rather carefully worked to match the contours of the shank mortise. Patience, a few files and sandpapers and a good set of calipers really help here!
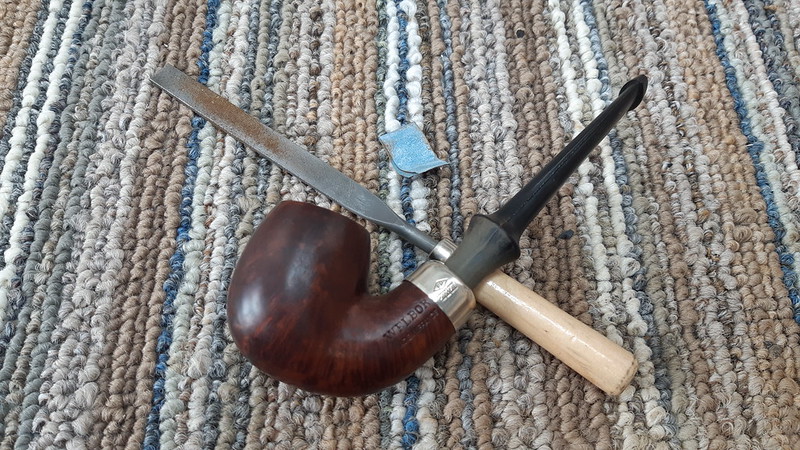

Once the stem fit properly in the shank, finishing the rest was a simple matter of knocking off the casting marks down the sides of the stem blank, then sanding and polishing the stem with sandpapers from 220 through to 2000 grit.
When the hand polishing was done, I slid a pipe cleaner down the stem’s airway, then warmed the Vulcanite over the heat gun until it became pliable enough to bend. When I was happy with the contours, I dipped the stem under cold running water to cool it down and set the new shape.

Then it was time to take the pipe to the buffer for a run of both Red Tripoli and White Diamond compounds followed by a few light coats of Carnauba wax to shine and protect the restored pipe.
This French-made Welbor has really transformed during its time on the bench. Though a few small handling marks are still visible here and there around the bowl, the pipe has gone from old junk to an entirely respectable pipe that any pipe smoker might feel good about adding to the rack and rotation. And that attractive grain I thought I spotted at the outset? You’ll need to check out the final pics below.
Thanks for joining me for this estate pipe restoration project. I hope you enjoyed following along. This pipe is now available for purchase on the Pipe Inventory page. Contact me if you’d like to make it yours.
Until next time, happy Piping! Here’s the finished pipe.


Wow ! Amazing. You’ve given it a new life.
LikeLiked by 1 person
Thanks! I didn’t have any expectations from this one when I started working o it but it cleaned up very nicely!
LikeLike
Reblogged this on rebornpipes and commented:
With both my current interests in restemming pipes and older French Briar pipes this was a fun read. Great work as always Charles. Great read. Thank you.
LikeLiked by 1 person
Thanks , Steve! It was fun to peel away the layers of grime on this one to find a rather nice pipe hiding underneath!
LikeLiked by 1 person