
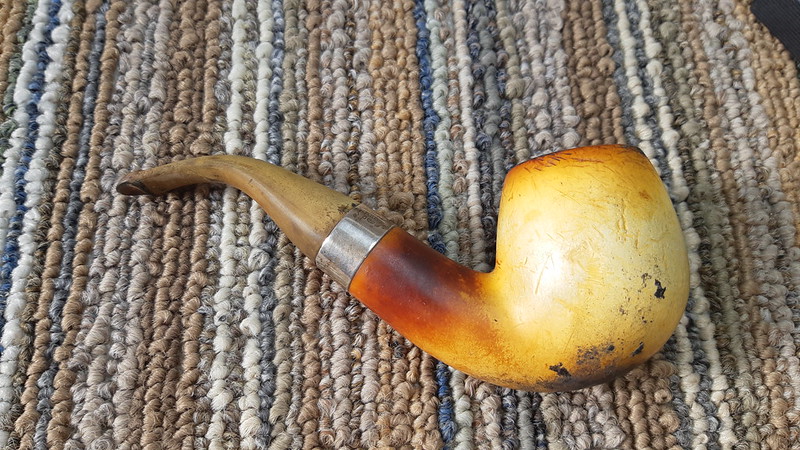
Over the years, I have developed a generally good sense of the age of a pipe based on its size, shape and finish, among other details. This Peterson Sherlock Holmes meerschaum, however, surprised me.
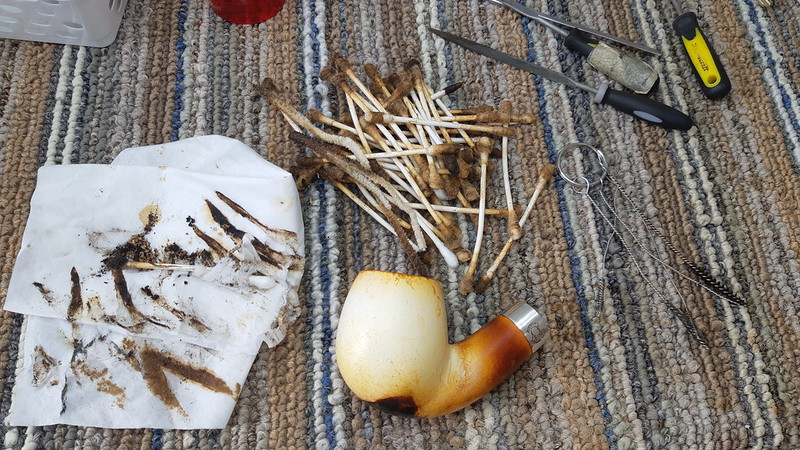
When it arrived on the work table, the pipe was looking far from its best. The stem was heavily oxidized with mineral accretions and a few tooth dents at the P-lip button, the rim was completely obscured behind a thick crust of carbon “lava”, and the bottom of the bowl carried a large black splotch of unknown origin – a concentration of colouration in the meer? A slipshod bowl repair?


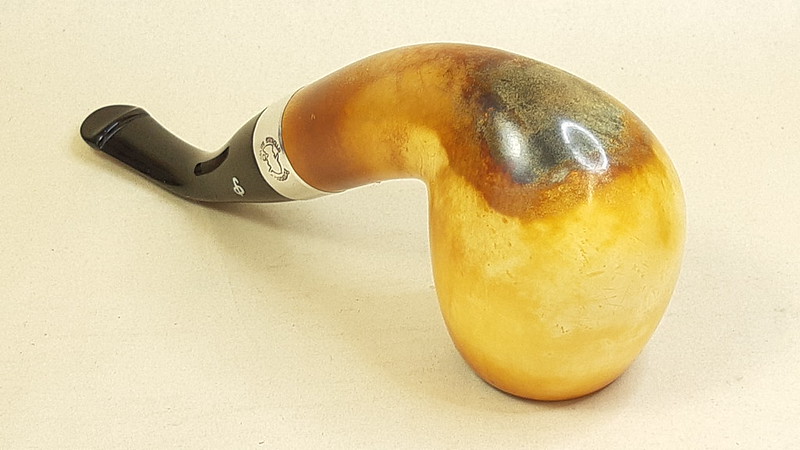
The shank band was marked on the left flank with “Peterson’s” over an image of Sherlock Holmes over “Stirling Silver”, and “Peterson’s” over a trio of hallmarks – Hibernia for the City of Dublin, Ireland, a .925 stamp indicating the purity of the silver, and a date letter, “V” . The stem was inset with a silver Peterson “P”.
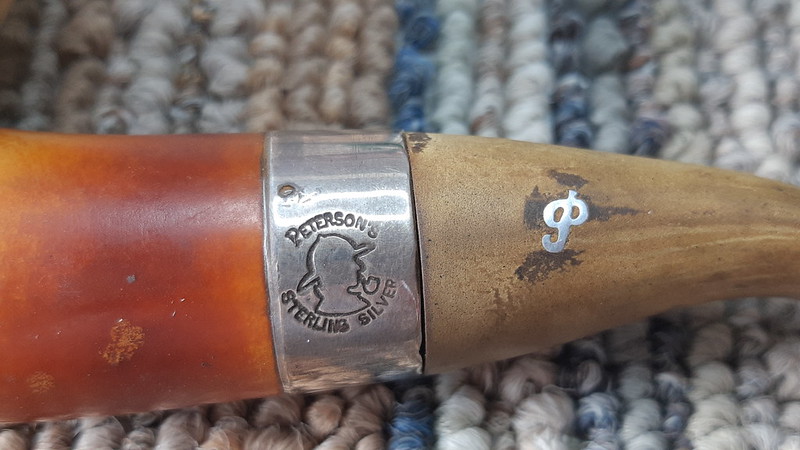

A quick check online here told me that the uppercase, italicized “V” indicated that the pipe was made in 2006 – surprising, given the overall wear and tear to the pipe. I had assumed that this Peterson belonged to the earlier first release of the Sherlock Holmes pipe series from the late 1980s. Mark Irwin’s exhaustive book, The Peterson Pipe, identifies the pipe on the table as a meerschaum version of the “Professor” shape –
“A three-quarter bent billiard (XL16) named after the Napoleon of Crime and Holmes’ greatest adversary, Professor James Moriarty.”
– Mark Irwin, The Peterson Pipe, p 178.
Now that I knew what I was working with, I got down to the business of restoring this obviously well-loved but rather neglected pipe. The first thing I did was twist off the dirty, discoloured stem and drop it into a bath of Oxyclean and warm water. While I worked on the stummel, the Oxyclean would raise and soften the oxidation, making it easier to remove.

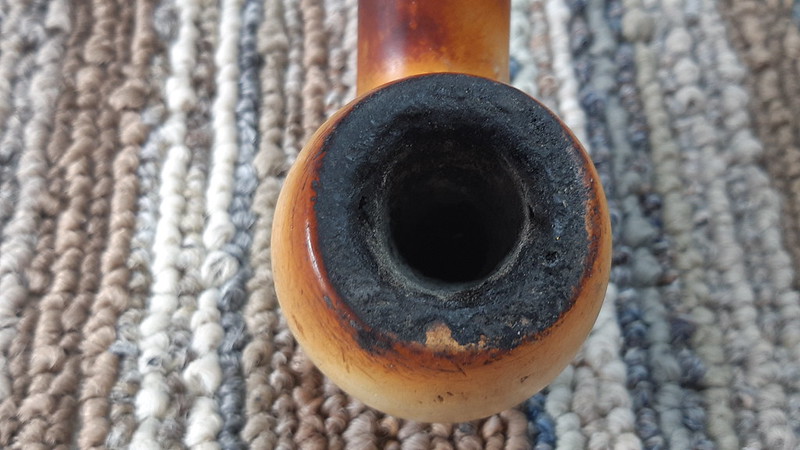
With great care, I reamed the chamber to remove what seemed like 15 years of carbon cake. I started with my smallest reamer and worked up through the sizes until the remaining cake could be removed with sandpaper wrapped around a pen.
As a friendly reminder, meerschaum pipes do not need, nor benefit from, a layer of cake in the bowl. Meerschaum is a mined mineral – a soft rock, if you will – that will not burn like briar. Building a cake layer in a meer is, therefore, unnecessary; in fact, too much cake in a meerschaum can crack the bowl.
The chamber was in surprisingly good condition under the carbon cake, so I left the chamber for now and scraped the lava crust from the rim with my trusty penknife, taking care not to scrape off any meerschaum in the process. As these pics show, the rim was slightly out of round.


With the worst of the carbon removed form the outside of the pipe, I took the stummel to the sink and scrubbed it down gently using a toothbrush dipped in clean water. This dissolved and removed more of the carbon as well as the layer of grease and dirt clinging to the exterior of the meerschaum. It’s important not to use too much water here as the meerschaum will absorb it readily and become soft and easily marred.
This pic of the still-damp meerschaum also shows how a bit of water can provide a sneak peek of sorts as to how the meer will colour during the waxing process.

After it’s scrub-down, i let the stummel dry completely before moving on. When I was certain that the meerschaum had regained its original hardness, I scrubbed the exterior with 0000 steel wool to remove more of the surface dirt and grime and smooth out some of the many dents, dings and handling marks peppered across the stummel. Some of that mystery stain on the bottom of the bowl came away, but most remained. On close inspection, I could not find any sign of a repair, so I my best guess was that it was caused by an overabundance of tobacco tars in that area. I polished it smooth with the steel wool then moved on.


When I was happy with the exterior, I switched gears and spent what turned out to be a significant amount of time cleaning the pipe’s internals, which were jam packed with tars and tiny bits of tobacco debris. As this pic shows, I worked on the shank and airway with scrapers, shank brushes and a half dozen or so pipe cleaners and a whopping 60 cotton swabs dipped in 99% isopropyl alcohol to get the job done. Whew!
Using alcohol to clean a meerschaum pipe is one of the most misunderstood concepts in pipe restoration. While alcohol is absolutely anathema to pressed meerschaum (it will dissolve the glue holding the meer dust together), high-proof alcohol evaporates almost instantly and its moderate use poses no harm to block meerschaum (ie a pipe carved from a single block). Soaking block meerschaum in alcohol is to be avoided, as, like water, alcohol can soften the meerchaum, making it prone to damage during cleanup.
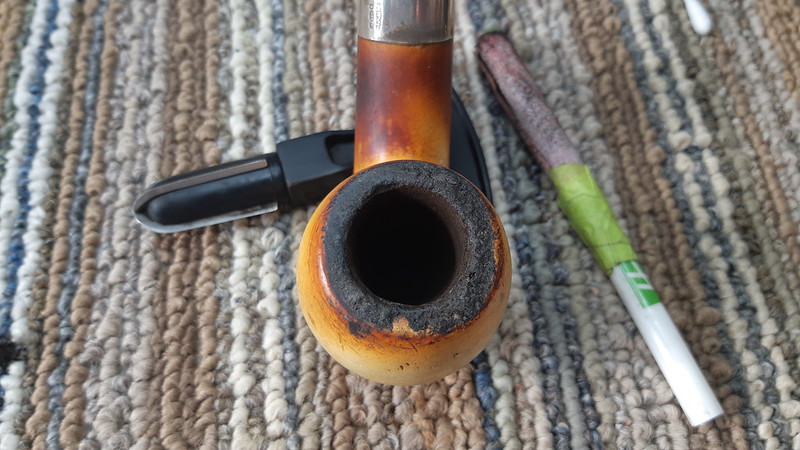
When I was finally satisfied with the state of the stummel’s internals, I gave the rim one last going-over with 0000 steel wool to clean things up a bit more and restore the inner rim’s round appearance. As this pic shows, I did not sand out every, or even most of, the myriad scratches and handling marks. Rather, my goal was to reveal as much of the meerschaum as possible without erasing the pipe’s history. These “character marks” tell the story of this pipe and deserve to remain.

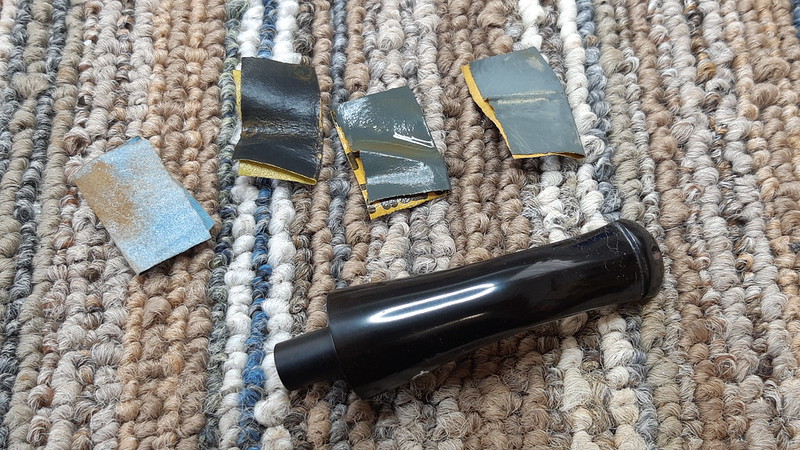
The stummel was now clean and much refreshed, so I set it aside and rescued the stem from its long soak in the Oxyclean solution. I scrubbed the exterior down with 0000 steel wool and Magic Eraser to remove the now soft oxidation and other grime, and ran a few alcohol-dipped pipe cleaners through the airway to remove the old tars lurking within. My apologies – I forgot to take photos during this process.
The stem had several deep tooth dents on both top and bottom of the P-lip button. After roughing up the surface of the vulcanite with 220-grit sandpaper, I drop-filled the damaged areas with a mixture of thick CA glue and activated charcoal powder and let the glue cure overnight.


When I came back to the work table, I filed and sanded the patches smooth. The patch on the bottom of the bit needed a few touchups, but eventually I was able to sand and polish the stem to 2000-grit in preparation for final buffing.


Before that could happen, though, the stummel needed a dip in the beeswax crock pot. I paid $5 for this tiny electric crock pot at a thrift shop, and it works really well for this purpose. I no longer need to mess around with multiple wax mops over a heat gun. After corking both bowl and shank to keep the wax out of the internals, I popped the stummel into the hot wax and allowed it to soak for several minutes on each side.
The hot liquid wax is drawn into the porous meerschaum by capillary action, where it interacts with the tars absorbed through smoking the pipe, drawing the colour to the surface. The process is rather mesmerizing to watch and the white meerschaum turns, in this case, a deep honey brown in just a few minutes.


When the meerschaum had soaked up as much wax as it could, I removed it from the crock pot and removed the corks while the residual wax was still soft. I left the stummel to rest and cool on a clean towel.

When the stummel was cool, a quick hand buffing with first the terry towel and then a microfiber cloth removed the excess wax from the surface and brought up the shine to a beautiful high gloss finish.
Not to be left behind, the stem, after being mounted to the shank to avoid rounding the edge of the stem face, got a run on both the Red Tripoli and White Diamond wheels followed by several coats of Carnauba wax to shine and protect the revitalized Vulcanite.
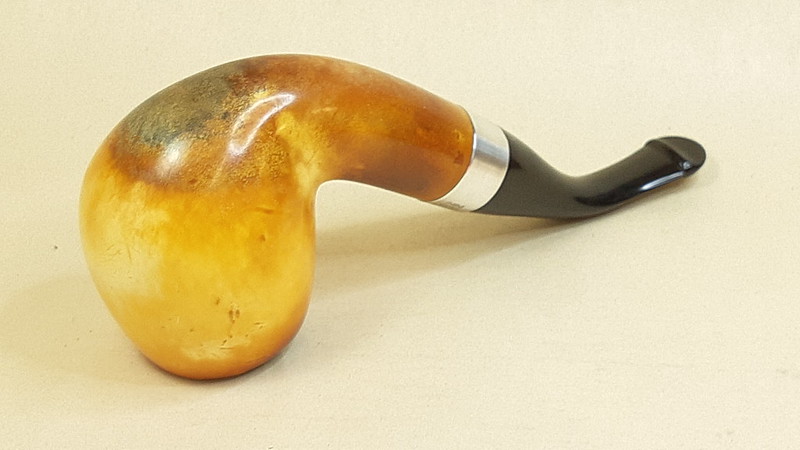
The restored pipe, with its richly coloured meerschaum and polished stem, is now looking every inch the well-loved pipe it is. Though only 15 years old, this 2006 Peterson Sherlock Holmes XL16 “Professor” had seen a lifetime of use before it came to me for refurbishment. It is now fresh and ready to provide at least another lifetime of faithful smoking companionship to its steward.
Thanks for joining me for this rather dramatic estate pipe restoration. This project is a great example of the power of a good cleaning and a little TLC.
Until next time, Happy Piping! Here’s the finished pipe.


….very nice!
LikeLike
Holy jumpin’, Charles. That was one of your crustier efforts. The pipe now looks mouth worthy again. Well done.
LikeLiked by 1 person
Thanks, David! “Mouth worthy” is definitely what I was aiming for! 😄
LikeLike
Beautiful job. For some reason, this pipe stirs a sense of wonder in me. What is the story behind this pipe and the condition it came to you in? Do you ever know those stories, and without revealing anything personal about the owner, can you comment on the environment this pipe was kept in to have it age at such an accelerated rate? As always, a beautiful job restoring this pipe without erasing its character.
LikeLiked by 2 people
I don’t have the details of this pipe’s history other than that it was inherited from a family member.
The relatively rapid oxidation of the stem would indicate that the pipe sat in full sun for a long time – sunlight is the main culprit behind oxidation. Vulcanite stems can also react to the smoker’s body chemistry, leading to discoloration or mineral buildup at the bit.
In the end, I believe that this pipe was well loved, used regularly, but maintained infrequently or not at all. I’m glad I was able to get it back I to fighting shape for it’s new steward.
LikeLiked by 1 person
Reblogged this on rebornpipes and commented:
This is a true rebirth of this beautiful Meerschaum. Well done Charles.
LikeLiked by 2 people
Thanks, Steve!
LikeLiked by 1 person
Cracken job Charles! I hope it continues to be loved but taken better care of.
Lance
LikeLiked by 2 people