
As some of you may be aware, I have recently started doing repairs and restorations for a Toronto-based pipe seller. Some of these jobs are more involved but many are straightforward projects like this Ashton Pebble Grain, which really just needed a bit of sprucing up.
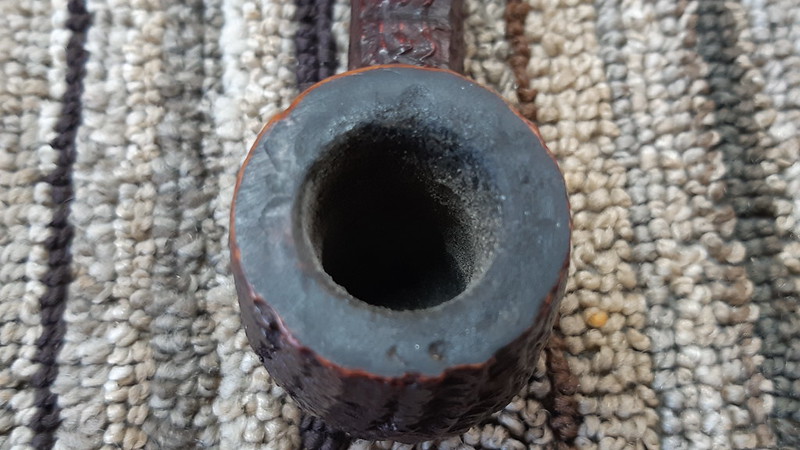
As you can see in this series of shots, the pipe was in pretty good estate condition when it arrived on the bench. There were no massive dents or missing briar. The pipe retained its original stem and the stamps were in great shape, but somehow the pipe came across as a little unloved. I’ll admit that most of this impression was based on the thick cap of carbon “lava” that covered the briar underneath. I hope that there was no major damage also lurking there. Apart from the rim, the pipe had some tooth dents on the wide, flat stem, and the sandblasted finish was dirty and dull.


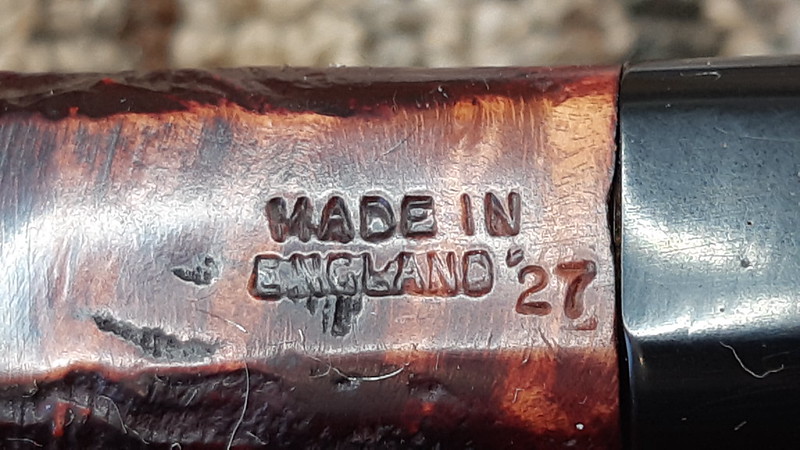
The flat underside of the long shank carries several stamps. From left to right, they read “XXX” in an oval followed by “Ashton” over “Pebble Grain” then “Made in” over “England” and finally the shape number, “27”.


I often find that the natural work flow of a restoration begins with the largest task and moves through the rest in descending order of magnitude. Thus, for this Ashton Pebble Grain, I started with cleaning the carbon crust from the rim of the bowl. Sometimes this can be a hard slog. If the carbon is really thick or particularly dense, cleaning the rim can be a painstaking and time-consuming process.
Here, however, I got lucky. The lava crust was fairly substantial but soft so I was able to remove most of it with some elbow grease and a wad of 0000 steel wool. The remaining carbon, especially the bits stuck in the carved areas of the rim, needed more attention, this time with cotton swabs wetted with a natural enzymatic cleaner – saliva.
With the carbon buildup removed, the original texture and grain were revealed. Here I got lucky again – there were no dents, dings or other damage to the rim.
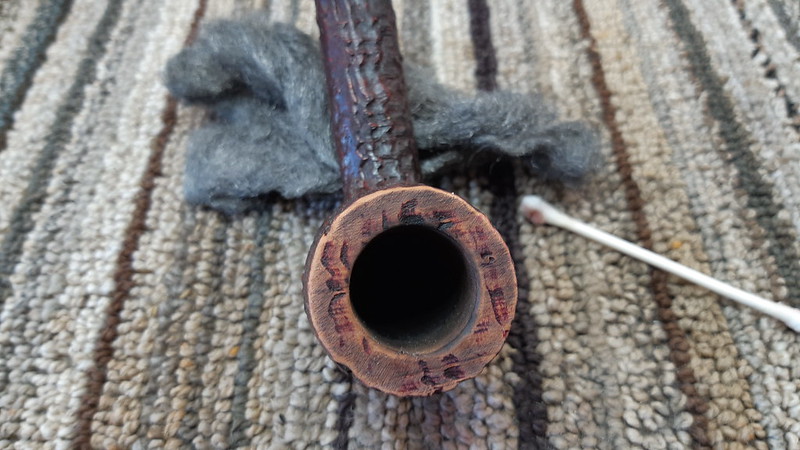

There was comparatively little carbon cake to clean out of the chamber, so little that passed on my reamer and completed the task with just a bit of sandpaper wrapped around a dowel. The inside of the chamber was in great shape so I moved on to cleaning the shank and airway.
A few pipe cleaners dipped in isopropyl alcohol removed a very small amount of tar and other dirt from the shank. Likewise, the airway in the stem was easily sorted.


I may otherwise have skipped this next step, but as this Ashton is destined for a new pipe steward after I am finished with it, I packed cotton wool into the shank and bowl and filled the stummel with more isopropyl alcohol. Left for the night, this deep clean would take care of any remining, more stubbornly set, tar deposits.

When I came back to the shop the following morning, the alcohol had all but evaporated and the cotton wool had turned a light shade of brown. I was now confident that this pipe would not be passing on any ghosts of tobaccos past to a new steward.

I removed the used cotton wool and let the pipe sit for a few minutes to give any lingering alcohol time to evaporate. Then it was time to address the tooth-dented stem. I mounted the stem to the shank and taped off the briar to avoid accidentally sanding the finish further up the shank than necessary. You’ll note in the pic below that I left about 3/16th of an inch of briar open before the tape. This was to allow a bit of wiggle room for cleaning up the stem-to-shank junction for a smoothly flowing shape down the length of the pipe from bowl to button.

Sandpaper in 220 through 2000-grit smoothed out the tooth chatter on top of the stem and the deeper dents on the underside. You may also notice a light sanding of the briar on the exposed end of the shank. This was done to address a slight misalignment of the stem. Sadly there was no easy fix for the rounded edges of the stem face (typically caused by sanding or buffing the stem separately from the shank) without replacing the tenon. That was outside of my brief for this project, so those edges would stay as-is.


With the pipe clean internally, it was time to give the exterior a scrub with Murphy’s Oil Soap and a toothbrush. Murphy’s does a great job lifting dirt, grease and old wax from the briar.

I then used a couple of stain pens to touch up the finish on the rim and the end of the shank to match the original. A thin coat of mineral oil helped set the touchups and gave new depth to the finish while injecting some moisture into the old briar.


I let the oil sit on the pipe for just a minute or two before buffing away the excess by hand with a towel. Then the pipe was allowed to sit for an hour or so to find its new equilibrium. When I came back to it, I again hand buffed the pipe with a towel before taking it to the buffer for a run of Red Tripoli and White Diamond compounds for the stem and a lighter buff on the White Diamond wheel only for the stummel. I used a gentle touch to avoid packing buffing compound into the nooks and crannies of the sandblast finish. A few light coats of Carnauba wax on the entire pipe finished the work on this Ashton XXX Pebble Grain Canadian.
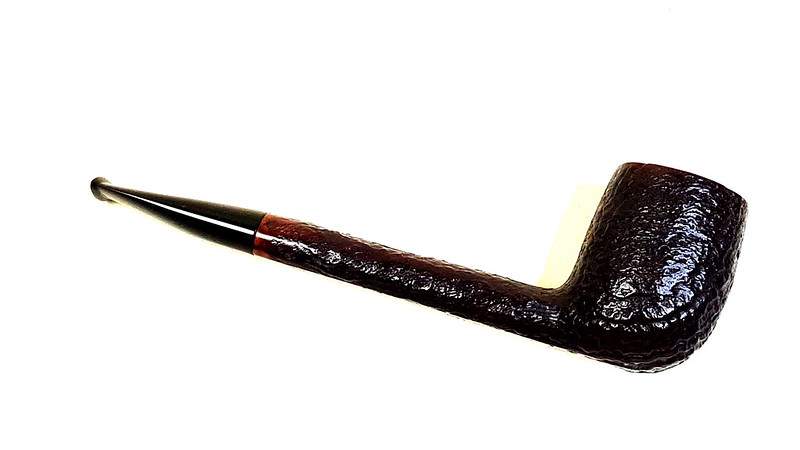
I’ve said it before. and I’ll say it again – I’m always impressed by the results of even a basic Ream & Clean project like this one. This Ashton pipe was in quite good condition at the outset, though much of its appeal was hidden under that crust of carbon on the rim. With that out of the way and the tooth chatter smoothed out, this lovely English pipe is once again showroom ready and looking every inch a top-quality estate pipe. I am certain it will find a new home with a new steward very soon.
Thanks for joining me for this estate pipe cleanup. Until next time, Happy Piping!
Here’s the finished pipe. (And please excuse the lint on the pipe in these shots. Apparently freshly buffed pipes are quite clingy!)


Beautiful work on a nice pipe. All my pipes could use this kind of spa day. Cheers!
LikeLiked by 1 person
I think I might as well, David! 😁
LikeLike
Thank you So So very much. I enjoy these and look forward to them. R.Compton No.Cal
LikeLiked by 1 person
Thank you! It’s great to hear from you. I’m glad you’re enjoying the site!
LikeLike