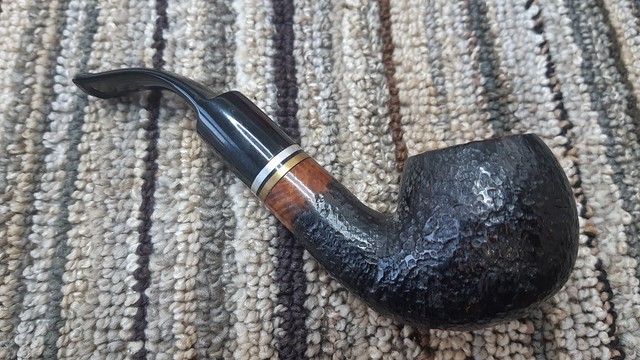
I’ve been doing a number of simpler estate pipe cleanups lately, so I guess that means it’s time for a more in-depth project. Today I’m dealing with the last of three Aldo Velani pipes recently acquired as part of an estate lot, this one an Executive series 292 Bent Apple.
Aldo Velani pipes are what I might call a middle-of-the-road marque made by Cesare Barontini in Italy specifically for export to North America. They seem to be on par, quality-wise, with lower end Savinelli or Peterson pipes, with some showing small fills and perhaps a thicker lacquer finish than I would otherwise like, but I really appreciate their acrylic stems, which all seem to be well fitted and share the same wide, comfortable bit. The line’s chunkier dimensions scream “Italian Made” to me, as well.
Here is the pipe as it looked when I brought it to the worktable. Overall it seemed to be in very good shape, though the black finish was chipped away in spots. There were four small putty fills surrounding the nomenclature on the left shank that stood out a little too much for my liking, and the acrylic stem was greasy and covered in fine scratches but no dep tooth marks.


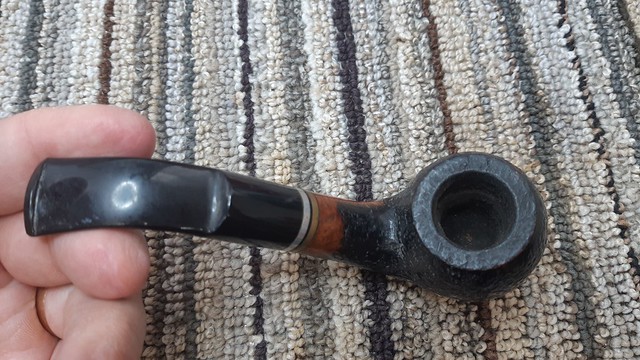


The pipe is stamped on the left shank with “Velani” in script over “Executive” in block letters over a shape number, “293”. The underside of the shank is marked “Italy”.


I started the basic cleanup of this pipe by twisting off the stem and running a few pipe cleaners dipped in alcohol through the airway. It didn’t take much work to get things presentable.

While I had the stem in hand, I had a look at the tenon. While nothing was wrong with it, I took a few minutes to funnel the end of the airway to improve the flow of air through the pipe.


Leaving the stem for now, I moved back to the stummel and reamed the chamber back to briar. The chamber walls and floor were in good shape under the light cake.


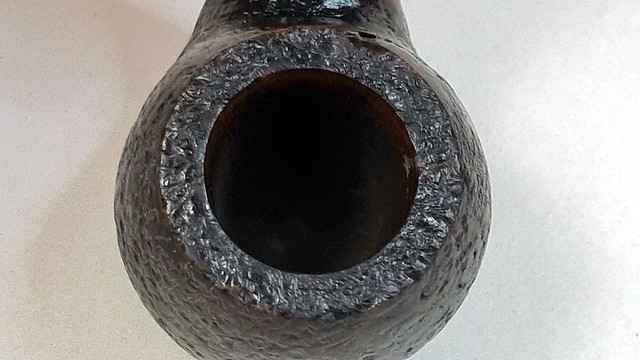
So far, so good – or so I thought. Wiping the exterior of the stummel down with alcohol on a cotton pad brought a few fills to light in a very unfortunate location – the fills wrapped up the left side of the bowl and over the rim. Closer inspection told me I wouldn’t be leaving them as found.


I spent some time with the dental pick, scraping the old putty out of the fills in order to get a better handle on the situation. Cotton swabs dipped in alcohol helped to clear out the loose putty. As this pic shows, I found a total of three problem fills on the rim – two at the four o’clock position, and one more, tighter than the other two, at the eleven o’clock position.

While I decided what to do about the fills, I worked on cleaning the rest of the stummel’s internals. I used quite a pile of cotton swabs and pipe cleaners, in addition to a scraper and dental pick, before I was satisfied that the pipe was clean. A follow-up scrub with Murphy’s Oil Soap removed the dirt, grease and old wax from th exterior of the briar, and brought the flaws into focus.


I think it’s important to point out here that the damages shown in the above pic are not cracks in the briar in the usual sense, but rather are natural flaws in unfortunate locations. There is no evidence that the cracks are creeping or speeding across the briar at all. Once repaired, the stummel should hold up just fine under normal use.
I began the repairs by addressing the exterior first, filling both the rim cracks and the old shank fills with a mix of briar dust and thick CA glue. Once cured, I used needle files and sandpaper to smooth out the shank fills. A fine diamond burr in the rotary tool helped me to match the texture of the rim fills to the surrounding rustication.


While smoothing out the fills on the shank, I spotted another natural fault line in the briar, this time running lengthwise up the end of the shank, splitting the “Italy” stamp in two. You can see that it’s not quite a crack, but has the potential to become one down the road. I decided to preemptively install a shank band to keep things in one piece.


Moving back to the rim repair, while the exterior was now looking better, the interior cracks needed some attention. Using CA glue inside the chamber is a no-no as it won’t stand up to the heat of burning tobacco and can release toxic fumes. Instead, I use JB Weld high-heat epoxy. A small amount smeared into and across the cracks did the trick. The JB both fills the gaps and binds the two sides of the crack together.


I let the epoxy cure completely, then scraped and sanded away the excess, leaving it only in the crack.

I was now nearing the home stretch on this restoration and it was time to refinish the stummel. I hit the briar with a coat of Fiebing’s Black leather dye to blend the repaired areas into the original finish. I let the dye dry, then buffed away the excess by hand with a towel. A wipe of mineral oil helped bring the finish together and inject some moisture into the briar.


After looking at the nearly finished pipe for a bit more, I decided that the wide nickel shank band wasn’t working for me – it covered too much of the nomenclature and looked out of scale with the silver and gold bands on the stem. I removed it and replaced it with a thin brass band instead. This doesn’t obscure the stamps and looks a bit more balanced to my eye. If I had had a black plastic washer, I might have added it to the stem to space out the rings a bit more, but c’est la vie!


Finally it was time for a final buff and polish. I gave the stem a run on both Red Tripoli and White Diamond wheels to erase the spiderweb of handling marks on the acrylic, while the stummel was rather more lightly buffed with White Diamond to bring up the shine on the smooth areas. Then the whole pipe was given several light coats of Carnauba to shine and protect the new finish.
The rejuvenated pipe is a good-looking piece with enough Italian heft to fill the palm of one’s hand nicely while the orange-peel rustication provides just enough tactile input. The cracks are gone and the replaced fills blend nearly invisibly into the rustication. They are very difficult to find if you don’t know where to look. The black acrylic stem is as smooth as glass and bends in exactly the right spot to hang this Bent Apple from the jaw very comfortably indeed.
If you’ve been looking for an affordable Italian pipe to add to your rack and rotation, this Velani Executive 293 is available on the Pipe Inventory page now.
I hope you enjoyed following along on this restoration project. It was a good test of my patience at times, but I’m pleased with the end result and trust that the rejuvenated pipe will serve a new steward for many years to come.
Until next time, Happy Piping! Here’s the finished pipe.