
The pipe on the worktable today is a good example of how Brigham made good use of old stock left over from discontinued product lines. I think this practice was very much in line with Herb Brigham’s penchant for tinkering with pipe shapes and his son Michael’s focus on efficiency and cost-savings in the 1980s.
To set the stage for this pipe, the stummel is clearly from the Norseman line of “Scandinavian-inspired” pipe shapes introduced by Brigham in the 1960s. This line of rusticated freehand style pipes, along with its smooth-finished brother line of Valhalla pipes, represented the top tier of Brigham pipe production until the lines were discontinued in 1980 in favour of the President series.
My apologies for the image quality here. This scan from a late 1970’s Brigham brochure shows the Norseman and Valhalla pipes. The W5 shape is the pipe at the top of the page.
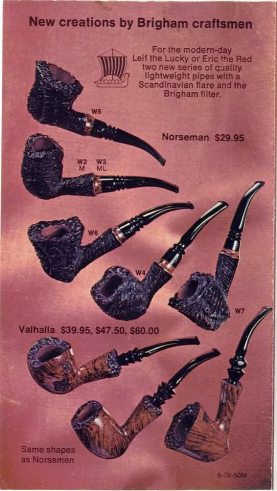
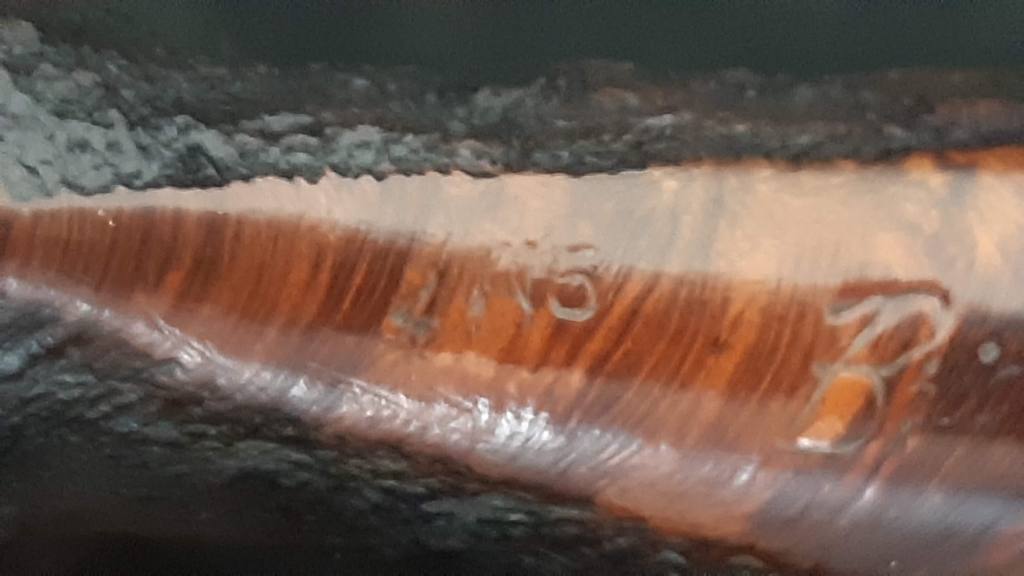
The Norseman line was stamp “9Wx”, where x represents the shape number 2 through 7, so a Norseman in shape 5 would be stamped “9W5”. However, when the line was discontinued, there were quite a few stummels left in inventory. The solution was to fit a standard Brigham tapered stem, mark the pipes as 4-Dot grades and get those surplus stummels from the warehouse to the store shelves.
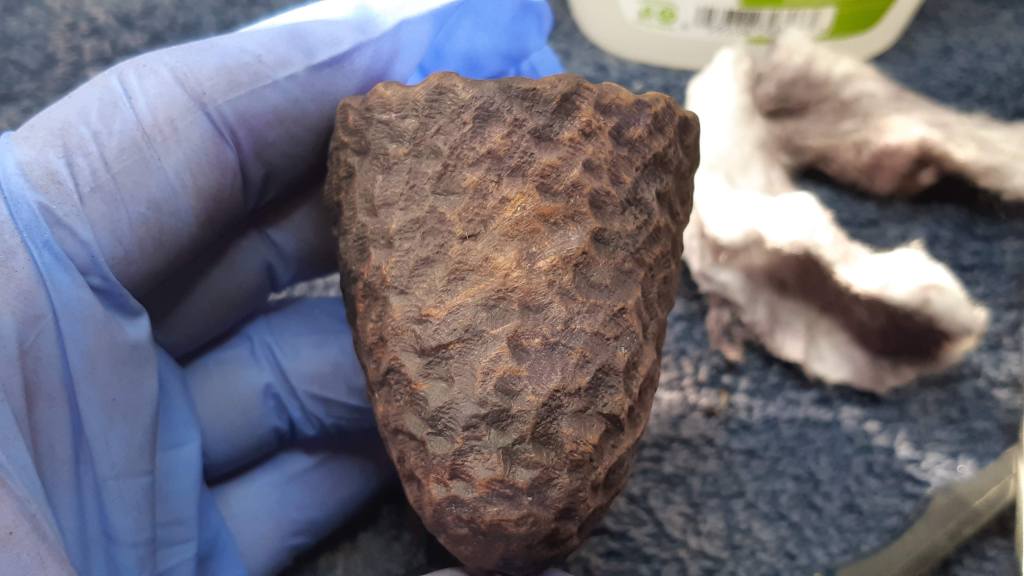
And that’s where this Brigham “4W5” enters the story. Sadly, the original stem was long gone, but the stummel itself, despite a peppering of white paint flecks and a good layer of dirt, was in very good condition.


Luckily, I hold on to every spare part I come across or scavenge from broken pipes. A dig around the shop produced just what I needed to give this vintage briar a new lease on life – a used but sound aluminum Brigham tenon and a suitable stem blank.

Before I got into fitting the new stem I had to clean the stummel inside and out. I started with the exterior, attacking the paint flecks with dental pick, brass bristle brush and alcohol. This was tedious, meticulous and time-consuming work, picking at the paint to loosen its grip on the briar, then wiping the rustication with alcohol on a cotton pad to remove the debris from the surface. It took quite a while, but eventually the paint was gone. I also removed quite a bit of lava from the rim of the bowl, where it had filled the hollows, flattening the appearance of the deep rustication.


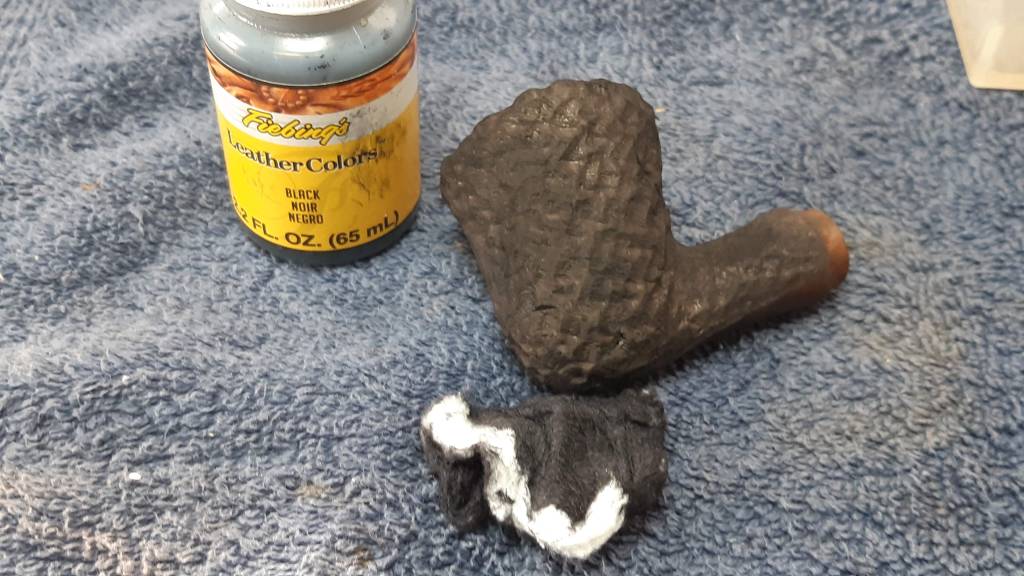
The cleaning had, inevitably in this case, lightened the finish considerably. To restore the original colour, I applied a coat of Fiebing’s Black leather dye to the briar. I let the dye coat dry, then carefully removed it from the smooth areas on the shank to reveal the reddish briar underneath. A wipe of mineral oil helped to enliven the finish.

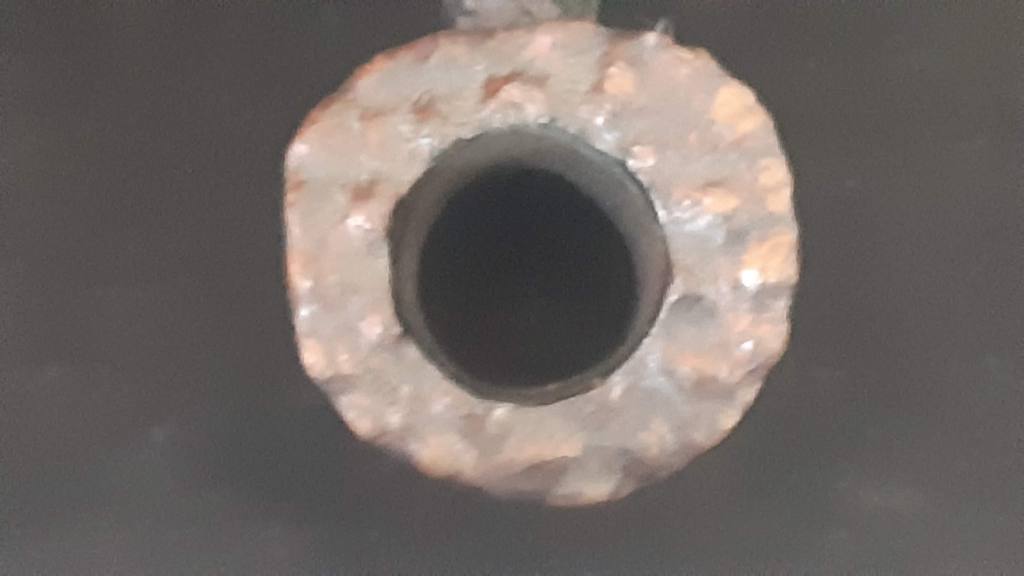
I also cleaned the shank and airway with alcohol, cotton swabs and pipe cleaners – a necessity before fitting a new stem. The chamber had been previously reamed clean of cake, so I only needed to tidy things up there with a scrap of sandpaper. Sadly the pics of the internal cleaning have gone AWOL, but regular readers will have seen me do this many times before and there really is no trick to it.
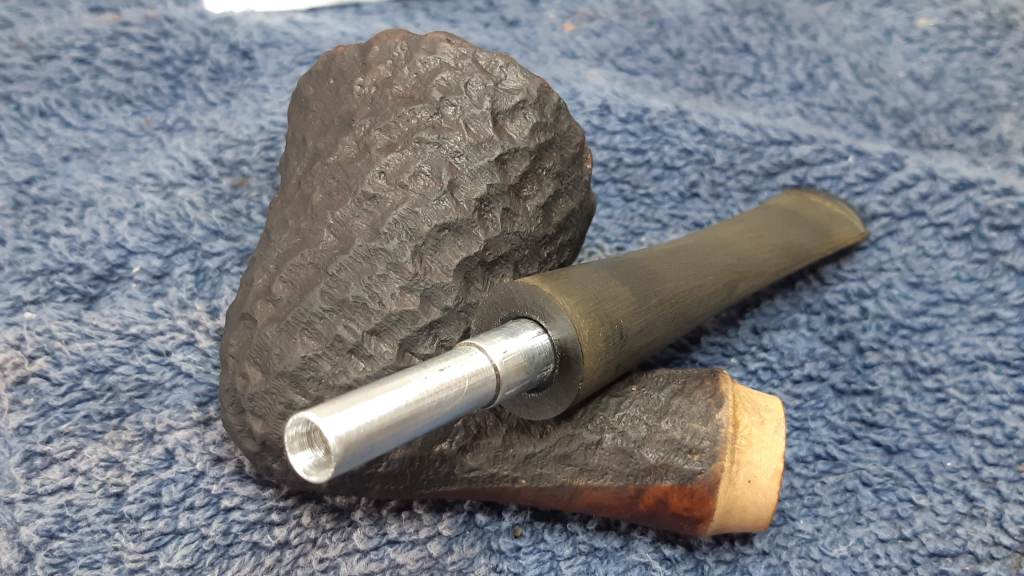
Now that the stummel was ready to go I moved on to fitting the new stem. This was made simpler by the fact that Brigham tenons are a standard diameter, so the “new” aluminum tenon twisted into place in the shank easily but snugly. This pic shows the tenon fitted to the shank with a Brigham Rock Maple distillator in place. You can see just how far the distillator will extend into the stem.

There was some work to do on the new stem to make the whole assembly fit together properly. I needed to drill out the airway to accept the length and diameter of the distillator. A mortise would also need to be drilled into the stem face for the tenon.
This pic shows the drill bits used for this task, marked with a bit of tape at the required depths. The first three drill bits enlarged the airway in easy steps, while the fourth opened the mortise.
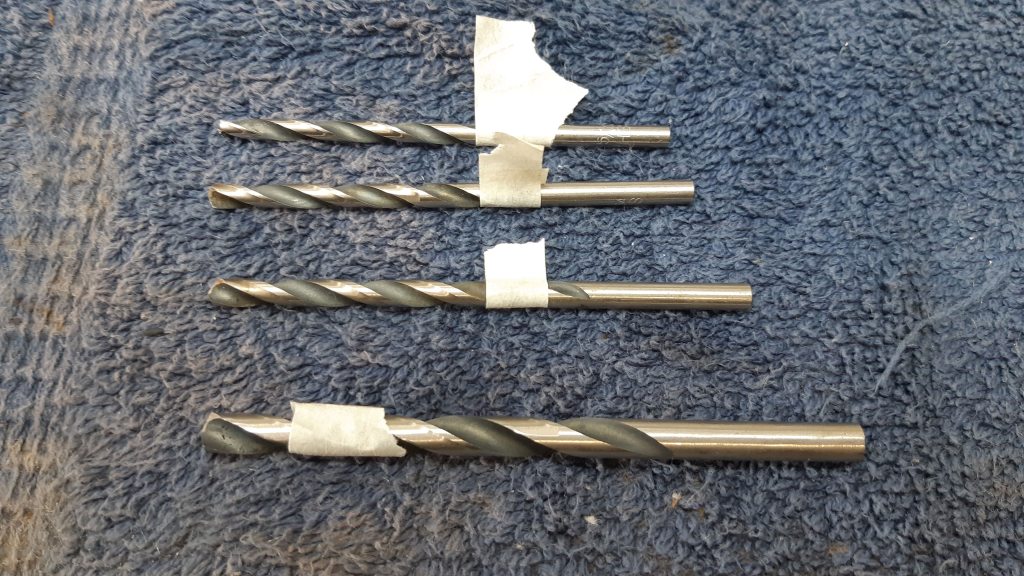
I’ll state the obvious here for those of you looking to tackle a similar re-stemming project. It is very important that the drilling maintains the original alignment of the airway! A small deviation can be excused, but if your drill wanders too far the stem will sit crooked on the pipe.

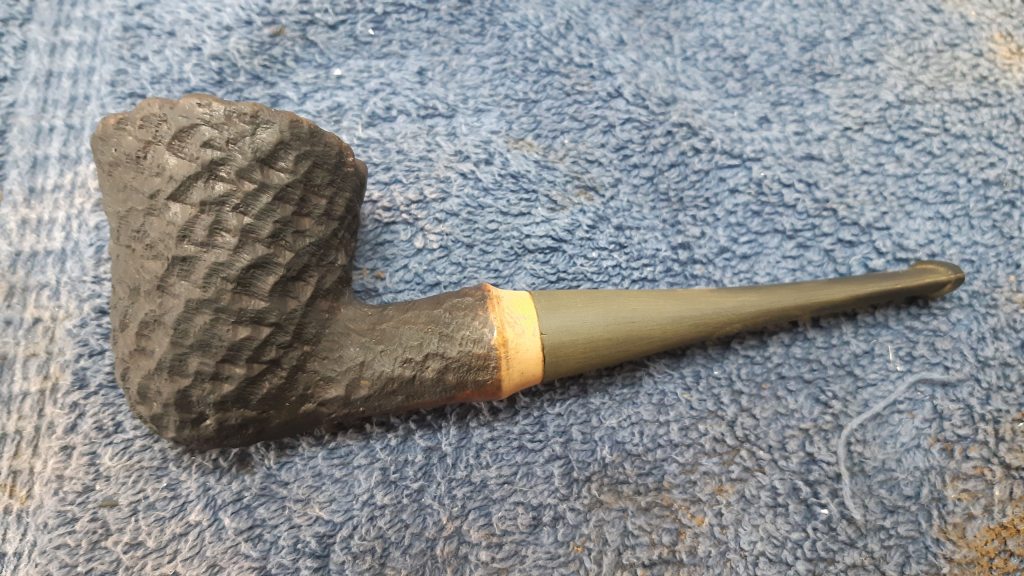
A quick test fit of the new stem, again with a distillator in place, shows that my drilling was satisfactory. The new stem fits flush to the end of the shank.

Factory Brigham tenons were pressed into the stems and then secured in place with a brass pin, but I choose to assist the stem’s grip on the tenon with a bit of epoxy. On Vulcanite stems like this, JB Weld is my glue of choice (I used clear two-part epoxy on acrylic stems).
I mixed up a small amount of JB Weld and applied it to both the inside of the mortise and the outside of the aluminum tenon. Then the stem is mounted to the tenon and held in place until the glue starts to grip. A bit of petroleum jelly on the shank face helps protect the pipe from any excess epoxy that might squeeze out during assembly.

I set the pipe, stem upright, in my bench vise for an hour or so to make sure nothing moved while the epoxy cured. The moment of truth came when I gently twisted the stem out of the shank. Success!
The job wasn’t quite finished yet, though, The new stem was missing its Dots. In this case, I needed to install four brass pins in a diamond pattern to complete the restoration. Historically, the pinning was done freehand, which accounts for the variation in pin spacing among vintage Brigham pipes. I freely admit to taking full advantage of this fact as I continue to refine my own system for drilling the pin shafts.
This series of pictures shows the process of first drilling the shafts then setting 1/16″ diameter brass rod in each shaft, assisted by a drop of CA glue. When the glue was fully cured, I filed away the excess rod and sanded the stem smooth.


All that was left to do at this point was the final sanding and polishing. Because this was a new stem blank, I had to knock off and smooth out the excess vulcanite along the molding seams before sanding the stem smooth with progressively finer abrasives.
In all, I worked through 220, 320, 400, 600, 800, 1000 and 2000 grits before taking the stem to the buffer where Tripoli and White Diamond polishing compounds erased the last of the sanding scratches ans brought up the shine.
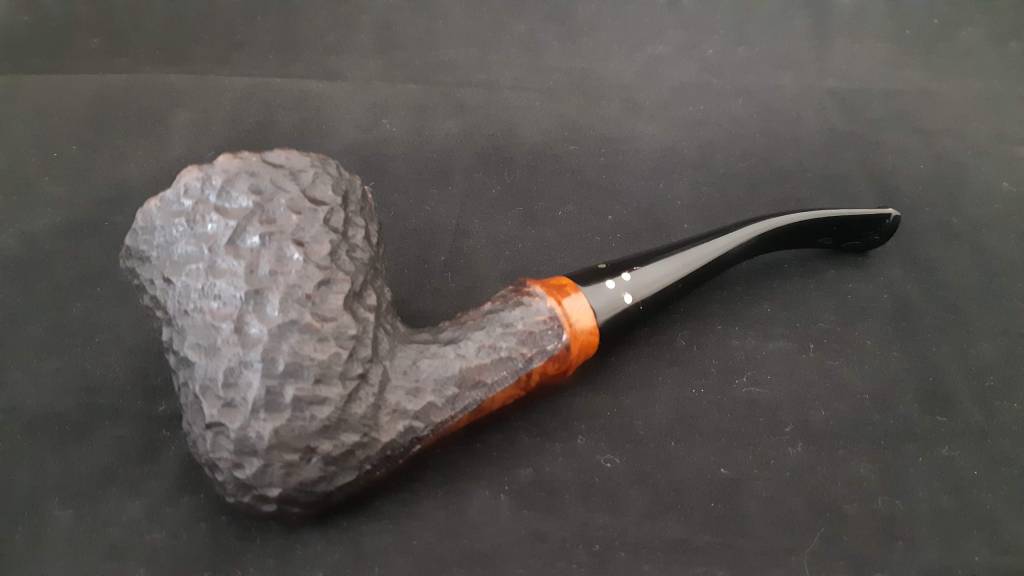
I reassembled the pipe at this point and buffed it with Carnauba wax, lightly on the rustication to avoid packing wax into the crevices, and heavier on the stem to shine and protect it against oxidation. The finished pipe is ready to pack with a favourite blend to inaugurate its second life.
Thanks for following along on this estate restoration with me. The techniques used here make up some of the essential skills of the pipe repairer. Besides that, making a pipe whole again is always a fun and rewarding project. I hope you enjoyed the journey.
Until next time, Happy Piping! Here’s the finished pipe.


Wow, that’s a beauty! Well done Charles.
LikeLiked by 1 person