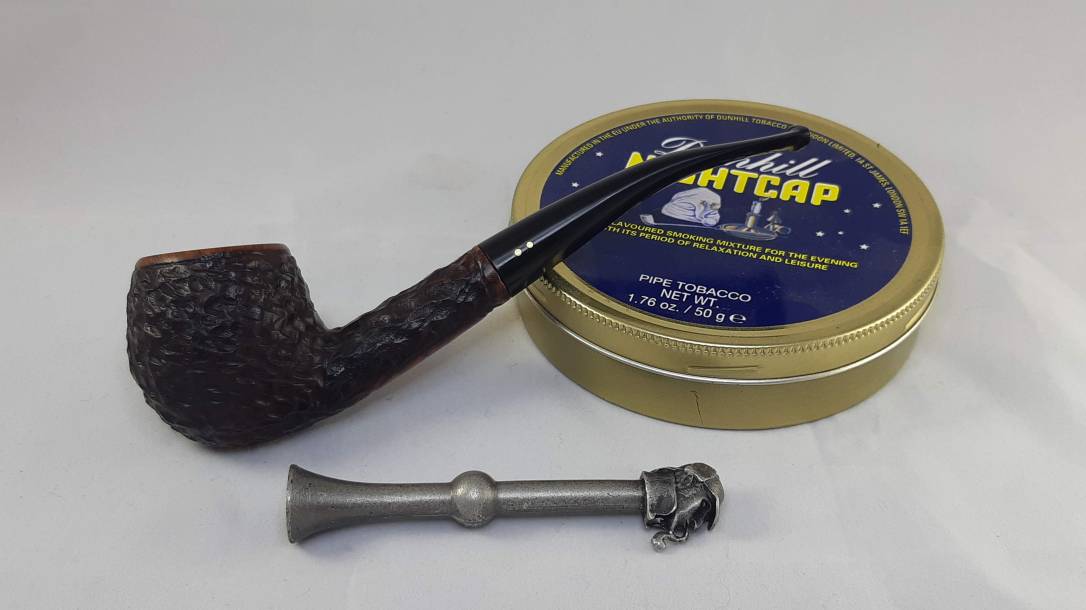
I started collecting Brigham pipes almost accidentally – my dad smoked Brighams, so it was natural that my first briar was also a Brigham – and the collecting began in earnest several years ago when I embarked on the Brigham Shape Chart project. Since then, I have managed to catalog over 80 vintage Brigham pipe shapes, adding about 60 of these shapes to my personal collection. The quest to “catch ’em all” continues with today’s restoration, a Shape 49 Bent Apple in a “Brigham Select” 2-Dot grade.
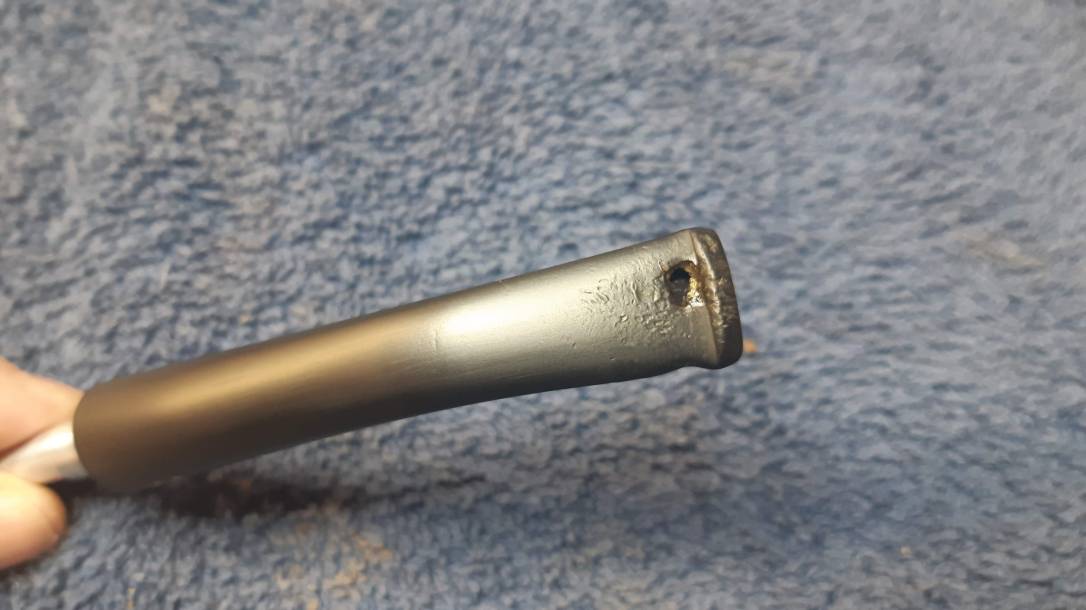
This rusticated pipe arrived on the worktable in decent estate condition, but with a few caveats. The finish was dull and dirty, the smooth rim was obscured by lava and thick cake in the chamber, and the vulcanite stem was oxidized a lovely shade of mustardy green. Most concerning was the bite-through on top of the stem that penetrated into the airway.


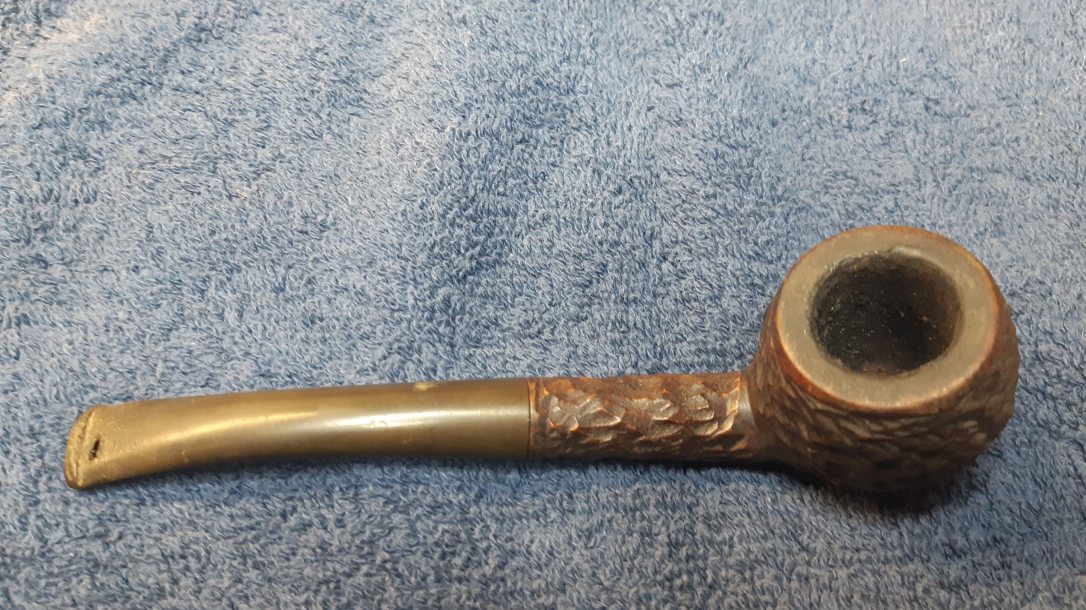


The pipe is stamped on the underside of the shank with “249” then “Brigham” over “Made in Canada” in block letters. This style of stamping dates the pipes to roughly the 1960’s through early 1970’s.

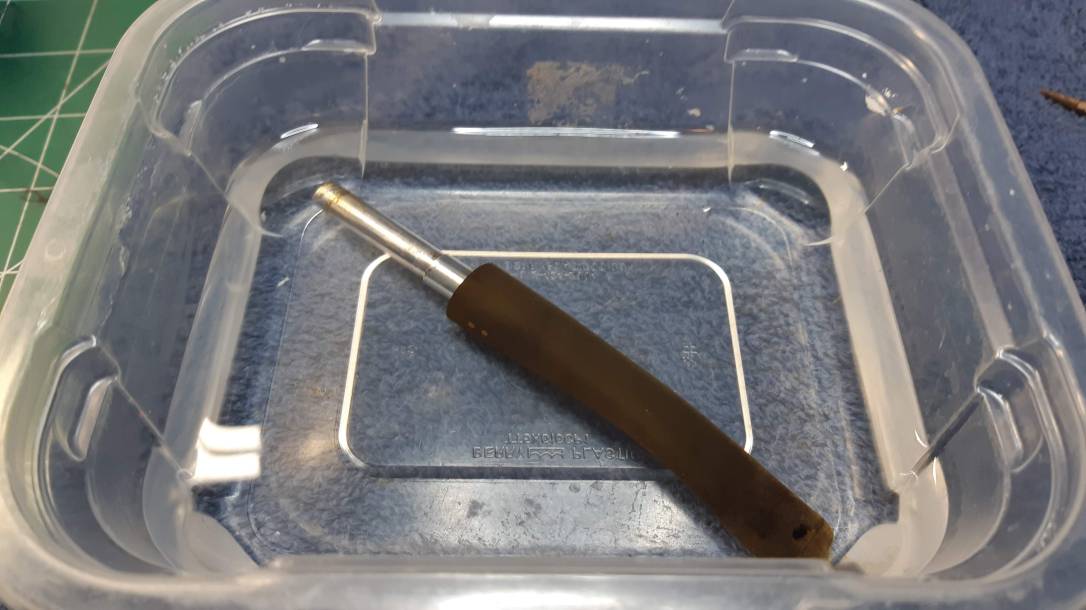
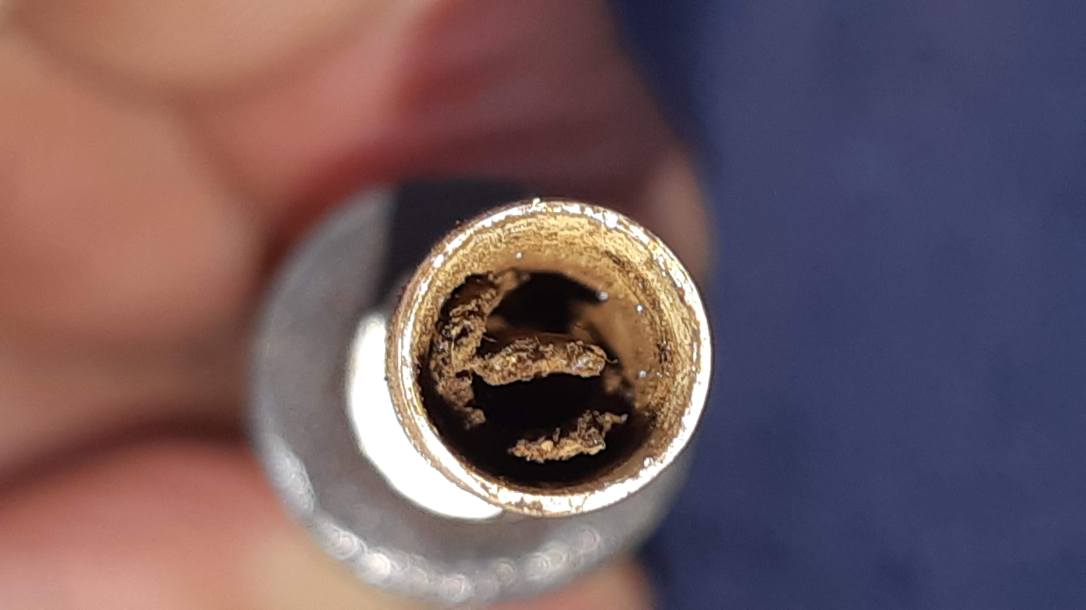
I removed the stem from the pipe and discovered the remains of an old and disintegrating rock maple filter lodged in the aluminum tenon. The filter did not want to go gently, so I soaked the stem in alcohol for half an hour or so to loosen the ties that bind. Even then, I resorted to drilling the remaining debris from the airway. I finished up the internal cleaning with pipe cleaners and more alcohol.

I used my Castleford reamer to clear the old cake from the chamber and tidied up the remnants with sandpaper wrapped around a Sharpie marker. The cake had done its job here; the chamber walls and floor were in excellent shape.

A shank brush, pipe cleaners and cotton swabs dipped in more alcohol cleaned the stummel’s internals of a surprisingly small amount of tars and debris.

I used 220 and 320 grit sandpapers and some 0000 steel wool to clean the lava from the rim and dress off a few small dents and dings. Micromesh pads really brought up the shine on the newly exposed rim. Much improved!

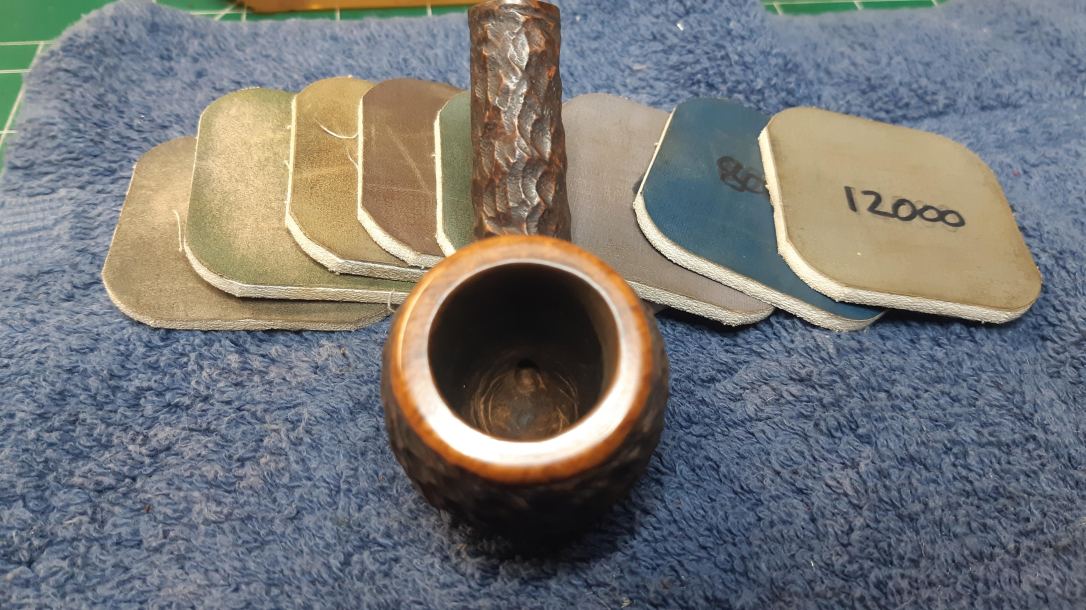
Just before working on the stem, I scrubbed the exterior of the stummel with Murphy’s Oil Soap to remove decades of oils, dirt and other goodies from the rustication.

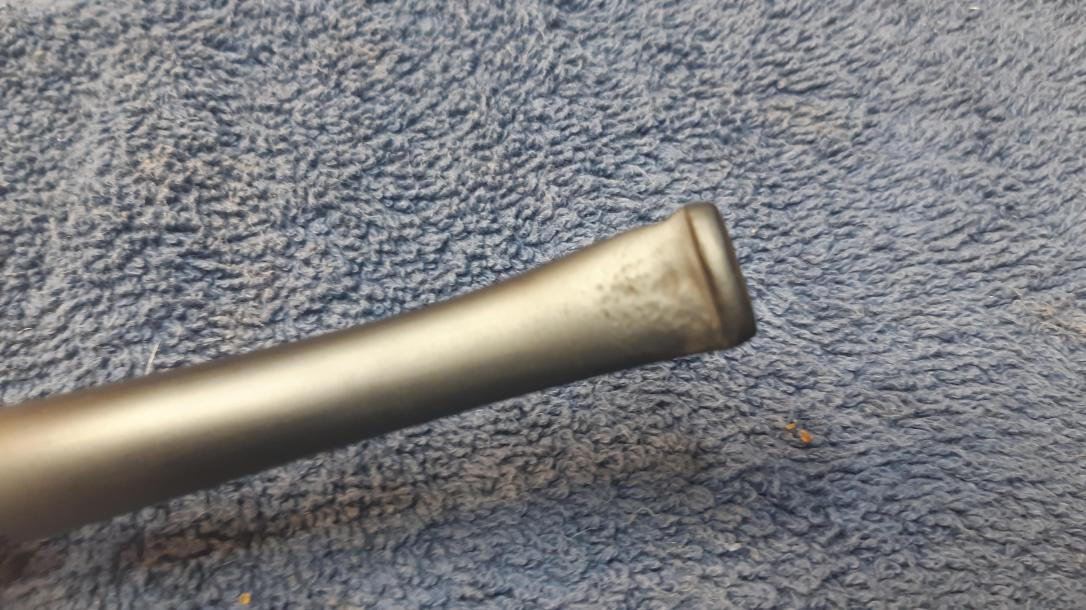
With the stummel cleaned up, it was time to devote some energy to the stem. I soaked it in a bath of Oxyclean and warm water for a few hours and then scrubbed away the softened oxidation with 0000 steel wool and Magic Eraser. A clean stem really shows up the tooth damage.

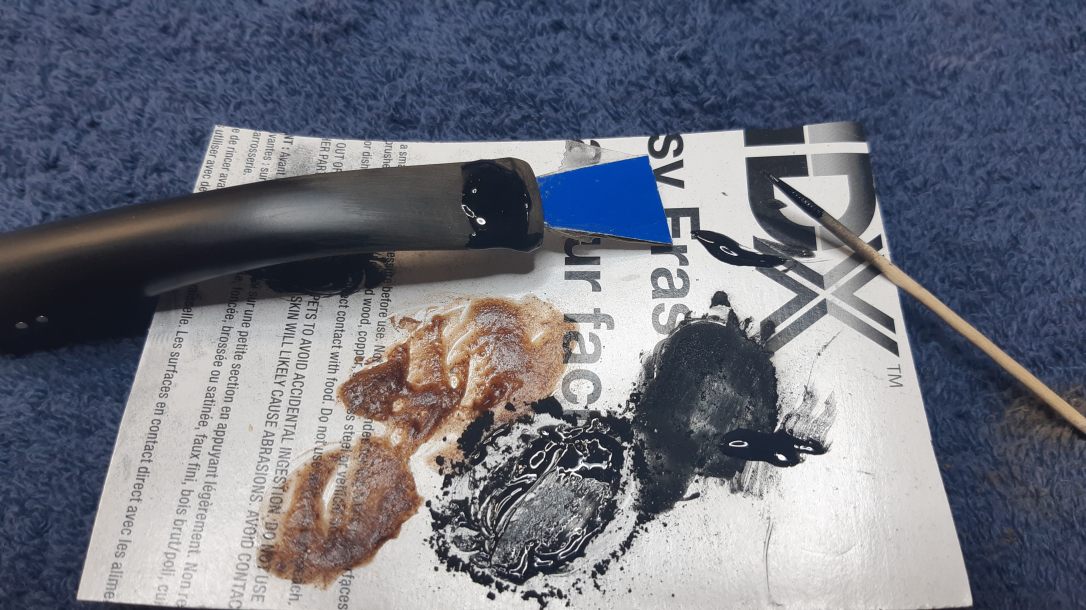
I assembled everything I’d need to repair the stem – a tape-covered cardboard wedge that fit snugly in the slot at the end of the stem, thick CA glue, activated charcoal powder, a toothpick for stirring and applying the patch, and a scrap of cardboard to act as a a mixing palette.

I roughed up the surface of the stem with 220 grit sandpaper, then mixed charcoal powder into a small dab of CA glue. I dropped the patch mixture onto and over the damaged area. The cardboard wedge stopped the patch from flowing into the stem’s airway while it cured.
Now began what turned out to be a rather tedious and tine consuming process of repeated filling and filing/sanding of the patched area to achieve a smooth finish. I don’t think the CA glue likes the up-and-down temperatures of my garage work area, as I had some issues getting the patches to cure properly without embedding tiny bubbles into the glue. A planned new workshop this summer will hopefully create a more stable environment.
At any rate, after more than its fair share of futzing around, I finally got the stem repair to an acceptable level and decided good enough was good enough! I set the stem aside and addressed the pipe’s faded finish by applying a wash coat of Saddle Tan leather dye to the stummel, followed by a full-strength coat of Dark Brown dye to the rusticated areas. I left the smooth rim and stamping patch lighter to stand out against the rustication.


I assembled the pipe and gave the entire piece a wipe with mineral oil to refresh the dry briar and vulcanite. I let the oil sit on the pipe for about 30 seconds before buffing off the excess with an old towel.
Finally, I took the pipe to the buffer for a run of White Diamond compound and several coats of Carnauba wax, being careful not to pack the rusticated finish with blobs of wax.
The finished pipe is looking good after its time on the bench. The briar glows, the black stem shines and the old damage is gone. This Brigham 249 is ready to provide decades of smoking companionship once again, and has taken its place in my personal collection. I’ll be adding the specs for Shape 49 to the Brigham Shape Chart as part of the next update.
Thanks for joining me for this restoration. I hope you enjoyed following along.
Until next time, Happy Piping! Here’s the finished pipe.