
I’ve had the parts of this pipe in a ziplock bag in my refurb box for some time, and decided to pull it out for a look a few days ago.
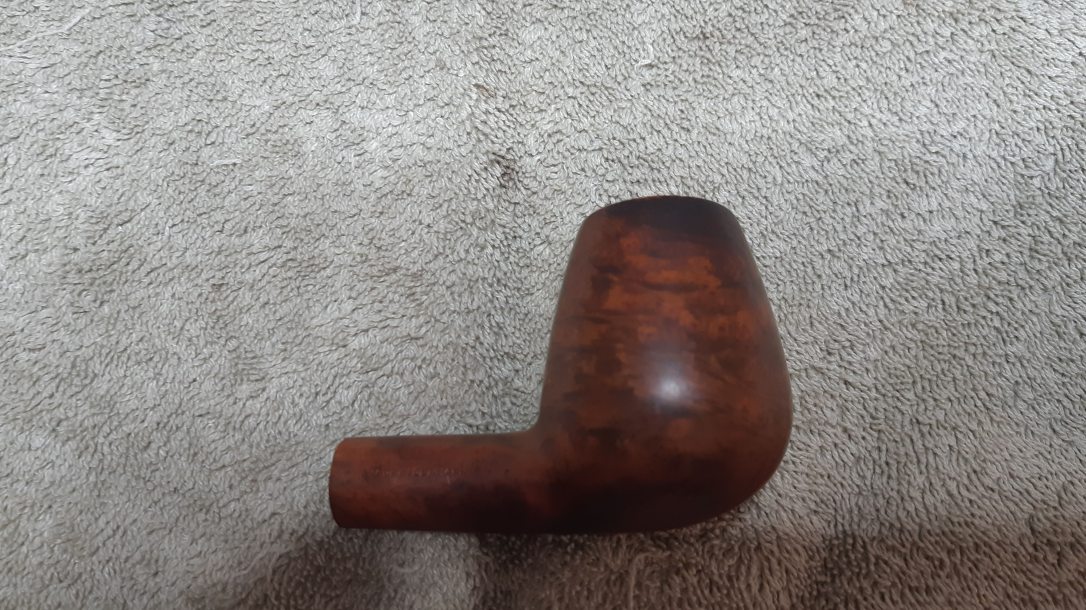
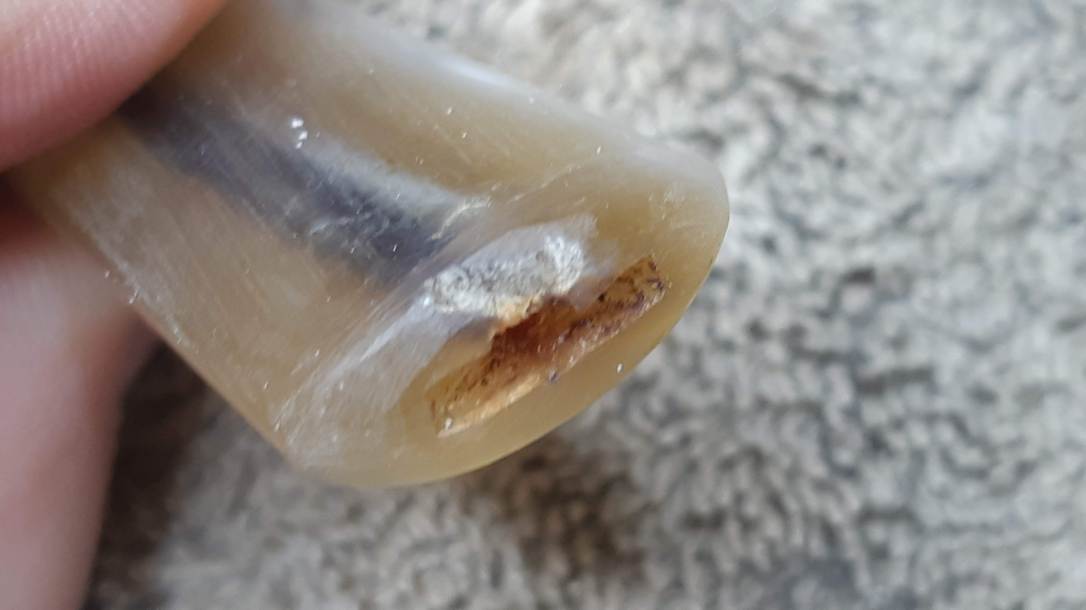
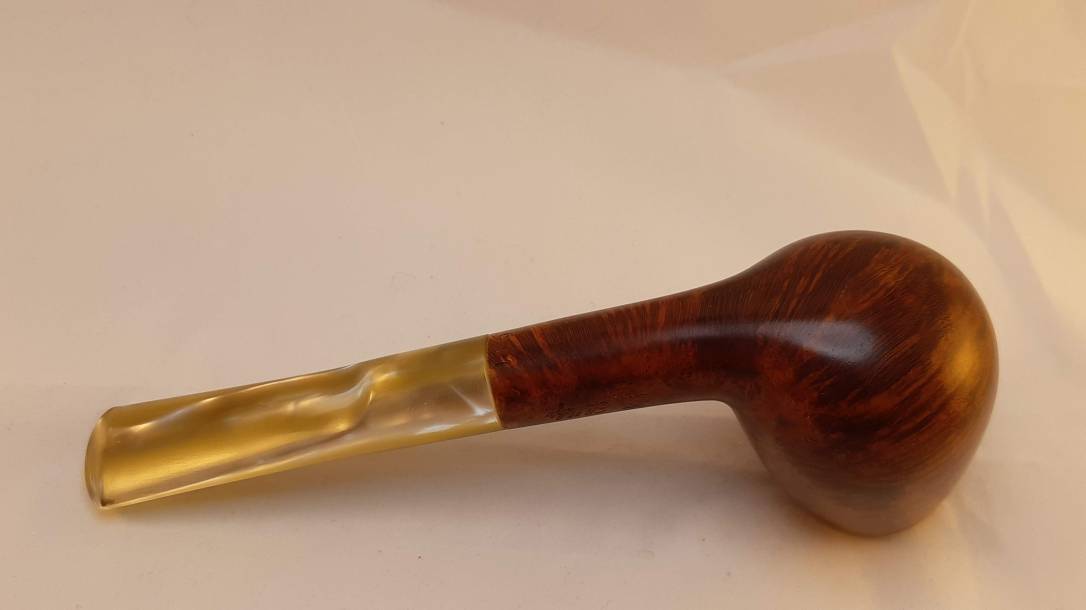
Despite a layer of dust and a crust of lava on the rim, this Peter Stokkebye Volcano had the undeniable appeal of a most capable Danish pipe-maker. I liked the overall lines of the pipe, though they were a bit hard to visualize with the stem broken off at the tenon.
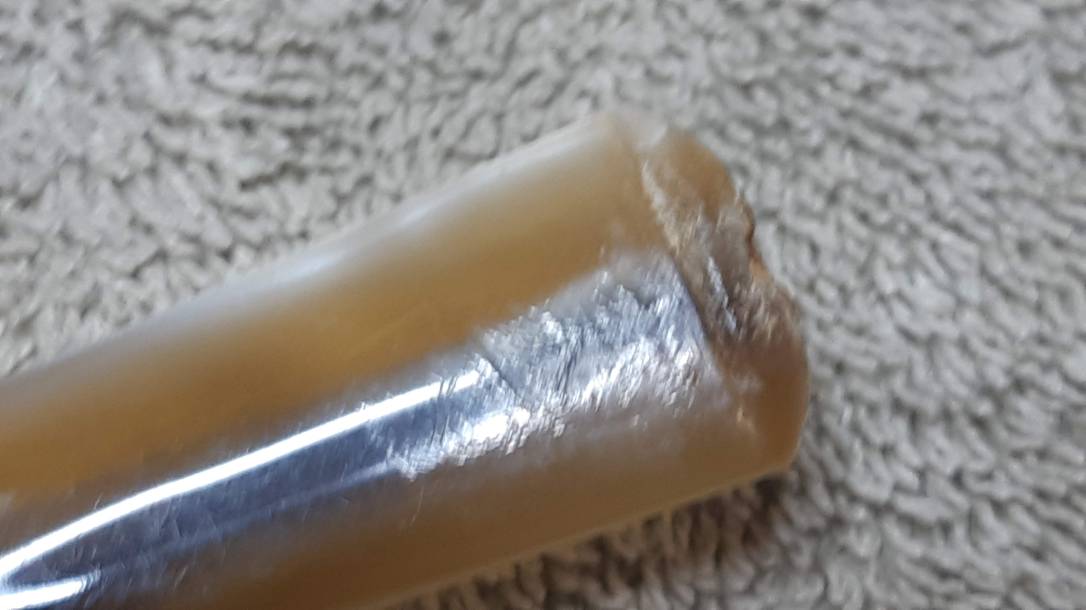
Here is the pipe as it looked when I started work. The tenon had snapped cleanly at the stem face, and was stuck in the shank mortise. The acrylic, patterned to resemble bone, I think, was rather chewed up at the button. The chamber was caked up fairly heavily, and a crust of lava obscured the rim.


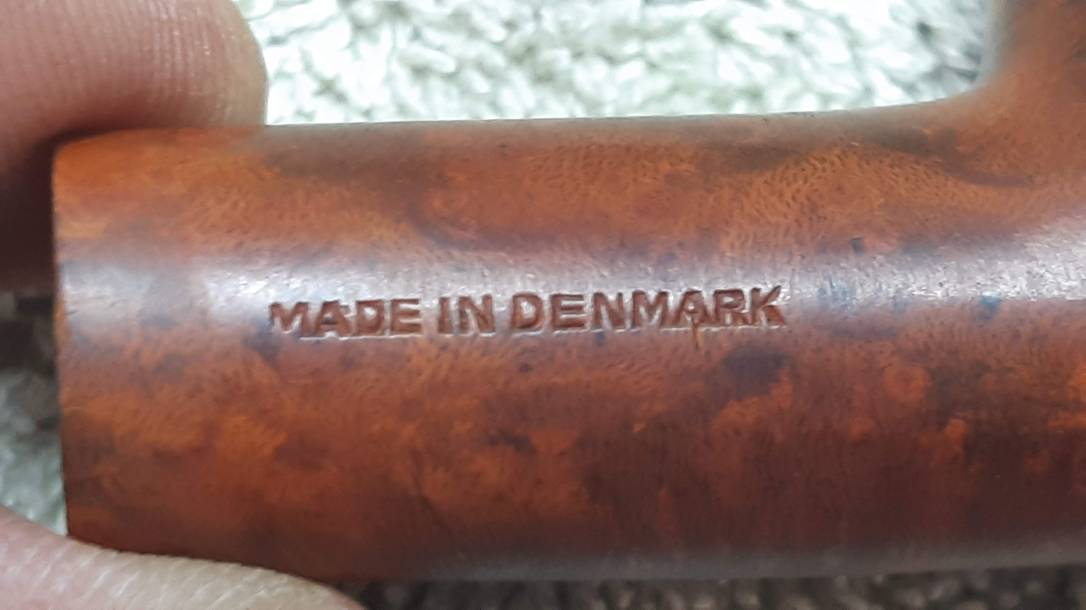
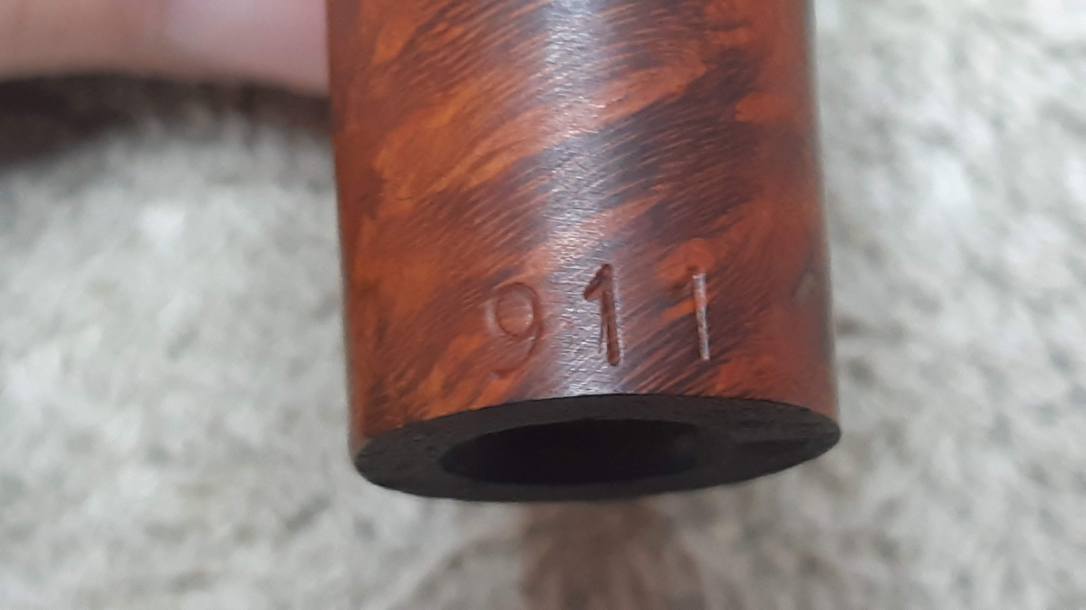
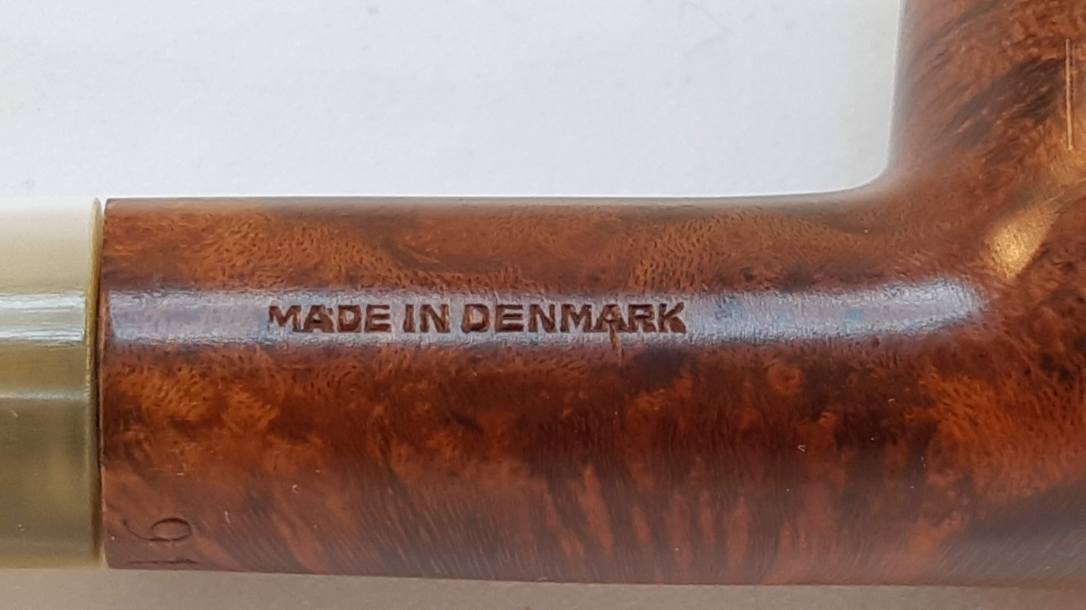
The stummel is stamped “Peter Stokkebye” in script on the left flank, “MADE IN DENMARK” in block letters on the right flank, and “911”, a shape number, on the underside of the shank near the stem junction.

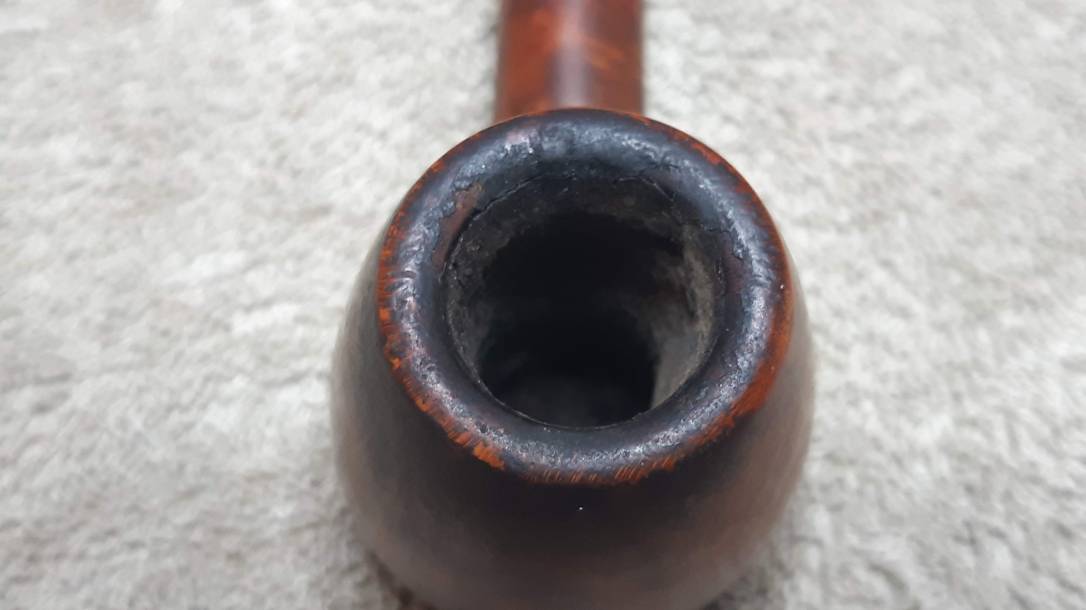
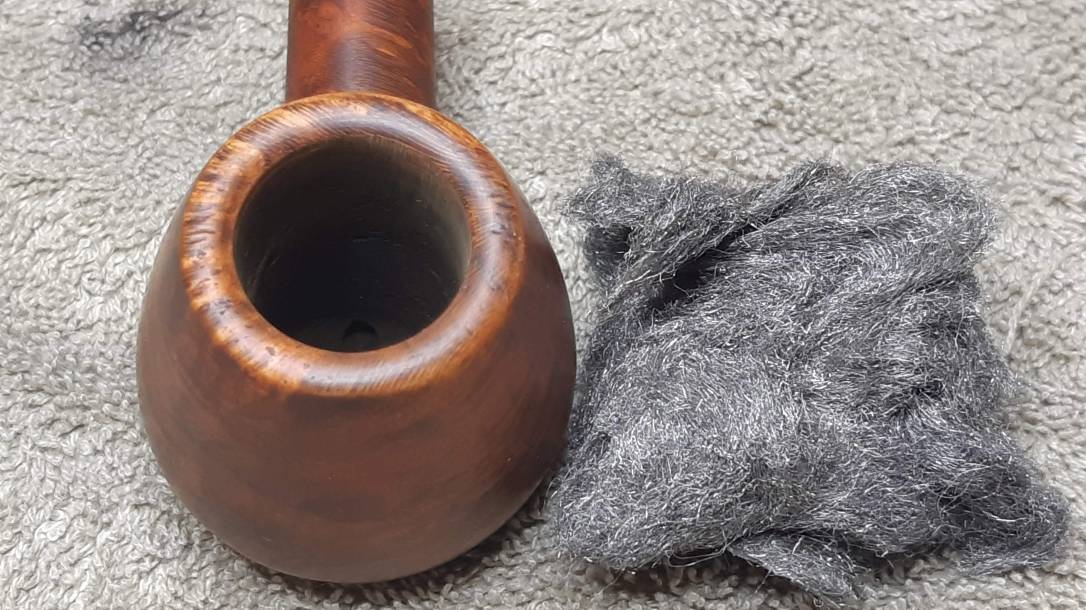
I reamed the tall, slender chamber back to briar using both my Castleford reamer and sandpaper wrapped around a Sharpie marker. I was pleased to find the briar was in excellent condition underneath. The rim lava came away very nicely with 0000 steel wool without damaging the finish.

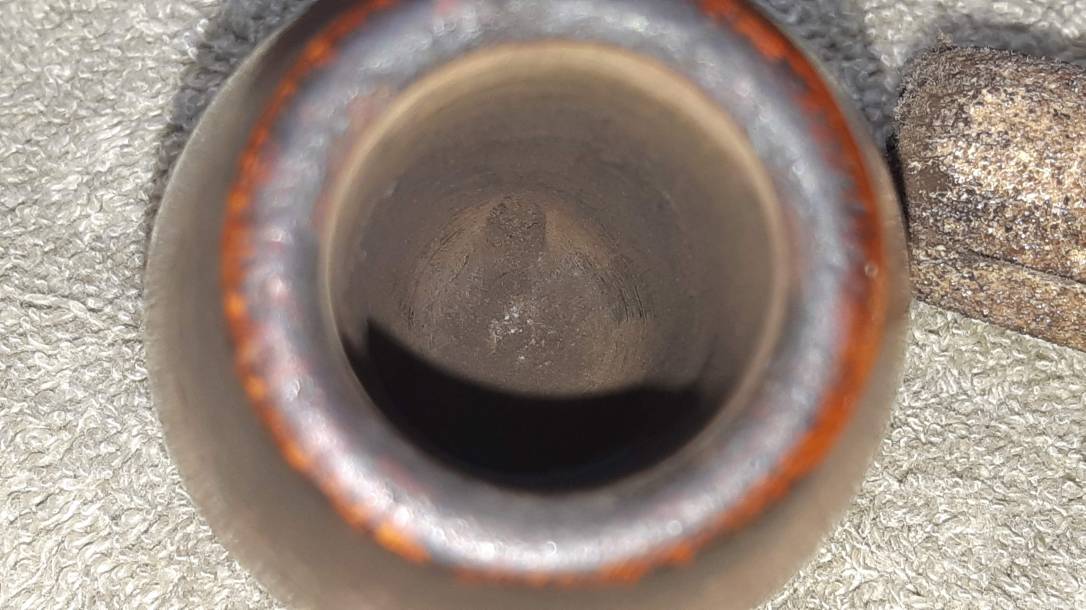
The pipe stem must have been broken shortly after the pipe was last cleaned – it took only a few pipe cleaners dipped in alcohol to tidy up the mortise and airway after I pulled the stub of the tenon out.

Setting the stummel aside, I had another look at the damage to the bit. Someone had enjoyed chewing on the acrylic, carving a deep notch into the top and front of the button. I cleaned the internals of the stem and then decided to minimize the amount of filling necessary by first filing and sanding the button. I was able to rework the button so that I only needed to drop-fill a small depression with clear CA glue.

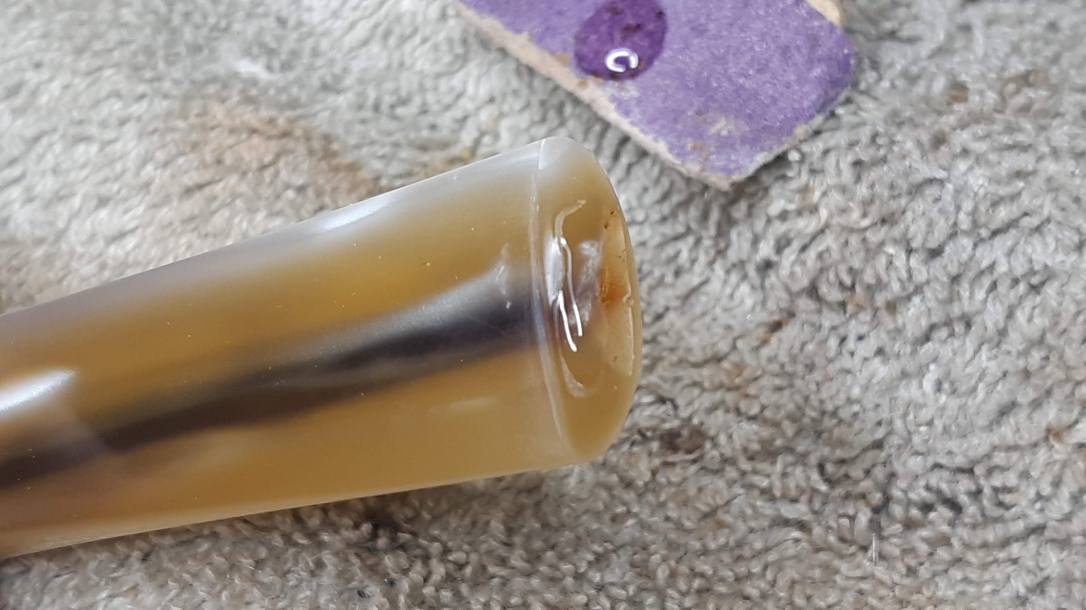
Now it was time to get to work on the tenon replacement. I started by drilling a mortise into the face of the stem to accept the new Delrin tenon. I’ve had acrylic stems snap if I try to drill a large hole in one go, so I worked my way up through about a half dozen drill bits, slowly enlarging the hole.
As you can see in the image above, my drill bit wandered a little, creating a lopsided, off-center mortise. Thankfully this won’t matter much in the end, as you’ll see, but I needed to get things a bit more lined up if I wanted the tenon to fit in the centre of the stem. For this I used my Dremel with a cylindrical carving burr and eyeballed things until the hole was more or less in the middle of the stem face.

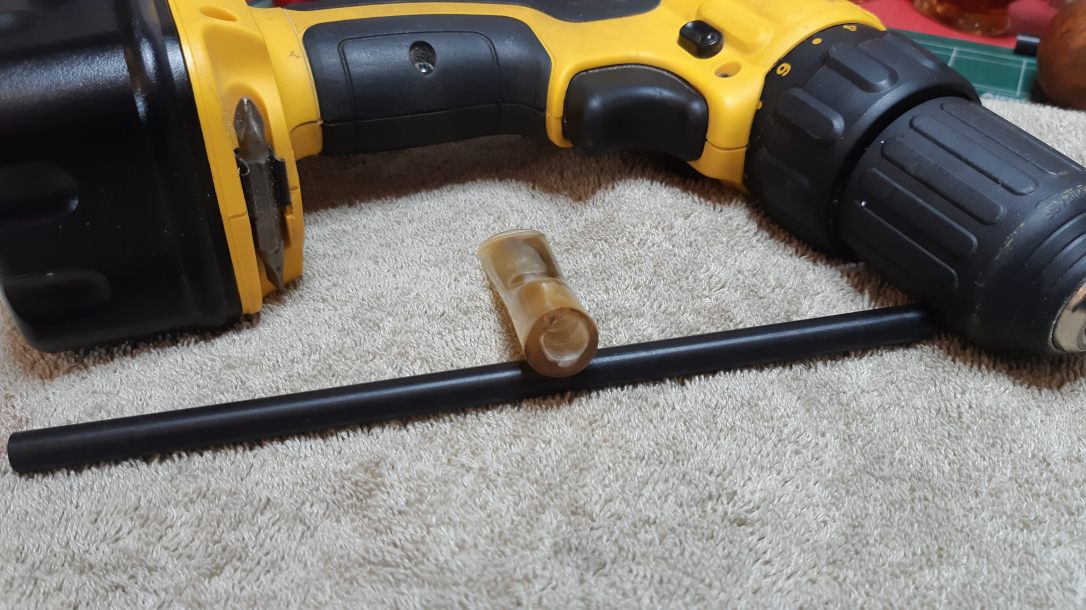
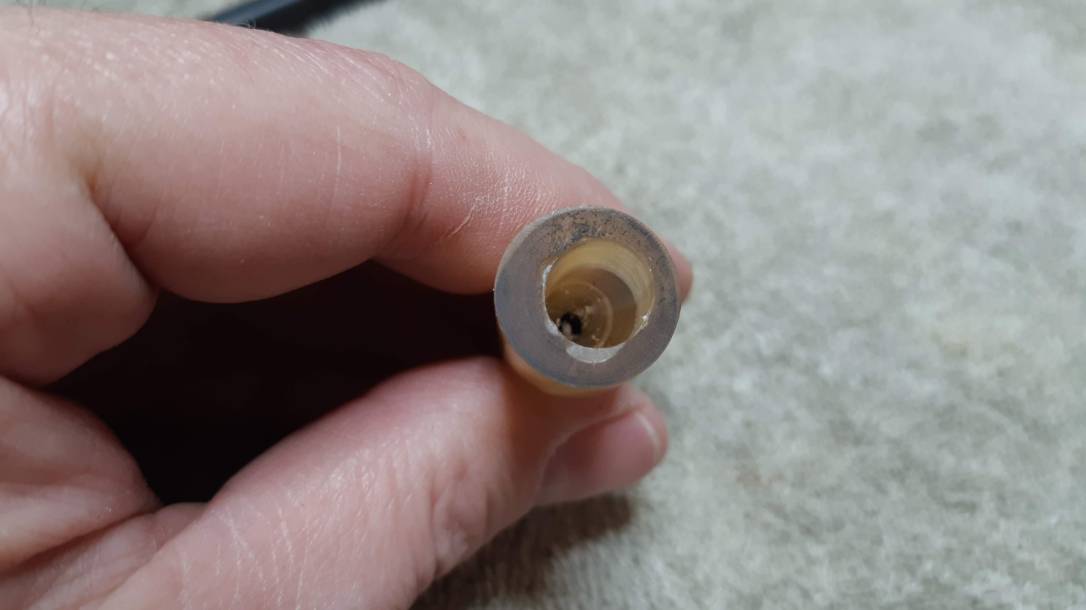
I made up a handful of Delrin replacement tenons from rod stock a little while ago. Now I selected one and used my tenon-turning tool to size it to fit the shank mortise. Note the threads cut into the gluing end of the tenon. Delrin is slippery, and the ridges created by tapping the threads will give the epoxy added grip.


The theory behind the oversized mortise in the stem face is to create enough space to fit both the Delrin tenon and a decent amount of epoxy. The rough surfaces on both pieces of the stem give the epoxy something to grab onto and form a mechanical joint that won’t let go of the Delrin.
On the practical side of things, it’s a relatively simple matter to apply the epoxy and slip the stem over the ridged end of the tenon. I clamp the stummel in my vise for this (after padding the jaws with a soft cloth), letting the stem stick straight up so gravity can assist. After lining things up for a nice smooth fit I left the pipe in the vise overnight to let the epoxy cure.

It’s important not to fiddle with the pipe once you’ve got the stem positioned properly. Let it sit until the epoxy cures – unless, of course, you like realigning things!
When the epoxy had fully cured, I twisted the stem out of the stummel and filled the gap around the tenon with clear CA glue. A little accelerator and a bit of finish sanding smoothed everything out.
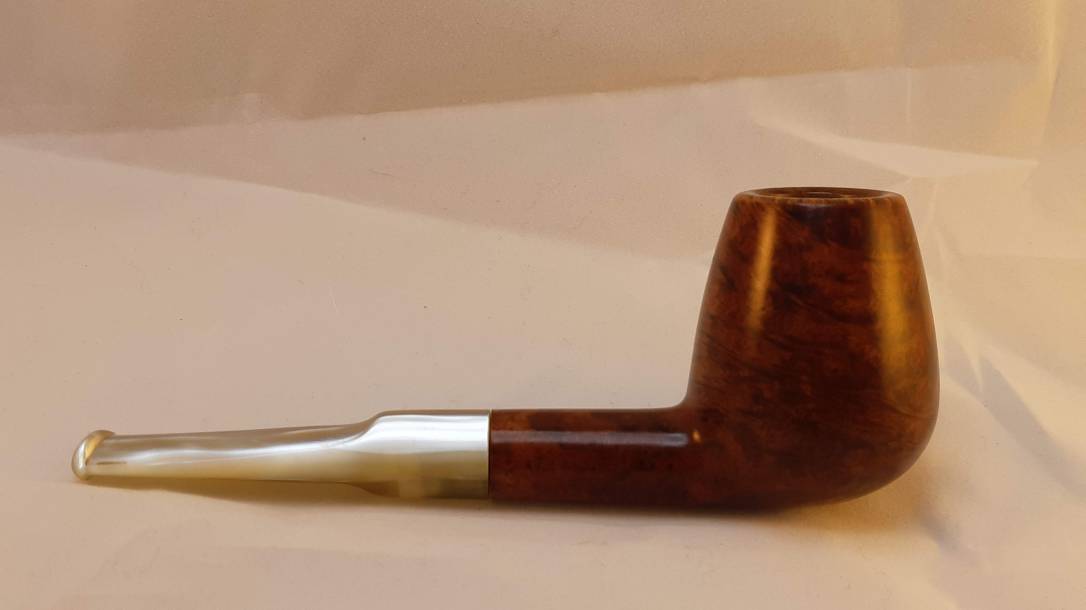
I finished up this quick restoration with a run on the wheel with White Diamond compound and Carnauba wax. This Peter Stokkebye Volcano took to the wheel like a duck to water, with both stem and stummel polishing up very nicely indeed. The pipe looks fresh and inviting with some lovely grain in the briar. Unless the stem is removed, there is very little to indicate that the pipe is not quite factory-new.
Thanks for following along on another estate pipe refurbishment. Until next time, Happy Piping!
Here’s the finished pipe.


Reblogged this on rebornpipes and commented:
Awesome job on the new tenon Charles and great recovery of the misaligned drilling in the stem… well done.
LikeLiked by 1 person
Thanks Steve. I’ve done a lot of tenon replacements over the last year, but learn something new every time!
LikeLike
That is the piece of this work that is the fun part – learning new things… I have never turned a Delrin tenon like you did on the tenon turning tool… I always have used my Dremel and worked at the shape… New lesson learned
LikeLiked by 1 person