
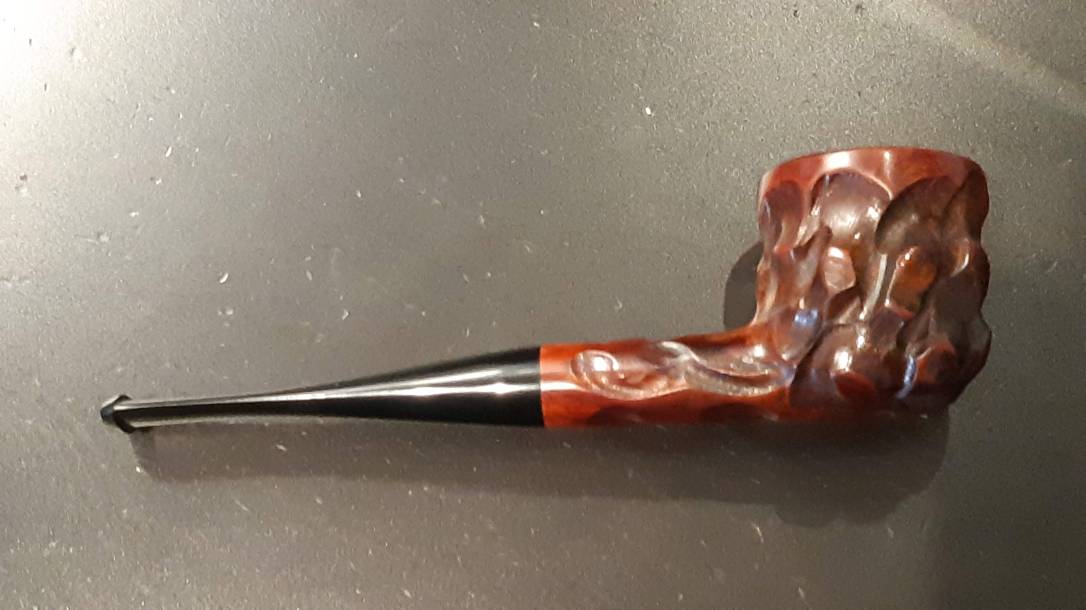
This pipe was sent to me by a friend in Calgary, Alberta for a bit of attention. The owner pointed out that the chamber floor was over-reamed, leaving the draft hole above the bottom of the bowl. I was also asked to look at the stem and give my opinion on what was going on there. These pics show the pipe as it was when it arrived on my worktable.


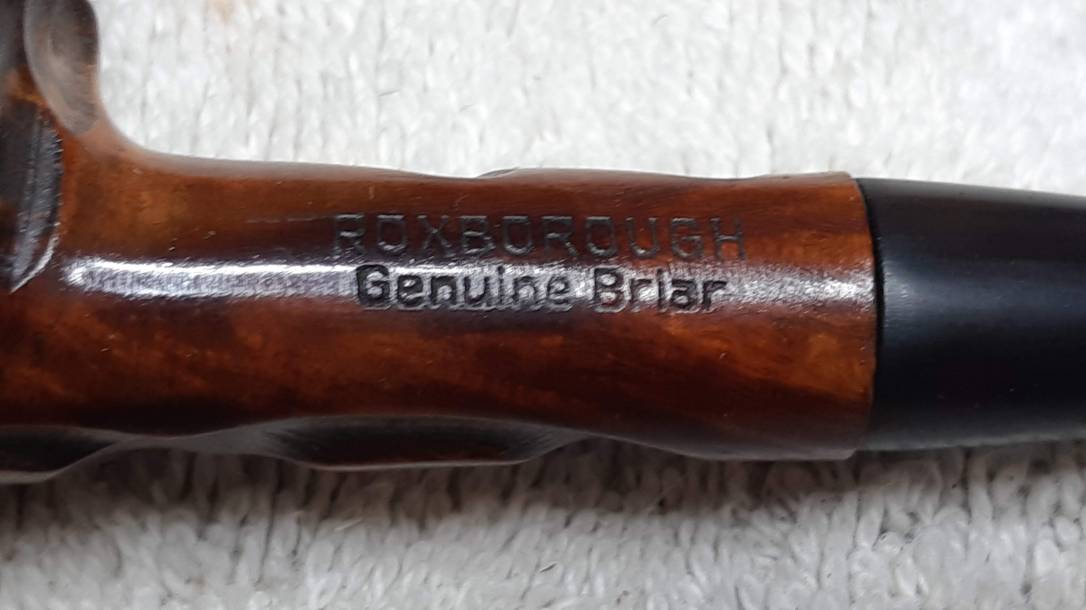
The pipe is stamped on the right flank with “Roxborough” over “Genuine Briar”. I was unable to find any information on the Roxborough marque at all, so I don’t have any background on the pipe or where it was made. If anyone has come across the brand before and can fill in some of the blanks, please comment below.
At first glance, the pipe appeared to be in pretty good estate condition. It was a bit dirty, with some lava buildup on the rim, and the stem was slightly oxidized and a bit chewed at the button, but closer inspection revealed a number of issues that would need attention.
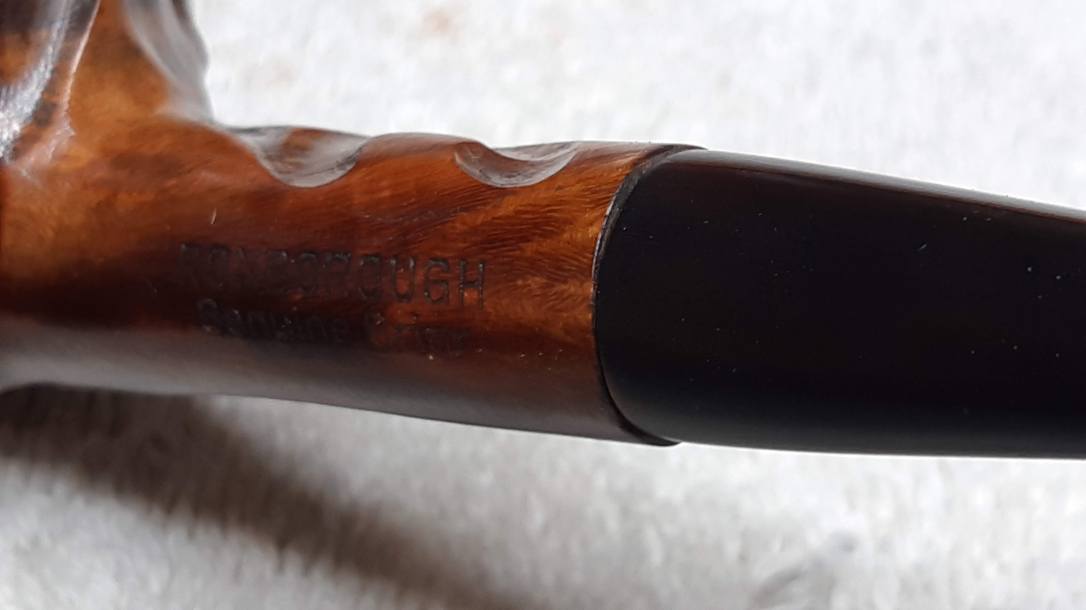
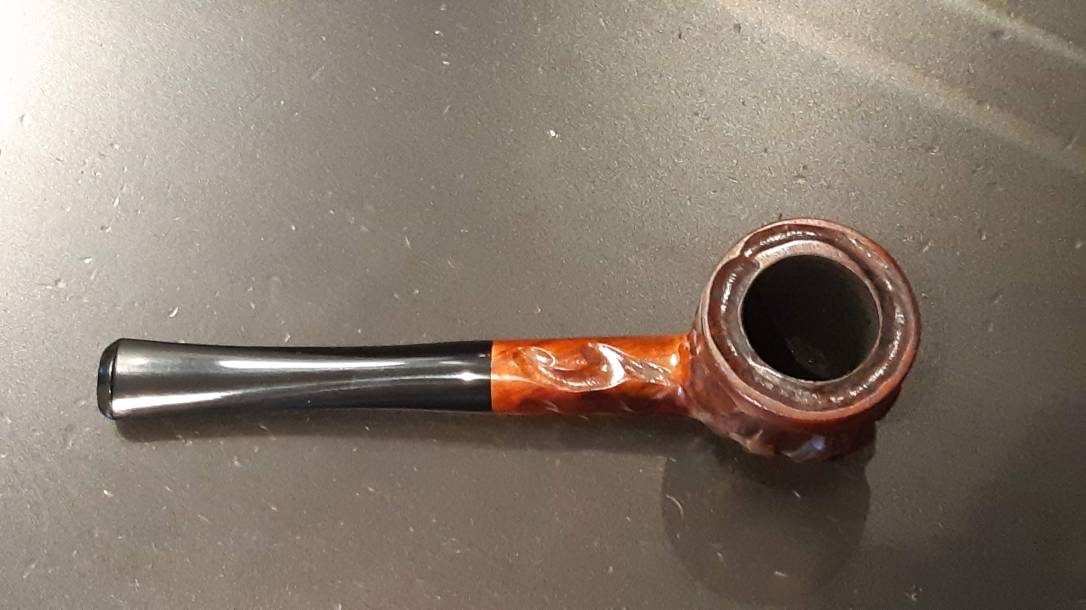
The damage to the chamber floor was hidden under a layer of cake, but the stem was clearly a replacement. The tenon was a decent fit for the mortise, but the stem was not the same diameter as the shank. These pics show the lip around the stem face where it meets the shank.

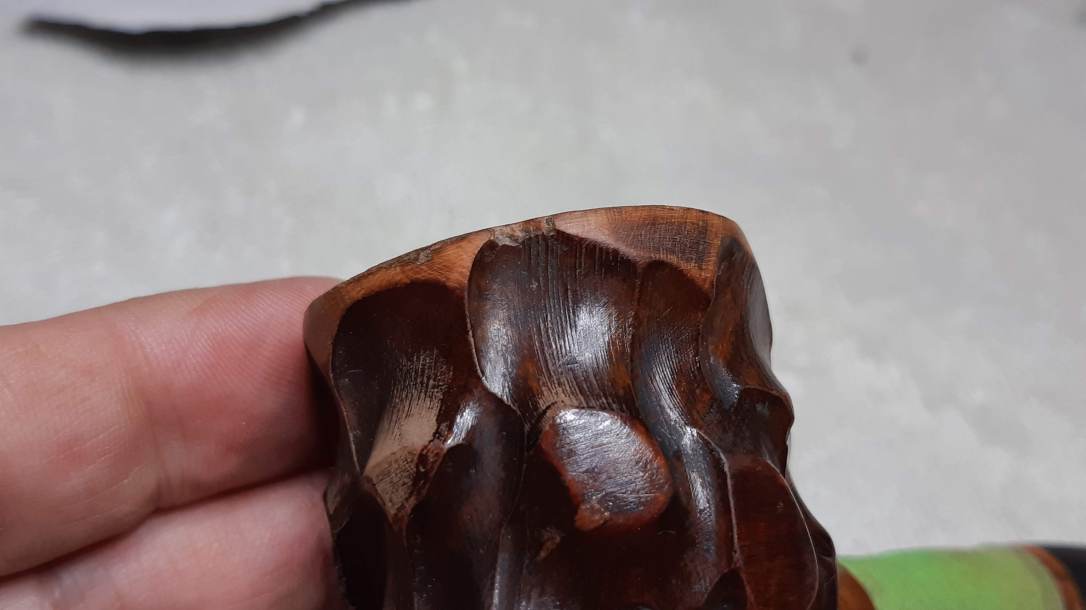
The outer rim of the bowl was also somewhat dented and dinged up, likely from careless knocks against hard surfaces to dislodge dottle. One small section of rim had chipped away entirely.

Before getting into the meat of the refurbishment, I set to cleaning the stummel. This would allow me to find any hidden damages and make sure that there was no gunk in the shank that could potentially derail my efforts to fit a new stem properly.
I used up a small pile of cotton swabs, pipe cleaners and alcohol scrubbing away the tars and other crud from the pipe’s internals. I also reamed the chamber back to bare briar to facilitate the expected chamber floor repair.

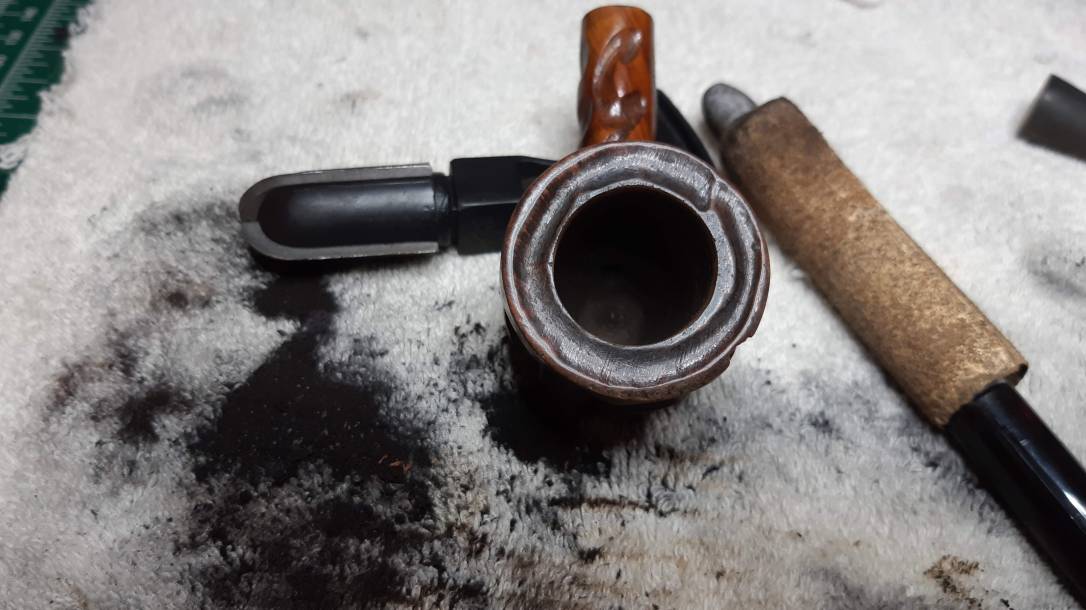
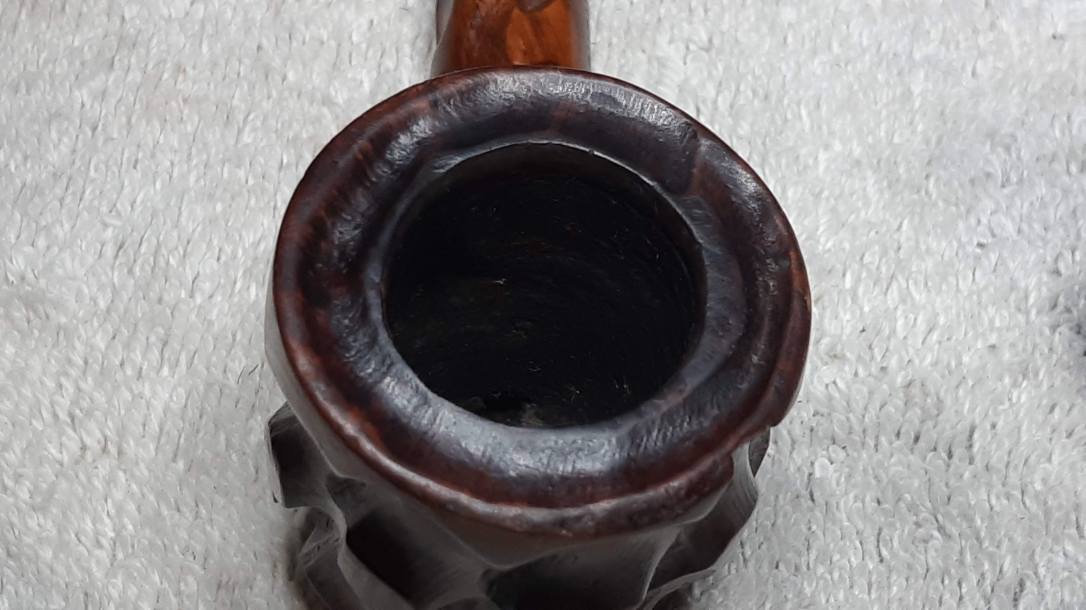
It’s a bit hard to see in this pic, but the pipe’s owner was right- the chamber floor was a few millimeters below the draft hole. I’d need to fill the over-reamed area to bring the smoking geometry back into line.

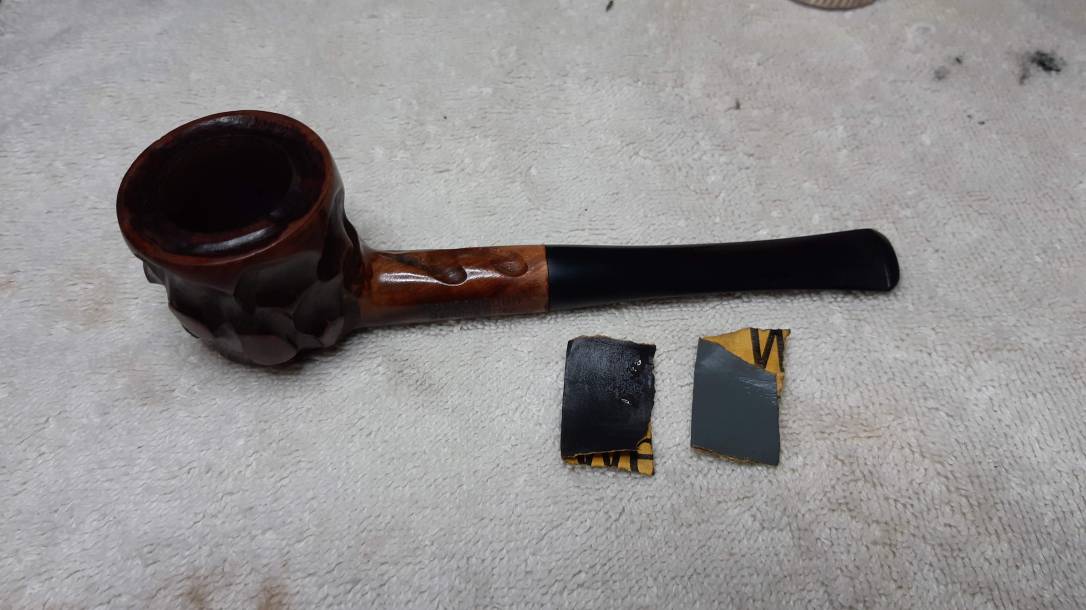
With the stummel clean, I started work on fitting a new stem. I picked a slightly over-sized pre-cast vulcanite stem from my stores for this. I much prefer to file down a larger stem to fit an existing pipe shank than to alter the stummel to suit a stem. This pic shows the stem that came with the pipe (top) and the stem blank I chose to work with (bottom).

I sized the tenon to roughly the correct diameter to fit the shank mortise using my tenon turning tool and finished the sizing by hand with a scrap of sandpaper.

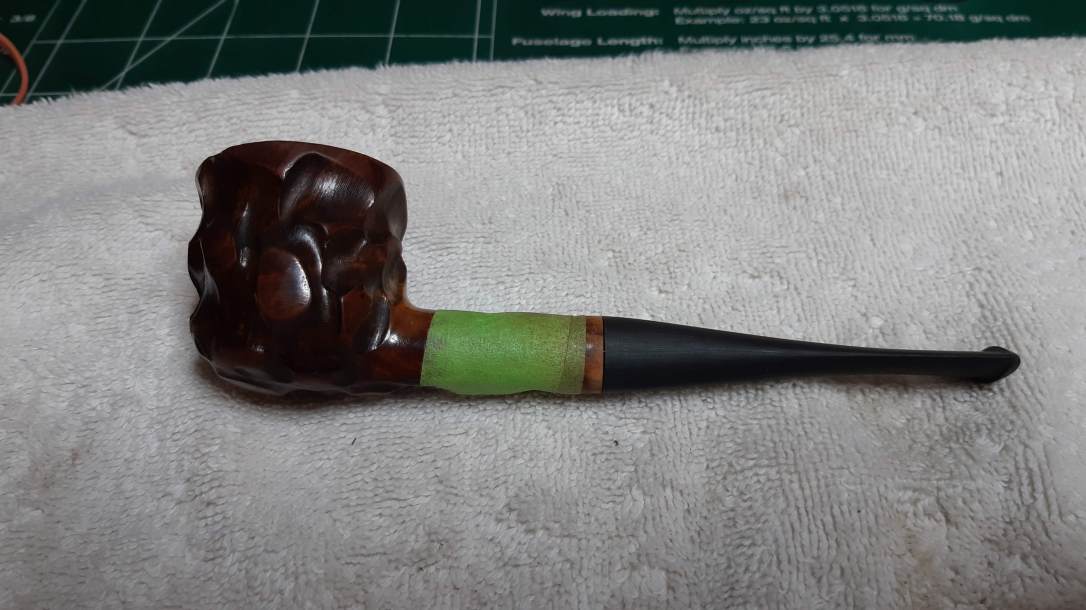
I taped off the stamps and most of the shank to protect them while I used files and sandpaper to fine-tune the shank-stem transition. I also knocked the casting marks off the stem blank. It’s starting to look good!
Happy with the stem fit at this point, I switched gears and had another look at the outer rim of the bowl. A fair bit of the front rim was dented and marked up from dottle-knocking. I used a scrap of 220 grit sandpaper to smooth out the damaged areas before drop-filling the missing chunk of briar with CA glue mixed with briar dust.


After the patch had cured I shaped it using sandpaper and a little bit of Dremel work to match the original contours of the deeply textured finish. A full course of micromesh sanding pads blended the repair into the surrounding briar. A bit of finish touch-up with a stain marker finished off this part of the refurbishment.


After wet sanding with 800 and 2000-grit papers, I again used the micromesh pads to complete the final sanding and polishing of the stem. I dry-sanded with each grade of pad from 2500-12000 grit, wiping the stem with mineral oil after each set of three pads. This took out the last of the sanding scratches and brought up a deep shine in the vulcanite.

The last remaining task was to fill the chamber floor to raise it to the level of the draft hole. For this I prefer to use JB Weld over the traditional pipe mud made from cigar ash and water. JB is highly heat resistant, hard as nails and completely inert when cured, so there is no danger whatsoever to using it inside the tobacco chamber.
A small dab of JB was all I needed to fill the damaged area. I let it sit overnight to cure, then smoothed the patch with sandpaper wrapped around a dowel before applying my usual bowl coating of maple syrup and activated charcoal powder.
When the coating is dry it is resistant to accidental scratches, hides the repair work nicely, and provides a slightly rough surface on which to build a new cake layer. This bowl coating has become one of the most popular pages on DadsPipes. You can find a detailed step-by-step explanation of the coating and how I apply it here.


With all repairs complete, I took the pipe to the buffer for a run of White Diamond and several light coats of Carnauba wax.
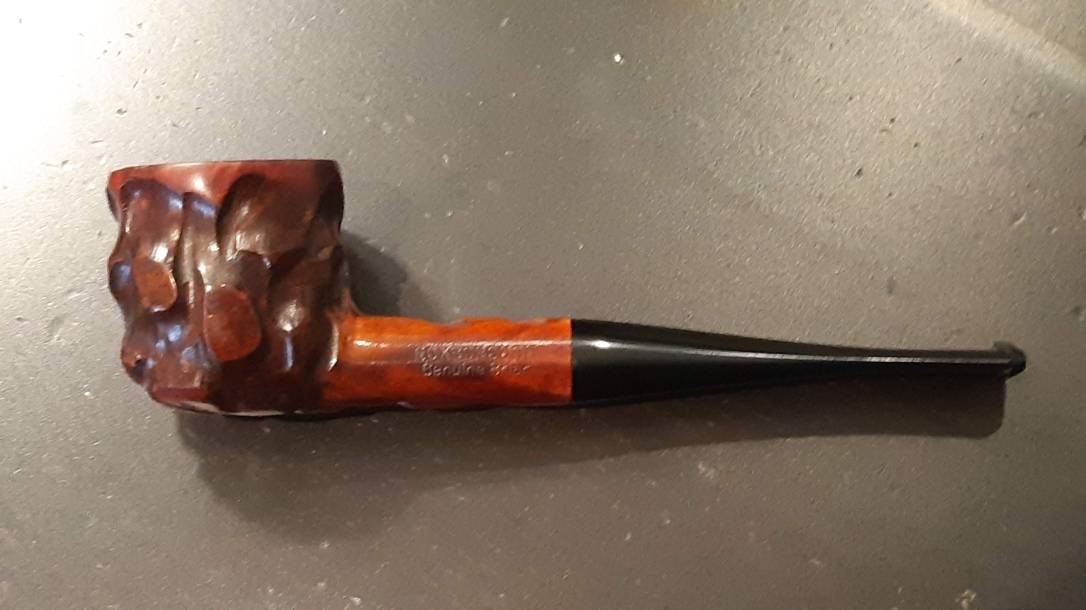
The finished pipe is looking good after its time on my worktable. The new stem fits well and its shine matches that coming from the freshly revived and repaired briar. More importantly, perhaps, the pipe has been structurally returned to as close to new as can be managed. It should now smoke just as it did when first purchased years ago. I think the pipe’s owner will be very pleased to pack the first bowl in his “new” Roxborough billiard.
Thanks for joining me for another estate pipe restoration. This pipe is a good example of the sort of work an average estate pipe might require, and serves as a good reminder that there is almost never just one job to tackle when considering a refurbishment.
Until next time, Happy Piping!
Here’s the finished pipe.


Super work there Charles. I really enjoy these posts. I also have a pipe with a bowl a bit deeper than the draft hole. I’ll have to try the JB Weld fix.
LikeLiked by 1 person
Thanks Marlowe! The JB really works well. I’ve used it on numerous pipes with great results.
LikeLike
As always, great work, Charles. The rim repair looks great.
LikeLiked by 1 person
Thanks, Dal. Tidying up the rim repair was a bit finicky but it came out ok. 🙂
LikeLiked by 1 person
That repair was at the bow of the ship too, so it needed to look good and you did well.
LikeLiked by 1 person