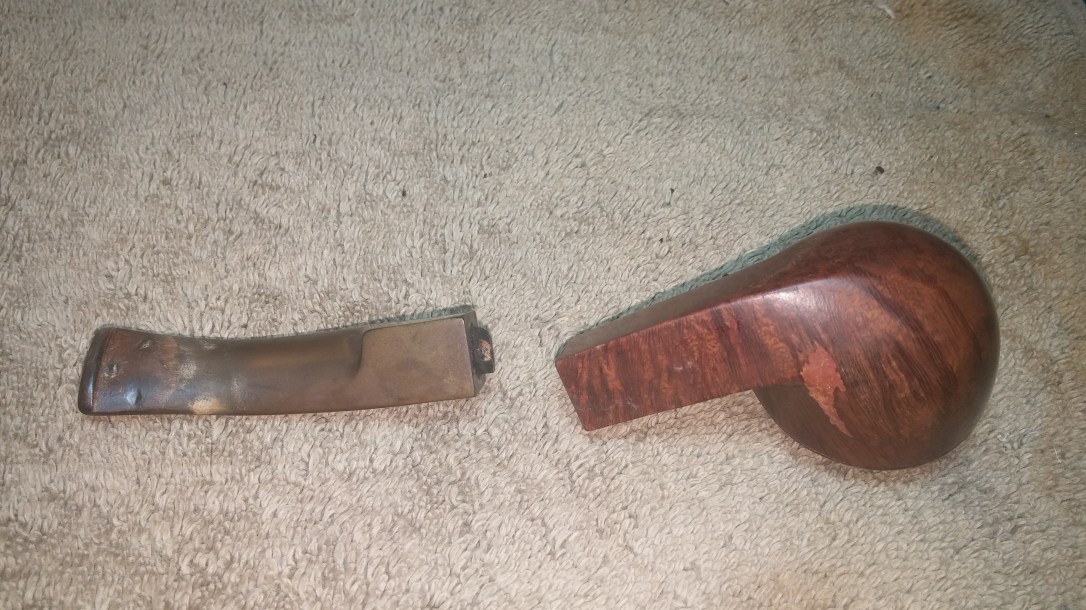
I picked up this Bent Bulldog as part of a random lot of estate pipes quite some time ago. I dug it out of the box after Christmas, and have been working on it in between other jobs for the last several weeks.
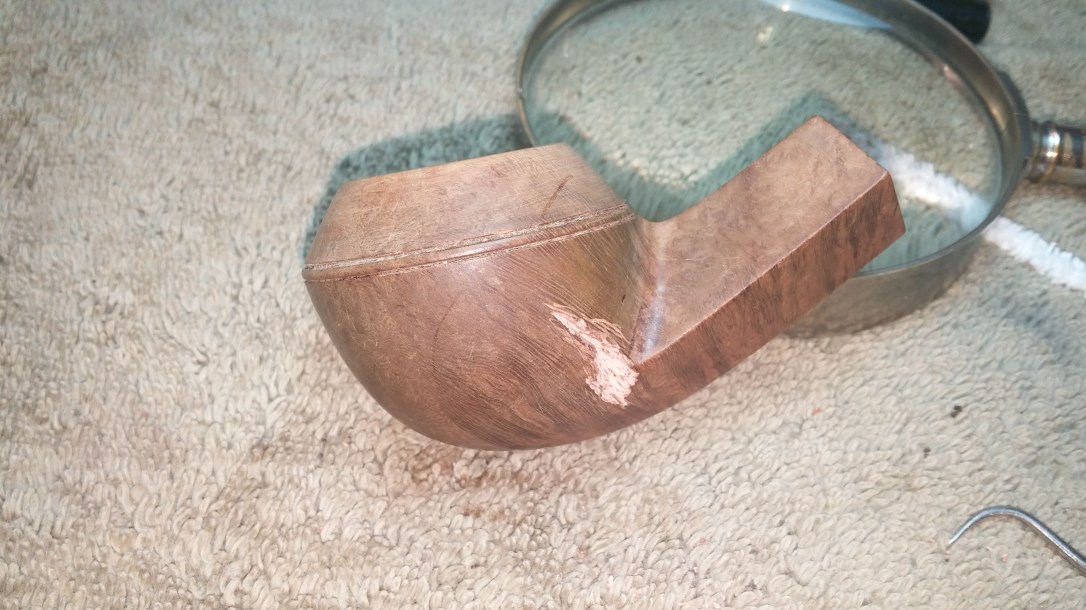
The pipe was in a certain amount of distress when it came to the worktable. The stem had broken at the shank face, and the tenon was lodged inside the shank. The rim was lava-crusted, with a patch of “road rash” peeking out on the front upper face of the bowl. The stummel also had one very large and glaring fill on the left rear quarter near the bowl-shank junction. The fill was in decent condition, but to me it stood out like a road flare against the otherwise not unattractive briar.
The stem, apart from the broken tenon, carried multiple tooth dents top and bottom and showed both oxidation throughout and mineral buildup at the bit.


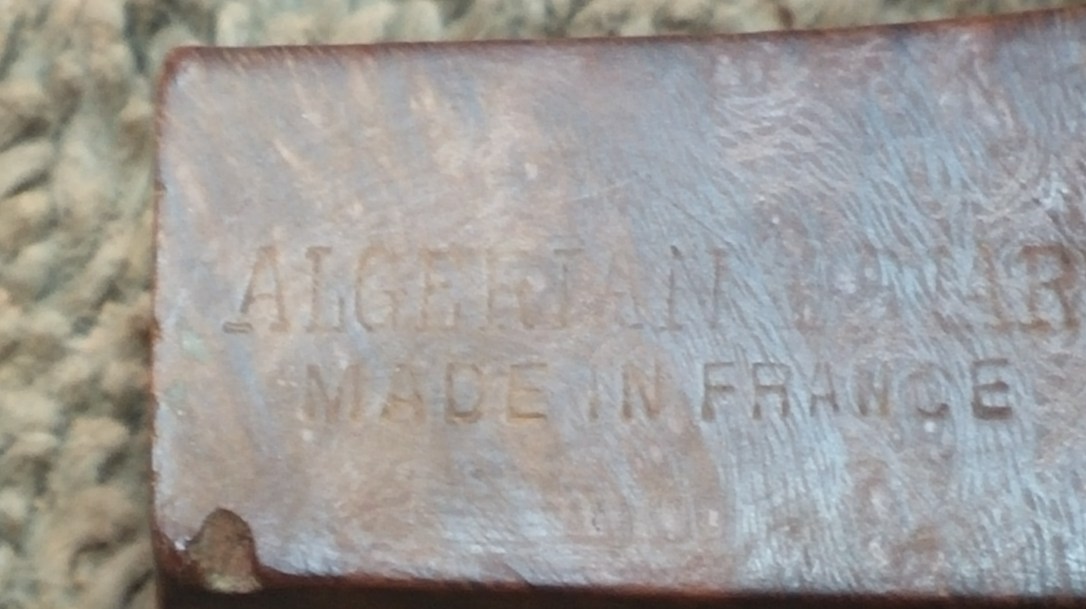
On first inspection I couldn’t find any stamps on the pipe. However, after wiping the dirt of the shank with alcohol on a cotton pad, I found the following imprints on the upper right flank of the diamond stem: “Algerian Briar” over “Made in France”. Without much information to go on, my best guess is that this pipe was one of hundreds of nameless second-grade pipes to come out of the St. Claude factories.
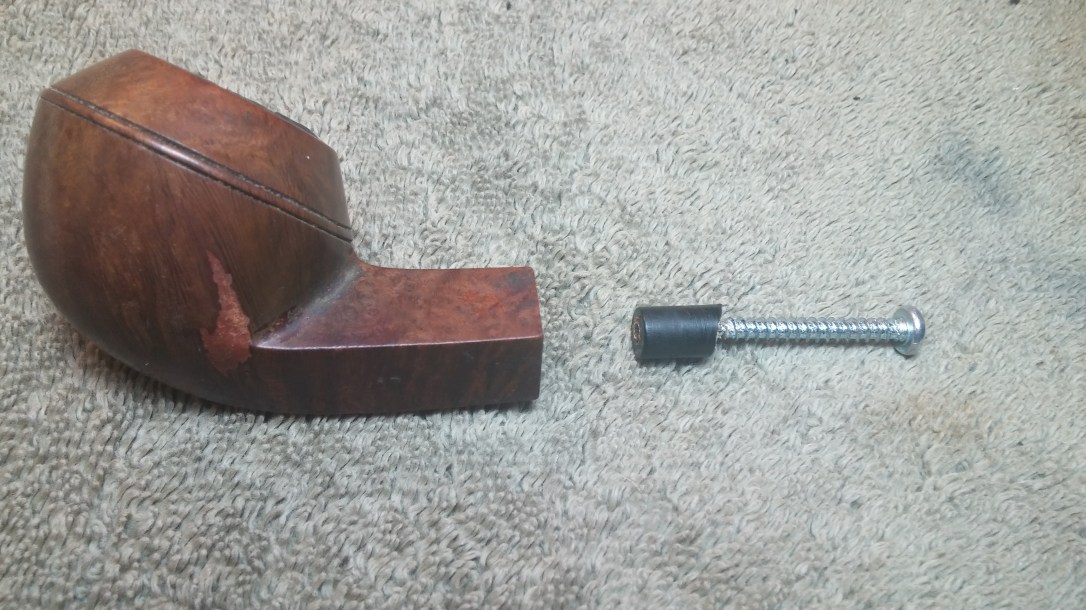
Turning to the actual repair, I dropped the stem into an Oxyclean bath to soften the oxidation and then used a wood screw to extract the broken tenon from the pipe shank. I twisted the screw into the airway of the tenon until the threads caught, then, continuing the twisting motion, gently pulled the broken vulcanite from the stummel. The metal visible in the middle of the broken tenon in the pics above proved to be the end of an aluminum stinger which had, ironically, also broken off. The stinger shaft is just visible inside the tenon in this pic.
I shone a strong light into the shank to see if there was any more damage hidden within. I didn’t find any damage, but I did find a lot of built-up tars and other gunk. Yummy!
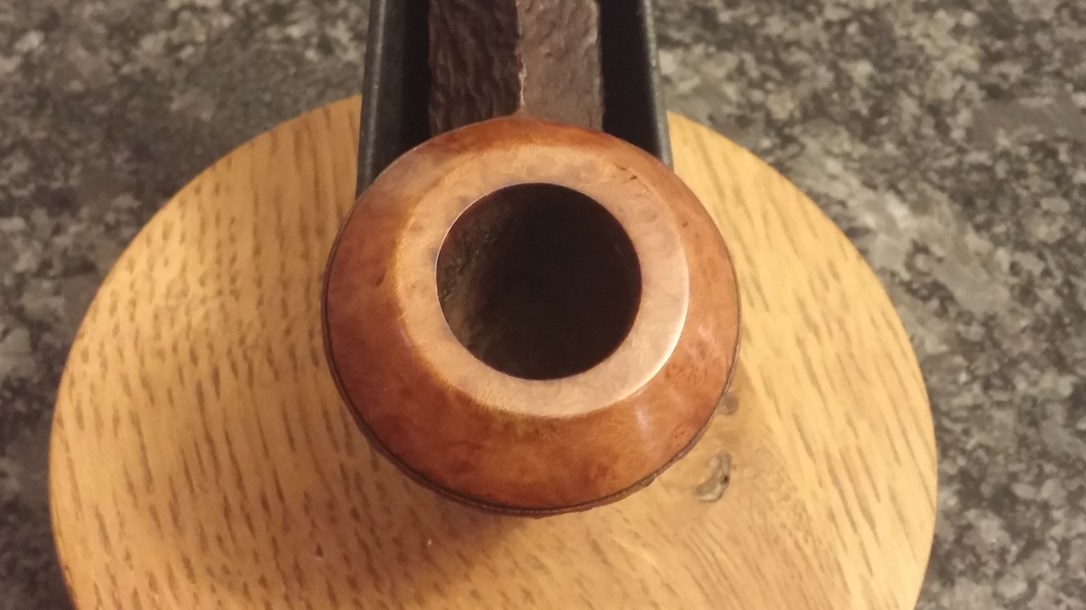
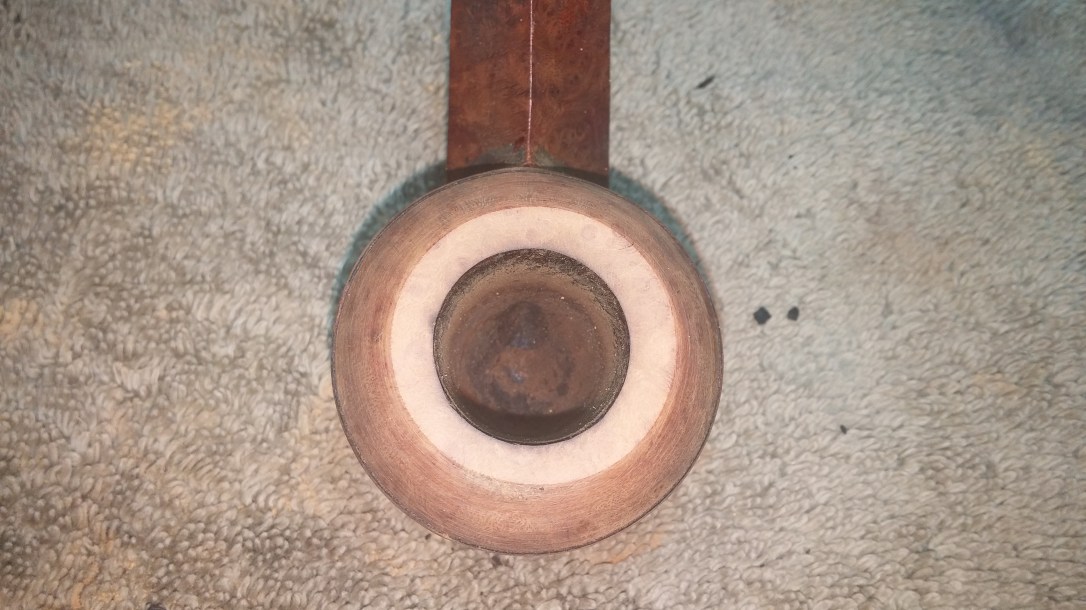
Continuing my explorations, I scraped the worst of the lava crust off the rim of the bowl using the flat edge of my pen knife before reaming the old cake from the chamber. Other than the aforementioned road rash at the front of the bowl, the rim was in pretty good condition.


I topped the bowl lightly to smooth out the small dents and dings of use, and took 220 and 320-grit sandpapers to the front of the bowl to erase the road rash caused by careless dottle-knocking against hard surfaces. Instead of just sanding the rough patch (and risking sanding a flat area into the front of the pipe), I sanded the entire upper part of the bowl. This ensured that the bowl stayed round and even all the way around.
Before moving on to the internal cleaning, I wiped the exterior of the stummel with alcohol on a cotton pad. This removed not only the dust created by the sanding but also the dirt, oil and old wax that had accumulated on the briar over the years. With the bowl clean, that huge fill really stood out.

I’d come back to deal with the fill after the cleaning was complete. To clear the worst of the crud from the shank I used a drill bit slightly smaller than the mortise bore, turned by hand. This pic shows just how much buildup was hiding in the shank.

I followed up the drill bit with cotton swabs and pipe cleaners dipped in alcohol. As you can see, I didn’t need to use many swabs. The drill bit had saved me a lot of work on this shank!

Time now to address that eyesore of a fill. As I had mentioned, the fill itself was in decent shape, but it was ugly, so I decided to top-coat it with CA glue mixed with briar dust to darken it and help it blend in better with the surrounding briar.
To give the fill material something to bond to, I scraped the surface of the old pink putty with a dental pick before dropping the CA and briar dust mixture on top. I let the patch cure before sanding the repair smooth.


While I had CA and briar dust on the go I also repaired a small chip in the briar at the end of the shank.

I set the stummel aside and pulled the stem from its Oxyclean soak. The oxidation had come to the surface, where it was relatively easy to scrub it away using 0000 steel wool and Magic Eraser, unveiling the black vulcanite underneath.
The Oxy soak had softened the tars built up in the stem’s airway, but it was just as packed with gunk as the briar had been. I picked a pile of crud out of the slot in the bit with my dental pick before clearing the rest of the airway with pipe cleaners and more alcohol.


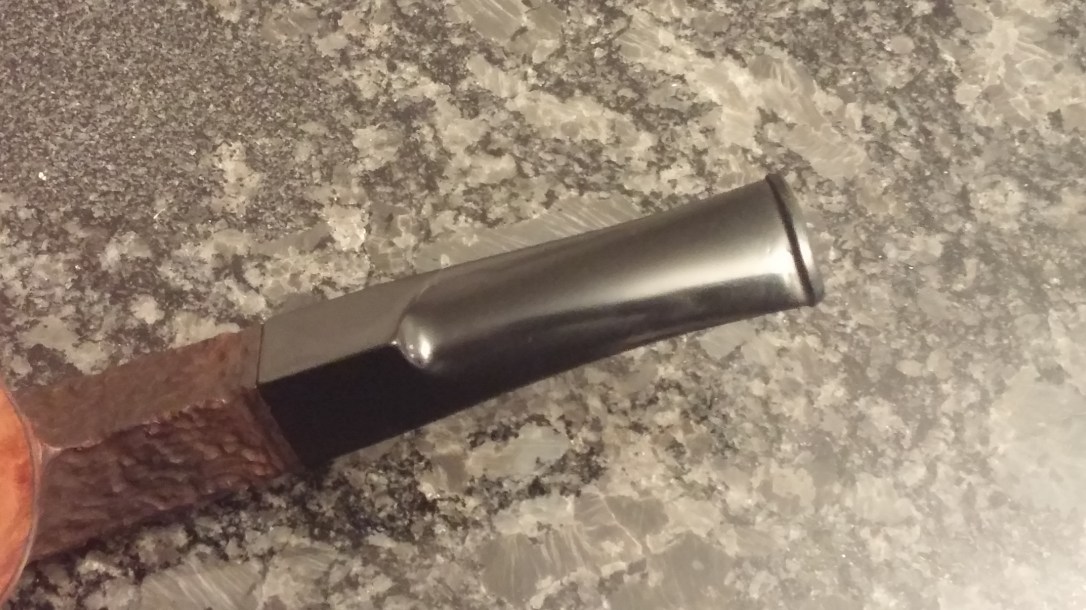
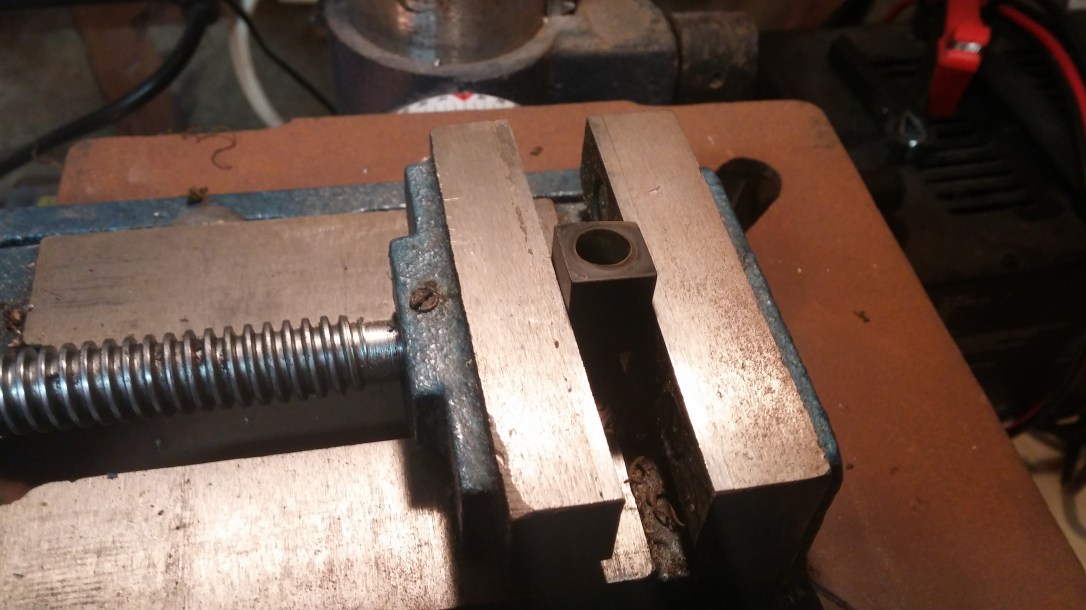
With the vulcanite finally clean, I clamped the stem into my drill press and drilled out the broken tenon. Here you can see the stem drilled out, and the new Delrin tenon test-fitted in the socket.

Before gluing the new tenon in place, I used the sharp edge of a half-round needle file to cut parallel grooves at one end to give the epoxy much more grip on the slippery Delrin. With everything ready, I mixed up a small batch of JB Kwik-weld and glued the tenon into the stem.
My usual process for gluing in a tenon is to test fit everything several times, then slip a pipe cleaner coated with a bit of petroleum jelly through the stem. I apply the epoxy to the tenon, slip it onto the pipe cleaner and then twist it into place in the stem face. The pipe cleaner helps keep the airway aligned, while the petroleum jelly stops the epoxy from gluing the pipe cleaner into the stem.
I also wipe a bit of petroleum jelly onto the shank face before assembling the pipe while the epoxy is still maleable. JB-Kwik sets in 15 minutes, so there’s a good window of time in which to ensure the stem registers properly to the shank face. I hold the pieces together until the epoxy sets up.


When the stem repair was fully cured (twelve hours or so), I drop-filled the tooth dents with a mixture of CA glue and activated charcoal powder, then set the stem aside to cure. When the patches were ready, I sanded them flush with the surrounding vulcanite and polished the repaired stem with 800 and 2000-grit wet sandpapers.

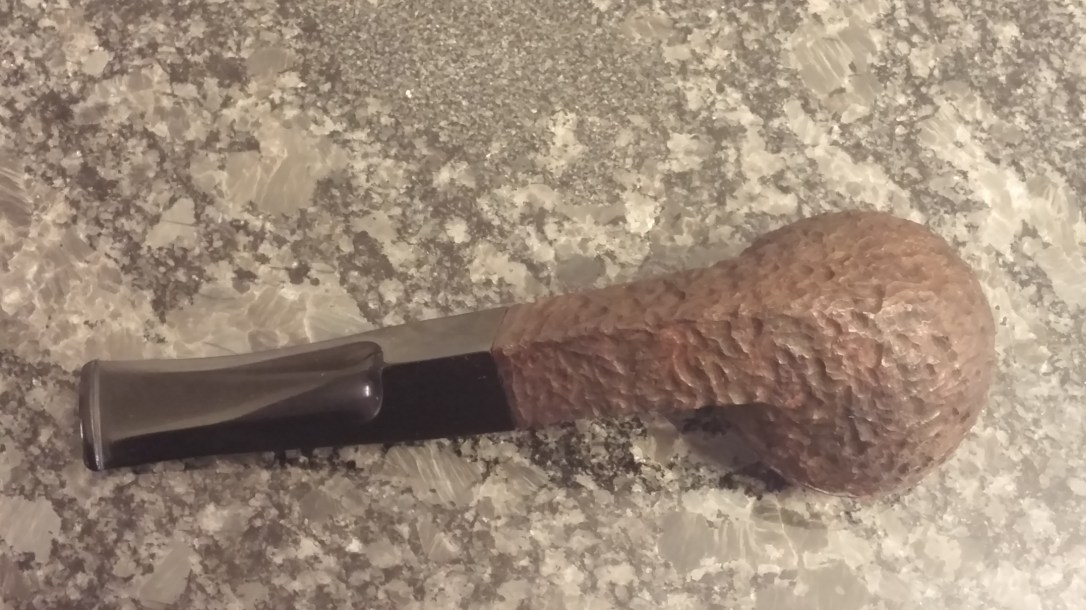
With so much sitting and waiting for glues to cure, I spent a fair amount of time staring at the stummel, and especially the large fill in the side of the bowl. While my patch had toned down the contrast between fill and briar, I still wasn’t happy with the way the pipe looked. The huge fill just made the pipe look cheap, so I decided to have some fun with this project and rusticate the bowl and shank below the bowl rings.
I mounted a small carving burr in my rotary tool and went at the briar, being careful to avoid damaging the rings and the end of the shank. I worked the carving burr in small, overlapping “C” shapes, which produced a deep, craggy rustication. As the pipe was already a nameless second, I carved right over the faint stamps.

A full set of micromesh sanding pads brought up the shine on the upper bowl.

I applied a coat of Fiebing’s Dark Brown leather dye to the rusticated parts of the stummel to finish the pipe and enhance the contrast between the smooth upper bowl and the rusticated lower stummel. Then it was time for the wheel, where both stem and stummel received a buffing with White Diamond compound and a coat of Carnauba wax – very light on the rusticated areas, and heavier on the smooth areas.
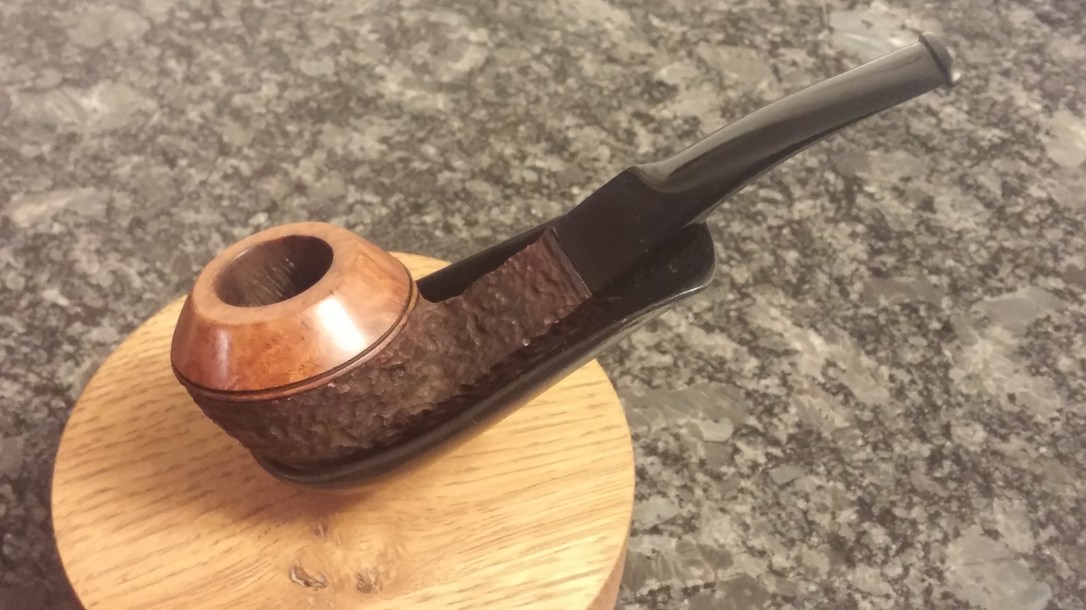
The finished pipe bears very little resemblance to the decrepit old thing that I brought to the worktable. Apart from being clean for the first time in a long time, the partial rustication gives the pipe a fresh new look, without that glaringly ugly fill. The rejuvenated stem fits snugly in the mortise and shines an attractive and dent-free gloss black.
With the amount of effort expended on this restoration, I’ll probably hold onto this pipe as a knockabout briar to use in the shop and at the campsite this summer. This project was a good exercise in fills, tenon replacement and rustication. Adding this pipe to my rack will be a good reminder of all the techniques used to bring it back to fighting form.
I hope you enjoyed walking through this restoration with me. Thanks for joining me, and until next time, Happy Piping!
Here’s the finished pipe.