
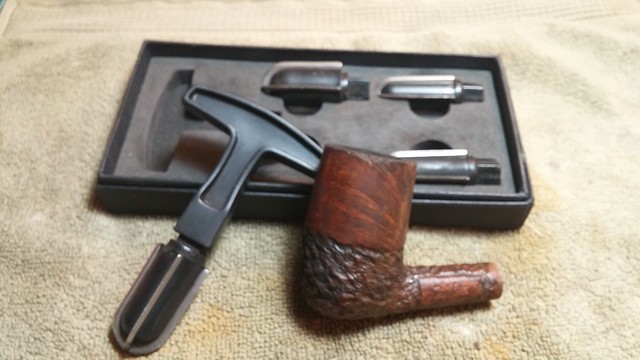
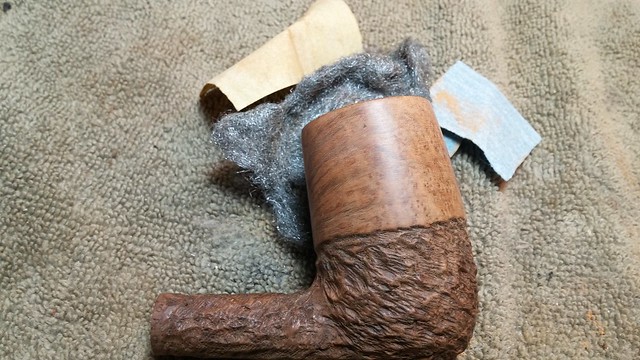
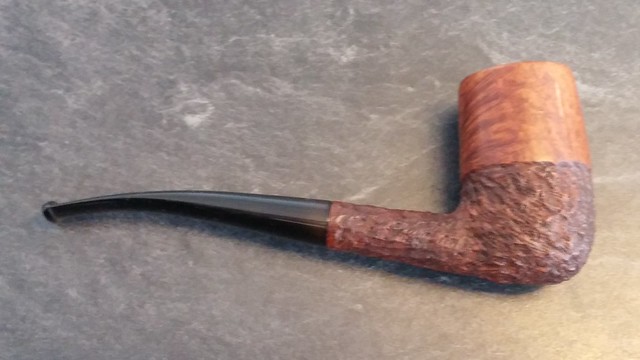
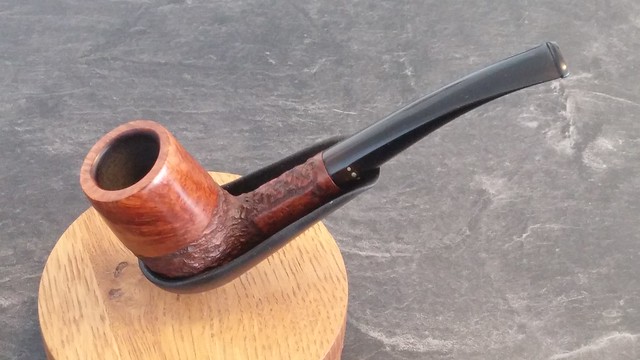
I could not pass up the opportunity to add this Brigham Statesman to my collection. Despite its flaws, including a battered rim and a large bite-through in the lower bit, the pipe was in decent vintage shape and was certainly restorable. Besides, I didn’t have the “bent stacked billiard” Statesman shape in the collection, so this was a good chance to fill a gap in my rack.
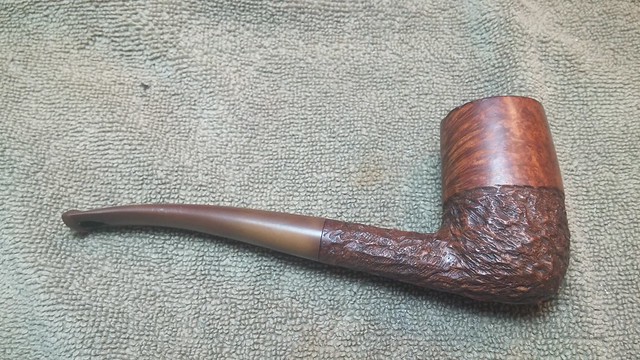
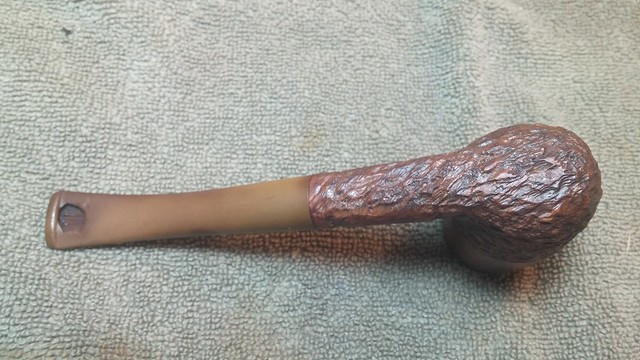
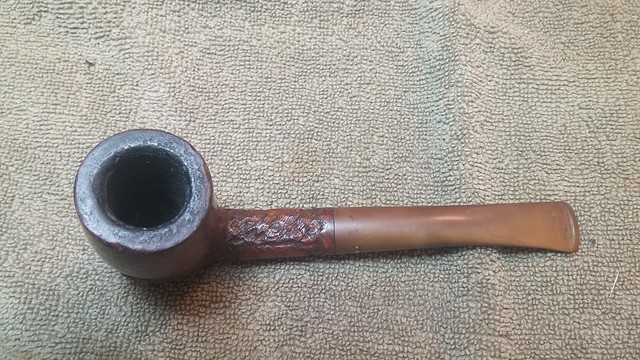
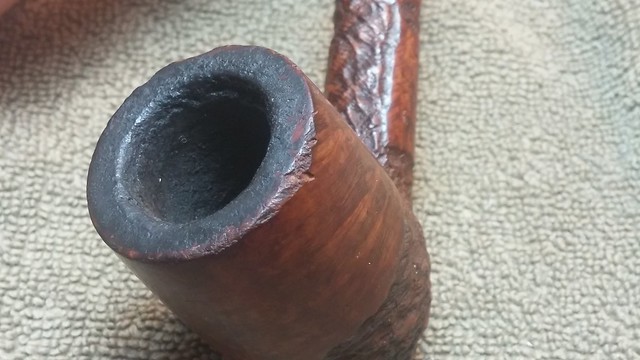
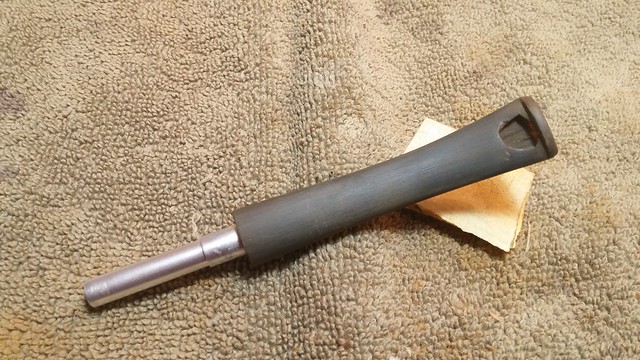
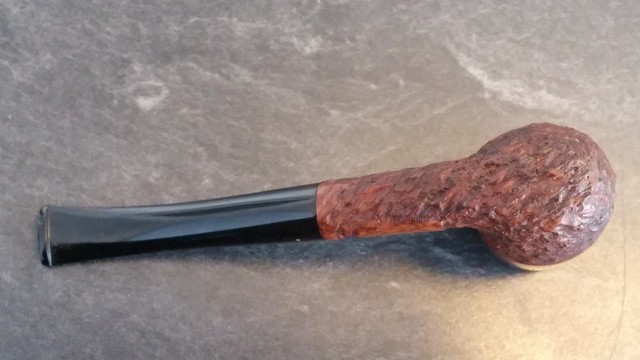
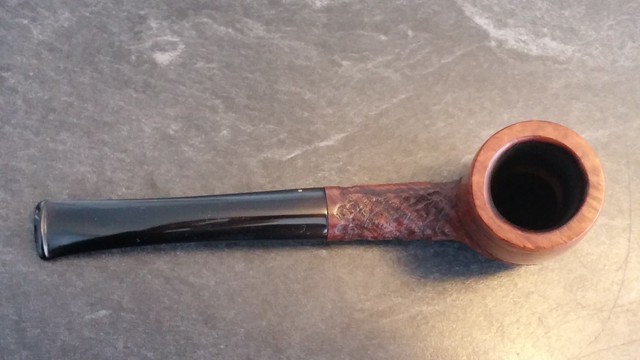
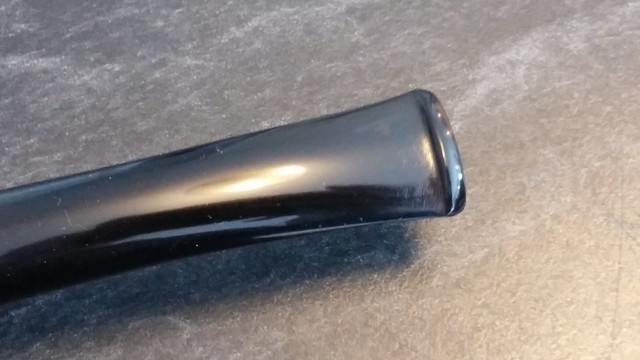
These pictures of the pipe as it arrived on the worktable attest to a reasonable level of care given to the pipe over its lifetime. As I’ve already pointed out, the rim was ringed with dents under a layer of lava crust, and the stem suffered from a large void on the underside of the bit. The gap, however, had been carefully smoothed with a file to make the damaged stem as comfortable as possible for the piper.
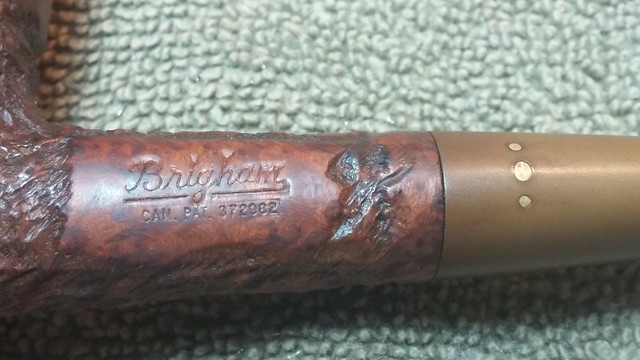
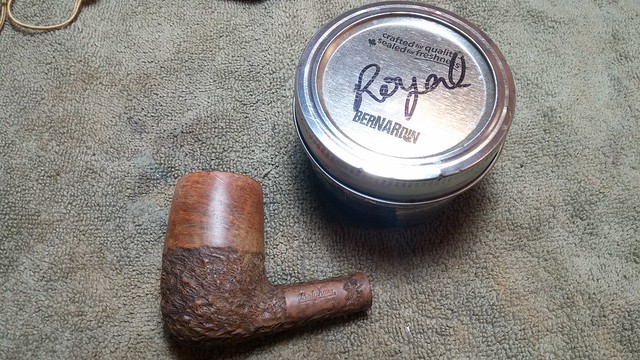
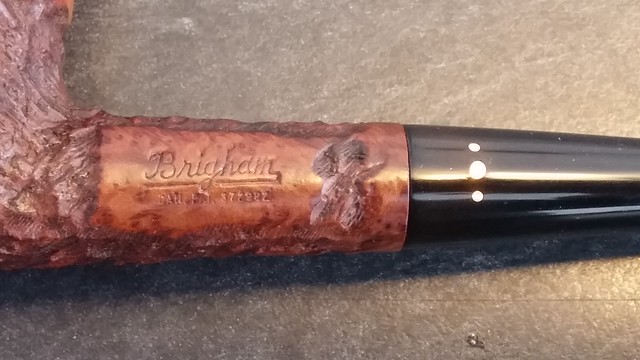
The vulcanite stem was heavily oxidized a rather sickly yellow/green colour, but the three vertical brass pins, or Dots as they became known for Brigham pipes, were still clearly visible. The pinning configuration identifies this pipe as an Executive grade Brigham, which sits between the regular 3 and 4 Dot pipes in the Brigham hierarchy.
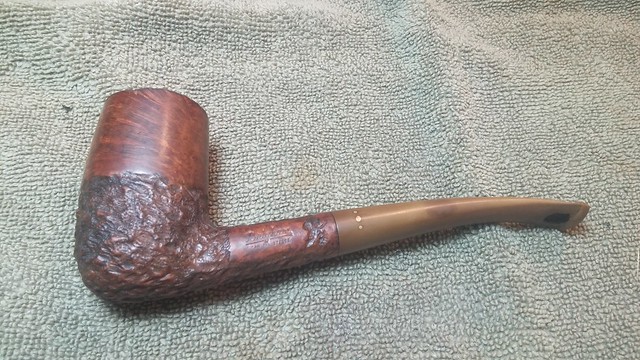

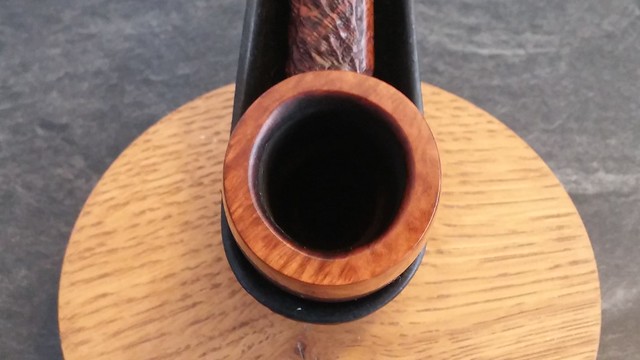
The pipe is stamped on the left shank with the old thin-script Brigham logo over “CAN. PAT. 372982”, indicating a production period between 1938-1955. There is no shape number stamp on this partially rusticated pipe, which, combined with the older logo, suggests to me that this particular Statesman was carved closer to 1938 than 1955. Early Patent Era Brighams were identified by shape name rather than shape number in the Brigham catalogs, though three-digit shape numbers were eventually added to the regular Brigham stamps sometime around the mid to late 1950s, and certainly by the 1960’s.
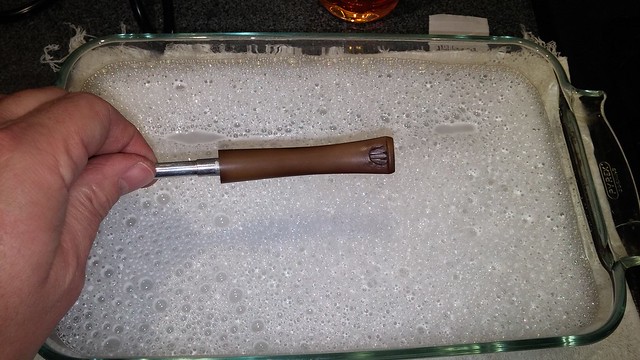
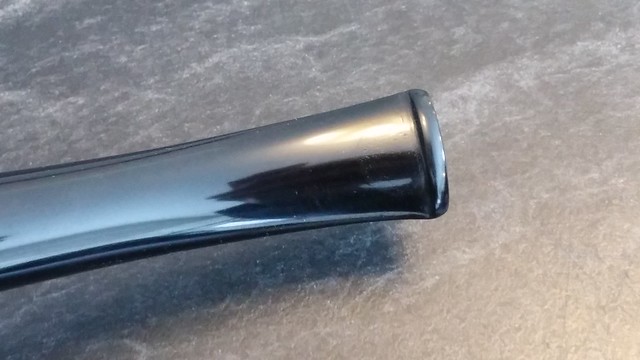
I started this restoration by soaking the stem in a bath of Oxyclean and warm water to raise and soften the oxidation. I let the stem soak overnight before scrubbing away the oxidation using 0000 steel wool and Magic Eraser. Without the oxidation the damage to the stem is clearly visible.
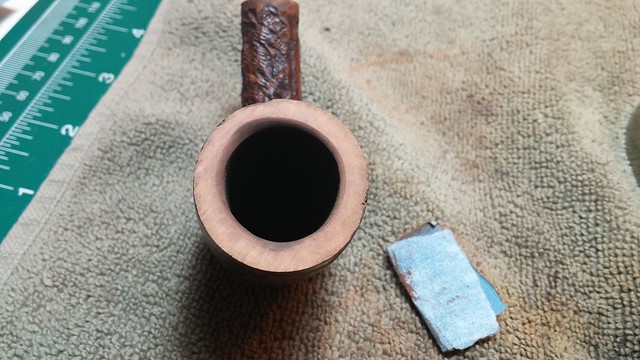
While the stem soaked, I reamed the old cake from the tobacco chamber – a somewhat tricky job as the stacked bowl was almost as tall as my Castleford reamer.

I topped the bowl lightly to remove the crust of lava and smooth out the flat surface of the rim. Without the layer of crud the rim dents really become obvious. The bore was slightly out of round, so I sanded a bevel into the inner rim to bring the chamber back into shape.
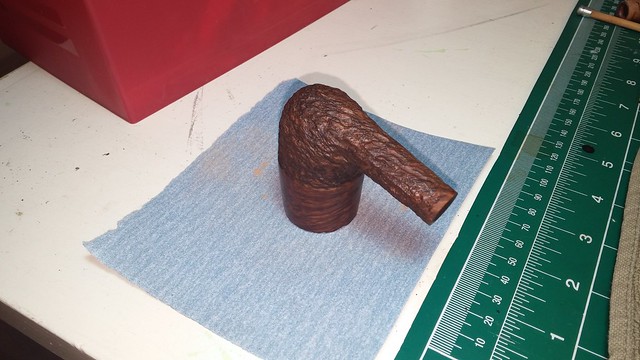
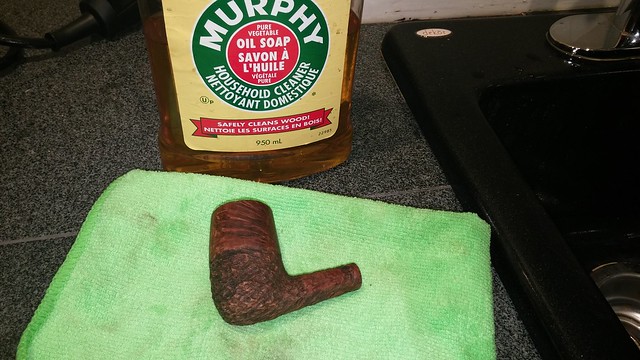
I could have topped the bowl more aggressively in order to erase the rim damage, but the Statesman shape is known for its stacked chamber. Instead, I decided to fill the rim dents. Before doing so, however, I scrubbed the stummel with Murphy’s Oil Soap to remove the dirt, wax and other grime from the surface of the briar.
With a clean surface to work with, I mixed briar dust and CA glue and applied the fill material to the outer rim of the chamber, overfilling the dents to ensure good coverage. I let the CA cure completely before filing and sanding the fills flush with the surrounding briar.
A light topping removed the excess fill from the rim surface. I finished the repair by sanding the smooth portion of the bowl with 220 and 320 grits of sandpaper followed by a hand buff with 0000 steel wool.

A wipe with my own blend of Fiebing’s Dark Brown and Saddle Tan dyes refreshed the original Brigham Royal finish. When the dye had dried, I hand buffed away the excess with an old towel and rejuvenated the briar with a light coat of mineral oil.

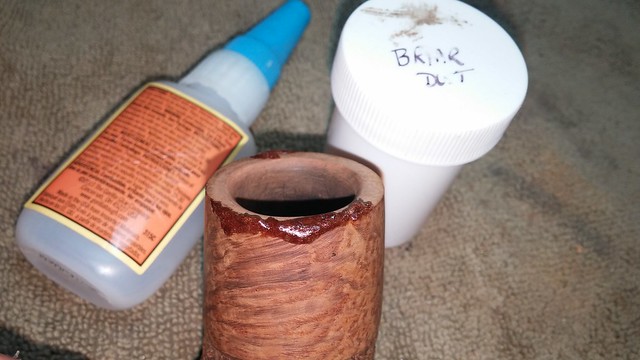
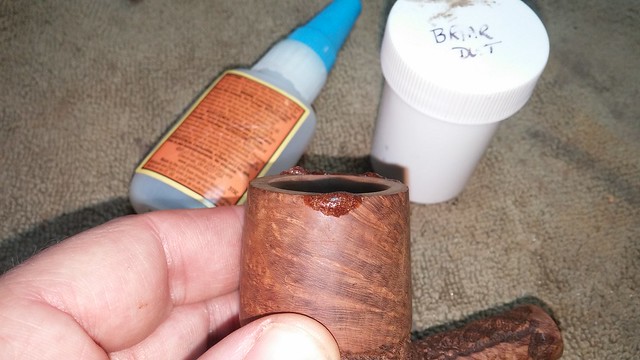
I set the stummel aside to rest while I worked on the stem repair, starting with the creation of a cardboard form. I cut a triangle of card stock to fit the flared slot at the end of the stem and wrapped the card with clear tape.
Wedging the form in the end of the stem, I dropped in a mixture of CA glue and charcoal powder, filling the gap completely and overlapping the edges of the hole to ensure good adhesion of the patch.

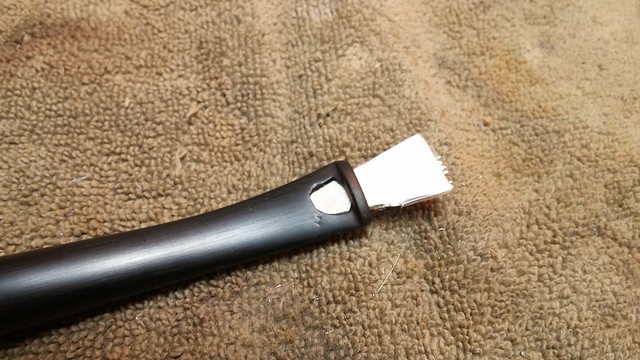
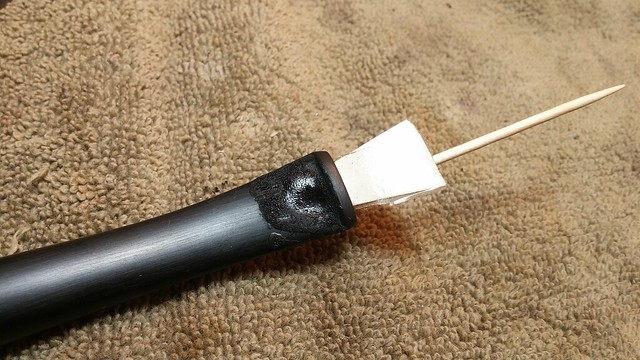
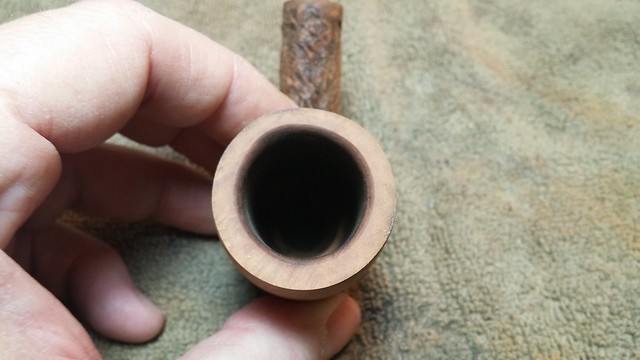
I let this first layer of patch set before gently removing the cardboard form and adding a second layer of CA and charcoal to bring the patch up above the level of the surrounding vulcanite. I let the repair cure overnight before filing and sanding the patch flush.

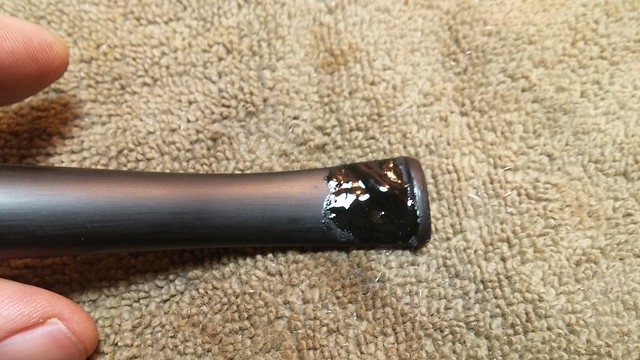

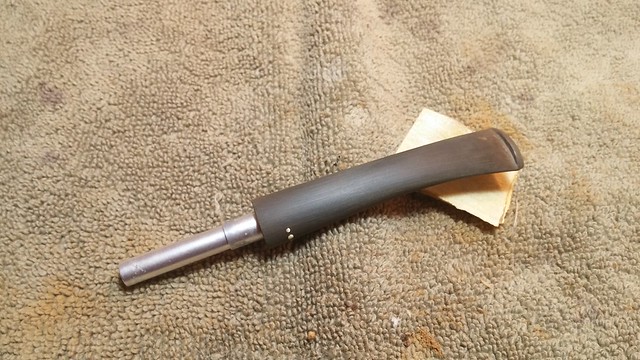
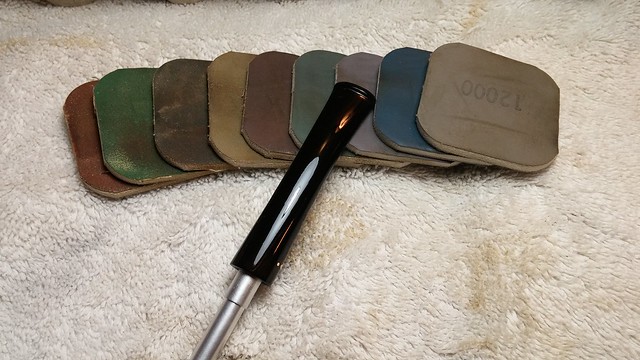
I ended up going over the patch several times with clear CA glue to fill a few stubborn air bubbles. When the patch was smooth and flat, I gave the entire stem a full course of micromesh sanding pads in 1500 – 12000 grits to smooth the repairs and bring up the shine.
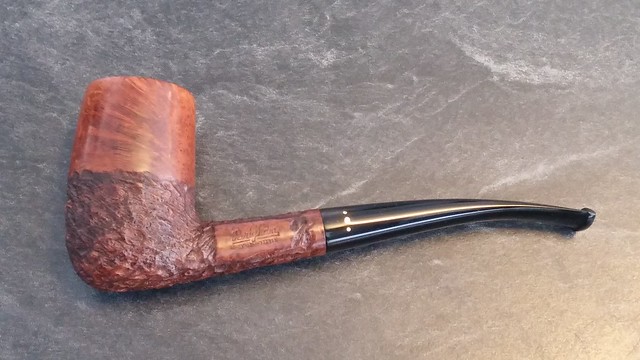
Then it was time to take the pipe to the buffer for a final polish with White Diamond compound and several coats of Carnauba wax. I gave the stummel a light overall buffing but then focused subsequent buffing on the smooth portions of the briar to avoid driving compound and wax into the rustication.
This Patent Era pipe is once again living up to its Statesman name – it’s classic, refined shape, now restored, would not look out of place in the hands of a diplomat or other senior official during sensitive negotiations.
I’m looking forward to enjoying a long, leisurely smoke from this stacked billiard just as soon as I have that much time to hide away! Until then, it will wait patiently in its new place in my rack.
Here’s the finished pipe. Thanks for looking, and until next time, Happy Piping!


Charles, you did your typical thorough job. Question: Do you think the stem repair of that hole will withstand a smoker who clenches the vulcanite stem firmly between his molars? (I’m a bad clencher and therefore prefer old-style hard rubber stems, which are few and far between nowadays, since they tend to take a strong clenching well. Your thoughts?)
LikeLiked by 1 person
My experience with the CA stem patch, Todd, is that it holds up about as well as the original vulcanite. That said, all stems are susceptible to damage by a determined clencher.
LikeLike
And may Heaven save us from the fury of a determined clencher. 🙂
LikeLiked by 1 person
A fine stem to stern restoration, Charles. Love the finish. This reminded me I have a similarly half-rusticated chimney pipe that I believe is a Hillson, if I remember correctly. I’ll have to dig it out and complete the restoration that I should have done two years ago.
LikeLiked by 1 person
Reblogged this on rebornpipes and commented:
Masterful job on the stem and rim repair Charles. Good to see you back at the repair work! Nice first bat! Well done. The information you are gathering on the Brigham pipes will soon be worthy or a book my friend.
LikeLiked by 1 person
Ha! Thanks Steve. A book would be quite the undertaking!
LikeLike
As usual with your work, it just takes my breath away. Simply amazing.
LikeLiked by 1 person
Thanks Mark. Very kind.
LikeLike
Wow, that was a large of a stem hole as I’ve ever seen, nice work!
LikeLiked by 1 person
It was certainly significant! I’m glad the button was intact as it gave the repair some structure. 😀
LikeLike
Charles, what activated charcoal product do you use (and source)?
LikeLiked by 1 person
I use activated charcoal capsules I buy at my local drug store. I believe the brand is Swiss Naturals. They are sold as a natural cure for indigestion if I recall correctly. Stop by your pharmacy and browse the aisles.
LikeLike
Ah, that sounds perfect. The product sold in pet stores fur aquariums is a lurker too coarse.
LikeLiked by 1 person