
There is still a handful of pipes from the Danish Lot I purchased last Spring waiting for my attention. We’ve already seen one example of a Stanwell Brazilia from this estate collection; here’s the second of three pipes from this series I’ll be restoring.
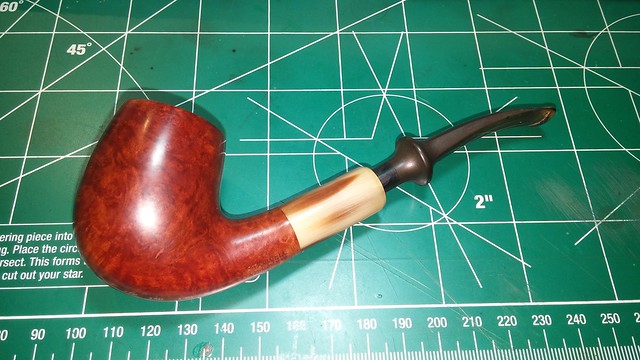
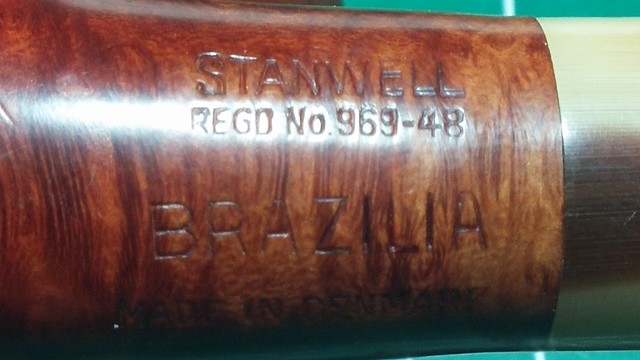
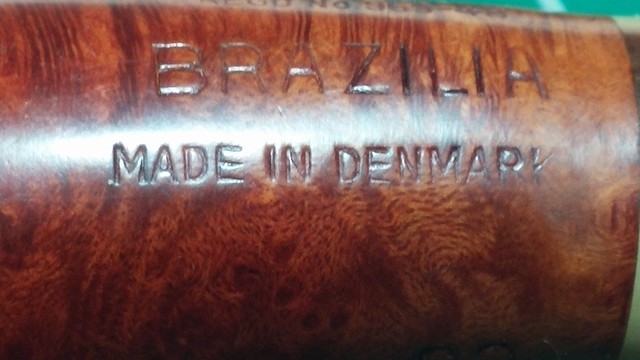
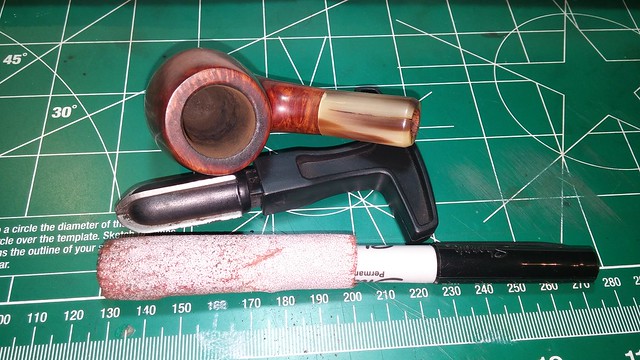
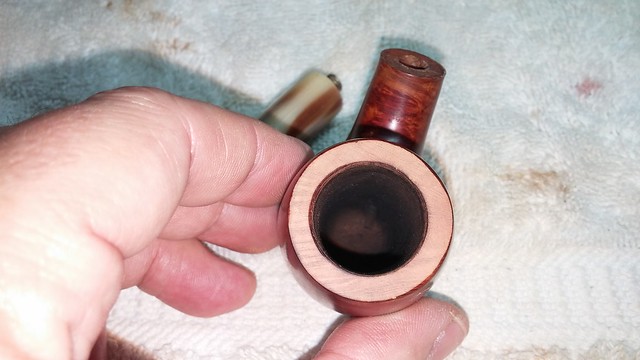
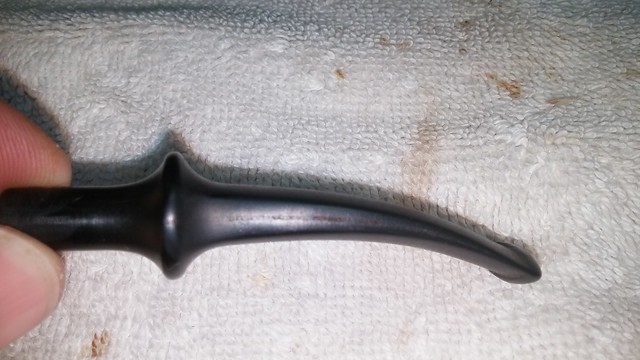
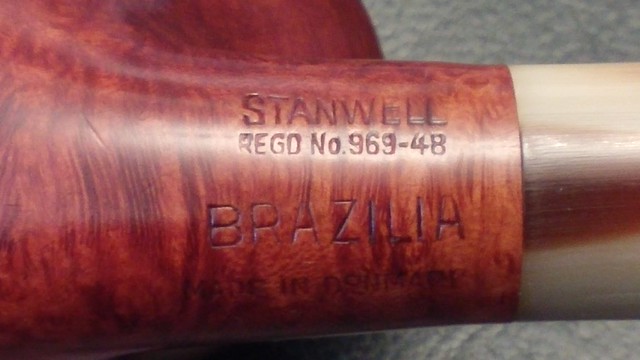
This Brazilia is a Shape 85 Bent Billiard with a few more years on it that the Shape 19 I posted previously. It is stamped “Stanwell” over “REG’D. No. 969-48” over “BRAZILIA” over “MADE IN DENMARK” on the left shank, and carries the shape number, “85” on the right shank just below the genuine Brazilian horn shank extension. The “Regd No” stamp dates this Brazilia no later than about 1970; it’s likely from the mid 1960s.
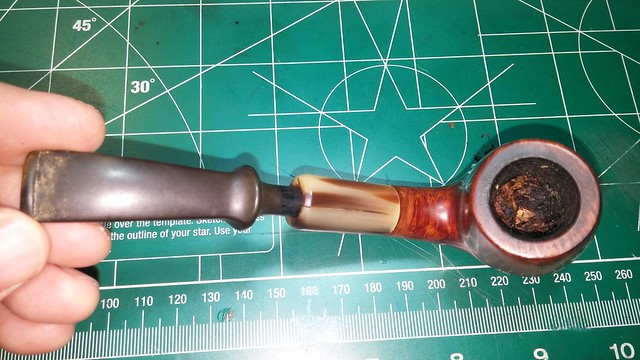
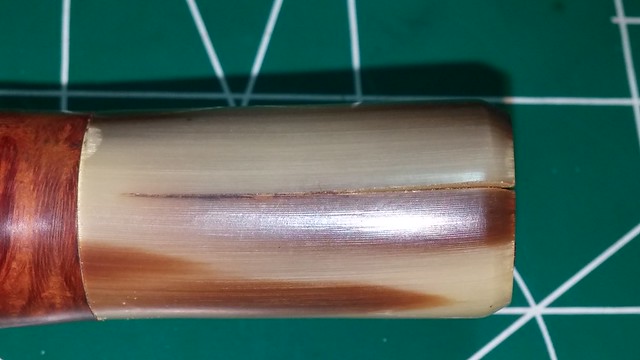
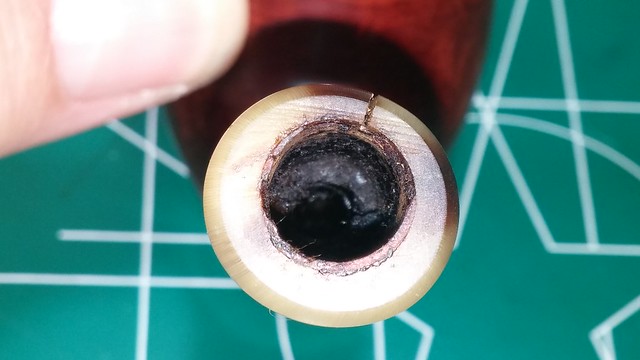
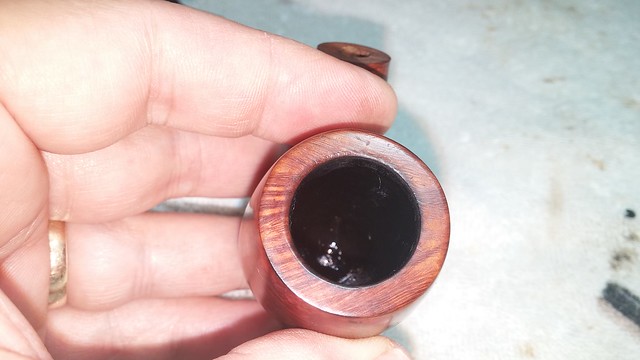
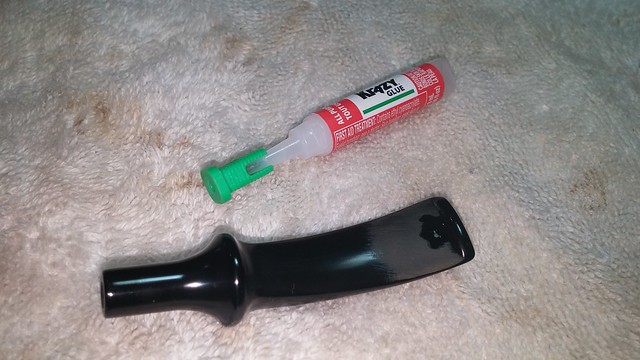
The pipe had been “ridden hard and put away wet” before it hit the work table. Half a bowl of un-burnt tobacco remained in the chamber, and a crust of tars covered the rim. There was a crack running most of the way down the horn shank extension; it stood out as a dark line against the pale horn as it was packed full of grime. The stem mortise was in rough shape, ragged and notched around the edges. I’m not sure if there was a vulcanite mortise insert there originally or not, but the damaged mortise was filthy and incapable of holding the stem securely. The stem itself was oxidized and poorly fitted, with the tenon roughly hacked down to more or less fit the ragged mortise.


I started this restoration at the beginning, scooping out the old tobacco and reaming the chamber back to briar. Thankfully the chamber walls and draft hole were in great shape under all the debris.
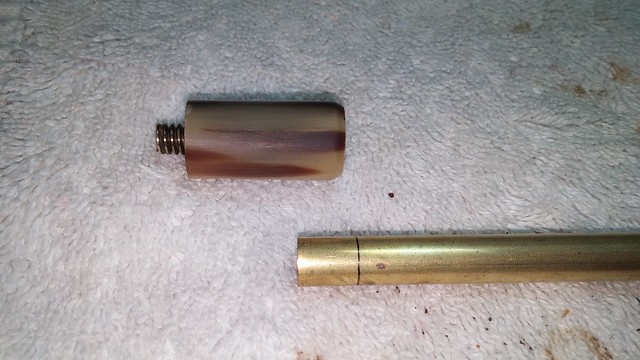
While inspecting the crack in the horn shank extension, I discovered that the horn had been attached to the briar shank by a short threaded tube. I unscrewed the horn and would do most of the repair work on it separate from the briar.

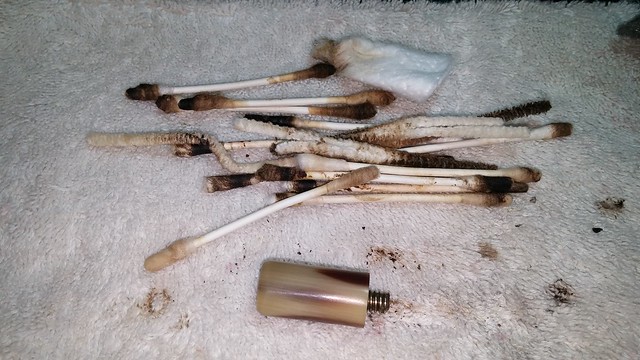
It took quite a few cotton swabs dipped in alcohol to clear out the heavy buildup of tars and other debris from the horn extension. I find this is generally the case with this style of mortise and tenon – the tenon only pushes in so far, leaving an air gap between the tenon and the end of the mortise where tars, oils and small bits of tobacco can cool and condense out of the smoke stream.
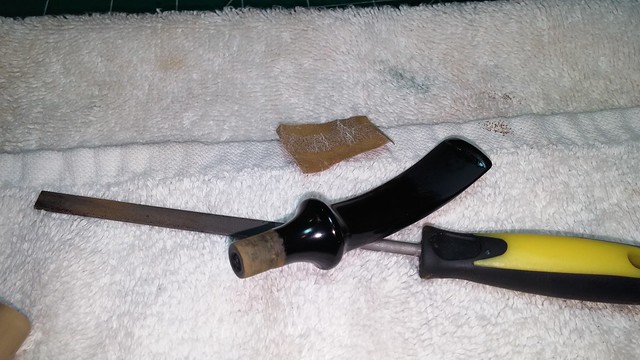
After considering my options for a permanent repair, I decided to splint the horn extension internally using a length of 3/8” brass tubing. The tubing was only slightly larger in diameter than the existing mortise, which meant I could clean up the rough edges and produce a nice clean finished look. To get the repair rolling, I clamped the horn extension into my drill press and used a series of drill bits to carefully expand the mortise to accommodate the brass tubing.
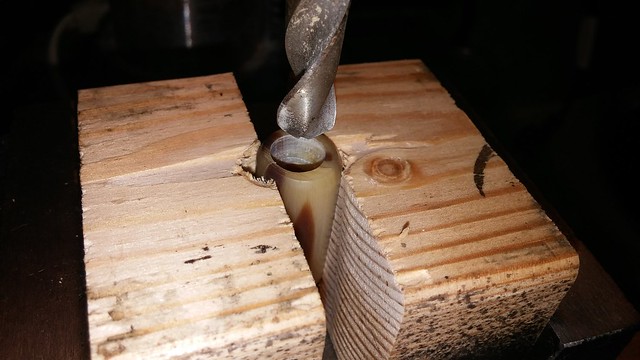
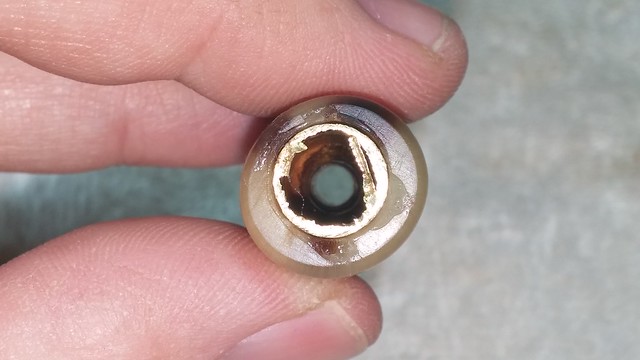
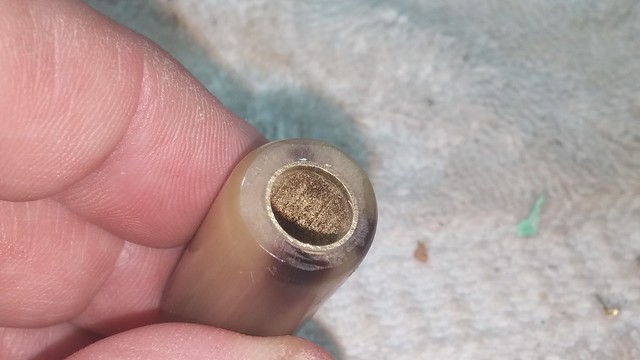
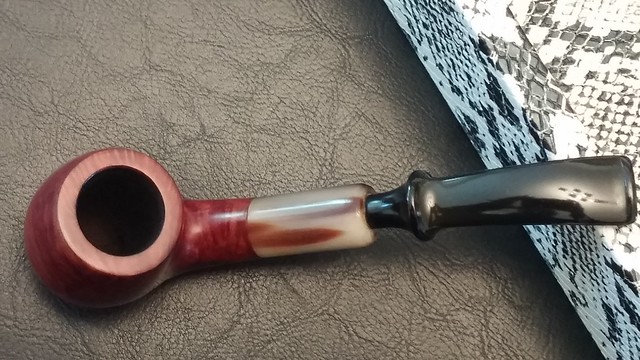
As you can see, the mortise is drilled slightly off-centre in the horn extension. This is a factory error, and one that may have contributed to the horn cracking where the mortise wall is thinnest (at about the 6 o’clock position on the shank end).
Now that the mortise had nice straight walls, I could slide in the brass tubing and mark it for length. I marked it so that the cut piece would sit a bit proud of the horn to facilitate final smoothing. The marked section of tubing shown is actually shorter than the piece I ended up using, as I went back to the drill press after this photo was taken and drilled the mortise all the way down to meet the threaded rod a the base. I wanted complete support for the crack repair coming next
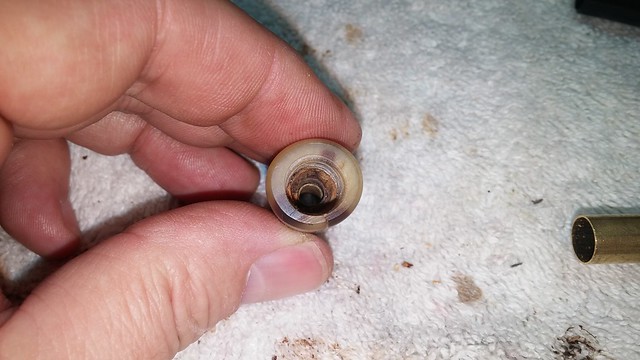
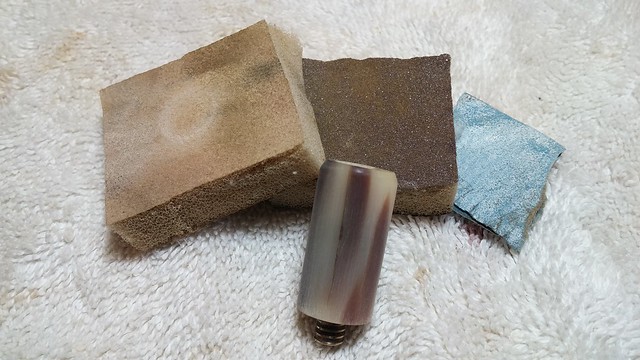
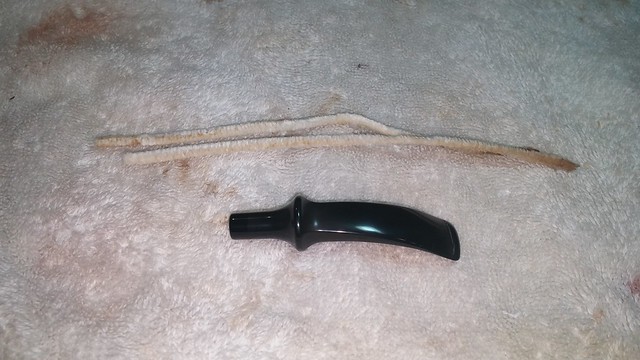
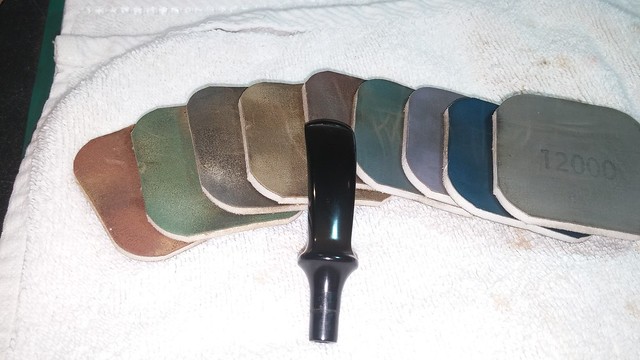
I picked the crack clean with a dental pick before running a line of clear CA glue into the crack. I let it cure before sanding away the excess. Remounting the horn extension back onto the stummel, I polished it up with a full course of micromesh to remove the sanding marks and bring up the shine.


With the crack cosmetically repaired, it was time to glue in the structural reinforcement. I applied a bead of thick CA glue around the interior of the mortise and pushed the brass tubing into place. While the glue was still wet, I used a few cotton swabs dipped in acetone to clean out the small amount of CA glue that squeezed into the airway, and set the shank extension aside to let the CA glue cure.


A flat file leveled the brass tubing with the end of the horn and 220-grit sandpaper tidied up the file marks. I finished off the horn repair with a full course of micromesh pads to match the finish of the shank end with that on the sides of the extension.

Before reattaching the shank extension to the briar, I took advantage of the shorter shank to give the stummel’s airway a good purging. I used a drill bit, turned by hand, to auger out the worst of the tars and tobacco debris from the shanks, and then went ot work with pipe cleaners, cotton swabs and alcohol.
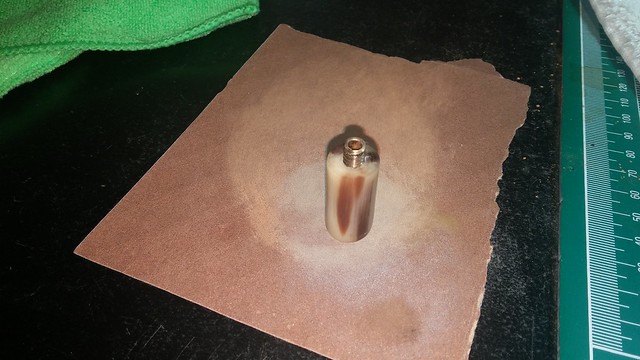
The cotton swabs also came in useful for removing the layer of tar on the rim of the bowl. Without its sticky disguise, the rim revealed several dings and small knife gouges.
I topped the bowl lightly to take care of the damage, and stained the sanded area with a medium stain pen to match the rest of the bowl.
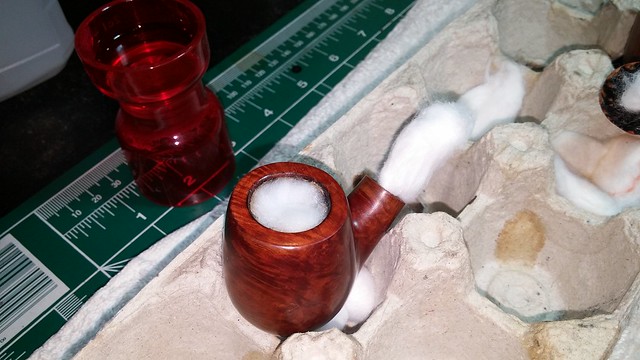
To make sure I had got all the tars and odours out of the briar, I stuffed both shank and bowl with cotton balls and filled the stummel with alcohol until it could hold no more. I left it to sit for 24 hours during which time the alcohol had done its work, pulling the tars out of the briar and trapping them in the cotton.

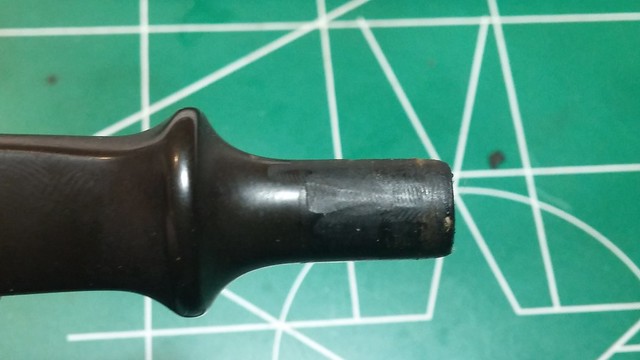
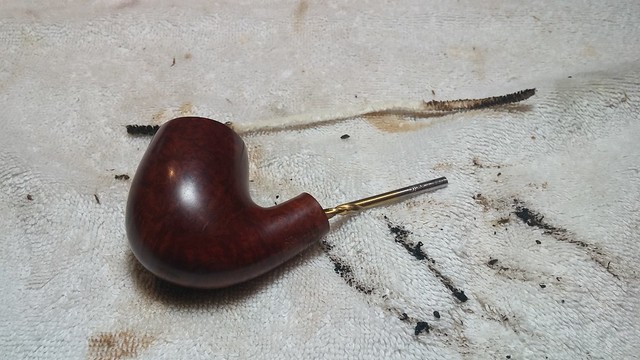
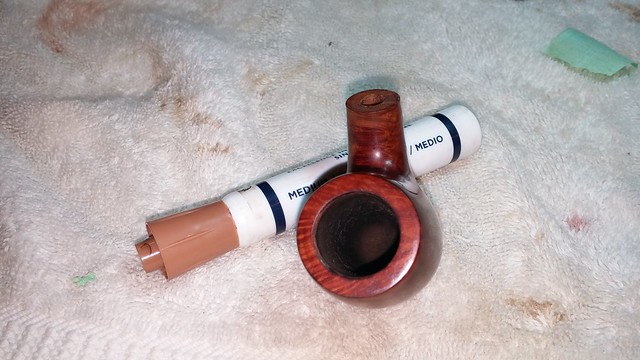
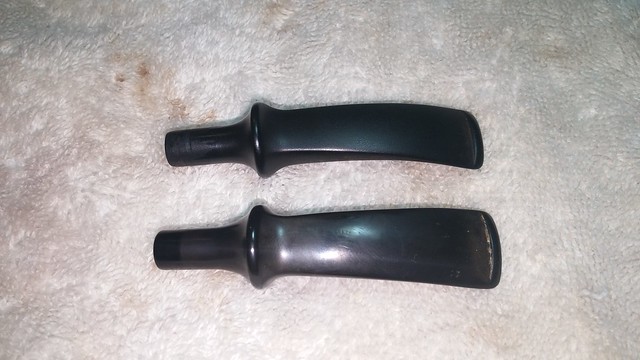
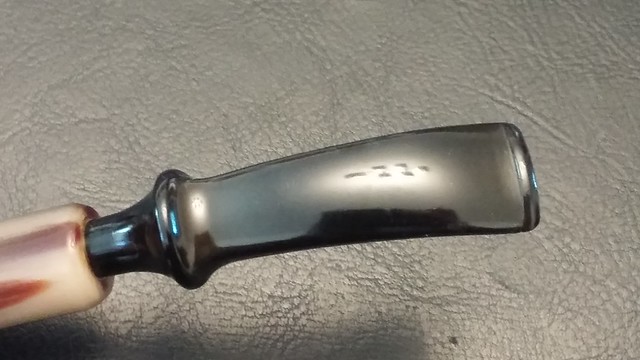
I moved on to the stem at this point, and it was while cleaning the stem that I noticed the tell-tale signs of a replacement stem. This pic is blurry, but it clearly shows the remains of the molding marks running lengthwise down the side of the stem.
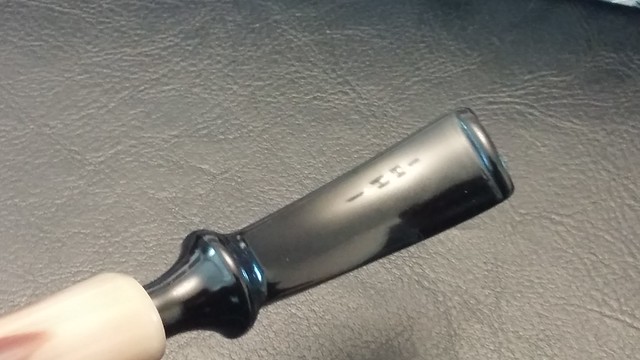
I remembered an old Stanwell stem I had in my stem box, and when I pulled it out, it proved to be just the right size and shape to fit this Brazilia. It was lightly oxidized and had a few small tooth dents, but it scored points for having an intact (read Not Hacked At) tenon, and the (faint) remains of the Stanwell Crowned S logo, so the switch was made. Here are the two stems side by side. The stem that came with the pipe is on top, the Stanwell stem on the bottom.
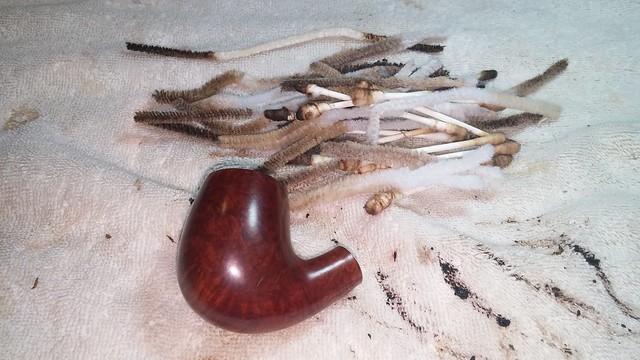
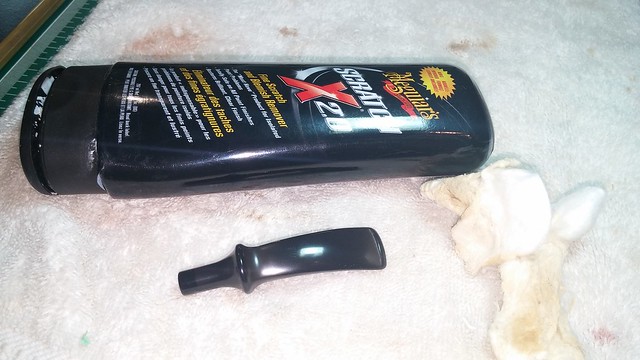
A scrub with Meguiar’s Scratch-X took care of the oxidation, and I only needed two pipe cleaners to tidy up the airway.
I dealt with the tooth dents in my usual manner, first sanding with 220 grit paper before drop=filling the dents with CA glue. The dents were shallow on this stem so I opted not to mix in any charcoal powder this time.
The stem tenon was just slightly over-sized for the new brass-lined mortise, so I used a needle file and various grades of sandpaper to remove the excess. This is one job for which I would have liked to have a Tenon Turning Tool on hand. The tool would have made the work faster, easier and tidier, but I got there in the end.

A full run of micromesh sanding pads cleared up the sanding marks and gave the stem a nice shine.
The new stem fit nicely and sealed airtight, so I was good to get on with reassembling the pipe. I put a tiny drop of CA glue on the threads before screwing the horn extension back into the briar shank. This will stop the parts from separating when removing the stem.
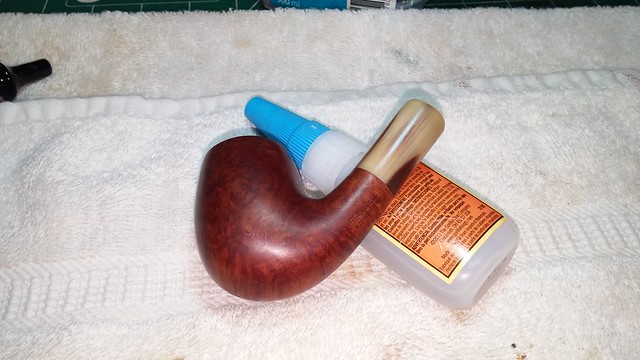
Then it was time to buff and wax. Both stem and stummel were polished with White Diamond compound on the wheel followed by several coats of Carnauba wax. I hand buffed the pipe with a microfibre cloth to finish off and bring up the shine a bit more.
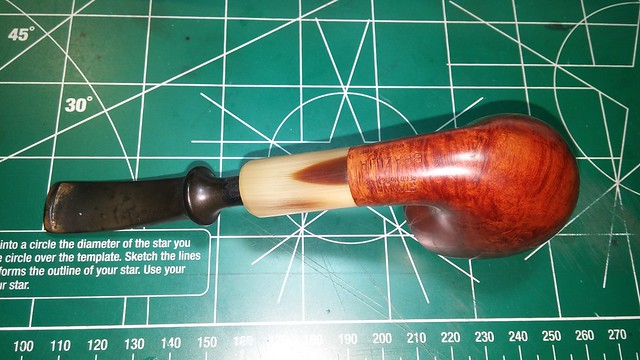
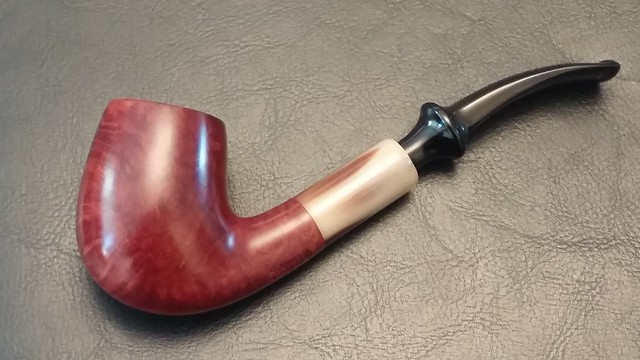
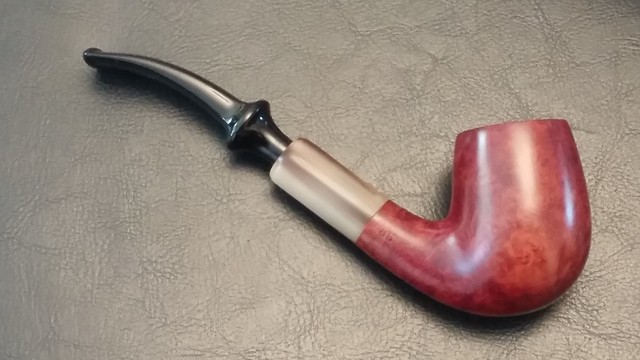
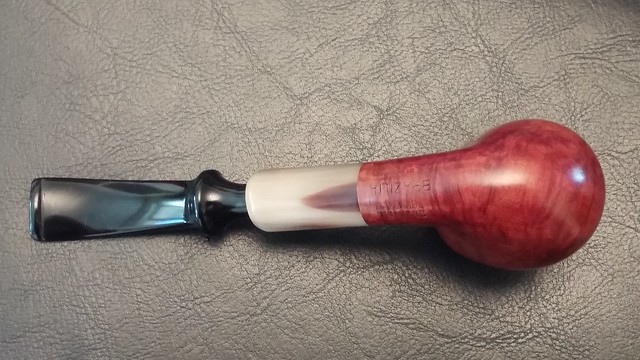
I’m quite pleased with the way this Brazilia turned out. The pipe is now cleaner than it’s been in a long time, and it’s fitted with a genuine Stanwell stem once again (though I admit you really have to look to find the remains of the stem logo. The stamps in the briar are all deep and well-struck, however, which might in some way compensate for the flawed stem.)
I dare say the brass mortise lining looks like it has always been there, and all polished up it adds a tiny bit of bling to the shank. The repaired crack is only visible due to the discolouration of the horn from all the dirt and tars that were wedged into it. To the casual eye it appears merely as a darker stripe of colour in the variegated horn extension. On top of all that, the pipe is made from a lovely piece of briar that features a nice mix of Birdseye and cross grain.
I’m very tempted to hold onto this pipe for my own collection, but I’m hardening my heart to such thoughts and making this Brazilia available for purchase on the DadsPipes Store. The Holiday season is fast upon us, so I’m making an effort to get as many “smokable stocking stuffers” onto the Store shelves as possible!
Thanks for joining me for this restoration. I’ll be tucking this shank repair technique away for future use, and I hope it helps you with your own repairs and restorations.
Here’s the finished pipe. Until next time, Happy Piping!

That was a fantastic repair to the horn section, bravo!
LikeLiked by 1 person
Thanks Al!
LikeLike
Great work on the horn repair, it looked like a daunting task to tackle.
LikeLiked by 1 person
Slightly nerve wracking during the initial drilling, but smooth sailing after the damaged horn was gone. 😀
LikeLike
Praiseworthy job, Charles.
LikeLiked by 1 person
Great repair, Charles! That stem extension splint was nicely done. I have not come across a pipe that needs this sort of repair but I will be book marking this write for when I do. Thanks! It will make some a great stocking stuffer
LikeLiked by 1 person
Thanks Aaron!
LikeLike