
I acquired this Dutch-made bent bulldog from Steve Laug of RebornPipes in a recent trade. It was in pretty good shape to start, which is a nice change from some of the estate pipes in my refurb box. It is stamped “Big-Ben” over “Grand Seigneur” on the left face of the diamond shank, and “15479S” over “Made in Holland” on the right shank. The stem is stamped with a “B” in a circle.
Here’s the pipe as received:


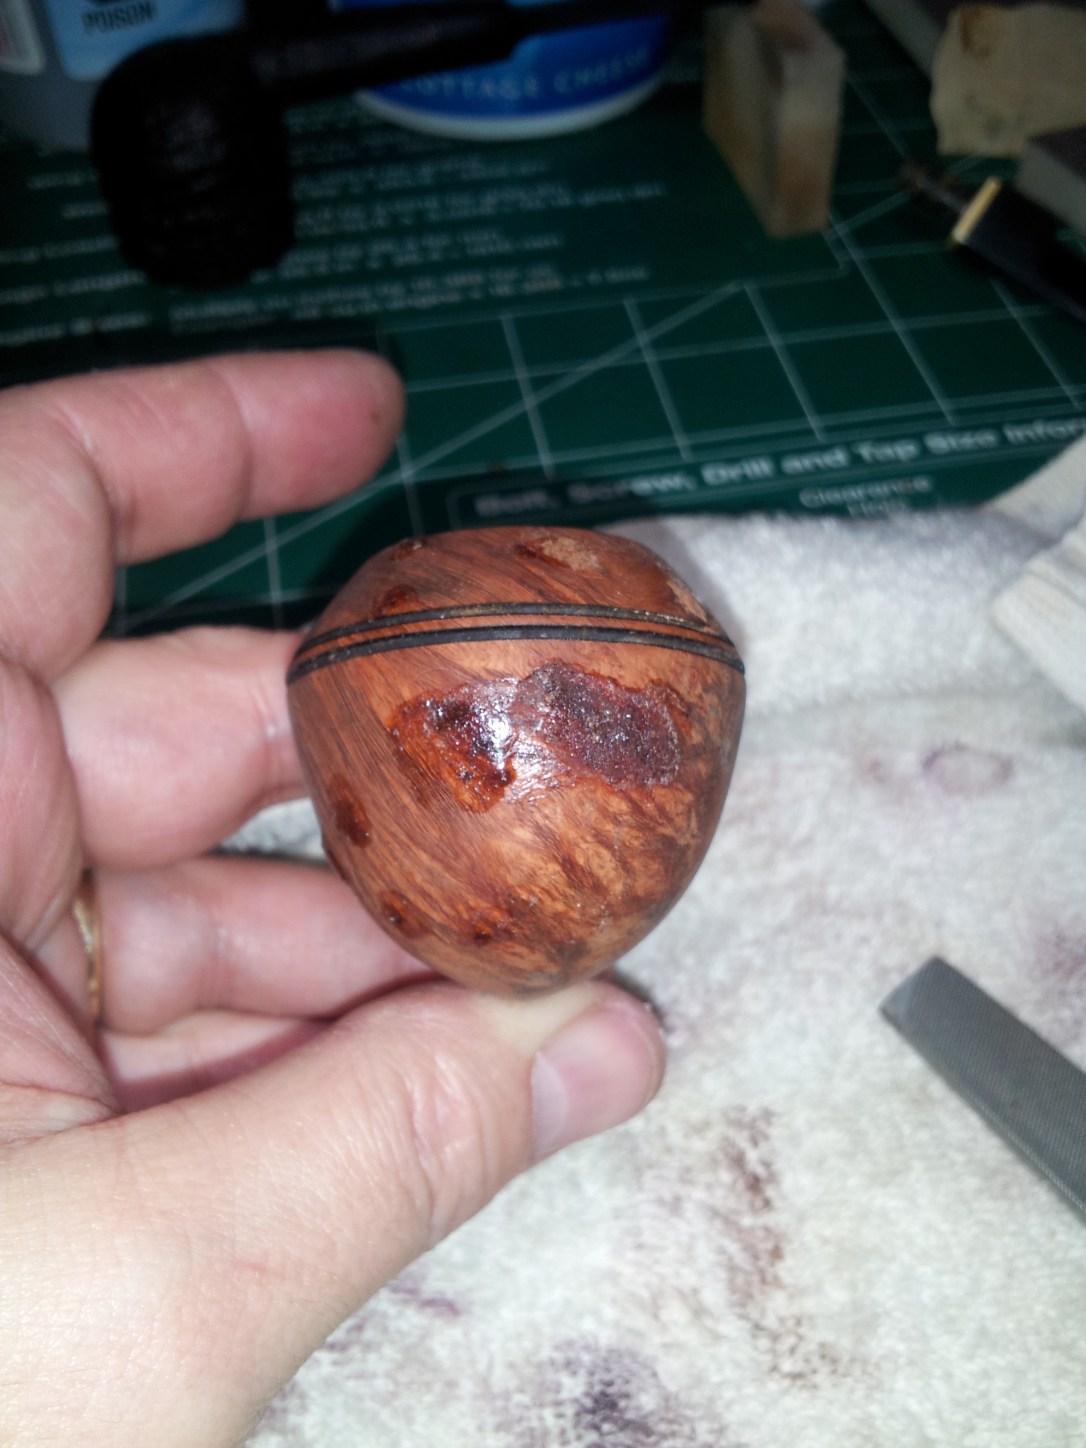
As the pics show, the pipe had been used but not abused. The stem was not oxidized, but had one deeper tooth dent that would need attention. The obvious flaws in the stummel were two medium-large factory fills that had shrunk and would need replacement. On a painted pipe like this, replacing fills means completely stripping and refinishing the stummel, as it would be very tricky to try to make spot-repairs.
I started by reaming the bowl back to briar and checking for any damages. There were none, thankfully, so I moved on to cleaning the airway with pipe cleaners and alcohol. I did the same with the stem, also wiping the exterior with alcohol to clean off any oils or dirt. I roughed up the area around the tooth dent with a bit of sandpaper and then dripped a bit of CA glue into the dent to fill.


I dropped the stummel into an alcohol bath for an overnight soak in an attempt to dissolve the old finish and make the paint easier to remove. While it soaked, I sanded the filled stem with 220-grit paper and medium and fine grit sanding sponges to level the CA glue and then polished the stem with various grades of MicroMesh pads to remove the sanding scratches.
The next morning, I pulled the stummel out of its bath and got to work removing the old paint. This wasn’t particularly difficult but it was time-consuming. The alcohol soak had cleaned the surface of waxes, oils and dirt but had left the paint virtually untouched. I ended up sanding the black paint off, taking care not to damage the stampings on the shank.
Here’s a few pics of the stummel after stripping – there are a LOT of fills here, as I had anticipated (factories generally only paint pipes with inferior briar and/or those with a lot of fills). Many were small pinhead-sized flaws, but several were more serious, including the two fills spotted through the old finish, and two that cut into the edge of the shank.


I used a dental pick to clean the old putty out of all the fills. It took a while, but eventually I had the stummel ready for new CA glue and briar dust fills. I worked in batches, mixing just enough glue and briar dust to fill one or two pits at a time. I worked methodically, making my way around the entire stummel until all the fills were done.
While the fills cured, I worked on fitting the stem. I had a few issues to sort out – the stem was a bit loose in the mortise, and stripping the paint had thinned down the shank slightly. I worked on the loose fit first. I heated the tenon over a lighter flame until it was pliable and then gently widened the airway using the smooth end of an appropriately-sized drill bit. This pushed the wall of the tenon outwards, thus increasing its diameter. I dipped the tenon in cool water to set the new size. It now fits snugly into the mortise.

The fills were now completely cured, so I started in with file, sandpaper and steel wool to level the many fills and smooth out the surface of the briar. I didn’t take pictures of this – it’s dead boring to watch someone sand wood anyway. I had to revisit several of the larger fills to sort out air bubbles or other flaws in the CA/briar dust mixture – more tedious work, to be sure, but necessary to achieve a smooth finish. I resisted the temptation to rush the fills – even a tiny pit in the briar will show as a flaw after waxing.

To smooth out the transition between shank and stem, I pushed the stem home in the mortise and then gently sanded across the joint with 0000 steel wool and MicroMesh pads. It didn’t take long to make up the difference – a layer of paint isn’t that thick, after all – but the small effort improved the appearance of the pipe considerably, at least to my eye.

With the fills done, the pipe was now ready to refinish. I began with two coats of Fiebing’s Black water-based leather dye to highlight the grain and help hide the multitude of fills. When the stain was dry, I hand-buffed with an old terry towel to remove the excess and then applied two coats of a reddish-brown stain blended from Fiebing’s Saddle Tan and Dark Brown dyes. Again I hand-buffed to remove excess dye and then applied a coat of mineral oil to liven and enhance the colour.


Just when I thought it was time to buff and wax, I noticed a small pit on the front face of the pipe that had somehow escaped the filling process.
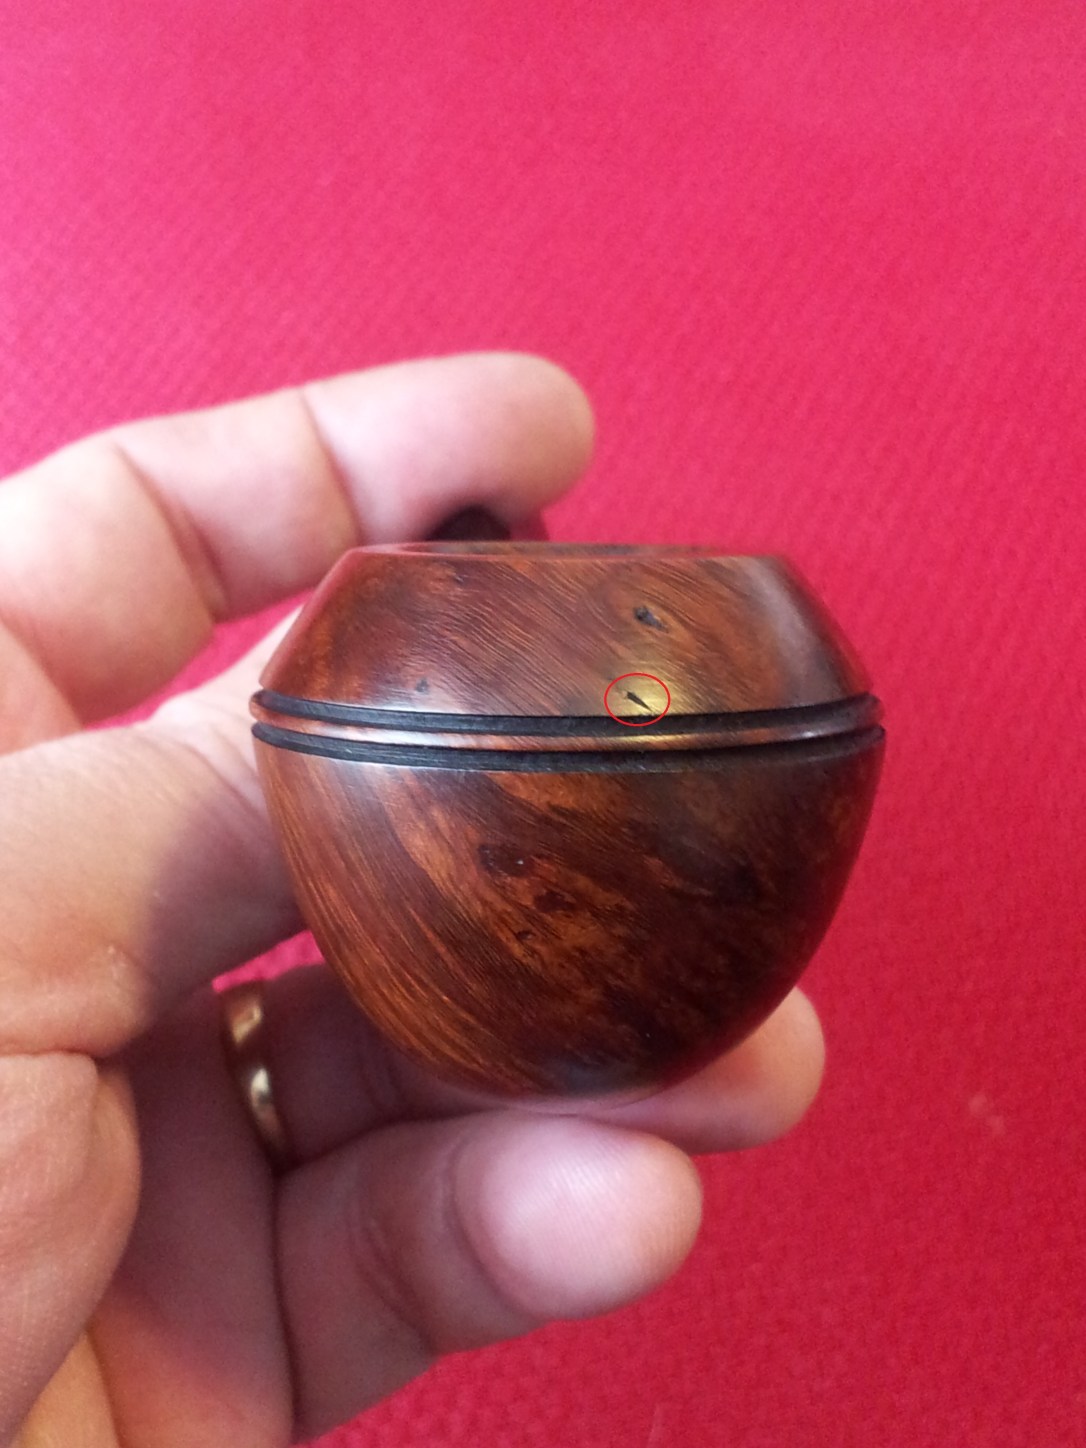
Argh! Frustrating, but given the number of fills this stummel needed, I’m kind of surprised I only missed one. The remedy, of course, was to backpedal furiously for a bit filling, sanding and restaining the briar. Maybe I needed the practice anyway.
Then it was (finally) off to the buffer for a run of White Diamond compound and several coats of Carnauba wax. Here is where all the prep pays off with a high gloss shine and a great smooth feel in the hand. The smaller fills have disappeared completely into the finish and the larger ones look more like natural dark spots that flaw repairs.
I liked the original black finish, but I have to admit a preference for this more natural look, especially after all the time and effort put into this pipe. The bent bulldog is one of my favourite pipe shapes, and this Big-Ben is ready to strut his stuff in his new coat!


Thanks for looking. Until next time, happy piping!

Ah, a 1000% improvement. I do not like black stained pipes, we generally know why such a stain was applied. That color choice is much more fitting such a classic shape. You may want to check out Dave G’s recent post on the Reborn Pipes blog, about removing stain to bare wood. It’s a bit less evasive than sanding and alcohol soak. (I have not tried it yet, but his results are incredible)
LikeLike
Thanks Al. I have fiddled with Dave’s method but have not had great success. I agree stripping is a far better approach to sanding. I went with sanding over chemical stripping as the lesser evil. The alcohol soak didn’t even soften the lacquer on this one. Might have been a poly coating of some kind?
LikeLike
The black painted pipes seem impervious to acetone and anything other than sanding. It is a real pain to remove. Well done Charles.
LikeLiked by 1 person
Thanks, Steve. Glad to know I went the right route on this one! I felt pretty safe sanding this one as the stampings were deep & well-struck. Gave me a bit of wiggle room 🙂
LikeLike
Reblogged this on rebornpipes and commented:
I am glad to see the work you did on this one. I like the overall look far better than what it was when I sent it to you. Great job.
LikeLiked by 1 person
Cheers, and thanks as always for the reblog!
LikeLike
Much labor, but the results more than justify the effort. Very well done Charles.
LikeLike
Cheers, Dave!
LikeLike
Looks much better now! Lots of time and effort spent, but the results speak for themselves. Great job!
LikeLiked by 1 person