
Hi everyone. Here’s a quick mid-week post to share a DIY solution to every piper’s perennial pipe storage shortage.
I made this 28-pipe storage/display rack in just a few hours. I was lucky enough to find a 24″ x 32″ piece of 5/8″ plywood in my garage, and a rummage through the fabric bin turned up a suitable remnant of black velvet fabric left over from another project. An old bath towel the Mrs had declared unfit for human use completed my scrounged materials.
I lay the velvet face down on my work table, then lay the towel on top of the velvet. The plywood was then laid on top of the towel. I trimmed excess fabric away, leaving just enough to wrap up over the edges of the plywood and about an inch more, where it was securely stapled to the back of the wood. This produced a nice velvet-covered board with just a little “give” when you push on it.
With the board ready, I measured out where to put my clips. What clips, you ask? THESE clips, which are actually rubber fishing rod holders I found on Amazon.

These were screwed to the board in a 7-high, 4-wide grid to give me 28 pipe holders. (Tip: Ditch the screws that come with the clips and go buy some good ones. The included screws strip out at the smallest provocation.) Also, be sure that you drive the screws far enough in to countersink below the inside surface of the clip, or you risk scratching the finish of your treasured pipes.
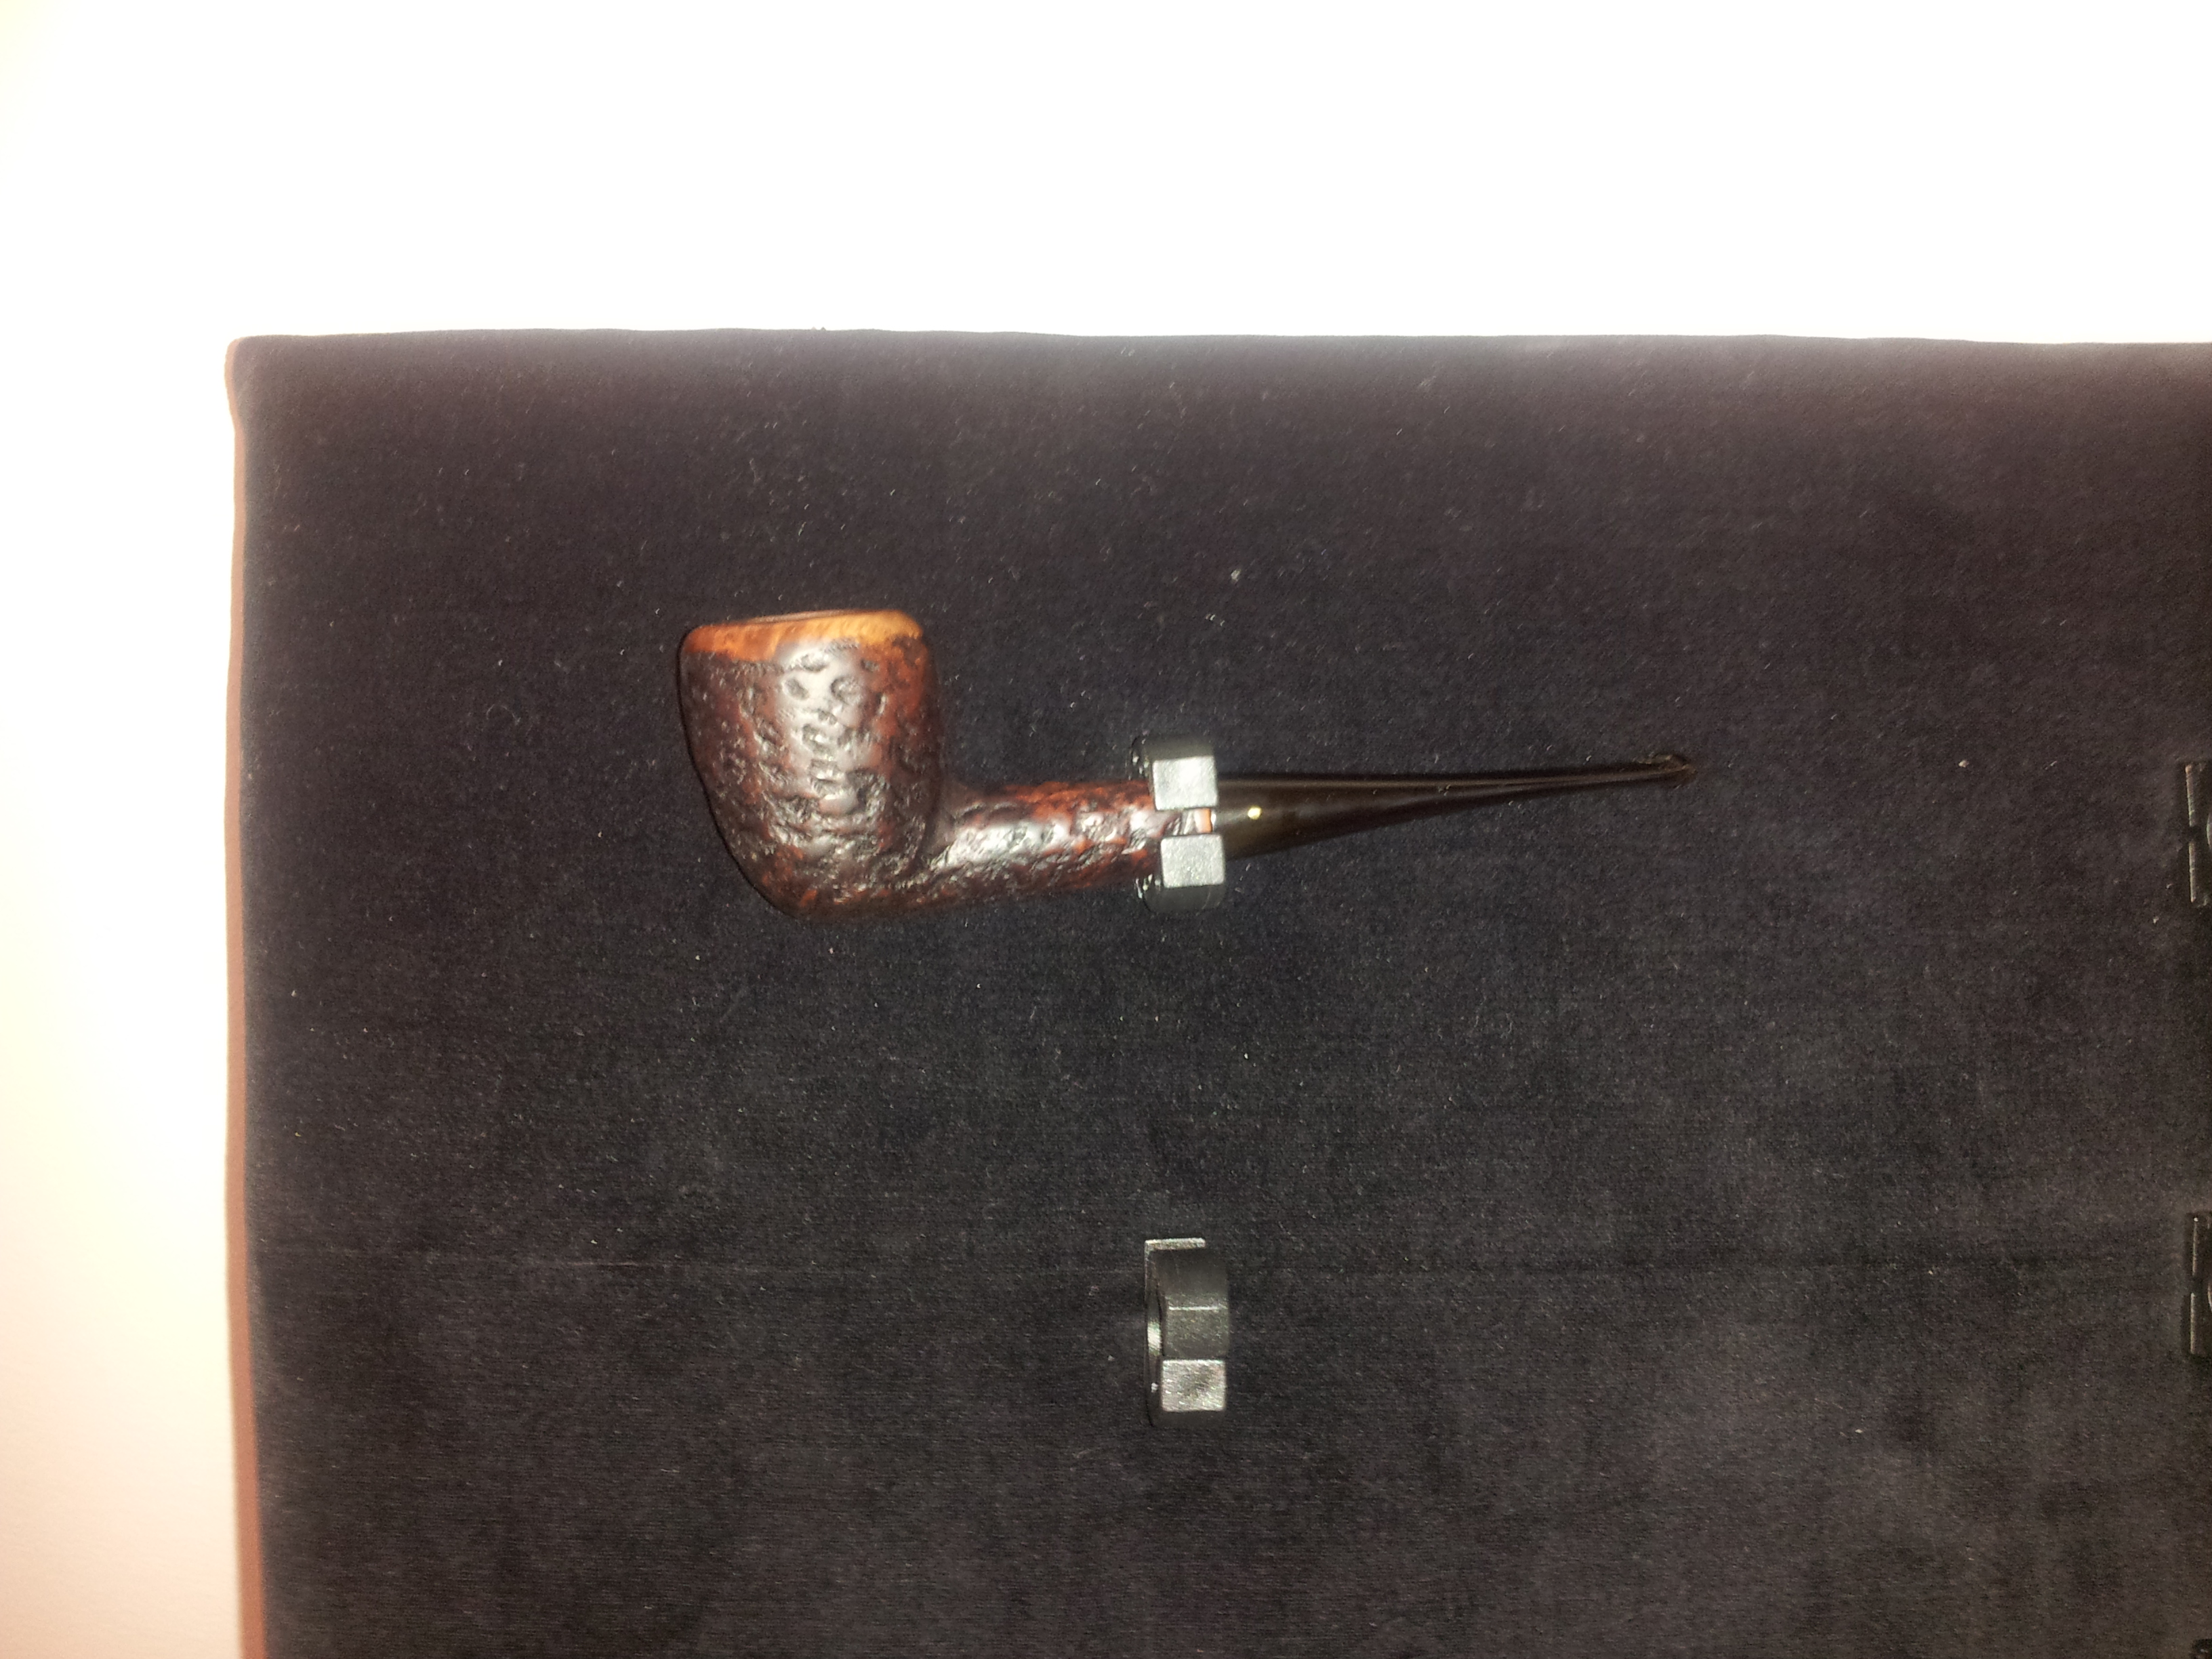
Here’s a closeup of the “tester pipe” in the rack to check that the clip will hold. It does. Some of you might recognize it as my Halloween pipe resurrection.
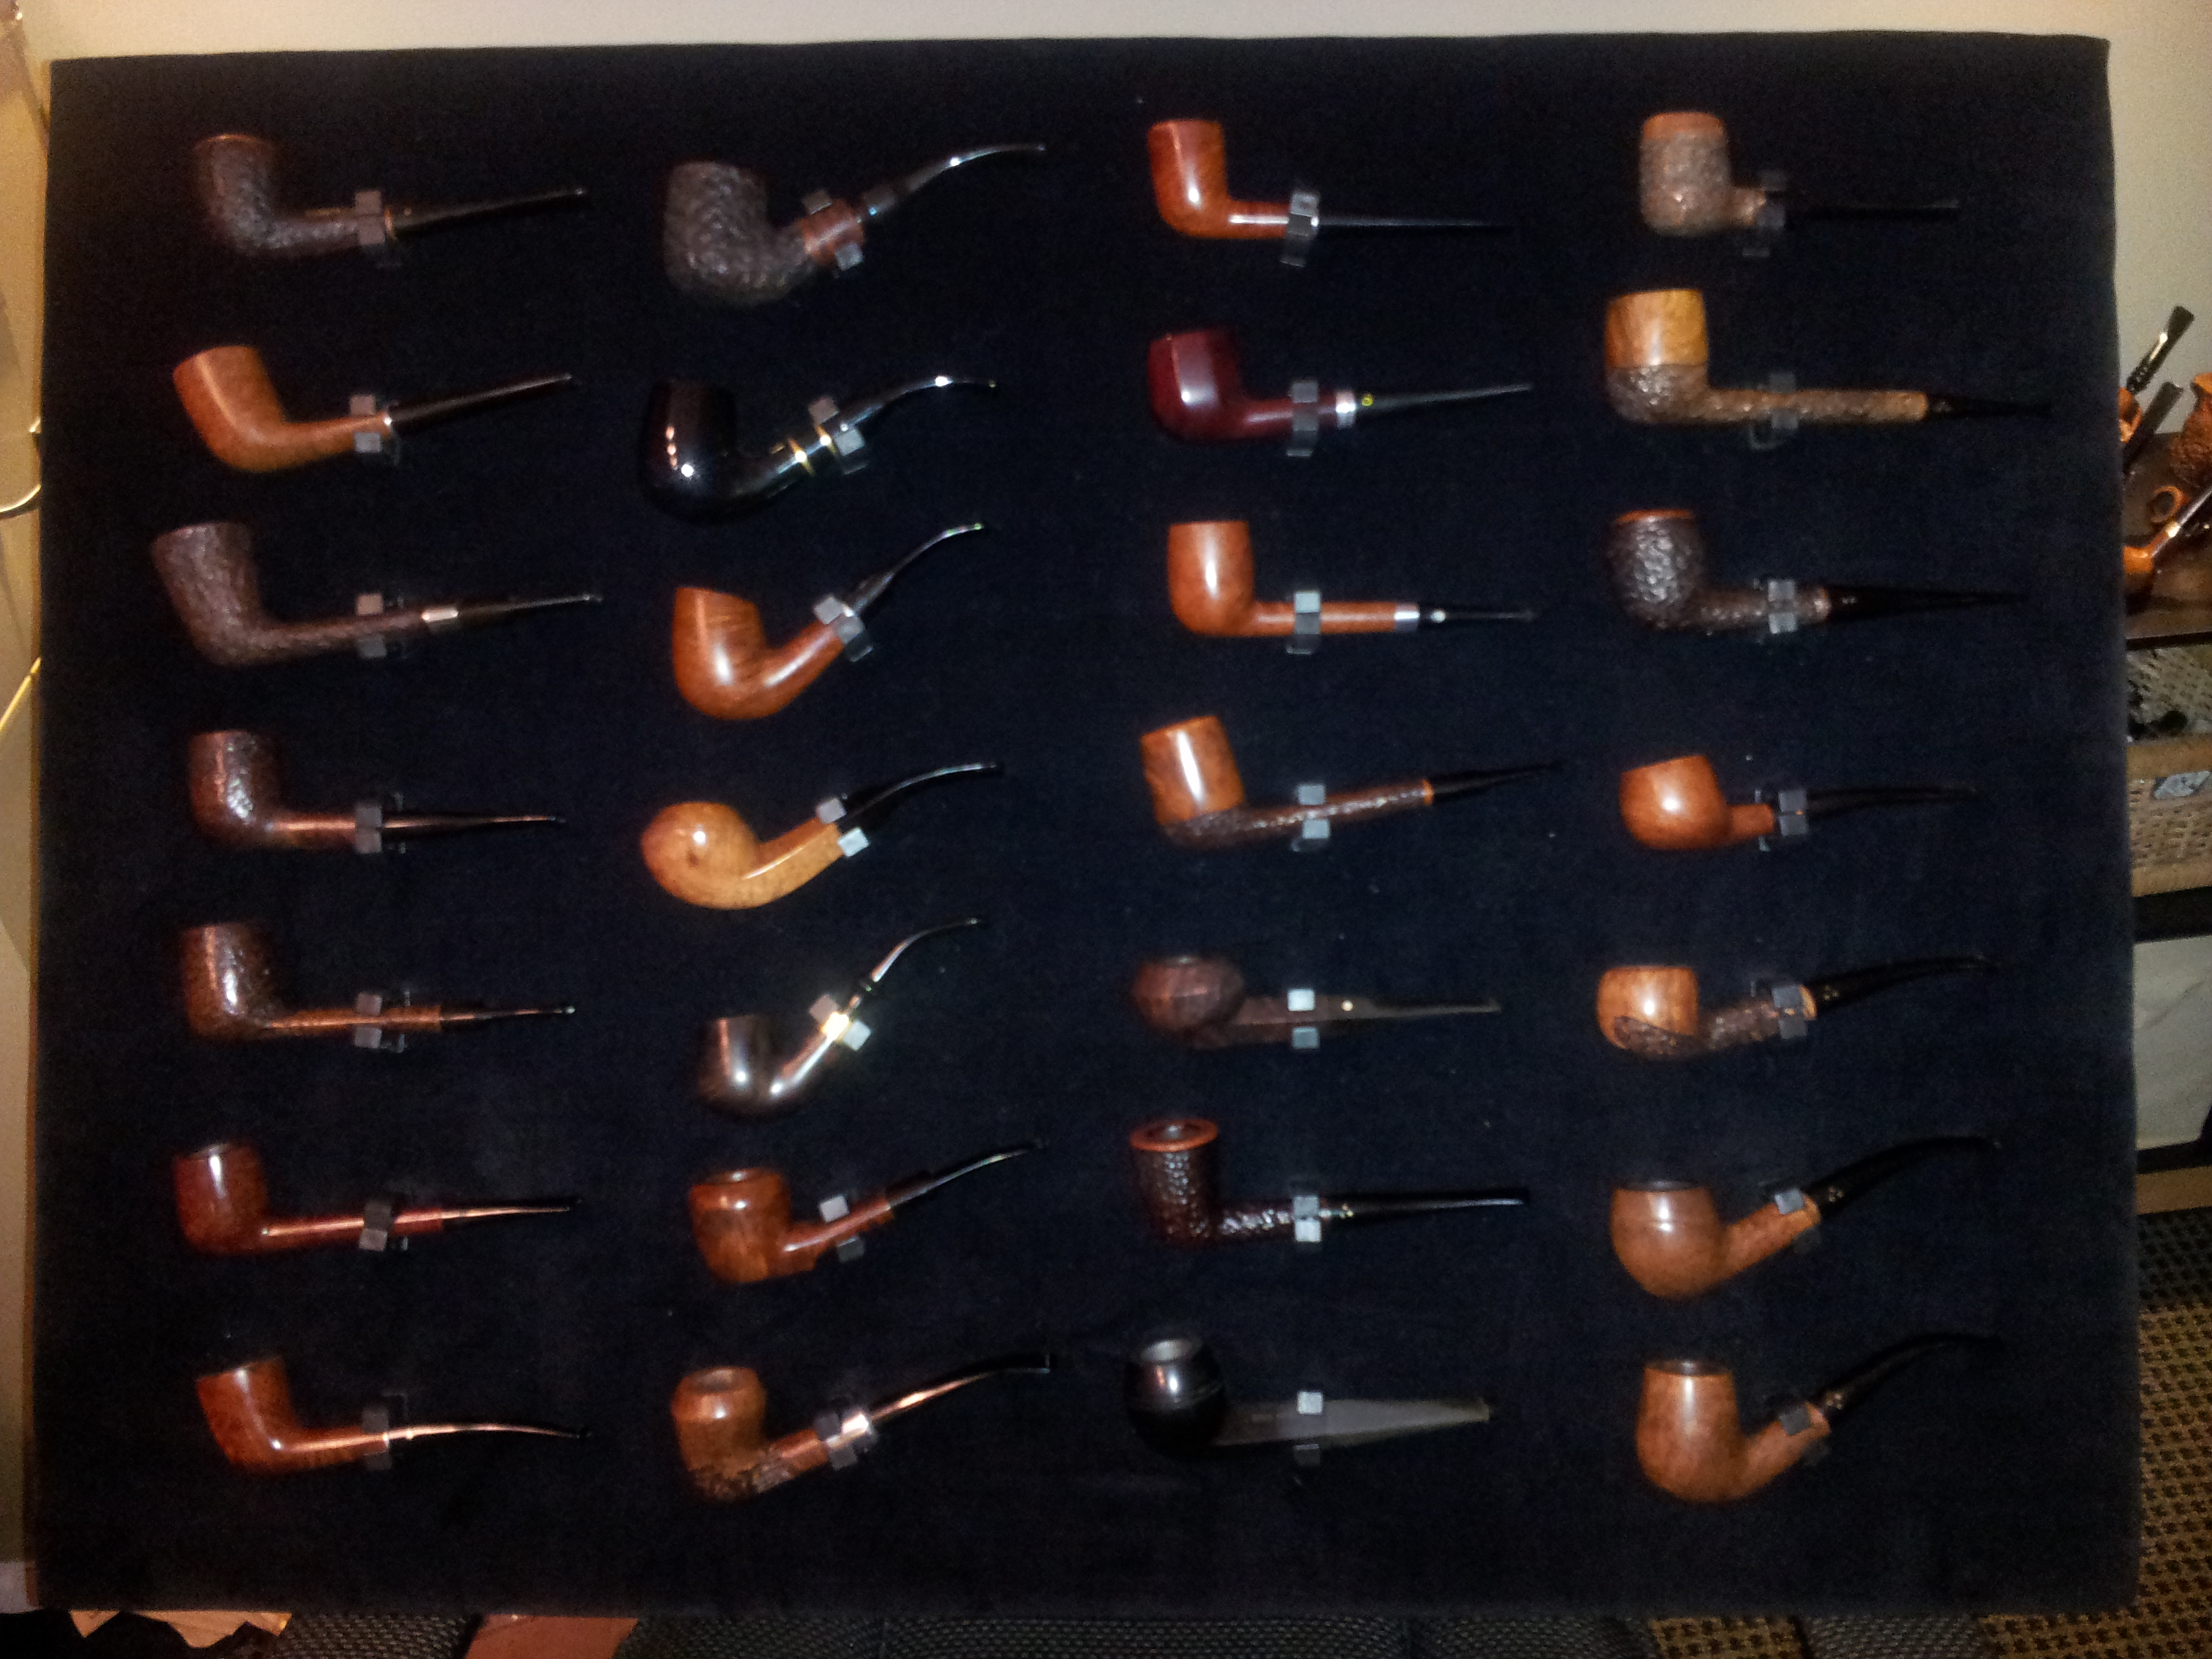
And here’s the rack fully populated. I cheated a bit for the picture – some of these pipes are actually still works in progress – but I’m happy with the overall look. All it needs now is a bit of mounting hardware to get it on the wall.
As an aside, this project could easily be modified by shape and size to fit your specific requirements. You could also frame it out and add glass doors and some built-in lighting if you wanted to go whole hog. I may do that down the road, but for now it works to get my pipes up off the table and away from the cat, who delights in tossing them to the floor.
Thanks for looking, and happy piping!
- Charles

I used the same clips in building my cabinet,they are quite handy. Beautiful job.
LikeLiked by 1 person
Reblogged this on rebornpipes and commented:
Great idea Charles. I may have to adapt that to my collection… it sure is easier than the boxes and drawers I use now. Well done.
LikeLiked by 1 person
I can’t help asking, but why would one want to ‘display’ a pipe collection on a wall? It just seems a bit of an odd thing to do personally.
LikeLike
To each his own, but I think most collectors enjoy displaying their items. Most of my pipes are estate restorations, so they’re a bit like trophies, too. I like looking at them and showing them to visitors.
LikeLike
This is an excellent idea. I was trying to think a way to incorporate my pipes into a book self space and this is just the ticket. pipes in one space and baccy, accessories etc. in another space or two within the bookshelf. Thanks for sharing.
LikeLike
You’re very welcome!
LikeLike
Hi
How soft are the clips? How careful does one have to be placing and retrieving the pipes? Did they scratch any of your pipes since posting? Also the clips in your picture look like the clips following your link,however the packaging appears different. Do the clips come in the same package as your picture? Great idea by the way, I am thinking one can also use these in a rack design possibility fitting more pipes in a smaller area. I appreciate your blog and help.
Best
Lee
LikeLike
Hi Lee. The clips are a fairly soft rubber compound. I have not had a pipe scratched by them. Re: packaging, I found my clips on Amazon. I’m sure they are available other places, and probably in other packaging.
LikeLike
Onde posso comprar esses Clipes no Brasil? Alguém sabe?
LikeLike
I’m not sure about local sellers in Brazil, but Amazon and eBay are good bets.
LikeLike