
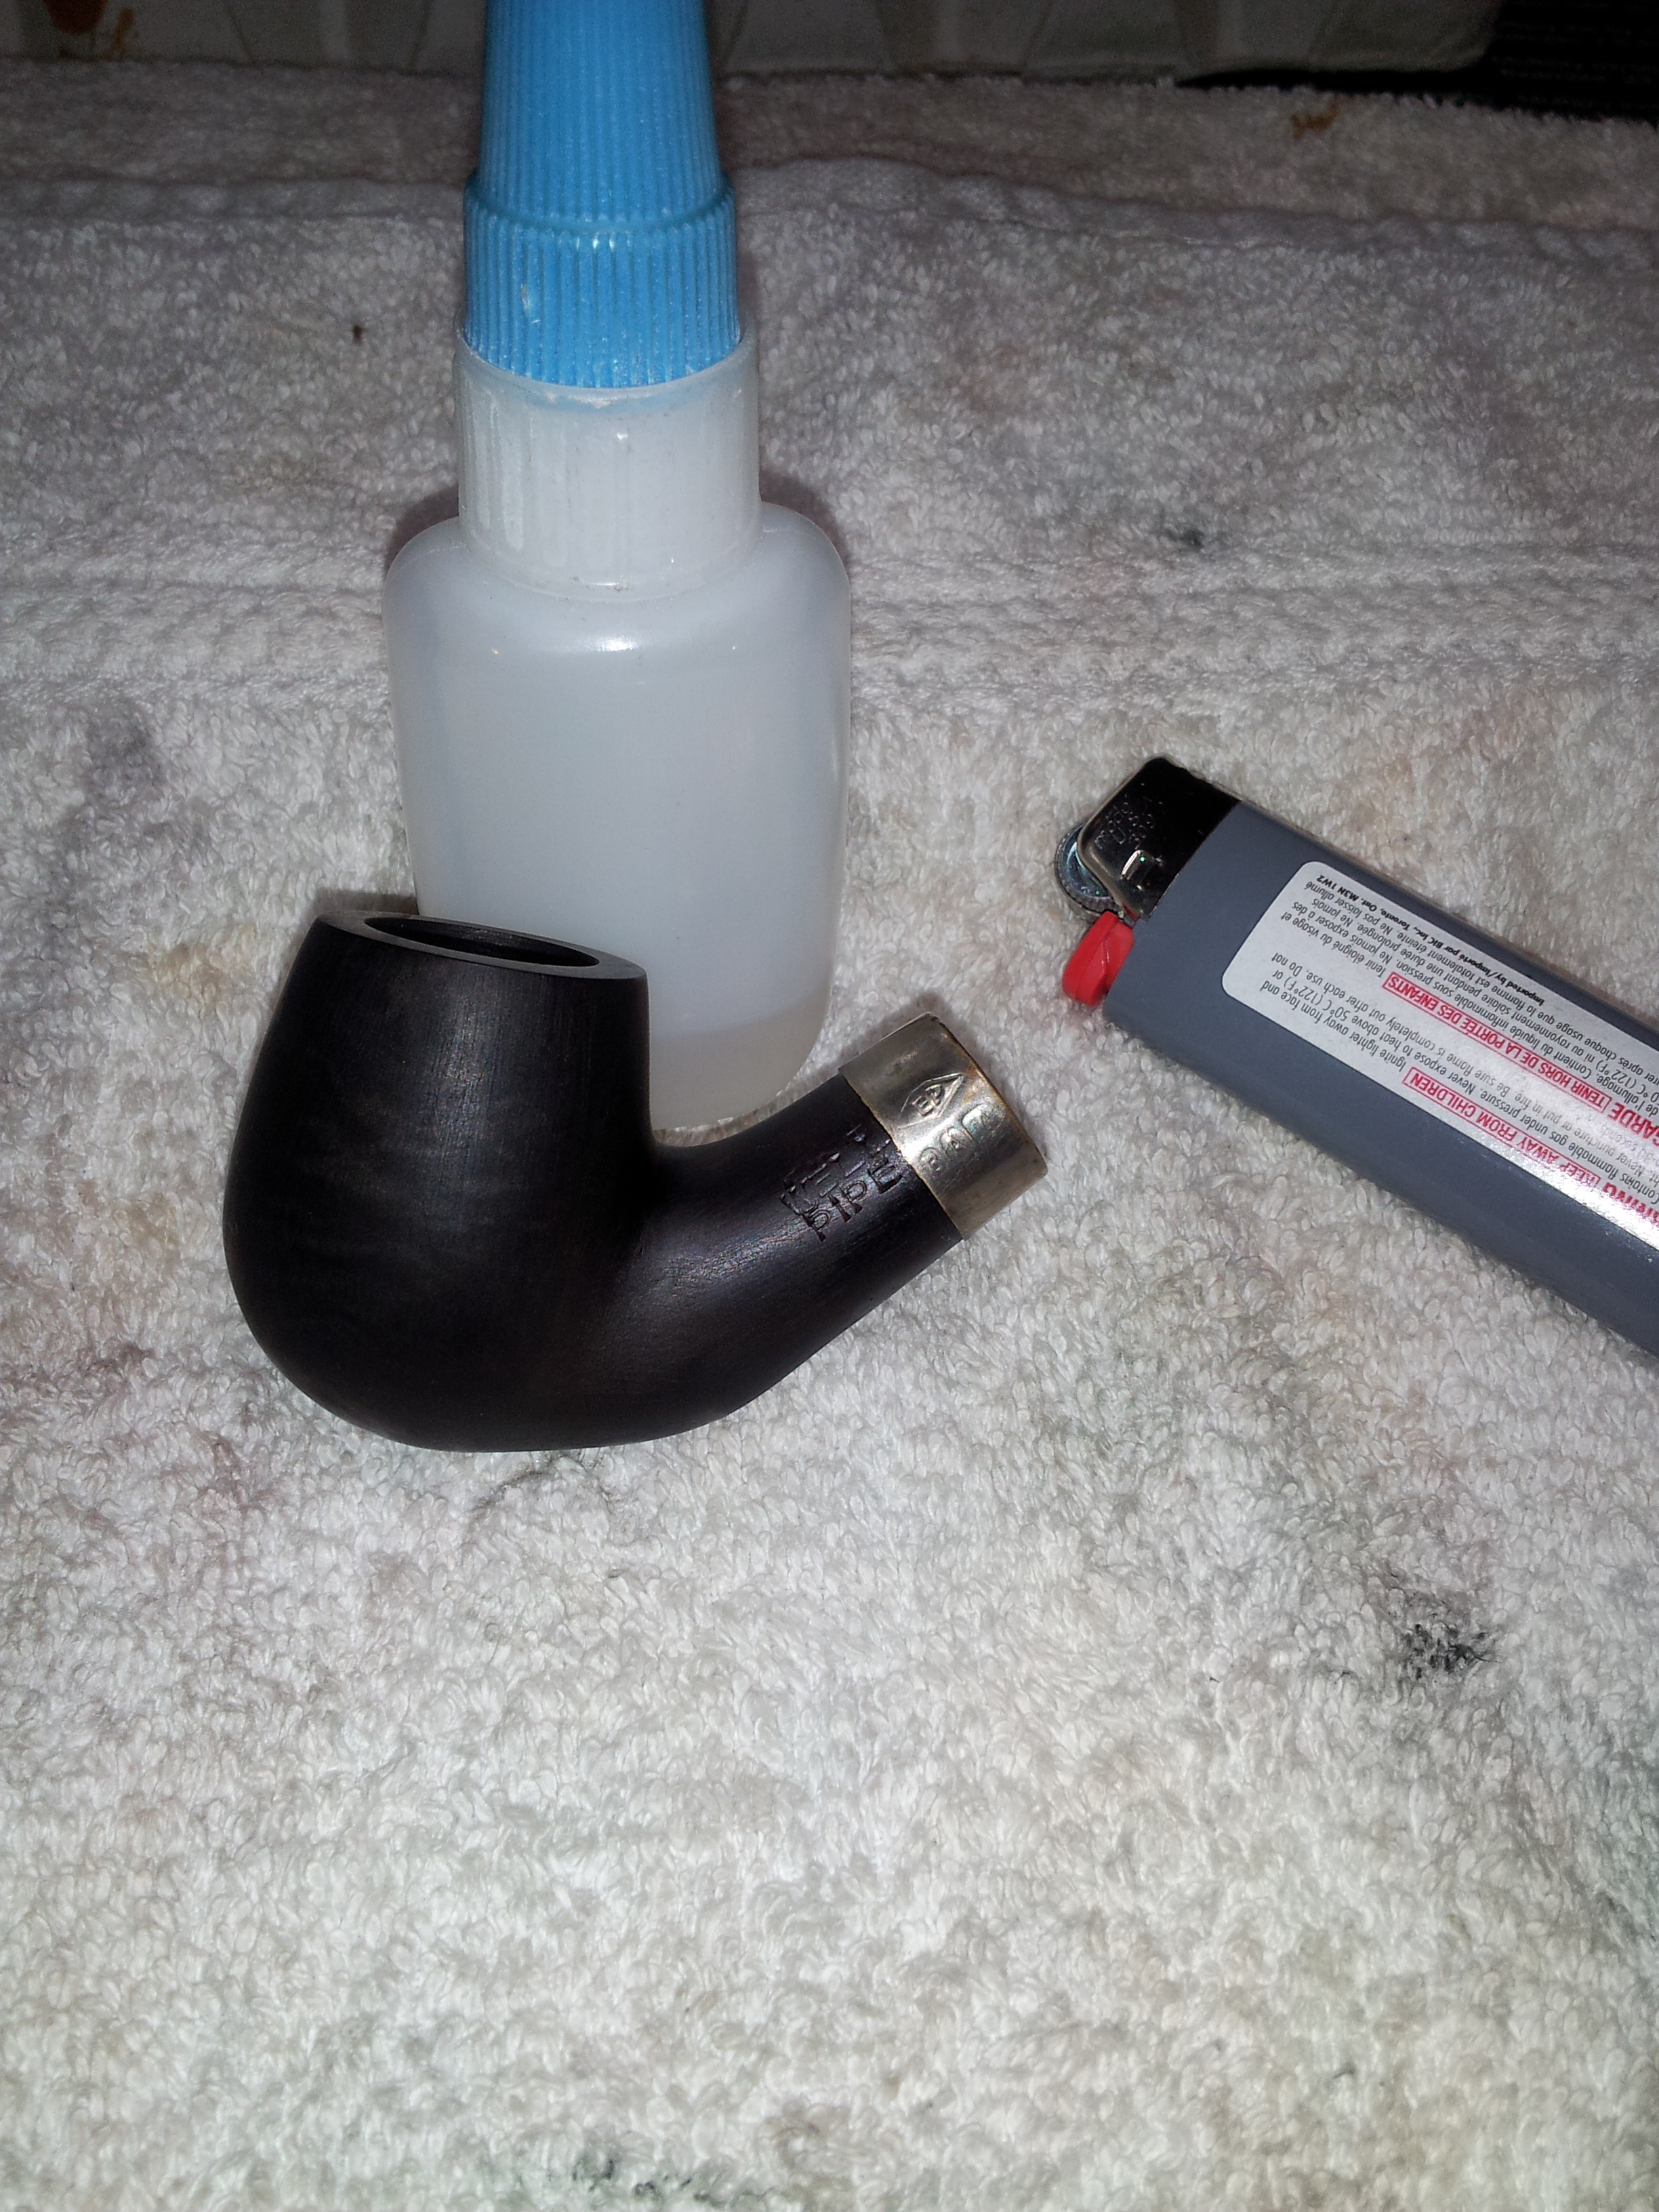
This is one of the last pipes from my first estate lot purchase to hit my work table. It’s in the top right corner of the pipe lot pic below. Even from this poor shot, you can see that the stem needs some tweaking.

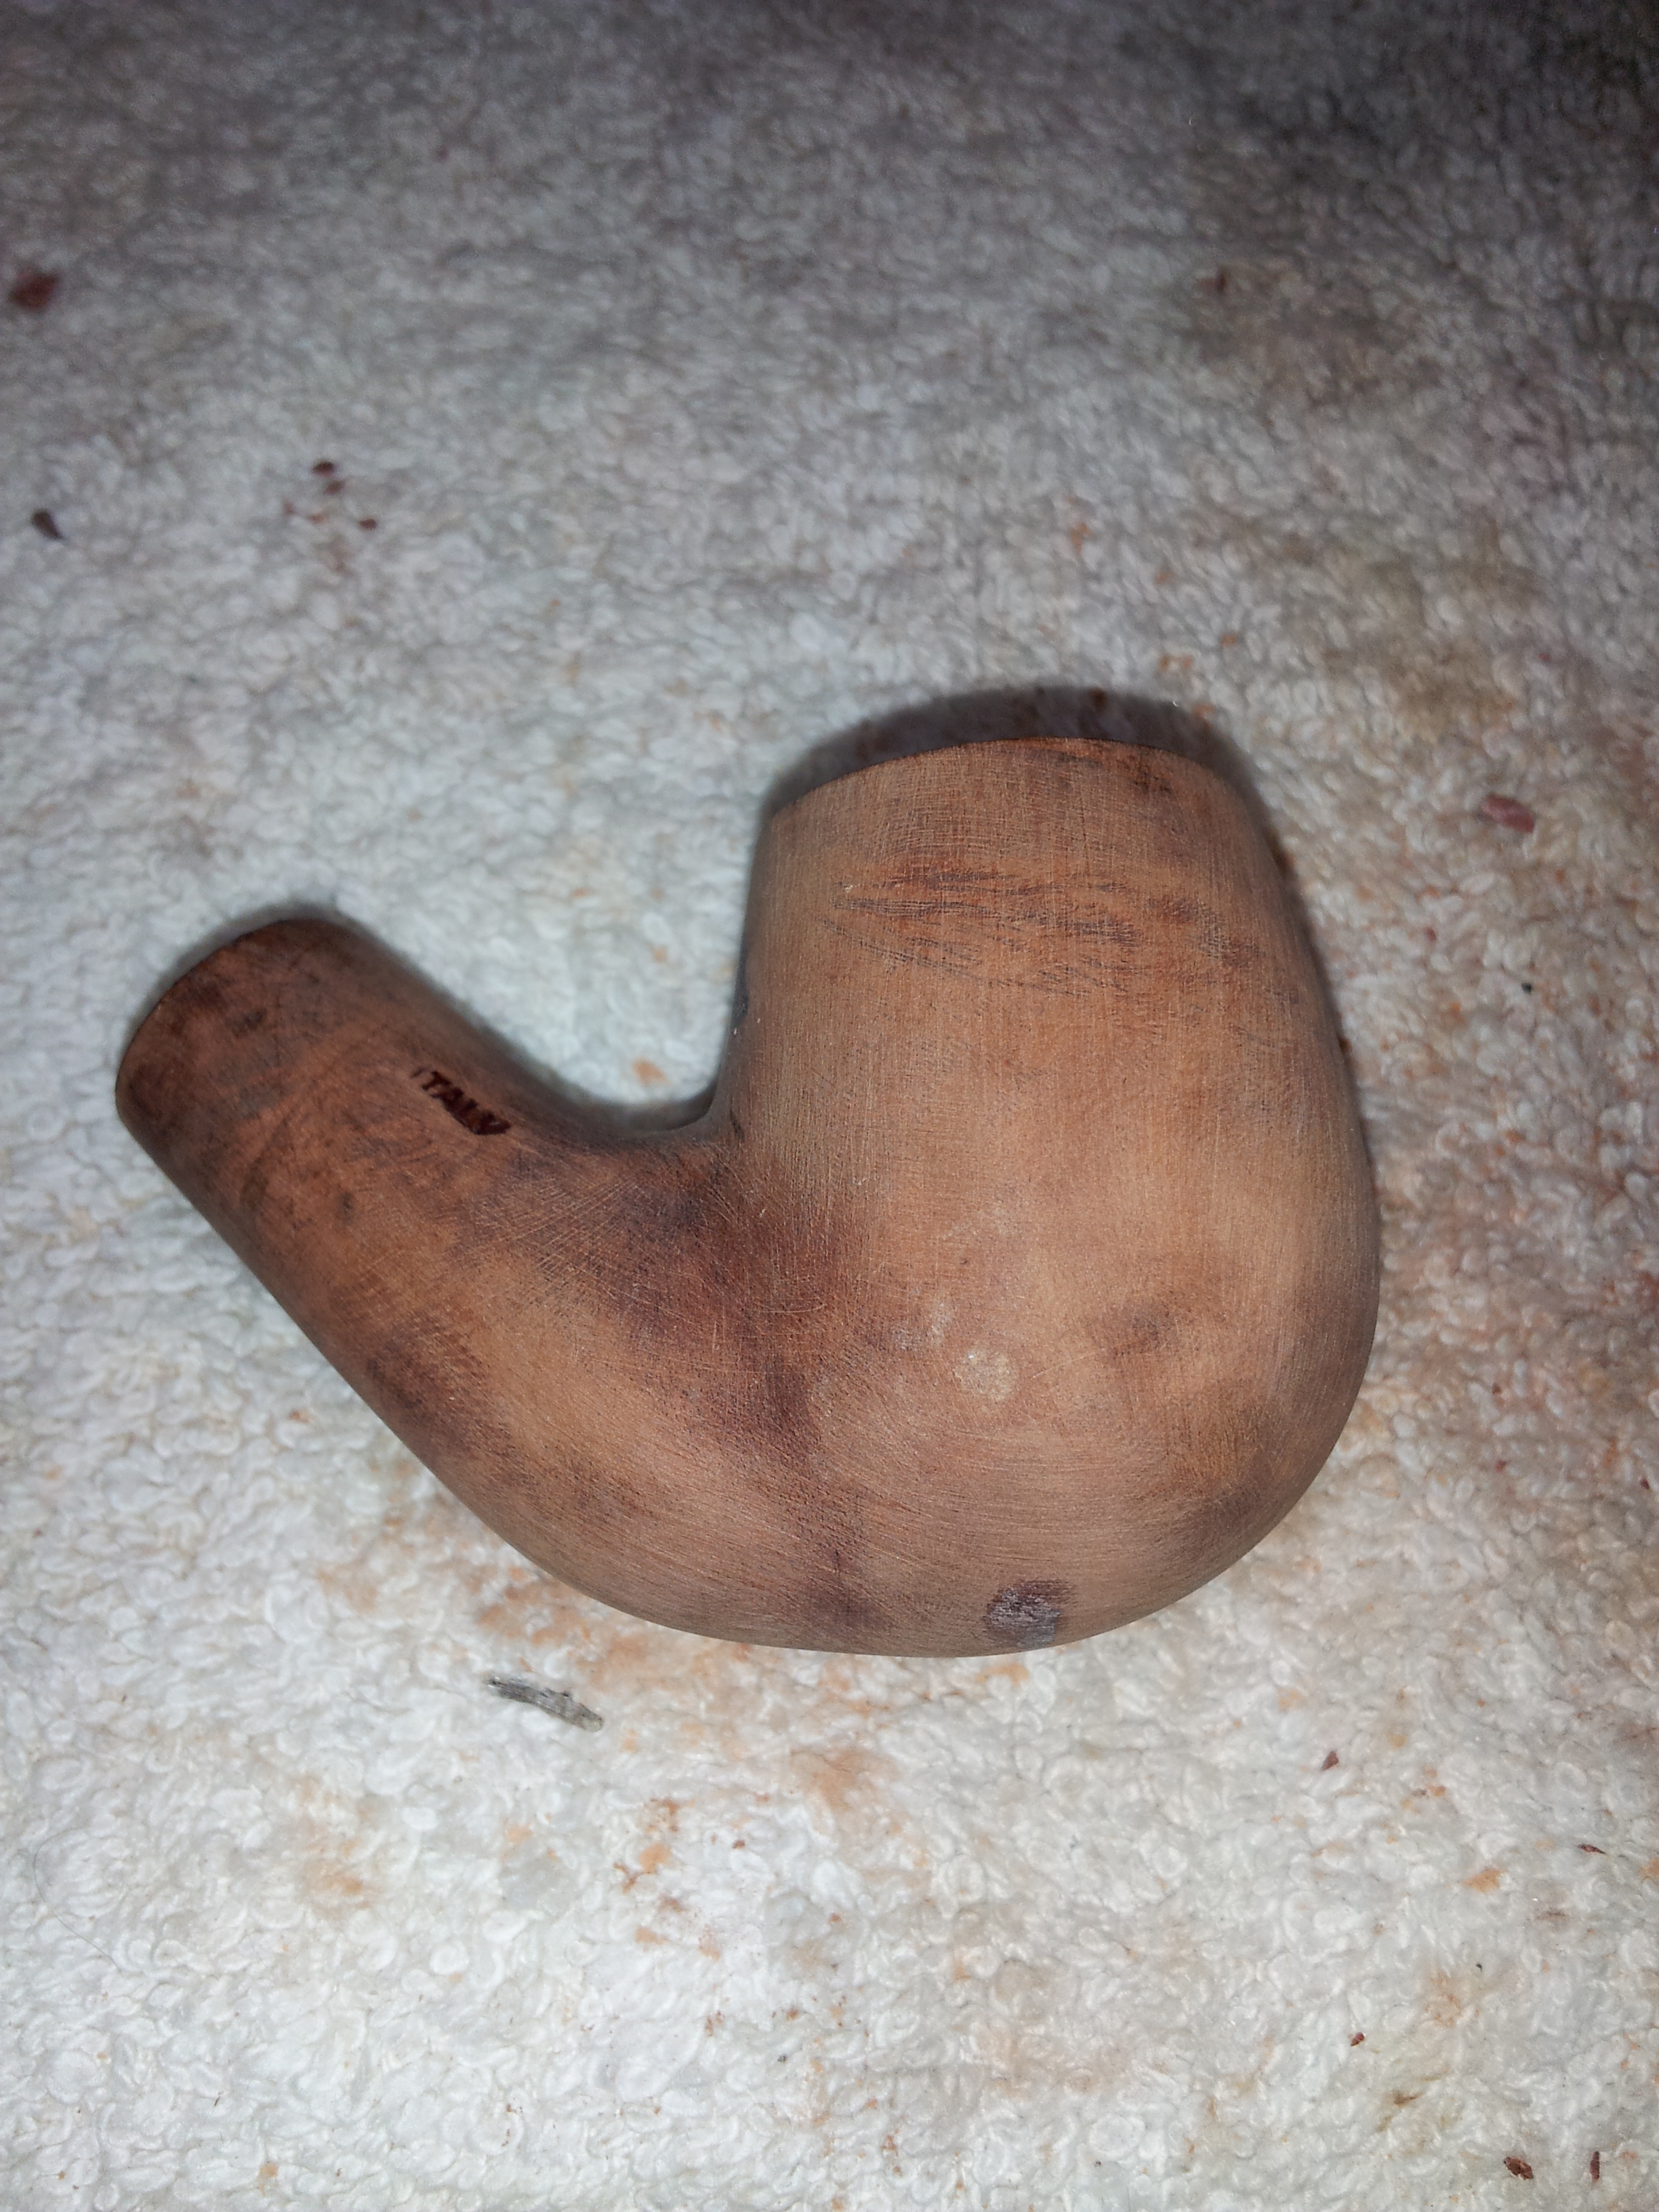
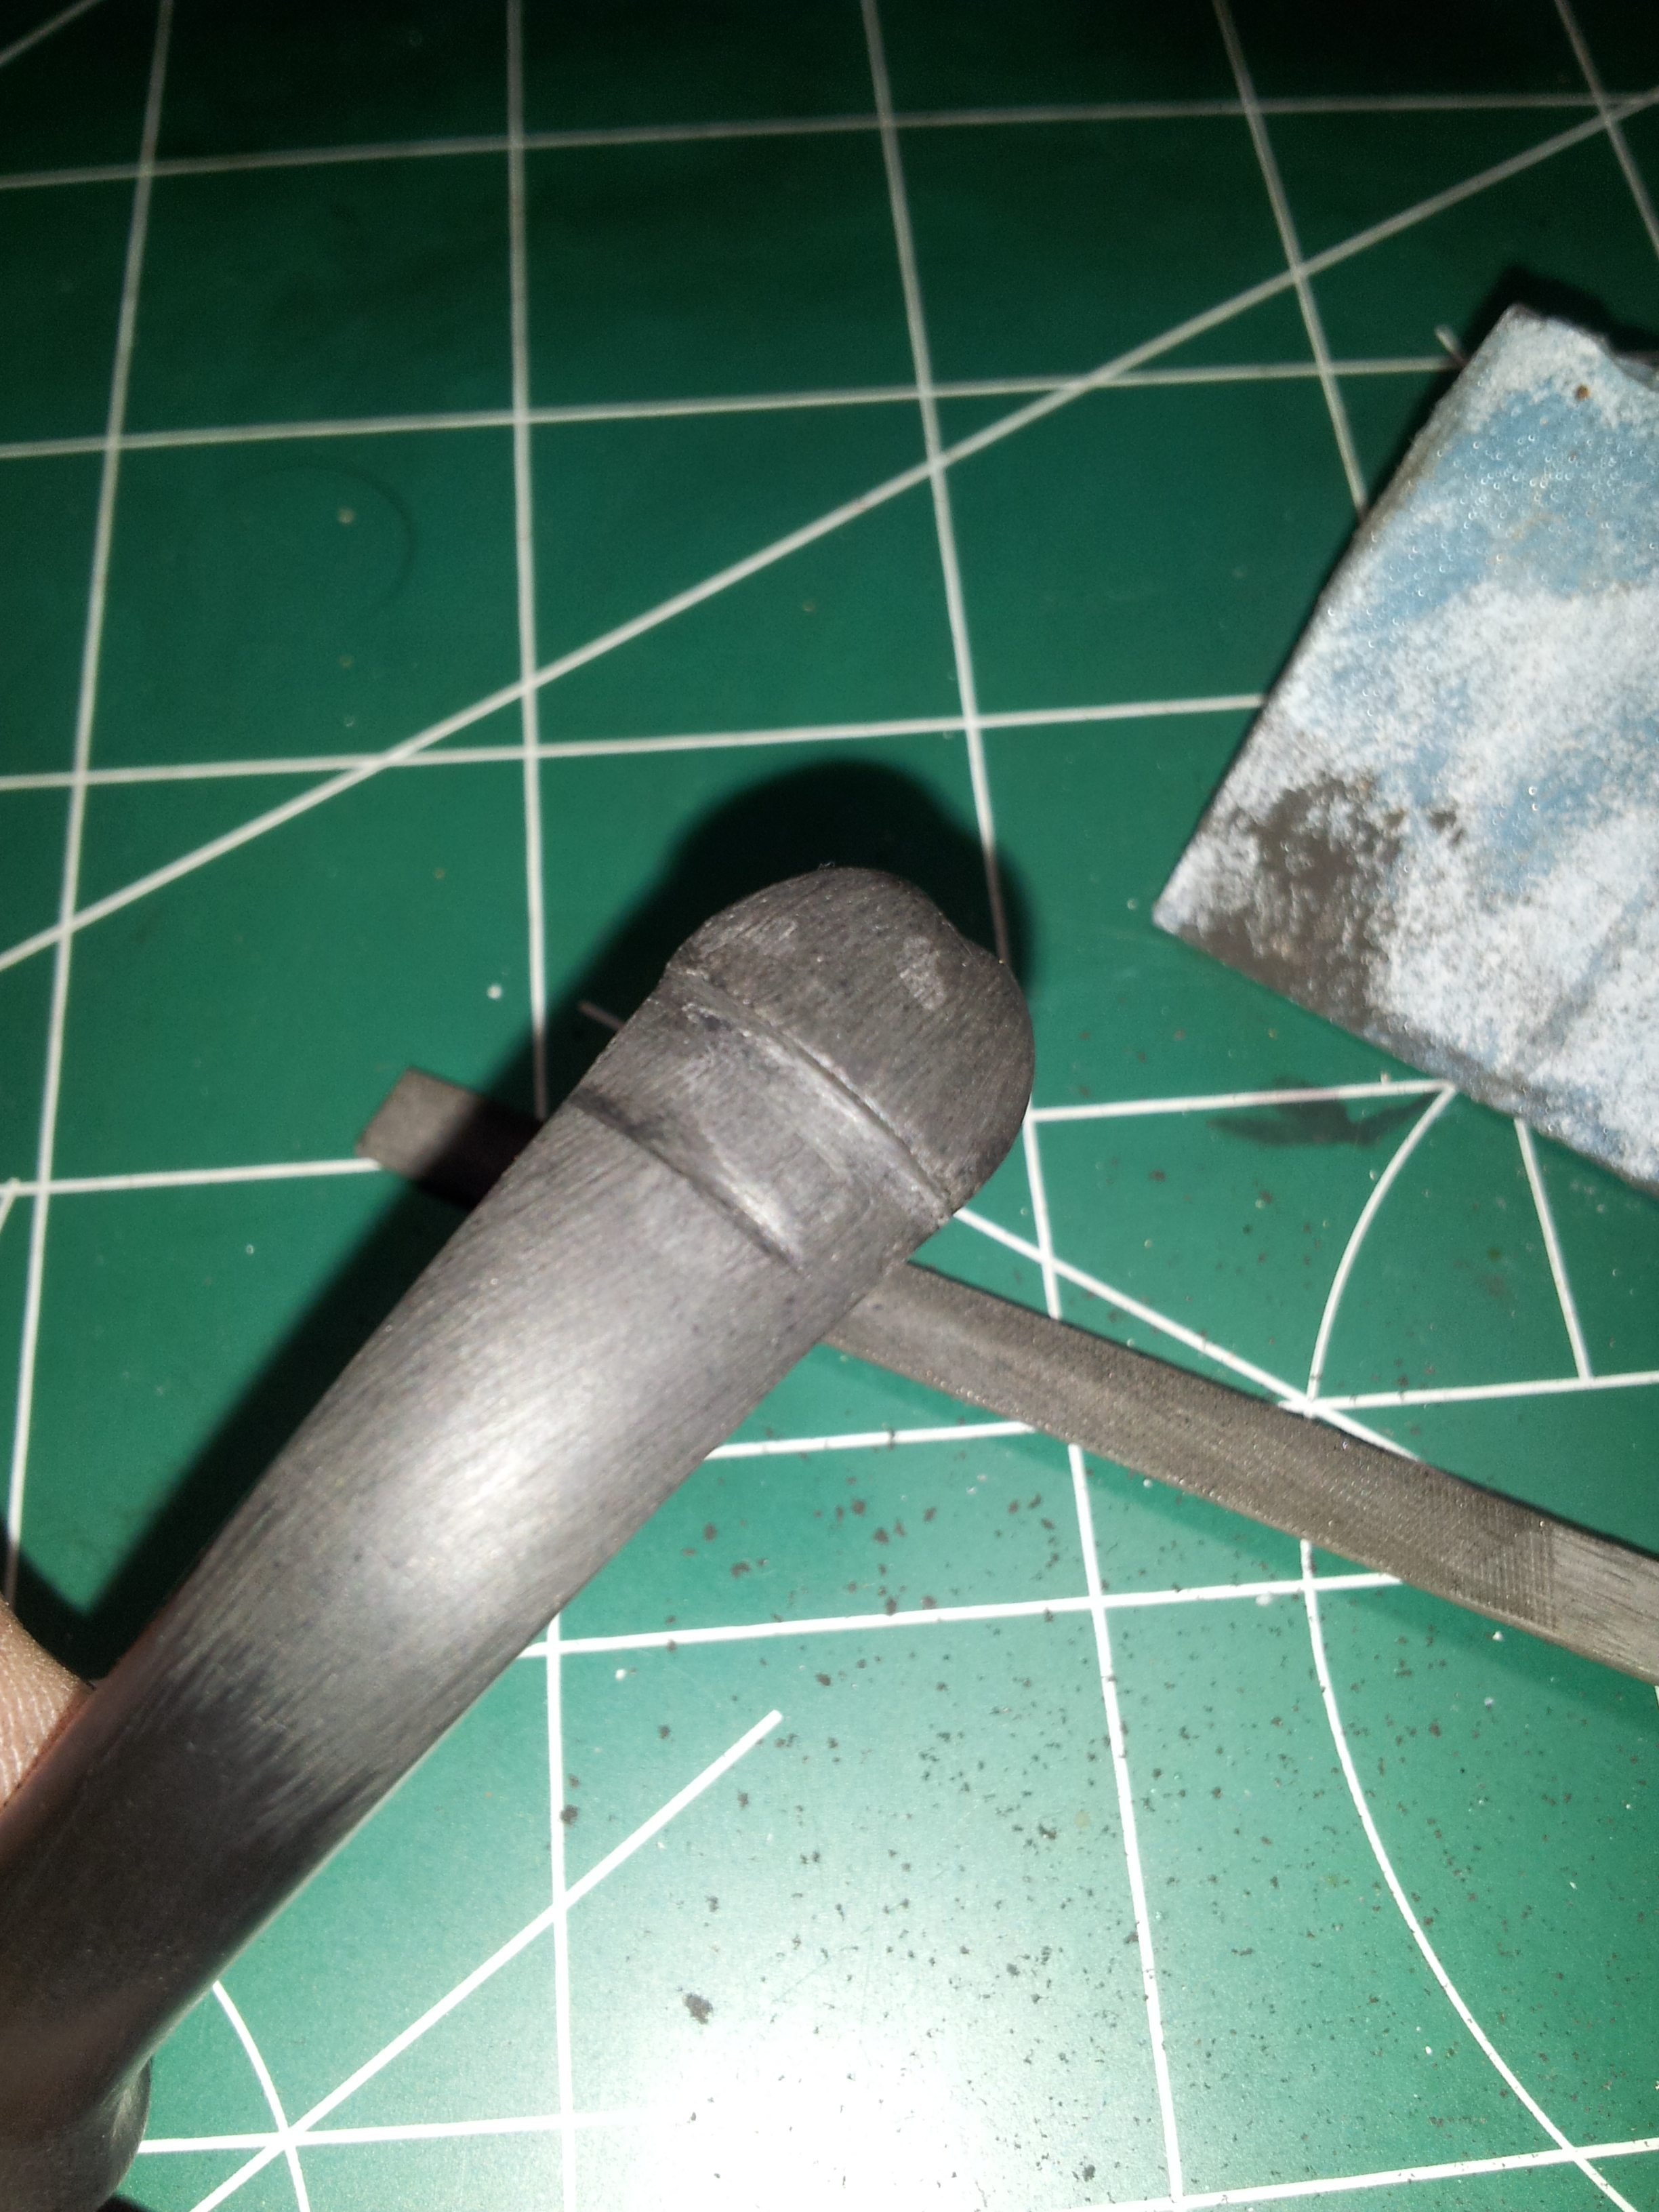
The pipe appeared to be in halfway decent condition when I pulled it from the refurb box – a bit of rim tars and surface grime on the stummel, but nothing major. The stem turned out to be a replacement, well fitted to the military-style mortise, but still showing the lines up the sides from the molding process. The amount of tooth chatter on the stem points to a DIY repair job – it was as if whoever had done the repair was only interested in making the pipe functional again, and left the stem in mostly its raw state. It can’t have been that comfortable in the mouth, though.
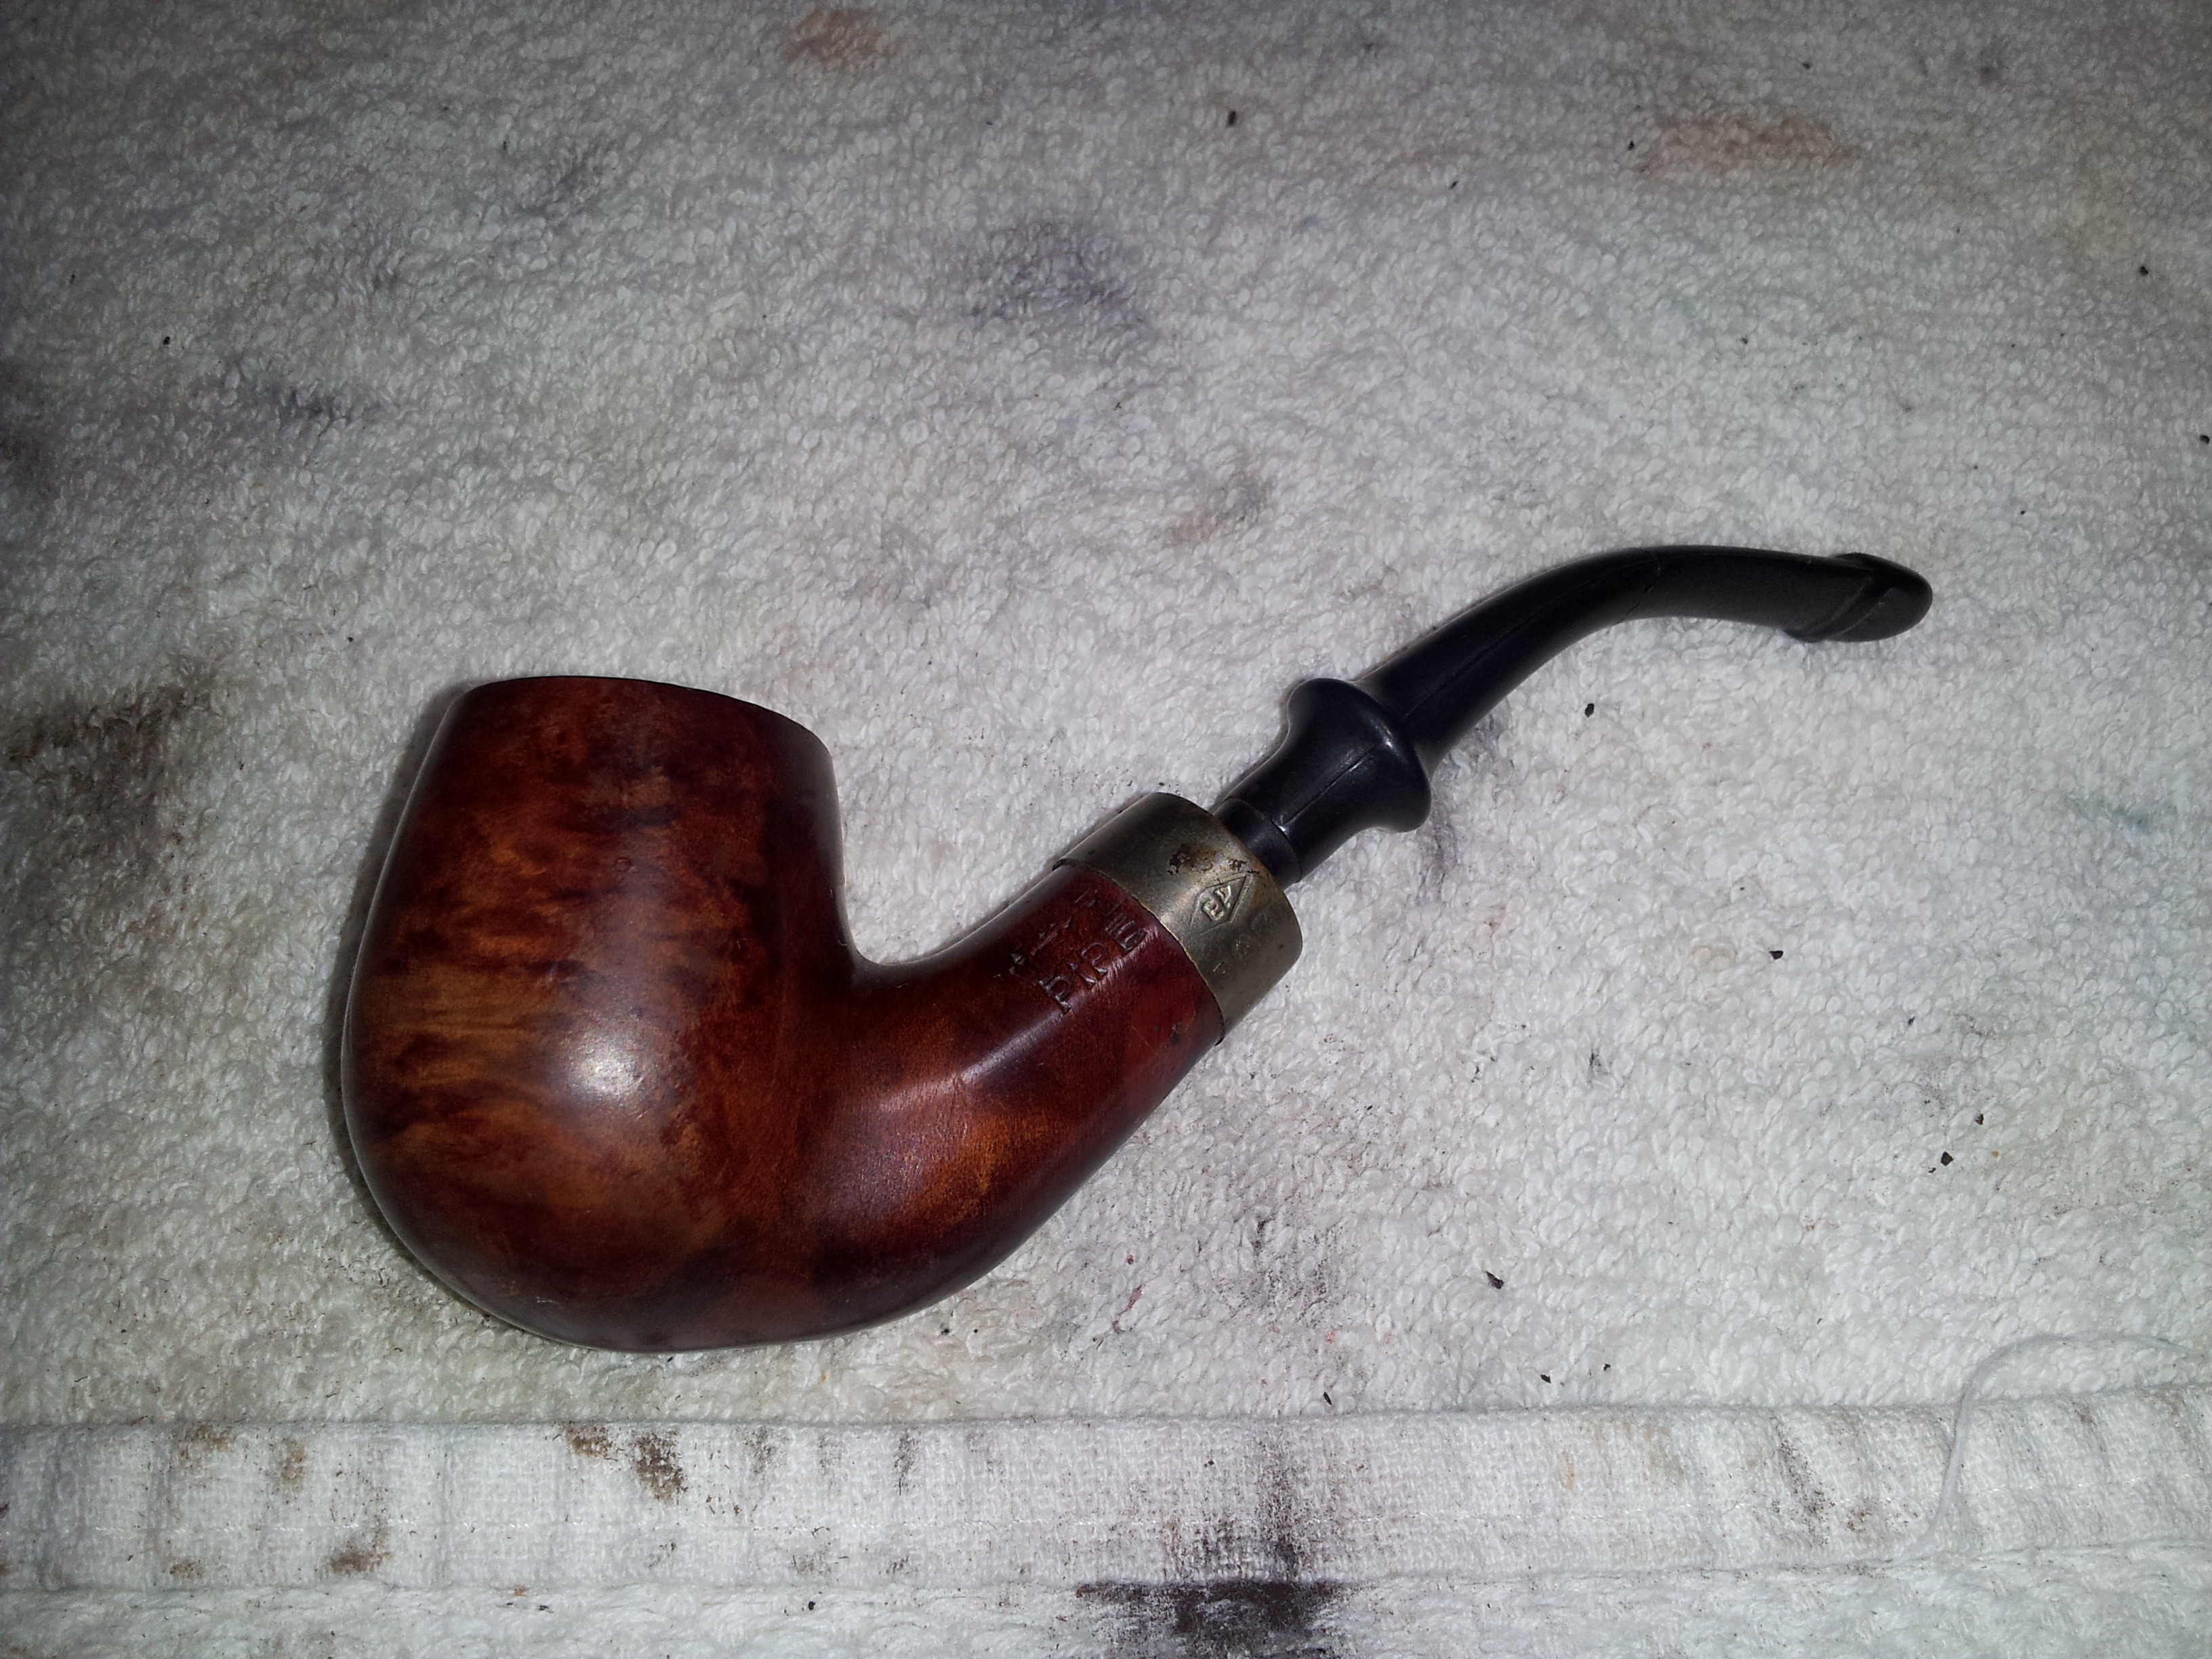
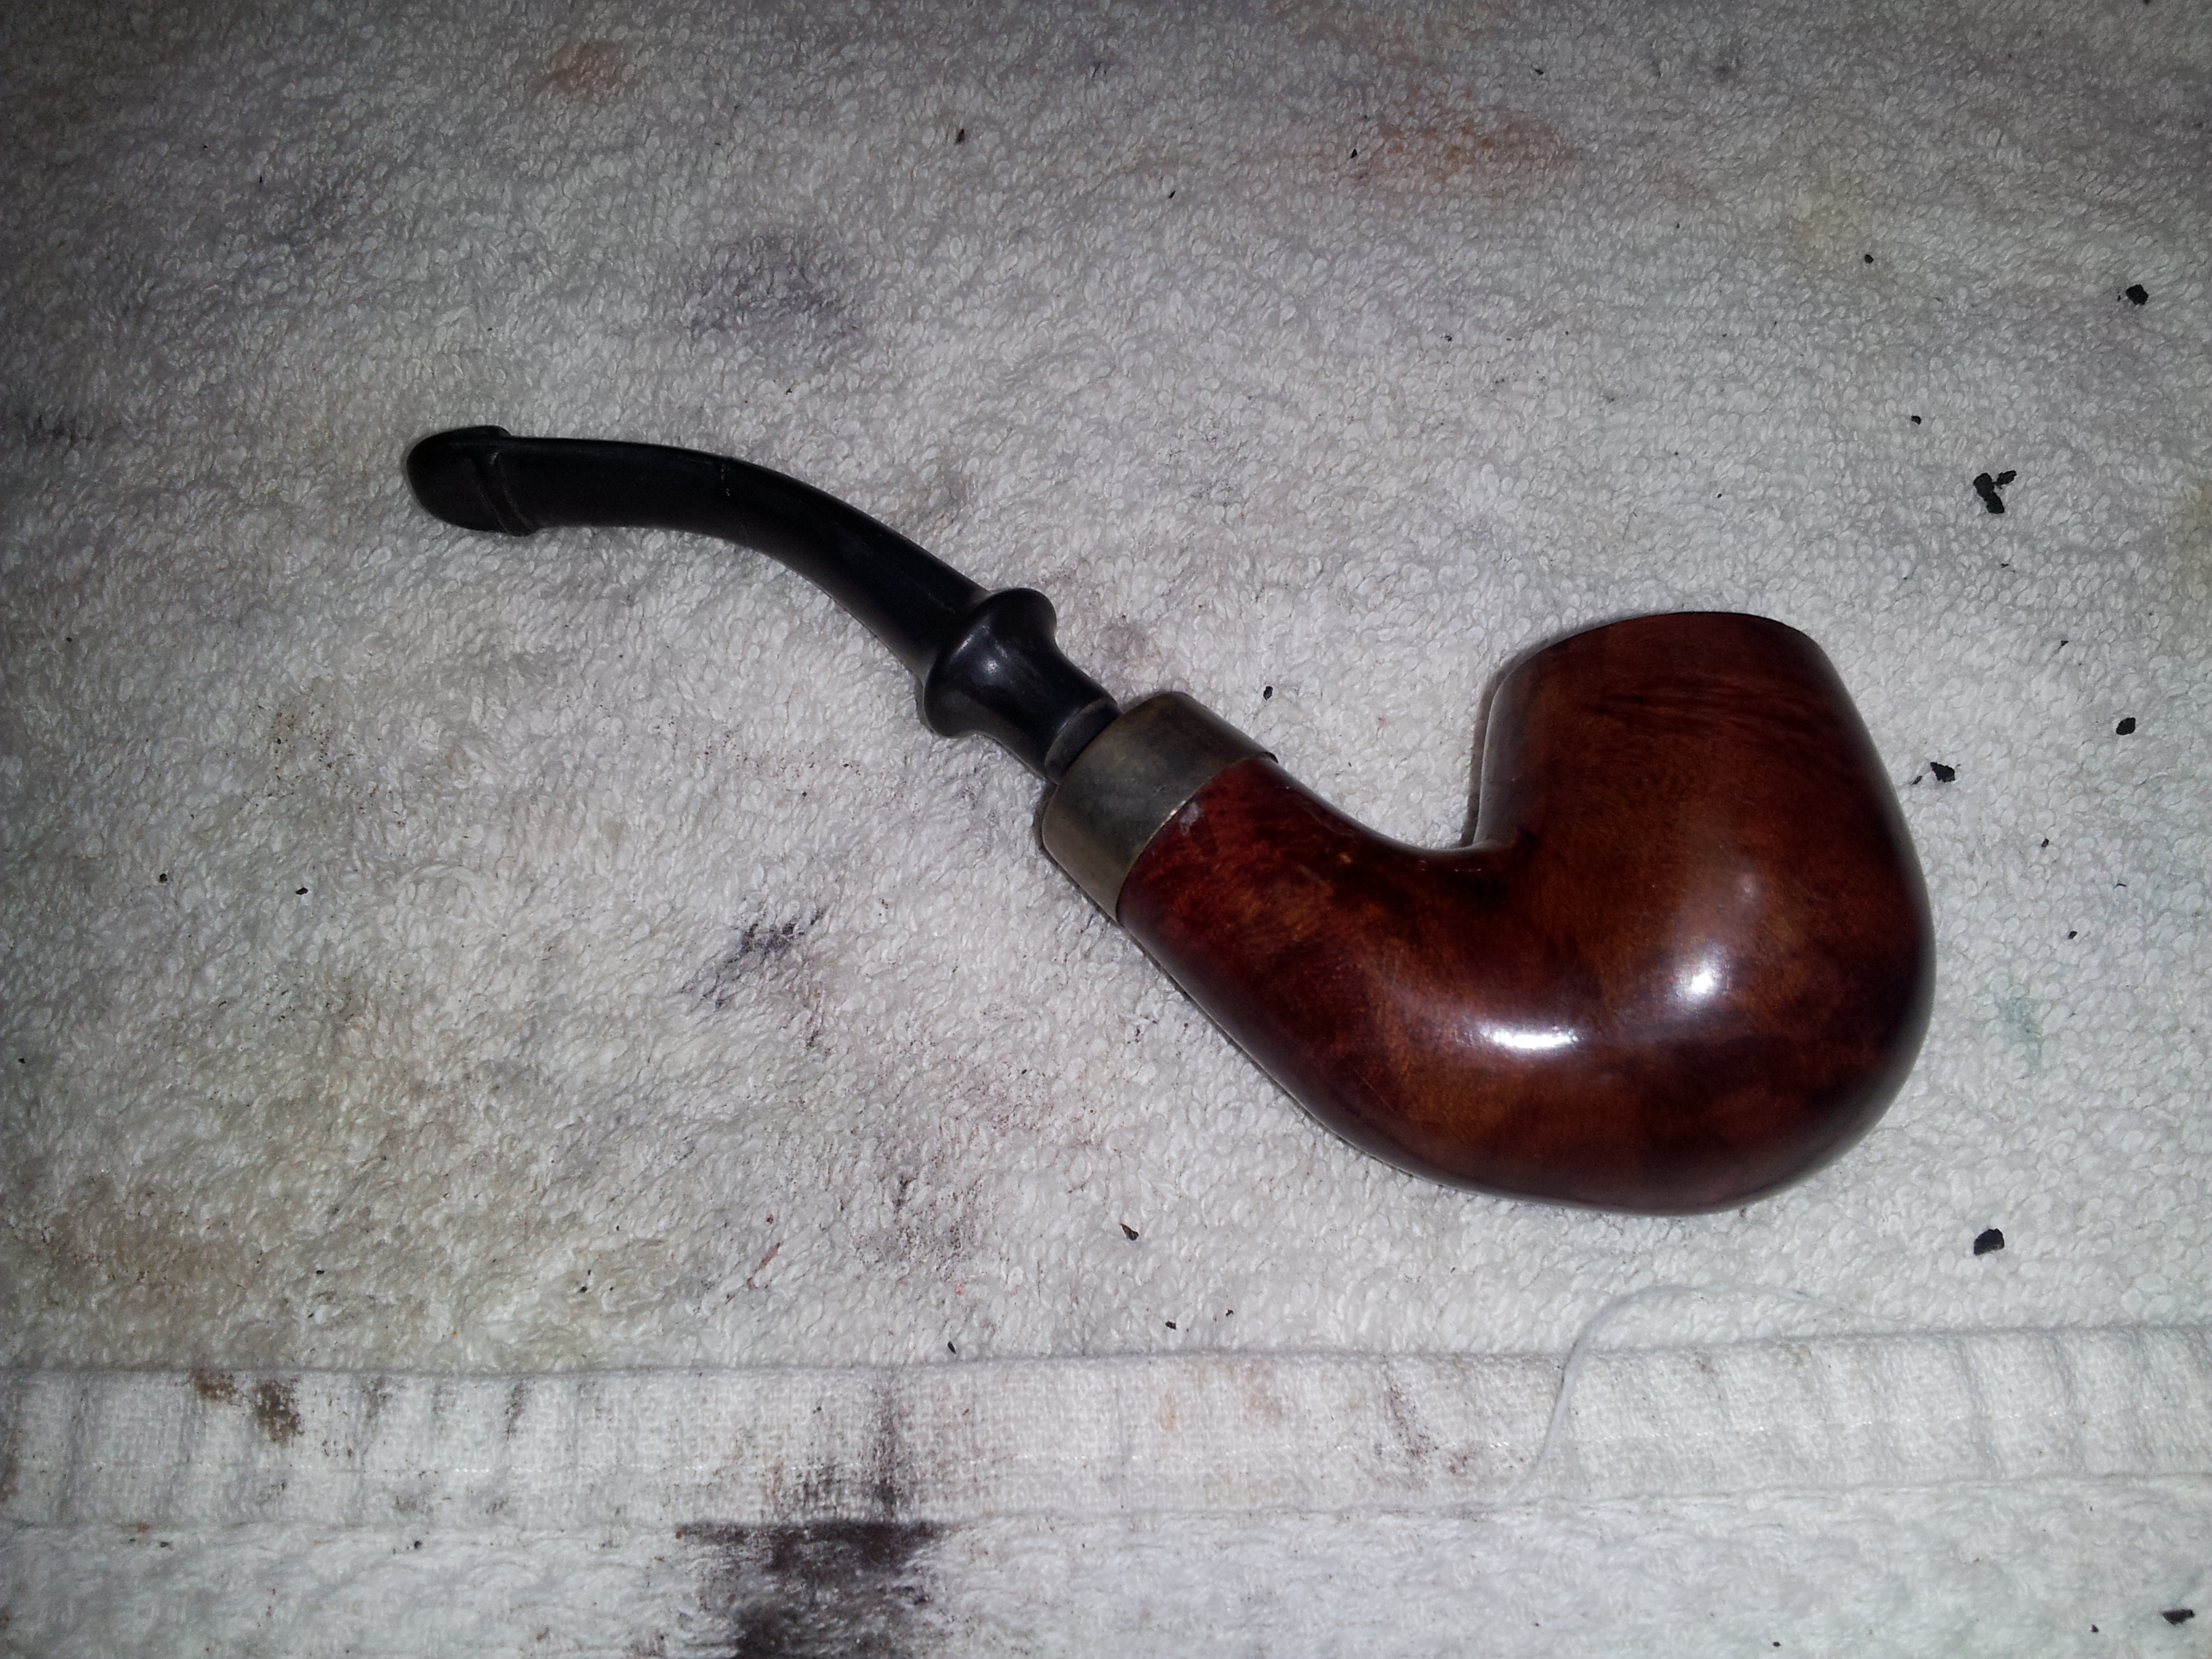
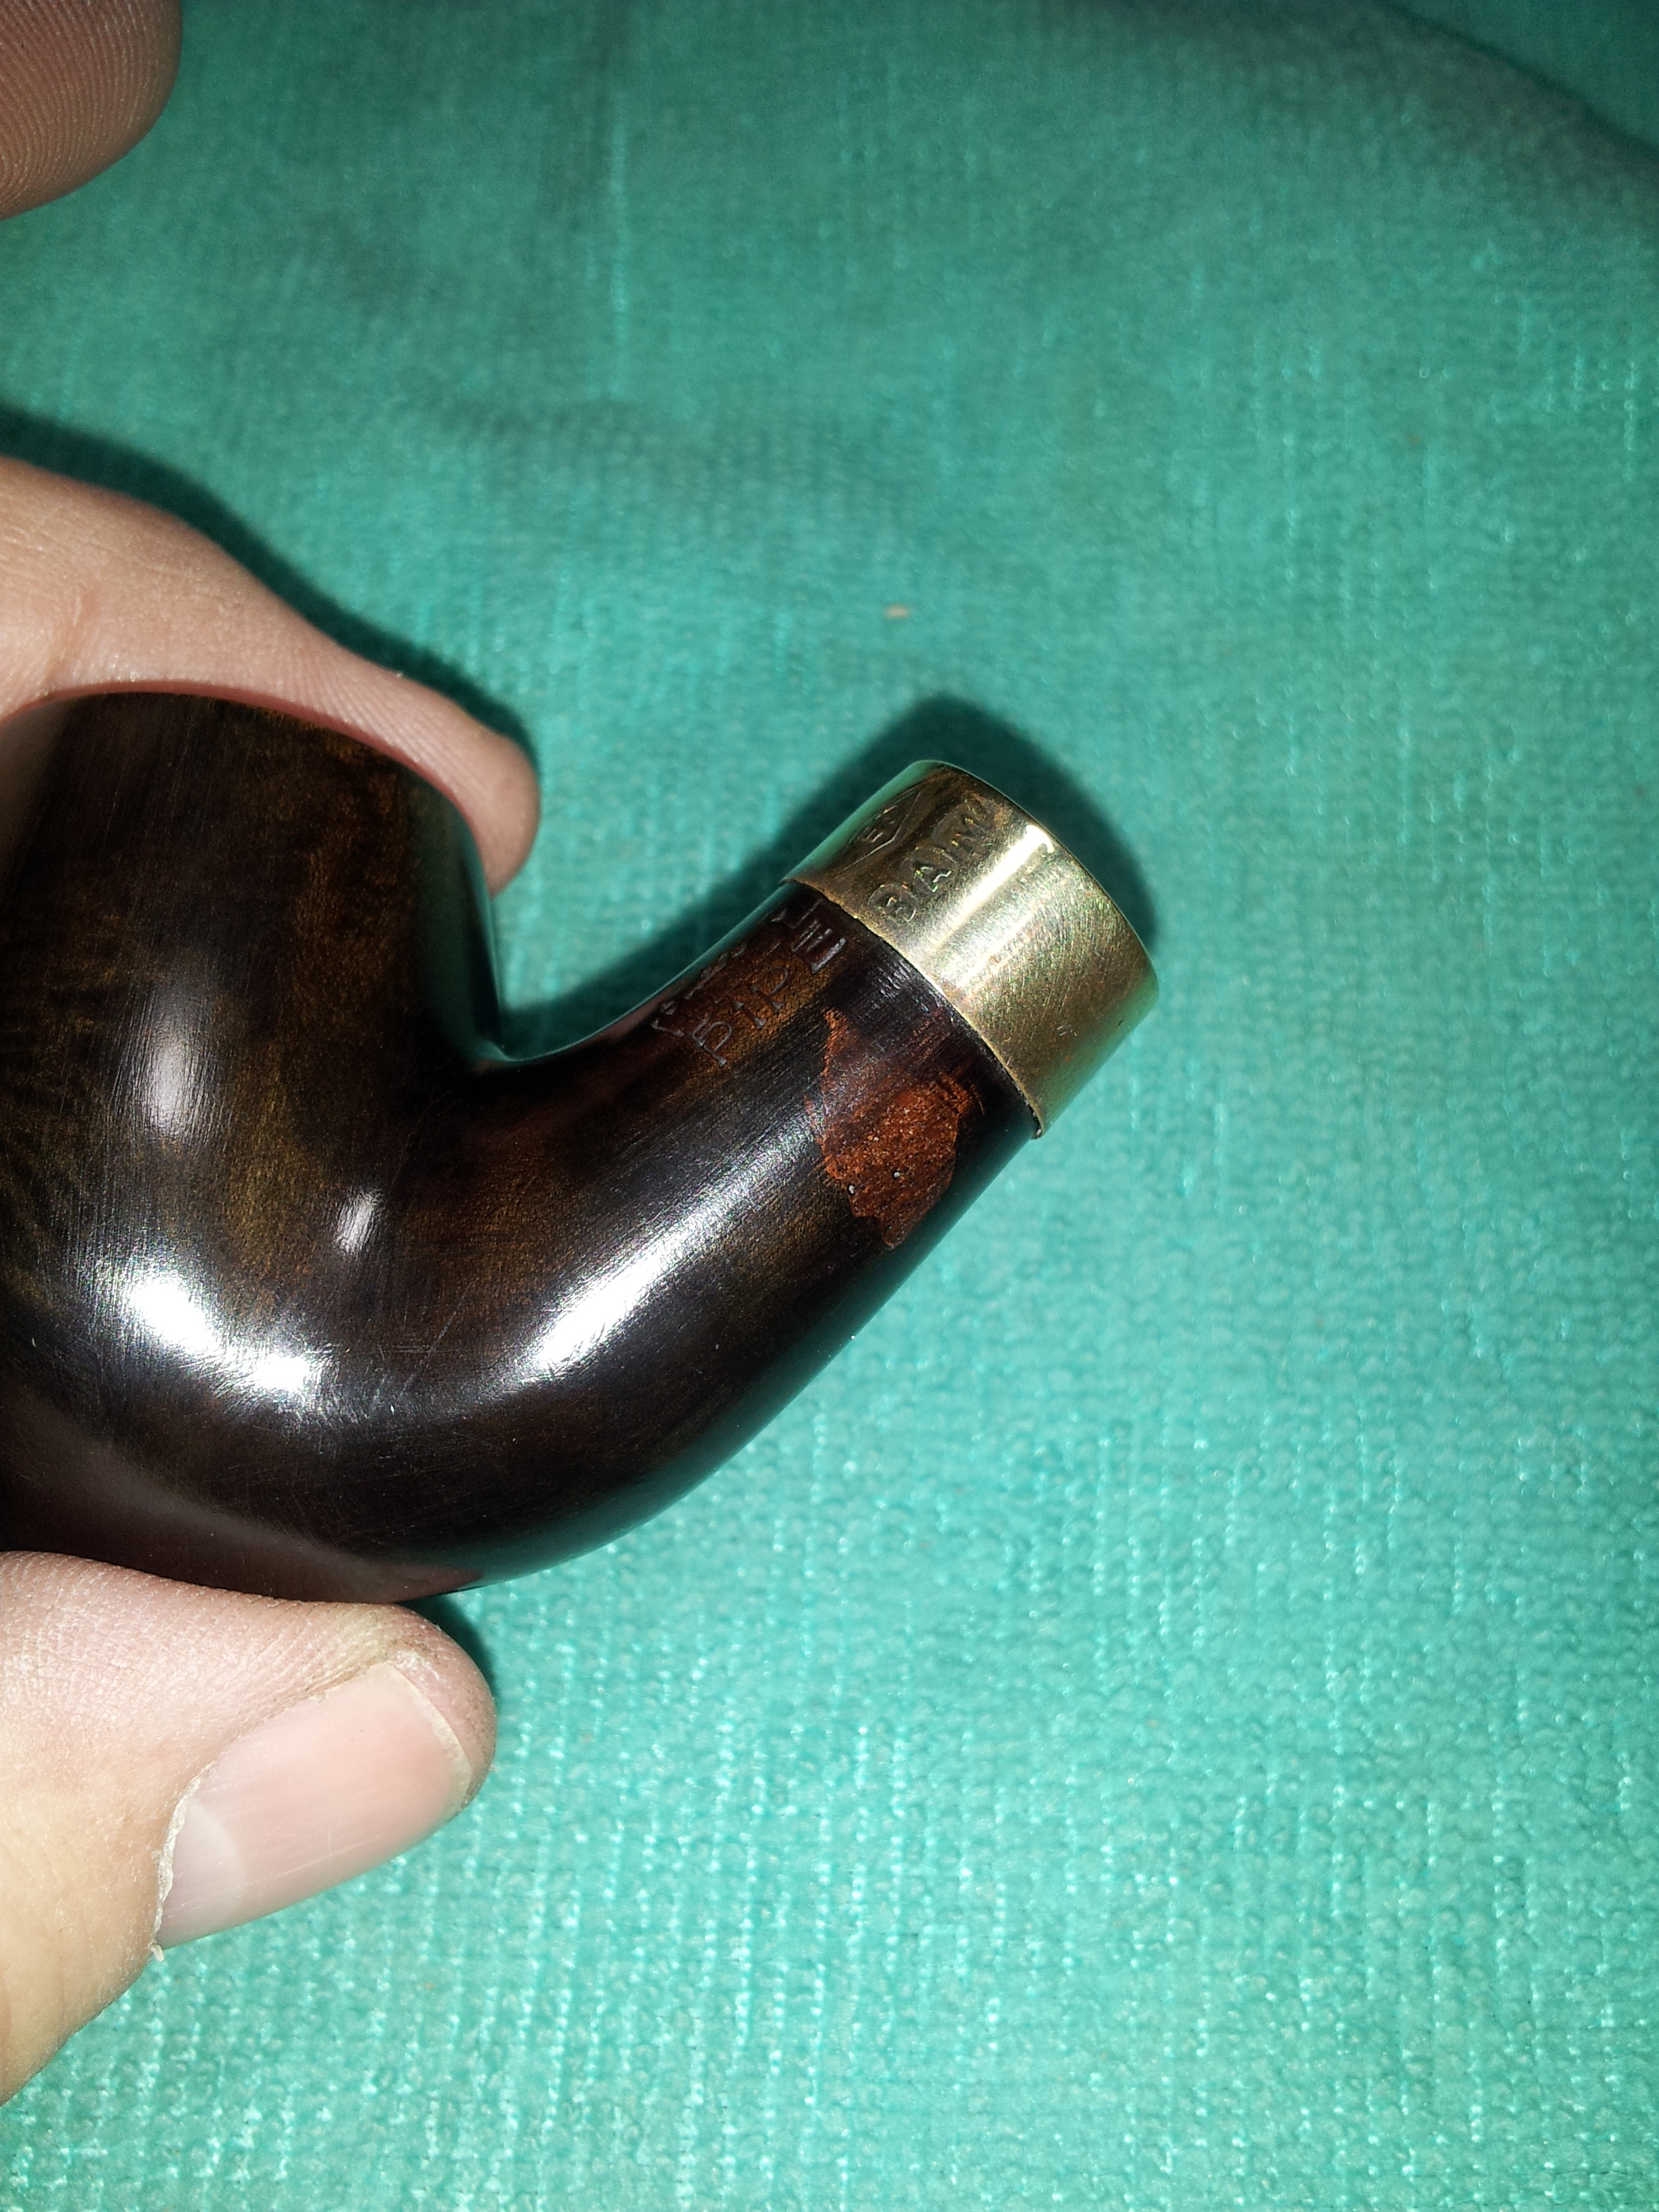
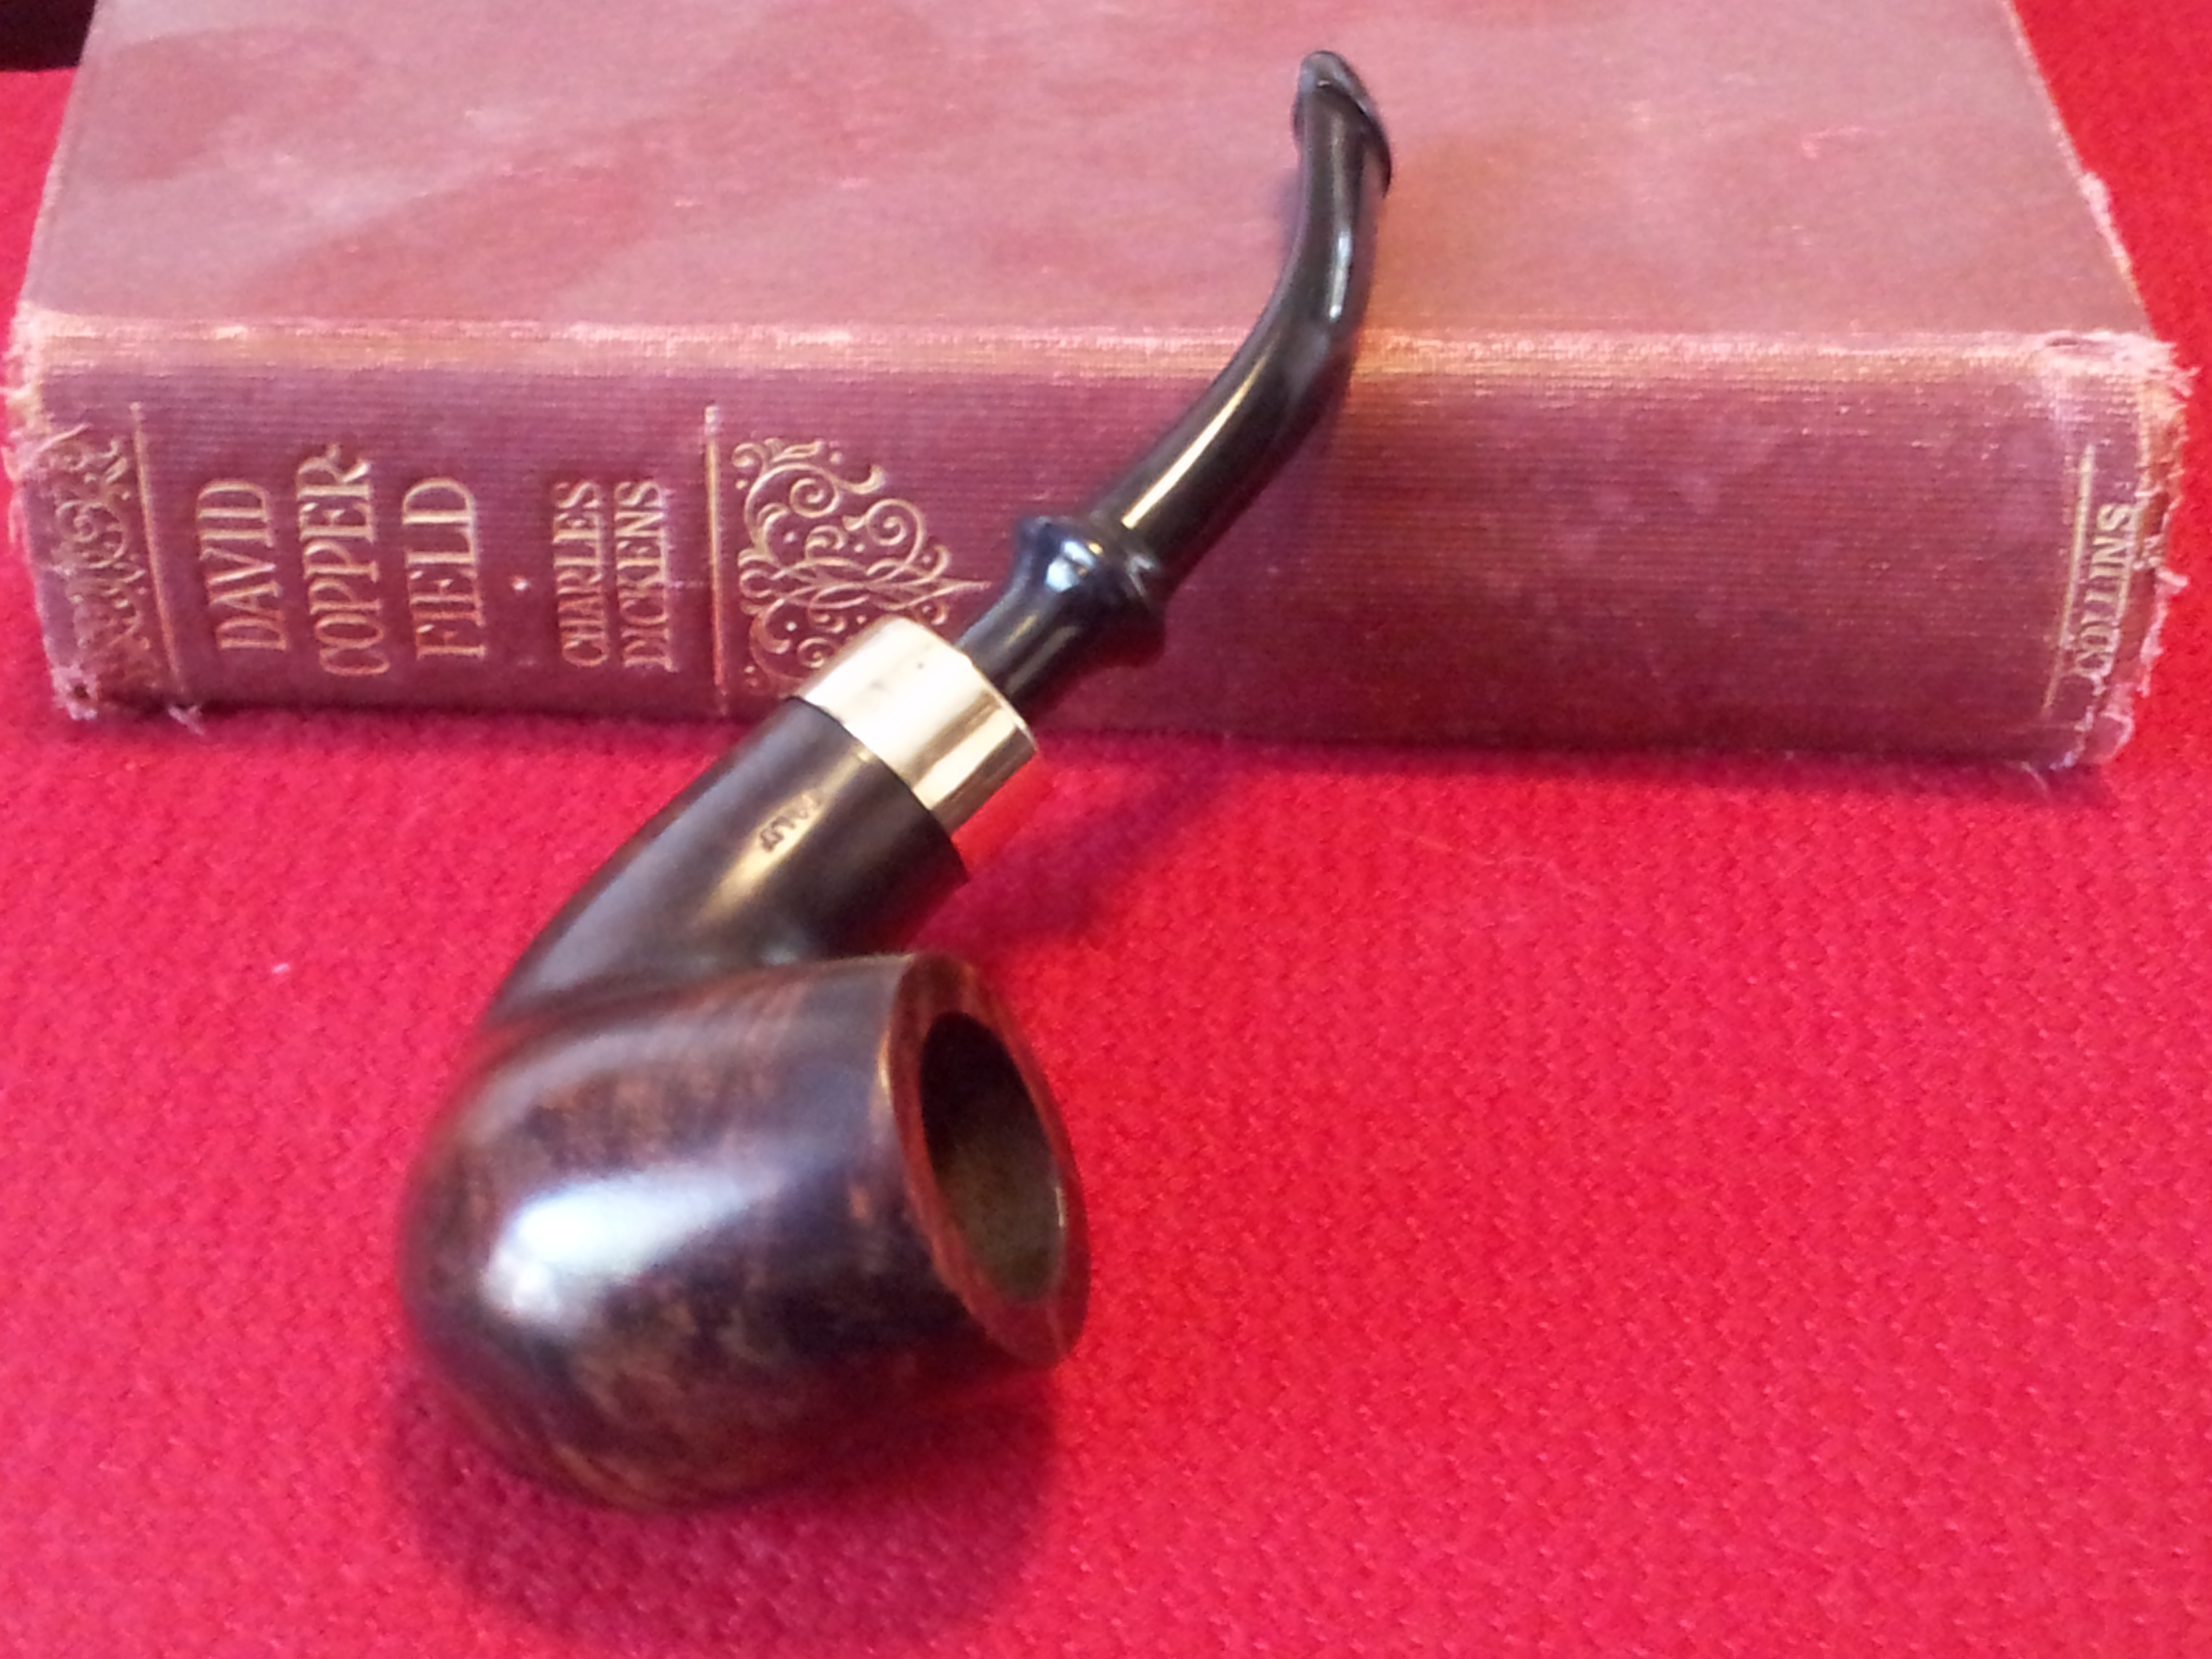
The pipe was stamped “Well” over “Pipe” in block letters on the left shank, and “Italy” on the right. The (likely nickel) band was stamped “EP” in a diamond over several faux hallmarks. My research so far has turned up very little about Well Pipe as a brand or company. I have found passing references to it being a possible seconds brand of more than one maker, though nothing seems definitive. I have found Well Pipes on eBay fairly frequently, though, so there are a fair number around. If anyone has any info on the brand, I invite you to share!
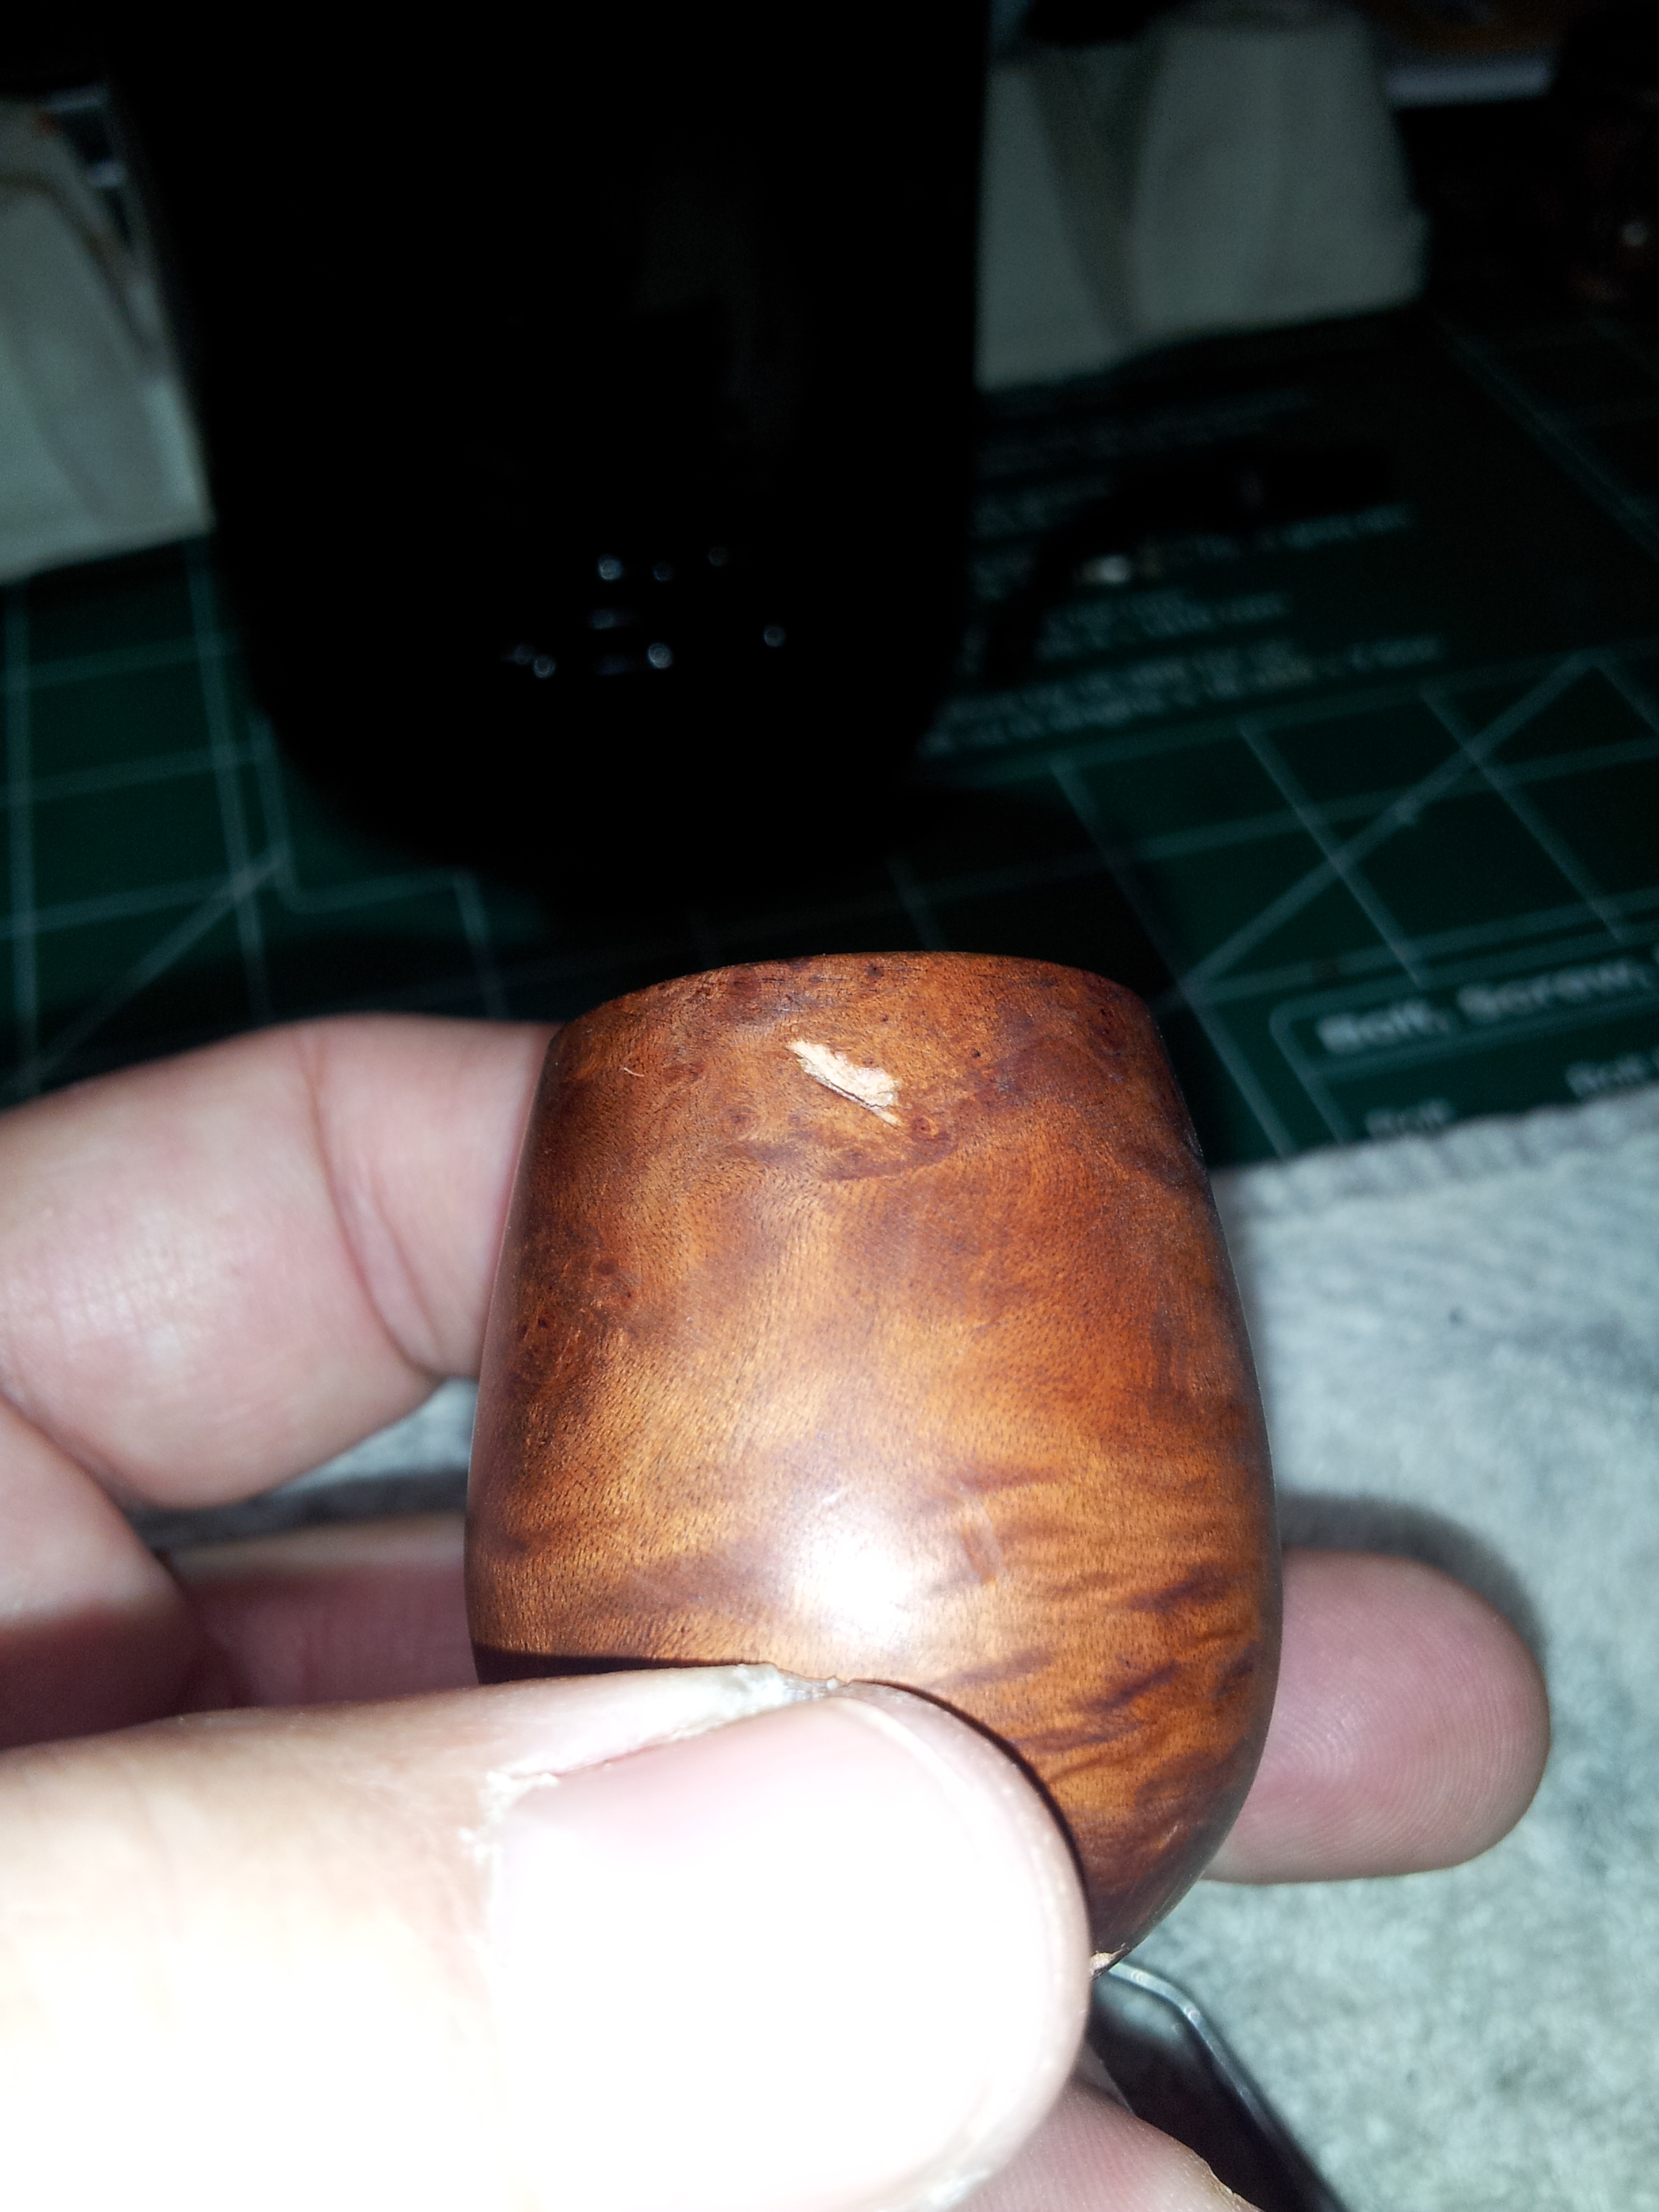
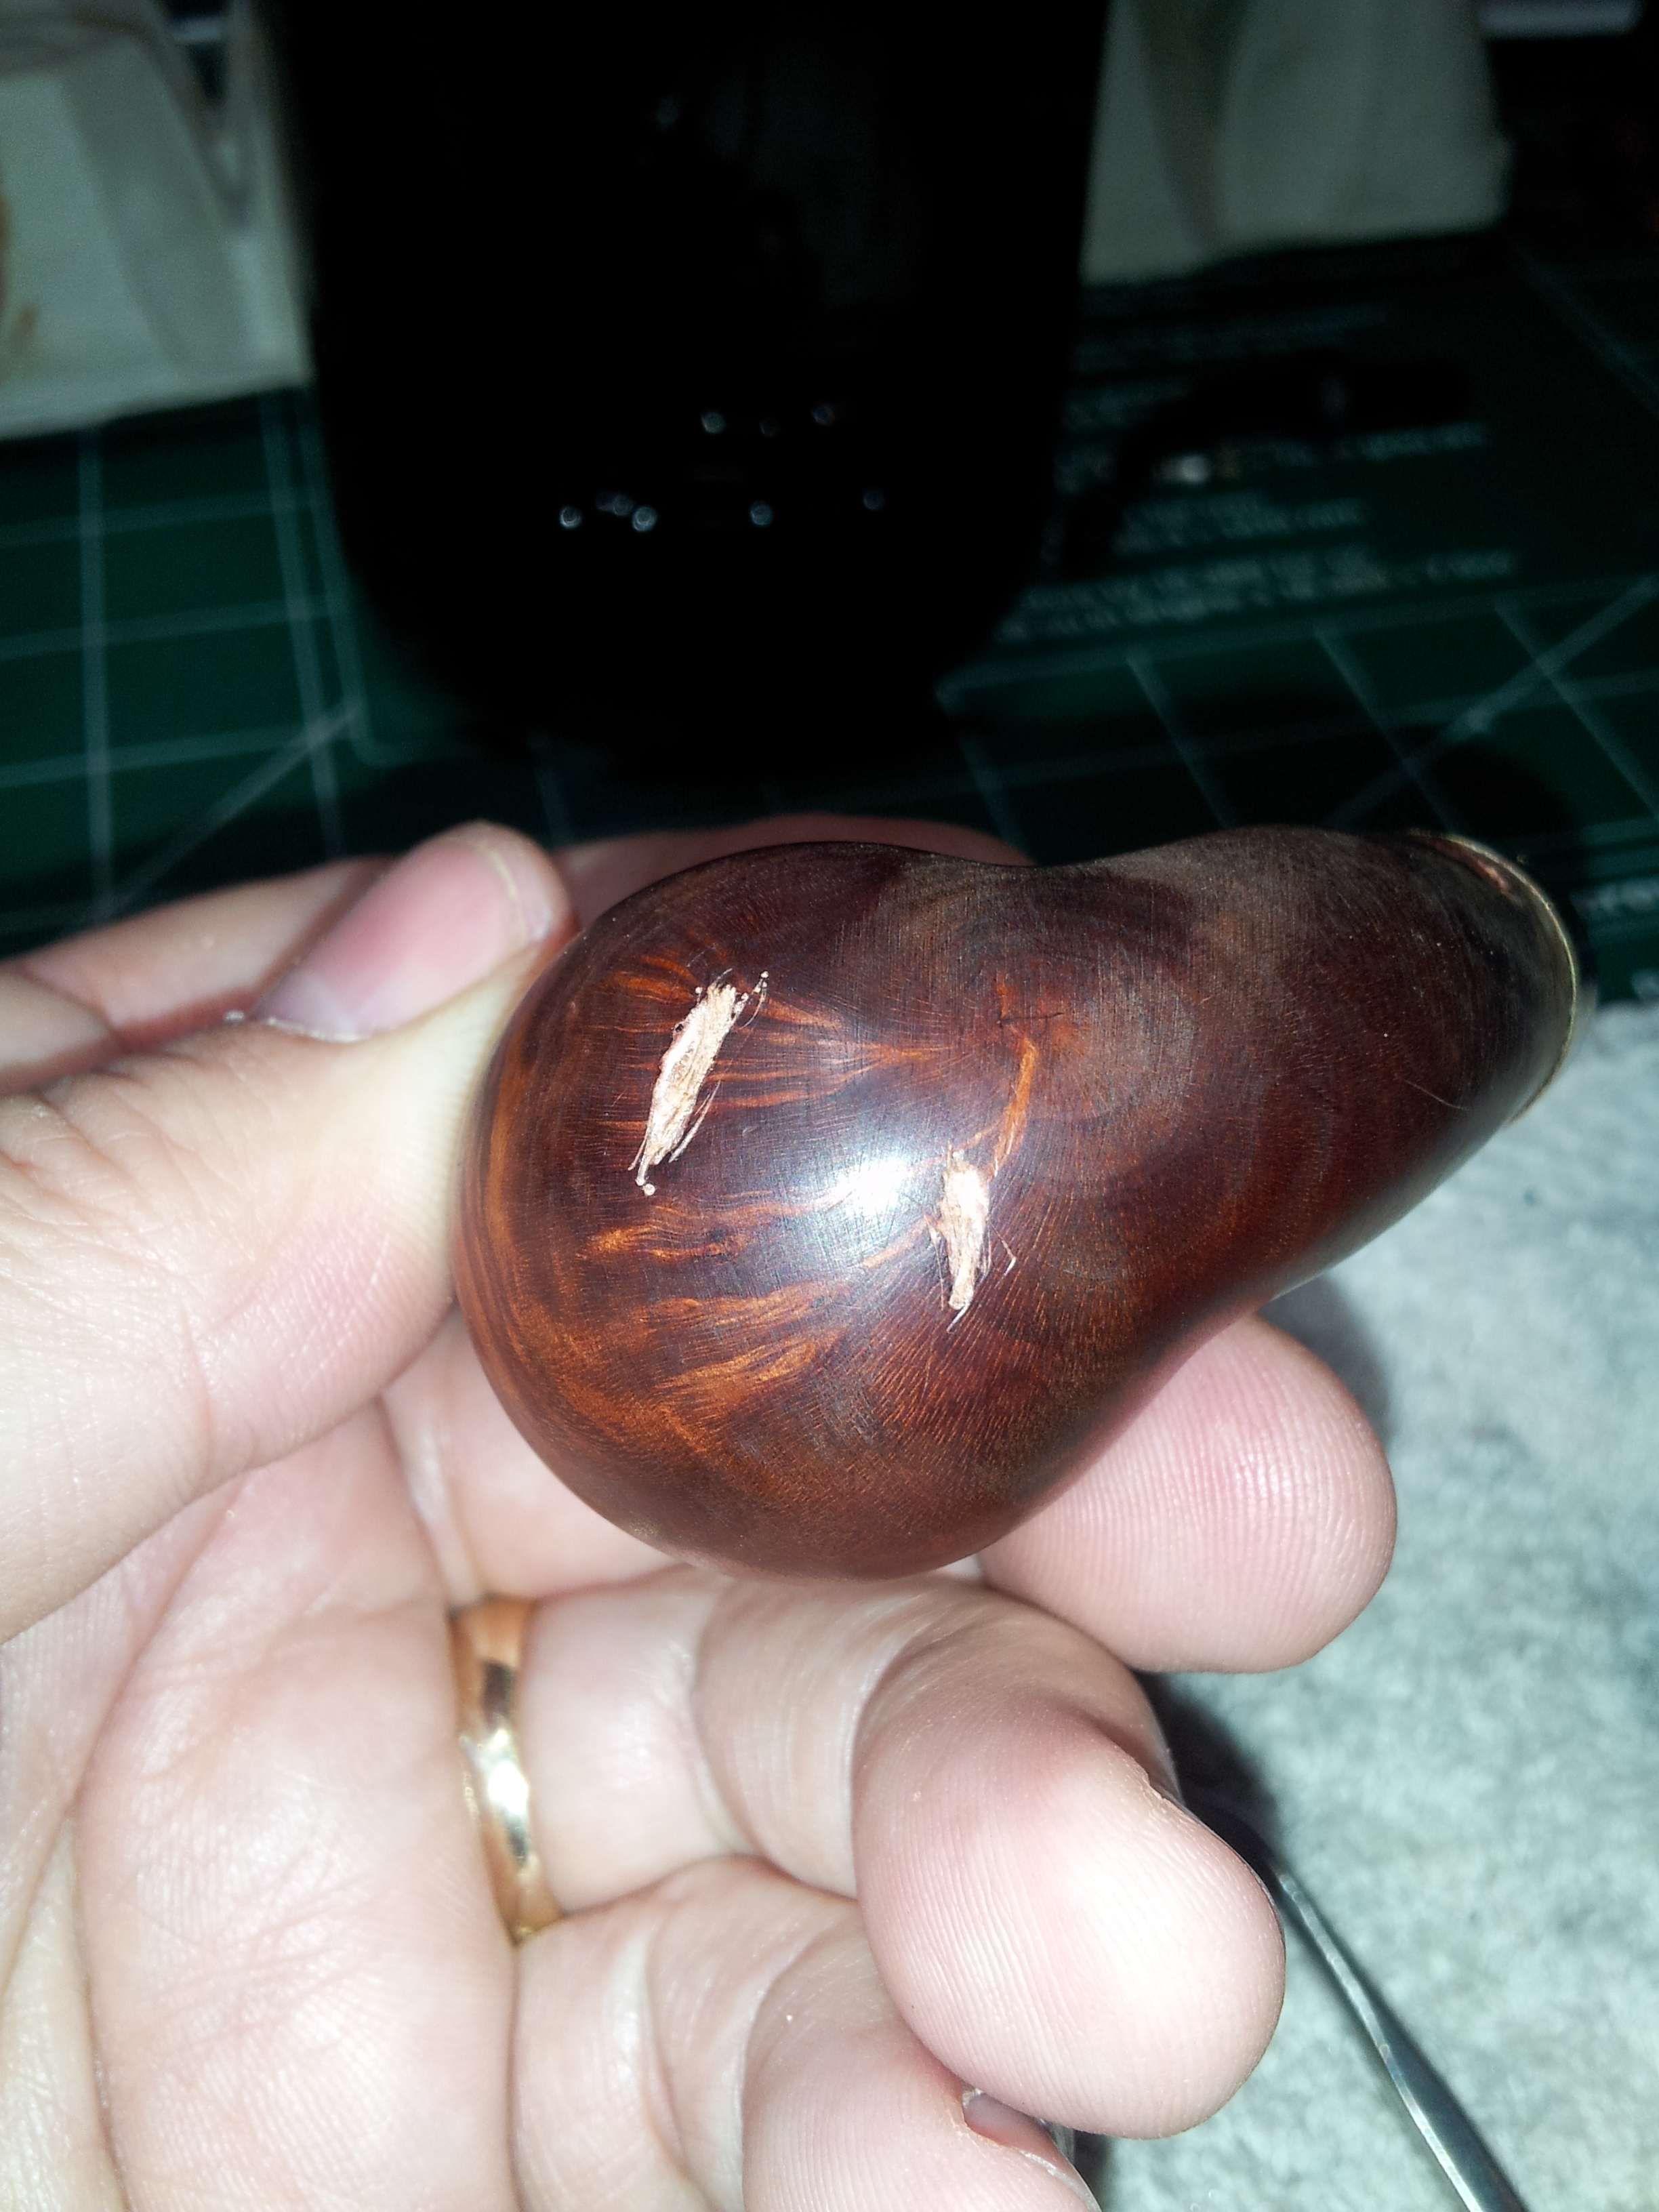
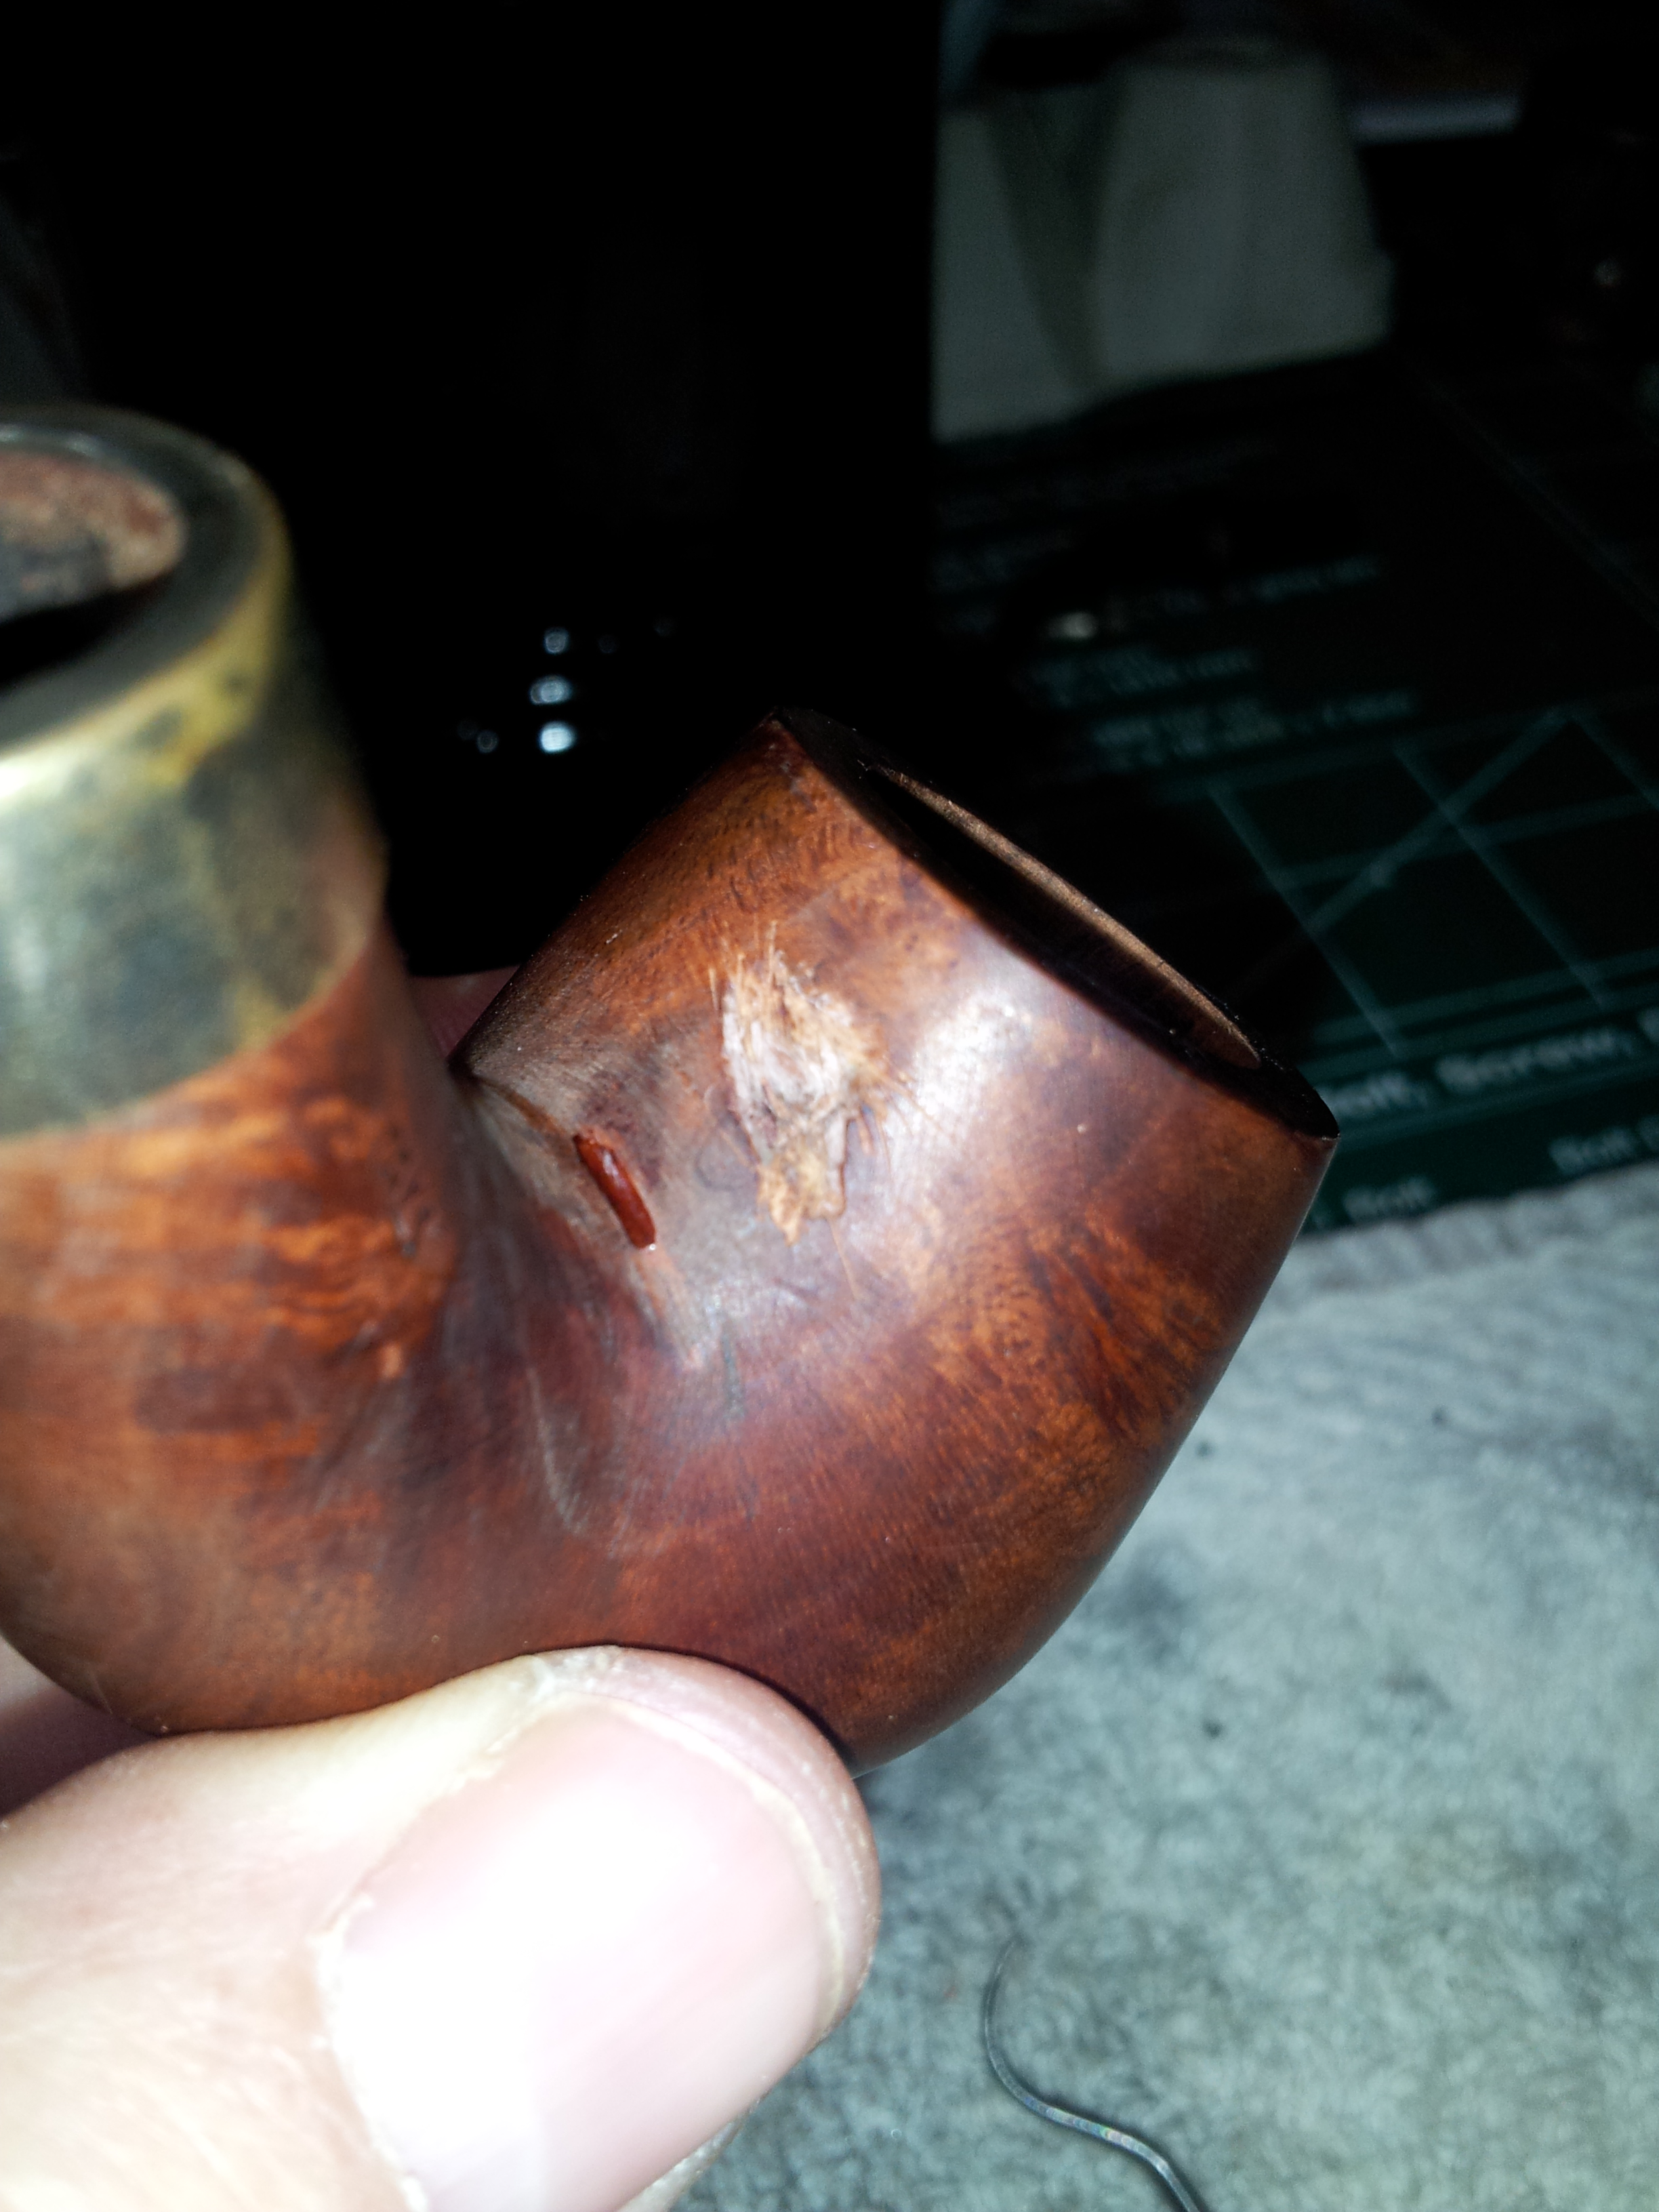
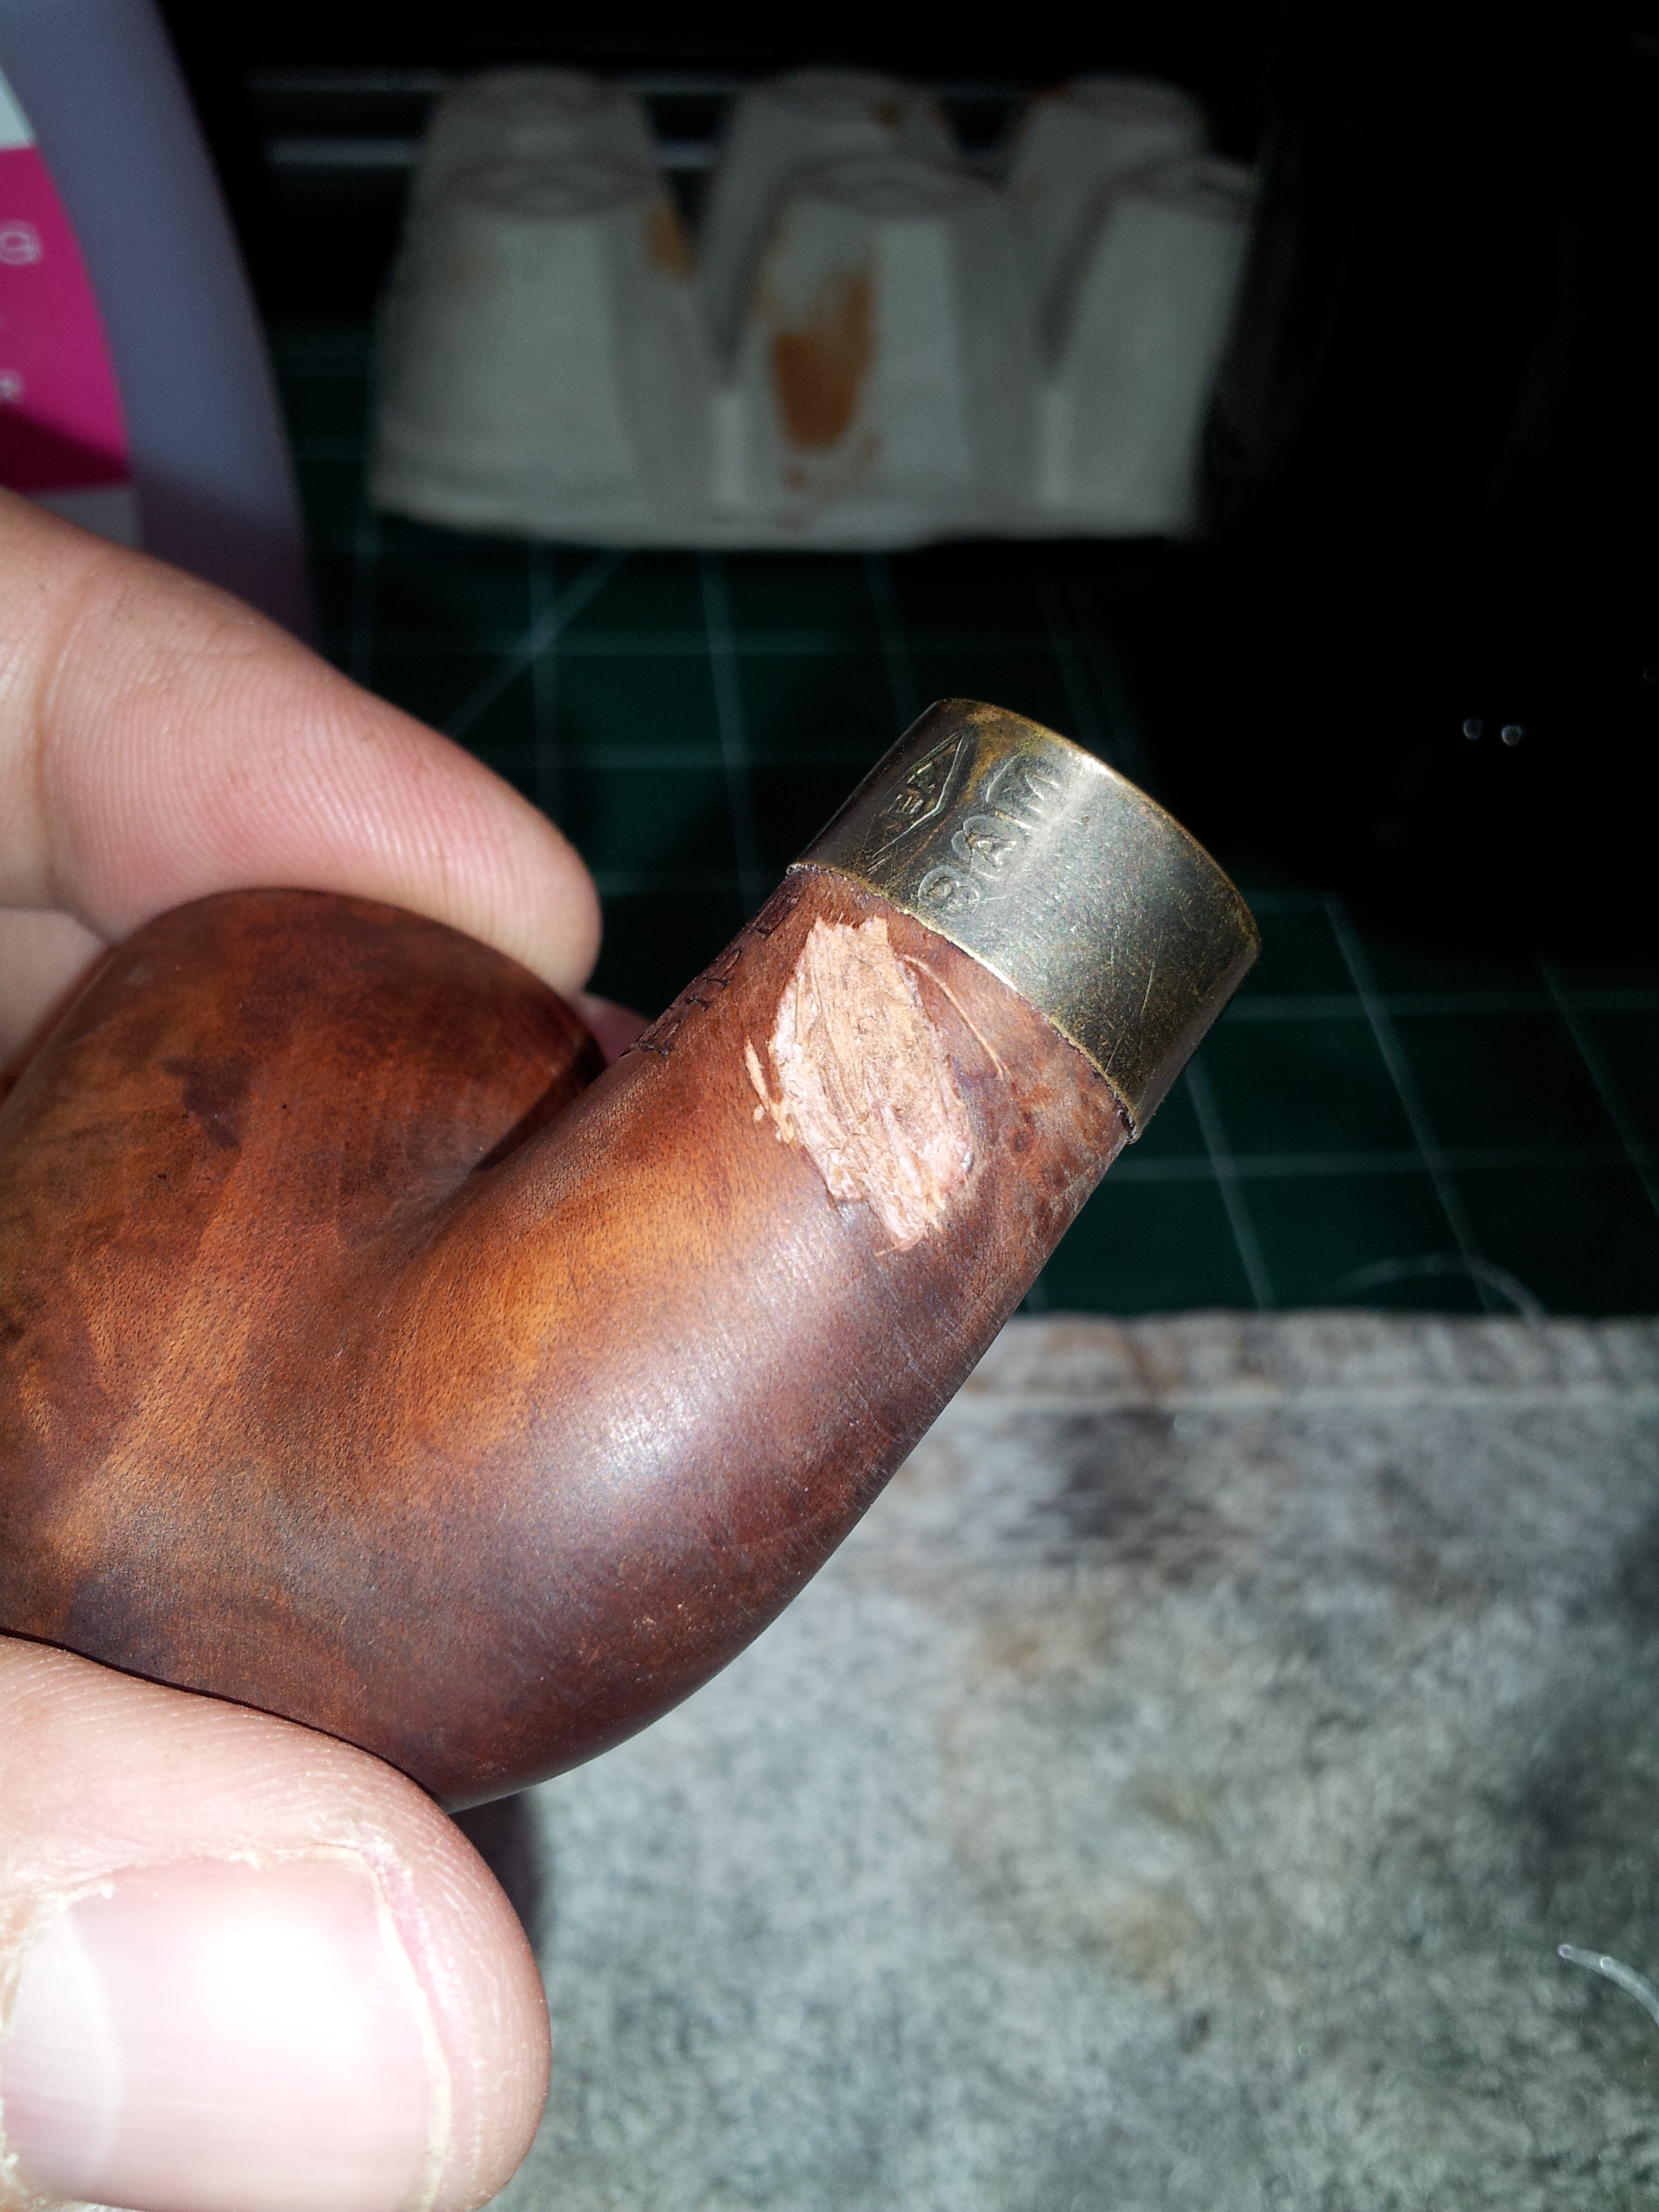
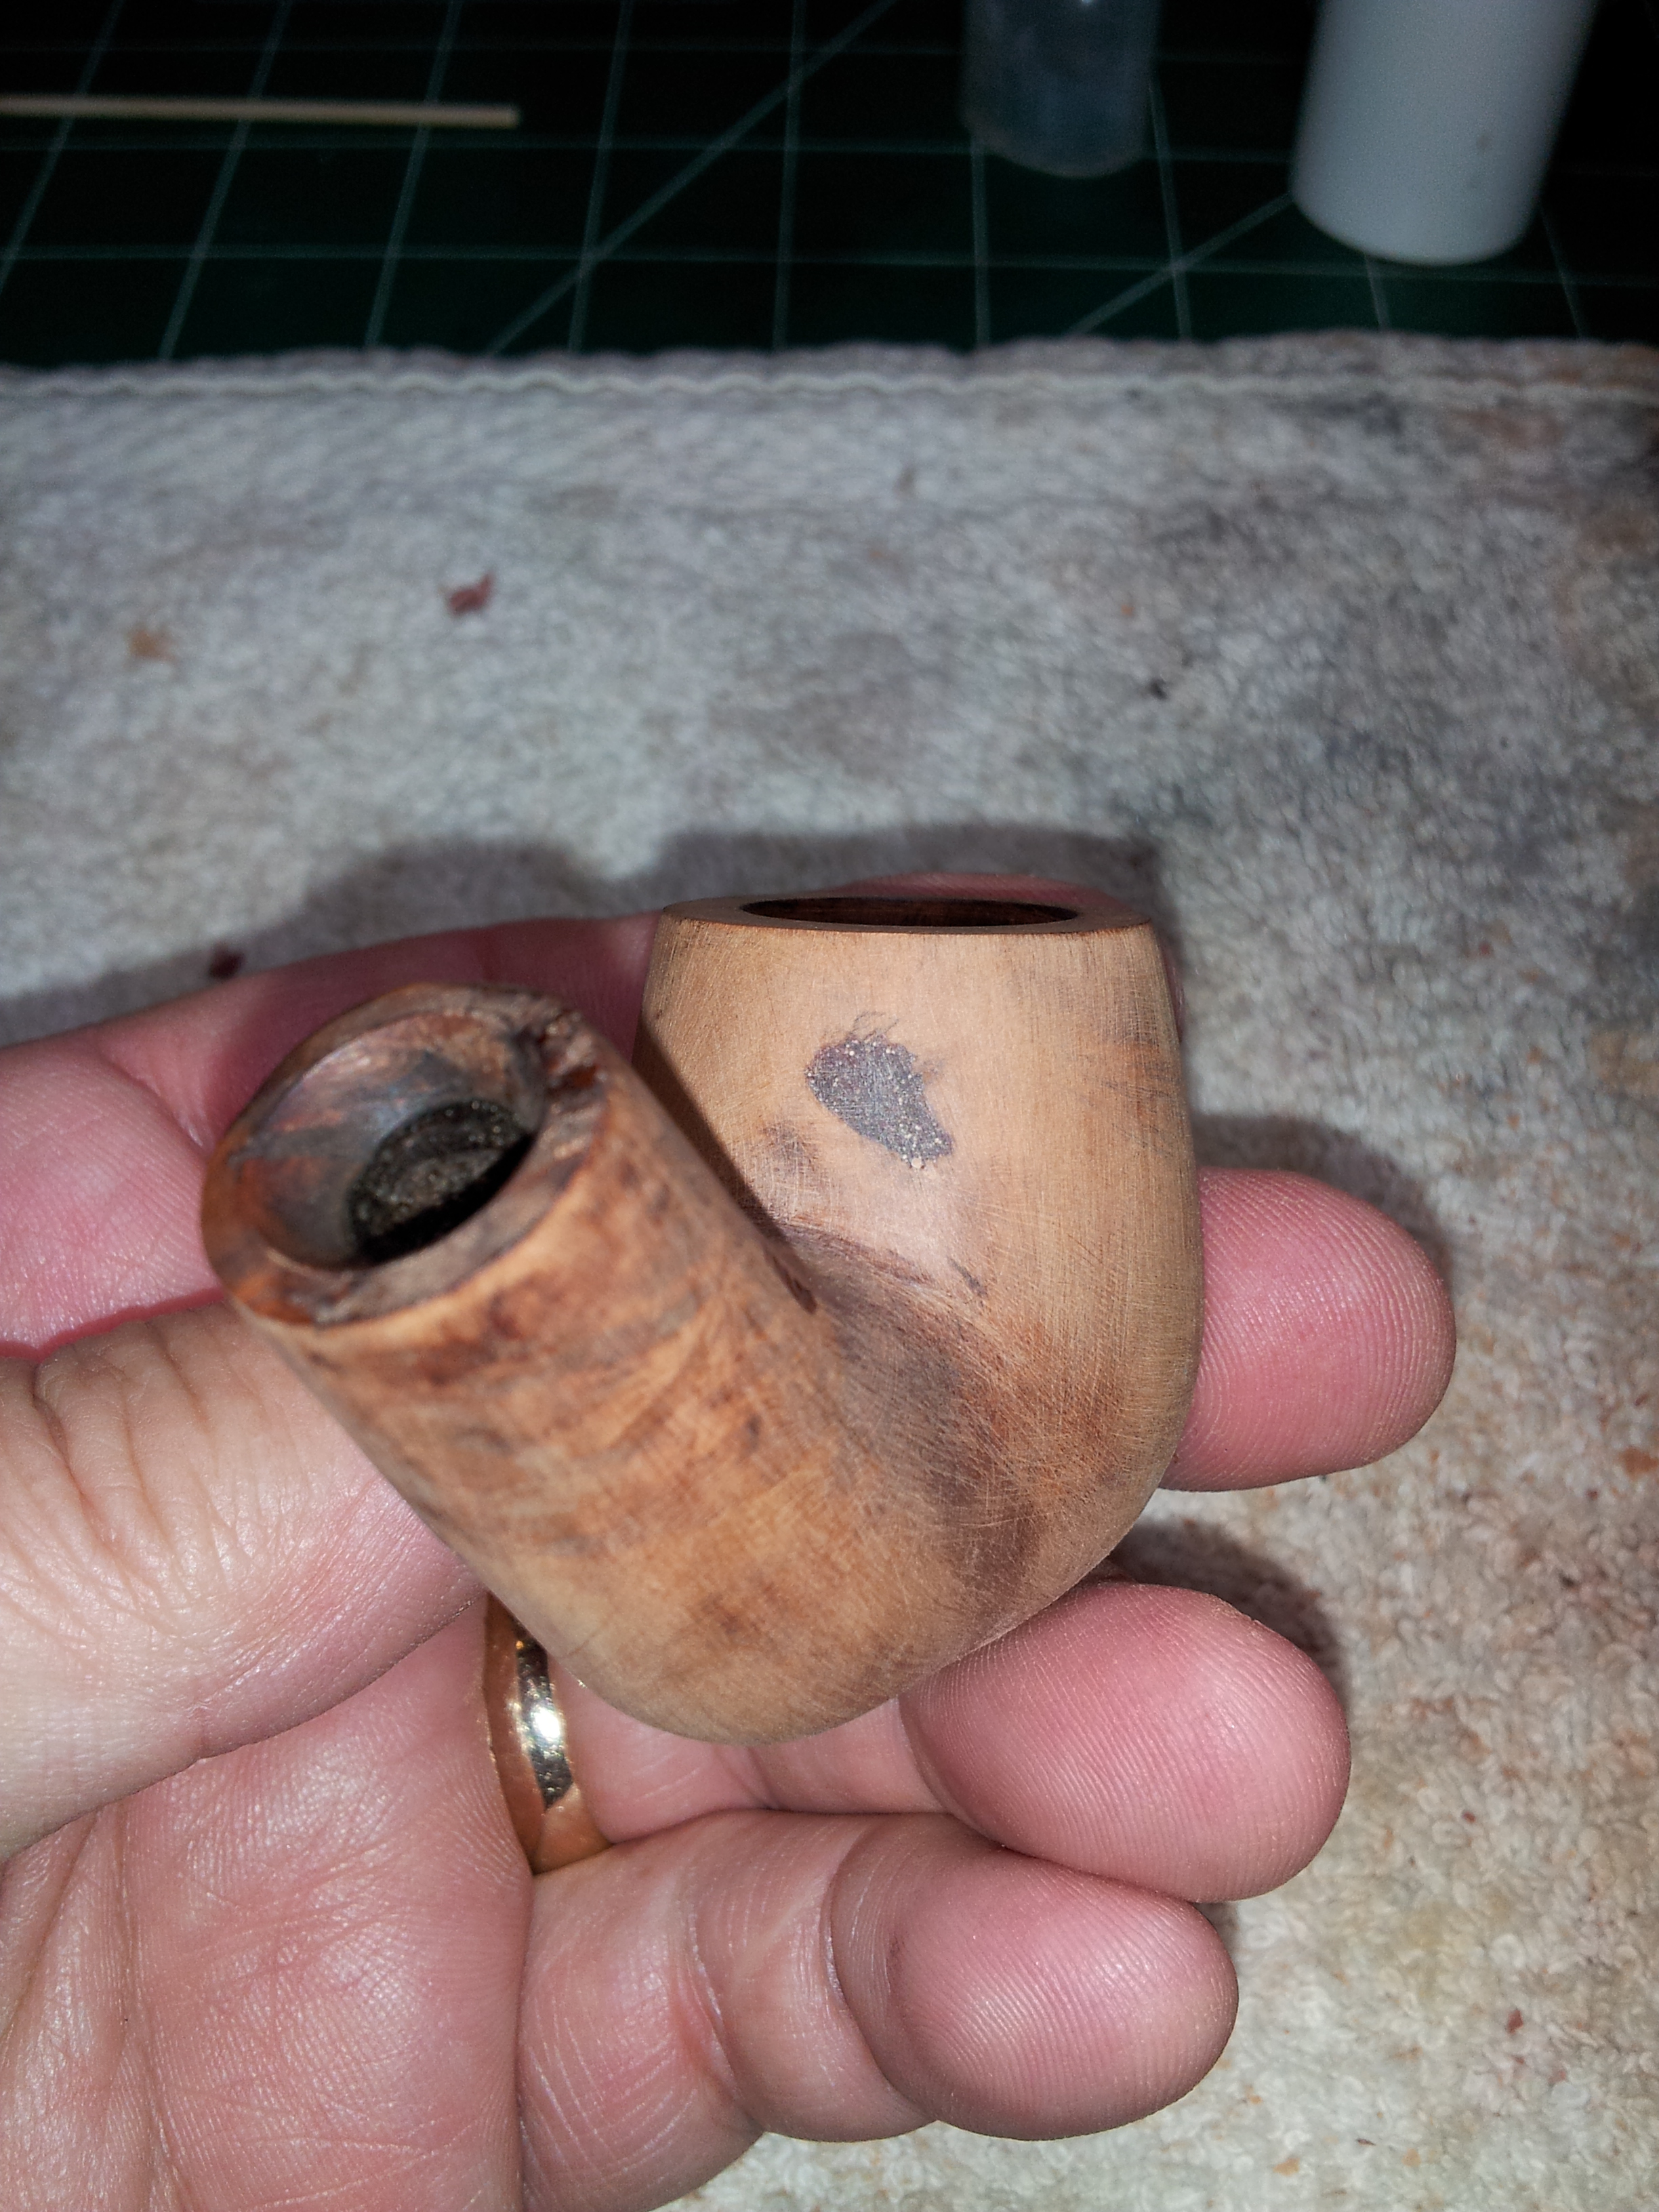
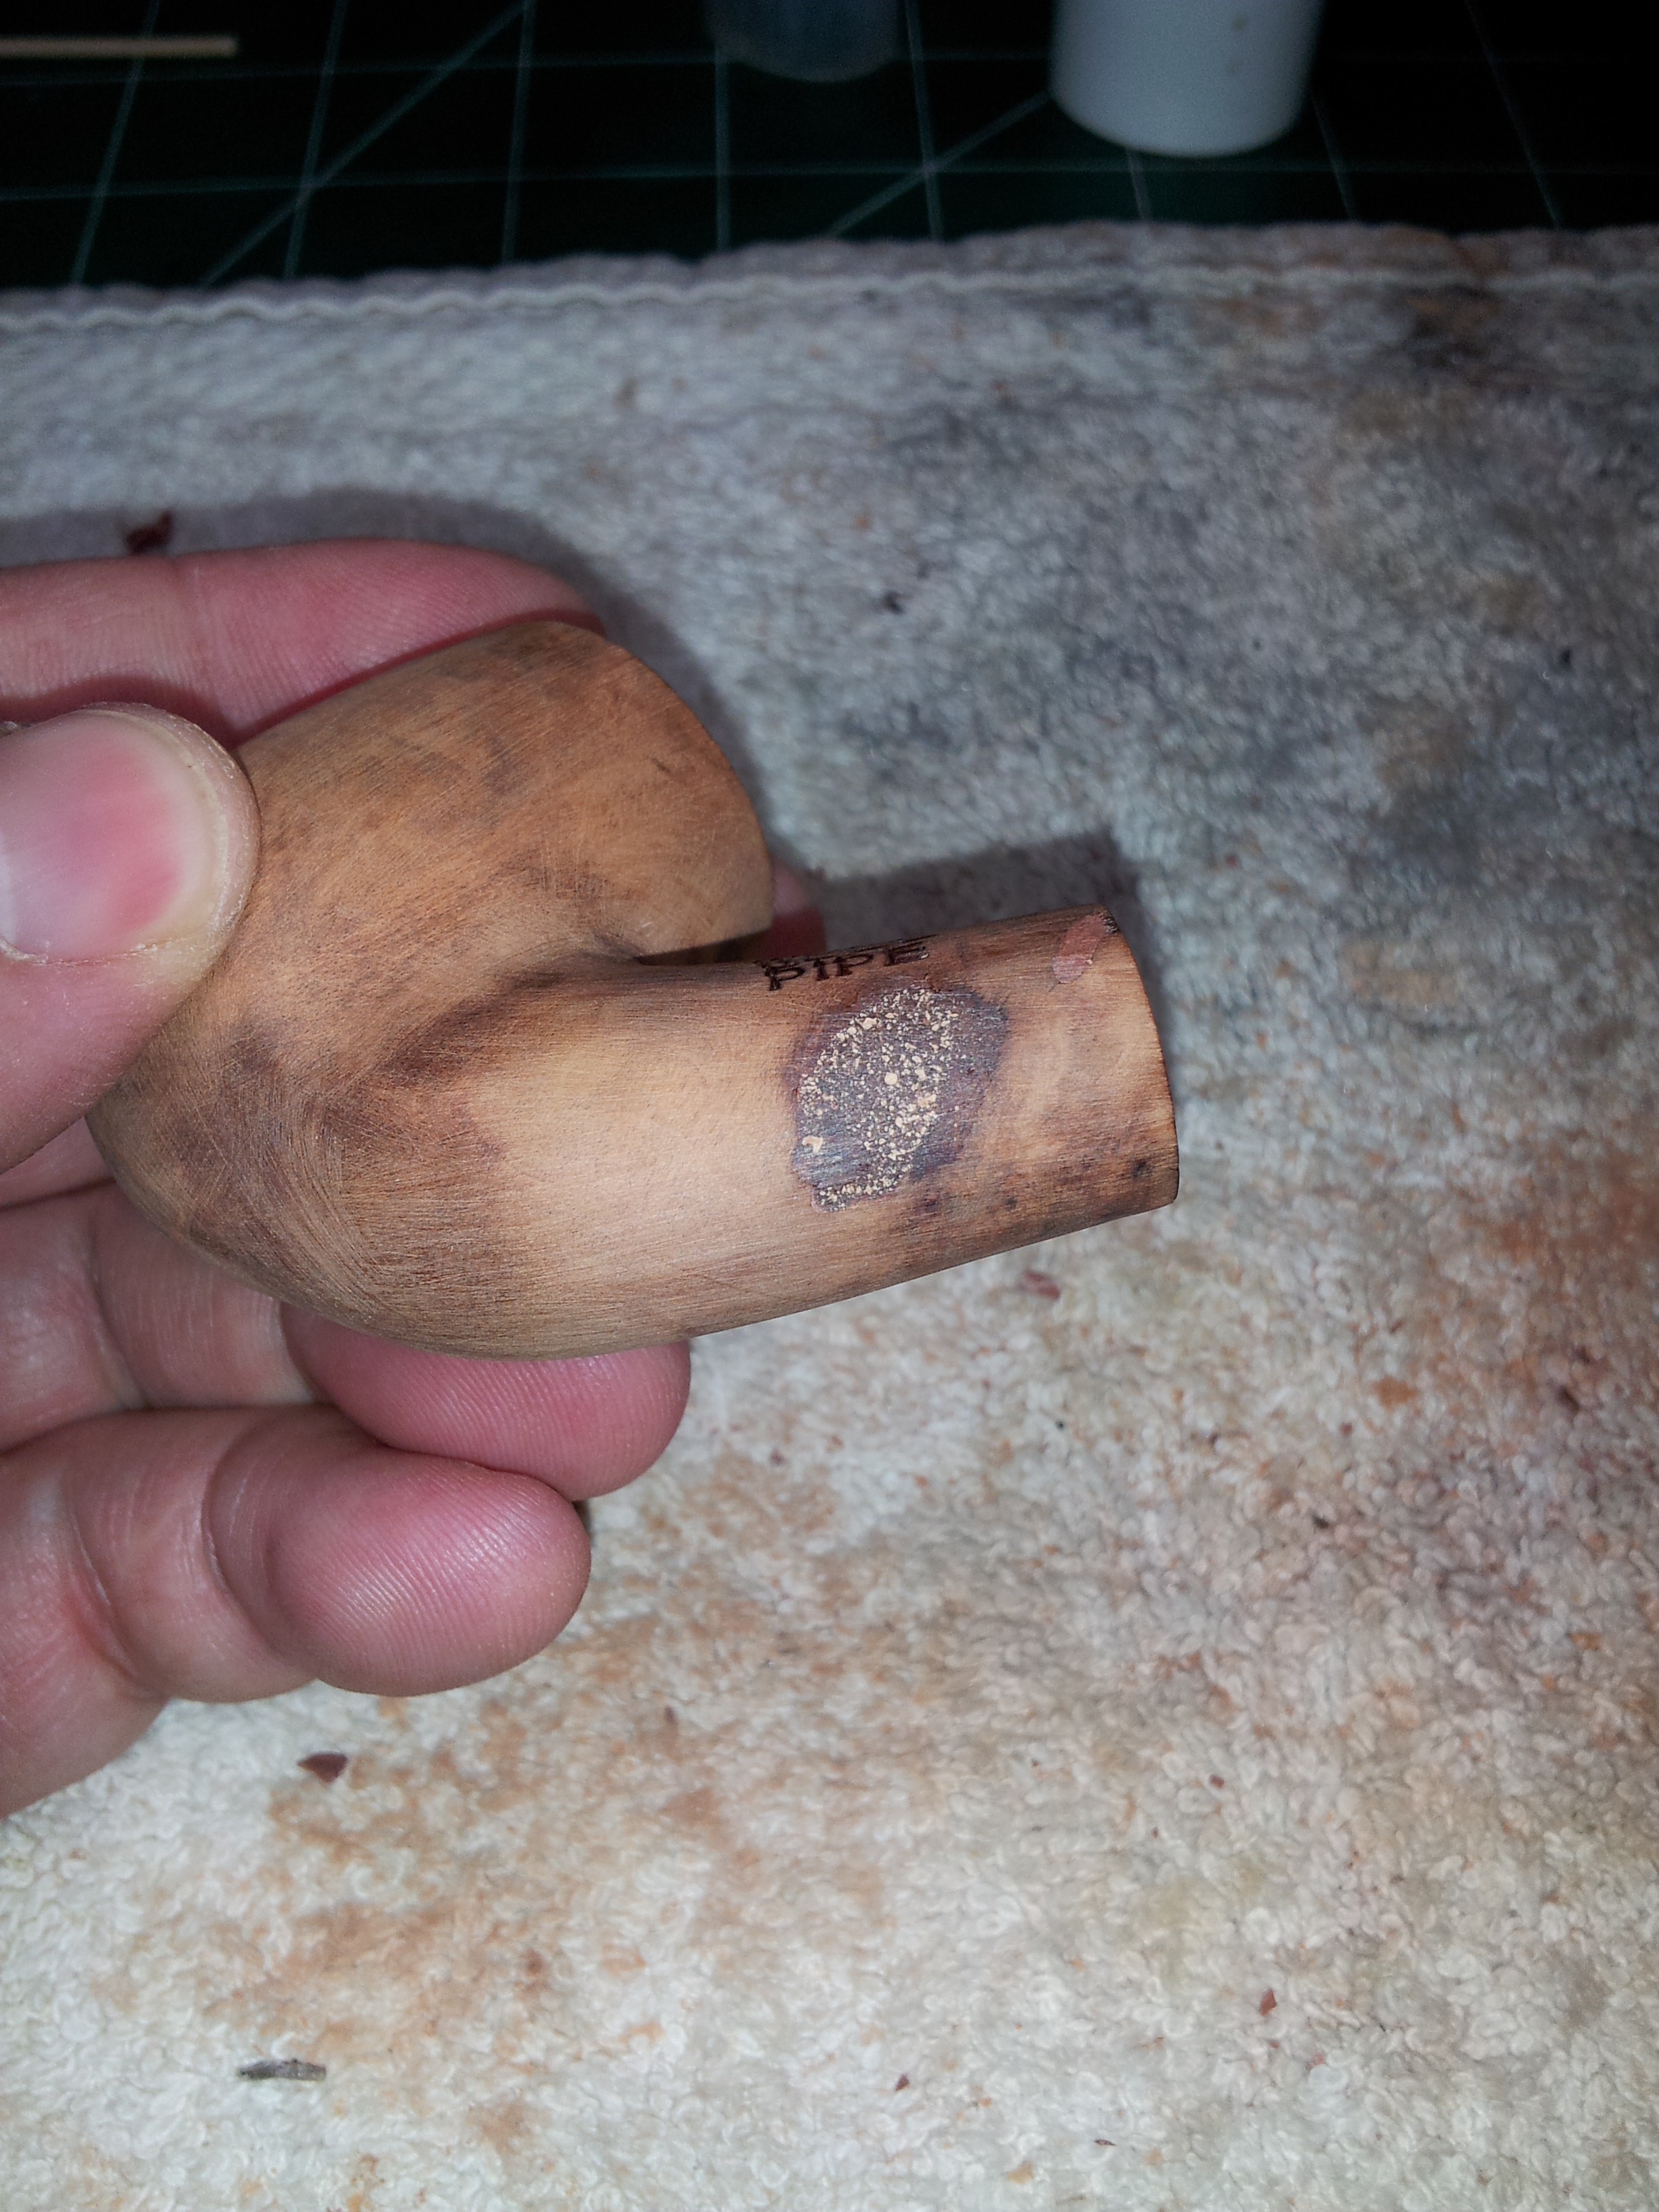
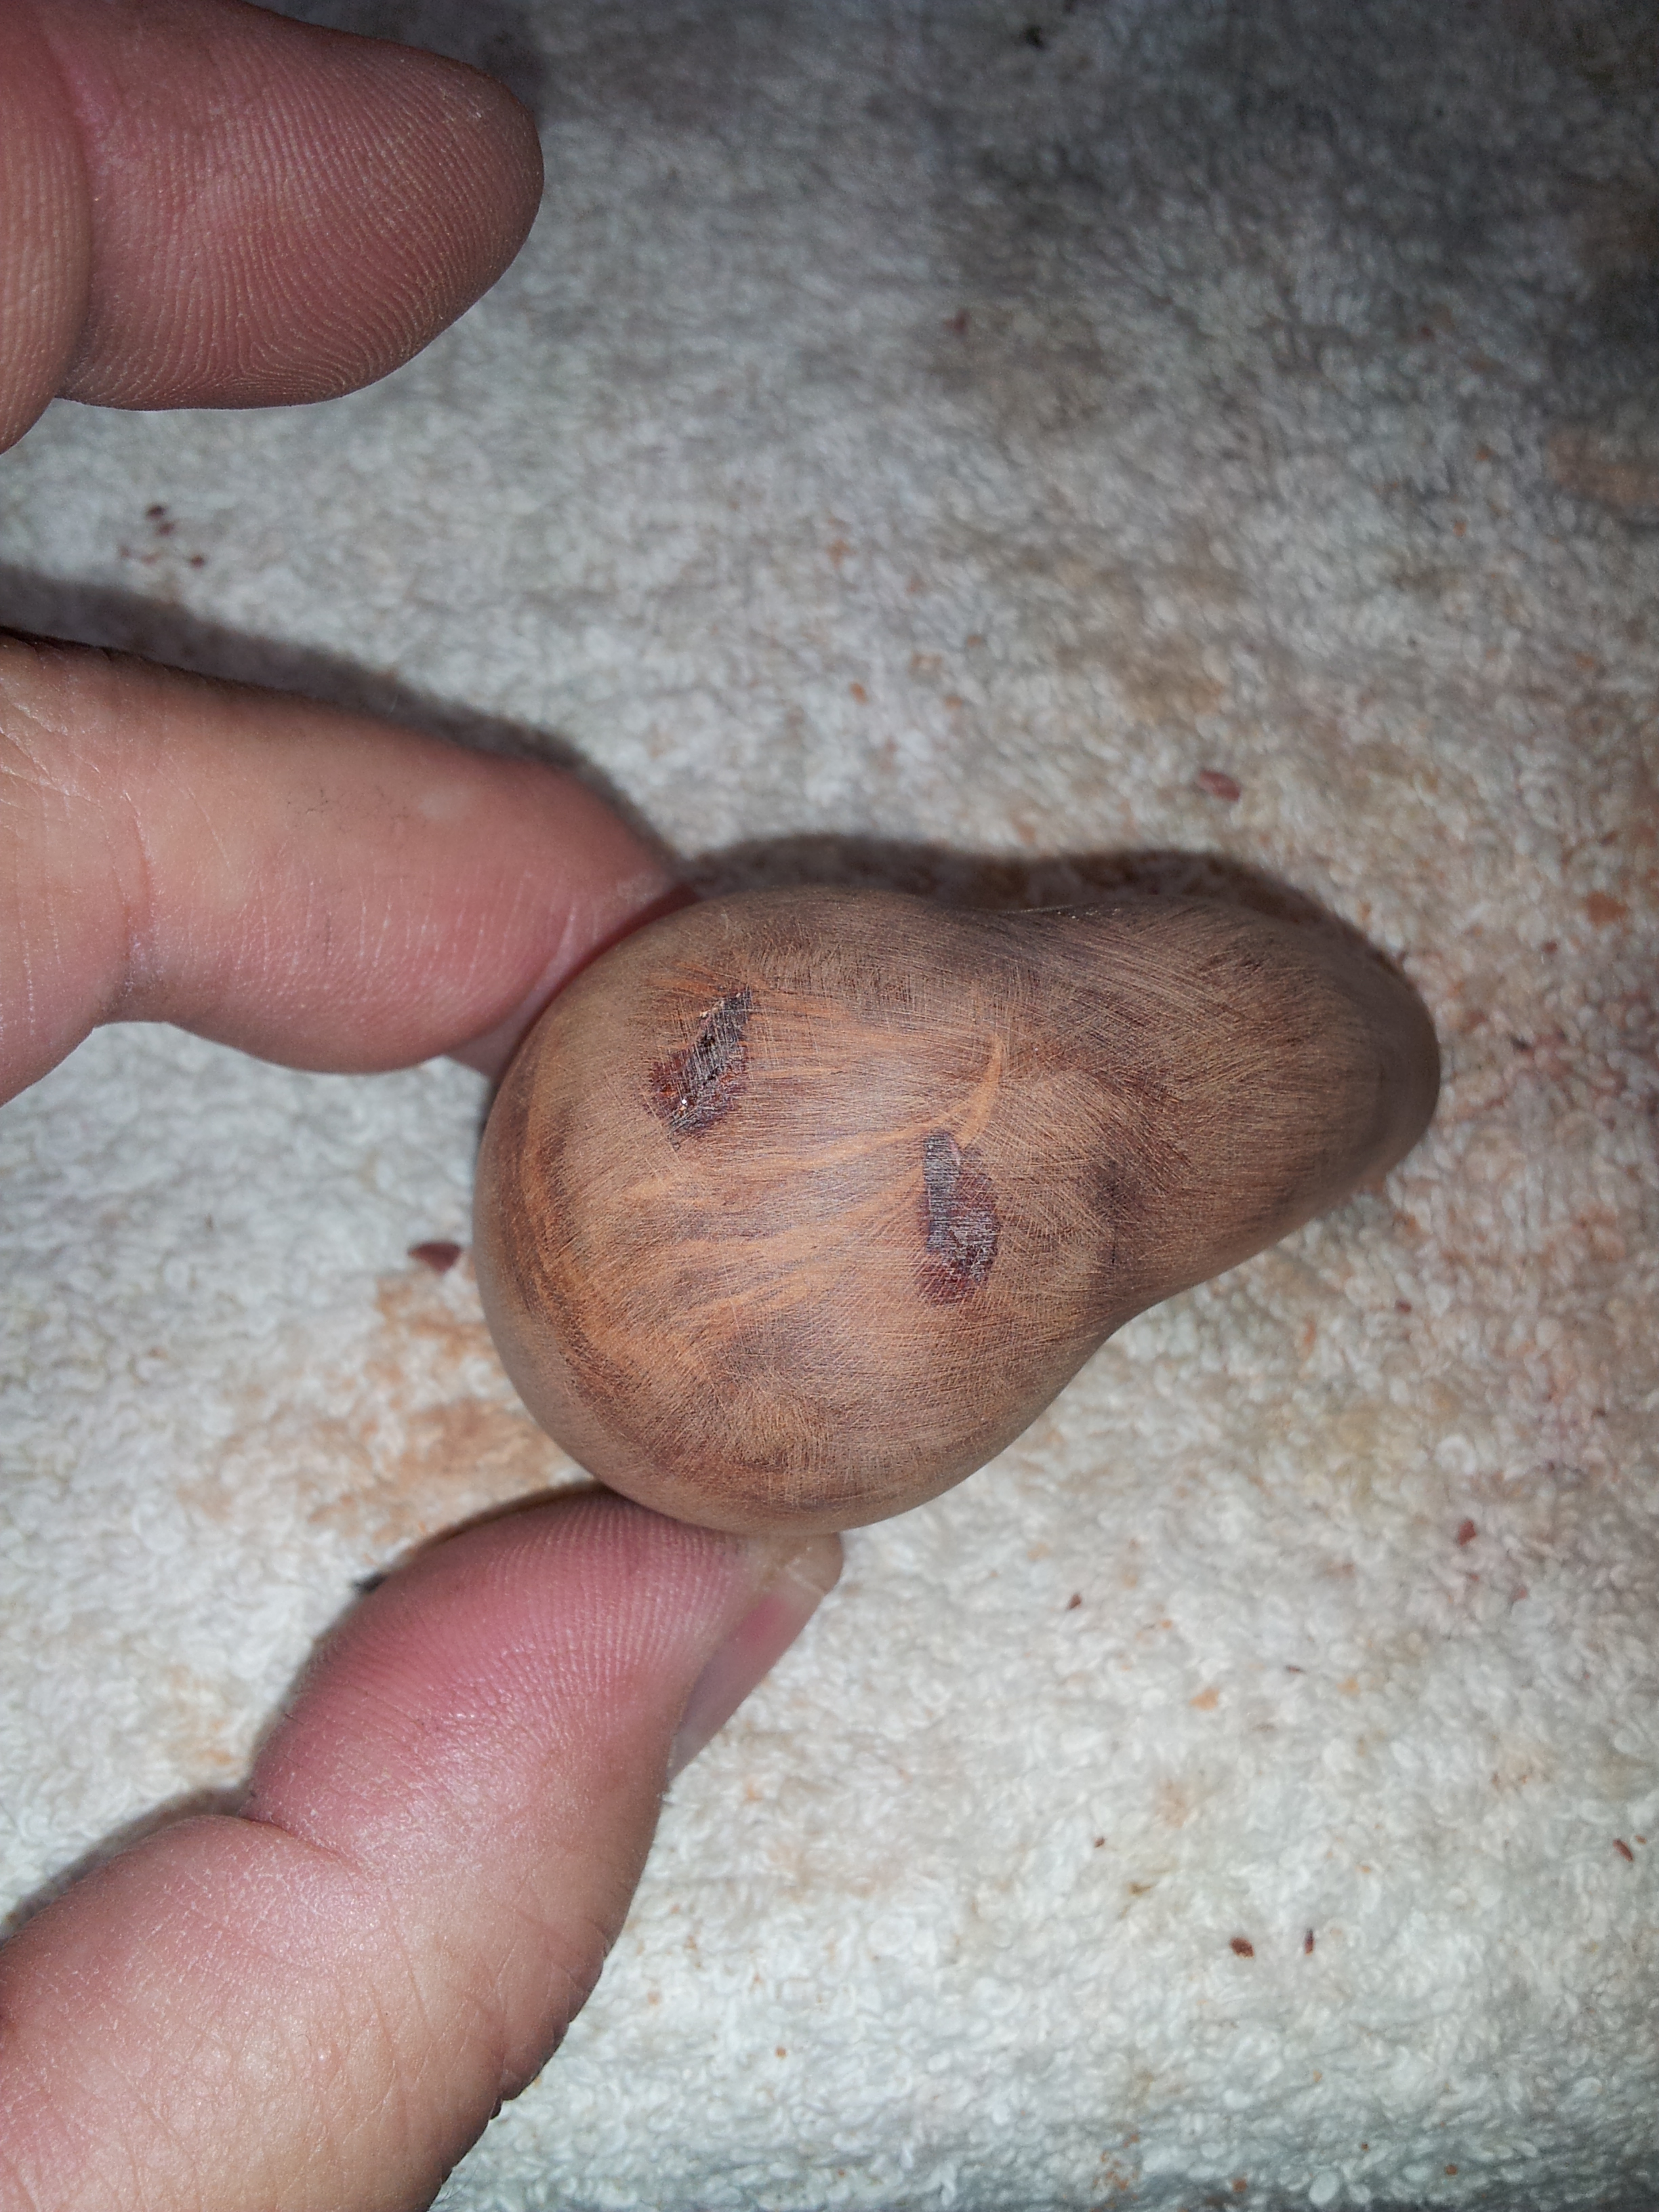
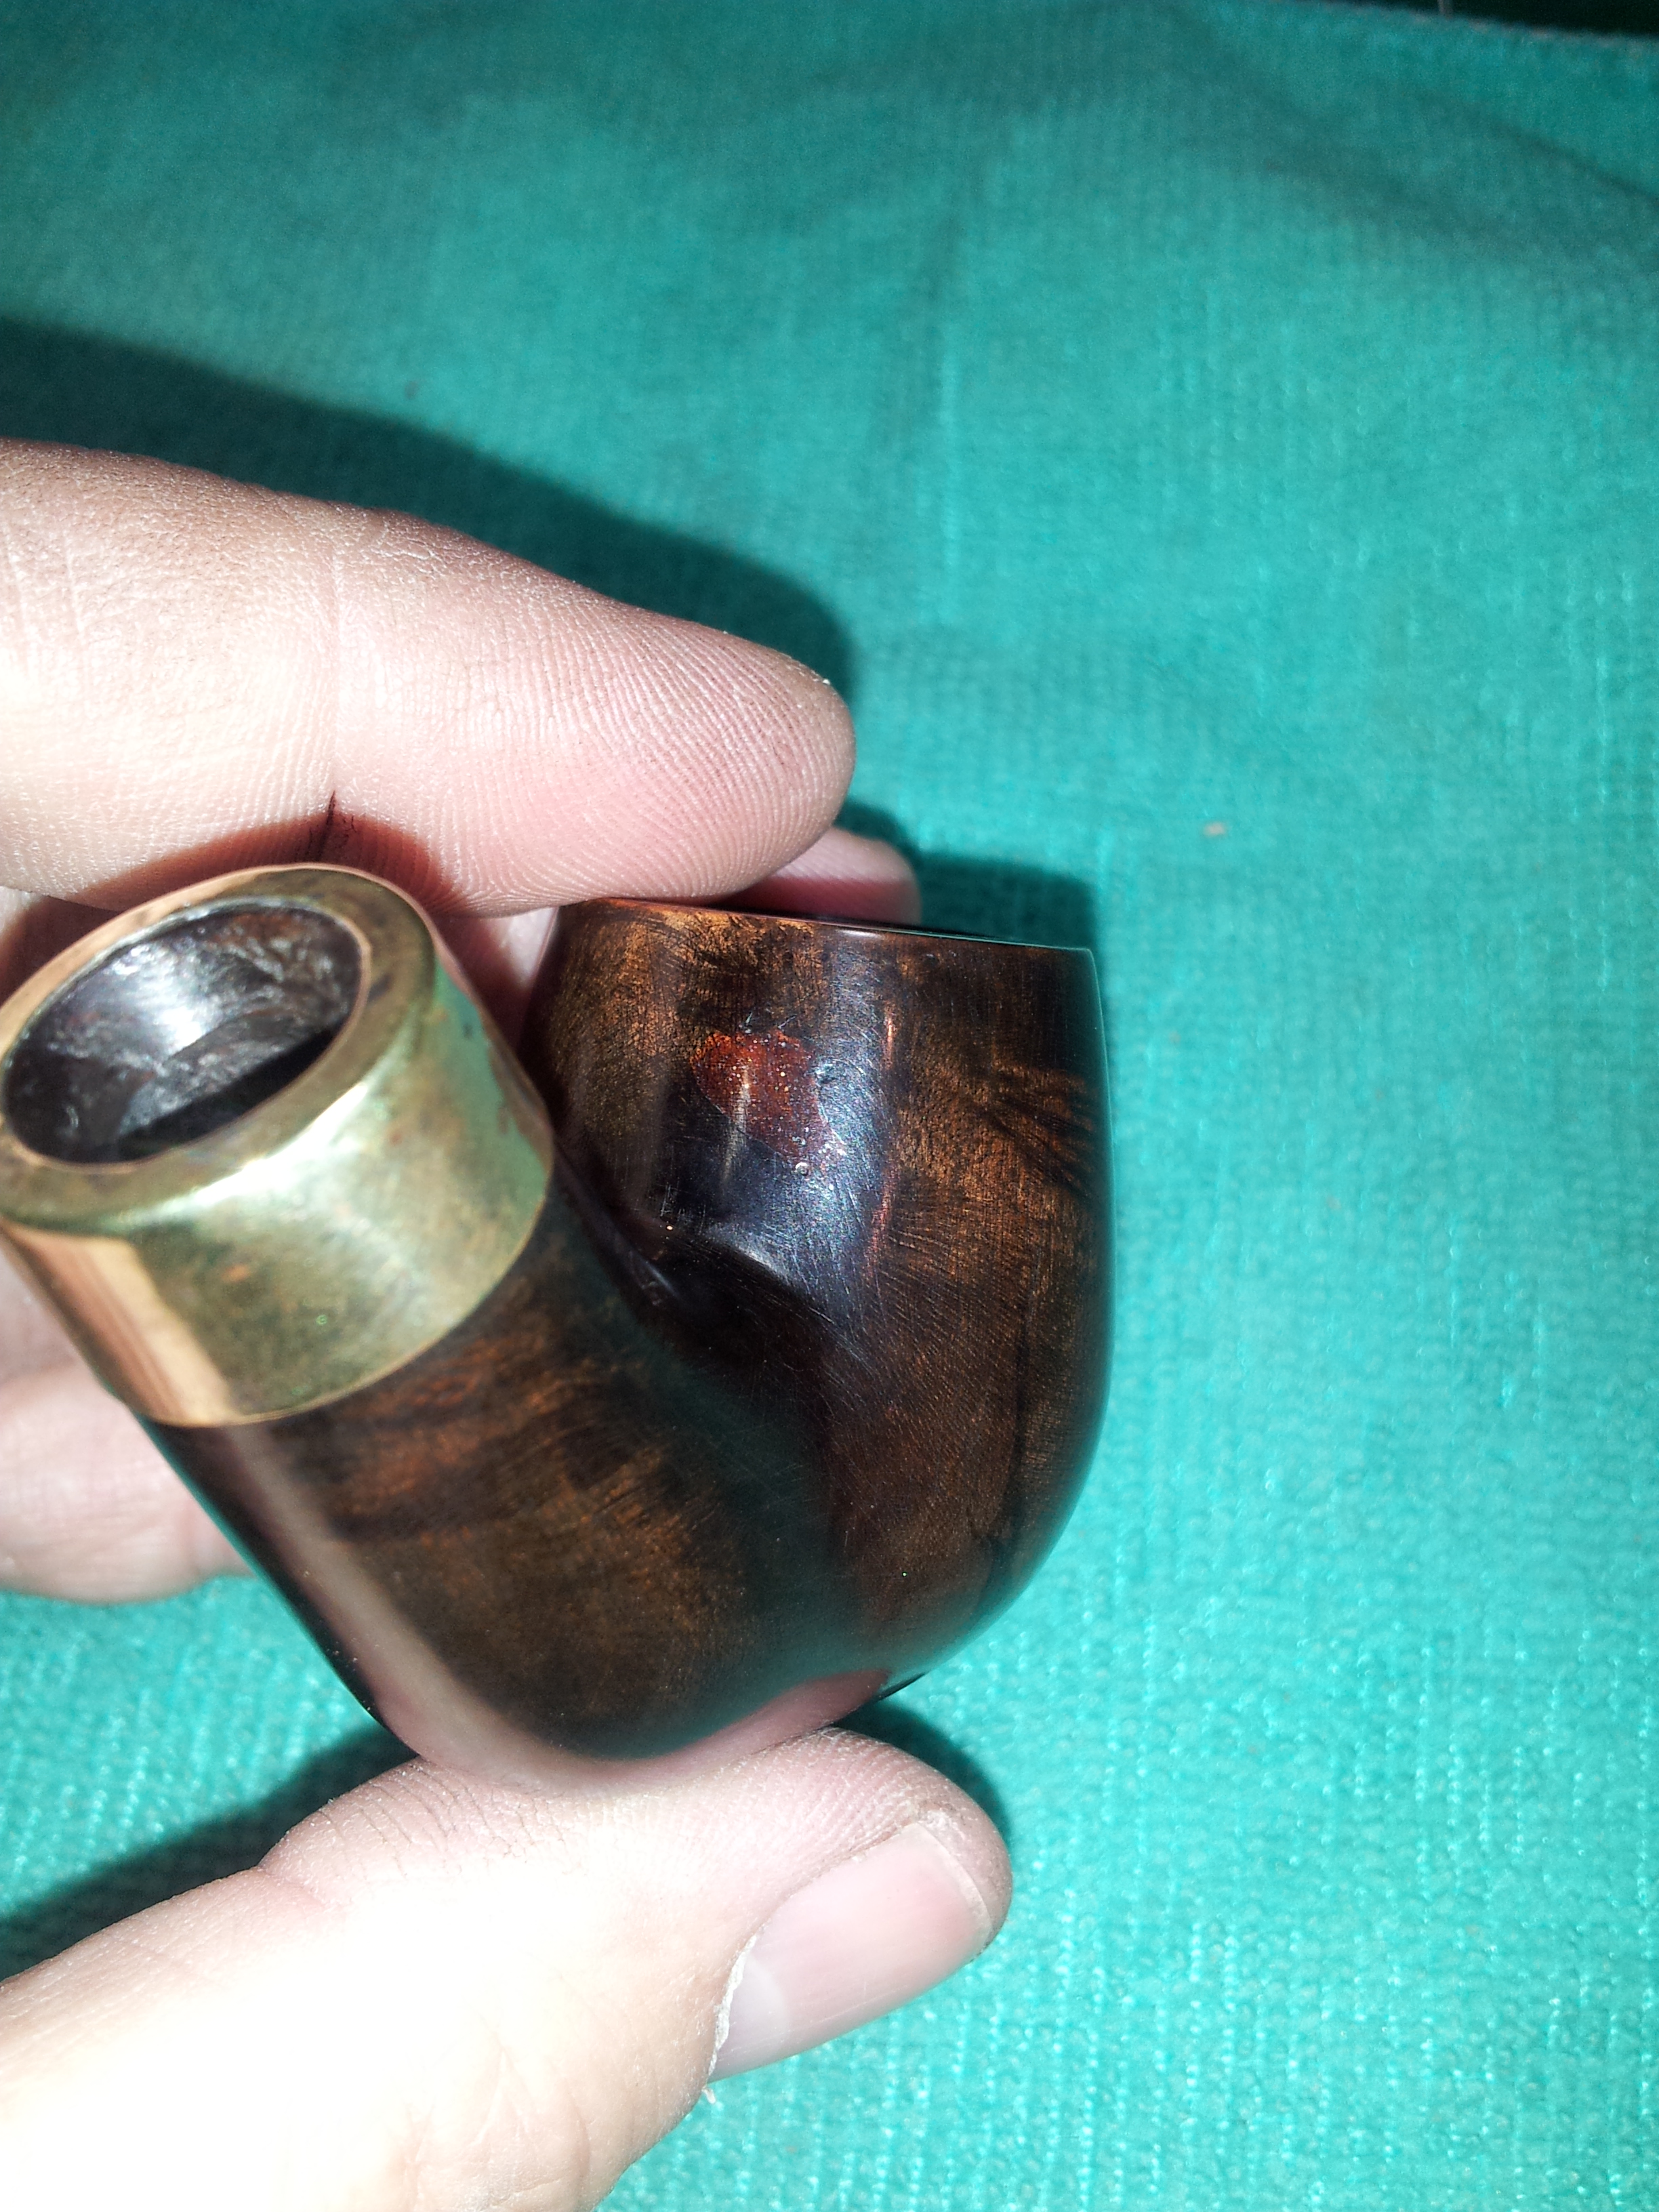
Getting back to the refurb, I decided to clean the stummel up first before working on the stem. To that end, I wiped the briar down with nail polish remover and cotton pads to remove the surface grime and old finish. Perhaps I shouldn’t have, as the cleaning uncovered some massive fills. Sigh. In total I found 5 fills in the bowl that needed attention – a small one on the front, two parallel “scrapes” on the bottom, a bigger blob on the rear of the bowl above the shank, and a HUGE one on the left shank near the band. This last one was easily the largest and deepest fill I have seen on any pipe, period. At its deepest point it could only have been a few millimetres from the mortise. The pics below show the fills after I had picked out all the old, crumbly pink putty.
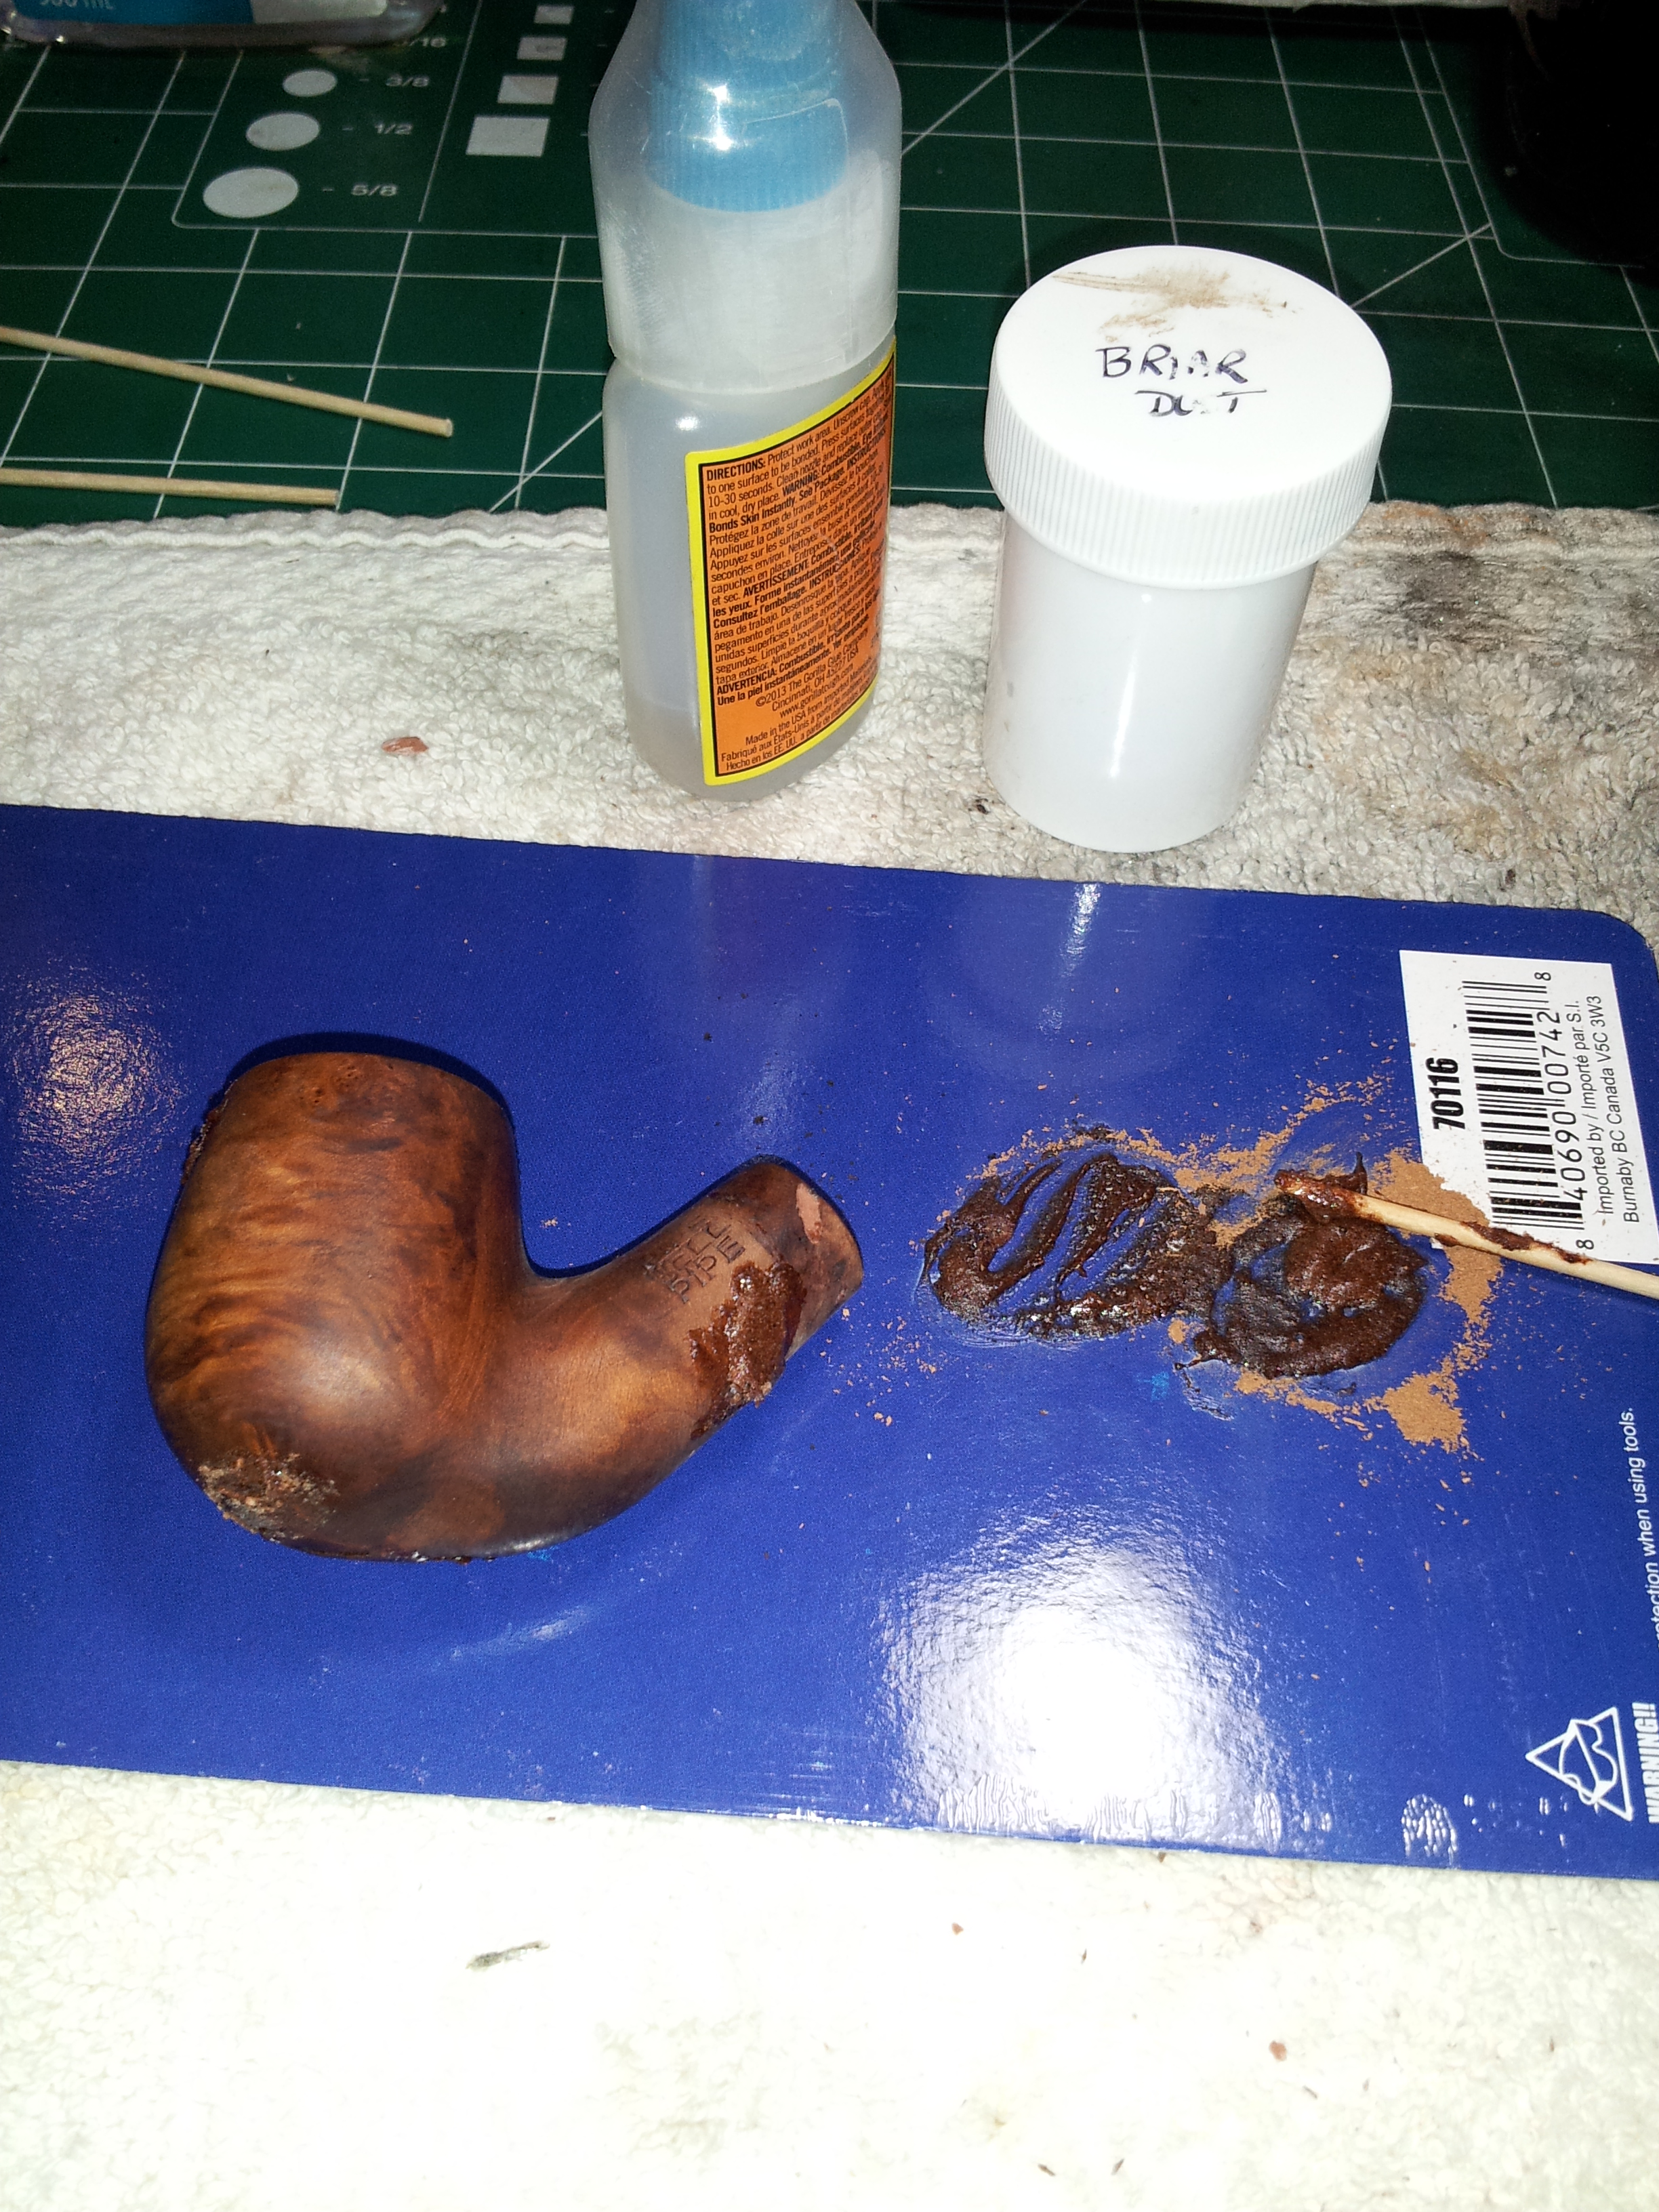
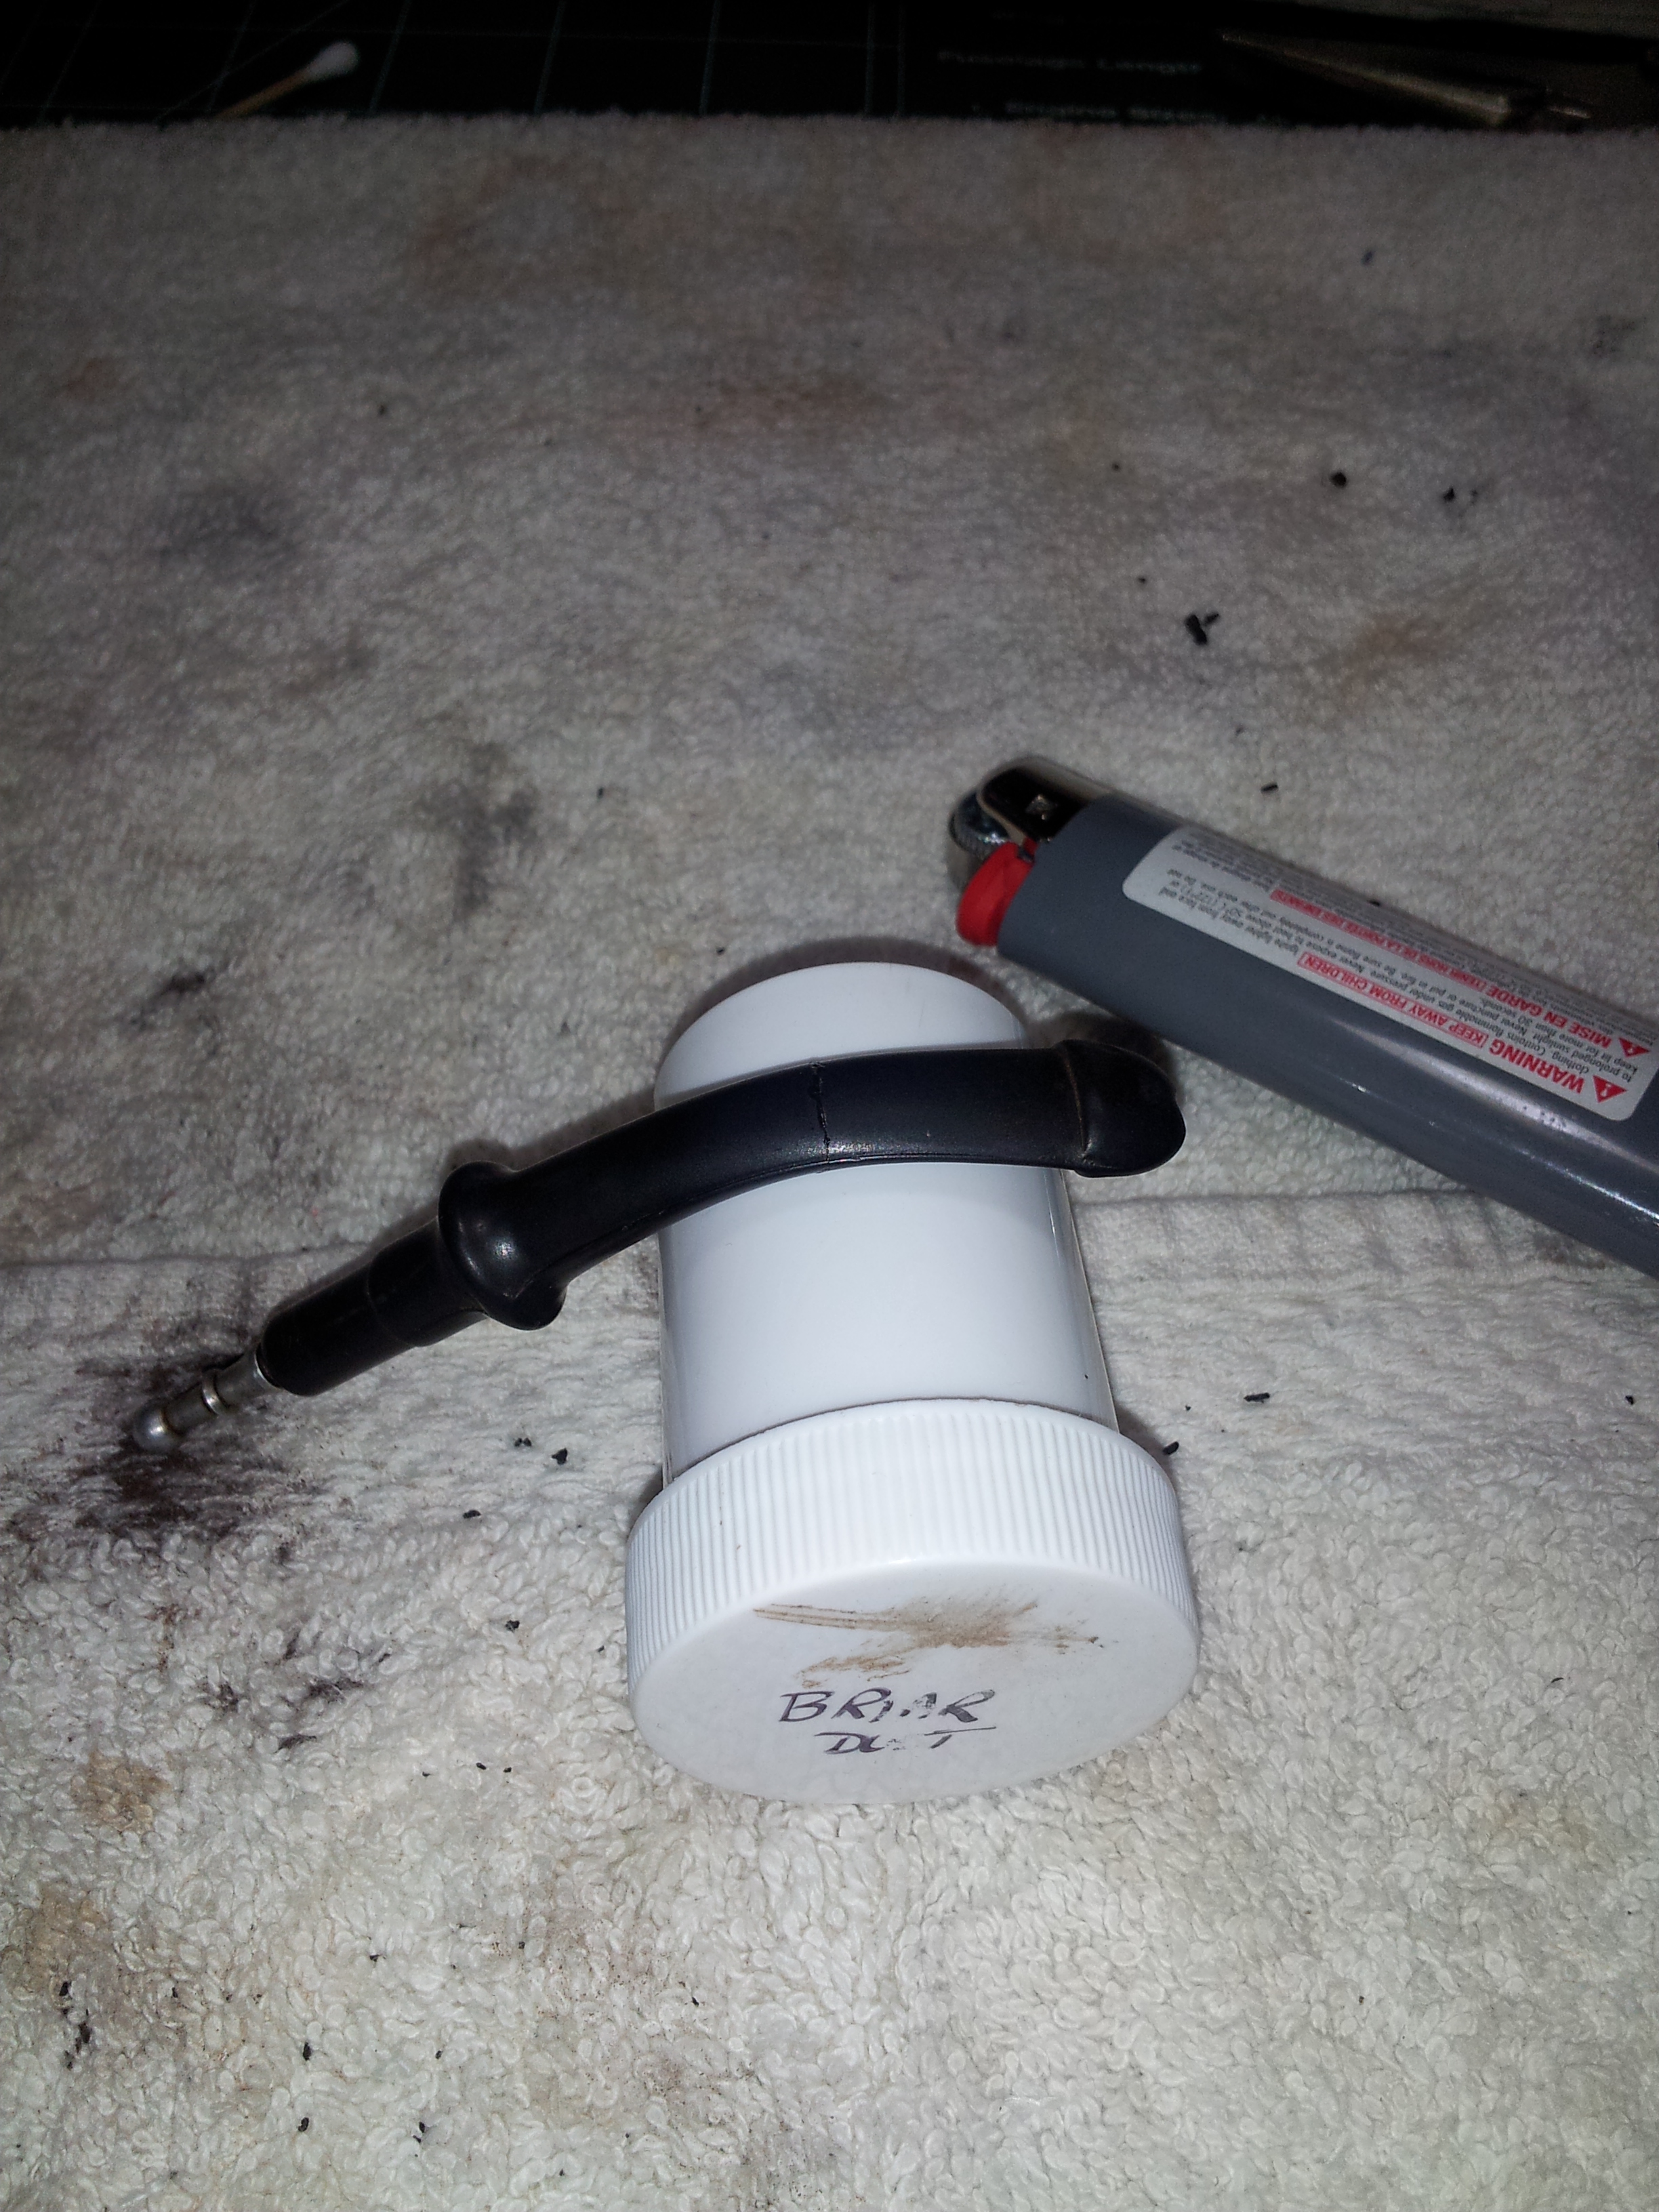
I reamed the bowl back to briar using 80-grit sandpaper wrapped around a Sharpie. I wanted to make sure there were no surprises hiding inside the bowl. Thankfully, the bowl was in good shape, with no cracks or other damage. To give myself a bit of elbow room while filling the Grand Canyon in the pipe’s shank, I used a lighter to heat up and remove the band. I set it aside for the duration of the fill work. Then it was time to fill! I worked on each fill individually, mixing up a fresh batch of briar dust and CA glue for each one. There was no way that I could have worked quickly enough to fill more than one of these flaws at a time.
 When the fills had fully cured, I used a combination of files and sandpaper to level them out with the surrounding wood. The monster fill required several top-ups of CA and briar dust to completely fill all the voids, but eventually I got to this point, where the fills are done and the entire stummel has been sanded to 320 grit.
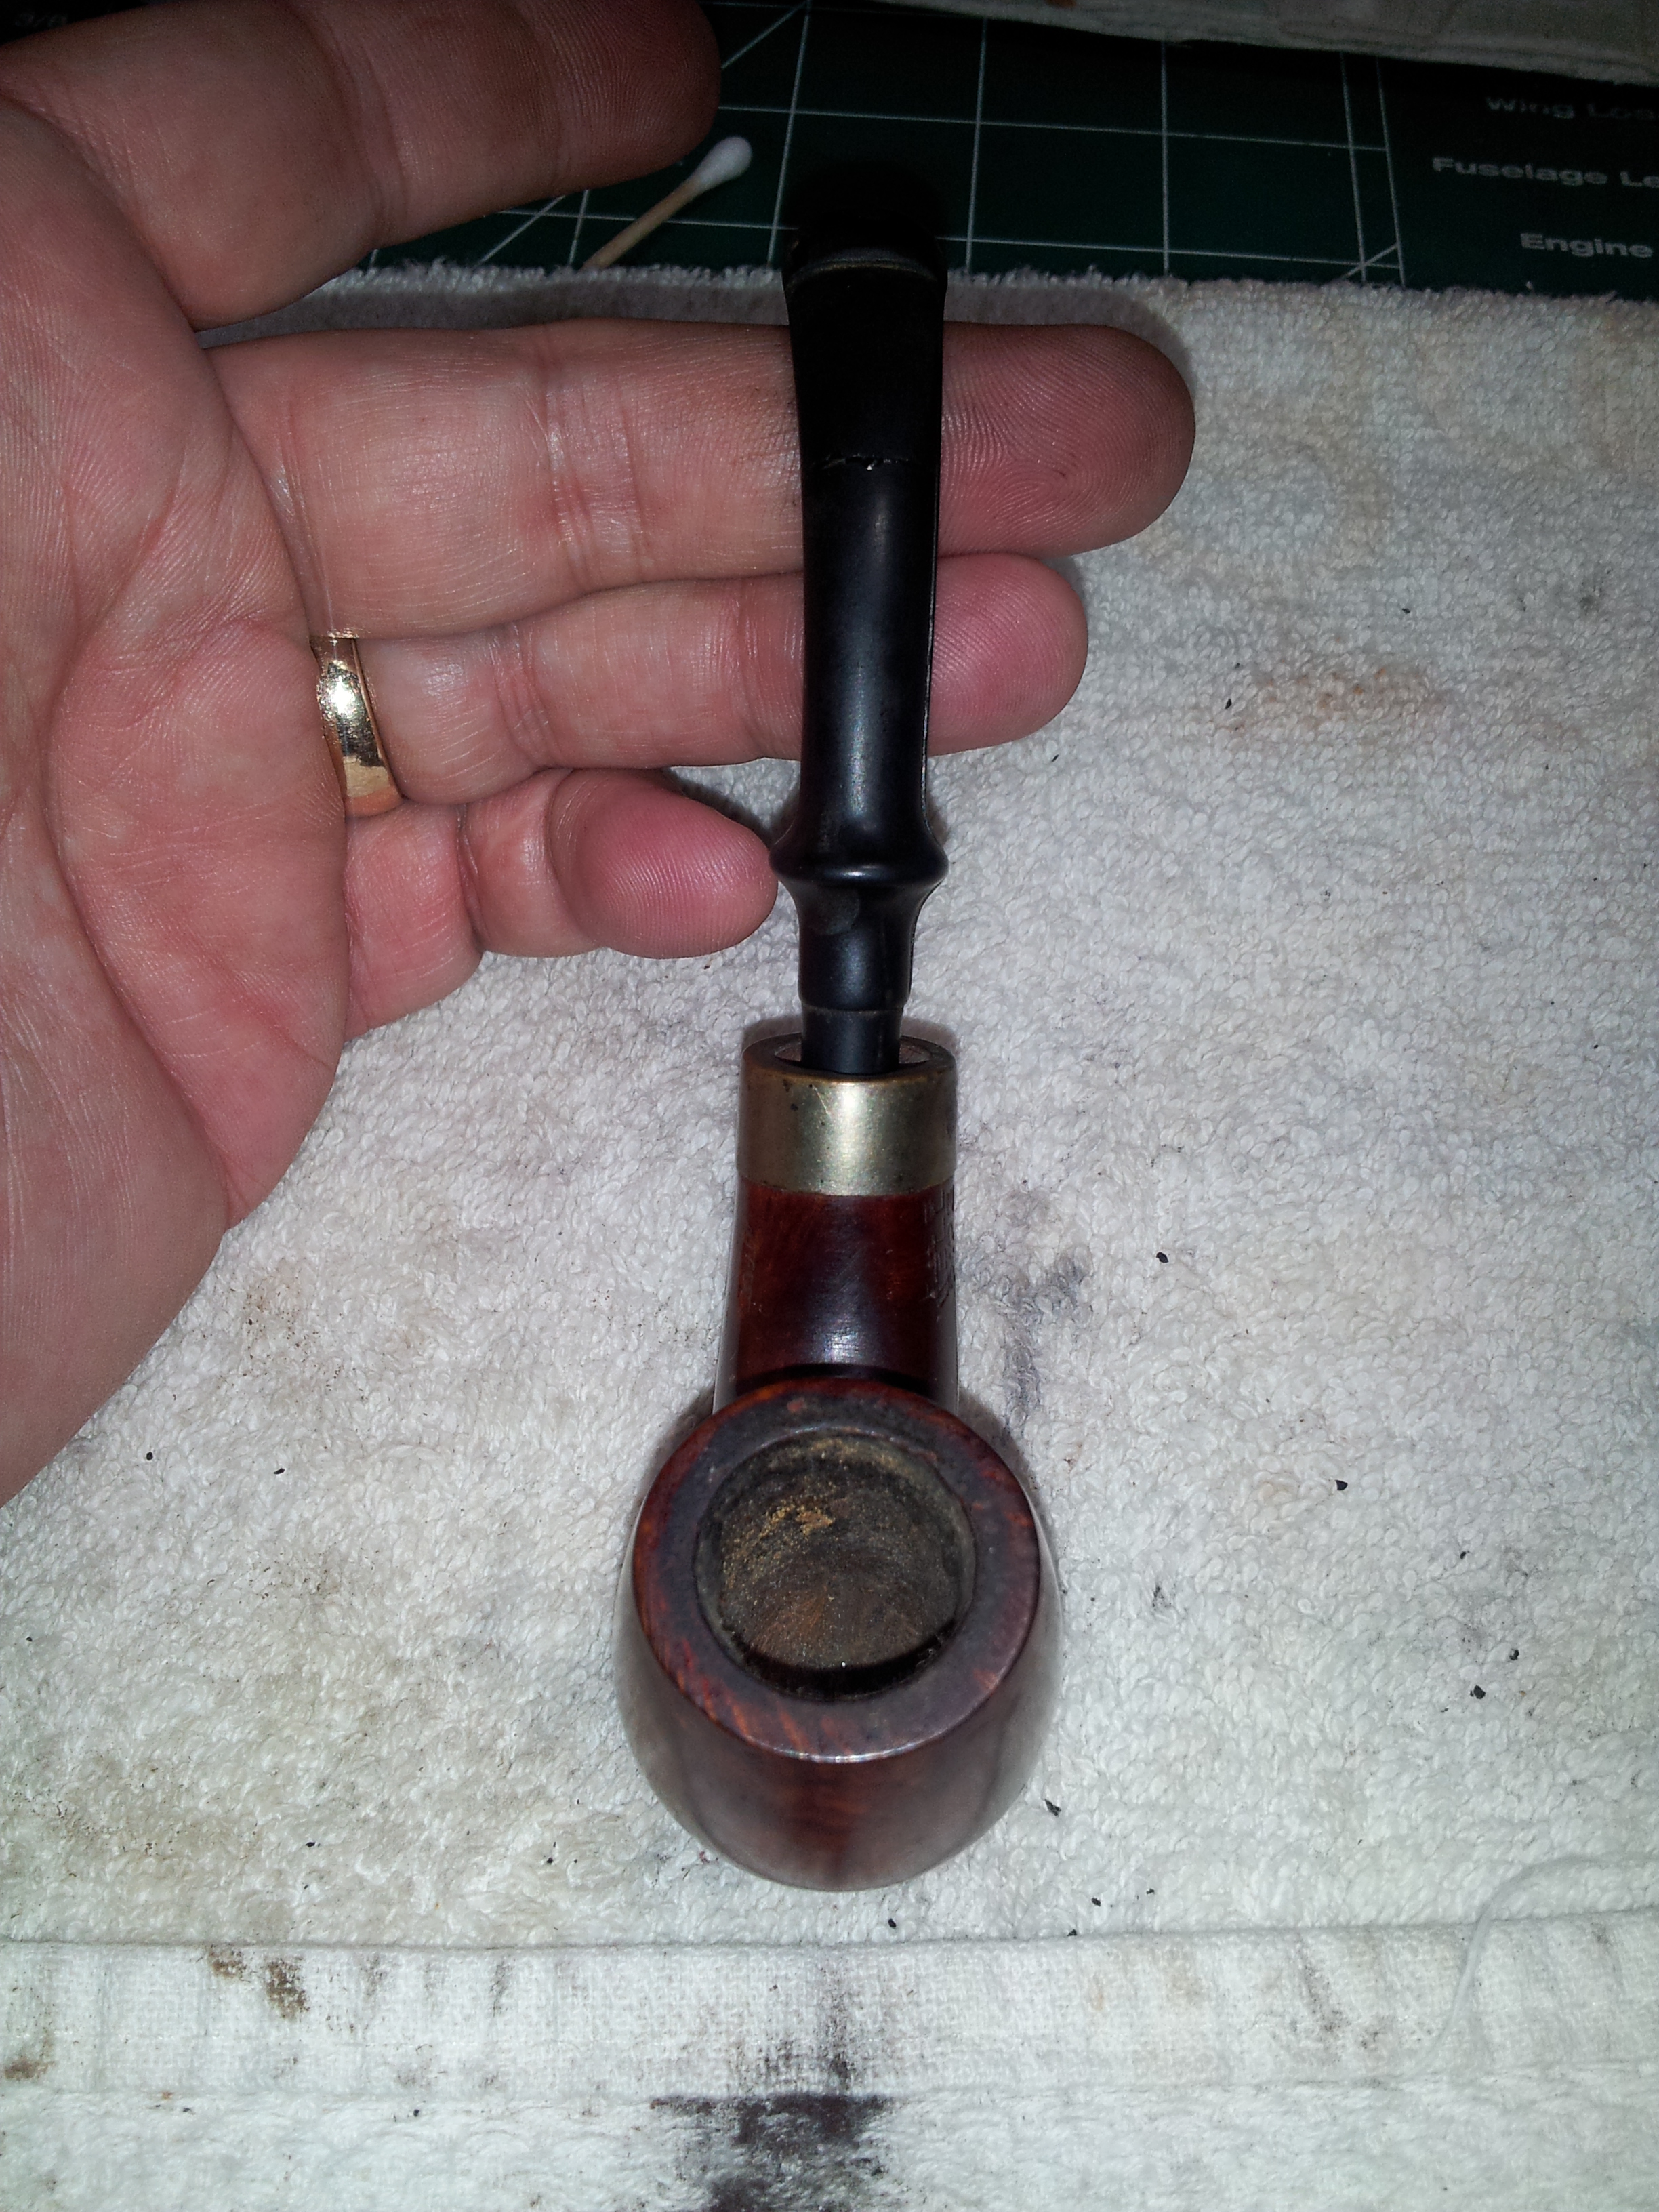
With the exterior work done, I moved to the stummel’s internals. I reamed out the shank with a series of drill bits turned by hand, opened the airway to 5/32”. A few pipe cleaners and alcohol finished up the internal cleaning.
I wet-sanded the stummel with 600 – 2000 grit papers in preparation for staining. I was going to go dark on this one in an attempt to hide the huge fills. I applied a total of 3 coats of Fiebing’s Black leather dye. When the dye was dry, I wiped the stummel with mineral oil to give the finish some depth, and then re-installed the shank band. It was a bit loose, probably due to the amount of sanding done when levelling the monster fill, so I gave it a drop of CA glue to make sure it stayed put.
I took the stummel to the buffer, where it received a light run of Red Tripoli and White Diamond. The buffing removed a fair bit of the black dye from the surface of the briar, so I went over the fills again with my darkest stain pen before applying several coats of Carnauba wax. The fills are quite evident in the pics below due to the camera flash. They do not show up so glaringly in real life, though the biggest one is readily identifiable on close inspection.
With the stummel finished, it was time to work on the stem. I started by sanding away the burr of extra vulcanite left behind from the molding process before sanding out the tooth chatter. I’ve only included a few pictures of this process, which makes it look like a quick job, but I spent quite a bit of time and effort to achieve a smooth stem. This replacement stem evidently got some solid use by the previous owner, who just as obviously like to bite hard on the button. I managed to lift the deeper dents a bit with heat, but ended up filling the remaining marks with CA glue. I also corrected the bend by heating the stem over a lighter and bending it over a handy cylinder – in this case my bottle of briar dust.
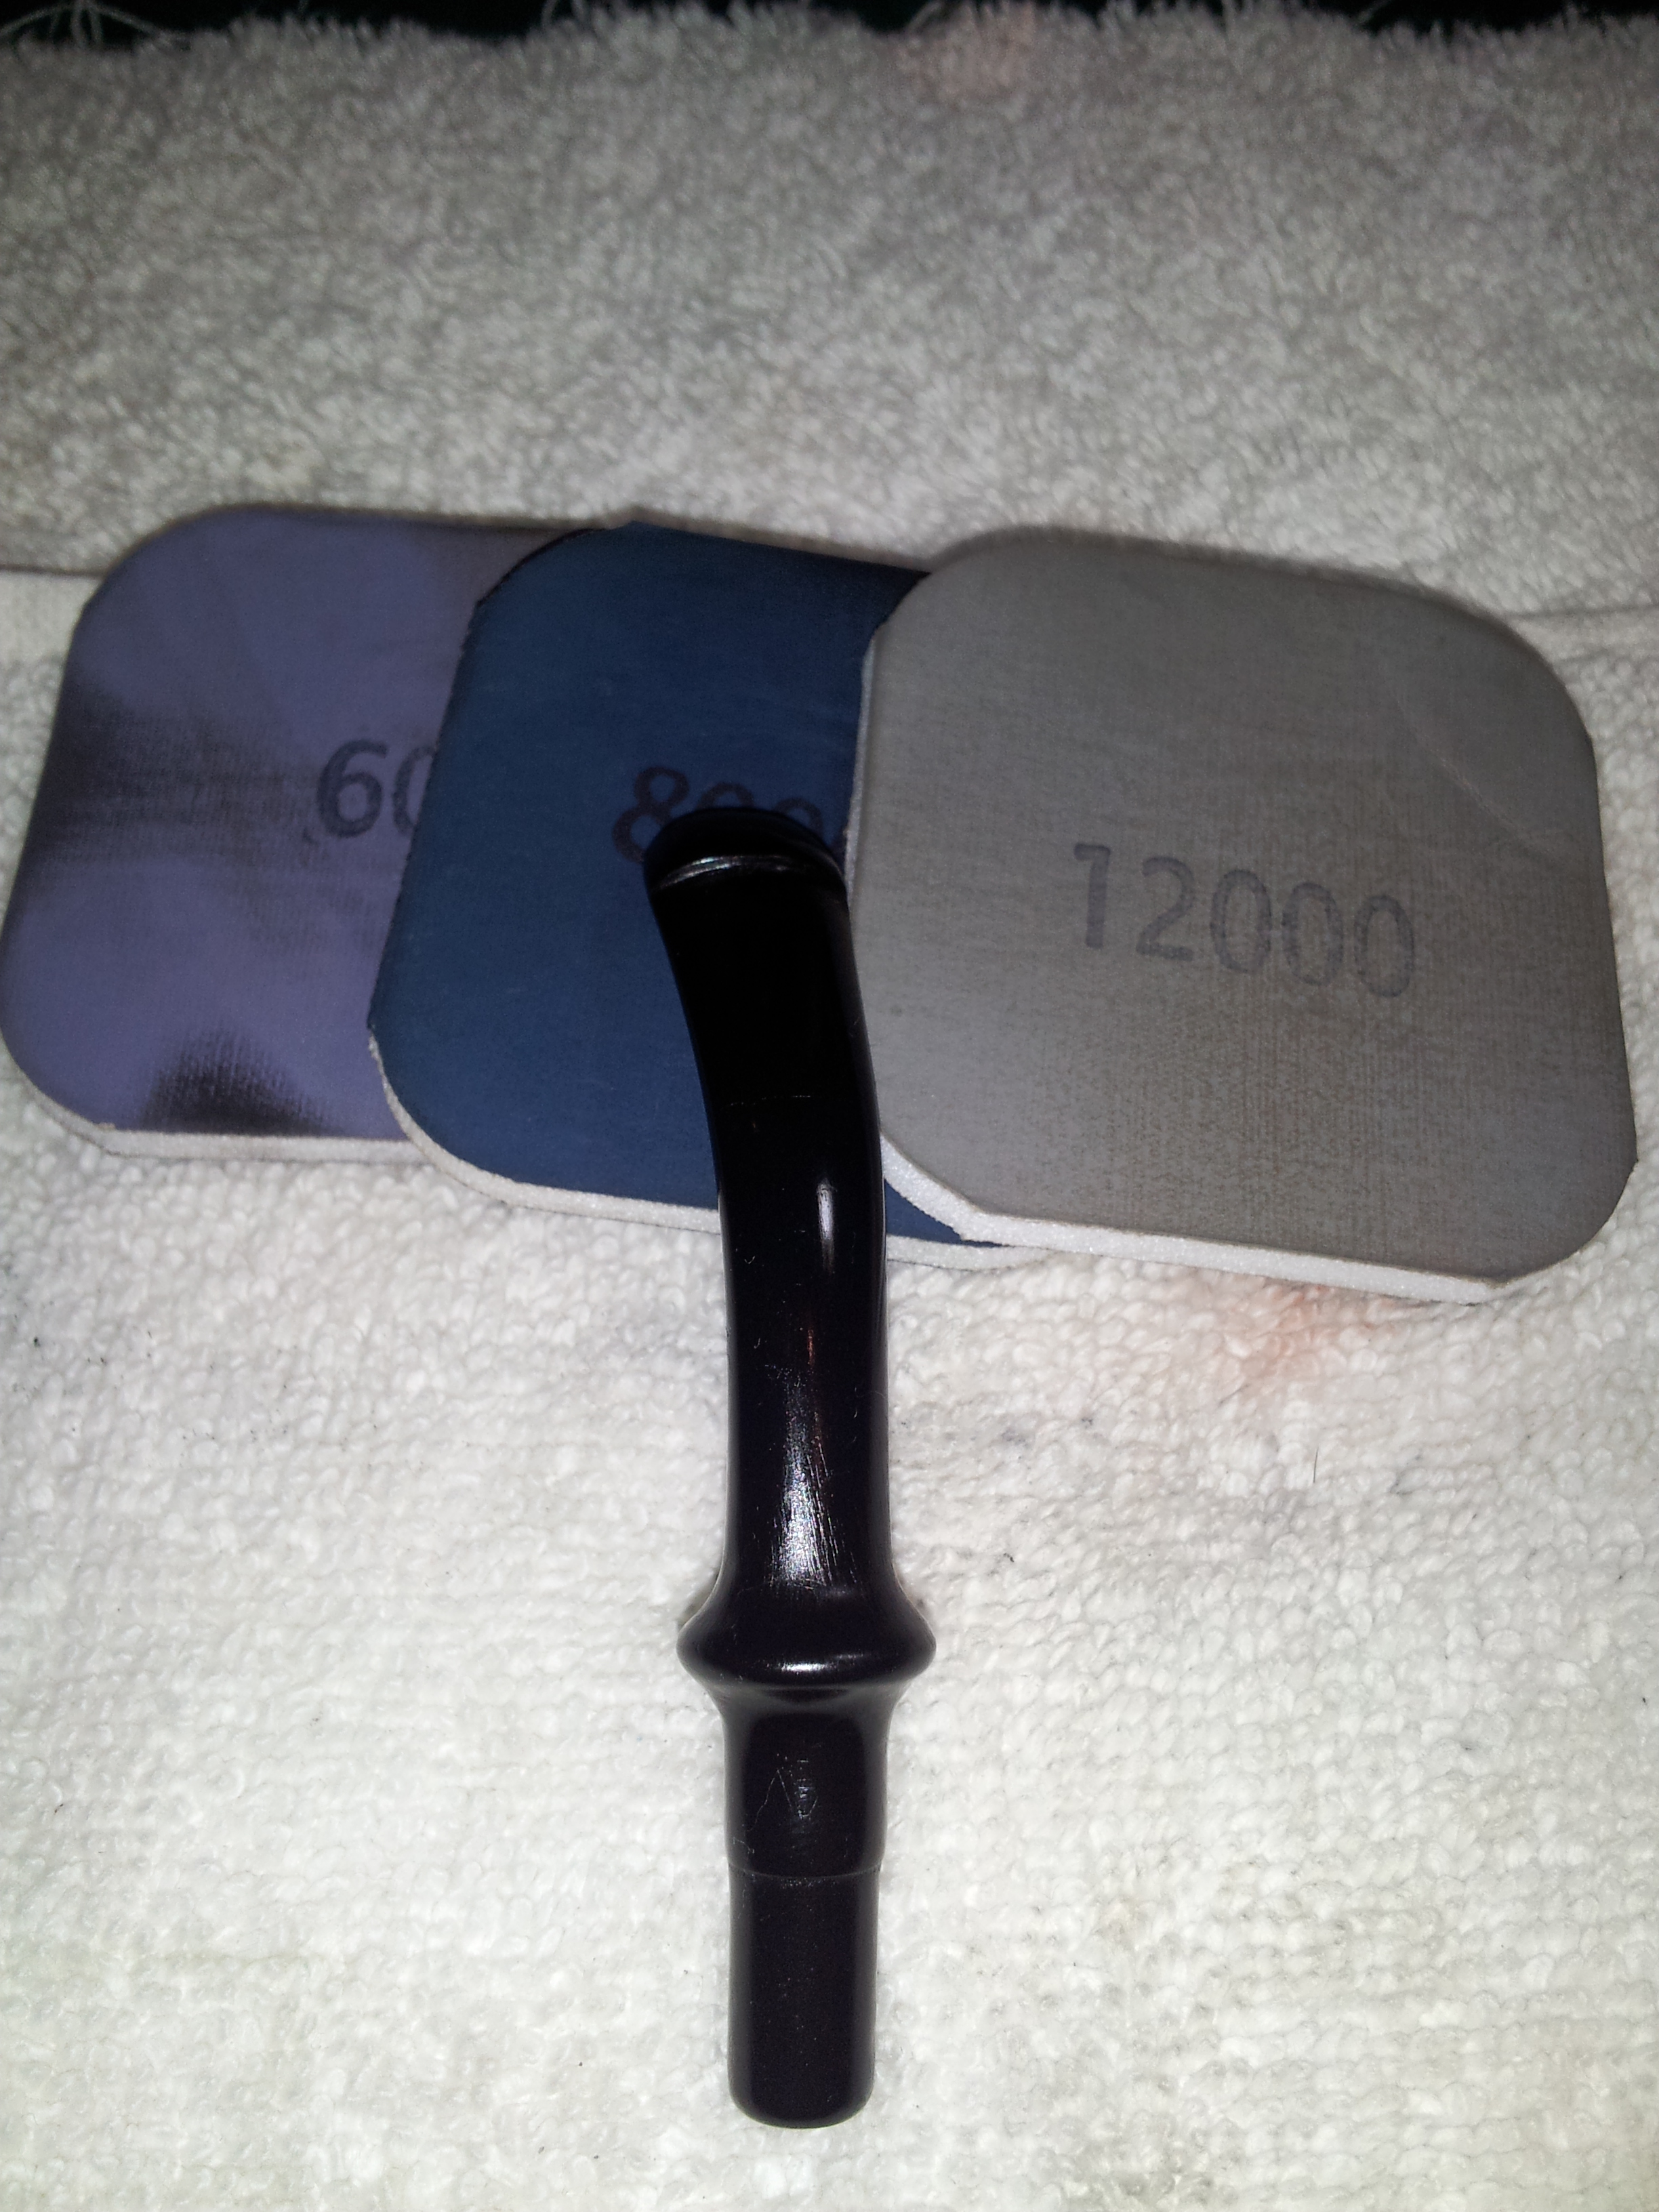
 Once the bite marks and chatter were taken care of, I polished the stem using my set of MicroMesh sanding pads, wiping down the stem with mineral oil in between sets of three pads.
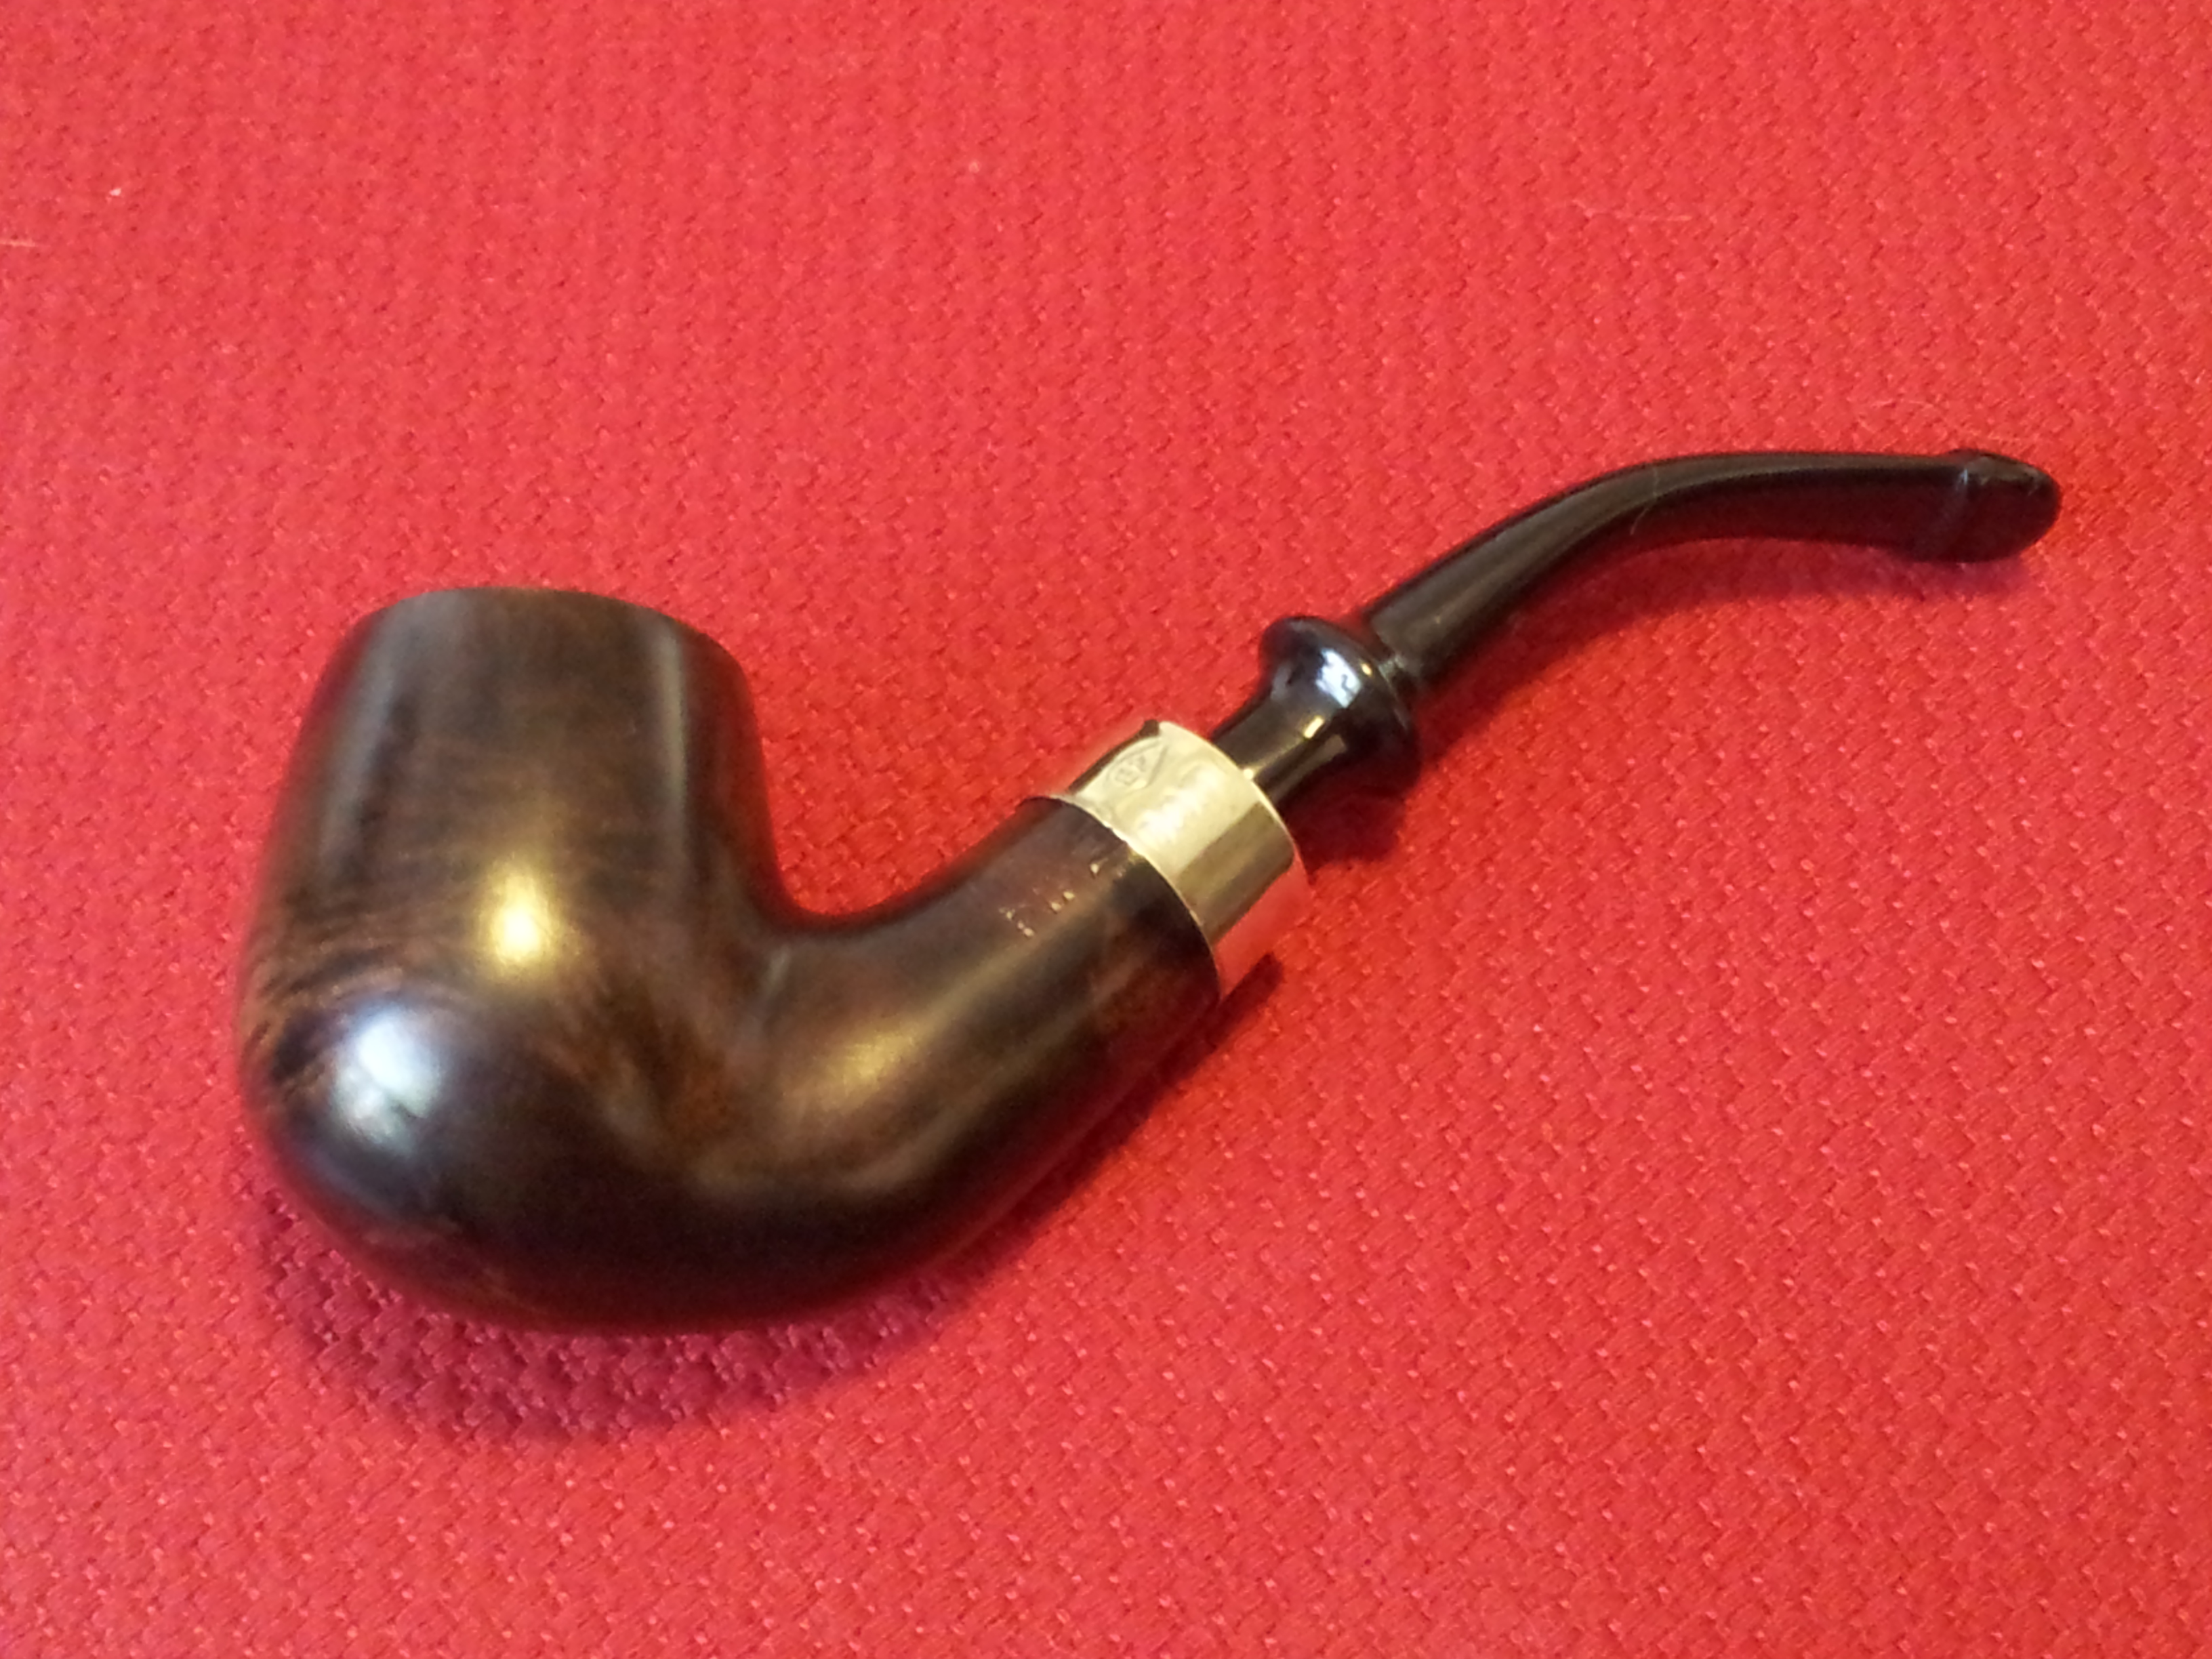
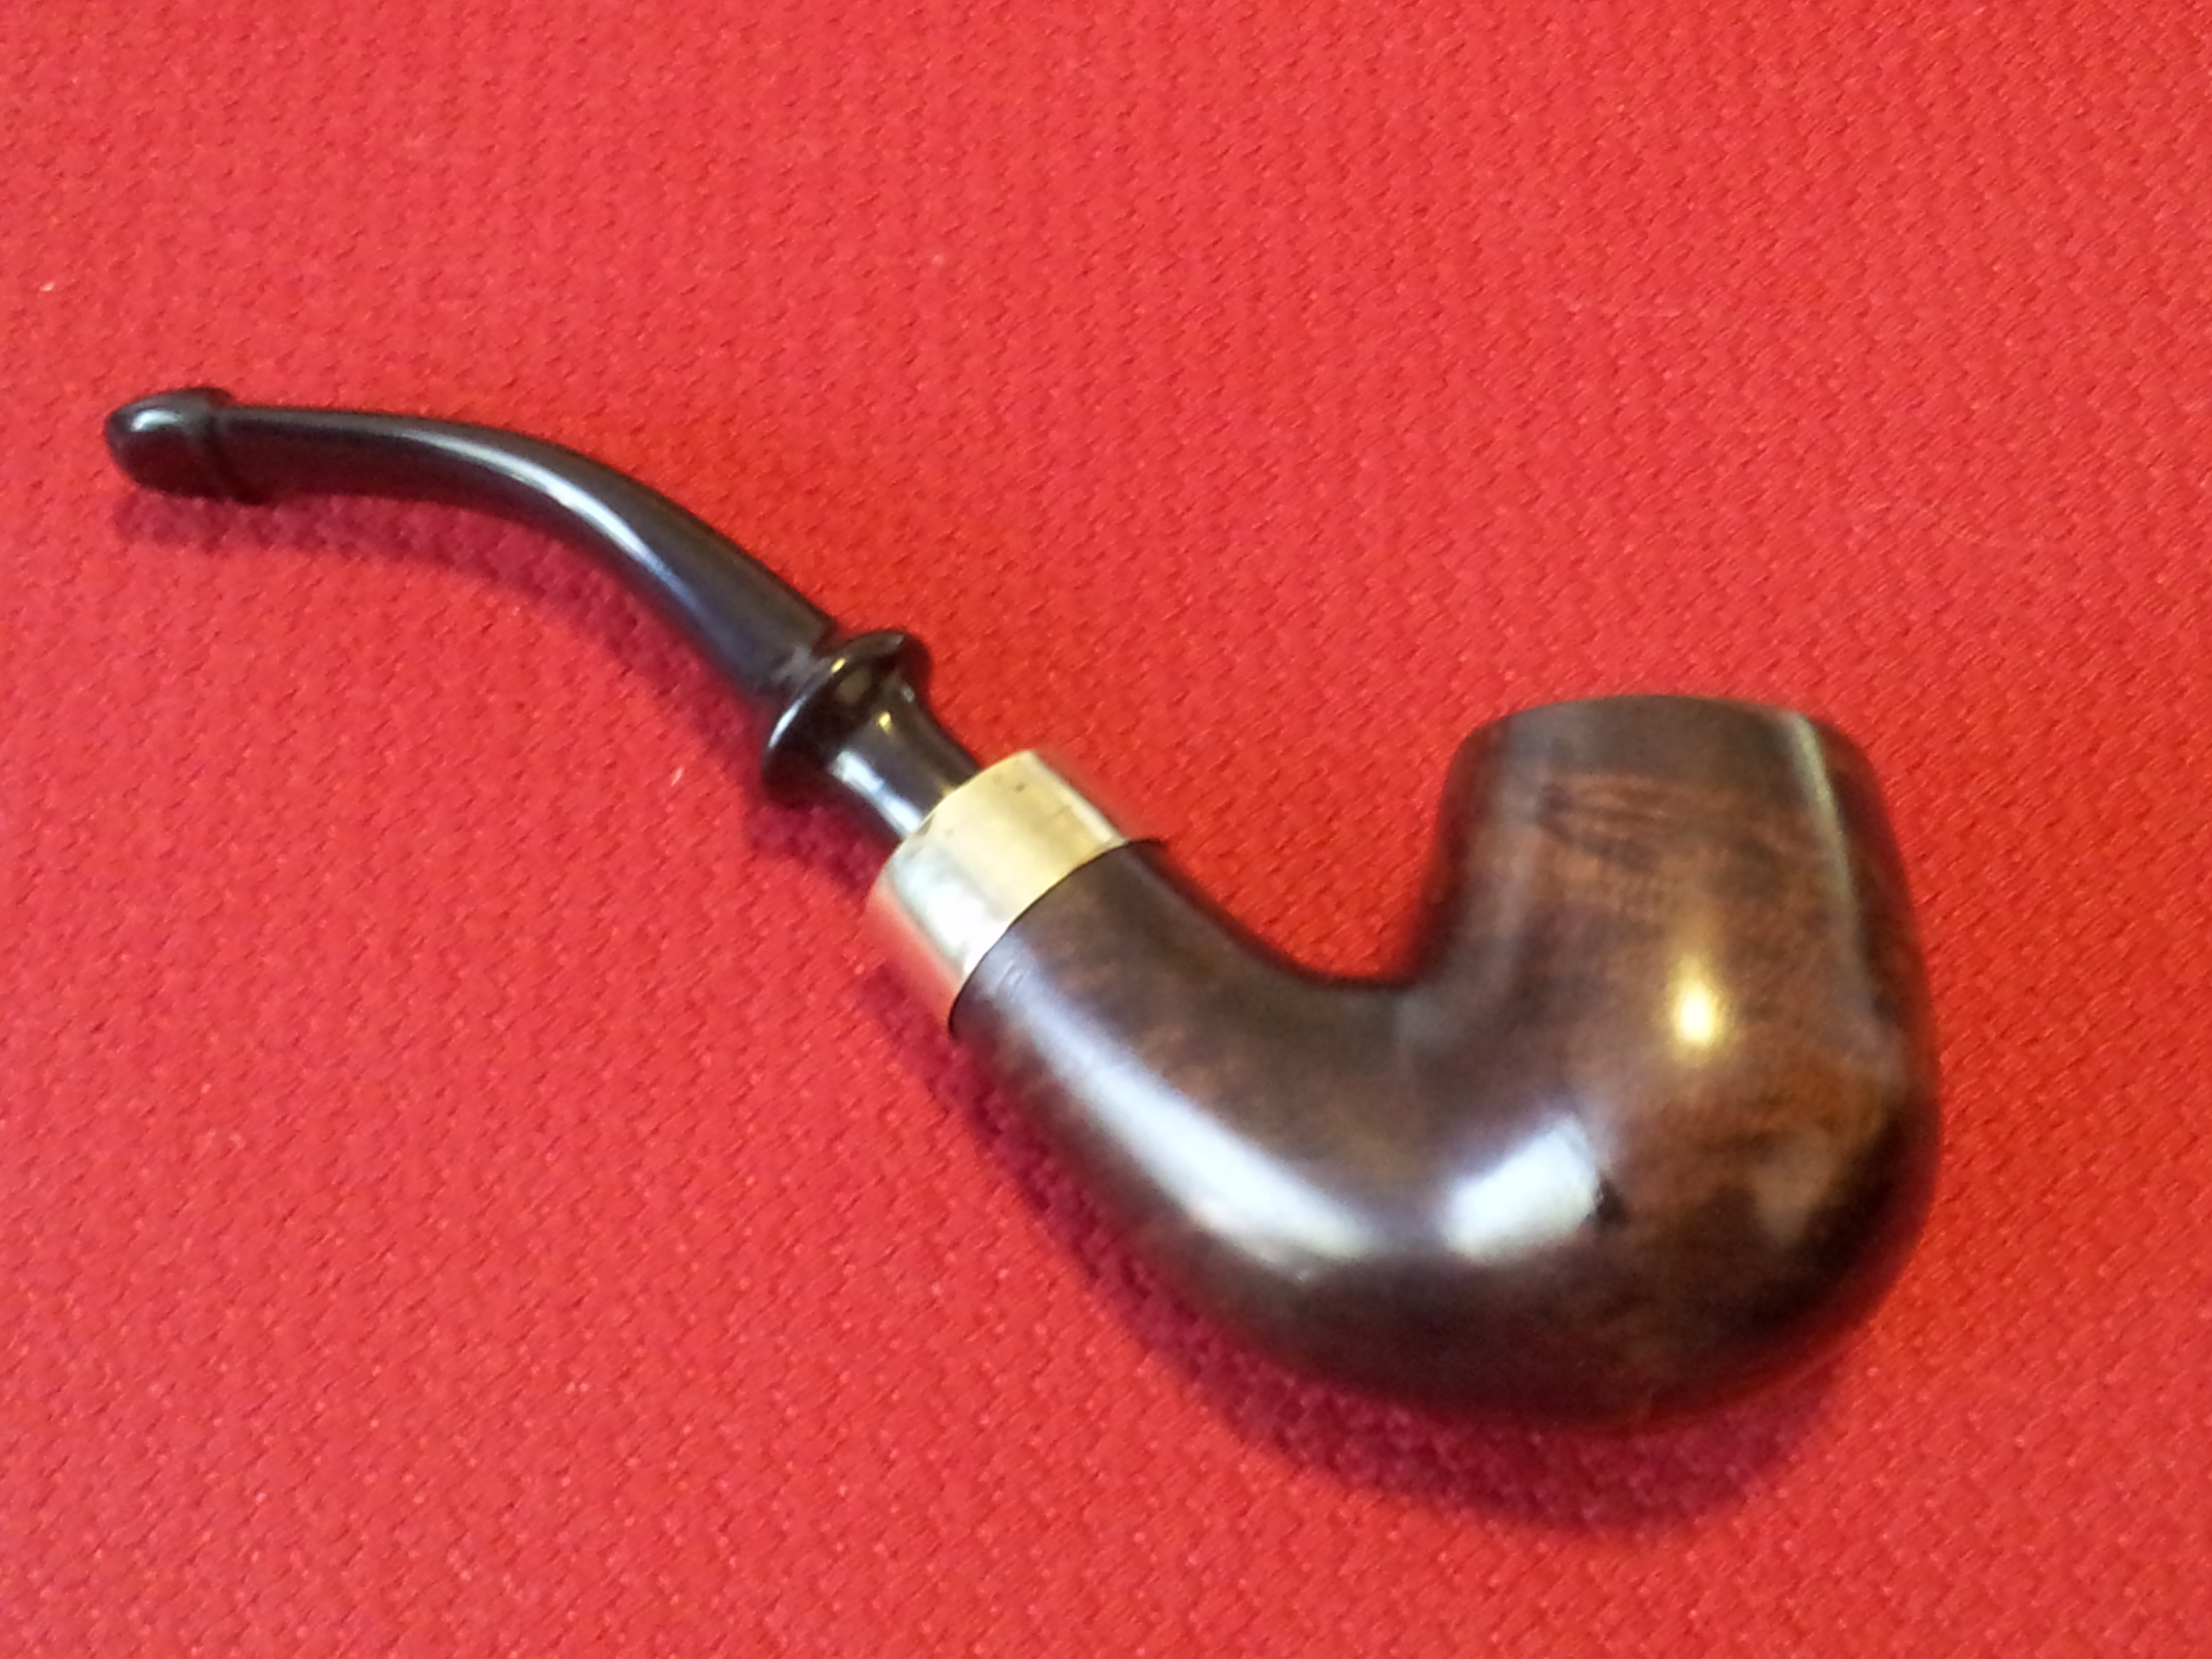
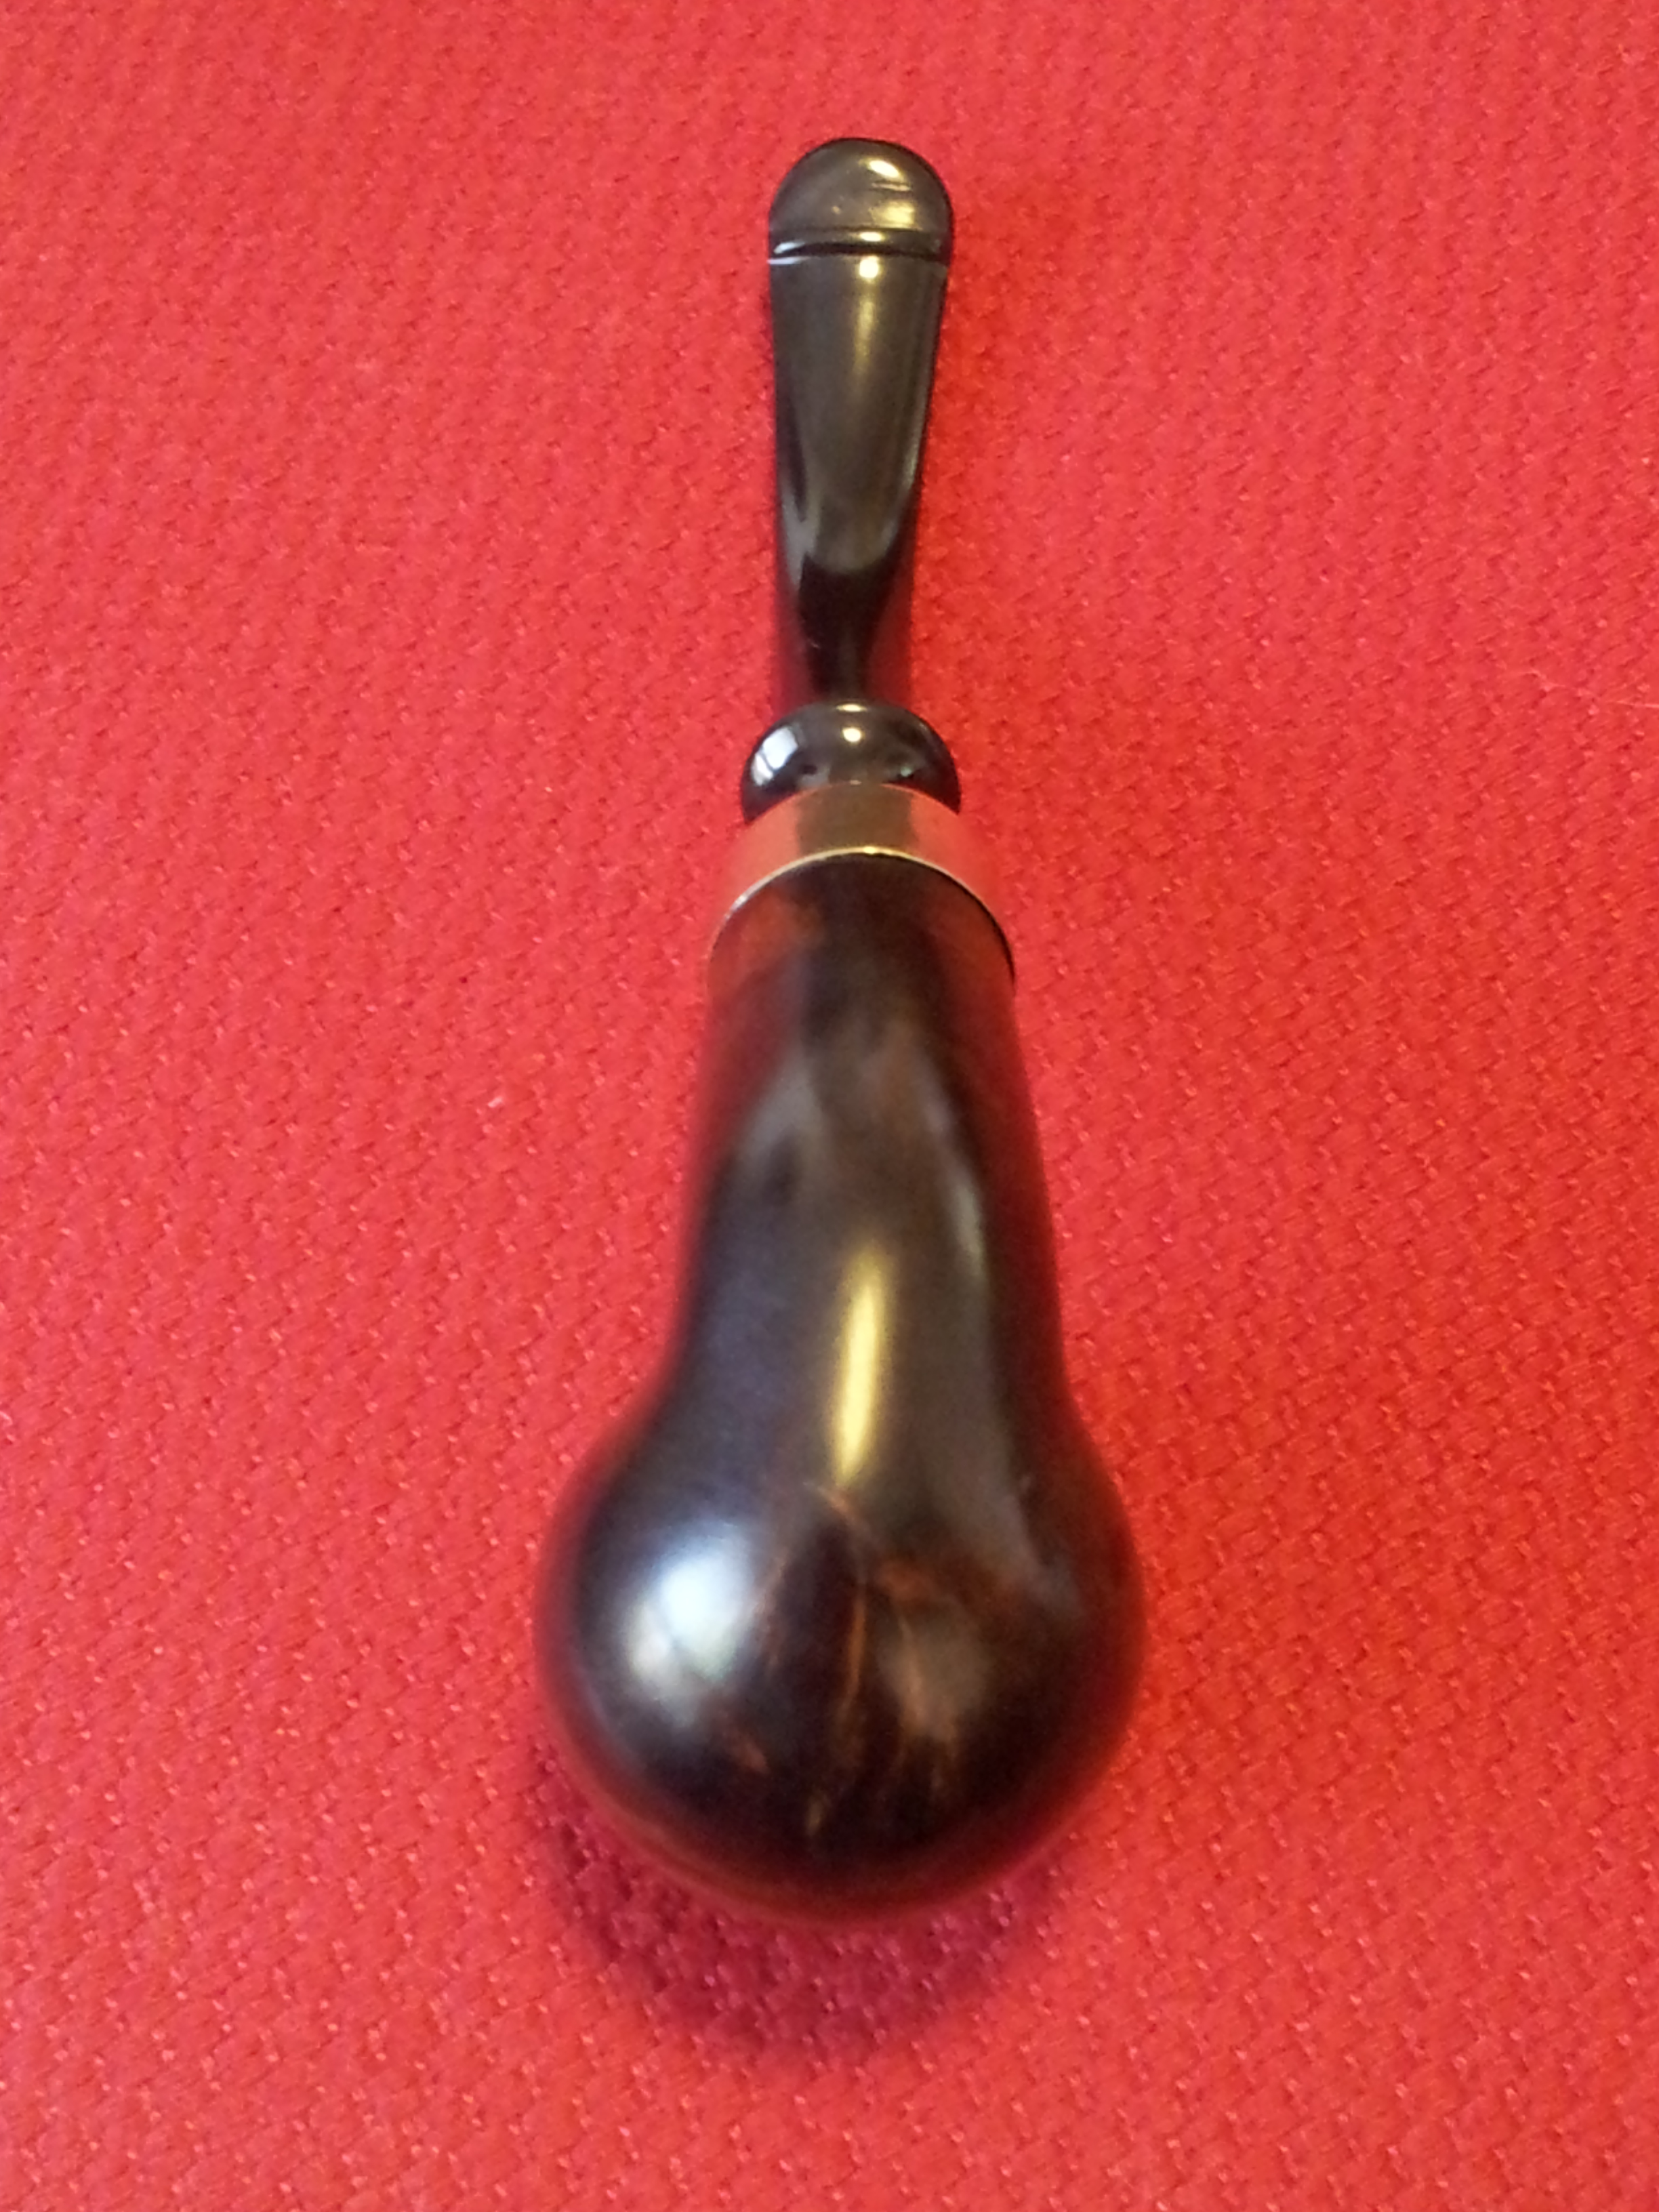
 The stem got its own buff and wax before being reunited with the stummel. I have to admit to breathing a sigh of relief when I declared this restoration done. This one was a lot of work. The end result, however, is not too shabby. While not likely to win any Best in Show awards, this Well Pipe is at least respectable again. The many fills blend (mostly) with the grain visible through the black finish, and the stem is worlds away from the factory-raw vulcanite shaft it began life as. The pipe is lightweight and sits comfortably in the mouth, with a good, open draw and should smoke well. The open draw is likely another benefit of the replacement stem. I have another Well Pipe in my collection similar in size, but the draw on it is horribly restricted. This little pipe is ready to start the next chapter in its eventful life.

Reblogged this on rebornpipes and commented:
I love the ways the stain job subdued the look of the many fills in this little bent pipe. Really nice work.
LikeLiked by 1 person
Great work! You did a wonderful job concealing those patched fills. That’s not an easy thing to do when they are that large.
It’s my understanding that the Well Pipes were a Mastercraft brand. The shank cap is most likely a replacement. The “EP” in a diamond stands for electroplate and it’s used for both silver and nickel. I have several nickel replacement bands with the same stamping.
LikeLike
Thanks Anthony. I was NOT shy with the stain on this one. I’m actually a bit surprised how much grain comes through on the finished pipe.
LikeLike
Looks GREAT Great job on them man hole cover fills .
LikeLiked by 1 person
These were the biggest fills I’ve tackled to date. Lookibg forward to some “normal” sized ones on the next pipe!
LikeLike