
Smoke Master is a now-extinct seconds brand of briar pipe originally made by a company called Briarcraft Pipe Company. The company did well in the early 20th century but closed its doors in the 1950’s. The brand eventually ended up in the Grabow stable of brands, as outlined in this post from 2010 on PipeSmokersForum.
“….I worked for Grabow/Mastercraft for 25 years. We/Grabow in fact, bought the Smokemaster name and system from Continental in about 1977 and continued to make/sell the pipe till’ the early 90’s. Actually had 5 versions. 50, 100, 200, 300, and LLB. The 50 series was always small pipes regardless of quality. Some…most….could be wonderfully grained and flawless.
LLB, Sold in their catalogue, was “top of the line”. Natural finish, no flaws and an exceptional smoking pipe.
300 series was the best at Grabow and through 200 and 100 the quality reduced.
Smokemaster may be the best smoking pipe I ever used, but….BUT…..In order to get the three holes into the bit the stem had to be “fatter”, thus the “bite” is thicker than I like.” — Ted on PipeSmokersForum.com
The Grabow-made Smoke Master Series 300 pipe on my table here came to me as part of an eBay auction lot. It’s pictured second from the bottom in the left-most column in the picture below. You can tell there’s something “off” about the pipe, but it’s impossible to tell from the angle of the shot. The rest of this series of pictures shows the pipe as I found it:


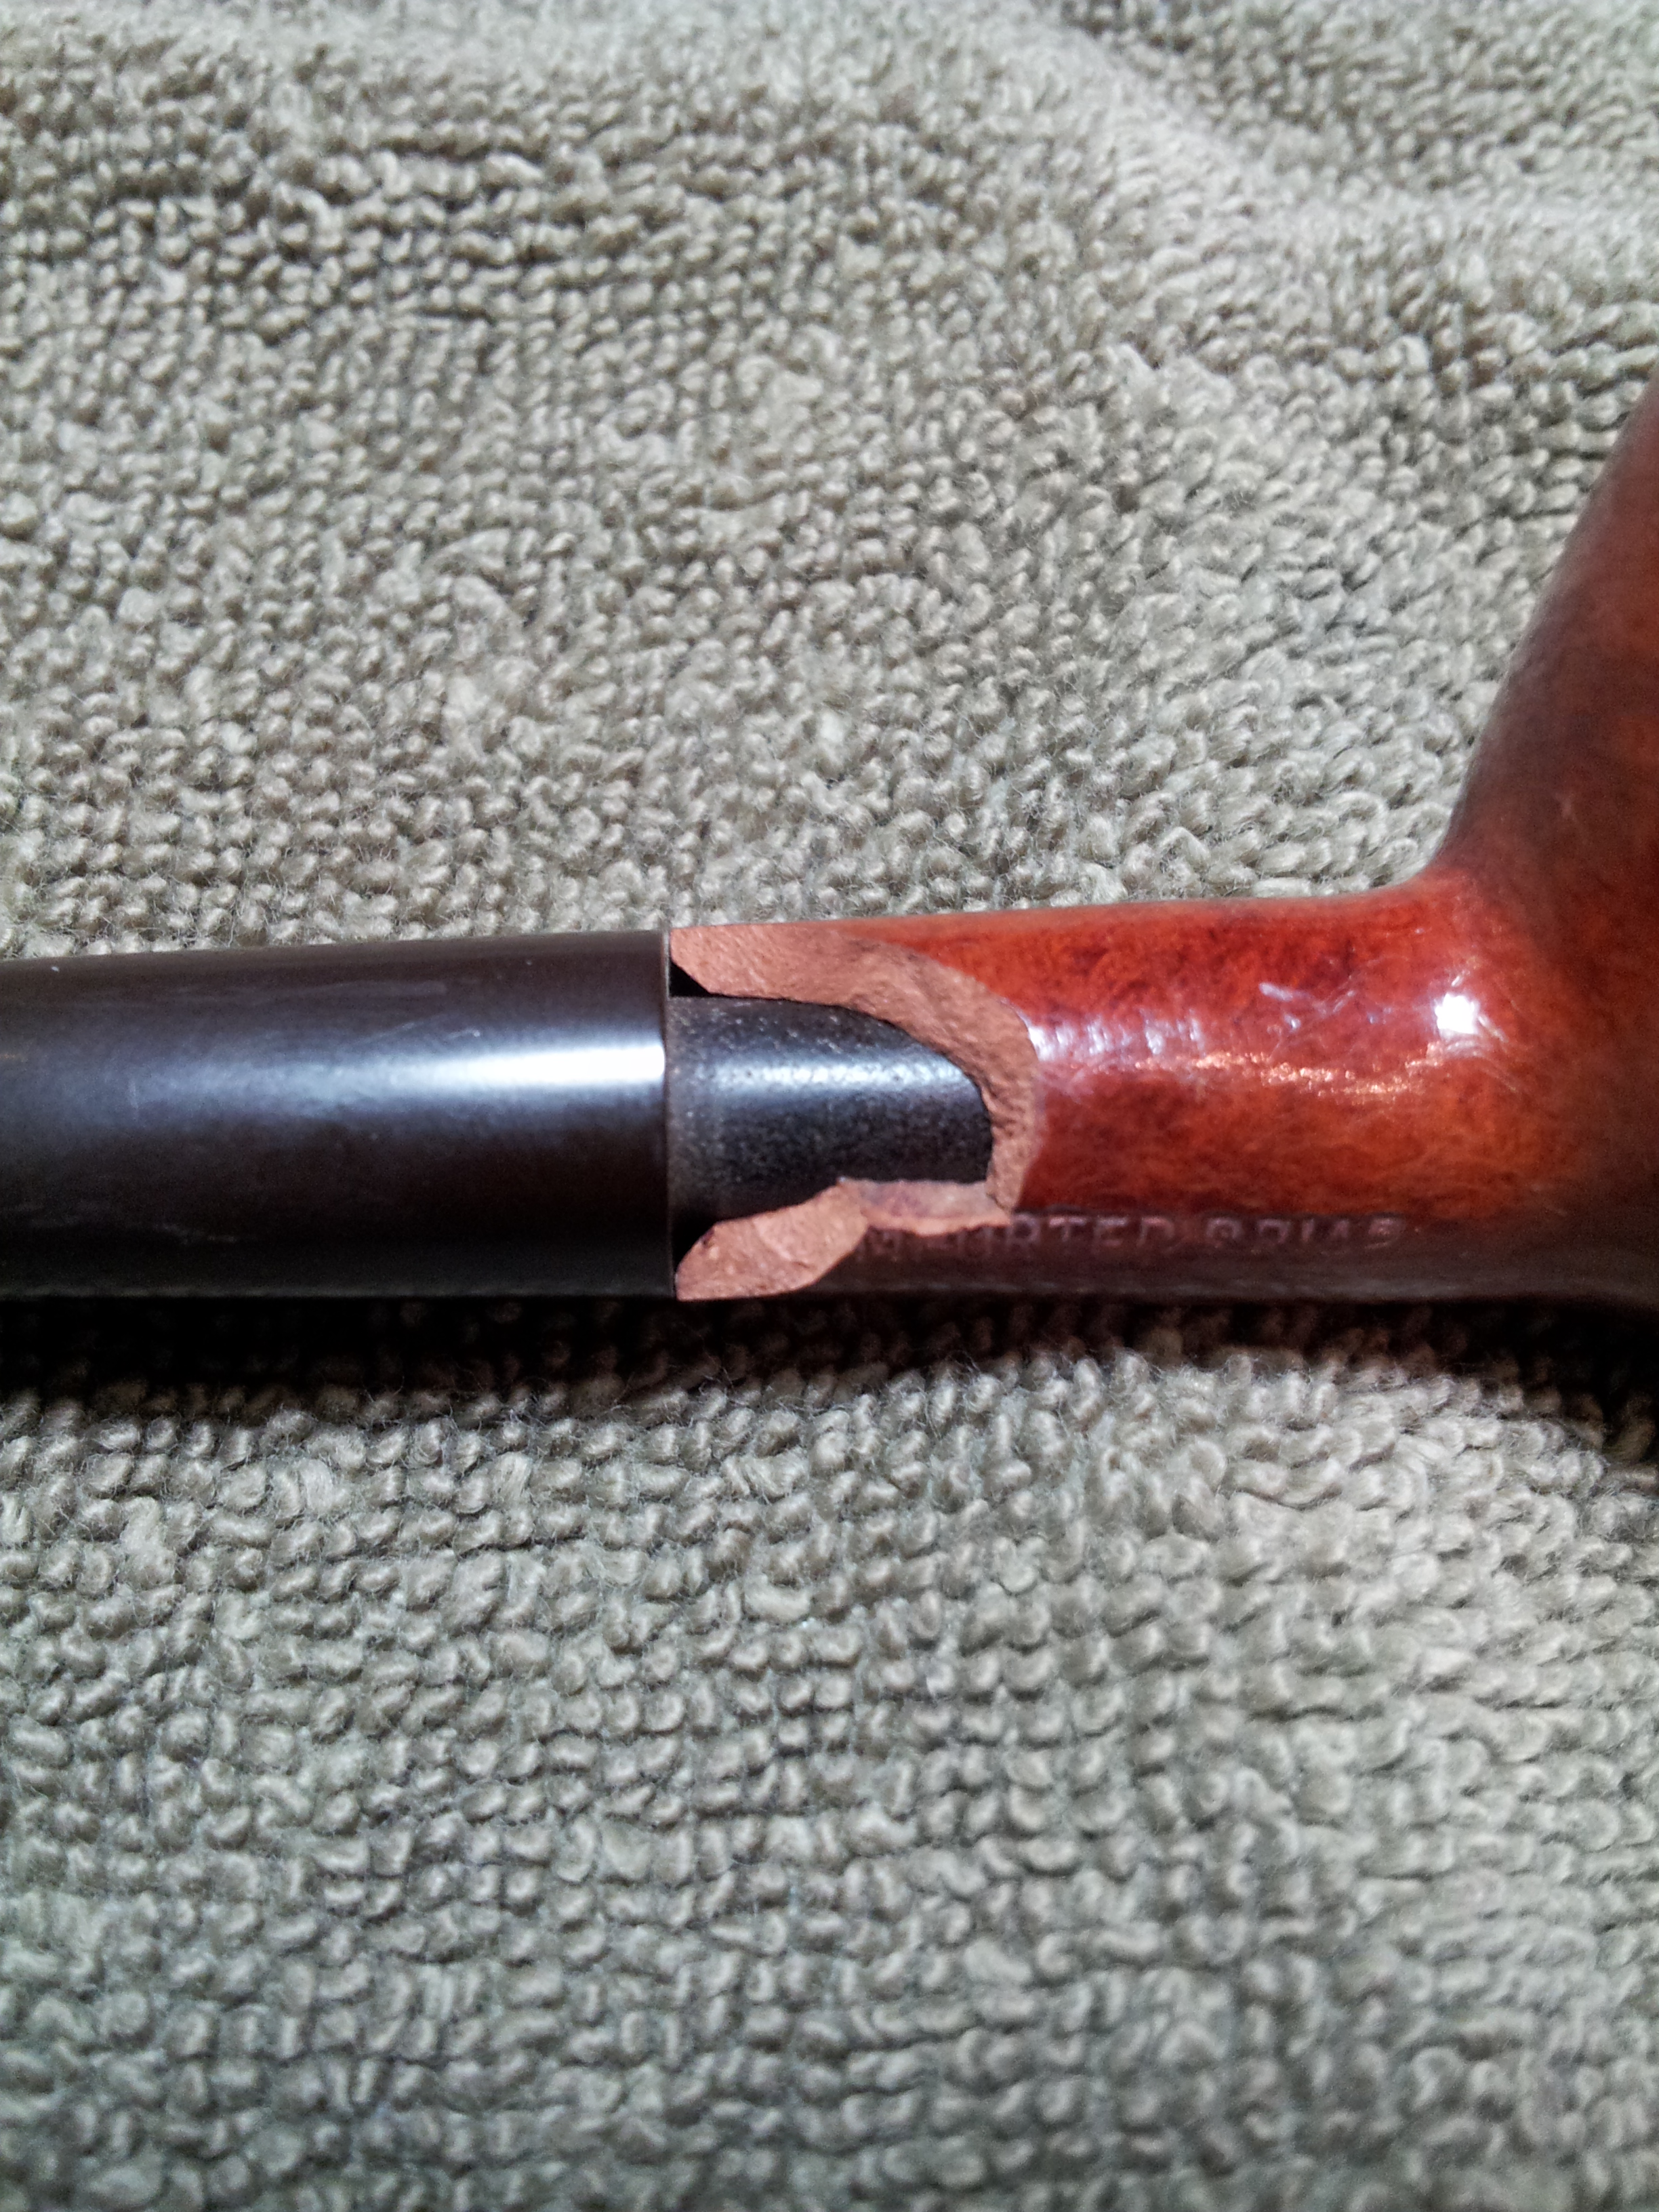
The rim was chipped and tarred, but the big issue was, of course, the large chunk missing from the pipe shank. Though the stem still sat fairly snugly in what was left of the mortise, it was clear that something would have to be done about the shank. In addition to the missing chunk, the shank had a crack running from the point of the missing piece towards the bottom of the bowl.
Also of interest, and unique to the Smoke Master line is the patented filter system consisting of a slotted metal tube positioned over a common pipe cleaner bent in half and inserted into two holes in the end of the tenon. The idea is that moisture and tars would condense inside the slotted tube, then be channelled out the slot on the bottom to be absorbed by the pipe cleaner underneath. The nice part about this system is that any standard pipe cleaner would fit – the piper would not have to constantly refresh his supply of proprietary filters.


While I considered a course of action on the shank repair, I decided to clean up the parts. The bowl was gently reamed and then dropped into a bath of isopropyl alcohol. The stem, with airway tube and pipe cleaner removed, went into an Oxyclean bath. Both were left to soak overnight.

 The next day, the stem had turned an icky yellow colour from the oxidation and other gunk the Oxyclean had pulled to the surface of the vulcanite. Both stem and stummel were scrubbed with 0000 steel wool and a Magic Eraser before being wet sanded with 600 – 2000 grit paper.

 I topped the bowl to remove the chips and dents. I also gently pried open the crack in the shank and flowed in some CA glue. This would at least help hold things together while I worked on the shank repair. I let the glue cure then sanded off the excess.


After much debate, I decided that the best corrective action for this pipe would be to shorten the shank – cutting off the broken end and refitting the stem to what was left. I used a cutoff wheel on my rotary tool to slice off the broken shank end, and then “topped” the mortise as one might do to the rim of the bowl. Holding the shank as near vertical as I could manage freehand, I moved the stummel in a circular motion on a sheet of 220-grit sandpaper on a flat surface to slowly bring the cut shank back into square.
 Now the tedious work began as I used a series of files and sandpapers to shape the new mortise for a tight fit against the face of the stem. It seemed like a “two steps forward, one step back” process, as I’d made a bit of headway on the fit only to realize that I’d gone to far and having to start again. In the end, I achieved a reasonable, but not perfect, fit and called it good enough for what was likely destined to become a yard or shop pipe. The shank was slightly larger in diameter than the stem, so I used file and sandpaper again to smooth out the transition.
 It was at this point in fitting the stem that I heard a small “pop”. Uh-oh! My repeated jostling had caused the old shank crack to reopen, this time running perilously close to the edge of the bowl. I pulled out my smallest drill bit and drilled a hole at the end of the crack to stop it running any further, then reglued the crack with CA glue. The drilled hole was patched over with a little briar dust and CA glue filler and sanded smooth.

When the transition from shank to stem was satisfactory, I sanded the entire pipe, using all nine grades of MicroMesh sanding pads. This brought both bowl and stem to a nice natural lustre. I restained the bowl with Fiebing’s Dark Brown, and then wiped the entire pipe with mineral oil.
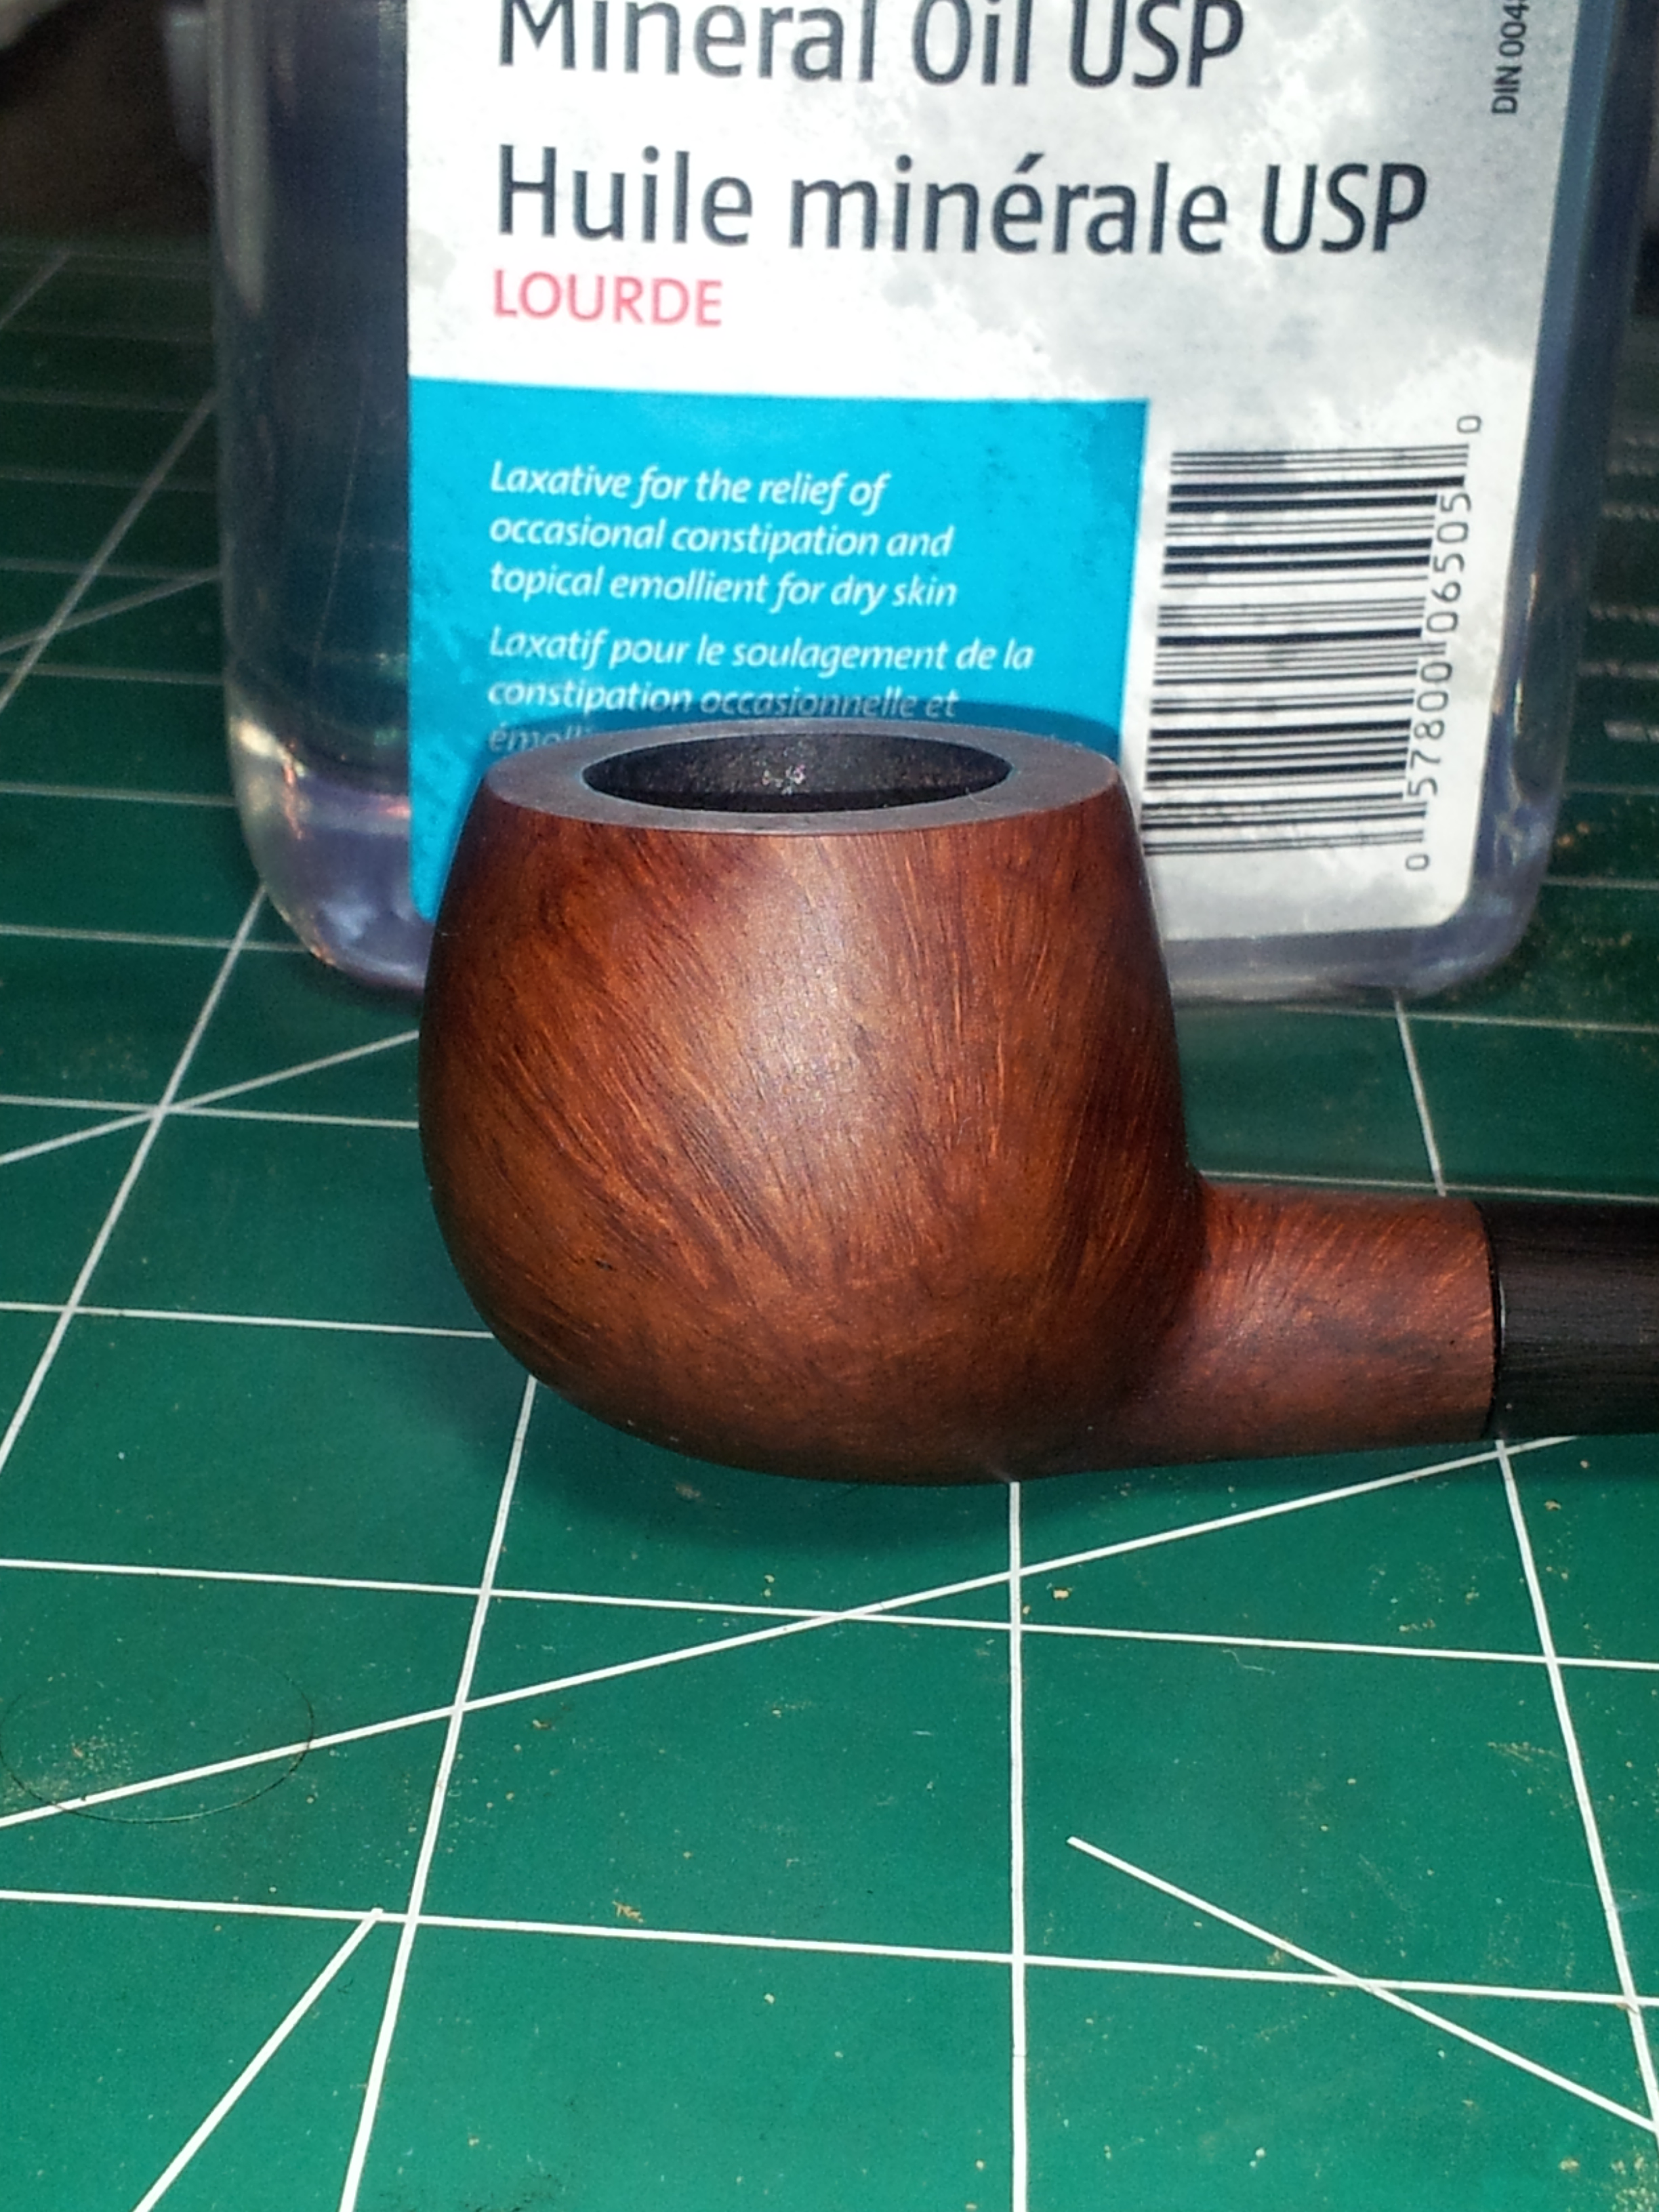 I also reinserted the Smoke Master filter system after making slight adjustments to accommodate the now shortened shank. Hopefully the shorter filter arrangement will work as well as the original.
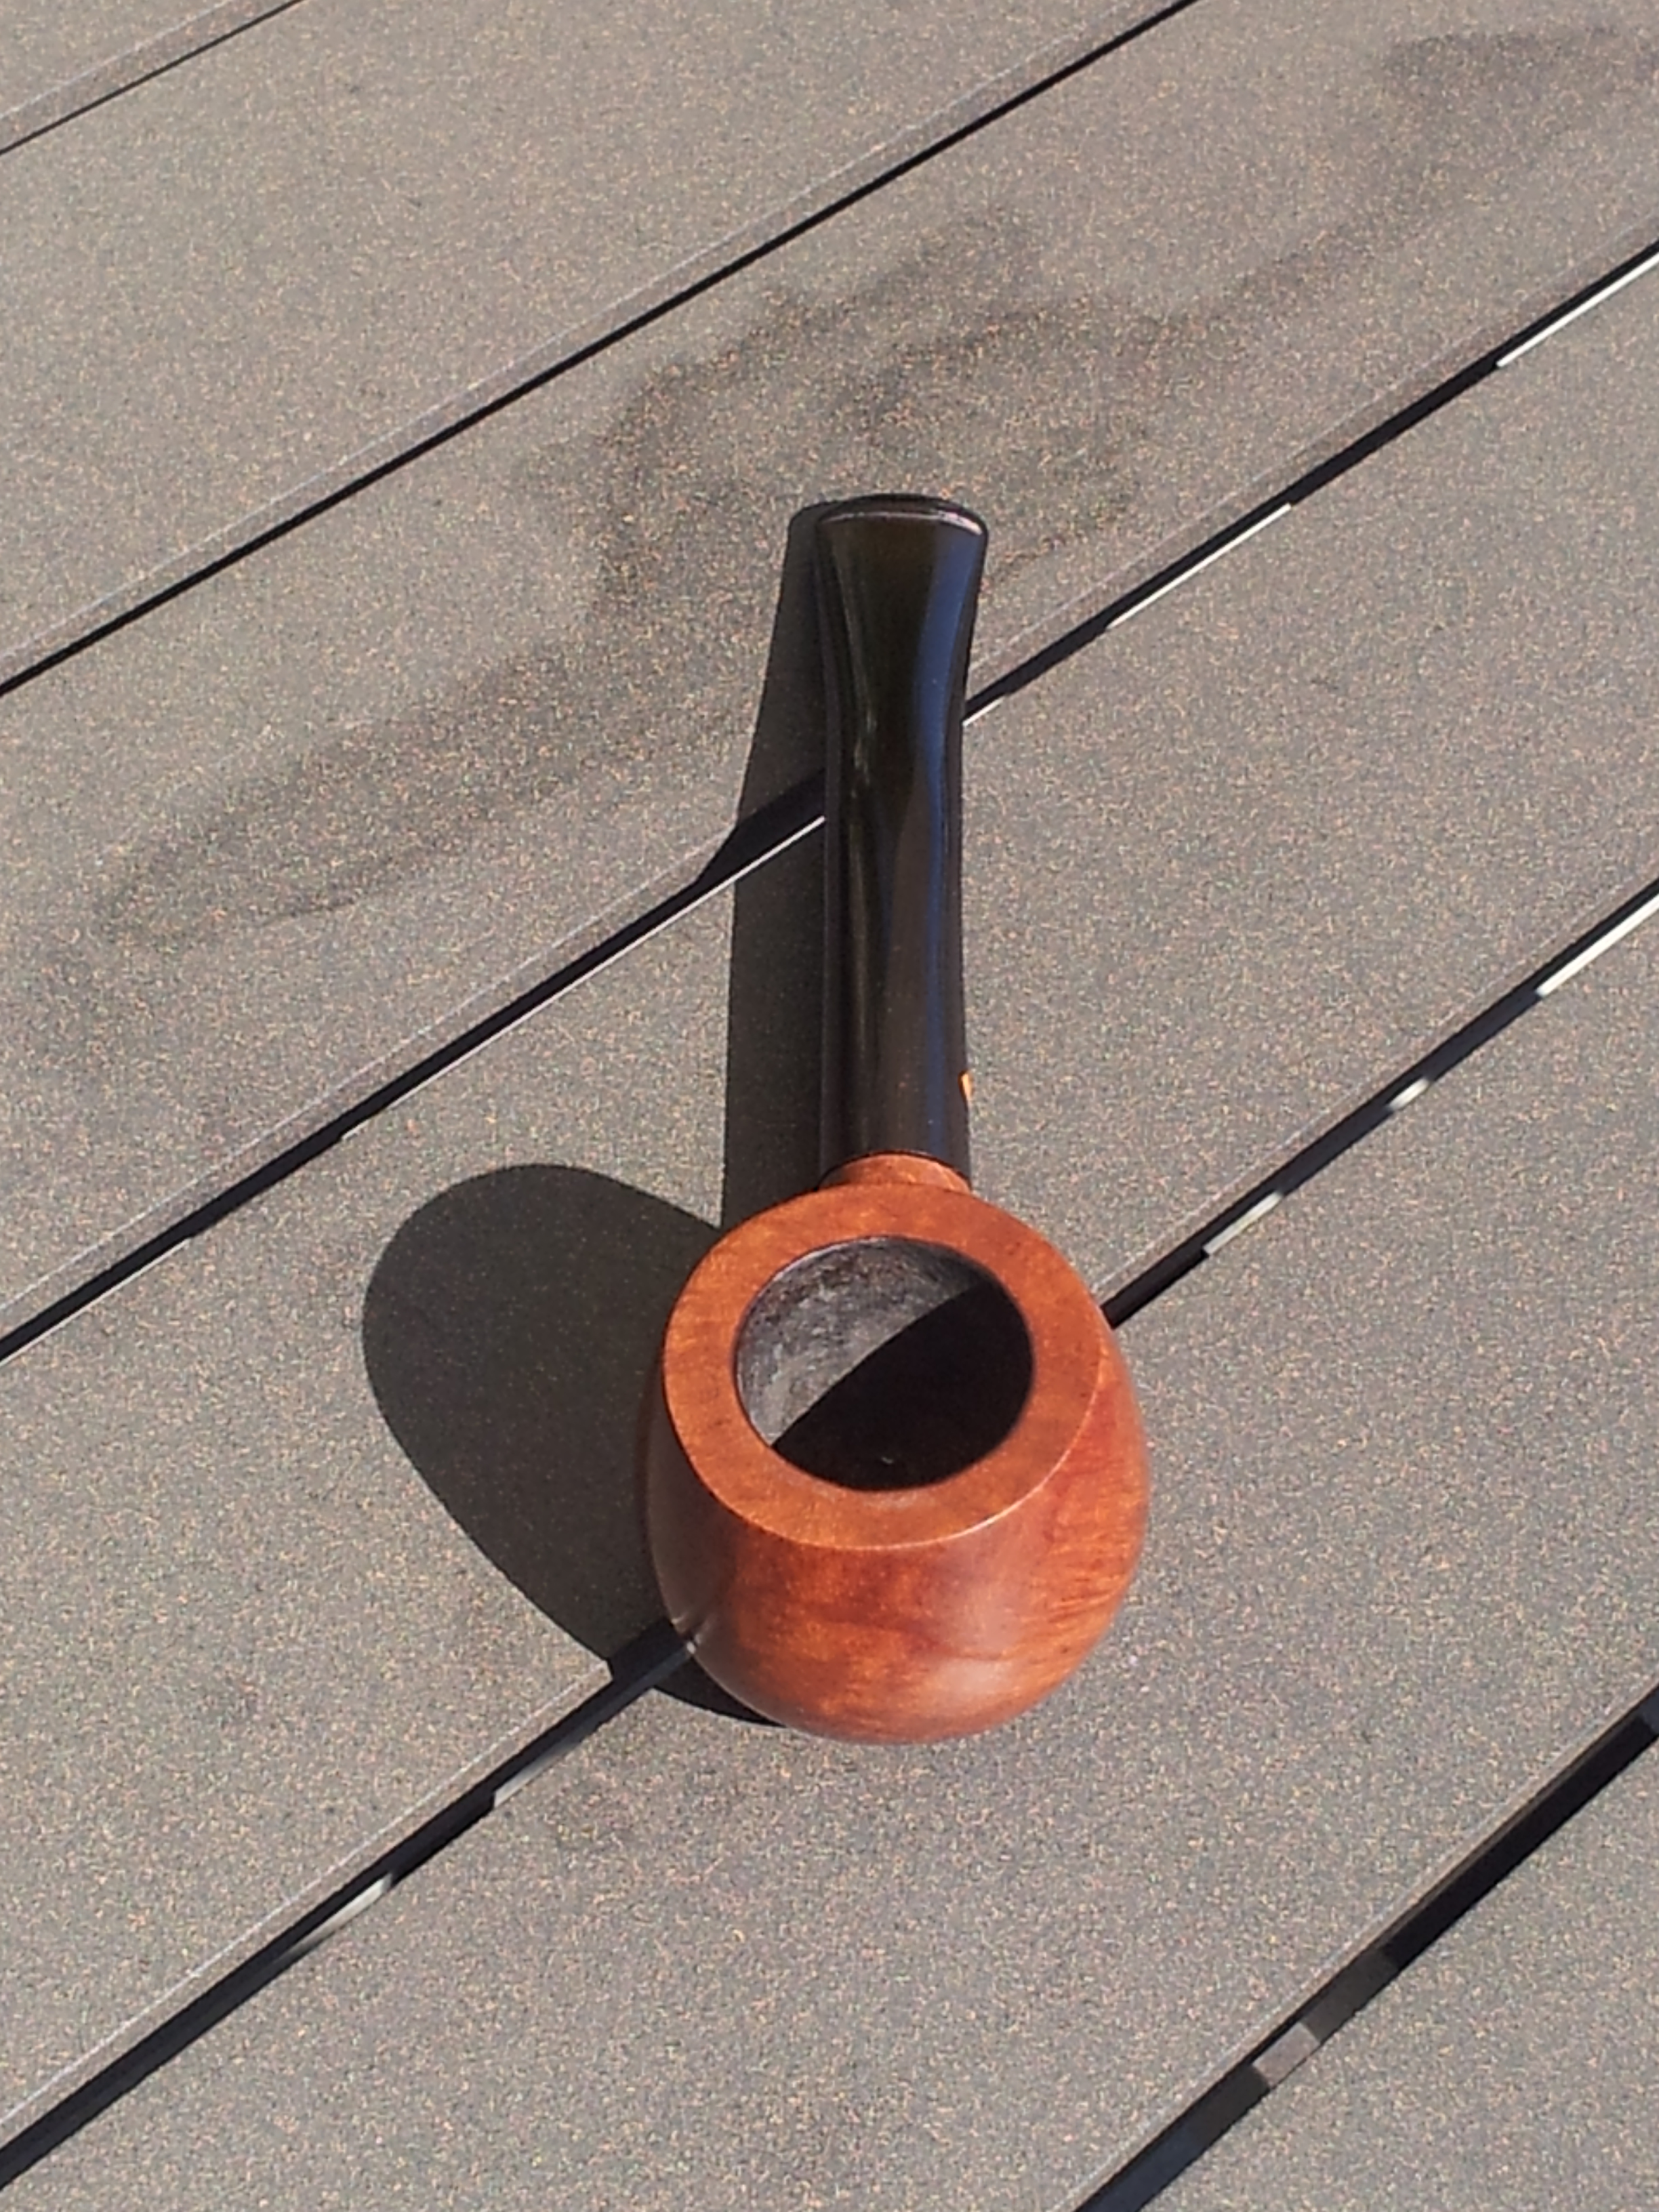
 I finished this refurb by buffing the pipe with Red Tripoli and White Diamond compounds followed by two coats of Carnauba Wax. The shank really should be banded, which I will do as soon as my order arrives. For now, here is the mostly-finished pipe. It looks new again, and I look forward to seeing if the unique Smoke Master filter system lives up to its hype as a cool, dry smoker!


That came out a lot better than I would have thought. Very nice job on a pipe that might have been destined for the scrap heap.
LikeLike
Thanks Al. The stem/shank fit is not as good as I woukd like but it’s a decent salvage. As you say, it was garbage otherwise! 🙂
LikeLike
Nice work. Nice save. The joining of the shank and stem can be frustratingly tedious at best. A fresh can of patience needs to be opened before every project. LOL Did you bevel the inner walls of the mortise? That really helps the stem “fit” better. Just a thought. Again, nice work on the pipe, it has some decent grain going for it.
LikeLike
I think I’ll need to buy two cans of patience before my next stem fitting! ;-D I did bevel the mortise, though I will revisit it when I eventually band the shank. Thanks for the tip!
LikeLike
I figured you probably did by looking at the pics. It is a pretty good join now. But, are we ever completely satisfied. LOL
LikeLike
Truer words, JDD. 🙂
LikeLike