
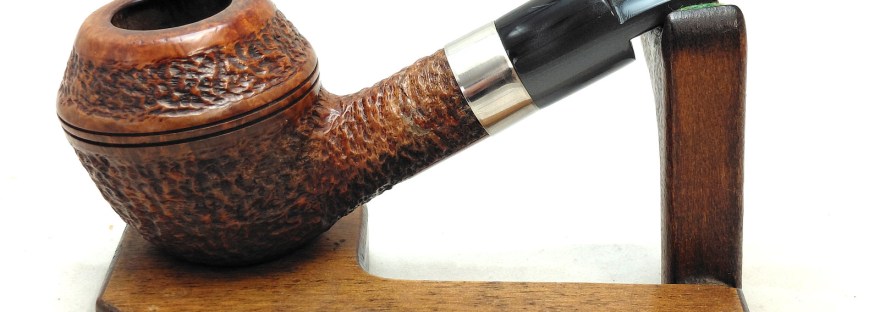
There are a handful of Canadian pipe makers who have made a notable mark on the pipe world. John Calich is one such artisan, active for over 40 years until his passing in 2008. Calich pipes were well regarded during John’s life, and they have remained popular on the estate market. Given Calich’s renown, the Pipedia article on him was surprisingly short.
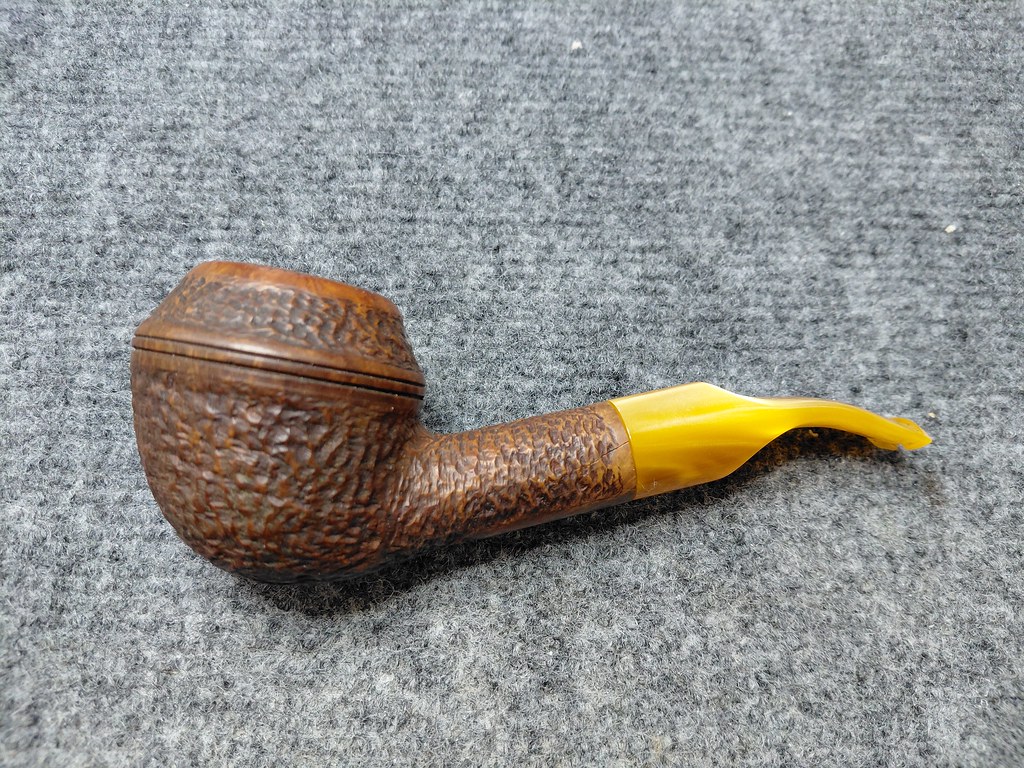
The Calich pipe on the bench today is a large Rhodesian shape with a refined orange peel rustication and yellow acrylic stem. According to the pipe’s steward, the pipe was part of a larger commission for a local pipe club years ago.
The pipe had been well cared for but had likely not been used for some time. The briar was dusty and the rim of the bowl carried a smudge of carbon on the rear edge. A layer of somewhat uneven cake lined the chamber, and the stem was missing a chunk of material from the lower button, but the reason the pipe had been sent in to me was damage to the shank – two thin spidery cracks crept from the shank face towards the bowl.


The pipe is stamped in Calich’s typical style, marked “Calich” over “Hand Made” over “Made in Canada” followed by “5E” and “01”. Calich pipes were graded from 3E through 8E, making this pipe a mid-grade pipe. I’m not positive on the meaning of the “01” stamp, but one possibility is that this was the first pipe in the limited series.

Here are some closer looks at the shank cracks. The damage caused the stem to fit loosely in the mortise. Note how the cracks are reaching towards one another from opposite sides of the shank. Without attention, the cracks could easily meet up and split off the entire top of the shank.


As is my usual, I began the work by cleaning the pipe. There wasn’t much to clean, though, so I didn’t take many pictures along the way. I did, however, want to highlight one thing that I think will interest readers.
As I was reaming the bowl to remove the carbon cake buildup, I noticed fissures appearing around the chamber walls. This pic shows an example. It’s very easy to jump to the conclusion that the chamber has suffered heat damage or burnout when anomalies like these present, but I encourage you to keep working to fully remove the old cake before forming an opinion.

I continued reaming the chamber until all of the old cake had been removed. Lo and behold, the fissures disappeared with the cake, revealing rather well preserved briar underneath. Sometimes a little patience pays off.

With the cleaning complete, I took a two-pronged approach to repairing the damaged shank, first flowing some thin CA glue into and over the damaged areas. I let the glue cure, then picked and sanded away the excess before fitting a shank band to keep everything tightly in place.
The installation process is fairly simple. I used my digital calipers to measure the shank diameter, then selected an appropriate nickel band from my supplies. In a perfect world, the shank band will slide a little over half way onto the shank before binding. To get it the rest of the way, heat is applied to expand the metal. The band can then be pressed home by positioning the stummel shank downwards on a hard surface and pushing. As the band cools, it shrinks in diameter, clamping the cracks tightly shut without the need for adhesive of any kind.


A close inspection of the shank showed that parts of the cracks had not been completely filled with the CA glue, so I touched up the areas of concern. When the glue had cured fully, I went back and again cleaned up the overflow.

The shank repair was one half of this restoration. The second half was replacing the damaged stem, and here is where things got a little tricky. My calipers measured the shank at a hair under 20mm in diameter, much larger than any of the available precast Acrylic stem blanks, which top out at about 16mm -17mm. Hoping to save the pipe’s steward the expense of a Hand Cut stem, I rummaged around my supplies and came up with a chunk of a New Old Stock Grey Swirl Acrylic stem that, impressively, was actually larger than the shank and just long enough to recreate the dimensions of the original stem.
This pic shows the original yellow stem over the replacement. This is a great example of why I don’t throw any old parts away unless they are damaged beyond reuse. One never knows when something may come in handy!

The new stem blank did not have a tenon, so I chucked a section of Delrin rod in the lathe and, after drilling an airway through it, turned a tenon that fit snugly in the shank mortise. This pic shows the stummel mounted onto the new Delrin tenon during a test fit.

I drilled a mortise into the stem face to accept the other end of the tenon, then applied some standard two-part epoxy to both the tenon and the inside of the mortise. I slipped the parts together and held the stem in the proper orientation until I felt the epoxy begin to grip. Then the pipe was clamped upright in a small padded vise while the epoxy cured overnight. Positioning the pipe like this allows gravity to assist in keeping the stem tightly against the shank face. A wrap of masking tape held the stem in position while the epoxy cured.

The original stem was a Saddle design, so I needed to replicate that shape on the new stem. I spent some time with a number of files, cutting the round taper of the new stem into a round saddle . When I was happy with the overall shape of the stem, I switched to sandpapers and sanded the stem from 220 through to 2000 grit., each grade of sandpaper erased the scratches left by the previous grit. At the end of the process, the stem was ready for final buffing and polishing.


Before taking the pipe to the buffer, I introduced the required bend. After slipping a pipe cleaner through the stem’s airway, I warmed the Acrylic over the heat gun until it became pliable. This stem didn’t need much of a bend, but leaving the stem straight would have made the pipe very awkward if not impossible to smoke properly. When I had the bend about right, I ran the stem under cold water to cool it and set the new shape.

Then it was off to the buffer where I erased the last of the sanding scratches on the stem with a run on the Red Tripoli wheel. A light buffing of the entire pipe on the White Diamond wheel added more shine and highlighted the smooth areas on the stummel. Finally, a few light coats of Carnauba wax added the final polish and some UV protection to the restored pipe.
This lovely Calich Rhodesian is ready to retake its place in its steward’s rack and rotation, where it should serve as a faithful smoking companion for many more years.
After a run of more complicated restorations, this project was comparatively simple but the end results are no less striking. The pipe is clean and whole, the new stem looks like it has always been there, and the pipe as a whole is much more inviting that the tired looking and damaged piece that had arrived on the bench only a few days ago. May its steward enjoy it in good health!
Thanks for joining me for another estate pipe restoration. This project shows that a cracked shank, while distressing and certainly inconvenient, is not the death knell for a favourite pipe. I hope you enjoyed watching this one come back to life.
Until next time, Happy Piping! Here’s the finished pipe.


That is a great looking Rhodesian, I had not previously heard of Calich.
LikeLiked by 1 person